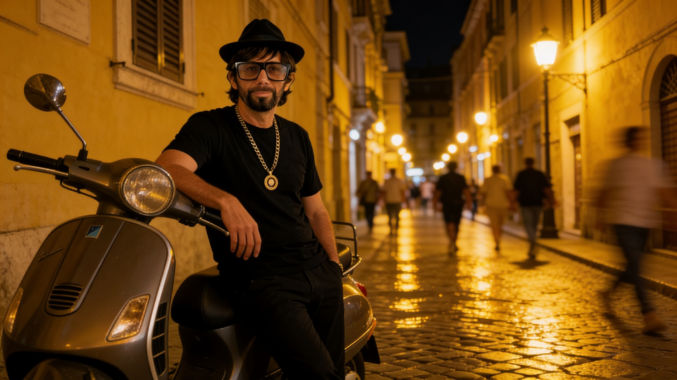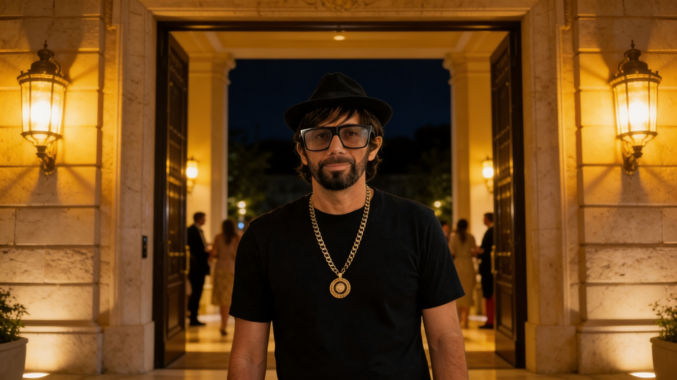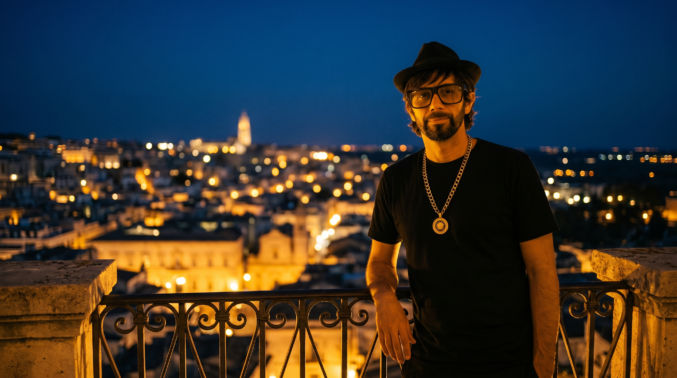

How I Made a Professional, Cinematic Music Video in 2 Days Using AI

I’ve made many music videos. This is my most recent one. I released it on YouTube on July 20, 2026. I think it’s one of the best I’ve made because it’s more than just singing; it’s more like a story with cinematic shots throughout.

For reference, here’s the original music video, which was released on August 24, 2000.

Personally, I like my version of the music video more, not because I made it, but because the original video has seemingly irrelevant and random scenes, and I don’t care for some of the dance moves. Also, the actual singing only covers a portion of the vocal sections of the song, and the singing clips are often wide shots, so it’s unclear whether they’re actually singing or not.

Anyway, here’s how I made the music video.

1. Get a Song

Sometimes, I create music using AI in Suno. For this music video, I chose an existing Bollywood song called “Kya Maine Aaj Suno” from the movie “Harama Dil Aapke Paas Hai”. It’s an old song from August 24, 2000.

Note: I’m not Indian, and I don’t speak or understand Hindi. It’s just a song I had in my music library from a long time ago that I thought might make a good music video. I used Google Translate to translate the lyrics from Hindi to English, but the translation didn’t make much sense, so I used ChatGPT to make sense of it.

2. Create Subtitles

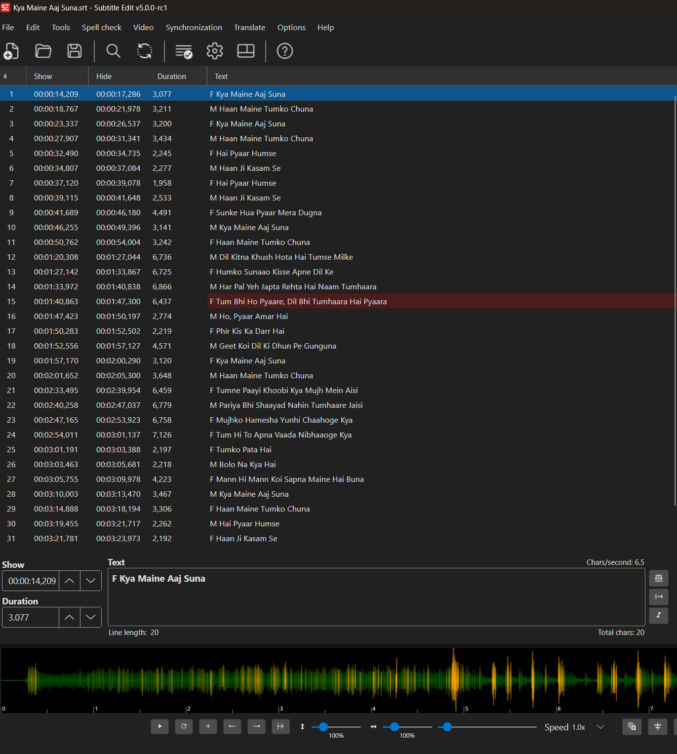
I used SubtitleEdit (free) to create the subtitles. SubtitleEdit can’t import mp3s, so I converted the song (mp3) to a video with a black screen in mp4 format and imported the video. I then manually created the subtitles since auto-subtitle generation is often wrong, especially for non-English audio. I made sure each lyric line time range started exactly or slightly before the vocals for that lyric.
3. Create Character Sheets

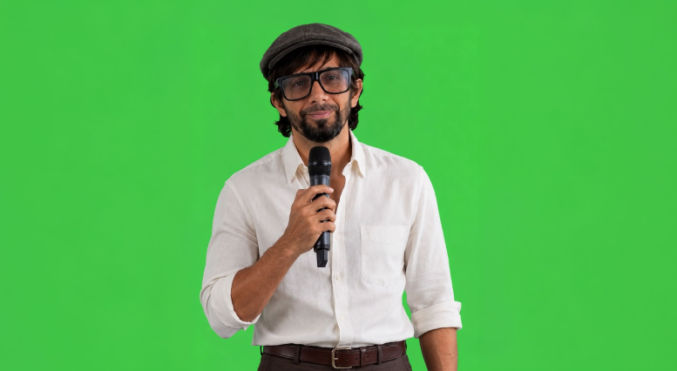
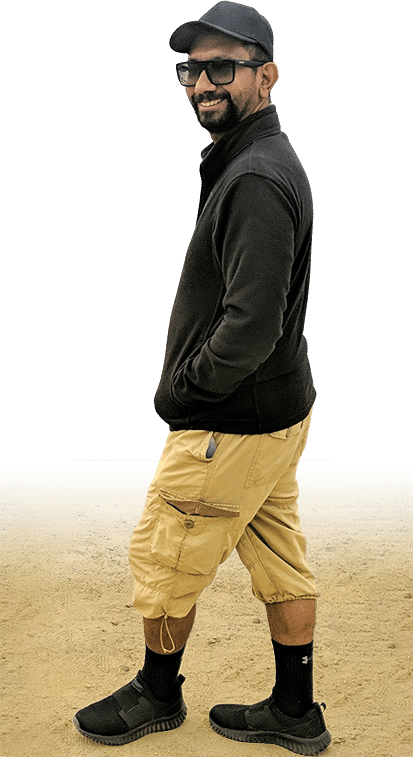
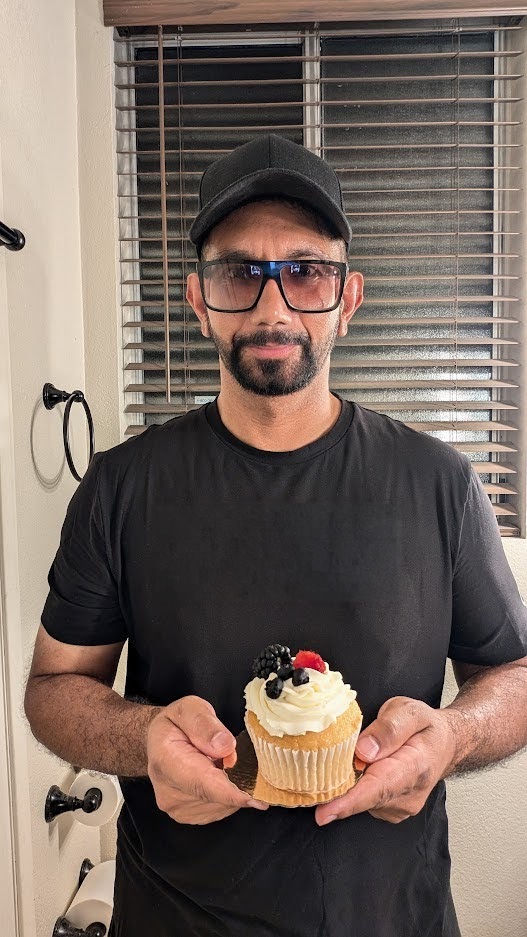
When I made music videos, I like to star in them, but I like to change my appearance, except my face, to match the theme of the song. So, for a Chinese song, I have AI create a character sheet of me but with typical Chinese clothing and a hairstyle suitable to the theme of the song. Here’s an actual image of me taken with my phone.
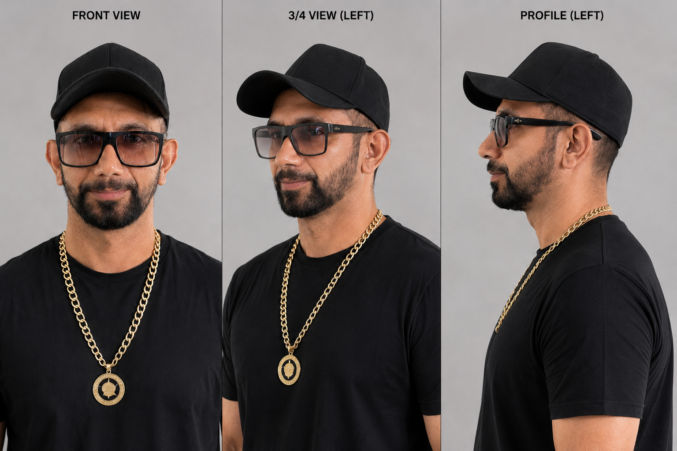
I then used ChatGPT to create a character sheet of me with a gold necklace. This is what it generated. You can start to see my facial identity drift a little, but it’s still close enough and acceptable.
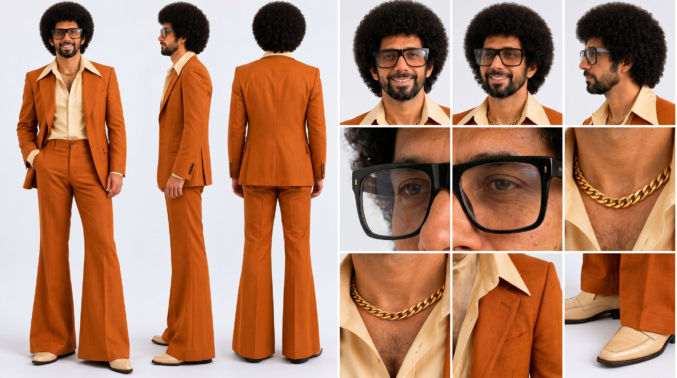
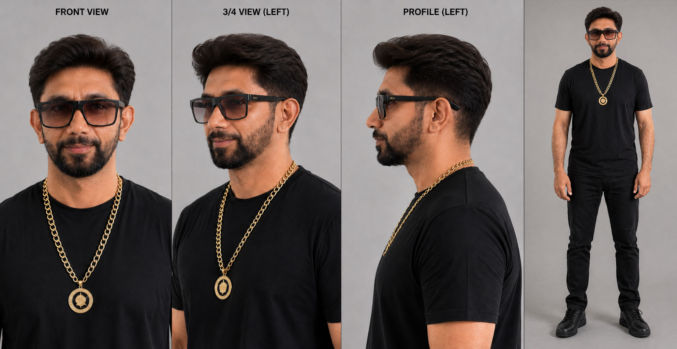
I then told ChatGPT to replace my hat with hair of a male Bollywood singer and to add a full-body shot. This is what it created. You’ll notice that my facial details drifted even further, but I figured it was still close enough and acceptable, so I settled with this character sheet for the male singer (me).
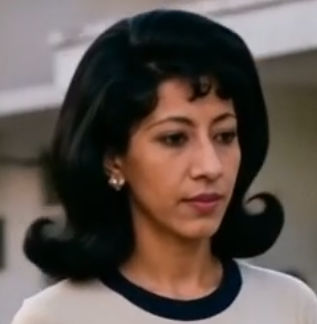
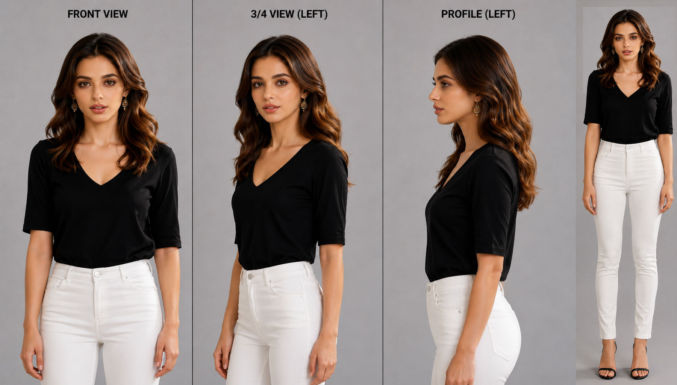
For the female singer, I started with this photo.
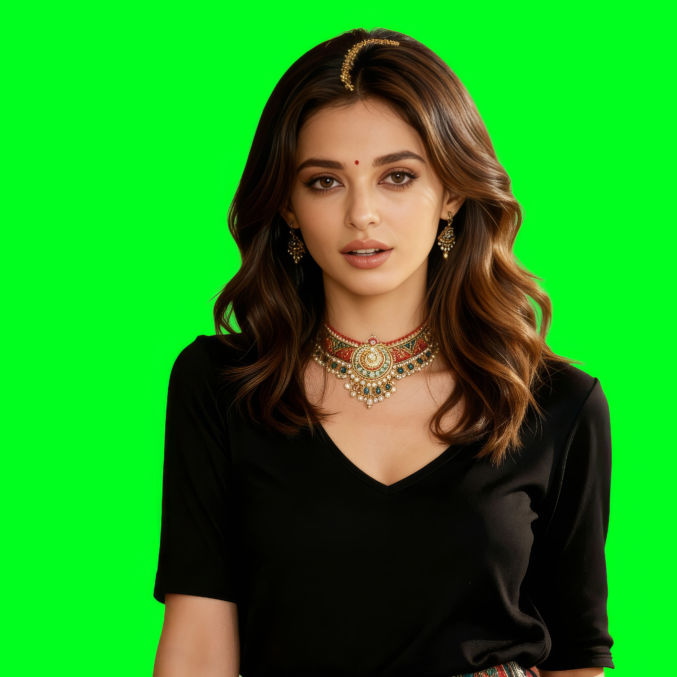
I asked ChatGPT to remove the red dot on her forehead, remove her necklace and the gold thing on her head, and give her white, fitted pants. Here’s what ChatGPT generated. Since I wasn’t trying to recreate a real person, whatever looked good was acceptable, so I chose this character sheet.
4. Create Black-Screen Video Clips for Each Lyric

I used CapCut for video editing and SeeDance 2.0 to generate the final video clips for each lyric. SeeDance generates videos at 24 frames per second (fps), so I set CapCut to create 24 fps videos.

To have SeeDance generate an accurate lip-sync video, I need to give it a reference video with the singing audio. You can upload a reference audio to SeeDance, but for some reason it doesn’t work as well as a reference video. So, I just created a bunch of black-screen video clips, one for each video clip. SeeDance 2.0 supports video generation between 4 and 15s. I make sure each black-screen video clip starts when the vocals start for a particular lyric and ends on an integer number, e.g., 8s instead of 8s and 13 frames. Here’s what I did to create the black-screen video clips.

  1. Import the full song (mp3) to the timeline
  2. Extract the vocals using https://uvronline.app/ai (this is necessary for better lipsync by removing any background and instrumental sounds)
  3. Add the vocals audio (mp3) to the timeline
  4. Import the subtitles (srt file) into CapCut and add to the timeline

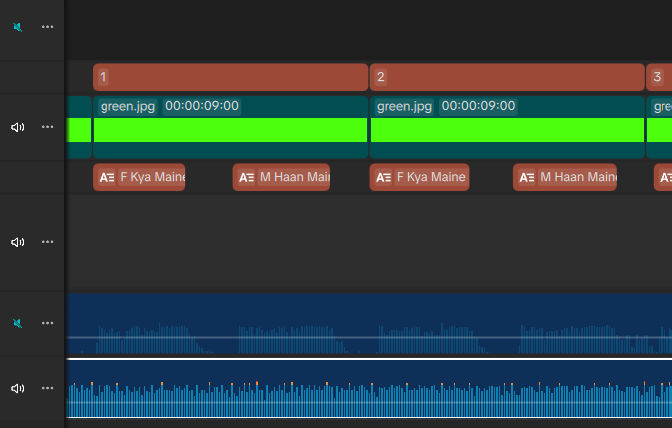
In order to see the duration of a clip, I found it easier to import a solid green image to CapCut, add it to the timeline. The left edge should line up with the start of the subtitle element. The right edge should end either at the end of the subtitle element or after it, and it should be a whole number in seconds, not seconds plus frames. I also like to add text to the timeline with just a number so I can see which video clip I’m working on. In the screenshot below, you’ll see the tracks from top to bottom are

  • text elements labeled 1, 2, and 3 to see which track I’m working on
  • solid green elements to easily see the start and end of a clip and the duration
  • the start and end of each lyric from the subtitles file
  • the vocals-only audio
  • the full-song audio

For clip 1, I decided to group lyrics 1 and 2 into one video clip. This particular song has alternating male/female vocals, e.g.,

  • lyric 1 is a female voice, which I prefixed with “F”, e.g., F Kya Maine Aaj Suna.
  • lyric 2 is a male voice, which I prefixed with “M”, e.g., M Haan Maine Tumko Chuna

Notice how the green element for this clip is exactly a whole number (9s long).

After repeating this process for each section that will be converted into a video clip, I

  • hid all visible elements (text and solid green),
  • disabled the full-audio track
  • enabled the vocals-only track

and exported each clip in 480p (the picture quality doesn’t matter since these videos clips are for audio reference only) and named each clip by its ID, e.g., audio1.mp4, audio2.mp4, etc.

For comparison, here’s clip 1, full audio and vocals only.

Note: sometimes, I would make a black-screen video longer than its lyric duration so its duration would be a whole number in seconds. I would then simply trim the end so that the clip ends when the next vocal segment begins.

5. Plan the Video Storyboard

Once I had all clips grouped in CapCut and all vocal segments exported as black-screen video clips, I created a storyboard in Excel like this. The yellow sections are instrumental sections. The blue sections are vocal sections. Since I wanted this music video to be more like a mini movie with a story as opposed to a bunch of random clips, I used this storyboard to help plan the story. I used ChatGPT to propose scenes for each clip.
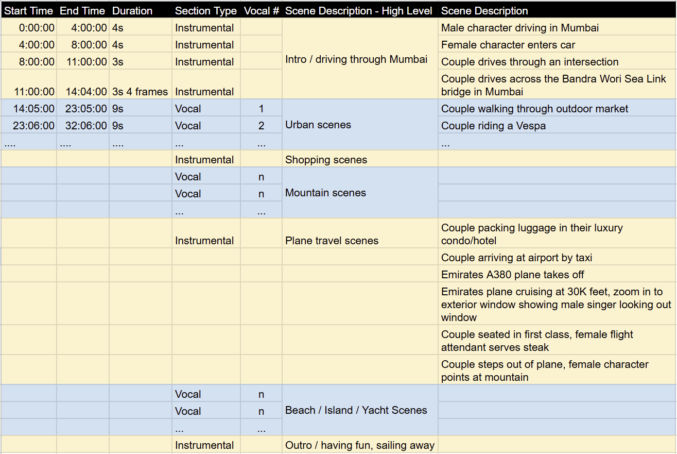
View the Excel file

6. Create Lipsync Video Clips

Since lipsync video generation is difficult, I started with these clips and left the instrumental sections for last. I used SeeDance 2.0 via Kie.ai. At first, I tried SeeDance 2.0 mini, but the lipsync quality was bad and inconsistent. There’s SeeDance 2.0 Fast, but I decided to stick with the regular version of SeeDance 2.0. Since this version is expensive, I generated lip-sync clips at 480p and generated non-lip-sync (instrumental) clips at 1080p, since the higher the resolution, the higher the cost.

Whenever a clip included both characters, I added their character sheets as reference images. For the audio to be lip-synced to, I added the black-screen video clip. The duration is set to match the duration of the black-screen video. For the actual prompt, I asked ChatGPT to generate it for me. The prompts can become very long but very detailed, resulting in highly professional and cinematic results. For example, here’s one prompt for just one lip-sync clip.

Use the song from reference video 1 as the audio.

The characters must exactly match reference image 1 (male) and reference image 2 (female) throughout the entire video. Use the character sheets as the only source of truth for each character's identity, face, hairstyle, clothing, accessories, and overall appearance.

Exactly two people appear in the entire video: one male matching reference image 1 and one female matching reference image 2. No other people appear at any time.

Identity continuity is critical. From the very first frame to the final frame, the left character must always remain the male from reference image 1, and the right character must always remain the female from reference image 2. The female must already appear as the correct female in the very first frame, before she begins singing. Never duplicate the male. Never duplicate the female. Never swap, morph, replace, transform, or blend the two characters at any point. Changing singers must affect only lip-sync and facial performance. It must never change either character's identity, face, body, clothing, accessories, gender, or position in the frame.

Lyrics:

Tumko Pata Hai\nBolo Na Kya Hai

This is a romantic Bollywood duet.

The scene takes place on a beautiful tropical island wooden pier extending into crystal-clear turquoise water on a bright sunny afternoon. The luxurious white motor yacht from the previous scene is docked behind them along the pier, naturally continuing the story. Palm trees sway gently on the nearby white-sand beach while small tropical islands are visible in the distance beneath a brilliant blue sky.

The couple stands comfortably side-by-side on the wooden pier, facing slightly toward each other while enjoying the peaceful ocean surroundings.

There is absolutely no physical contact between them at any point. No hand holding, no touching, no hugging, no kissing, no leaning against each other, and no body contact of any kind. Maintain a small, natural gap between their bodies throughout the entire scene. Their romance is expressed entirely through warm smiles, affectionate eye contact, natural facial expressions, and relaxed body language.

The video is one continuous cinematic shot with no cuts.

The camera begins with a medium waist-up shot from slightly in front of the couple and slowly performs a smooth sideways dolly along the length of the pier while maintaining approximately the same distance from them. The movement should feel elegant, stable, and cinematic. Throughout the shot, the turquoise ocean remains visible on both sides of the pier while the yacht, palm trees, and tropical island scenery create beautiful depth in the background.

The female sings the lyric:

"Tumko Pata Hai."

She lip-syncs perfectly to the original audio while smiling playfully at the male, as though teasing him with a secret. Her expression conveys warmth, affection, and gentle curiosity.

As she finishes, the male immediately replies:

"Bolo Na Kya Hai."

He lip-syncs perfectly to the original audio while smiling warmly back at her. His expression conveys playful curiosity, happiness, and affectionate encouragement, inviting her to continue. He may briefly raise his eyebrows with a natural friendly expression before smiling again.

Only the currently singing character lip-syncs the lyrics. The other character maintains a gentle, natural smile with subtle facial movements, breathing, blinking, and realistic expressions, but never mouths the lyrics or appears to sing. Changing the active singer must never change either character's identity or appearance.

Both characters blink naturally, smile subtly, and make small natural head movements. Their body language should feel relaxed, elegant, affectionate, and comfortable together while always maintaining the small gap between them. Avoid exaggerated acting or large gestures.

A gentle tropical breeze softly moves their hair and clothing. Bright sunlight creates sparkling reflections across the turquoise water and soft natural highlights on their faces, giving the scene a luxurious, peaceful, and romantic atmosphere.

No scene changes. No cuts. No dancing. No text. No subtitles.

Modern Bollywood movie style. Bright tropical daylight. Crystal-clear turquoise water. Rich saturated colors. Highly realistic. Beautiful cinematic composition. Natural facial expressions. Accurate lip-sync that follows the original reference audio exactly.

Here are all the video prompts used in the video.
As an example, here’s one generated lip-sync clip. Notice the audio is the vocals-only version. Later, this audio from this clip will be muted and replaced with the full audio.

7. Create Additional Reference Images

When a series of video clips contains the same object and object consistency is important, I create a reference image for that object. For example, in the instrumental intro of the music video, I show a Rolls-Royce convertible across multiple clips. To ensure SeeDance creates a consistent-looking car, I created this reference image.
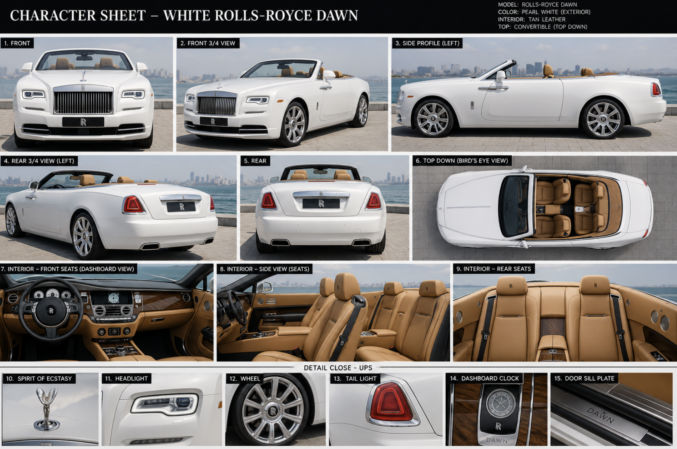
In addition to the two character reference images, I added this car image as a third reference.

8. Review, Export and Upscale Final Video

Once all clips have been generated and added to the timeline, I previewed the entire compilation and when it looked good, I exported it at 720p since my instrumental clips were generated at 720p. The 480p lip-sync clips would just get upscaled to 720p, but not using AI. I then reviewed the 720p-version of the full video and when it looked good, I upscaled it to 4K using Topaz Video AI. If you want the best quality video, you can have SeeDance generate video clips in 4K, but it will be much more expensive than 480p and 720p.

9. Generate YouTube Thumbnail

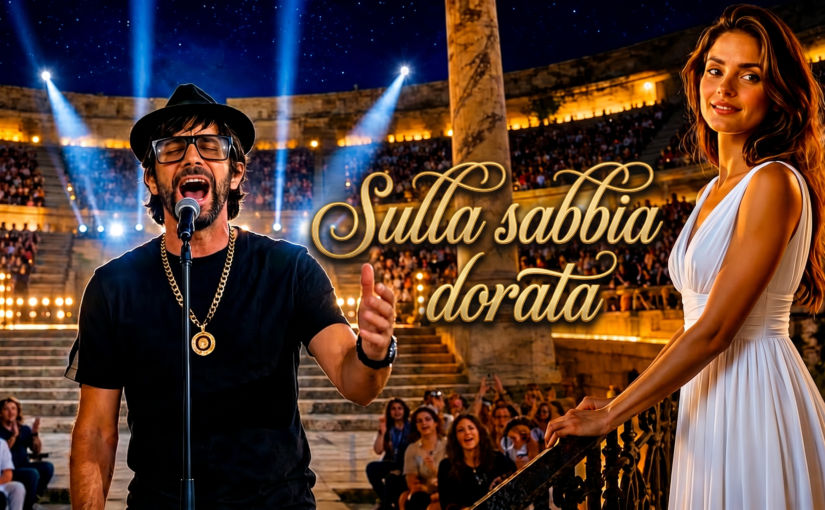
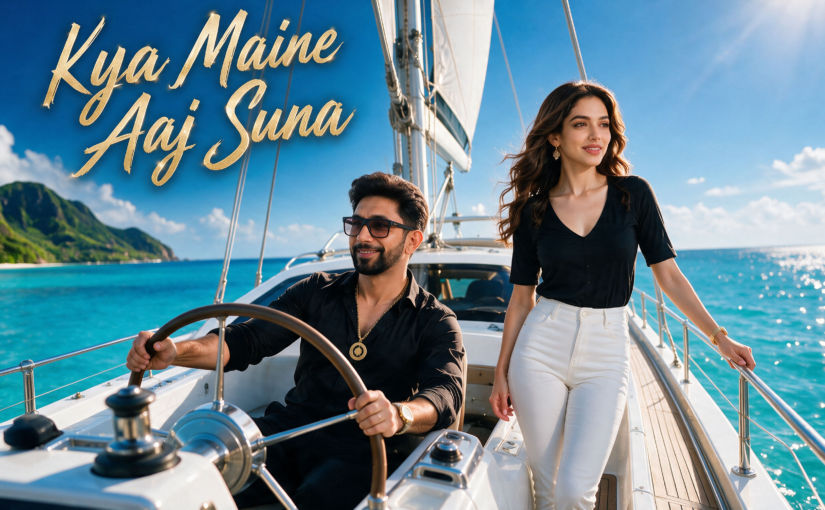
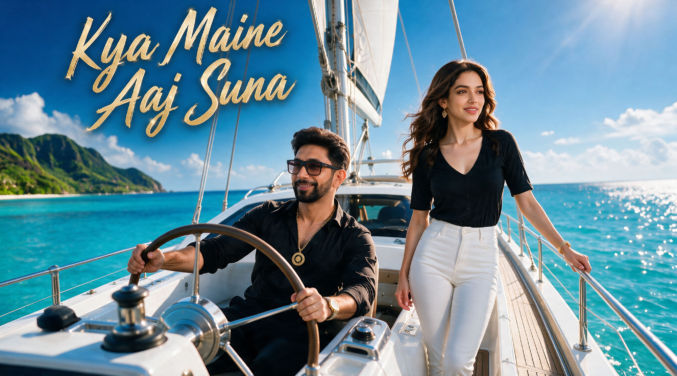
To generate the YouTube thumbnail image, I used SeeDream 5.0 on Kie.ai. ChatGPT gave me the prompt and I uploaded the two character sheets. Here’s the generated thumbnail that I approved.
Easily Generate and Edit Subtitles or Lyrics From a Video With Subtitle Edit

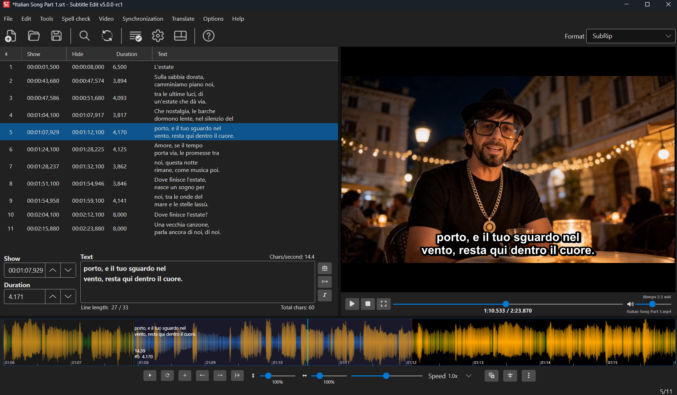
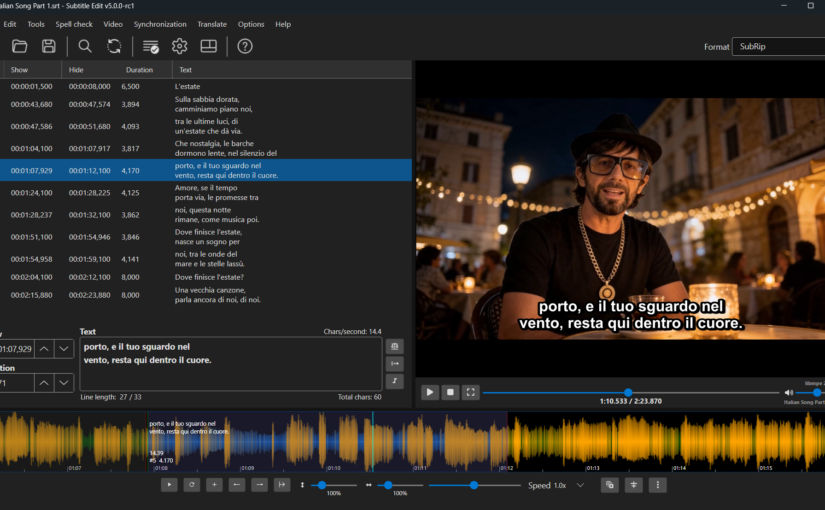
Subtitle Edit is a free app that lets you generate and edit subtitles from a video. If you have a song that you want the lyrics for, you can export the song as a video and then add the video to Subtitle Edit. In the example below, I want the lyrics for an Italian music video.

Download Subtitle Edit and then install it

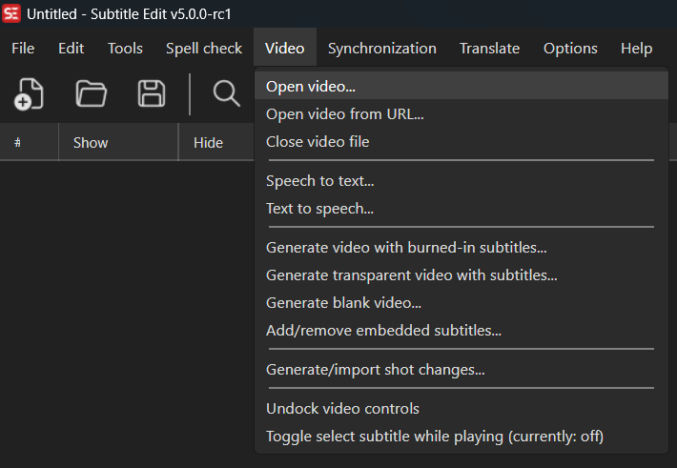
Click Video > Open video… and select your video.

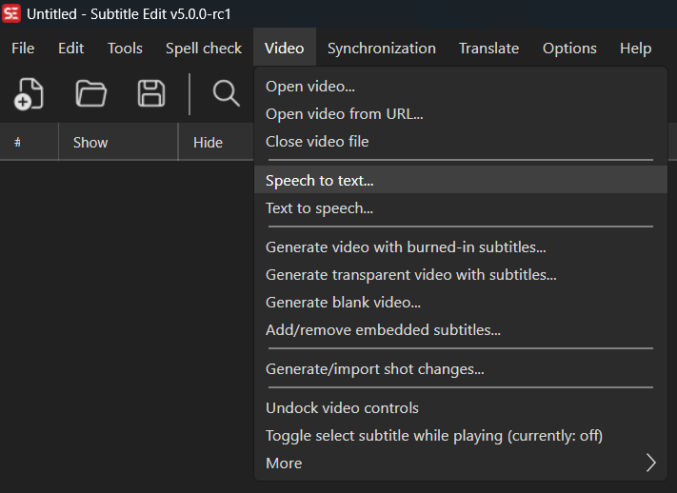
Click Speech to text…

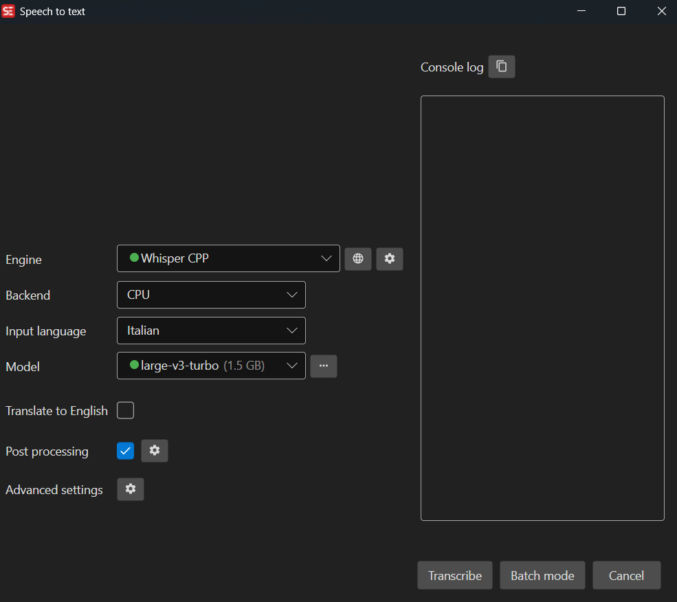
In the pop-up window, I like to choose

  • Engine: Whisper CPP
  • Model: large-v3-turbo (1.5 GB)

Since my video is in Italian, I set the language option to Italian.

When processing is done, you will see the lyrics in the left pane. Clicking on a verse will jump the playhead to the point in the waveform where that verse begins. The “Text” field lets you edit subtitle text. In the waveform, you can also drag the vertical start and end lines for each verse, which will update the timestamp accordingly.

Generate Consistent Characters in Videos with SeeDance 2.0

Most AI image-to-video generation tools support first-frame reference images. Considering how much more expensive video generation is compared to image generation, it makes sense to use image references, like a first frame, when generating videos. However, providing a first-frame image, with or without a last-frame reference, still fails when you need character consistency because the AI model only knows what the character looks like in the first-frame image. Fortunately, SeeDance 2.0 supports multiple reference images, so you can upload both a first-frame image and a character sheet containing different views of a character.

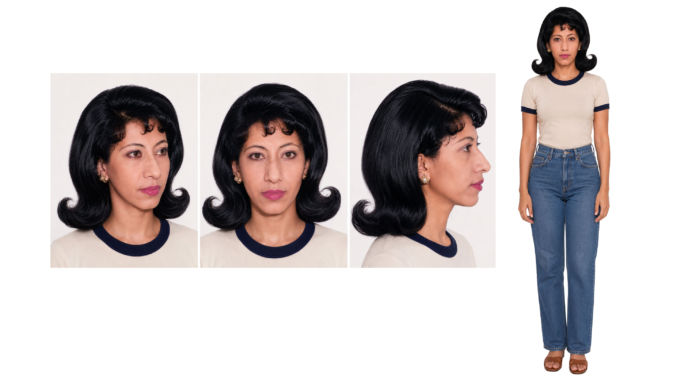
For example, I had the following character sheet.

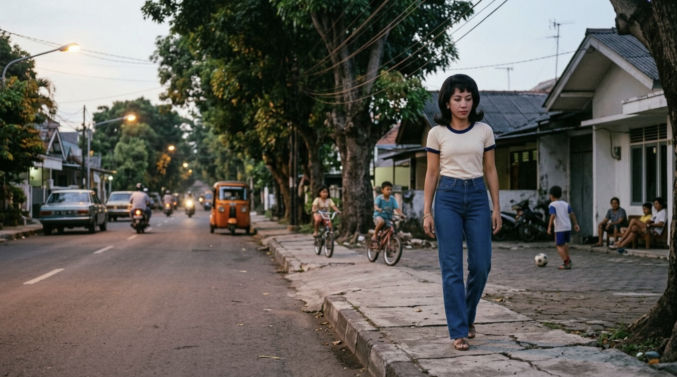
I then used it to create the following first-frame image using Nano Banana 2 in OpenArt.ai.

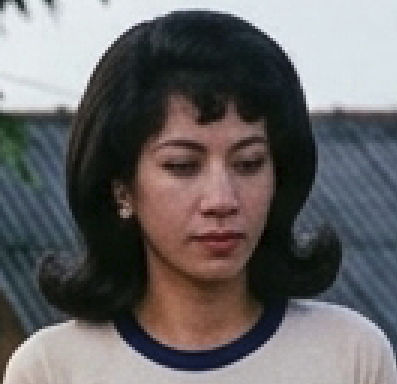
If I zoom in, I can see that the face looks close enough to the one in the character sheet.

When I created a video using Kling 2.5 of the woman walking, using that image as the first frame, I got the following.

The video starts out fine because of the first-frame reference, but as it progresses, the woman’s face slowly changes and looks less and less like the one in the character sheet. Here’s a screenshot of just her face in one frame of the video.

What’s particularly different is the nose, but the width and height of her face looks somewhat different as well, especially compared to the character sheet.

Now, let’s see how the same video turned out using SeeDance 2.0 with multiple references. For this, I used Kie.ai.

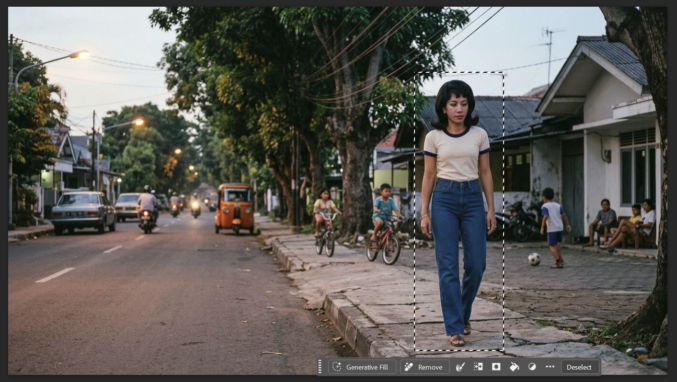
Since I wanted to keep the setting and just replace the subject, I used Photoshop to “remove” the subject from the previous image. I selected the subject and clicked “Remove”, which used AI to remove the woman.

This is what I got.

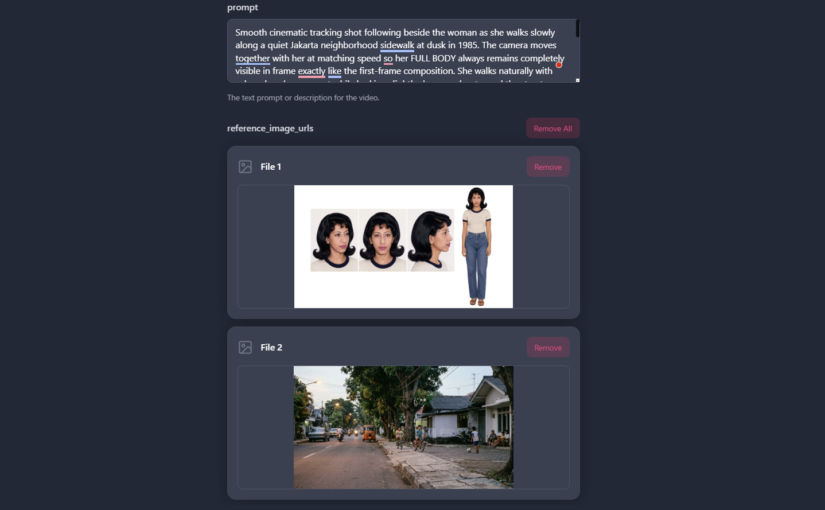
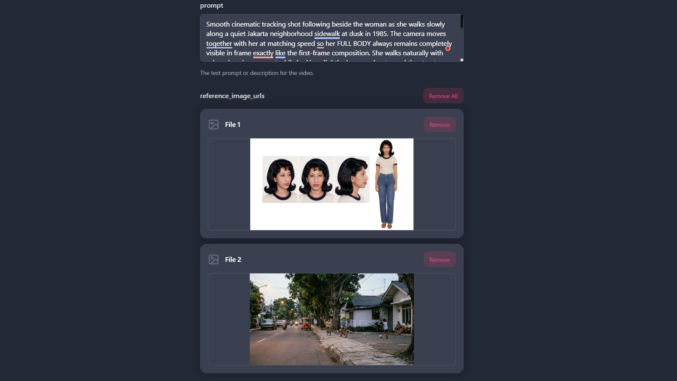
Next, I upload the character sheet and setting image to Kie.ai (SeeDance 2.0 page), gave it the same prompt I used in Kling 2.5.

Here’s the resulting video.

Notice how the character looks EXACTLY like the one in the character sheet throughout the entire video clip.

Here’s a close-up of the face near the end of the clip.

Make Realistic Lip-sync Music Videos with SeeDance 2.0

I just made this music video, and the lip-sync portion is amazingly impressive.

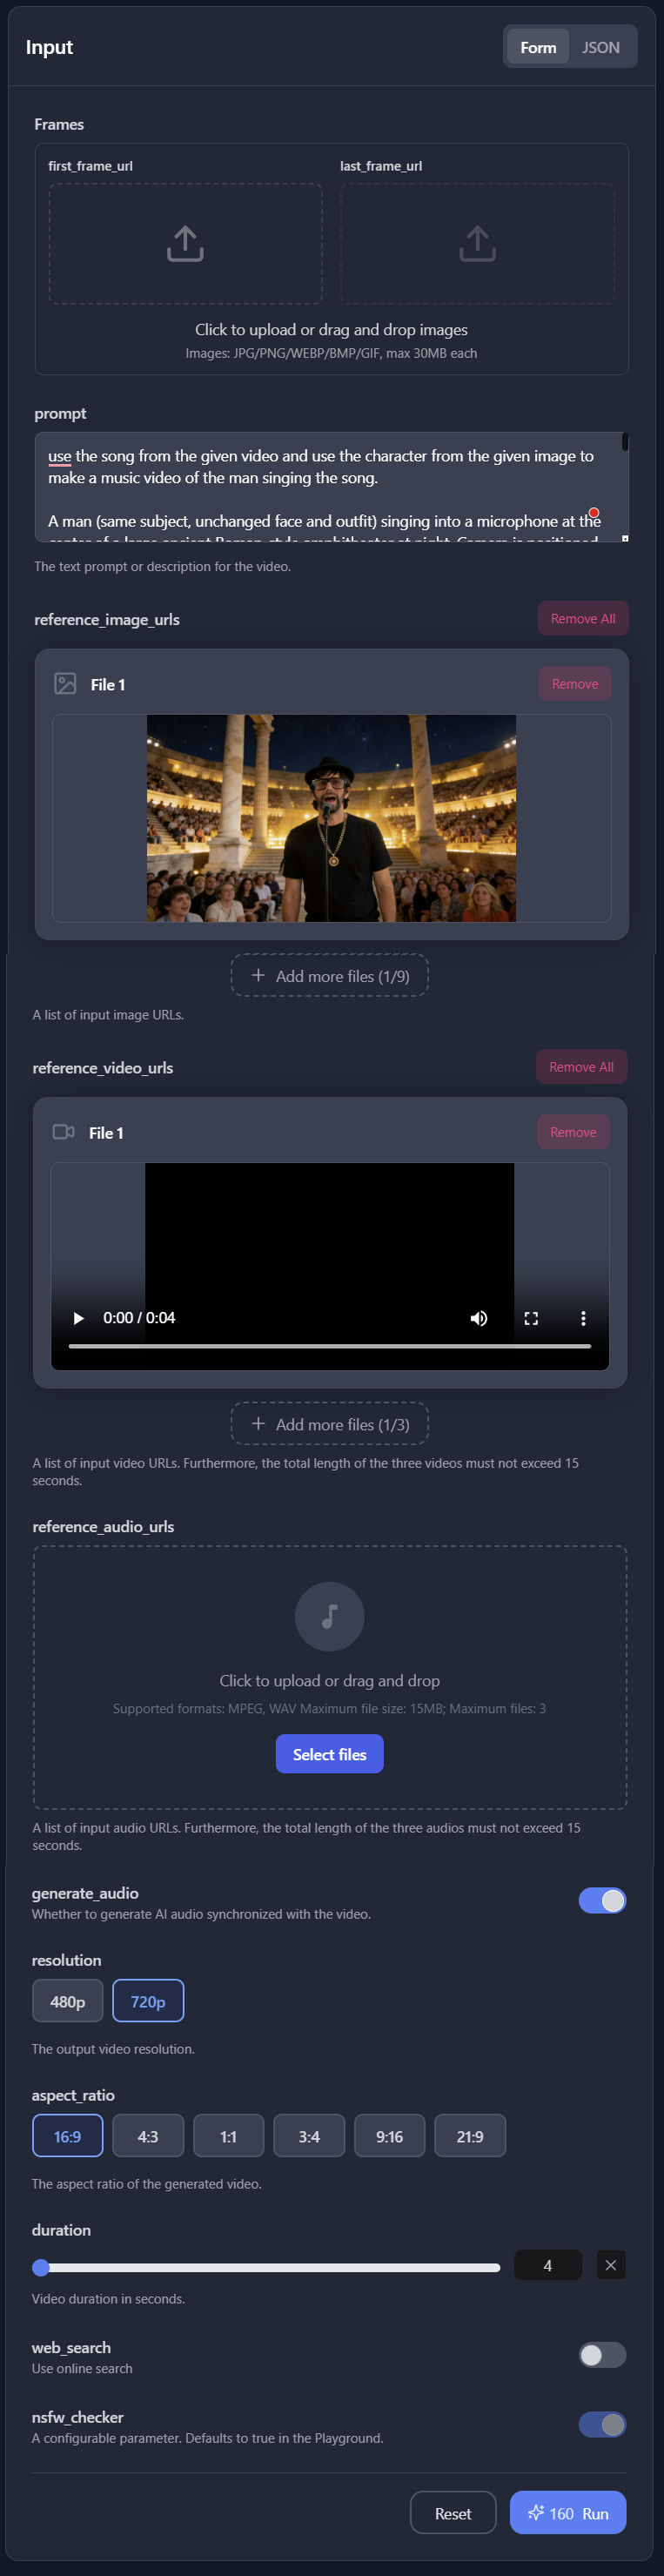
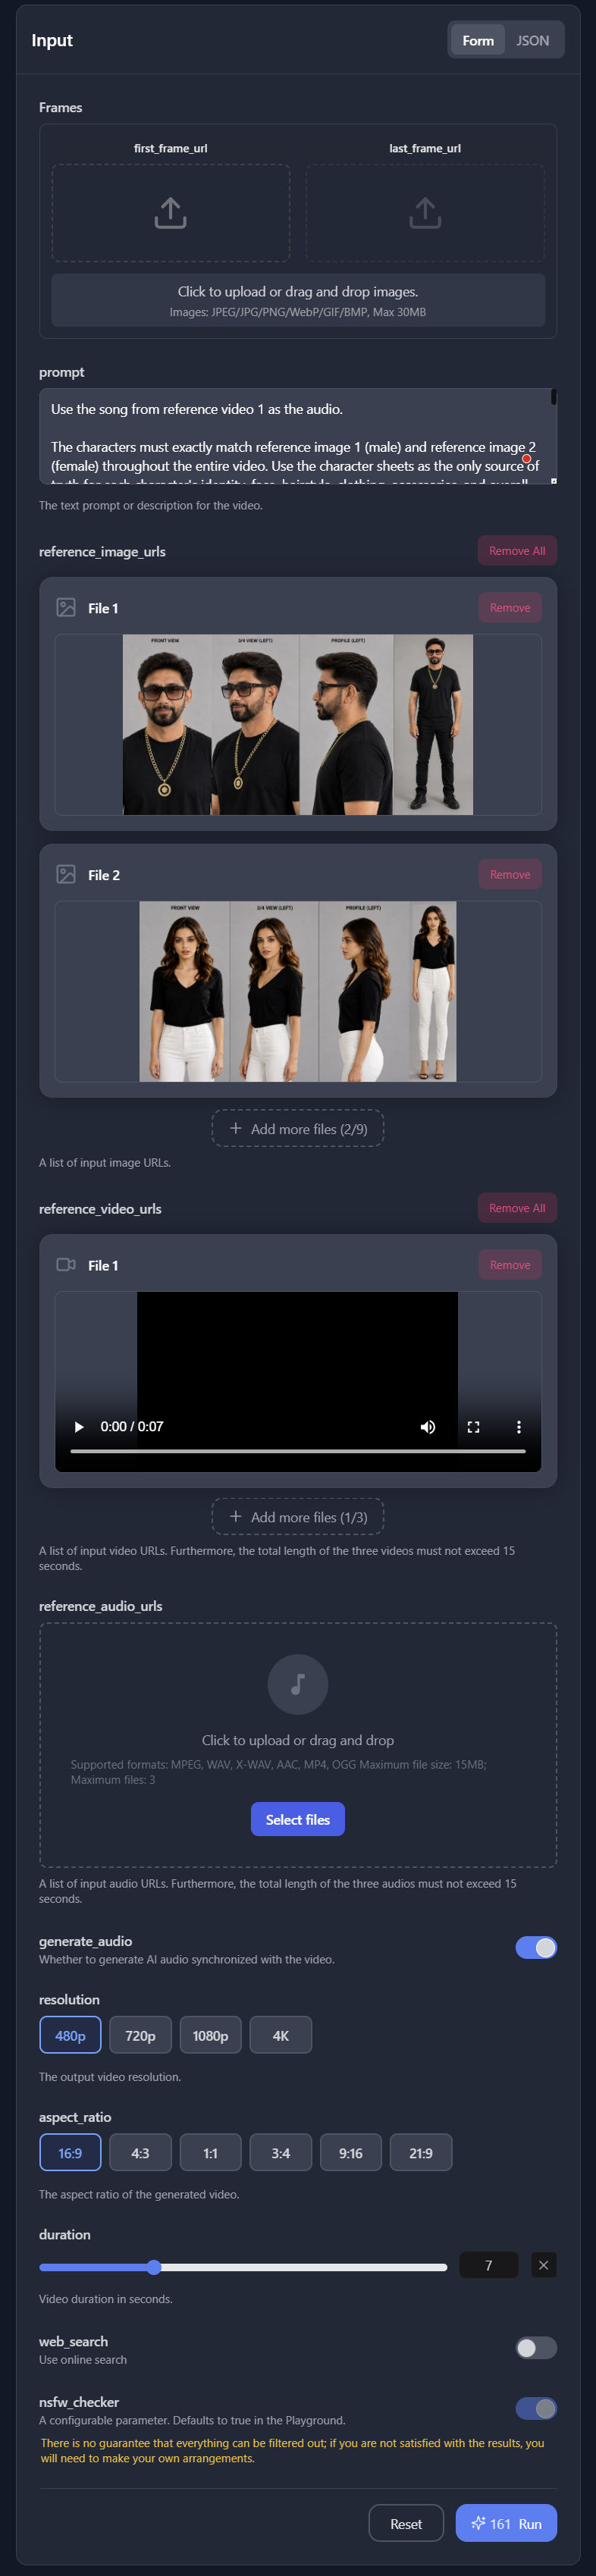
I actually used SeeDance 2.0 Fast at Kie.ai, but you can use SeeDance 2.0 as well and get up to 1080p resolution. For each generation, I used

  • Prompt
  • Reference image (not first-frame image)
  • Reference video (this was just a black video containing the audio clip)
  • “Generate audio” enabled
  • “Web search” disabled
  • Duration = duration of reference video

SeeDance 2.0 supports generating videos up to 15 seconds long. But, if you give it a 15s reference video and you want to lipsync a character in it, the lipsync won’t work. So, when generating lipsync videos, always provide a reference video that is no longer than 13 seconds to be safe.

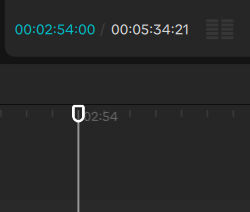
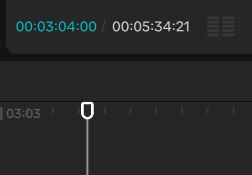
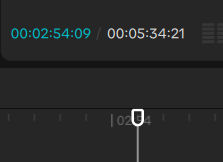
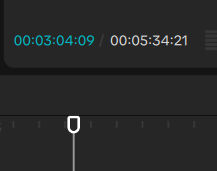
When creating reference videos, make sure the duration is a whole number, not a fraction, e.g., 5 full seconds, not 5.5 seconds. The reason is because in the UI, Kie.ai or another app may round down the duration to the nearest whole second, and if you tell SeeDance you want to generate a 5s video, then it will generate a 5s video, not a 5.5-second video, and your lip-sync video will be truncated. I use Capcut to generate my black reference videos. I put a playhead at a location where I want a segment to begin and end and set a marker at each location, making sure the time ends with :00 (no frames), e.g.
  • start 2:54:00
  • end: 3:04:00
  • duration = 10s

If I really need to split at a location between seconds, like 2:54:09, then make sure the end location includes the same number of frames, e.g., 3:04:09, so you end up with a duration in whole seconds.

SeeDance 2 supports reference audio, but for some reason, it didn’t lip-sync my reference image, and sometimes it would change the lyrics.

Also, the following method worked well for English audio. It may not work for other languages. If you find that it doesn’t work for your language, then see some options below.

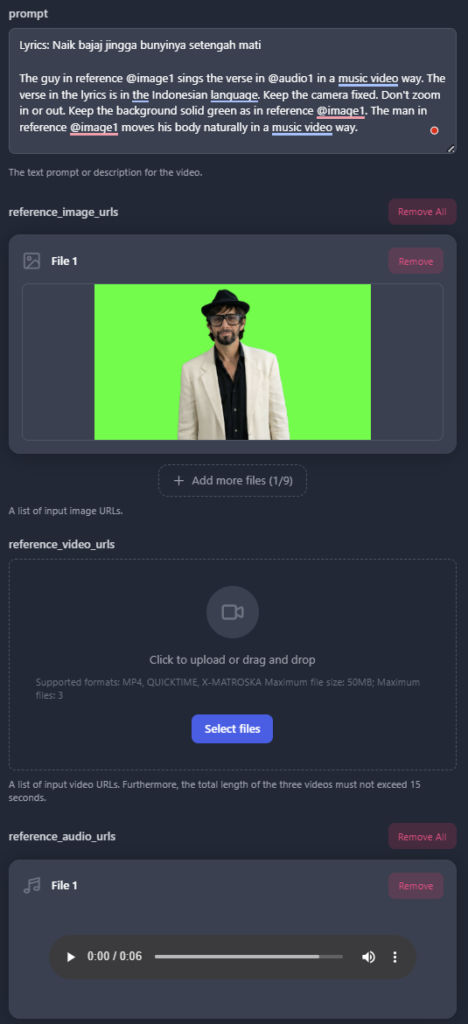
Here’s a screenshot of the inputs.

Below are the inputs and outputs for various lip-sync clips.

Prompt:

use the song from the given video and use the character from the given image to make a music video of the man singing the song. he sings the exact lyrics in the song as if lip-syncing.

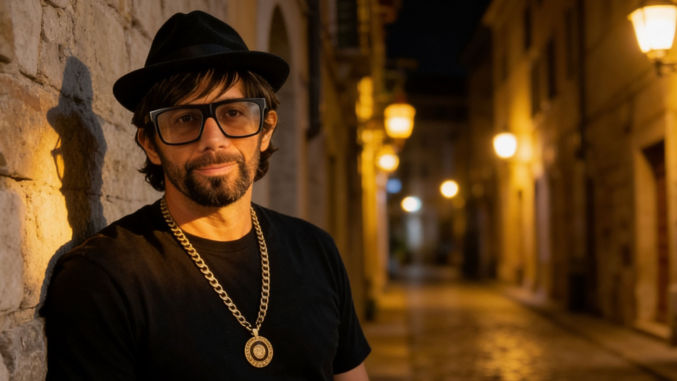
Reference image:

Reference Video:

Output:

Prompt:

use the song from the given video and use the character from the given image to make a music video of the man singing the song. he sings the exact lyrics in the song as if lip-syncing.

Reference image:

Reference Video:

Output:

Prompt:

use the song from the given video and use the character from the given image to make a music video of the man singing the song. he sings the exact lyrics in the song as if lip-syncing.

Reference image:

Reference Video:

Output:

Prompt:

use the song from the given video and use the character from the given image to make a music video of the man singing the song. he sings the exact lyrics in the song as if lip-syncing.

Reference image:

Reference Video:

Output:

Prompt:

use the song from the given video and use the character from the given image to make a music video of the man singing the song. he sings the exact lyrics in the song as if lip-syncing.

Reference image:

Reference Video:

Output:

Prompt:

use the song from the given video and use the character from the given image to make a music video of the man singing the song. he sings the exact lyrics in the song as if lip-syncing.

Reference image:

Reference Video:

Output:

Prompt:

use the song from the given video and use the character from the given image to make a music video of the man singing the song. he sings the exact lyrics in the song as if lip-syncing.

Reference image:

Reference Video:

Output:

Prompt:

use the song from the given video and use the character from the given image to make a music video of the man singing the song. he sings the exact lyrics in the song as if lip-syncing.

Reference image:

Reference Video:

Output:


Prompt:

use the song from the given video and use the character from the given image to make a music video of the man singing the song. he sings the exact lyrics in the song as if lip-syncing.

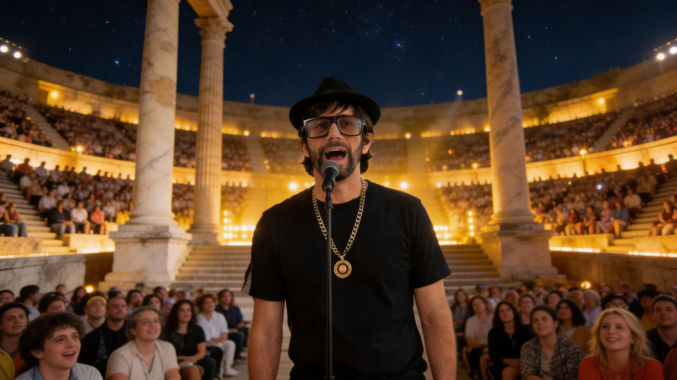
A man (same subject, unchanged face and outfit) singing into a microphone at the center of a large ancient Roman-style amphitheater at night. Camera is positioned at chest height, medium close-up framing, stable and focused on the singer.

The audience fills the stone bleachers behind him, hundreds of people seated and standing, naturally animated: subtle head movements, clapping, cheering, shifting in seats, occasional phone screens glowing, realistic variation in motion without repetition.

Warm golden stage lighting illuminates the singer from the front and slightly below, creating a cinematic glow on his face. Behind the singer, rows of soft amber lights line the steps and columns. Moving stage lights sweep slowly across the audience and architecture, creating gentle light motion across the crowd and stone surfaces.

The night sky is clear with visible stars. Light atmospheric haze adds depth and catches the beams of moving lights. The columns and amphitheater remain stable and realistic.

The singer performs naturally: subtle head movement, mouth lip-syncing accurately, slight body sway, breathing and posture shifts.

Camera behavior: very subtle cinematic push-in (slow, minimal), no drifting or unintended orbit, no zoom jitter. Maintain subject as the clear focal point at all times.

Depth of field: subject sharp, audience slightly softened but still readable.

Lighting style: warm amber/yellow tones only, no harsh white light, no overexposure, cinematic contrast.

Reference image:

Reference Video:

Output:

Here are some similar clips using the same prompt and reference image but different reference videos (for the audio).

Reference Video:

Output:

Reference Video:

Output:

Playing Musical Instruments That Sync to Music

SeeDance 2.0 also seems to support making a video of a person playing a musical instrument in a way that matches the sounds in a reference source. Consider the following:

Prompt:

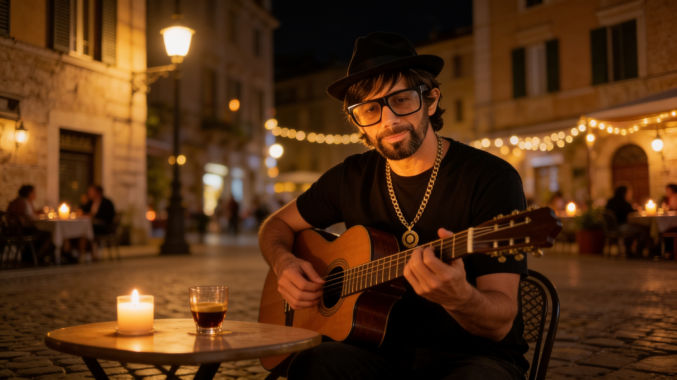
use the song from the given video and use the character from the given image to make a music video of the man playing the guitar sounds in the song. sync the playing of the guitar to the guitar sounds in the song.

Reference image:

Reference Video:

Output:

Here’s another example.

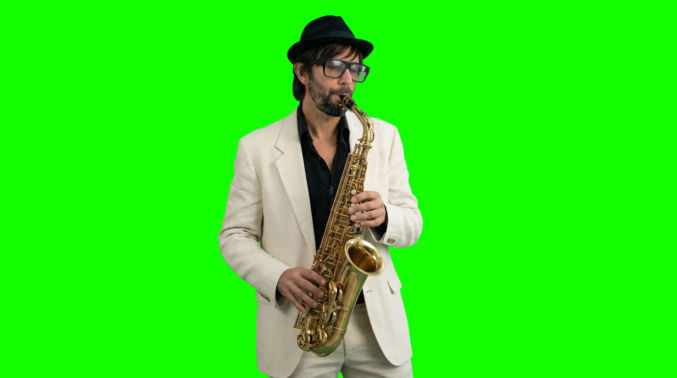
Prompt: use the song from the given video and use the character from the given image to make a music video of the man playing the saxophone such that the sound of the saxophone in the song is in sync with the playing of the saxophone. the background should be solid green as in the reference image for chroma key background removal later on. the camera remains fixed. do not zoom in or out. the man’s fingers move on the saxophone naturally and in sync with the sound from the song. the man moves his body naturally as he plays the saxophone.
Reference Image: https://www.youtube.com/watch?v=_piqiZkLKgY

Reference Video:

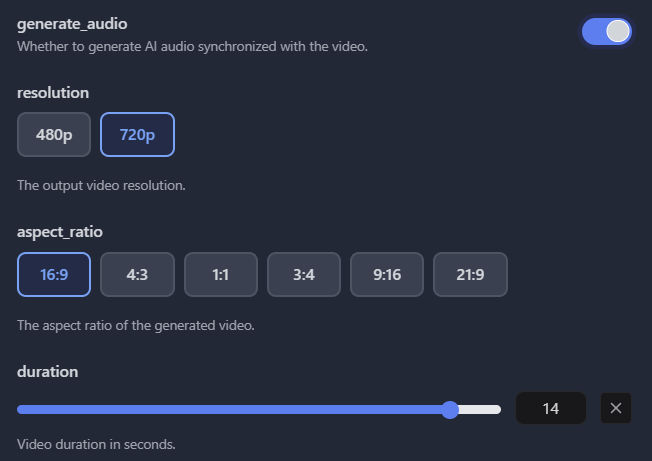
generate_audio: on

The duration was set to the duration of the reference video. I used SeeDance 2.0 Fast and 720p resolution. I later upscaled the video to 4K using Topaz Video AI.

Result

SeeDance 2.0 Error – output audio may contain sensitive information

If you get an error that says “The request failed because the output audio may contain sensitive information.”, then disable audio generation.

For example, in order to make the following video,

I had to use the following settings in Kie.ai:

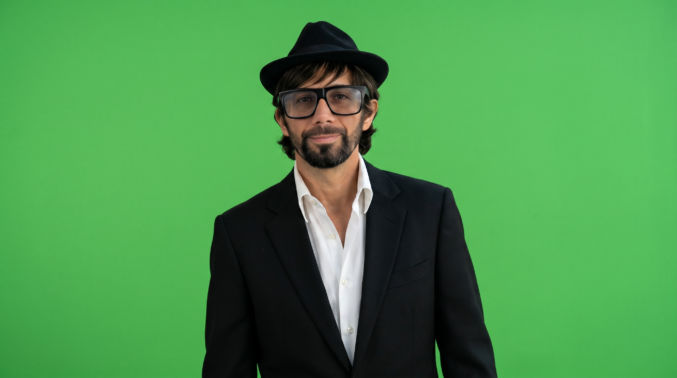
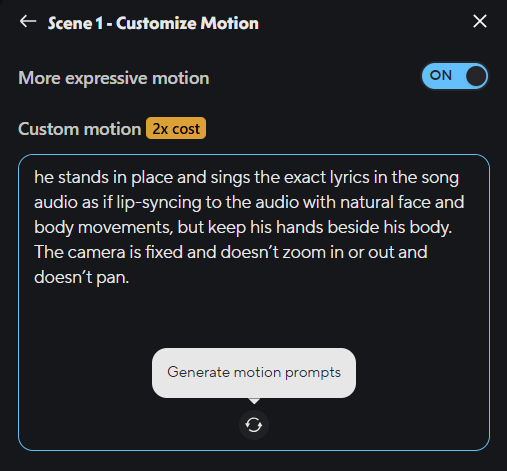
Prompt: use the song from the given video and use the character from the given image to make a music video of the man singing the song in front of a green screen, as shown in the reference image. he stands in place and sings the exact lyrics in the song audio as if lip-syncing to the audio with natural face and body movements, but keep his hands beside his body. The camera is fixed and doesn’t zoom in or out and doesn’t pan.

Do not add shadows, floor shadows, lighting gradients, reflections, stage lighting, environmental lighting, or any background elements. Camera locked off and completely static.

Reference Image:

Reference Video: (example)

generate_audio: off

The duration was set to the duration of the reference video. The resulting clip was

I then removed the green background in Capcut to overlay the singer on a series of background video clips.

Singing Lip Sync Videos Using HeyGen

If your song is not in English and SeeDance 2.0 can’t lip-sync it correctly, then use HyeGen with custom motion enabled, as follows.

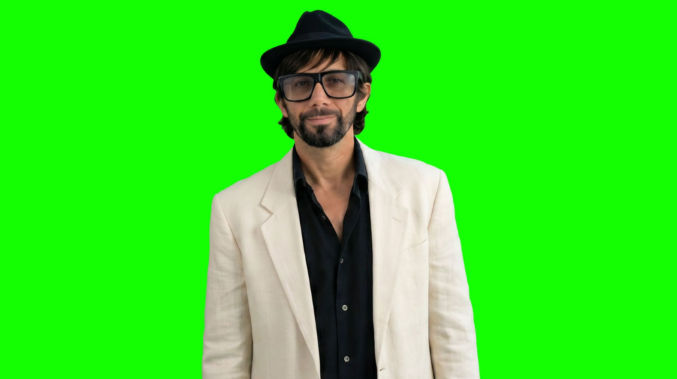
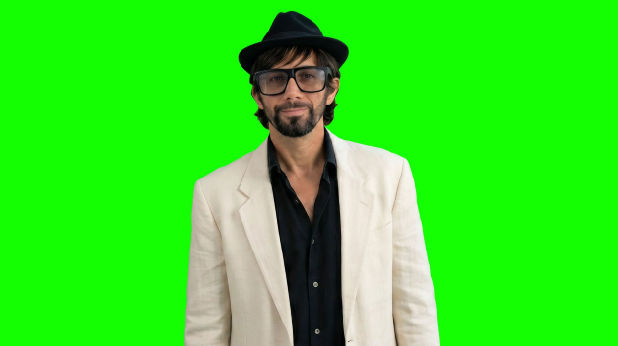
Log in to HeyGen and create an avatar. You can simply upload a photo of your singer. I used the one below. I put my avatar on a green background so I can chroma key it out.

Open Avatar Studio and

  • in the Script section on the left, instead of typing your script, upload your song’s audio (mp3)
  • in the Avatar and Voice section on the right, under Voice, you can ignore this since you’ll be using the audio you uploaded
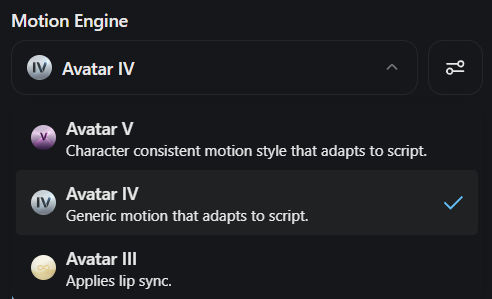
  • in the Avatar and Voice section on the right, under Motion Engine, choose “Avatar IV”

then, and this is important, click the “Advanced Settings” button.

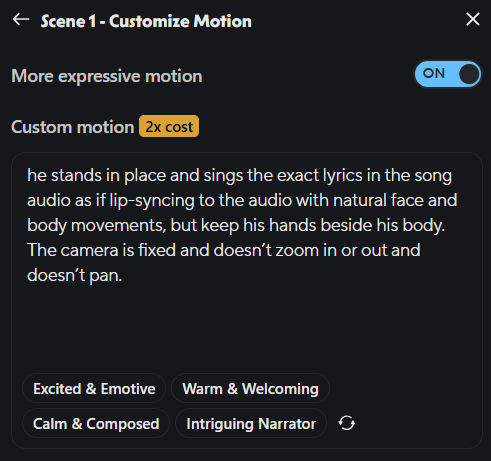
Toggle on “More expressive motion” and enter a custom motion prompt.

Optionally, you may click the “Generate motion prompts” icon, which will generate motion tags as shown below.

Then, click the Generate button.

Following are examples comparing different settings.

HeyGen LipSync Using Avatar IV WITHOUT Custom Motion

HeyGen LipSync Using Avatar IV WITH Custom Motion

In this example, I didn’t click the “Generate motion prompt” button.

HeyGen LipSync Using Avatar IV WITH Custom Motion

In this example, I did click the “Generate motion prompt” button.

As you can see, in the first example, the avatar doesn’t look like he is singing at all, and in the last 2 examples, the avatar looks more expressive. It may be difficult to tell the difference for such a short clip, but the difference is actually huge when you lipsync a full song, as in the following example.

The lip-sync quality is definitely not as good as SeeDance 2.0, but it seems to be the best option when SeeDance 2.0 doesn’t work for a particular language.

UPDATE 6/5/2026

There’s another way to generate lip-sync videos using SeeDance 2.0, and it supports non-English languages. Here, I’m using Kie.ai. Instead of uploading a black video with audio, I upload an audio and include the lyrics in the prompt.

Inputs:

Prompt: Lyrics: Naik bajaj jingga bunyinya setengah mati

The guy in reference @image1 sings the verse in @audio1 in a music video way. The verse in the lyrics is in the Indonesian language. Keep the camera fixed. Don’t zoom in or out. Keep the background solid green as in reference @image1. The man in reference @image1 moves his body naturally in a music video way.

Reference Image:

Reference Audio:

Duration: 6s

Output:

Inputs:

Prompt: Lyrics: Naik bajaj jingga bunyinya setengah mati

The guy in reference @image1 sings the verse in @audio1 in a music video way. The verse in the lyrics is in the Indonesian language. Keep the camera fixed. Don’t zoom in or out. Keep the background solid green as in reference @image1. The man in reference @image1 moves his body naturally in a music video way.

Reference Image:

Reference Audio:

Duration: 6s

Output:

UPDATE 6/13/2026 – Actually, using a video reference containing the audio is better than an audio reference. See following example.

Inputs:

Prompt: Lyrics:

Còn tôi như cánh chim
Sẽ bay đi muôn phương
Mang về mầm xanh tươi

use the song from the given video (@video1) and use the character from the given image (@image1) to make a music video of the man singing the song. he sings the exact lyrics in the song as if lip-syncing. The lyrics are in Vietnamese. He sings passionately and moves his body naturally to the sound of the music. Keep the camera fixed. Don’t zoom in or out. Keep the background solid green as in reference @image1.

Reference Image:

Reference Video:

Duration: 11s

Output:

Create Cinematic, Multi-Shot Lip-sync Music Videos

To create cinematic, multi-shot lip-sync music videos in one SeeDance 2.0 video generation, do the following:

  1. Give Claude or ChatGPT the lyrics to the whole song so it knows what the song is about
  2. Create reference video clips in 720p containing audio segments that are 14s or less. Don’t split mid-word.
  3. For each clip, give Claude the mp3 and the lyrics for that clip, if any, and tell Claude you want a SeeDance prompt to generate a music video. Specifically, tell Claude to give you the shots (scenes) similar to the example below.

Shot 1: Medium-close on the singer at golden hour along a cliffside coast, glowing amber coastline and ocean curving behind him, warm sun on his face. Camera slow gentle push-in. He is the only person in frame.

Shot 2: Medium shot of the singer standing at a coastal overlook, vast golden California coastline stretching into the distance behind him, soft waves and warm haze. Camera slow drift. He is the only person in frame.

Shot 3: Medium-close, front-on, on the singer with the blazing golden sunset coastline glowing behind him, the warmest light of the clip full on his face, a peaceful contented expression. Camera slow push-in. He is the only person in frame.

Then, append it to your base prompt, which is

LYRICS: “[enter lyrics for the clip / segment here]”

use the song from the given video (@video1) and use the character from the given image (@image1) to make a music video of the man singing the song

@image1 is the face and identity reference for the lead singer — match his face, afro, beard, and glasses to @image2 throughout, keeping his identity consistent.

The generated audio must match the audio in @video1 EXACTLY and the lip sync must match the vocal segments in @video1 EXACTLY.

4. Add your character sheet as the first reference image (@image1).

5. Add your reference video

6. Specify a duration that matches the reference video duration

Example Character Sheet Image

Example Reference Video

Output

Create Overview Videos in 5 Minutes on Any Topic Using AI and NotebookLM

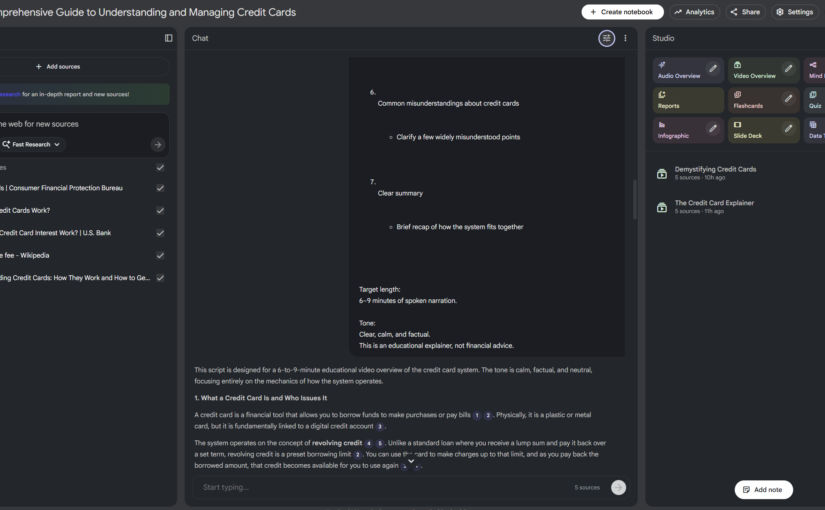
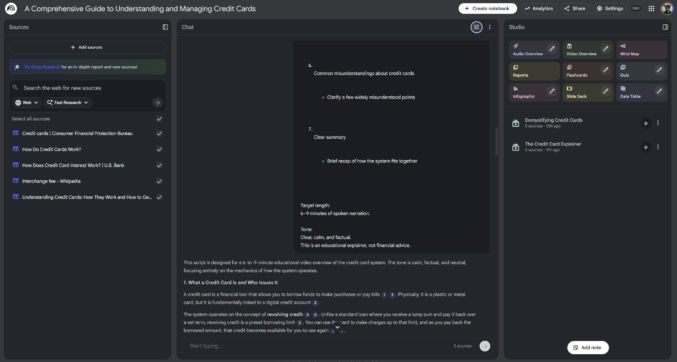
Here’s how I created this overview video in 5 minutes with just a single prompt.

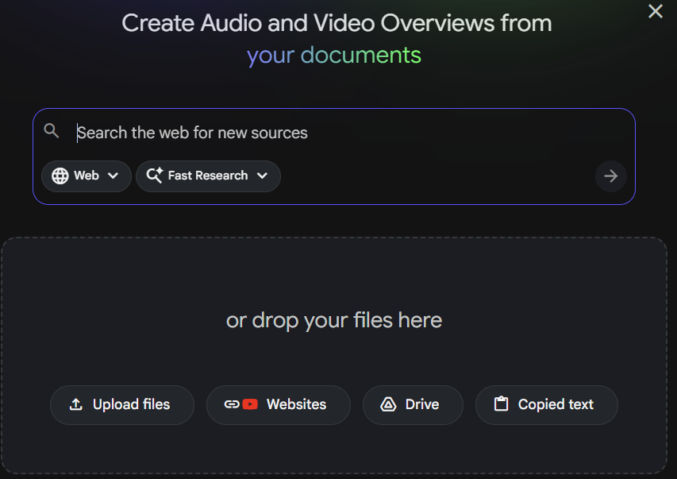
Get Content

Gather the content for the overview video you want to create. The content can be local files (PDFs, text files, etc), copied text, and website URLs. In my case, I got these URLs to pages explaining how credit cards work:

Add Content to NotebookLM

In the left pane of NotebookLM, add your source content.

Add a Prompt

In the middle pane, add a prompt describing what you want NotebookLM to do. In my example, I asked ChatGPT to give me a prompt to tell NotebookLM to generate an overview video of the content in my sources, which I then pasted into NotebookLM.

Generate Overview Video

In the right pane, click “Video Overview” to have NotebookLM generate an overview video based on the content and your prompt. My 4-minute video was generated in a few minutes.

How to Create a Cover Song in Suno AI

Let’s say you have the rights to a song, e.g, a song that’s in the public domain, and you want to create a cover for it by only replacing the lyrics. Here’s how you can do it using ChatGPT and Suno AI.

Upload the original song to Suno

For this example, I uploaded this song.

Suno will add your uploaded song to your workspace, as shown below. When you click on the song’s title, you’ll see an auto-generated style description of the song and the lyrics.

Song Style

A French pop song with a moderate tempo and a romantic, dreamy atmosphere, The instrumentation features a prominent acoustic guitar playing arpeggiated chords, a bass guitar providing a smooth, walking bass line, and a drum kit with a soft, brushed snare sound, Synthesizers contribute to the ethereal quality with pad sounds and occasional melodic lines, The female lead vocalist sings with a soft, breathy tone, employing a gentle vibrato, The song structure follows a verse-chorus pattern with a bridge, The chord progression is primarily diatonic, creating a sense of warmth and familiarity, Reverb is applied generously to the vocals and some instrumental elements, enhancing the dreamy quality, The overall mix is balanced, with the vocals sitting clearly in the foreground

Song Lyrics

[Intro]
(Paru paru pa)
(Paru paru pa)
(Paru paru pa)
(Paru paru pa)
(Paru paru pa)
(Paru paru pa)
(Paru paru pa)
(Paru paru pa)

[Verse 1]
Quand tu me souris
Mon cœur s’envole
Tout devient doux
Tout prend son rôle
Ton nom résonne
Comme une chanson
Dans mes rêves
Tu es ma raison

[Chorus]
Je me sens au ciel de t’aimer
Comme un ange qui vient d’naître
Ton amour me fait trembler
Sous la lune, je veux renaître

[Verse 2]
Tes yeux brillent comme l’été
Chaque nuit, je veux t’aimer
Ta voix douce me fait rêver
Je t’appelle sans m’arrêter

[Chorus]
Je me sens au ciel de t’aimer
Quand tes mains touchent ma peau
Le temps s’arrête enchanté
Dans ton cœur, je trouve mon écho

[Bridge]
Même si le jour se lève
Et que tout s’enfuit
Ton amour reste mon rêve
Mon paradis, c’est toi mon fruit

[Chorus]
Je me sens au ciel de t’aimer
Chaque instant, je veux y croire
Je me sens

[Outro]
Au ciel de t’aimer
(Paru paru pa)
(Paru paru pa)
(Paru paru pa)
(Paru paru pa)
(Paru paru pa)
(Paru paru pa)
(Paru paru pa)
(Paru paru pa)

Generate new lyrics

To create new lyrics, the easiest way is to ask ChatGPT to do it for you. For example, here’s a prompt I gave ChatGPT to generate new lyrics that meet my specific criteria:

I want to create a cover of a French song. The lyrics are below. Give me English lyrics that have a similar theme and can be used as a drop-in replacement for the French lyrics so I can use the Suno cover feature. If the French song has a rhyming pattern, the new lyrics should rhyme as well. If possible, try to match the syllable count, but prioritize the flow and meaning of the lyrics over the syllable count.

The lyrics below were auto-generated by Suno.

[Intro]
(Paru paru pa)
(Paru paru pa)
(Paru paru pa)
(Paru paru pa)
(Paru paru pa)
(Paru paru pa)
(Paru paru pa)
(Paru paru pa)

[Verse 1]
Quand tu me souris
Mon cœur s’envole
Tout devient doux
Tout prend son rôle

ChatGPT will then respond with the lyrics. Here’s what it gave me:

[Intro]

(Para para pa)
(Para para pa)
(Para para pa)
(Para para pa)
(Para para pa)
(Para para pa)
(Para para pa)
(Para para pa)

VERSE 1

When you smile at me,
My heart goes free,
Everything glows,
Warm like it knows,
Your name rings on,
Soft as a song,
In dreams each night,
You are my light.

[Chorus]

Your love lifts me higher each day,
Like an angel learning to fly,
Every touch sends my worries away,
Under moonlight, you open the sky.

[Verse 2]

Your eyes shine bright, like summer air,
Every night I find you there,
Your soft voice brings me into dream,
Calling you flows like a stream.

[Chorus]

Your love lifts me higher each day,
When your hands are holding mine,
Time stands still in your gentle way,
In your heart, all my echoes align.

[Bridge]

Even when the morning shines,
And the world moves on,
Still your love stays in my mind,
You’re the dream I lean upon.

[Chorus]

Your love lifts me higher each day,
Every moment feels so true,
I feel you—
So high in love with you.

[Outro]

Floating through the sky
(Para para pa)
(Para para pa)
(Para para pa)
(Para para pa)
(Para para pa)
(Para para pa)
(Para para pa)
(Para para pa)

Create cover song

Now that you have new lyrics, go back to Suno and click on the 3 dots next to the original song title, the click “Remix/Edit” > “Cover”

In the left pane, Suno will load the original song and lyrics. Replace the original lyrics with your new lyrics. In the “Style” field, paste the Suno-generated style description. Suno will also set some advanced options, like “weirdness”, “style influence”, and “audio influence”. You can keep the defaults.

Click “Create”. Suno will create 2 cover songs, as shown below.

Edit the cover song

After listening to the two cover songs, I like the second one more, but one section didn’t sound right. Some of the lines in verse 2 sounded rushed. To fix this, edit the song by clicking on “Open in Editor”.

With the editor open, you’ll see the song’s waveform, color-coded by section. Click on the section containing the lyrics you wan to edit. In this example, that’s the pink section shown below. When you click on it, the lyrics for the section will be selected in the lyrics box on the left. You can then type in revised lyrics in the “new lyrics” box below it. In this case, I made some of the lyrics shorter (fewer words).

Click the “Replace” button. Suno will generate two alternate versions of that section with the modified lyrics you provided. Click the play button beside each one to preview the alternate versions. If you don’t like either one, click “Regenerate” to generate more versions. When you like a version, click “Commit” to replace the section with the new section.

When you’re done editing, click “Save as new song”. The edited song will appear in your workspace.

You can then download the song.

Here’s the cover song in English. As you’ll hear, the backing instrumentals sound almost identical to the original French song, but the lyrics are new.

Cheaply Create High-Quality Images Inspired by Existing Images Using AI

Recently, I needed some high-quality Mediterranean images. I tried searching stock photo libraries, but they were expensive, it took too long, and the images weren’t that good or what I was really looking for. I found several videos on YouTube that had the type of images I wanted, but I didn’t want to copy them exactly, so I used AI to create new images inspired by them. Here’s how I created them.

AI Model: SeeDream 4.0

Prompt: Create a Greek home using the same colors, lighting, and elements from the reference image, but it should look different from the reference image.

Reference Image:

AI-Generated Image:


AI Model: SeeDream 4.0

Prompt: Create an image using the same colors, lighting, and elements from the reference image, but it should look different from the reference image. The perspective should be 45 degrees from the perspective of the reference image, facing the sea.

Reference Image:

AI-Generated Image:


AI Model: SeeDream 4.0

Prompt: Create an image with the same composition and view as the first one, but use colors and materials from the second one.

Reference Images:

AI-Generated Image:


AI Model: SeeDream 4.0

Prompt: Create an image with the same composition and view as the first one, but use colors and materials from the second one.

Reference Images:

AI-Generated Image:


AI Model: SeeDream 4.0

Prompt: Create an image with the same composition and view as the first one, but use colors and materials from the second one.

Reference Images:

AI-Generated Image:


AI Model: SeeDream 4.0

Prompt: Create an image with the same, layout, composition and view as the first one, but use colors and materials from the second one.

Reference Images:

AI-Generated Image:


AI Model: SeeDream 4.0

Prompt: Create an image with the same, layout, composition and view as the first one, but use colors and materials from the second one. Keep the blue and white tile in the first image as is.

Reference Images:

AI-Generated Image:


AI Model: SeeDream 4.0

Prompt: Create an image with the same, layout, composition, elements and view/framing as the first one, but use colors and building materials from the second one.

Reference Images:

AI-Generated Image:


AI Model: SeeDream 4.0

Prompt: Create an image with the same, layout, composition, elements and view/framing as the first one, but use colors and building materials from the second one.

Reference Images:

AI-Generated Image:


AI Model: SeeDream 4.0

Prompt: Create an image with the same, layout, composition, elements and view/framing as the first one, but use colors and building materials from the second one.

Reference Images:

AI-Generated Image:


AI Model: SeeDream 4.0

Prompt: Create an image with the same, layout, composition, elements and view/framing as the first one, but use colors and building materials from the second one.

Reference Images:

AI-Generated Image:


AI Model: SeeDream 4.0

Prompt: Create an image with the same, layout, composition, elements and view/framing as the first one, but use colors and building materials from the second one.

Reference Images:

AI-Generated Image:


AI Model: SeeDream 4.0

Prompt: Create an image with the same, layout, composition, elements and view/framing as the first one, but use colors and building materials from the second one.

Reference Images:

AI-Generated Image:


AI Model: SeeDream 4.0

Prompt: Create an image with the same, layout, composition, elements and view/framing as the first one, but use colors and building materials from the second one.

Reference Images:

AI-Generated Image:


AI Model: SeeDream 4.0

Prompt: Create an image with the same, layout, composition, elements and view/framing as the first one, but use colors and building materials from the second one.

Reference Images:

AI-Generated Image:


AI Model: SeeDream 4.0

Prompt: Create an image with the same, layout, composition, elements and view/framing as the first one, but use colors and building materials from the second one.

Reference Images:

AI-Generated Image:


AI Model: SeeDream 4.0

Prompt: Create an image with the same, layout, composition, elements and view/framing as the first one, but use colors and building materials from the second one.

Reference Images:

AI-Generated Image:

I ended up using the images to create 5-second background videos using Kling AI for this music video:

Comparing TopMediAI to HeyGen for Singing Lipsync AI Video Generation

There are many talking lipsync AI tools out there. The inputs are usually text and an image of a person. The results are almost indistinguishable from a non-AI talking video. But when it comes to lipsync videos involving singing, that’s a whole different story. Generating realistic singing lipsync videos is apparently very challenging. Tools like Kling AI and Runway ML, despite being very popular tools for video generation, do a horrible job at this. After trying a number of tools, the two best ones I’ve found are TopMediAI and HeyGen. In this post, I’ll share my experience using them.

UPDATE 12/19/2025: Longcat Avatar is a new option that is worth trying and comparing against.

UPDATE 12/8/2025: There’s a new singing lipsync generator called WaveSpeed MultiTalk (WAN 2.1). Preliminary testing indicates that, with respect to video quality, MultiTalk is better than TopMediAI but not as good as Heygen. With respect to lipsync, Multitalk is just as good as TopMediAI and better than Heygen.

TopMediAI Singing Photo Maker

Website

This tool does a decent job at creating singing lipsync videos, and the interface is very simple and intuitive. Though it’s designed for singing, it’s far from perfect.

Inputs

  • upload an audio file (mp3) between 2 and 30 seconds
  • upload an image of the character you want to sing

When generating a video using TopMediAI, sometimes, generation will fail repeatedly. From my experience, you have to keep trying 3-5 times until generation succeeds. It’s annoying, but it’ll eventually work.

HeyGen

Website

This tool was designed for creating talking lipsync videos, not for singing. Nevertheless, it’s most advanced motion engine (Avatar IV) does a pretty good job a generating a singing lipsync video if you choose the “Quality” mode with a “Custom motion” value of “singing”. If you use the “Avatar Unlimited” engine, the results are just not good enough, in my opinion.

Update 12/8/2025: If you use the “Faster” generation mode, the quality appears to be just as good as the “Quality” mode, so just choose that mode since it costs half the cost of the “Quality” mode.

The process to create a lipsync video using HeyGen is more complex. Here are the steps:

  1. Click “Avatars” > “Create New” > “Start from a photo” >
  2. Upload a photo and wait for it to be processed
  1. Choose to create a new avatar or add the photo as a new “look” of an existing avatar. (One avatar can have multiple “looks”)
  2. Click “Create with AI Studio”
  1. Click “Audio” > “Upload Audio” , then upload your audio clip. You can upload a clip anywhere between 1 second and 3 minutes.

You can also choose from a previously uploaded audio.

  1. Play and confirm the uploaded/selected audio.
  1. HeyGen will attempt to transcribe the audio. If transcription fails, you won’t be able to proceed. In my experience, if it fails, it’s usually because the audio clip is too short. When I upload a longer clip, it usually can transcribe it. Note that the transcription can be wrong. This doesn’t appear to matter, as the video generation appears to be based on sound rather than words.
  1. Click “Generate”.

Comparing HeyGen to TopMediAI

Body movements

Neither TopMediAI nor HeyGen will make your character dance, but they will animate your character’s body to some extent. This is good, because older technologies literally only animated the lips or face and left everything else frozen/static. I feel that TopMediAI generates stronger body and lip movements, which makes the results look more realistic from that perspective.

Lipsync accuracy

When uploading a audio clip, it’s better to isolate the vocals from the backing track to prevent TopMediAI and HeyGen from getting confused. Neverthless, even when you upload the vocal track of a song, both AI tools occasionally produce inaccurate results, e.g., instead of lip movements to sing the word “hati”, TopMediAI made the lip movements as if to sing the word “hapi”; it wasn’t able to detect the difference between the “t” and “p” sounds. HeyGen seems to do a better job at lipsync accuracy.

Sustained vocal sounds

TopMediAI animates both the subject’s body and their lips to try to match the sounds in the audio file. This is particularly necessary for sustained vocal sounds, like in the following example.

Using the same inputs, and using HeyGen’s most advanced model (Avatar IV in “Quality” mode with a “Custom Motion” value of “Singing”, you can see below that HeyGen failed.

Video picture quality

With TopMediAI, if you upload an image of a zoomed-out character, even if it’s a hi-res image, the tool will have difficulty detecting the facial features, and the resulting video will be blurry with lots of artifacts. For that reason, I only upload images containing close-up shots of the character from the waist up. However, even then, the picture quality of the generated lipsync video deteriorates, sometimes significantly. For example, here’s the source image I uploaded to TopMediAI:

And here’s a frame from the generated video:

That’s a big difference.

HeyGen, on the other hand, does a much better job at preserving picture quality of the source. For example, compare the source and generated (screenshot) images below.

Teeth

TopMediAI can’t seem to produce consistent and natural-looking teeth. Sometimes, the results are acceptable, but other times, they are not. Compare the following.

Teeth appear okay, but still not perfect.
Teeth appear heavily chipped

HeyGen, on the other hand, does a very good job and showing natural, and almost perfect, teeth, as in this example:

Output resolution

With HeyGen, you can export videos up to 4K quality. With TopMediAI, there are no resolution options.

Recommendations

I would definitely use HeyGen’s Avatar IV with the “Quality” mode first to generating singing lipsync videos. If the results don’t look good, then I’d use TopMediaAI as a fallback.

Camera Shots, Angles, and Movements For Generating AI Images and Videos

When generating images and videos using AI, you need to include in your prompt how the camera takes the picture or video. Following are common camera shots and movements you can reference when creating your prompts. The example images below were all generated using Nano Banana. The videos were generated using Kling AI.

Shot Types (Distance and Framing)

Shot TypeDescription
Extreme Close-Up (ECU)Focuses tightly on one detail (eyes, mouth, hand). Great for emotional intensity.
Close-Up (CU)Shows the subject’s head and shoulders — captures facial emotion clearly.
Medium Shot (MS)Shows the subject from waist up — good balance between subject and background.
Full Shot (FS)Shows the entire body of the subject within the frame.
Wide Shot (WS)Shows the subject and full surroundings — emphasizes environment.
Extreme Wide Shot (EWS)Subject is small within a large landscape — epic and cinematic.
Over-the-Shoulder (OTS)Camera is behind one person’s shoulder, focusing on what they’re looking at.
POV (Point of View)The camera shows what the character sees — immersive perspective.

Extreme Close-Up

Close-Up

Medium Shot

Full Shot

Wide Shot 

Extreme Wide Shot

Over-the-Shoulder Shot

 POV (Point of View) Shot

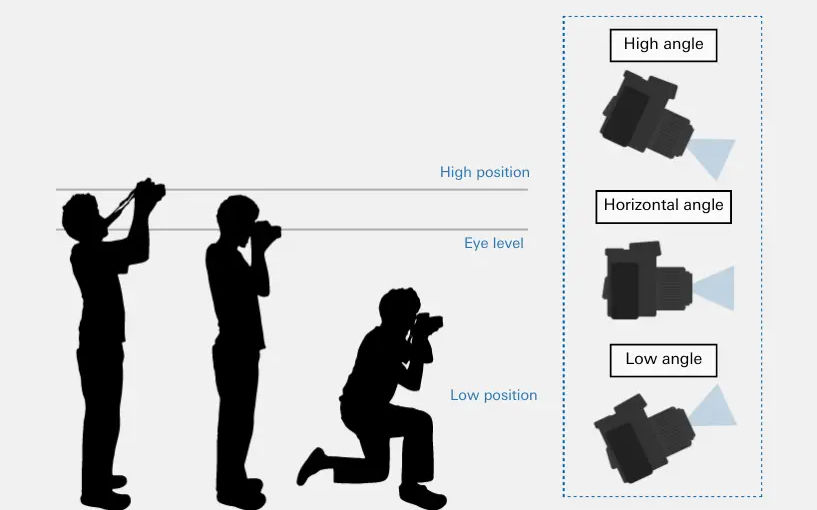
Camera Angles

AngleDescription
Eye-LevelNeutral, natural perspective — like the viewer’s eye line.
High AngleCamera looks down on the subject — makes them seem small or vulnerable.
Low AngleCamera looks up at the subject — makes them seem powerful or heroic.
Dutch Angle (Tilted)Camera is tilted diagonally — adds tension or unease.
Bird’s Eye View / Top-DownShot from directly above — good for movement, choreography, or maps.

Eye-Level, medium shot

High-angle, medium shot

Low-angle, medium shot

Dutch Angle (Tilted), medium shot

Bird’s Eye View / Top-Down shot

Camera Movements (Dynamic Shots)

MovementDescription
StaticCamera doesn’t move — perfect for portraits or emotional moments.
PanCamera rotates horizontally left ↔ right.
TiltCamera moves vertically up ↕ down.
Dolly (Push/Pull)Camera moves forward or backward smoothly on rails. Great for dramatic reveals.
Truck (Left/Right)Camera moves side to side — similar to dolly but horizontally.
Crane / JibCamera moves up or down through large vertical space — majestic motion.
Orbit / 360° MoveCamera circles around the subject — cinematic hero shot.
Tracking / Follow ShotCamera moves following the subject — conveys movement and energy.
Zoom In / OutLens zooms, not physical movement — adds focus or emotional punch.
HandheldShaky or organic motion — feels immersive or documentary-style.
Drone ShotHigh-altitude or sweeping view — ideal for landscapes, travel, or sports.

Static

Pans Left to Right

Tilt Upward

Dolly Pull

Orbit / Circles

Track / Follow

Zoom Out

A Brief Overview of Artificial Intelligence (AI)

Artificial Intelligence (AI) is about teaching computers to do smart things that normally require human intelligence — such as understanding language, recognizing faces, playing games, or creating art and music.

AI learns from lots of examples so it can notice patterns. For example, if you show AI thousands of pictures of cats and dogs, it will eventually know the difference between what a cat looks like and what a dog looks like. It doesn’t know what a cat or dog does; it just knows what a cat or dog looks like. Data is the fuel of AI. The more data and the cleaner the data, the better the AI is. AI improves by trial and error. Initially, AI will guess what a cat or dog looks like. If it makes a mistake and humans correct it, AI will learn and, eventually, not make the same mistake.

Huge Neural Networks

AI uses neural networks, which are like a simplified brain. Large Language Model (LLM) and Diffusion Model are two types of huge networks. These models are trained on billions of examples from the internet.

FeatureLLM (Large Language Model)Diffusion Model
Main goalGenerate or understand textGenerate or edit images/videos
Input typeWords / sentencesText (as a prompt) + random noise
Output typeText (e.g., paragraphs, code, chat)Visuals (e.g., images, videos)
How it learnsPredicts the next wordLearns to reverse noise and create images
ExamplesChatGPT, Claude, GeminiMidjourney, Stable Diffusion, DALL·E, Runway, Kling

AI as a Classroom Analogy

Imagine a big school containing teachers (humans) and students (AIs).

The Teacher (Humans)

The teachers (humans) give the students (AIs) tons of examples: books, images, songs, videos, code — everything. The students don’t just memorize — they practice until they can do similar things on their own.

The LLM Student (AI)

One student, Lucy the LLM, loves reading and writing. She studies every book in the library and learns:

“After the words ‘Once upon a’, the next word is usually ‘time’.”

She becomes amazing at predicting the next word and can write essays, stories, or even hold a conversation — because she knows how words fit together.

Lucy = Large Language Model (writes and speaks intelligently).

The Diffusion Student (AI)

Another student, Danny the Diffusion Model, loves art. His training exercise:

  1. The teacher shows him a picture.
  2. Then they cover it with random paint splatters.
  3. Danny learns to carefully “un-splatter” the image until it looks clear again.

After years of practice, Danny can now start with a blank canvas (just random dots) and, when you say “a cat wearing sunglasses,” he paints that from scratch.

Danny = Diffusion Model (paints images from words).

The Big Picture

Both Lucy and Danny are smart in different ways:

  • Lucy talks and writes (text world 🌍).
  • Danny paints and visualizes (image world 🎨).
    They often work together — Lucy writes the idea, Danny draws it.

Types of AI

CategoryDescriptionExample
Narrow AISpecialized, task-based AIChatGPT
Generative AICreates new contentDALL·E, Runway
Agentic AIActs independently to achieve goalsAutoGPT, Devin
Analytical AIAnalyzes large dataFraud detection
Predictive AIForecasts outcomesStock or weather models
Conversational AITalks with humansChatGPT, Siri
Robotic AIMoves and interacts physicallyDrones, factory robots
  • Machine Learning teaches AI patterns.
  • Generative AI teaches AI creativity.
  • Agentic AI teaches AI action and autonomy.

AI Leaderboard

There are many AI models by different creators, but some are more intelligent than others. This leaderboard ranks AI models based on intelligence score.

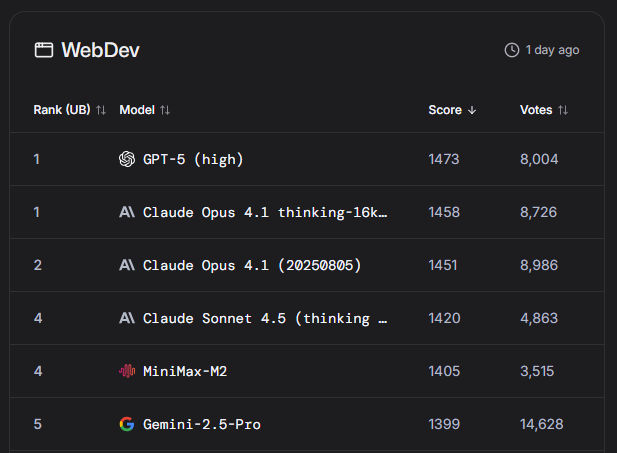
Some models are better than others at specific tasks. The following leaderboards compare leading models by

Here’s the current top-5 leaderboard for web development as of Nov 11, 2025.

AI, CPUs, and GPUs

TypeAnalogyGood For
CPUA brilliant chef cooking one perfect dish at a timeComplex logic, single-thread tasks
GPUA kitchen with 1,000 chefs making the same dish simultaneouslyMassive parallel work (like AI math)

Originally, GPUs were built for graphics — drawing images and 3D scenes in video games.

  • CPUs (central processing units) are like smart workers — great at doing one task at a time, but carefully.
  • GPUs are like armies of workers — they can do thousands of small calculations at once.

What would take a CPU weeks to do, a GPU can do in hours.

AI depends heavily on GPUS.

Nvidia, the company that makes most AI GPUs (like the H100 and A100), has become one of the most valuable companies in the world because of AI demand.

Data centers around the world are being built specifically to host GPU farms — giant rooms filled with thousands of GPUs that power AI models.

Cloud providers (like AWS, RunPod, or Google Cloud) rent out GPU power so smaller developers can build and test AI apps without owning hardware.

AI Training VS Inference

There are two main stages of AI:

1. Training (Learning)

This is when the AI learns from data. For example, teaching an AI to recognize cats by showing it millions of cat photos. It requires huge amounts of computation and it needs massive GPU clusters — sometimes thousands of GPUs working together for weeks or months.

Think of it like “going to school.”

2. Inference (Using What It Learned)

Once trained, the AI can now use what it knows — answering questions, generating images, etc. It still uses GPUs, but fewer — since it’s now recalling knowledge rather than learning it.

Think of it like “taking an exam” — it’s using what it learned efficiently.

AI Hallucinations

An AI hallucination is when an AI makes up something false but presents it as true.
It happens because AIs don’t know truth — they just predict what sounds right based on pattern-matching. For example,

AI TypeWhat “Hallucination” Looks Like
LLM (ChatGPT, Claude)Makes up fake facts, quotes, sources, or people
Image Model (Midjourney, DALL·E)Adds random visual details that weren’t in the prompt (like extra fingers 👋 or distorted objects)
Video / Audio ModelsCreate unrealistic motion, or mis-sync voices and faces

Hugging Face

Hugging Face is basically the GitHub of Artificial Intelligence. It’s a giant online platform where people share, explore, and use AI models, datasets, and tools — all in one place. At Hugging Face, you’ll find

SectionWhat It OffersExample
ModelsPre-trained AI models (text, image, audio, etc.)ChatGPT-like LLMs, Stable Diffusion, Whisper
DatasetsLarge collections of data used to train AIsWikipedia text, image caption sets, code samples
SpacesInteractive apps people build with AIYou can test image generators, chatbots, translators
Transformers LibraryHugging Face’s open-source code that makes it easy to use modelsUsed by researchers, developers, and hobbyists everywhere

Imagine you want to build an app that turns spoken words into text, translates it to French, and then summarizes it. On Hugging Face, you can:

  1. Search for a speech-to-text model (like OpenAI’s Whisper).
  2. Add a translation model (like Helsinki-NLP English-to-French).
  3. Plug in a summarizer (like BART or T5).
  4. Run it all with just a few lines of Python code using the transformers library.

You don’t have to train anything from scratch — it’s all there, ready to go.

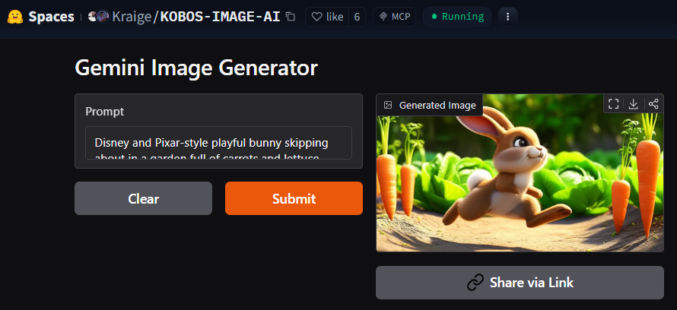
Hugging Face Spaces is like GitHub Pages – it’s where developers can host their AI models and provide a simple UI using Gradio, a simple web interface to demo an AI app. For example, you can search for “text to image”, click on a result, like Gemini Image Generator, and test the model in a browser.

You can also use models in your own code using Python. For example,

  1. Install the transformers library:

pip install transformers

  1. Load a model (for example, a text generator):
from transformers import pipeline

generator = pipeline("text-generation", model="gpt2")
result = generator("Once upon a time, there was a cat", max_length=30)
print(result[0]["generated_text"])

ComfyUI

ComfyUI is a visual, node-based interface for creating AI images and videos. It’s a drag-and-drop app that lets you build your own AI image or video generator. Instead of typing long code, you build a “workflow” by connecting blocks called nodes. Each node does one thing:

  • One node loads your model
  • One node reads your text prompt
  • One node generates an image
  • Another node might upscale, add depth, or edit colors

You can run ComfyUI locally on your computer, but you need a lot of space and a powerful computer, preferably with a GPU. These computers are expensive. Alternatively, you can run ComfyUI in a browser at ComfyCloud, RunComfy, and ThinkDiffusion, where you can rent powerful GPUs and pay only for when you’re using the service.

Image and Video AI Playground

You can test some of the leading image and video AI models at RunComfy’s playground.