How to Make an AI Video With Consistent Characters

In this post, I’ll show how I made this AI video containing a consistent main character.

Note: as I made this video, I kept finding and learning better ways to make it, so this video is not as good as could be had I started over using the techniques in this post.

Decide on a theme/setting

I wanted to make a music video using the song “When You Believe” from the movie “The Prince of Egypt”. For that reason, I chose ancient Egypt for my setting.

Create your main character

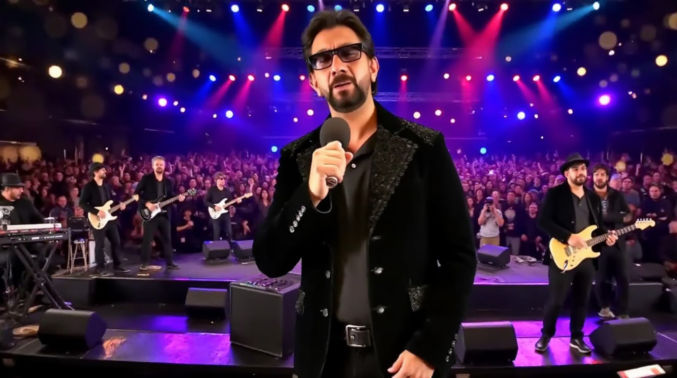
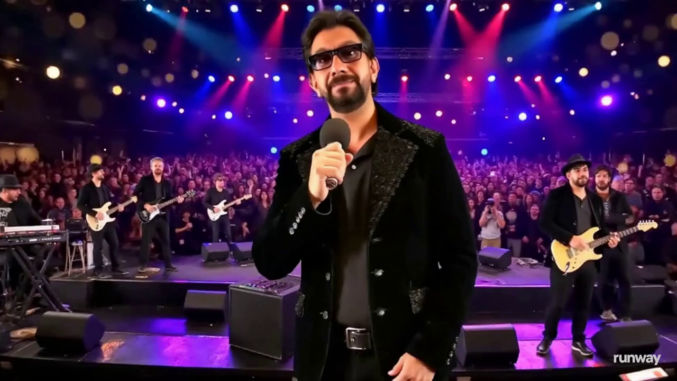
I wanted to see if I could create an AI version of me with changes to suit my desired main character, i.e., I wanted the character’s face to look as close as possible to me, but have other features like physique be more athletic and sculpted. To create the main character, I chose a picture of me that I liked and I asked ChatGPT to give me a prompt to create an image of a person that matches an example image I found.

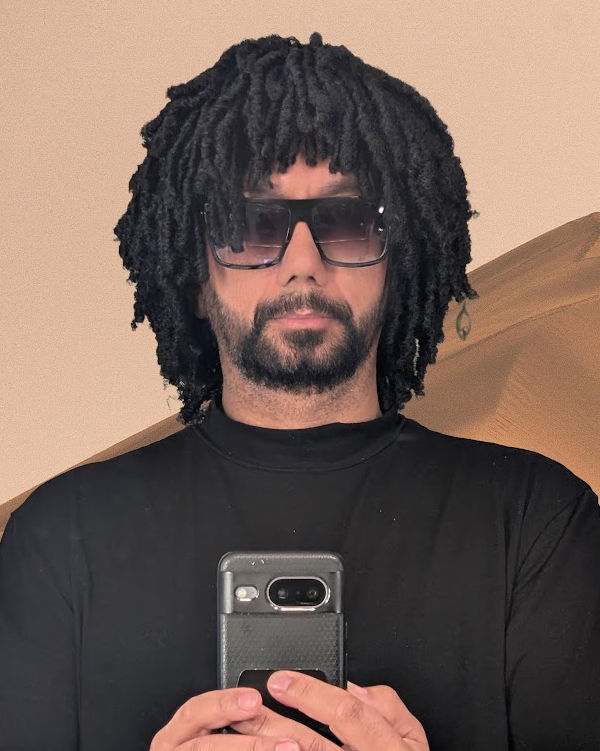
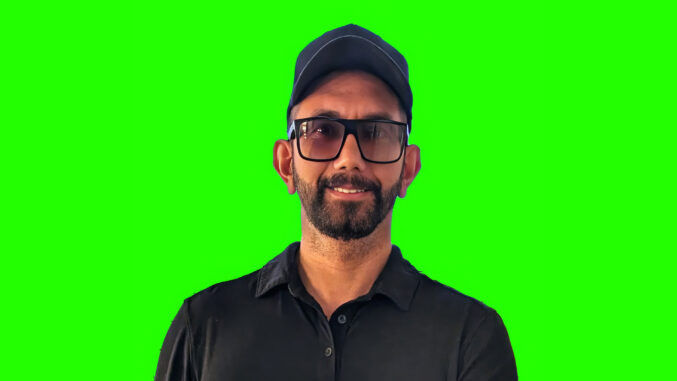
ChatGPT analyzed the outfit in the image I uploaded and gave me a prompt to generate an image with that outfit applied to a reference image I would upload. For the reference image, I chose this picture of me.

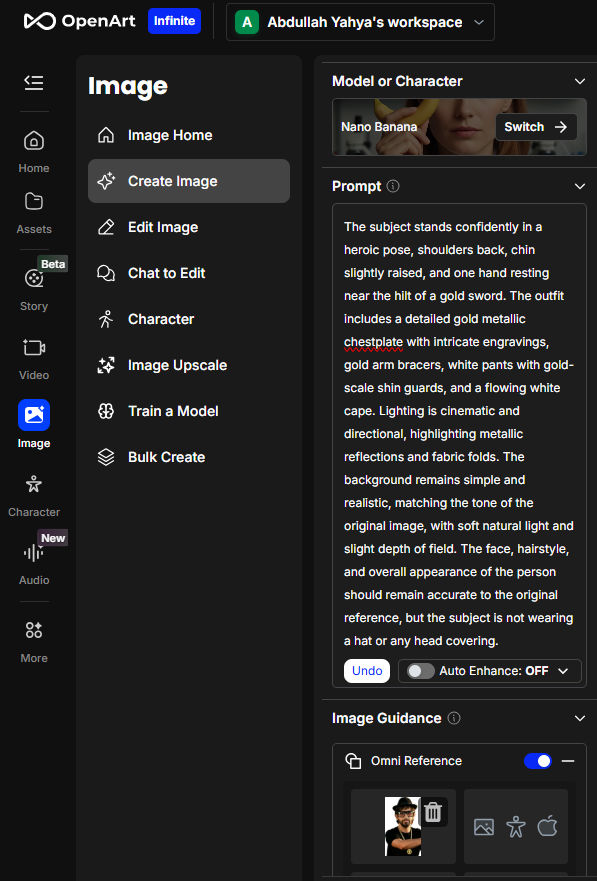
In OpenArt, I did the following

  1. Image > Create Image
  2. Model = Nano Banana
  3. Uploaded my reference image to the Omni Reference input
  4. Clicked “Create”

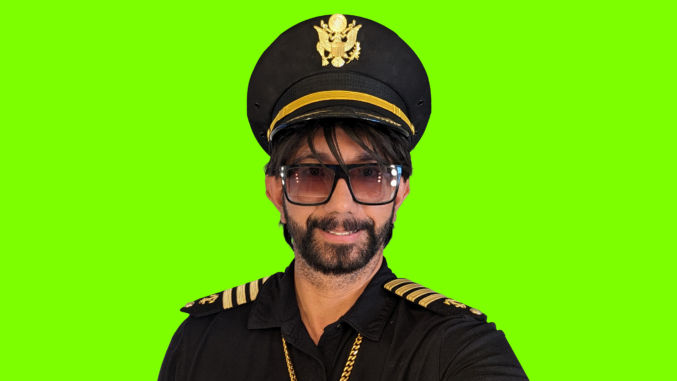
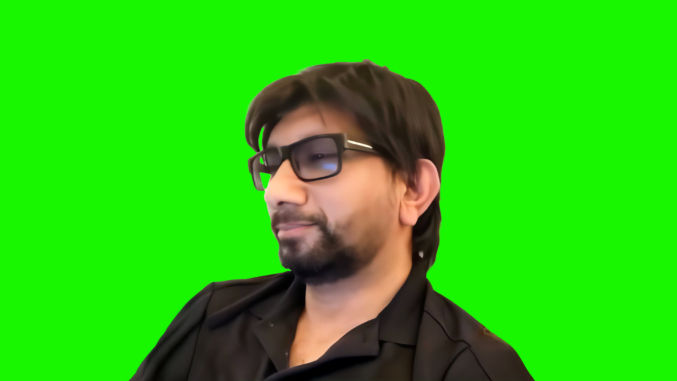
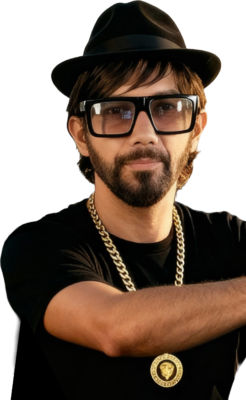
Nano Banana gave me this:

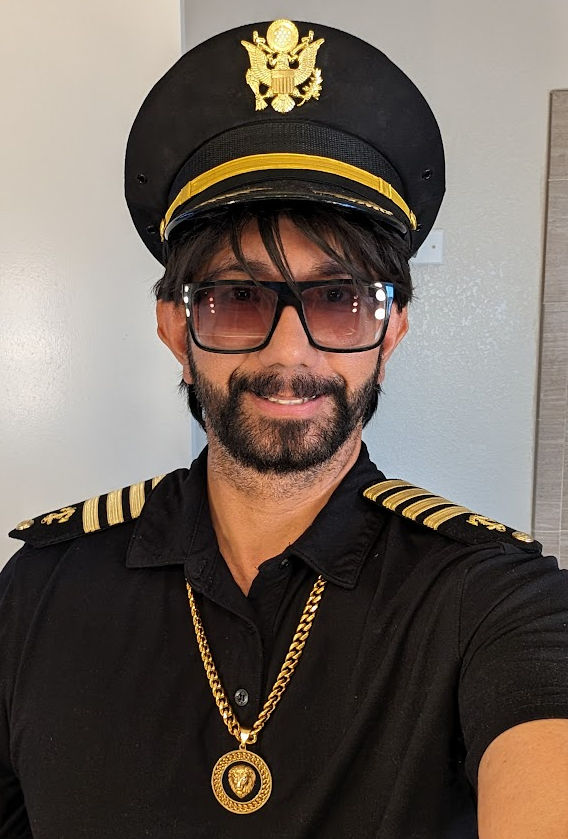
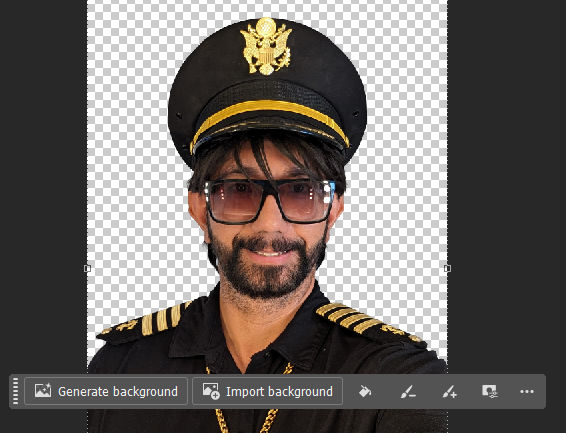
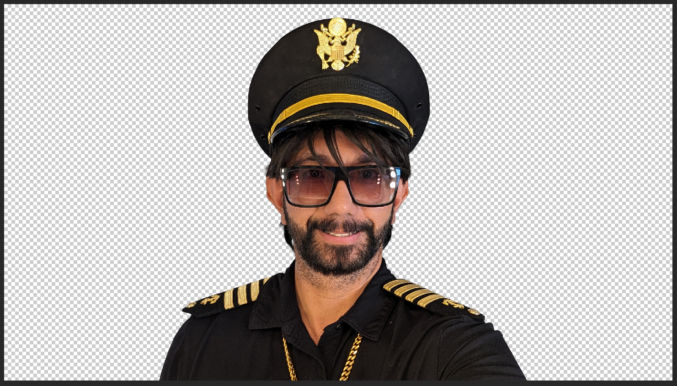
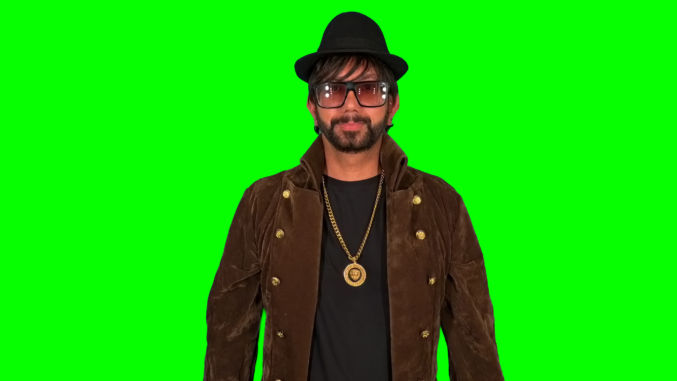
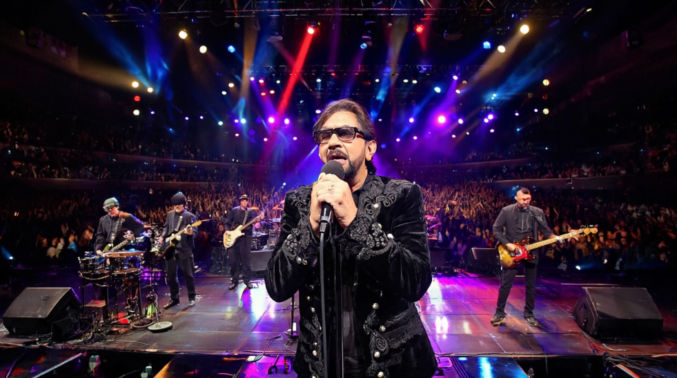
It was good, but I ended up making various changes until I got this:

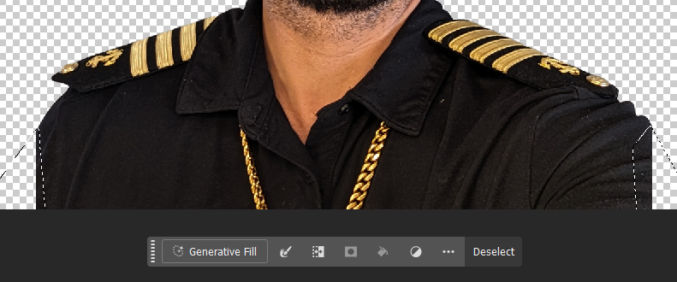
This final character image is based on another photo of mine. Tweaking the character photo was a lot more difficult than it should have been. I had to tell Nano Banana to make my arms a little darker and have me facing straight at the camera. When you create your main character, whether from a photo of a real person or not, try to have the character standing straight and facing the camera with a neutral facial expression. In my image above, I have a little smile, which kept getting carried over into various AI image generations. To fix this, I had to update every prompt that used this image to include the comment, “Subject is not smiling”. Also, AI generations would often remove my sunglasses, even though my main character reference image includes sunglasses. To fix this, I had to update every prompt that used this image to include the comment, “Subject is wearing glasses or his sunglasses.”

Note: Make sure you are satisfied with your main character image because you will use it to generate many images and videos with it as a reference.

Decide on your video content structure

In my case, I didn’t want to show viewers the main character non-stop throughout the video, so I decided to have alternating clips showing clips with and without the main character, i.e.

Scene 1Video clip without the main character
Scene 2Video clip with the main character
Scene 3Video clip without the main character
Scene 4Video clip with the main character
Scene 5Video clip without the main character
Scene 6Video clip with the main character

Generate image and video prompts

Generating images is much cheaper than generating videos. For example, in OpenArt, here’s what I paid in credits for each type:

Image using Flux Pro model5 credits
Image using Nano Banana model16 credits
Video using Kling 2.5 model100 credits

For this reason, I created an image of the first frame of each scene (video clip) before creating each video clip. If I didn’t like an image that was generated, I could regenerate it, which is much cheaper than regenerating a video.

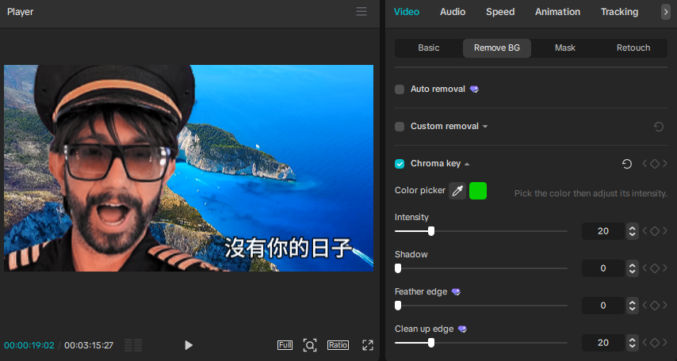
For the scenes without the main character, I didn’t need a reference image, so I used the Flux Pro model, which was cheap (5 credits) and produced great results.

For the scenes containing the main character, I needed to upload my reference image. Flux Pro doesn’t support reference images, so I used the Nano Banana model, which does support reference images.

UPDATE: actually, SeeDream 4.0 is just as good as Nano Banana. Use both SeeDream and Nano Banana, then choose which result you prefer.

For video generation, I chose Kling 2.5 because it supports a first-frame image option and produced good results.

Since we want the final video not to show a bunch of random content, I had each pair of consecutive scenes with and without the main character be relevant to each other. To do this, and to generate detailed prompts that matched my theme and setting, I used ChatGPT. For example, I asked ChatGPT the following:

Give me 10 pairs of cinematic video prompts along with their first-frame image prompt. For each pair, the first set of image and video prompts will not include my main character reference image, and the second set of image prompts will include my main character reference image.

I will use Flux Pro to generate images that don’t include the main character, I will use Nano Banana to generate images with the main character reference image, and I will use Kling 2.5 to generate each video using the corresponding image as the first frame. Every detail that will be referenced in the video prompt should be included in the image prompt.

Since I am making a music video of the song “When You Believe – The Prince of Egypt”, the theme/setting of the scenes should be ancient Egypt. The scenes should include popular landmarks, like the pyramids and the Nile River, people in a busy market, ancient mosques, and, of course, a royal palace for the prince. Each pair of prompts with and without the main character should be relevant to each other so as to flow as a story. If possible, all scenes should flow together as a cohesive story.

After answering a few follow-up questions from ChatGPT, it gave me the prompts, like the following:

1. The Desert Procession (without the prince)

Image Prompt (Nano Banana)
Epic realism, ancient Egyptian soldiers and servants walking through golden desert dunes at dusk, carrying ornate banners and treasures toward a distant palace on the horizon. The sky glows crimson-orange, sand whipping lightly in wind, dust haze around the caravan, footprints trailing through rippled dunes. Cinematic depth, ultra-detailed, 50mm lens realism, warm atmospheric glow.

Video Prompt (Kling)
Dynamic tracking shot alongside the caravan; camera glides parallel to marching servants, banners flapping, sand swirling, sunlight catching on gold ornaments; as the procession nears the palace, a subtle lens flare crosses frame, suggesting the arrival of royalty; ambient desert wind and drum rhythm underscore the movement.


2. The Prince’s Arrival (with the prince)

Image Prompt (Nano Banana)
Epic realism, regal Egyptian prince wearing a black tunic with gold trim, ornate jewelry, and a linen cloak, descending from his chariot before the grand palace gates. Behind him, the same caravan from previous scene arrives in the background. The palace gleams under the last light of sunset, palm trees swaying gently, atmosphere majestic and warm. The prince’s face is clearly visible, confident and composed, cinematic lighting on his features, 50mm shallow depth.

Video Prompt (Kling)
Camera begins low behind the prince’s boots stepping onto polished stone, then cranes upward to reveal his full figure framed against the glowing palace. Cloak moves naturally in breeze, chariot wheels still turning in background, banners from previous scene flutter in golden light. Subtle push-in as the prince lifts his gaze toward the palace — the soundtrack swells, symbolizing destiny and return.

Generate Images and Videos

Now that we have our inputs (prompts and main character image), we can generate images and videos for each scene.

For the images without the main character, I used Flux Pro like this

In this example, I got the following image:

I then used that image as the first frame to generate a video using Kling 2.5 as follows:

This produced the following video:

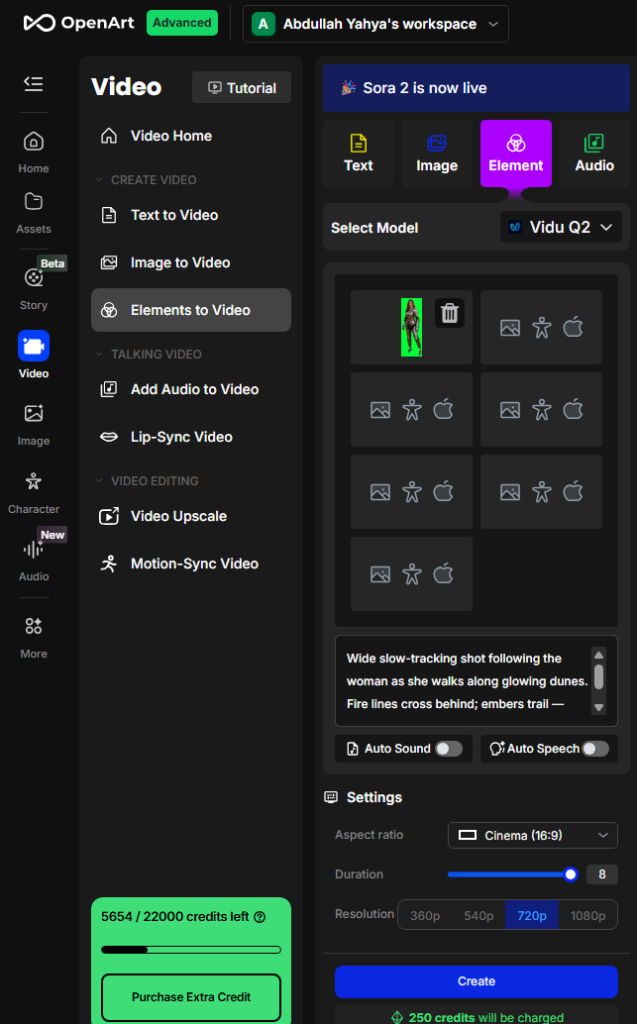
For the images with the main character, I used Nano Banana like this:

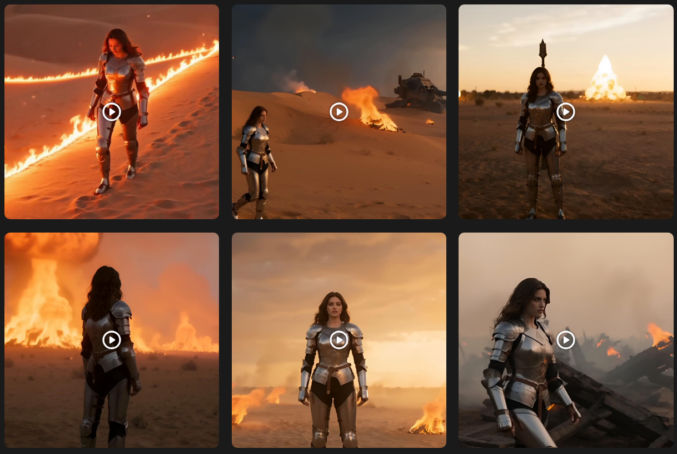
Notice that I uploaded my main character reference image in the Omni Reference field. I also uploaded the image from the previous prompt showing the caravan since this prompt references it. This prompt generated the following image:

Again, I then used that image as the first frame to generate a video using Kling 2.5 as follows:

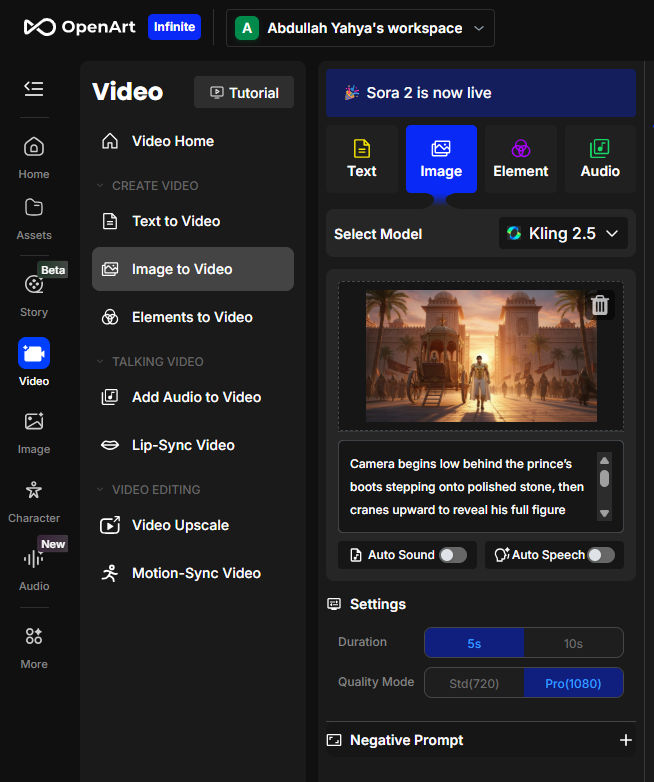
which generated the following video:

Repeat for all prompts

I then just repeated the previous image and video generation step for all the prompts that ChatGPT gave me.

Create final video

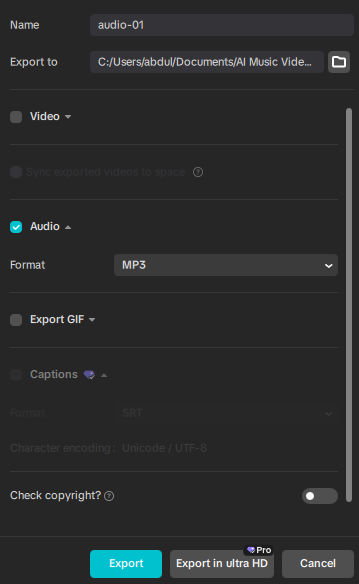
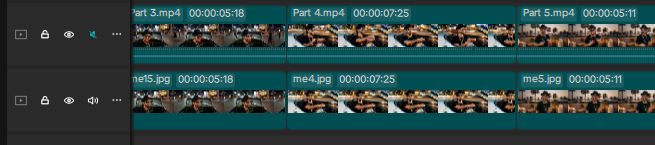
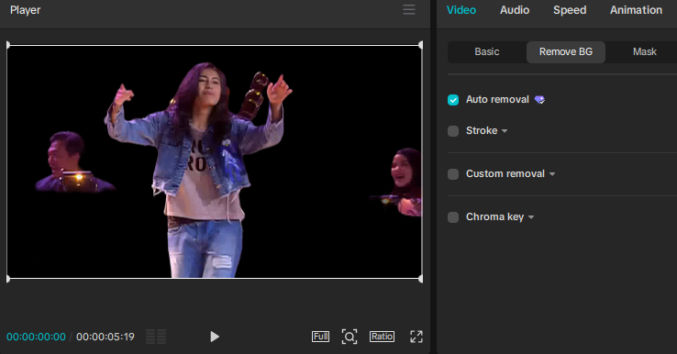
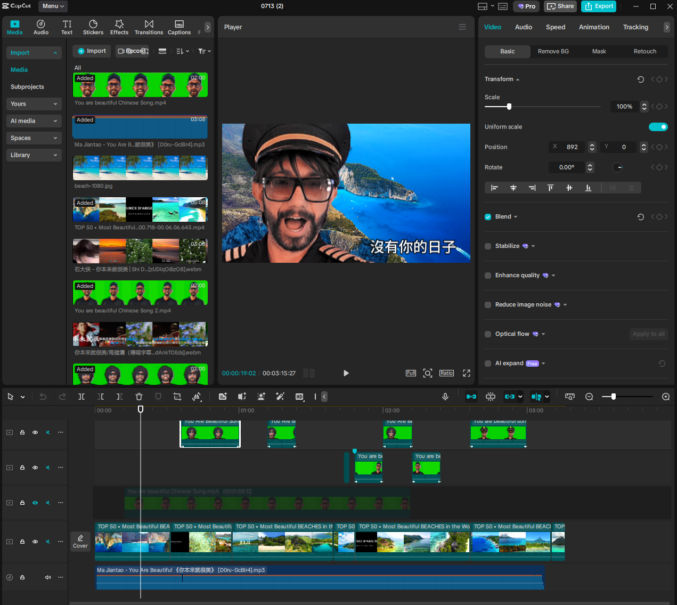
Lastly, I added all assets (video clips, music) to a video editing to (I used Capcut), put them on the timeline in my desired sequence, and exported the final video.

Create a poster image

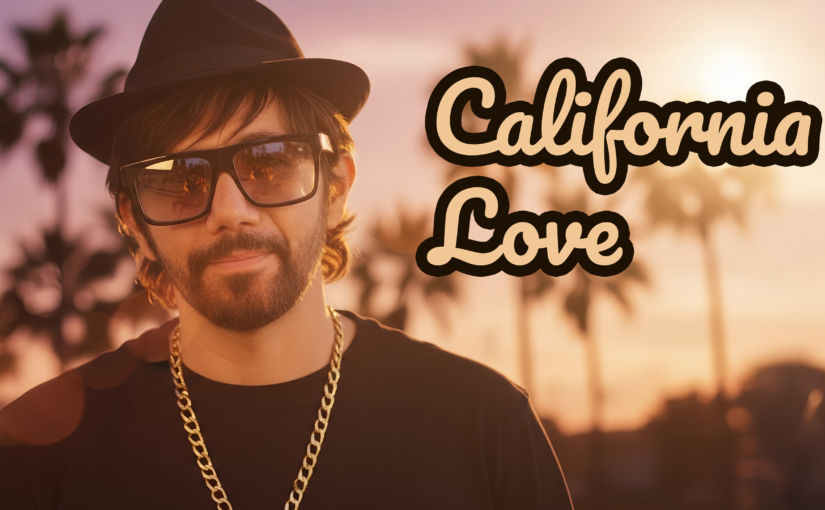
Since I published my video on YouTube, I wanted an attractive thumbnail / poster image. I scrubbed through the video in the timeline in Capcut until I found a frame that I like, and then exported that frame as a still image. I then added the title of the song (“When You Believe”) to it in Photoshop. This is the poster image I ended up with.

How to Make an AI Music Video

In this post, I’ll explain how to make a music video using AI like the one below.

Get a song

The first step is to get a song. Here are some options:

  1. Buy a song, e.g., on Amazon
  2. Download a song from YouTube, e.g., using a YouTube music downloader
  3. Create a song using AI, e.g., using Suno or TopMediAI

I chose the song “California Love” and I had it in mp3 format.

Optionally, separate vocals from backing track

Sometimes, when you upload a song to generate a lipsync video, the tool can’t distinguish between the vocals and the backing track, resulting in imperfect lip movements. For example, using this song segment

we see that the lipsync results near the end are inaccurate.

If you created the song using Suno, TopMediAI, or any other AI music generation tool, you may be able to cleanly separate the vocal track. Look for “get stems”. Otherwise, you can try to separate the vocals from the backing track using UVR Online.

Here’s how the same lipsync video looks using this vocal track separated using UVR Online.

In this case, the lip movements at the end look accurate, but the beginning looks imperfect, which is why it’s better to get the vocal track from the source.

Get a photo of your singer

In the video above, I wanted to be the singer, so I found a clear, front-facing photo of myself. I then removed the background. Make sure to have a clear photo for better results.

Generate AI prompts for different scenes of the music video

When it comes to generating AI prompts, I find it easier to use AI (I use ChatGPT) to generate the prompts. Later, we will use AI to generate a lip sync of the singer singing the song. Unfortunately, at the time of this writing, AI is not good enough to lip sync images of subjects where their faces are too small, so for the AI prompts, we want to tell ChatGPT to show a close-up of the subject such that their face occupies 1/3 or 1/2 the image height.

Here’s an example prompt to generate a list of prompts.

Give me 20 prompts to generate 20 images using AI with the following criteria:

  • the generated images should be relevant to the theme or lyrics of the song “California Love” by 2pac, ft. Dr. Dre.
  • the singer in the generated images will come from an uploaded reference image
  • the singer should be shown close up from the waist up so that an AI lip sync tool will produce better results
  • the singer should be either facing the camera or at most facing 45 degrees from the camera

ChatGPT may ask for more information or inputs, like the image of the singer or the lyrics to the song.

Here is example output from ChatGPT.

It’s important to ensure the face of the subject is clear so the lip-sync video generation results are good. Here’s a comparison of video results from images with a small and large subject face.

Subject is not close up
Subject is close up
Subject is not close up
Subject is close up

Notice how the videos where the subject is not close up show facial distortion. The videos with the subject close up show much less distortion. The closer the subject (extreme close up), the less the distortion, e.g.,

Extreme close up

Generate still images using the prompts and the singer image

I like to use OpenArt and Google Nano Banana to generate the images. In OpenArt, go to

  1. Image > Create Image
  2. Model: Choose the “Nano Banana” model (I prefer this model for this purpose)
  3. Prompt: enter one of the prompts from the previous step
  4. Omni Reference: upload the image of the singer from the previous step (you can optionally upload more than one image, e.g., a front-facing image, a side-facing/profile image, etc)
  5. Output Size: I prefer 16:9
  6. Upscale output: x2 (if you choose x4, the image will be too large for TopMediAI – the lipsync tool – so I choose x2)
  7. Number of images: 1 (you can choose more than one, but you’ll pay more. I prefer to start with one, and if the results are okay, I’ll regenerate more images to get a variety)

Here’s an example of the interface.

After you do this for each prompt, you should end up with an array of images.

Note that you will likely need to tweak some of the prompt text and regenerate images until you get results you like.

Organize files

Since you’ll be working with many files, you’ll want to organize them so you don’t get lost and make mistakes. I like to put all files in a folder like this

“California Love” (folder)

  • california-love.mp3
  • img-01.jpg
  • img-02.jpg
  • img-03.jpg

Split the song in a video editor

I like to use Capcut for video editing. Import the audio file and all image files to Capcut.

  1. Add the audio file to the audio track
  2. Play the video (audio only at this point) and place a marker where you want different scenes to appear
  3. Listen to the audio and move the marker so that it is located between words or sentences.
  4. Split the audio track at the marker
  5. Repeat for as many scenes (clips) as you want

Add an image to each audio clip

  1. On a video track, add an image for each audio clip such.
  2. Set the duration of the image clip to match the duration of the audio clip by dragging either end of the image clip to the left or right.
  3. Play the video in the preview window to see if you like the image sequence for the associated music.

Export the audio clips

If you like the preview in the previous step, export each audio segment in mp3 format. I use the left and right arrow keys to jump the playbar to the start or end of each segment and then I hit the “i” key to set the start point and the “o” key to set the end point so that I only export the segment that I want. The other segments will be grayed out.

Click the “Export” button and check only the “Audio” checkbox. Name each export with a number corresponding to its order in the timeline.

When done, your folder structure should look like this:

“California Love” (folder)

  • audio-001.mp3
  • audio-002.mp3
  • audio-003.mp3
  • california-love.mp3
  • img-01.jpg
  • img-02.jpg
  • img-03.jpg

Create a lip-sync video from each image clip

There are many AI lip-sync tools, like HeyGen. HeyGen is used 3D modeling, which is good, but the output is more for talking rather than singing. As such, only the subject’s head moves. For the video above, I used TopMediAI. Though it only uses 2D modeling, it does an impressive job at animating an entire image, including the background, the subject’s head, and the subject’s body.

  1. Log in to TopMediAI
  2. Music AI > Music Tools > Singing Photo Maker
  3. Drag/upload audio segment 1 (audio-01.mp3)
  4. Drag/upload image 1 (img-01.jpg)
  5. Click the “Create” button

When generation is done, preview the lip sync video. If it’s good, save the video as “video-01.mp4” and repeat for all other images. When done, your file structure should look like this:

“California Love” (folder)

  • audio-001.mp3
  • audio-002.mp3
  • audio-003.mp3
  • california-love.mp3
  • img-01.jpg
  • img-02.jpg
  • img-03.jpg
  • video-01.mp4
  • video-02.mp4
  • video-03.mp4

Add the lip-sync videos to the video timeline

  1. Import all lip-sync videos to Capcut
  2. Drag each lip-sync video to a new video track above the track containing images, making sure the video matches the image.
  3. Optionally add transitions, e.g., fade in/out audio or still images, crossfade between video clips, etc
  4. Disable the audio in the lip-sync video track so that only the audio from the music track is heard.
  5. Preview the entire video

If everything looks good, export the video. Click the “Export “button, check the “Video” checkbox, and set parameters (4K resolution, etc).

B-roll

Many videos include B-roll, which is filler content. In my music video above, my B-roll includes video footage of various iconic locations in California. To create this footage, I did the following:

  1. Asked ChatGPT to give me a list of the top 20 most iconic landmarks in California
  2. Asked ChatGPT to give me an image and video prompt for each of those 20 landmarks
  3. Used OpenArt > Image > Google Nano Banana to generate an image using the image prompts from the previous step. Generating images is much cheaper than generating videos, so I prefer to generate images first. If I like an image, I use it as a reference to create a video.
  4. Used OpenArt > Video > From Image to create a video from the images and video prompts generated in the previous steps.
  5. Added the videos to the timeline in Capcut.

If you want to create B-roll footage using the same character, the following process produced good results.

  1. Go to OpenArt > Video > Elements to Video
  2. Select the Vidu Q2 model (you can use other models, like Google Veo 3, but they can be way more expensive)
  3. Upload your character and optionally some other reference images
  4. Enter a text description of the video scene
  5. Choose other settings (aspect ratio, duration, resolution)
  6. Click “Create”

For example, using this character image

and this description text:

Wide slow-tracking shot following the woman as she walks along glowing dunes. Fire lines cross behind; embers trail — cinematic motion, 8K realism.

I was able to create this video

and many other ones using the same character.

Use AI to Remove Objects / People From a Video

There are many tools for removing objects and people from a video, including Adobe After Effects. So far, the easiest one I’ve found is Fotor. You can also use it to remove watermarks on videos.

  1. Upload your video
  2. Click the “Remove Object” button
  3. Paint over the objects you want to remove (you can adjust the size of the paintbrush, if needed)
  4. Click ‘Generate Preview” to see how it looks. If it looks good, you can download the generated video if you are a paying member.

Here’s an example. Below is a video clip from a music video.

I wanted to remove the 2 people, which I identified in Fotor using the purple paintbrush.

Here’s the resulting video.

Use Runway Act-Two (AI) To Animate Characters Based on an Existing Video

Usually, people create AI videos by describing what they want using a text prompt. This can be very difficult depending on the results you are looking for. Another way to create an AI video is by creating a “driving performance” video, which shows what movements you want to mimic. For example, if you want to make a video of yourself dancing and lip syncing exactly like someone else in an existing video, you can upload the existing video as a “driving performance” video and upload an image of yourself as the “character image”. This post explains how to do it using Runway Act-Two.

In Runway, click on Act-Two. You will see the UI below.

In the top section, you upload a “driving performance” video, which will contain the body movements and facial gestures you want to copy and apply to your character in the bottom section.

In the bottom section, your character can come from an image or video that you upload. For simplicity, and to match the driving video, I will upload an image containing my character.

For demonstration purposes, I want to make myself sing and dance exactly like the subject in the following video.

Runway Act-Two provides the following recommendations for driving performance videos.

  • Feature a single subject in the video
  • Ensure the subject’s face remains visible throughout the video
  • Frame the subject, at furthest, from the waist up
  • Well-lit, with defined facial features and expressions
    • Certain expressions, such as sticking out a tongue, are not supported
  • No cuts that interrupt the shot
  • Ensure the performance follows our Trust & Safety standards
  • [Gestures] Ensure that the subject’s hands are in-frame at the start of the video
  • [Gestures] Start in a similar pose to your character input for the best results
  • [Gestures] Opt for natural movement rather than excessive or abrupt movement

Since my “driving performance” video has people playing music in the background, I need to remove them. One way is by using Capcut’s Auto Background Removal feature.

While it’s not perfect, it may be sufficient for Runway’s Act-Two. Here are two other AI-based video background removal tools that seem to do a better job.

Unscreen

VideoBgRemover.com

VideoBgRemover.com seems to produce the best results. However, for this test, I used the imperfect results from Capcut.

If you need more accurate subject isolation or background removal, use Adobe AfterEffects’ RotoBrush feature.

DRIVING PERFORMANCE VIDEO

CHARACTER IMAGE

Runway Act-Two provides the following recommendations for character images.

  • Feature a single subject
  • Frame the subject, at furthest, from the waist up
  • Subject has defined facial features (such as mouth and eyes)
  • Ensure the image follows our Trust & Safety standards
  • [Gestures] Ensure that the subject’s hands are in-frame at the start of the video

For the character image settings, make sure “Gestures” is toggled on.

OUTPUT

To show just how close the generated video matches the source, I overlaid it on the source.

That looks pretty impressive to me.

Here are more examples.

INPUT – Performance Video

INPUT – Character Image

OUTPUT

OUTPUT – Overlaid

INPUT – Performance Video

INPUT – Character Image

OUTPUT

OUTPUT – Overlaid

INPUT – Performance Video

ERROR

INPUT – Performance Video

ERROR

INPUT – Performance Video

ERROR

INPUT – Performance Video

Since the subject in the previous video was too small, I scaled it up in Capcut. Now, Runway Act-Two was able to detect the face.

INPUT – Character Image

OUTPUT

OUTPUT – Overlaid

Since I wasn’t able to put myself behind the metal railing, I scaled up the source video to hide the railing.

INPUT – Performance Video

ERROR

INPUT – Performance Video

INPUT – Character Image

OUTPUT

OUTPUT – Overlaid

INPUT

I used VideoBgRemover.com to remove the background.

OUTPUT

OUTPUT – Overlaid

INPUT – Performance Video

INPUT – Character Image

OUTPUT

OUTPUT – Overlaid

Turn Your Photos Into a Music Video With AI Lip Sync Tech

In this post, I’ll share how I created this music video from just a few static photos.

Assets

To make a music video showing someone singing, you’ll need the following:

  • One or more photos of the people who will be singing (usually JPG format)
  • A song (usually MP3 format)
  • Background video footage

Tools

To make the video, I used the following tech tools.

  • Adobe Photoshop Image Editor
  • Audacity Audio Editor
  • Capcut Pro Video Editor (you can use this as an audio editor as well)
  • YT-DLP to download videos and music from YouTube
  • UVR Online to split a song into stems and extract the vocals as a separate audio file
  • HeyGen AI video generator to convert a photo into a lipsynced video
  • Topaz Photo AI to upscale low-res photos

There are many alternatives to the tools above, but I like these the best.

Instructions

Get a song audio file

One easy way to get your song audio file is to find a song on YouTube and download it. I wanted this song:

I downloaded the audio MP3 file using the YT-DLP command line tool. The URL of the song was https://www.youtube.com/watch?v=D0ru-GcBIr4, which shows a video ID of D0ru-GcBIr4. So, to download the audio, I downloaded YT-DLP and ran the following command:

yt-dlp --extract-audio --audio-format mp3 --audio-quality 0 https://www.youtube.com/watch?v=D0ru-GcBIr4

If you are a simpleton and this looks confusing to you, then just use the online version of YT-DLP, which currently looks like this:

Get background video footage

Since the name of the song I made into a music video was 你本來就很美, which means “You are beautiful”, and the original music video showed beautiful beach scenes, I looked for similar beach footage on YouTube to use as the background for my video. I liked this video (https://www.youtube.com/watch?v=0ZBqnOeIxbQ):

Since the video ID was 0ZBqnOeIxbQ, I downloaded it from YouTube using YT-DLP using the command

yt-dlp 0ZBqnOeIxbQ

You don’t have to put a video in the background of your music video; you can also just put one or more still photos, but I think a background video looks better.

Separate vocals from the song’s audio

To improve lipsyncing and transcribing, we’ll need to separate the song into stems, where each track is a separate sound, e.g. vocals, instruments, etc. Go to UVR Online and upload the song’s audio file (MP3). You get process up to 12 minutes of audio per day for free.

When done, download the vocals track. Here’s what I got.

Note: I used Audacity to trim the audio to remove the silent sections to speed up AI-processing in Heygen and because Heygen has a duration limit per video.

Update: You can use Suno to extract all stems.

You can also use LALAL.AI to extract vocals. Both Suno and LALAL separate lead vocals from backing vocals.

Choose photos to lipsync

The photos that work best for lipsyncing are ones that

  • show the subject facing forward
  • are hi-res

These are the photos I picked for my video.

This last photo shows me looking to the side to add variety to the video. The AI lipsyncing results aren’t perfect, but it was acceptable, so I kept it.

Remove background from photos

I used Adobe Photoshop to remove the background from photos. For example, when I open a photo in Photoshop, I see a floating toolbar with a button called “Remove background”.

Clicking on it add a layer mask to the image layer

which causes the background to be transparent.

If the mask isn’t perfect and you see some of the background showing or some of the subject removed, you can edit the mask by

  1. clicking on the mask thumbnail in the layer,
  2. clicking on the paintbrush tool,
  3. adjusting the size of the paintbrush,
  4. changing the color of the paint to either white or black
  5. painting on the are of the image you want to show or hide

Change the photo aspect ratio to 16:9

Since I wanted to put my music video on YouTube, I wanted the video to be landscape format, 16:9, and 4K. I used Adobe Photoshop’s “crop’ tool to convert my portrait, 9:16 photos to 16:9. Notice that when I do that, I lose much of the photo, like the top of the hat and the shirt in the screenshot below.

To remedy this, first I expand the canvas wider than the original image and crop it.

Since my arms are cut off, I select those two areas and click the “Generative Fill” button.

The generative fill produces 3 variations. I picked one that looked the best.

This made my image 19:6 image look like this:

Change the background to neon green

Since we’ll want to change the background of our singing subjects to show our background video, we’ll need to put our photos on a green background so we can chroma key the green background out when editing the video in Capcut. In photoshop, change the foreground color to neon green.

Then, use the paint bucket tool to paint the background green. You may need to create a new layer positioned below the subject layer.

I repeated these steps for all other images, as necessary.

Upscale the images

Since my target video platform is YouTube and many devices like TVs support 4K, I upscaled some of my images to 4K. I used Topaz Photo AI to do this, but there are many alternatives that may be cheaper. With Topaz Photo AI, you can also do other things like sharpen, denoise, etc.

Create an avatar in Heygen

Now that we’ve collected and prepared all of our assets, we can create convert our photos to videos with lips synced to the lyrics. I created an account with Heygen and paid for cheapest monthly plan ($29 / month). This outputs 1080p videos only. If I wanted to created 4K videos, I would need the next plan at $39 / month. However, I think Capcut was able to upscale my 1080p footage to 4K using AI.

In Heygen, click on “Avatars” and create a new avatar by uploading your photos.

Create lipsync video

In Heygen, click the “Create video” button, choose “Landscape” for the orientation, and change the default avatar to one of your avatar’s “looks”.

The next part is important. For the script, click the “Audio” link and “Upload Audio”.

Upload the audio vocals file to Heygen, which has the backing music removed.

You can leave “Voice Mirroring” turned off so that the voice will be the voice in the uploaded audio.

Heygen will then try to transcribe the audio and display the words (lyrics) for the AI to produce the lipsync. Depending on the quality of the uploaded audio file, this may or may not work. In my case, it worked, and Heygen even detected the language as Chinese.

Click the “Generate” button and choose the appropriate settings.

Heygen will take some time render the video, which will show up under “Projects”. Repeat the above process for all photos (avatar looks).

Note: sometimes, some portions a video will have good lipsync results while others may not. In this case, you can try recreating the lipsync video.

Create the final video

To create the final video, I used Capcut. Though Capcut can be used for free, I paid for “Pro” access so I could use some of the paid features that I needed. I won’t go through all steps in detail since there are many general video editing tutorials online.

  1. Import (drag) all media (audio, video) to the “Media” pane (top left) in Capcut
  2. Drag your media to the timeline (bottom pane) to the appropriate tracks

The screenshot below shows the following tracks from bottom to top

  1. Audio track (complete song, not just the vocals)
  2. Main video track (background video showing different beach scenes)
  3. Other video tracks (since the lipsync results weren’t perfect for the duration of each Heygen-produced video, and because I wanted to show different versions of me signing different parts of the song, I chopped the videos into sections where the lipsync results were good)
  4. Text track (I copied and pasted the Chinese lyrics so viewers who read Chinese can read the lyrics as the video plays).

The tracks behave like layers in Photoshop, so media on higher tracks appear above media on lower tracks, which is why the tracks containing the green screen lipsync videos are above the track containing the background video.

Remove the green screen

To remove the green background from the lipsync videos,

  1. click on the video clip in the timeline
  2. in the top-right pane, click Video > Remove BG, Chrome key, and then, using the color picker, click on any area of the green background in the “Player” pane in the middle. The green background with suddenly disappear, revealing the media in the lower track (the background video).
  3. you may see some green artifacts around the edge of the subject. To clean up them up, slide the following sliders until you see good results: “Clean up edge”, “Feature edge”, ” Intensity”.

To improve the final video, you can do some other things as well, like

  • add a crossfade (“mix”) transition between adjacent video clips
  • Add a “Fade in” and/or “Fade out” animation to clips that are not adjacent to any other clips (go to “Animation” > “In” > “Fade In” and “Animation” > “Out” > “Fade Out”)
  • adjust the color of a video clip by going to Video > Adjust > Auto Adjust or Manual Adjust

Read my other post on how to work with Capcut.

Here’s another example of a music video I created using the same method.

HeyGen Avatar IV

HeyGen recently released Avatar IV, which allows you to create more realistic lipsync videos. To use it, make sure to click on Avatar IV in Heygen to use it. Here are some example inputs and outputs. The results are definitely more realistic!

INPUTS

There are 2 inputs:

  1. Image
  2. Script

For the image, just upload one image.

For the script, you can either type something or upload an audio file. Since we want to lip sync to a song, we’ll upload an audio file of the song containing just the vocals.

In the examples below, all script inputs will use the following audio.

INPUT

OUTPUT

INPUT

OUTPUT

INPUT

OUTPUT

INPUT

OUTPUT

Notice in the last test HeyGen can’t animate the background correctly.

There is yet another way to create a music video. It requires more effort, but the result may be more interesting. It uses Heygen, Krea, and Runway AI’s ACT-TWO feature.

Generate a Driving Performance Video

Follow the same steps above to create a lip sync video in Heygen to be used to drive another video. The background doesn’t have to be green. Make sure the resulting video is as follows:

  • Well-lit with defined facial features 
  • Single face framed from around the shoulders and up
  • Forward-facing in the direction of the camera

Since we will give Runway Act-Two a “character video”, the most important things in the “driving performance” video are the facial features and lip movements. What clothes you wear and the background are irrelevant as Runway Act-Two will just use your facial expressions in the “driving performance” video.

For example, here’s a “driving performance” video I created.

Split the driving performance video into 30-second clips

Runway’s Act-Two feature only lets you create videos that are 30 seconds long. So, we’ll have to split the driving video into a series of 30-second clips. If your driving video is 2 minutes long, you’ll end up with 4 clips, e.g.

  1. Clip 1 (0:00 – 0:30)
  2. Clip 2 (0:30 – 1:00)
  3. Clip 3 (1:00 – 1:30)
  4. Clip 4 (1:30 – 2:00)

Train a model of your face in Krea

Go to https://www.krea.ai/train and follow the instructions to train a model of your face. You will need a subscription to do this. Use the Flux model.

Train the AI model: Upload multiple hi-resolution photos of yourself (ideally around 40 with different angles and lighting) to the “train” section of Krea AI. You can specify whether you’re training a style, object, or character. You can choose “character” or keep the default setting.

Use the Flux model: Once your model is trained, click “Use with Flux” to generate images based on the trained model.

Generate a bunch of images of yourself singing

  1. Add your trained style: In the Flux model, click on “add style” and select your newly trained style from the “my styles” category. 
  2. Adjust influence: Use the provided slider to control how much your trained face style influences the generated images. Increasing the slider will make your face more recognizable, while decreasing it will reduce the resemblance. 

You can now use various prompts in Krea to generate diverse images incorporating your trained face. For example, you can make an image of you

  • singing in front of a mic facing the right with the camera close up
  • singing while holding a mic with the camera at a distance
  • playing drums
  • playing an electric guitar
  • etc

Here’s an example prompt with a reference image.

Text prompt

Subject is singing on stage in front of a band with a large audience in front of him. There are many multi-colored lights illuminating the stage.

If you’re unsure what prompt to enter, ask Chat-GPT to write a prompt for you specifically for Krea.ai.

Uploaded “image prompt”.

Output

Krea generated 4 images. After experimenting a few times, I chose this image.

Generate a bunch of 30-second videos

Use Runway’s image-to-video feature (not Act-Two) to create a series of videos based on the images generated in Krea. Here’s an example.

Input

You can create a video that is at most 10 seconds long. Since our song is 2 minutes long, we’ll need to create twelve 10-second videos, unless we use b-roll for parts of the final video.

Output

Create a lip sync video

In Runway, click on Act-Two. In the Performance section on top, upload your first driving performance video. In the Character section on the bottom, upload your first character video that you generated in the previous step. Click the button to generate the lip-synced video.

Runway will take the facial expressions and lip movements from your driving video and apply them to the character video. The resulting video will be the same duration as driving performance video – in this case, 30 seconds.

Here’s another example using a simple character video for demo purposes.