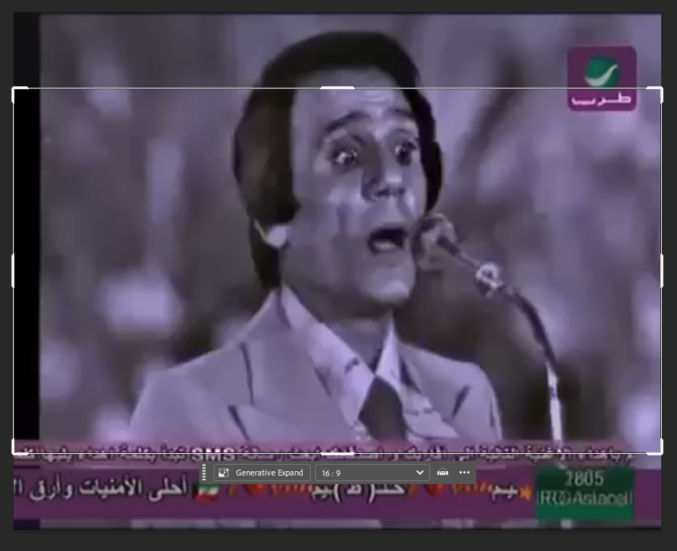
Older videos tend to be in the 4:3 aspect ratio rather than the 16:9 we use today. If you enlarge an old video, you’ll end up cropping parts of it. To keep all of the existing video, but extend it horizontally or vertically, you can use Photoshop’s Generative AI Extend feature. Here’s an example.
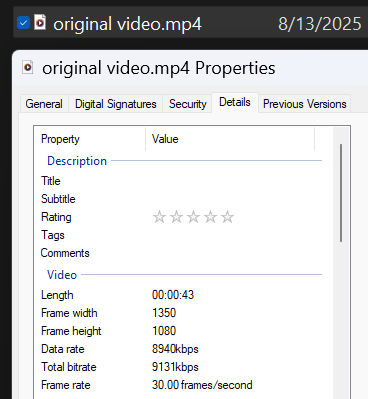
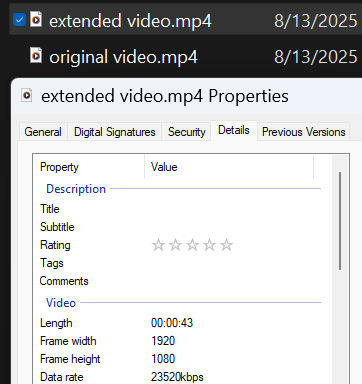
I have a video with dimensions 1350 wide by 1080 tall.
You can see this by looking the at file’s properties.
To extend this video horizontally so that it has a 16:9 aspect ratio, we’ll use Photoshop.
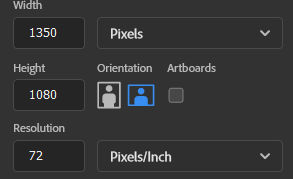
Create a new document with the same dimensions (1350 x 1080 px)
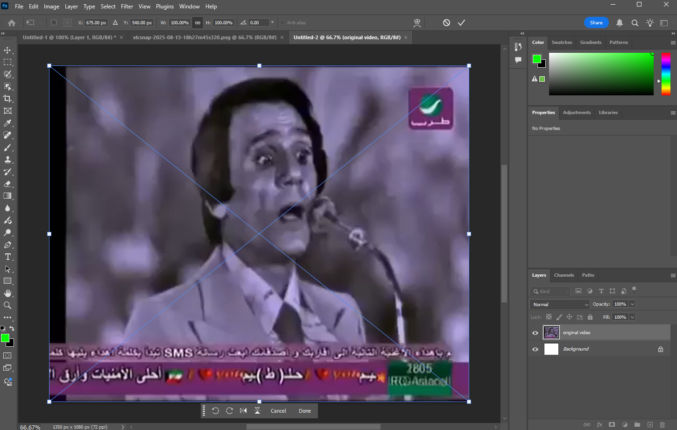
Drag the video to the blank document. The video will be on a layer above the white background layer. Click “Done” or the checkmark at the top to accept importing the video into the document.
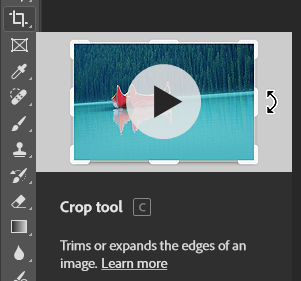
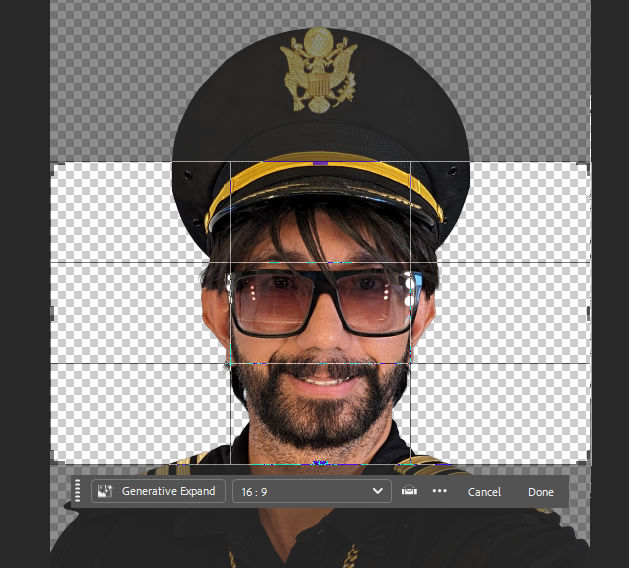
Click the Crop tool
A white border with handles will appear on the video. A floating toolbar that says “Generative Expand” will also appear. Ensure the dimensions are set to 16:9.
Drag the handles so that the crop border covers the video. In this case, I dragged the vertical handle on the right toward the right.
The original video had a black vertical bar on the left. I don’t like that, so I will drag the video to the left so he black bar is outside the crop rectangle.
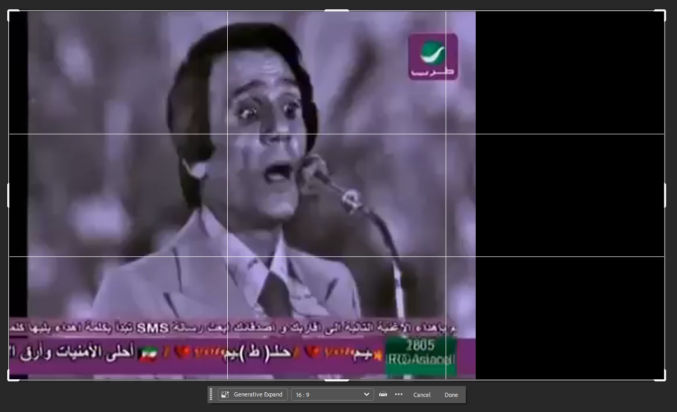
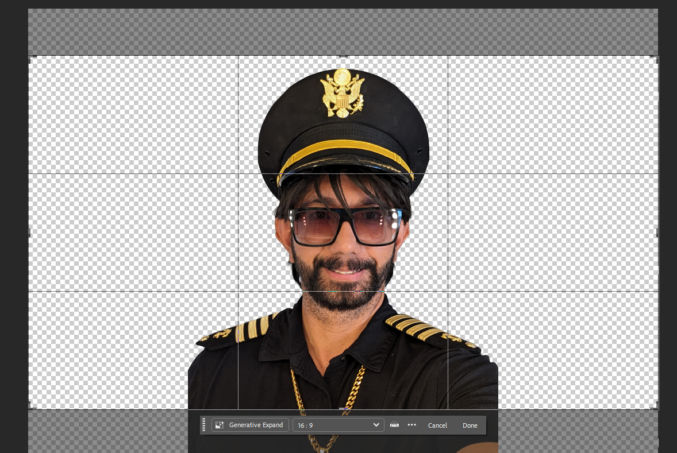
Click the Generative Expand button in the floating toolbar.
You can then enter a prompt if you want. I will just click “Generate”.
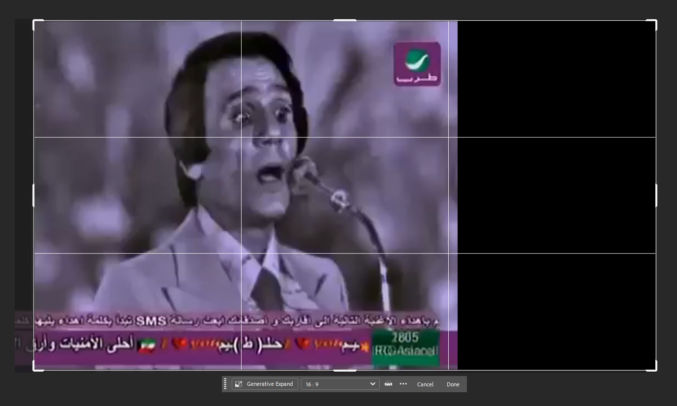
Photoshop will generate 3 variations. Click on each one to see how they look.
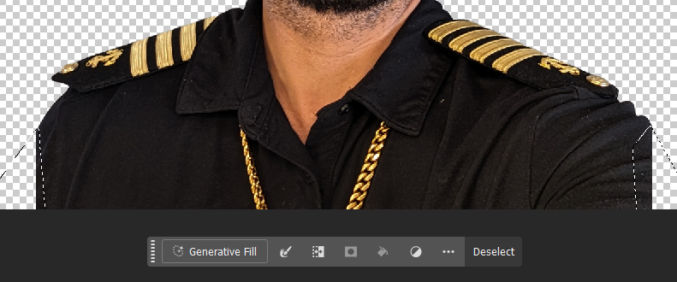
I like variation 1, but I don’t like that Photoshop added 3 purple and green boxes on top to the right of the original box.
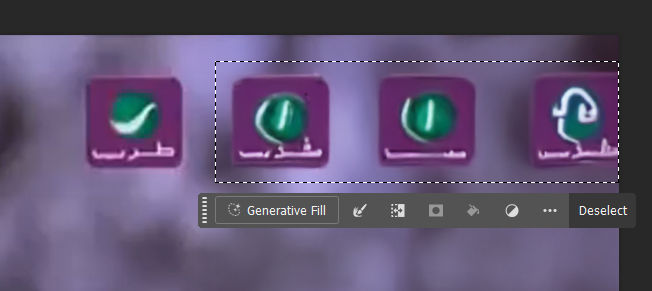
Select the 3 boxes so we can remove them using Generative Fill.
Click the Generative Fill button followed by ‘Generate”.
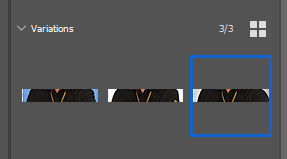
Those 3 boxes are now gone.
Click “Window” > “Timeline” to open the timeline. Then, click “Create Video Timeline”.
You will see a track for the original and two tracks above it, one for generative expand and one for generative fill.
Drag each generative track so they are the same duration as the original track.
Click the play button in the timeline to preview the modified video.
If the results look good, export the video by going to File > Export > Render Video.
If you inspect the video’s properties, you’ll see that they are now 1920 x 1080 px.
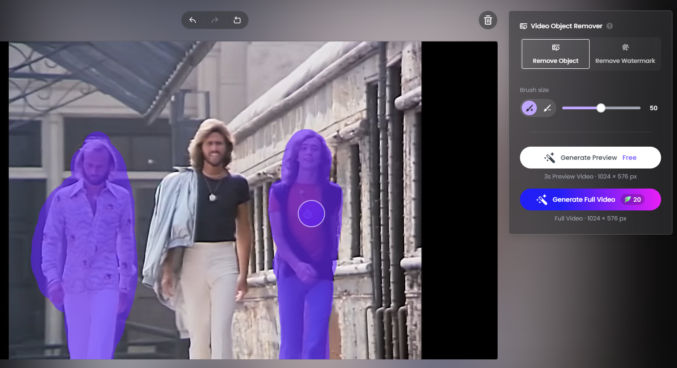
There are many tools for removing objects and people from a video, including Adobe After Effects. So far, the easiest one I’ve found is Fotor. You can also use it to remove watermarks on videos.
Upload your video
Click the “Remove Object” button
Paint over the objects you want to remove (you can adjust the size of the paintbrush, if needed)
Click ‘Generate Preview” to see how it looks. If it looks good, you can download the generated video if you are a paying member.
Here’s an example. Below is a video clip from a music video.
I wanted to remove the 2 people, which I identified in Fotor using the purple paintbrush.
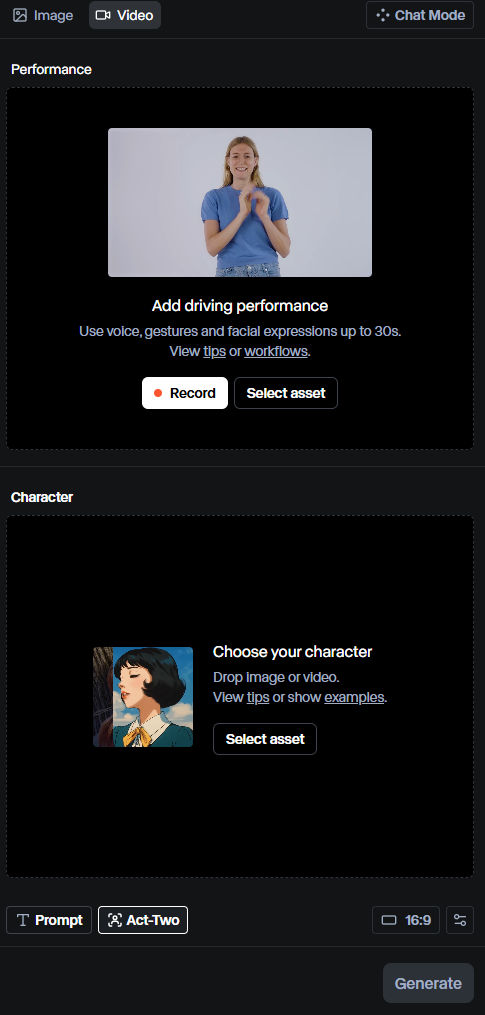
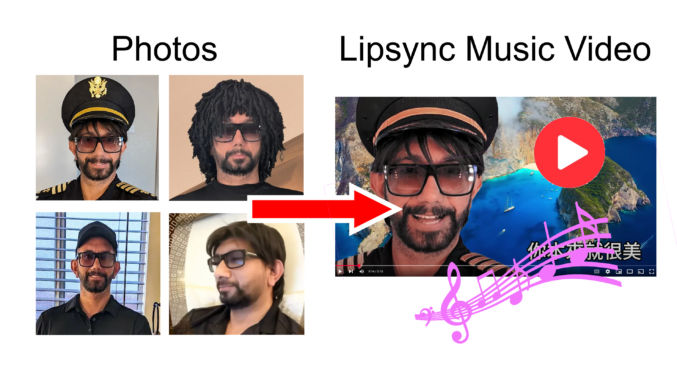
Usually, people create AI videos by describing what they want using a text prompt. This can be very difficult depending on the results you are looking for. Another way to create an AI video is by creating a “driving performance” video, which shows what movements you want to mimic. For example, if you want to make a video of yourself dancing and lip syncing exactly like someone else in an existing video, you can upload the existing video as a “driving performance” video and upload an image of yourself as the “character image”. This post explains how to do it using Runway Act-Two.
In Runway, click on Act-Two. You will see the UI below.
In the top section, you upload a “driving performance” video, which will contain the body movements and facial gestures you want to copy and apply to your character in the bottom section.
In the bottom section, your character can come from an image or video that you upload. For simplicity, and to match the driving video, I will upload an image containing my character.
For demonstration purposes, I want to make myself sing and dance exactly like the subject in the following video.
Ensure the subject’s face remains visible throughout the video
Frame the subject, at furthest, from the waist up
Well-lit, with defined facial features and expressions
Certain expressions, such as sticking out a tongue, are not supported
No cuts that interrupt the shot
Ensure the performance follows our Trust & Safety standards
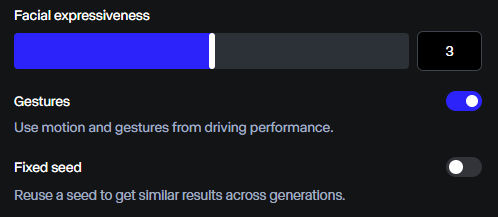
[Gestures] Ensure that the subject’s hands are in-frame at the start of the video
[Gestures] Start in a similar pose to your character input for the best results
[Gestures] Opt for natural movement rather than excessive or abrupt movement
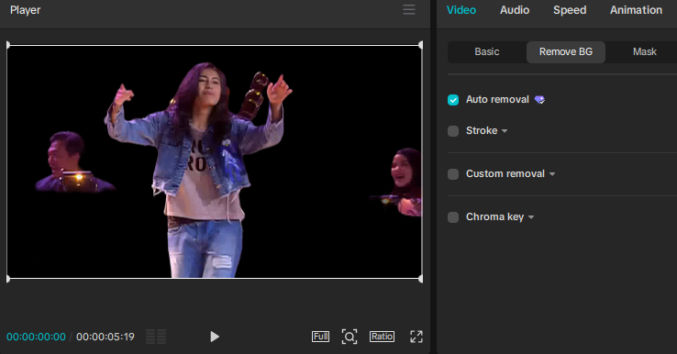
Since my “driving performance” video has people playing music in the background, I need to remove them. One way is by using Capcut’s Auto Background Removal feature.
While it’s not perfect, it may be sufficient for Runway’s Act-Two. Here are two other AI-based video background removal tools that seem to do a better job.
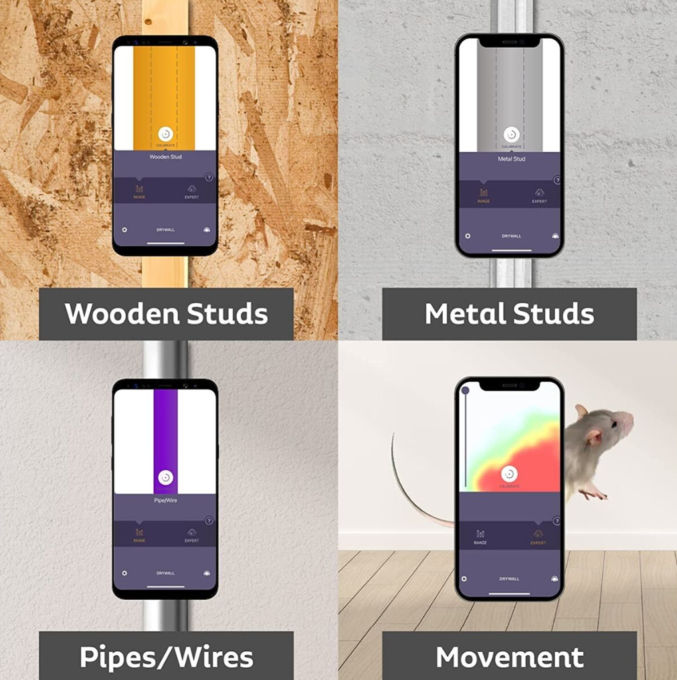
As a real estate investor, I’m often needing to know what’s behind some drywall. I normally use a stud finder, but after removing a bunch of drywall, I sometimes find pipes, which, unlike electrical cables, are difficult to move, so I end up wasting my or my contractor’s time patching a wall back up. So, I bought the Walabot DIY 2, which claims to be able to detect wood and metal studs, plastic and metal pipes, and wires behind drywall up to 5/8″ thick and 4″ deep.
I put this to the test and compared it to my Franklin ProSensor M150, which can detect wood and metal studs as well as live wires up to 1.5″ deep.
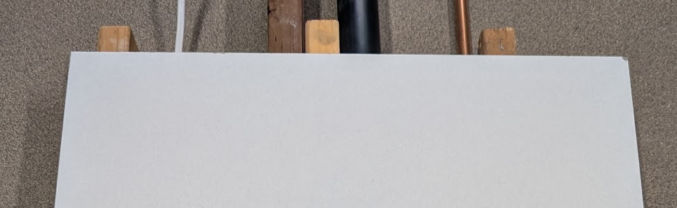
I tested both sensors on an actual wall with pipes and live wires as well as a test wall.
My test wall below has, from left to right,
2×4 stud
15A Romex wire (non-live)
Pressure-treated 2×4 stud
2×4 stud
2″ black ABS drain pipe
Metal copper pipe
2×4 stud
The Walabot DIY2 detected all items, but it couldn’t differentiate between a wire and a pipe. Also, the Walabot got a bit confused by the 2 touching studs in the middle because of the small gap between the studs. The Franklin only detected the wood studs, but it detected them very well, including the two touching studs.
On an actual wall with wood studs, pipes and live wires, the Walabot performed the same, and it couldn’t differentiate between pipes and wires. The Franklin sensor, however, was able to detect live wires. The lightning symbols lit up yellow when a live wire was detected, as shown below.
Conclusion
It looks like both detectors are needed to see what’s behind your walls. I’d use them as follows:
Use the Walabot first to mark all wood/metal studs, and pipes/wires.
Use the Franklin to confirm the location of the wood/metal studs and to determine whether the pipe/wire detections by the Walabot are live wires or pipes. If the Franklin detects live wires, then that’s what they are. If the Franklin doesn’t detect anything where the Walabot detected a pipe/wire, then there’s a pipe there.
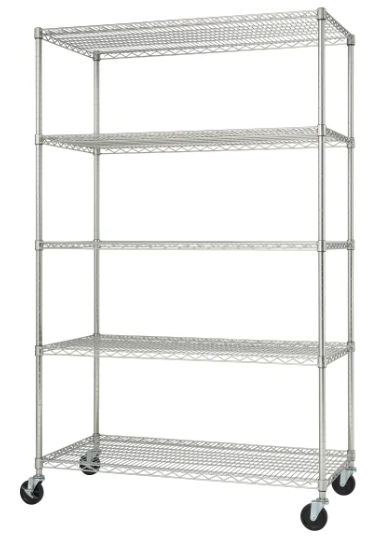
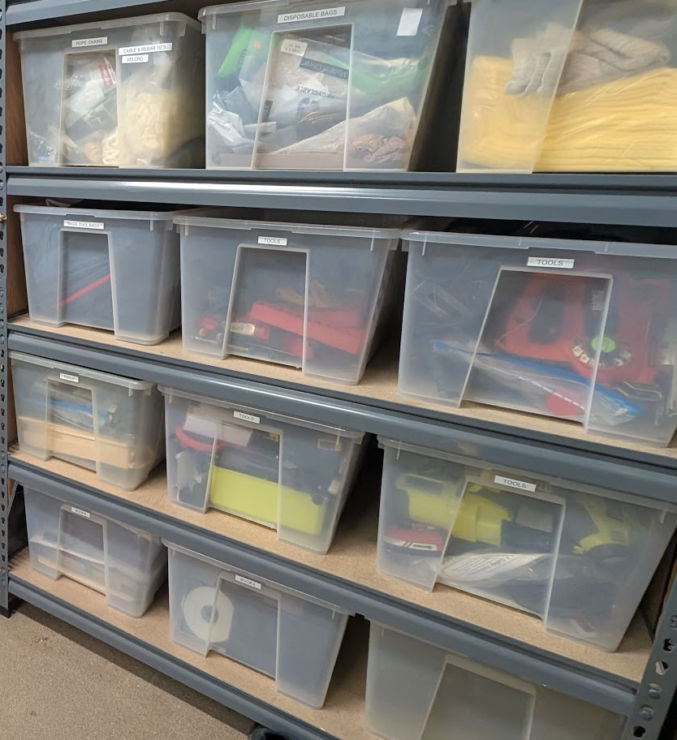
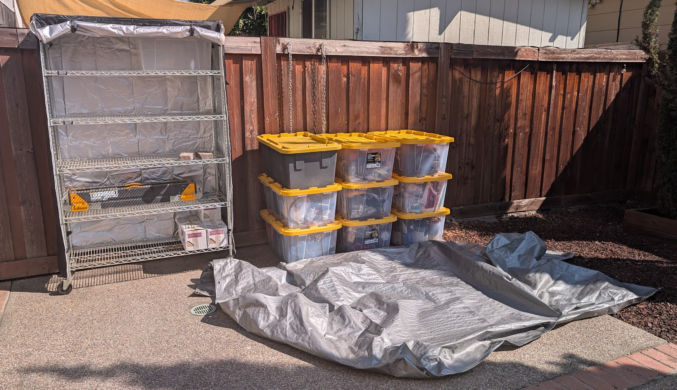
In America, many people use their garages as storage rooms rather than what they were intended for (parking vehicles). I do the same, but I also use my garage as a home gym. Along the side walls are 5-tier shelf racks with wheels and on each shelf there are 3 transparent plastic containers.
Having shelves with wheels makes it easy to move everything around.
But what do you do when you are renovating or remodeling your garage or if you need a temporary place to store your stuff for about 6-12 months. You can put everything in a self-storage unit, but for a 20’x20′ garage worth of stuff, you’re looking at paying hundreds of dollars a month if you are in the San Francisco Bay Area. You can buy a shed and put it in your backyard, but a large one would cost your around $1500, and you may not necessarily have the space for a large one in your backyard. Plus, you’d have to spend a lot of time assembling it, and it’s more of a permanent solution rather than a temporary one.
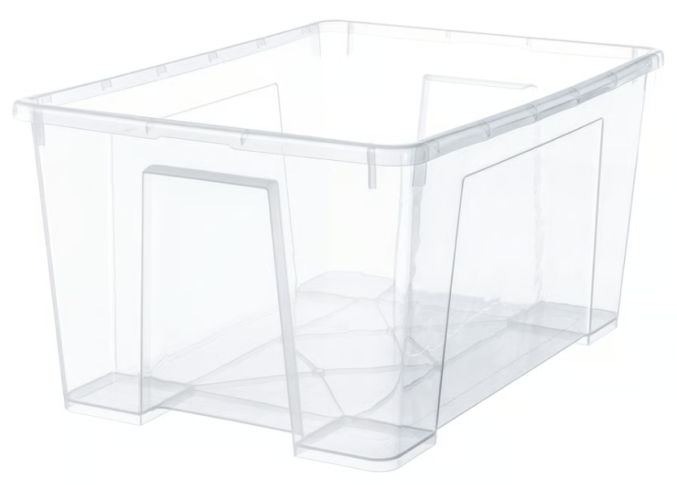
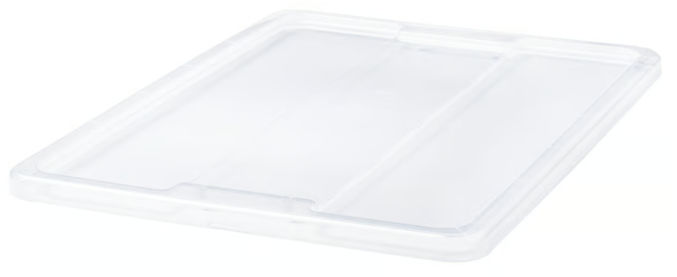
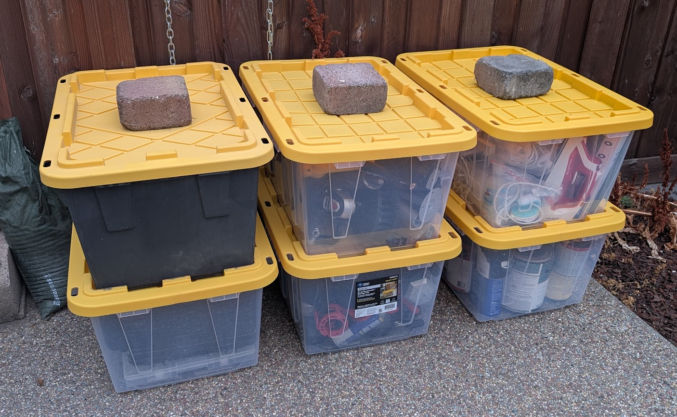
One low-cost option is to simply put your stuff in heavy-duty plastic storage containers with lids and stack them up in your backyard. Since they come with a lid, you wouldn’t need a shed because they are waterproof. If you’re worried strong winds could blow the lids off, just place something heavy on them, like a concrete paver.
The 27-gallon plastic bins are a good size as they’re not too big to carry and they’re not too small to fit somewhat large items.
The transparent kind is nice because you can see what’s inside and don’t need to necessarily label each bin. If you do want to label the bins, you can buy a label maker. This Brother P-touch PT- D610BT can print up to 1″ labels, making it easy to read them from a distance.
As of this writing, the price for a 27-gallon bin is $14, so even if you needed 35 of them, you’re only paying $500 for them, and when you’re done using them, you can easily empty the contents and stack them inside each other for future use.
UPDATE: Costco Business Center has the same 27-gallon bins for $11. Both the bin and the lid are transparent, which is even better.
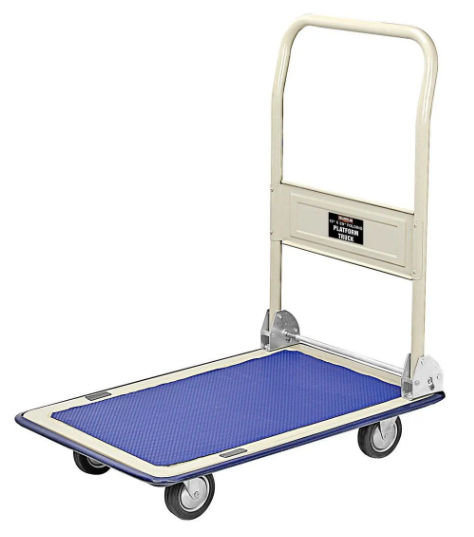
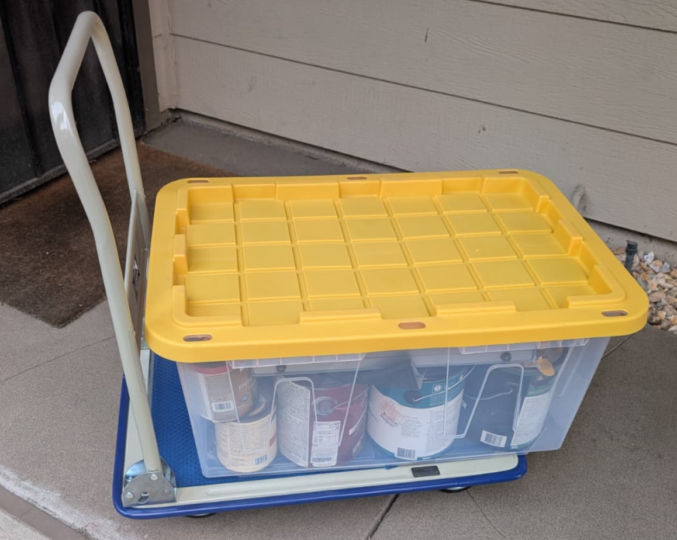
If you have a lot of stuffed bins, some of which may be heavy, you don’t want to have to carry each one. For convenience, you can just buy a folding platform truck.
For $36, it’s totally worth it. The plastic bins fit on the platform and the handle allows for comfortable pushing or pulling (I prefer pulling). When you’re done moving the bins, you can fold the handle down so the dolly doesn’t take up a lot of space.
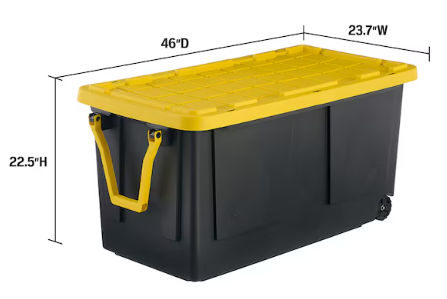
Now, you may have some large or long items that won’t fit in those 27-gallon bins. For these items, you can either but a few larger bins, like this 75-gallon one, which comes with its own wheels.
Or, you can just buy a small shed just for those items.
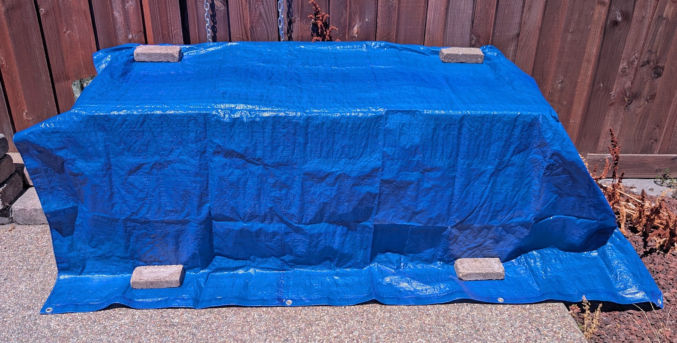
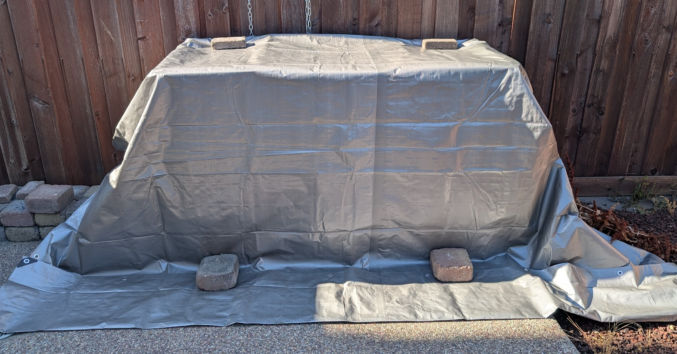
If you leave things exposed to the elements for a long time, they can become weathered and even break down. Thin plastic, for example, can become brittle from long exposure to the sun’s UV rays. To prevent this from happening, you can cover the bins with a heavy-duty tarp that is treated to prevent deterioration from UV rays.
If the tarp doesn’t cover the sides and you’re worried water might get in through some small gaps between the bins and their covers, you can cover the gaps with duct tape.
Or, you can buy a bigger tarp. The one picture below is 9mm thick (heavy duty) and from Harbor Freight.
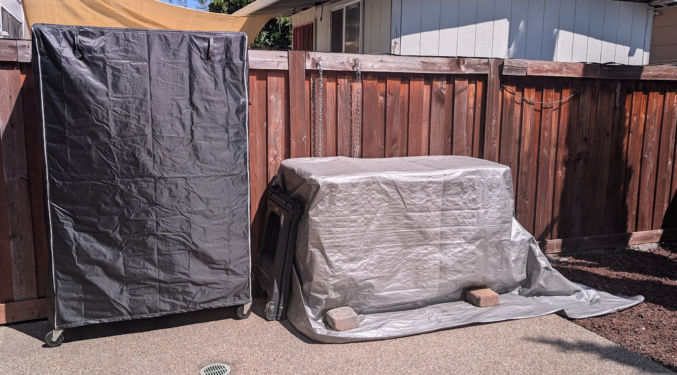
But what if you have a bunch of shelving racks with uncovered bins in them? In this case, rather than disassemble the racks and buy lids for those bins, you can buy a cover designed specifically for shelving racks. There are many on Amazon with many different sizes. I bought this 72″ H x 48″ W x 18″ D one on Amazon. It’s waterproof and the zippers make it easy to open one side when you need to get something.
If you have to store a bunch of clothes, a cheaper storage option is to put the clothes in a cardboard box or a plastic tote bag, like this.
For just $5, these large, 20-gallon plastic totes are cheap and, since they’re designed for light items, like clothes, you can easily carry them without the need for a platform truck or dolly. They also come with a zipper. If you go with cardboard boxes, not only are they not waterproof, but you’d have to use tape to close them, which is extra work.
So there you have it. A cheap, easy, and organized way to temporarily store stuff in your backyard.
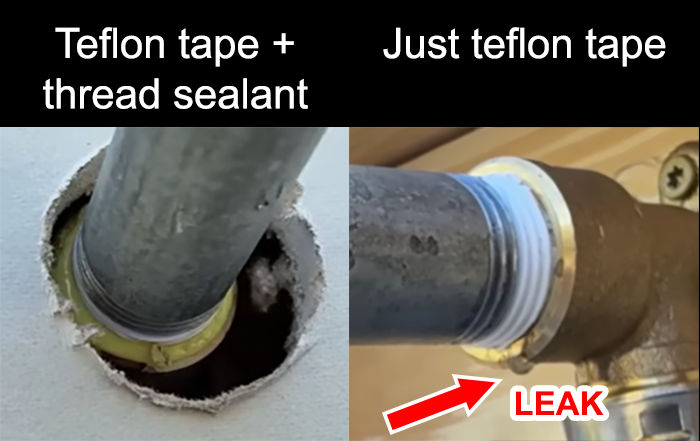
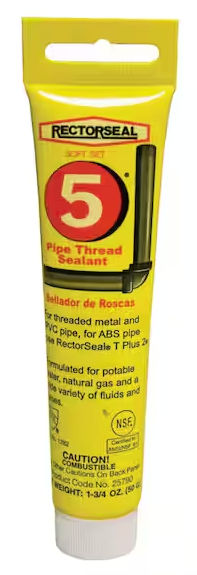
Most homeowners and, surprisingly, some plumbers, only use Teflon tape around pipe threads. While this often is sufficient to prevent leaks, it is not the best practice. For more reliable results, always use a combination of Teflon tape followed by thread sealant.
One of the most popular thread sealants is RectorSeal #5.
A few months ago, I charted a small yacht for a 6-hour trip from Jeddah, Saudi Arabia to Bayada in the Red Sea. Since I had a great time, I highly recommend it for anyone visiting Jeddah. Unfortunately, planning such a trip and making a reservation isn’t easy due to the limited marketing and communication efforts by businesses there. So, this post will detail my experience along with recommendations so if you do decide to go on this trip, you’ll have a better experience. I’ll share my experience in chronological order.
Yacht Reservation
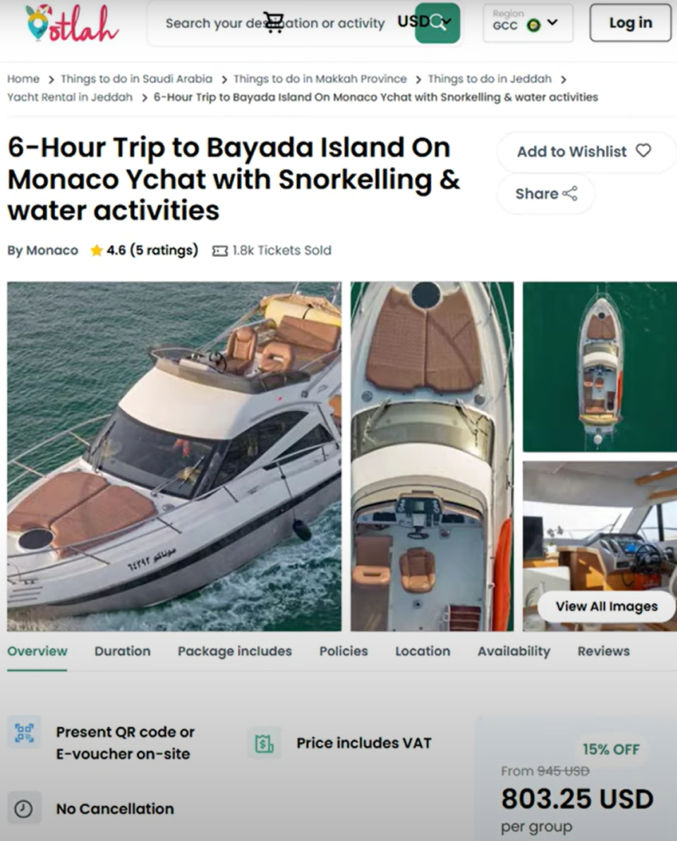
I live in the San Francisco Bay Area. Since I was visiting Saudi Arabia for just one week, I wanted to make sure I had a reservation for the Red Sea trip. I found a tour company on Otlah.com, an online UAE-based vacation marketplace. Below is one of the trips available.
The trip details, the yacht, and the price all looked good, but the communication was bad. There was no way to ask questions until after I paid for the non-refundable trip. With no better option available at the time, I crossed my fingers and booked the trip. On the confirmation page, which was shown just briefly before I get redirected to some other page, showed some contact information. Luckily, I was able to quickly take a screenshot, so I was able to contact the trip provider, who confirmed they had my reservation.
Yacht Out of Service
While, in Jeddah, two days before the scheduled trip I got a message from Otlah, the middleman, saying that the trip provider said the yacht was out of service because they just discovered an issue required a part that would not be available for a week or two. Otlah offered some other boats, but they were ugly and I don’t think they even had an on-board restroom. I decided to get a refund from Otlah and find another yacht at the marina in Obhur, Jeddah. Fortunately, I was staying with local relatives who were able to help with this. We went to the marina and the gatekeeper told us which boats were available, their cost, and other details.
Second Yacht Reservation
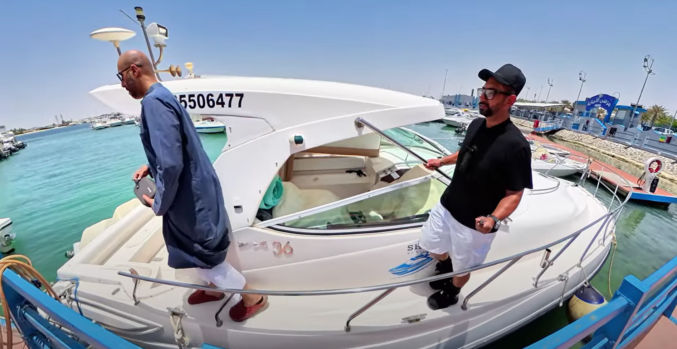
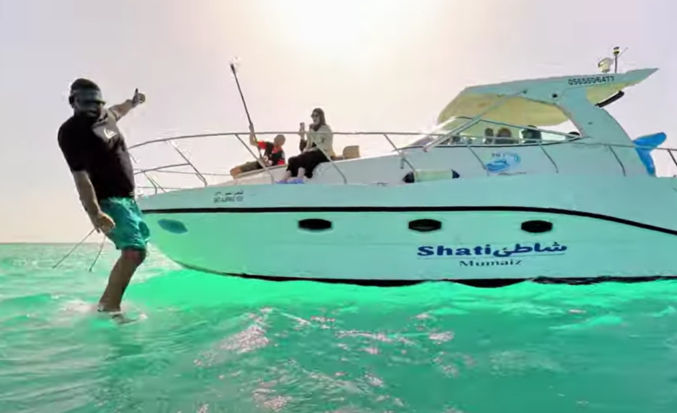
Below is the photo of me checking out the one and only yacht available for the dates we wanted.
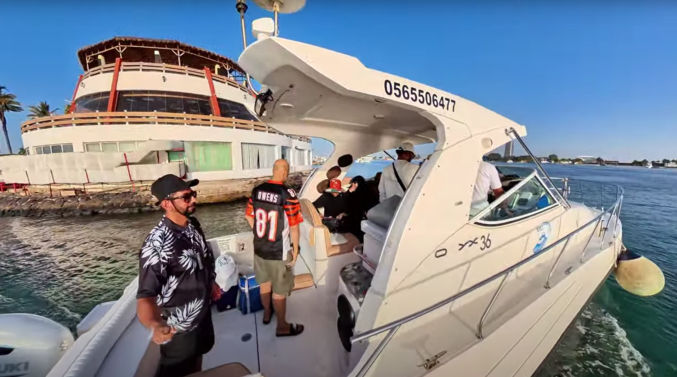
The yacht was not as nice as the one on Otlah.com, but it had one thing that made it better – a Seabob water scooter, which could be rented for an additional $100. The total cost for the yacht charter with captain and Seabob rental came out to about $900. I ended up choosing this yacht and provider, and I did not regret it. Here’s the provider’s contact information.
Sohaib Jifry (Abu Yaseen) 0-56-550-6477 (Saudi Arabia) 966-56-550-6477 (International) linktr.ee/sohaib119
There were 2 time slots per day: 7 AM to 1 PM and 1 PM to 7 PM. We chose the morning slot so the weather wouldn’t be so sizzling hot like it is mid-day and in the afternoon.
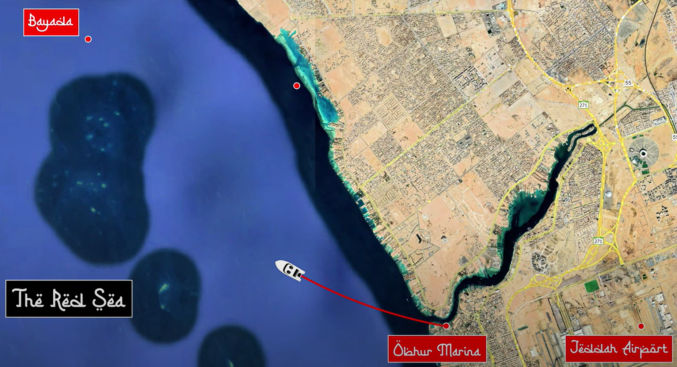
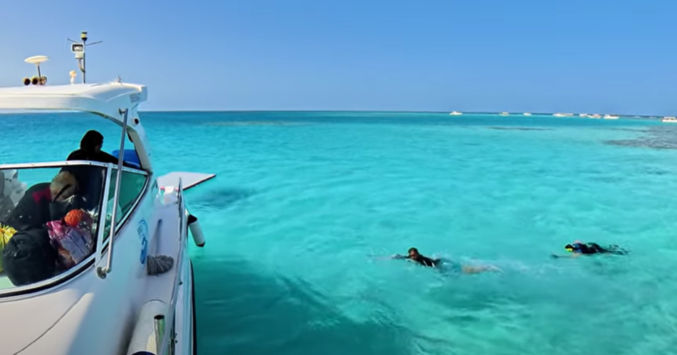
Going to Bayada in the Red Sea
Bayada is located just 40 minutes away from Jeddah by boat.
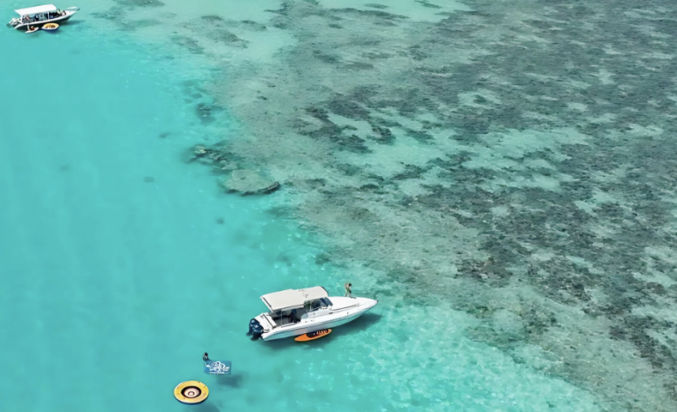
Many people call Bayada an “island”, but it’s not really an island in the traditional sense. Rather, it’s an area with land where the surface is a few feet below the water. You can stand on it, but you’ll be partially in the water. I didn’t stand on it, but others who did said it’s very pointy, so you should definitely bring water shoes with you.
We left Jeddah around 7 AM. Before entering the open sea, we had to stop by a government dock. Normally, we’d have to show our IDs or passports for all passengers, but for some reason they just let us go.
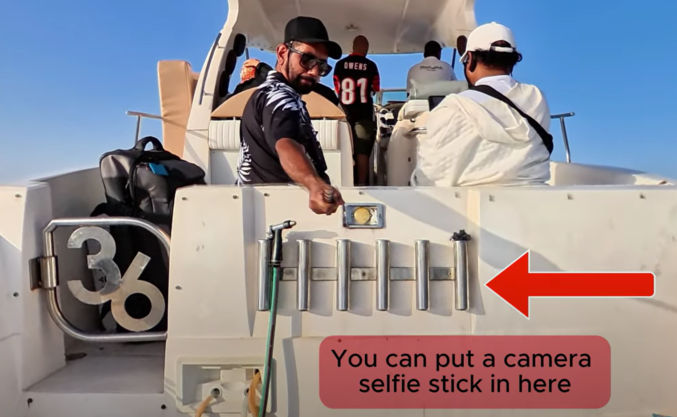
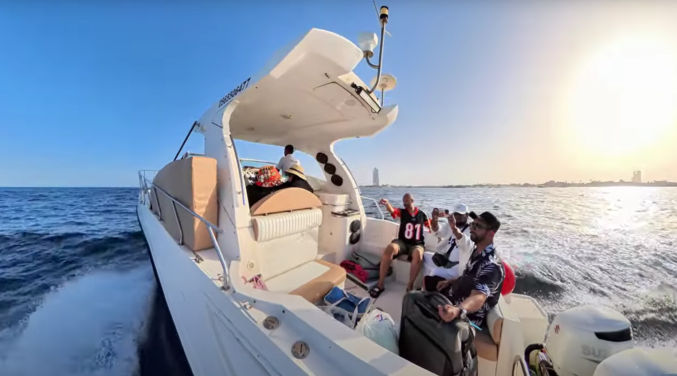
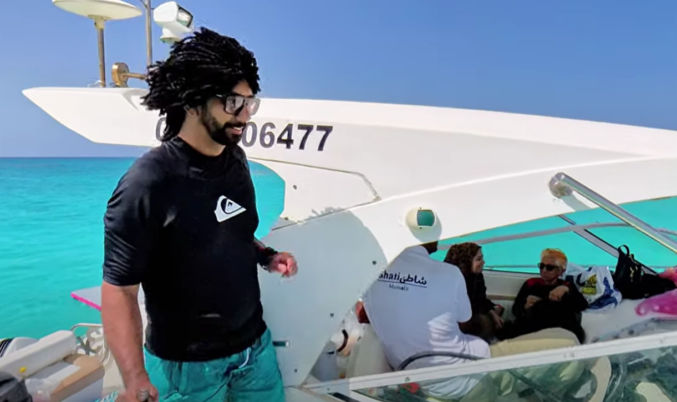
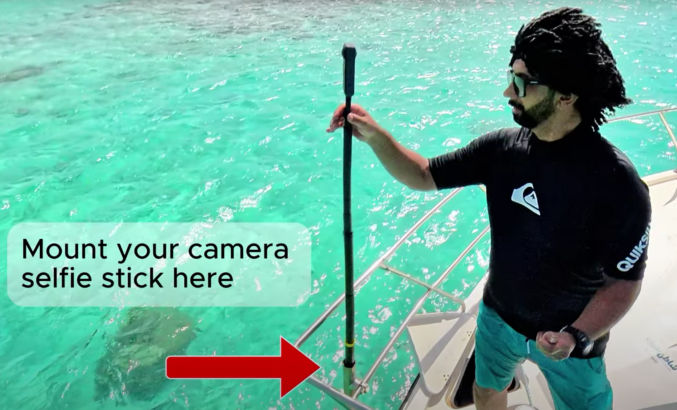
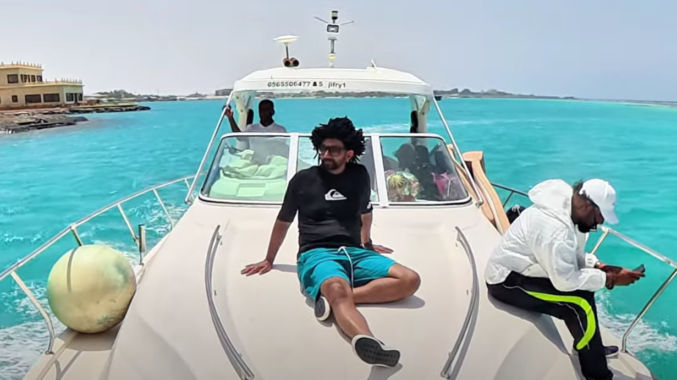
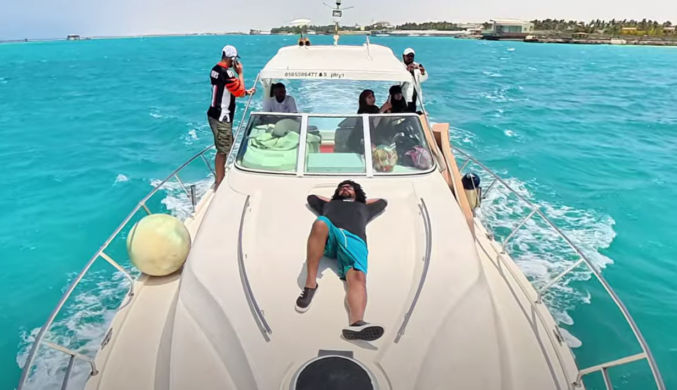
I brought the Insta360 X4 and X5 cameras with me to take 360-degree videos. Around the yacht, like on the back, as shown in the photo below, there are tubes, which I think are for putting a fishing rod. They were perfect for putting a selfie stick, so I wouldn’t have to hold the camera all the time.
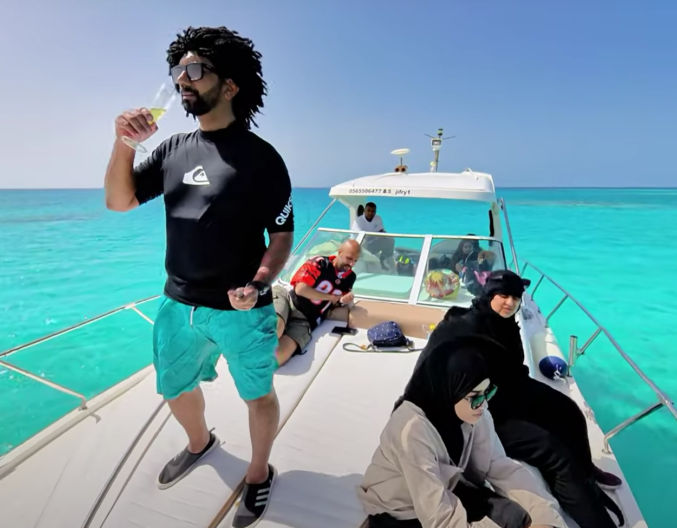
Even though it was already pretty hot int he morning, the wind kept us cool as we zoomed to Bayada, passing other (slower) boats beside us. The ride was a bit bumpy due to the waves, but the cushioned seats made it painless.
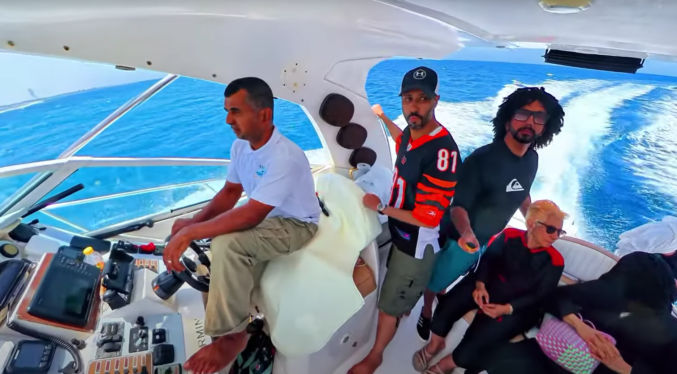
The yacht came with speakers with Bluetooth support. We were able to connect our phones to it to play our own music.
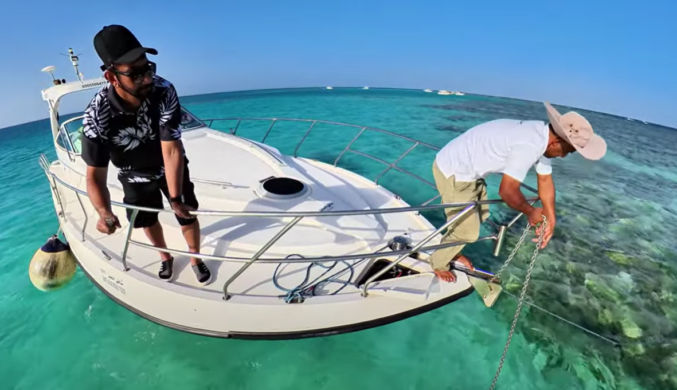
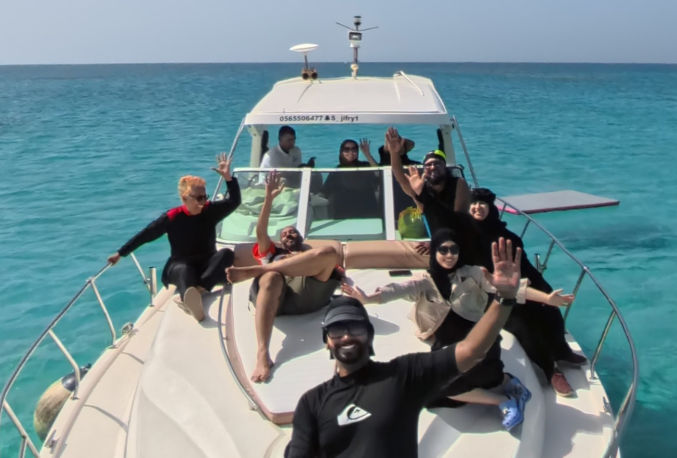
When we got to Bayada, a few other boats had already arrived. Our captain anchored our yacht to what appeared to be underwater rocks. This was necessary to prevent drifting back to Jeddah. Note that despite the anchor, the yacht still rocked slightly due to the waves. If you get sea or motion sickness, be sure to take Dramamine the night before the trip.
In the lower deck of the yacht, there was a master bedroom, a second bedroom, a tiny kitchenette, and a tiny bathroom with toilet, sink, and shower. This is important in case you need to use it during the 6-hour trip.
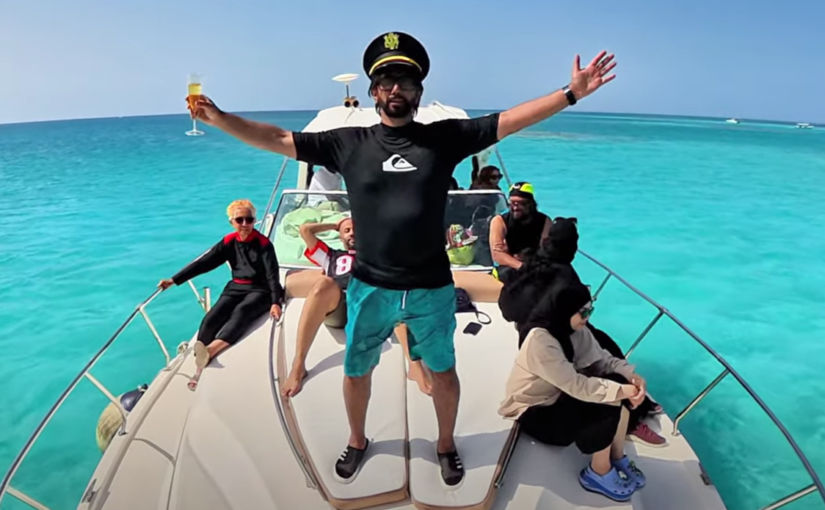
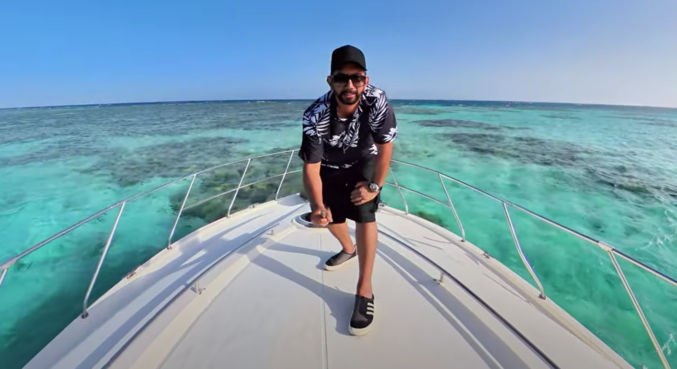
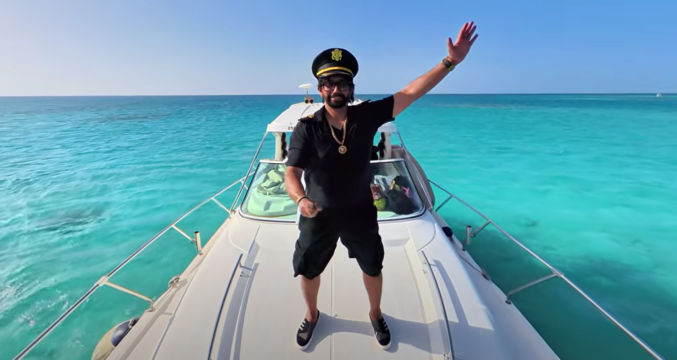
For the trip, I brought a captain outfit just for fun.
At Bayada
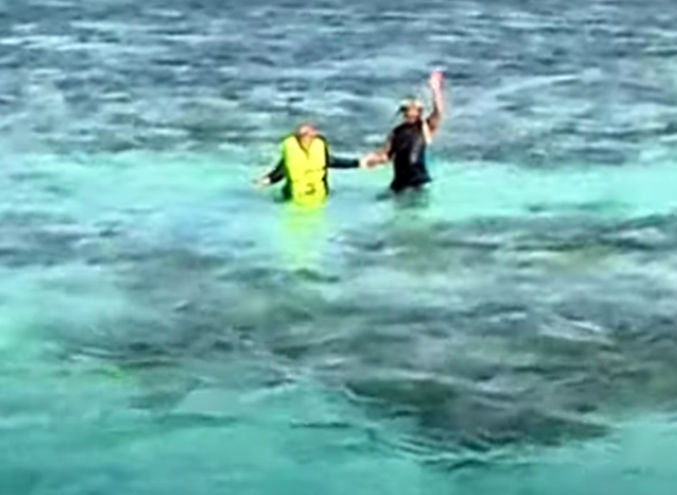
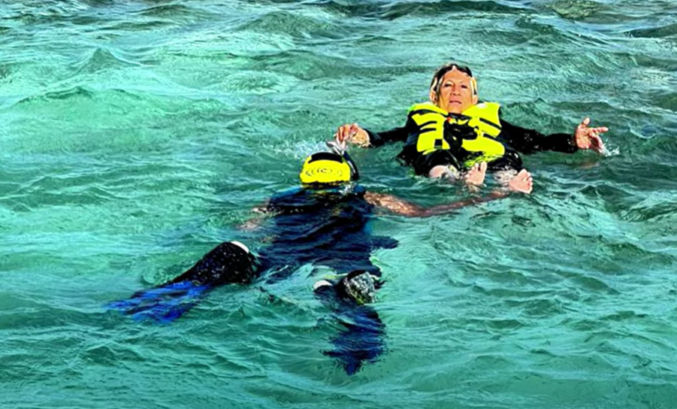
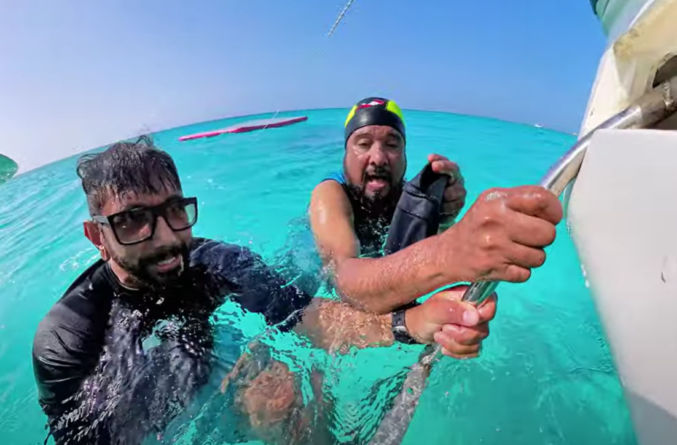
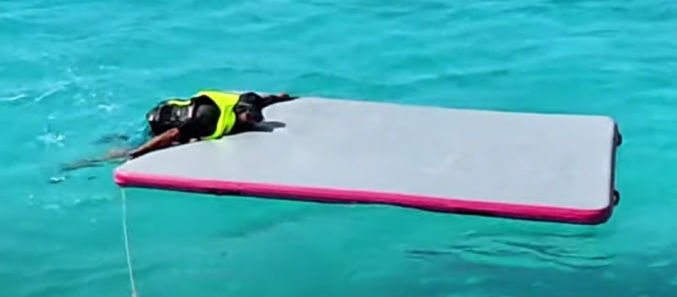
When going in the water, even though it looks like a massive swimming pool, it’s a sea, so you should wear a life jacket unless you are an experienced open-sea/ocean swimmer, which most people aren’t. The waves appeared gentle, but the current was strong enough to quickly cause fatigue. This deserves emphasis.
WARNING 1: WEAR A LIFE JACKET!
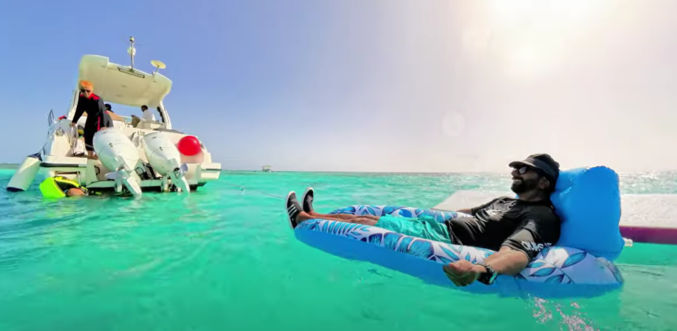
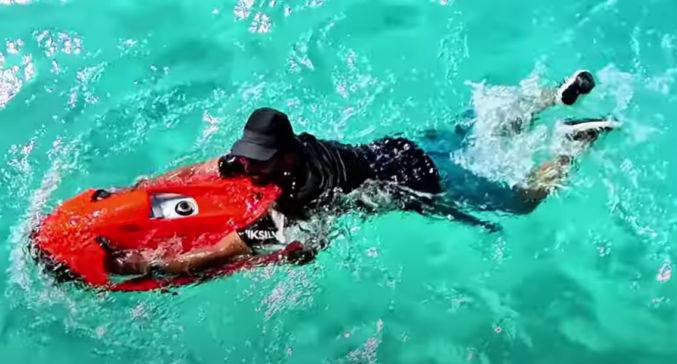
Since I wanted to relax in the water, and I didn’t know what water toys would be available on the yacht, I brought an inflatable lounge with me. I also brought a battery-powered inflater, but our captain inflated the lounge for me using his heavy-duty inflater, which he also used to inflate his raft.
The inflatable I brought was very good. My body and legs were partially in the water, which felt good, and the back rest was sufficiently firm. I paid $20 for it on Amazon.
WARNING 2: All such inflatables should be tied to the yacht to prevent drifting out to sea. If you don’t tie them to the yacht, the inflatable, along with you, if you are on it, will definitely drift out to sea!
Since I had not tied my inflatable lounge to the yacht, but the raft was tied to the yacht, I just held on to the rope that was tied to the raft.
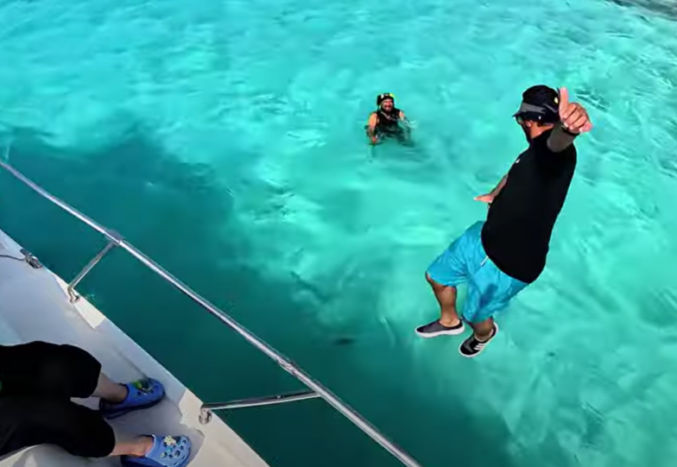
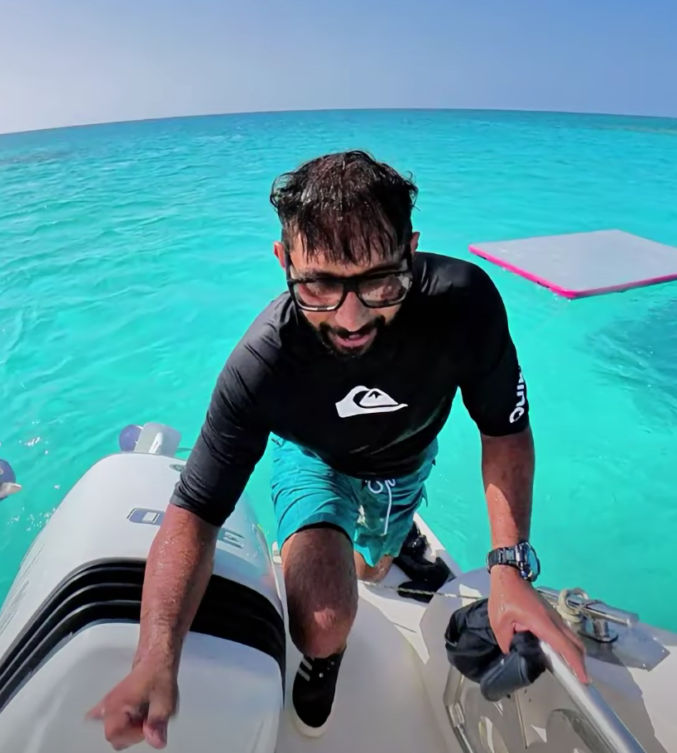
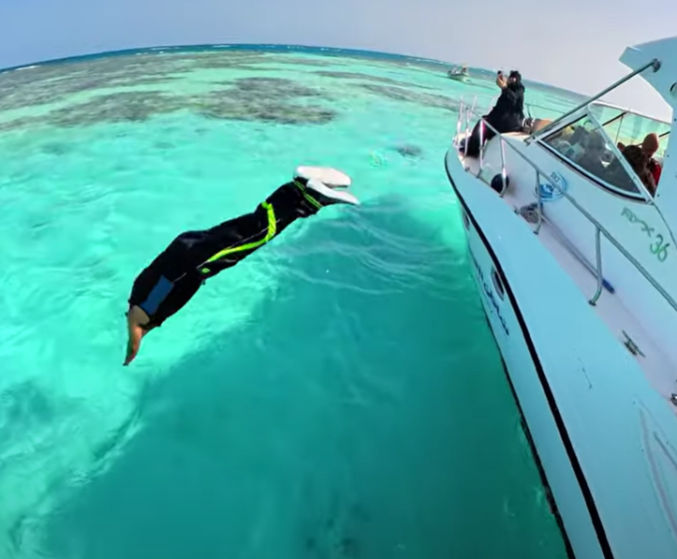
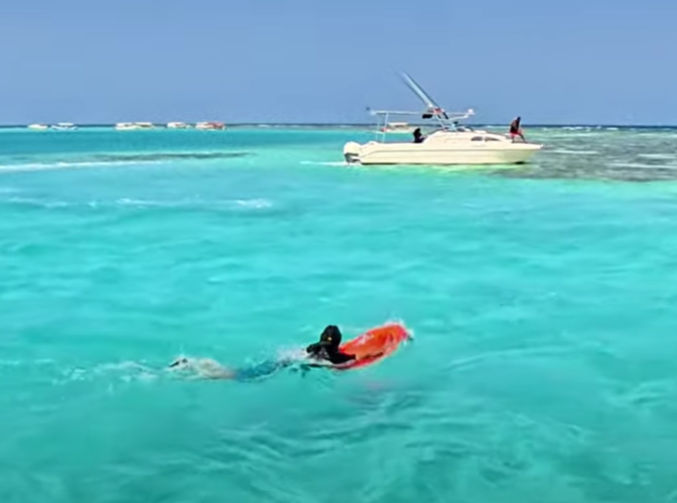
I also jumped into the water from the deck. Unfortunately, the railing made it difficult to do so, so I only did it once. I wish the yacht had a plank like a jumping board.
Even though we didn’t land far from the boat, swimming back to the boat was very tiring, especially without a life jacket.
By the time we reached the yacht, we were exhausted and out of breath!
If you decide to go in the water, no matter how you do it, make sure to test it first slowly by swimming around near the stairs. To be safe, wear a life jacket and hold on to a rope in case you realize you need to pull yourself back to the boat.
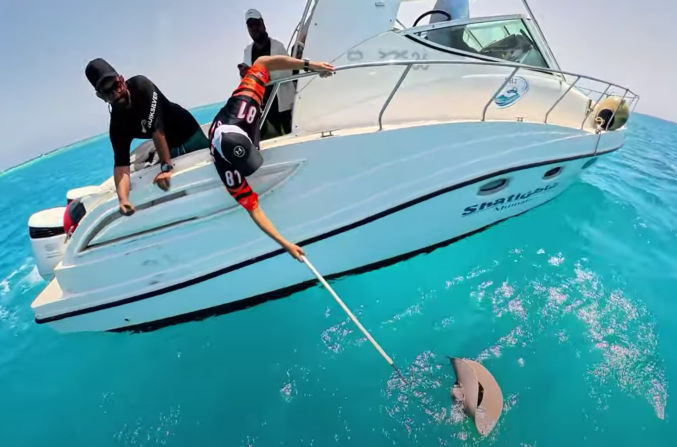
This guy (Mustafa), who came with us, was a pro. He used to dive often. If possible, bring an experienced swimmer with you on the trip in case someone needs help in the water. Again! The Red Sea may look like a big swimming pool, but it’s anything but.
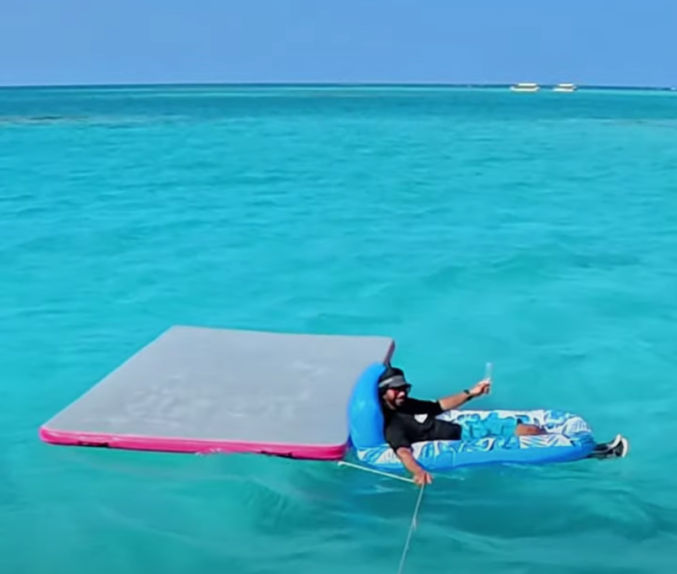
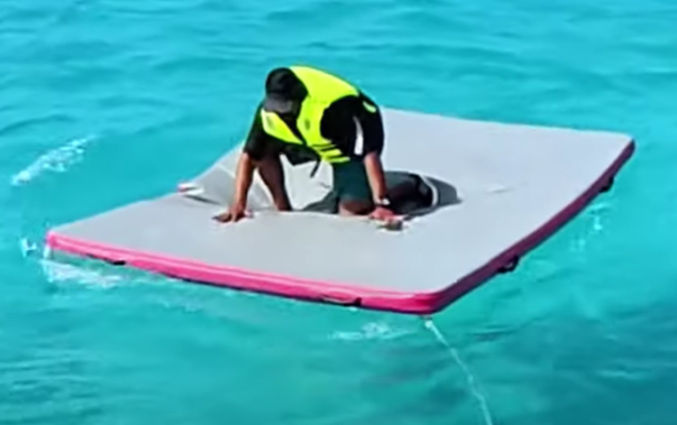
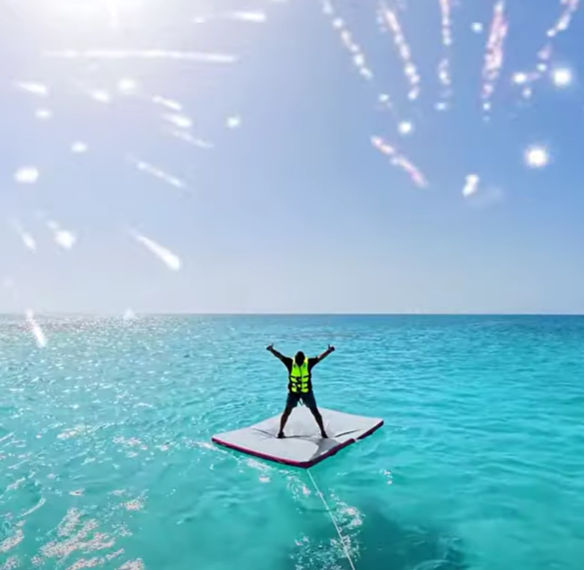
If you have an inflatable raft, like the one pictured below, realize that it is very difficult to get on it in the water.
It’s also very hard to stand on it in the water.
But it’s not impossible.
The yacht comes with cushions for lounging on the front. Make sure to stay hydrated by drinking plenty of healthy drinks.
If you don’t want to sit on the front deck and you want to avoid the sun, you can sit under the roof near the captain’s seat is.
At the front of the yacht was another fishing pole holder. I used it to hold my camera selfie stick.
This allowed me to take shots like this
and this
For me, the most fun thing to do was to ride a Seabob, pictured below. You grab on to both handles and push the button with your right hand to have the Seabob propel you through the water. The feeling is refreshing and exhilarating as you feel the water flow over your body and you effortlessly cruise around the water.
If you wear a hat, make sure to hold on to it when the boat is moving, otherwise it could fly off into the water.
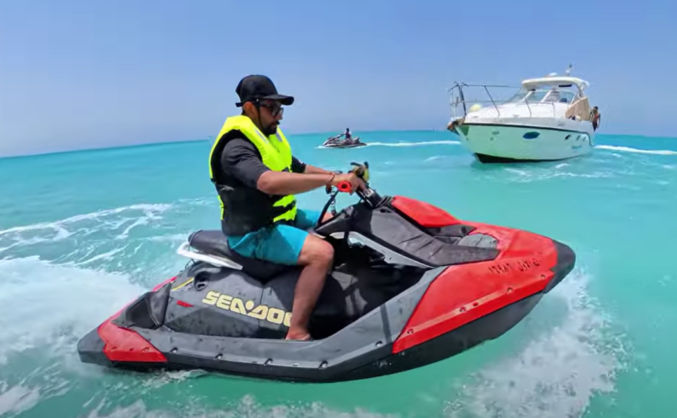
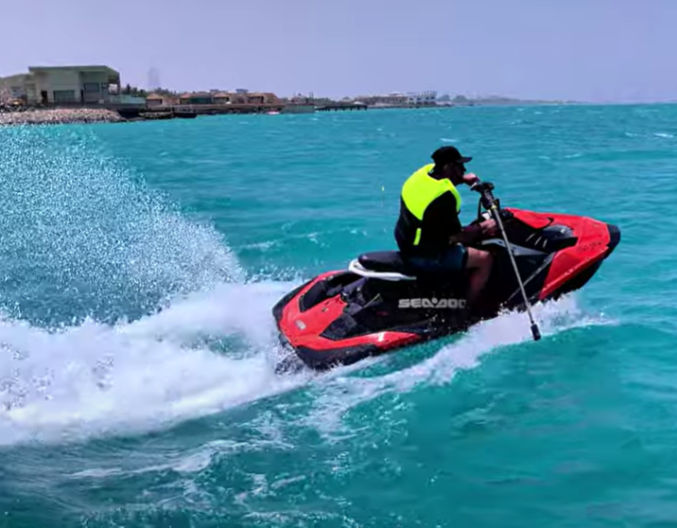
After Bayada, we went to a private place near the shore to ride a jet ski.
While on the trip, make sure to spend some time to relax and enjoy the sea breeze, whether your sitting or laying down.
The jet ski I rented was very lightweight and fast.
I strapped my camera selfie stick to the handle using ratchet straps so I could get 3rd-person video footage, like the one pictured above.
I couldn’t go to fast because the waves made my ride very bumpy.
After the jet ski ride, we headed back to the marina and reached it at 1 PM.
Overall, the trip and experience was amazing and totally worth the cost. I’m glad I was able to capture almost all of it on video, which you can watch below.
There are many alternatives to the tools above, but I like these the best.
Instructions
Get a song audio file
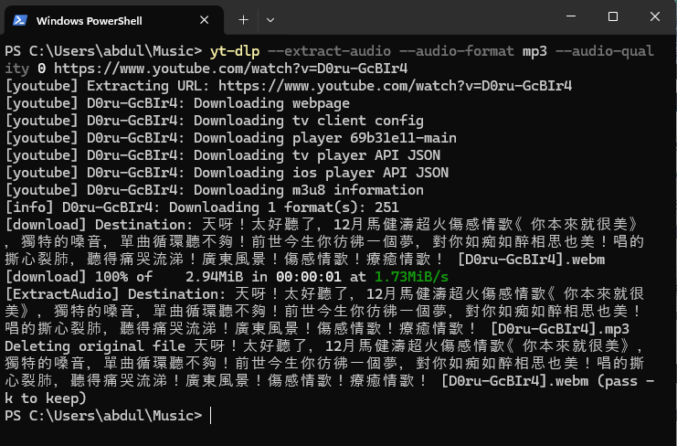
One easy way to get your song audio file is to find a song on YouTube and download it. I wanted this song:
I downloaded the audio MP3 file using the YT-DLP command line tool. The URL of the song was https://www.youtube.com/watch?v=D0ru-GcBIr4, which shows a video ID of D0ru-GcBIr4. So, to download the audio, I downloaded YT-DLP and ran the following command:
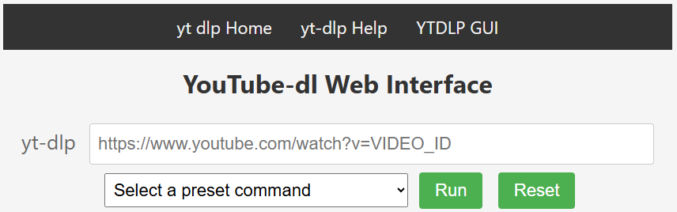
If you are a simpleton and this looks confusing to you, then just use the online version of YT-DLP, which currently looks like this:
Get background video footage
Since the name of the song I made into a music video was 你本來就很美, which means “You are beautiful”, and the original music video showed beautiful beach scenes, I looked for similar beach footage on YouTube to use as the background for my video. I liked this video (https://www.youtube.com/watch?v=0ZBqnOeIxbQ):
Since the video ID was 0ZBqnOeIxbQ, I downloaded it from YouTube using YT-DLP using the command
yt-dlp 0ZBqnOeIxbQ
You don’t have to put a video in the background of your music video; you can also just put one or more still photos, but I think a background video looks better.
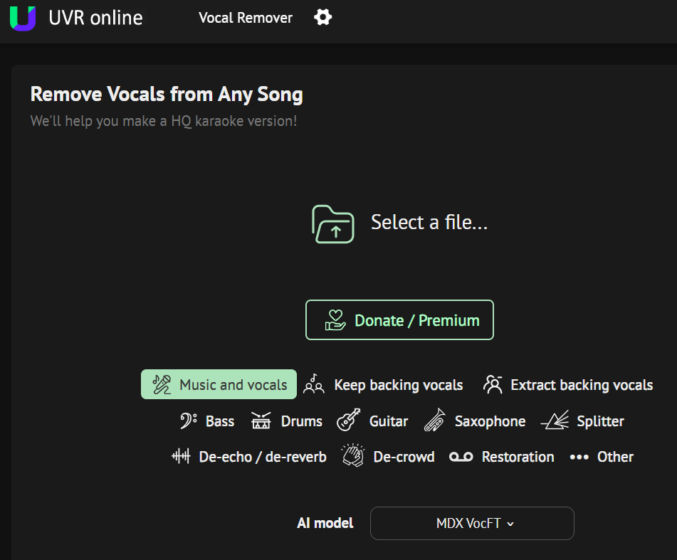
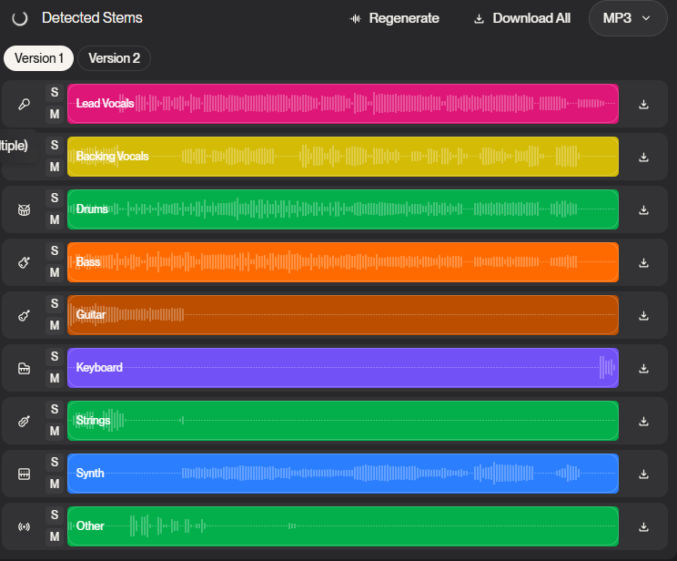
Separate vocals from the song’s audio
To improve lipsyncing and transcribing, we’ll need to separate the song into stems, where each track is a separate sound, e.g. vocals, instruments, etc. Go to UVR Online and upload the song’s audio file (MP3). You get process up to 12 minutes of audio per day for free.
When done, download the vocals track. Here’s what I got.
Note: I used Audacity to trim the audio to remove the silent sections to speed up AI-processing in Heygen and because Heygen has a duration limit per video.
Update: You can use Suno to extract all stems.
You can also use LALAL.AI to extract vocals. Both Suno and LALAL separate lead vocals from backing vocals.
Choose photos to lipsync
The photos that work best for lipsyncing are ones that
show the subject facing forward
are hi-res
These are the photos I picked for my video.
This last photo shows me looking to the side to add variety to the video. The AI lipsyncing results aren’t perfect, but it was acceptable, so I kept it.
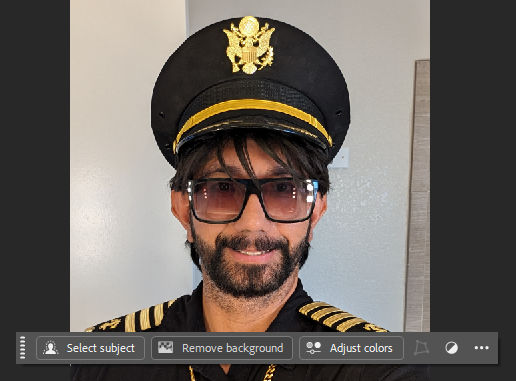
Remove background from photos
I used Adobe Photoshop to remove the background from photos. For example, when I open a photo in Photoshop, I see a floating toolbar with a button called “Remove background”.
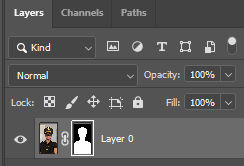
Clicking on it add a layer mask to the image layer
which causes the background to be transparent.
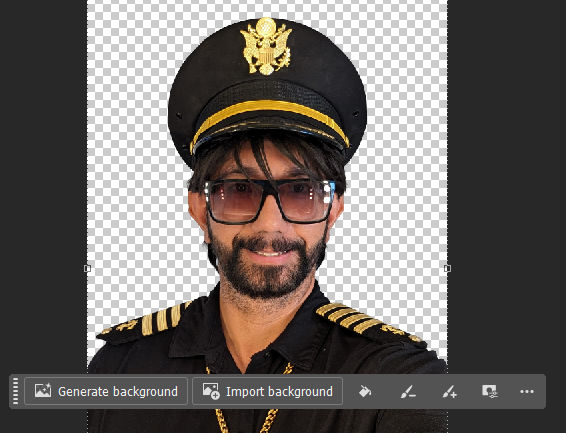
If the mask isn’t perfect and you see some of the background showing or some of the subject removed, you can edit the mask by
clicking on the mask thumbnail in the layer,
clicking on the paintbrush tool,
adjusting the size of the paintbrush,
changing the color of the paint to either white or black
painting on the are of the image you want to show or hide
Change the photo aspect ratio to 16:9
Since I wanted to put my music video on YouTube, I wanted the video to be landscape format, 16:9, and 4K. I used Adobe Photoshop’s “crop’ tool to convert my portrait, 9:16 photos to 16:9. Notice that when I do that, I lose much of the photo, like the top of the hat and the shirt in the screenshot below.
To remedy this, first I expand the canvas wider than the original image and crop it.
Since my arms are cut off, I select those two areas and click the “Generative Fill” button.
The generative fill produces 3 variations. I picked one that looked the best.
This made my image 19:6 image look like this:
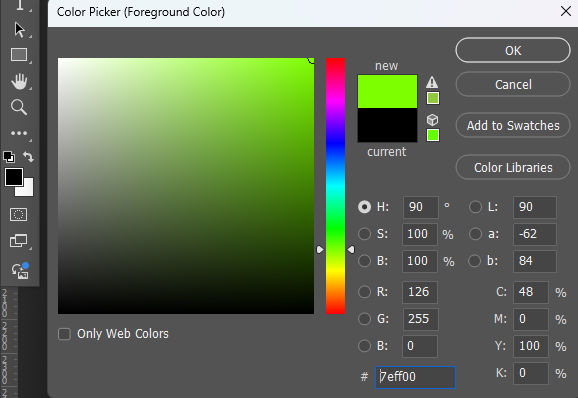
Change the background to neon green
Since we’ll want to change the background of our singing subjects to show our background video, we’ll need to put our photos on a green background so we can chroma key the green background out when editing the video in Capcut. In photoshop, change the foreground color to neon green.
Then, use the paint bucket tool to paint the background green. You may need to create a new layer positioned below the subject layer.
I repeated these steps for all other images, as necessary.
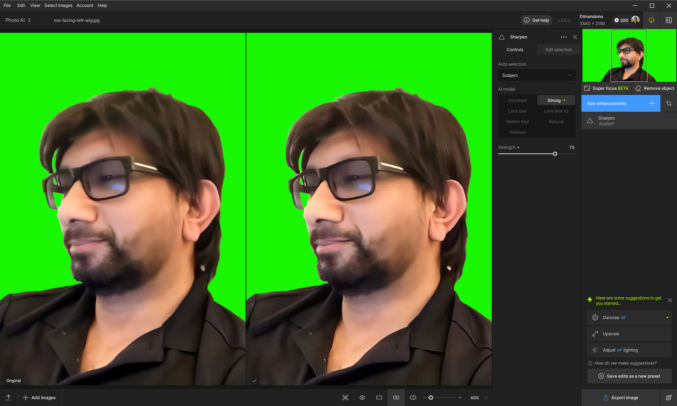
Upscale the images
Since my target video platform is YouTube and many devices like TVs support 4K, I upscaled some of my images to 4K. I used Topaz Photo AI to do this, but there are many alternatives that may be cheaper. With Topaz Photo AI, you can also do other things like sharpen, denoise, etc.
Create an avatar in Heygen
Now that we’ve collected and prepared all of our assets, we can create convert our photos to videos with lips synced to the lyrics. I created an account with Heygen and paid for cheapest monthly plan ($29 / month). This outputs 1080p videos only. If I wanted to created 4K videos, I would need the next plan at $39 / month. However, I think Capcut was able to upscale my 1080p footage to 4K using AI.
In Heygen, click on “Avatars” and create a new avatar by uploading your photos.
Create lipsync video
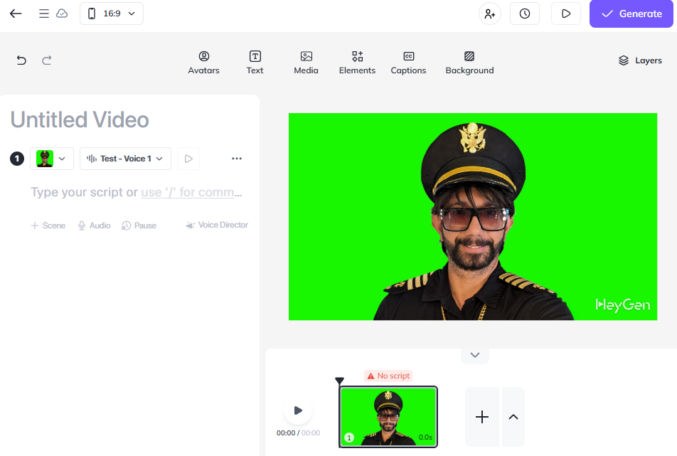
In Heygen, click the “Create video” button, choose “Landscape” for the orientation, and change the default avatar to one of your avatar’s “looks”.
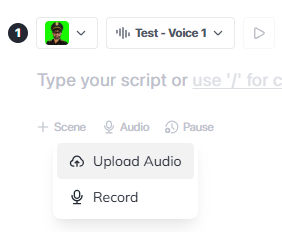
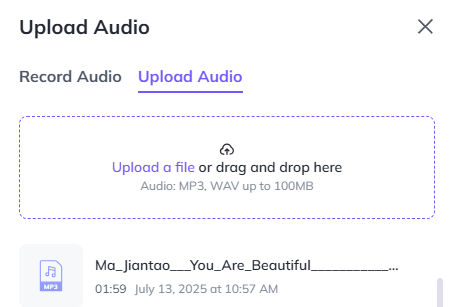
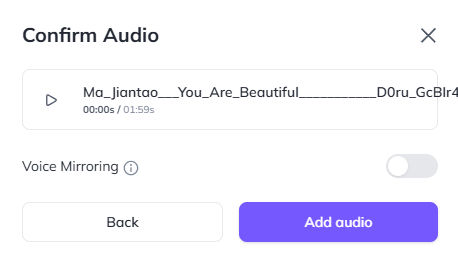
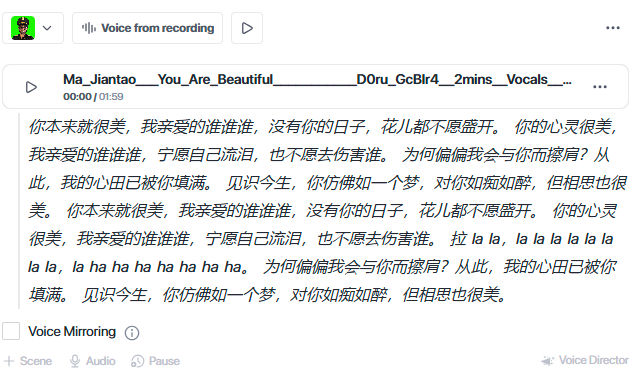
The next part is important. For the script, click the “Audio” link and “Upload Audio”.
Upload the audio vocals file to Heygen, which has the backing music removed.
You can leave “Voice Mirroring” turned off so that the voice will be the voice in the uploaded audio.
Heygen will then try to transcribe the audio and display the words (lyrics) for the AI to produce the lipsync. Depending on the quality of the uploaded audio file, this may or may not work. In my case, it worked, and Heygen even detected the language as Chinese.
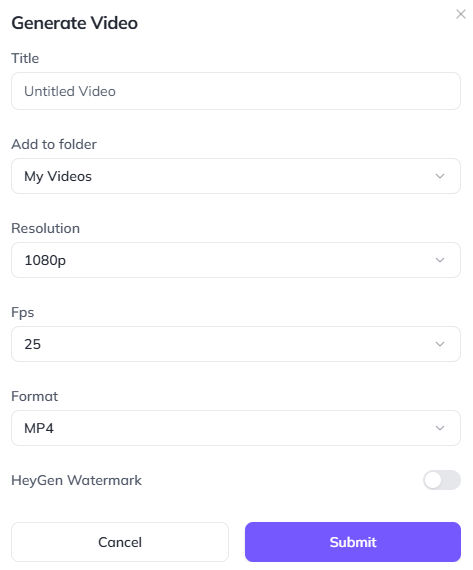
Click the “Generate” button and choose the appropriate settings.
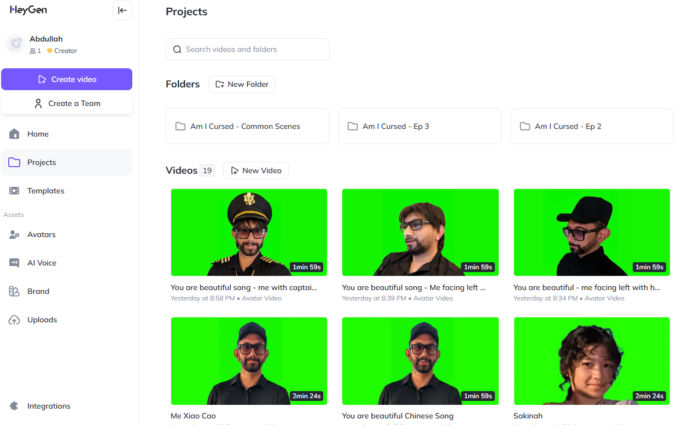
Heygen will take some time render the video, which will show up under “Projects”. Repeat the above process for all photos (avatar looks).
Note: sometimes, some portions a video will have good lipsync results while others may not. In this case, you can try recreating the lipsync video.
Create the final video
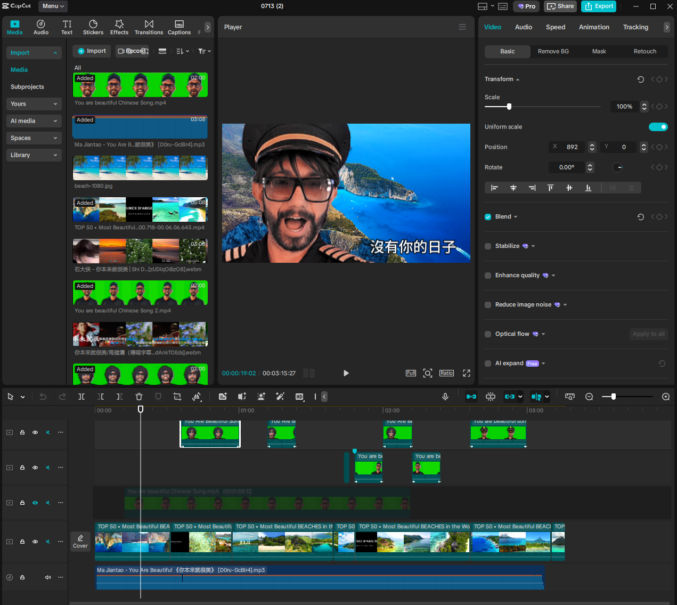
To create the final video, I used Capcut. Though Capcut can be used for free, I paid for “Pro” access so I could use some of the paid features that I needed. I won’t go through all steps in detail since there are many general video editing tutorials online.
Import (drag) all media (audio, video) to the “Media” pane (top left) in Capcut
Drag your media to the timeline (bottom pane) to the appropriate tracks
The screenshot below shows the following tracks from bottom to top
Audio track (complete song, not just the vocals)
Main video track (background video showing different beach scenes)
Other video tracks (since the lipsync results weren’t perfect for the duration of each Heygen-produced video, and because I wanted to show different versions of me signing different parts of the song, I chopped the videos into sections where the lipsync results were good)
Text track (I copied and pasted the Chinese lyrics so viewers who read Chinese can read the lyrics as the video plays).
The tracks behave like layers in Photoshop, so media on higher tracks appear above media on lower tracks, which is why the tracks containing the green screen lipsync videos are above the track containing the background video.
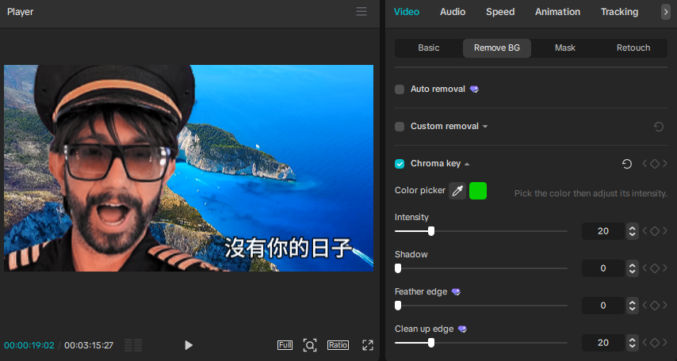
Remove the green screen
To remove the green background from the lipsync videos,
click on the video clip in the timeline
in the top-right pane, click Video > Remove BG, Chrome key, and then, using the color picker, click on any area of the green background in the “Player” pane in the middle. The green background with suddenly disappear, revealing the media in the lower track (the background video).
you may see some green artifacts around the edge of the subject. To clean up them up, slide the following sliders until you see good results: “Clean up edge”, “Feature edge”, ” Intensity”.
To improve the final video, you can do some other things as well, like
add a crossfade (“mix”) transition between adjacent video clips
Add a “Fade in” and/or “Fade out” animation to clips that are not adjacent to any other clips (go to “Animation” > “In” > “Fade In” and “Animation” > “Out” > “Fade Out”)
adjust the color of a video clip by going to Video > Adjust > Auto Adjust or Manual Adjust
Here’s another example of a music video I created using the same method.
HeyGen Avatar IV
HeyGen recently released Avatar IV, which allows you to create more realistic lipsync videos. To use it, make sure to click on Avatar IV in Heygen to use it. Here are some example inputs and outputs. The results are definitely more realistic!
INPUTS
There are 2 inputs:
Image
Script
For the image, just upload one image.
For the script, you can either type something or upload an audio file. Since we want to lip sync to a song, we’ll upload an audio file of the song containing just the vocals.
In the examples below, all script inputs will use the following audio.
INPUT
OUTPUT
INPUT
OUTPUT
INPUT
OUTPUT
INPUT
OUTPUT
Notice in the last test HeyGen can’t animate the background correctly.
There is yet another way to create a music video. It requires more effort, but the result may be more interesting. It uses Heygen, Krea, and Runway AI’s ACT-TWO feature.
Generate a Driving Performance Video
Follow the same steps above to create a lip sync video in Heygen to be used to drive another video. The background doesn’t have to be green. Make sure the resulting video is as follows:
Well-lit with defined facial features
Single face framed from around the shoulders and up
Forward-facing in the direction of the camera
Since we will give Runway Act-Two a “character video”, the most important things in the “driving performance” video are the facial features and lip movements. What clothes you wear and the background are irrelevant as Runway Act-Two will just use your facial expressions in the “driving performance” video.
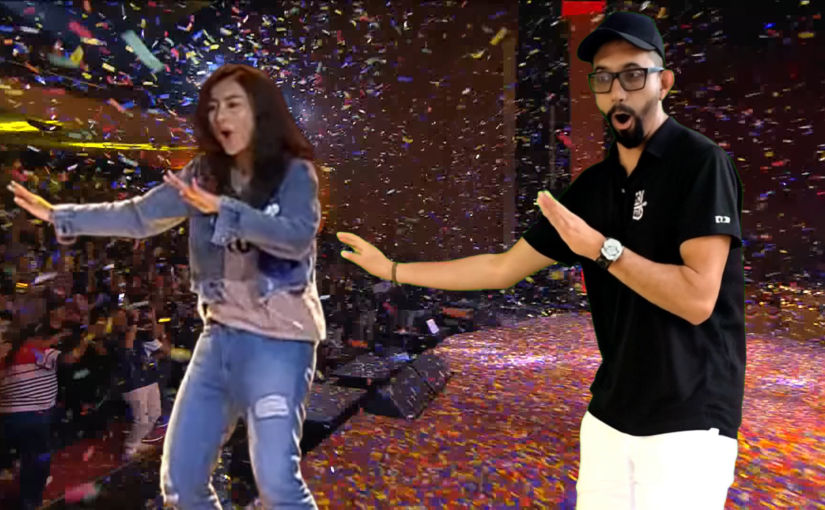
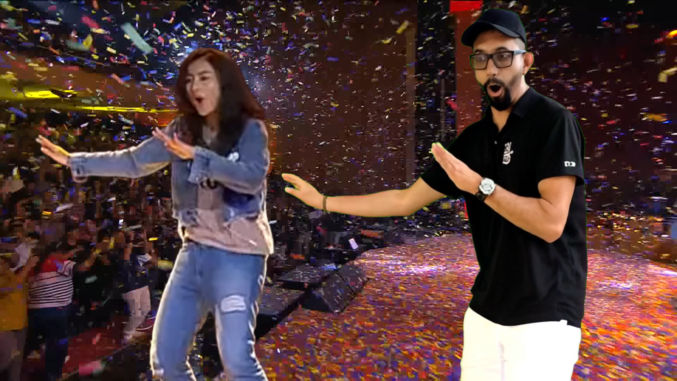
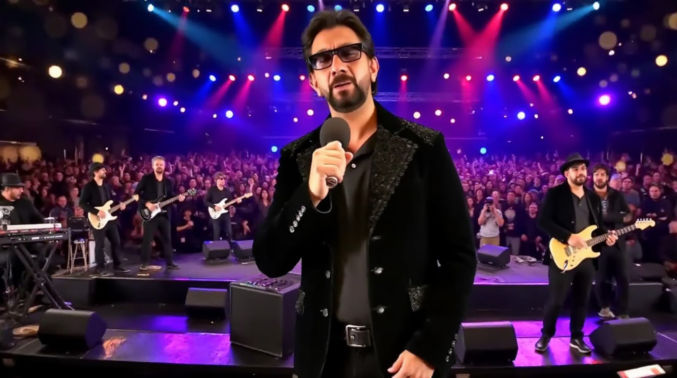
For example, here’s a “driving performance” video I created.
Split the driving performance video into 30-second clips
Runway’s Act-Two feature only lets you create videos that are 30 seconds long. So, we’ll have to split the driving video into a series of 30-second clips. If your driving video is 2 minutes long, you’ll end up with 4 clips, e.g.
Clip 1 (0:00 – 0:30)
Clip 2 (0:30 – 1:00)
Clip 3 (1:00 – 1:30)
Clip 4 (1:30 – 2:00)
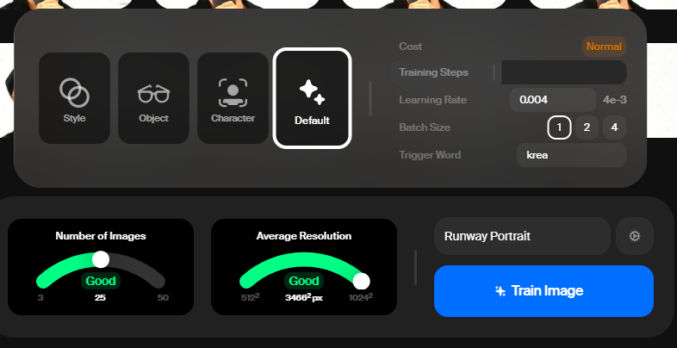
Train a model of your face in Krea
Go to https://www.krea.ai/train and follow the instructions to train a model of your face. You will need a subscription to do this. Use the Flux model.
Train the AI model: Upload multiple hi-resolution photos of yourself (ideally around 40 with different angles and lighting) to the “train” section of Krea AI. You can specify whether you’re training a style, object, or character. You can choose “character” or keep the default setting.
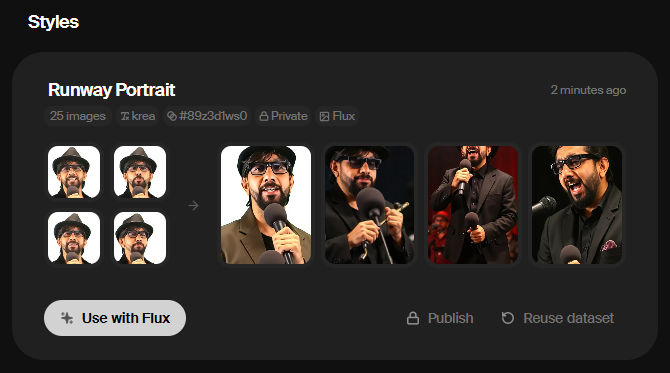
Use the Flux model: Once your model is trained, click “Use with Flux” to generate images based on the trained model.
Generate a bunch of images of yourself singing
Add your trained style: In the Flux model, click on “add style” and select your newly trained style from the “my styles” category.
Adjust influence: Use the provided slider to control how much your trained face style influences the generated images. Increasing the slider will make your face more recognizable, while decreasing it will reduce the resemblance.
You can now use various prompts in Krea to generate diverse images incorporating your trained face. For example, you can make an image of you
singing in front of a mic facing the right with the camera close up
singing while holding a mic with the camera at a distance
playing drums
playing an electric guitar
etc
Here’s an example prompt with a reference image.
Text prompt
Subject is singing on stage in front of a band with a large audience in front of him. There are many multi-colored lights illuminating the stage.
If you’re unsure what prompt to enter, ask Chat-GPT to write a prompt for you specifically for Krea.ai.
Uploaded “image prompt”.
Output
Krea generated 4 images. After experimenting a few times, I chose this image.
Generate a bunch of 30-second videos
Use Runway’s image-to-video feature (not Act-Two) to create a series of videos based on the images generated in Krea. Here’s an example.
Input
You can create a video that is at most 10 seconds long. Since our song is 2 minutes long, we’ll need to create twelve 10-second videos, unless we use b-roll for parts of the final video.
Output
Create a lip sync video
In Runway, click on Act-Two. In the Performance section on top, upload your first driving performance video. In the Character section on the bottom, upload your first character video that you generated in the previous step. Click the button to generate the lip-synced video.
Runway will take the facial expressions and lip movements from your driving video and apply them to the character video. The resulting video will be the same duration as driving performance video – in this case, 30 seconds.
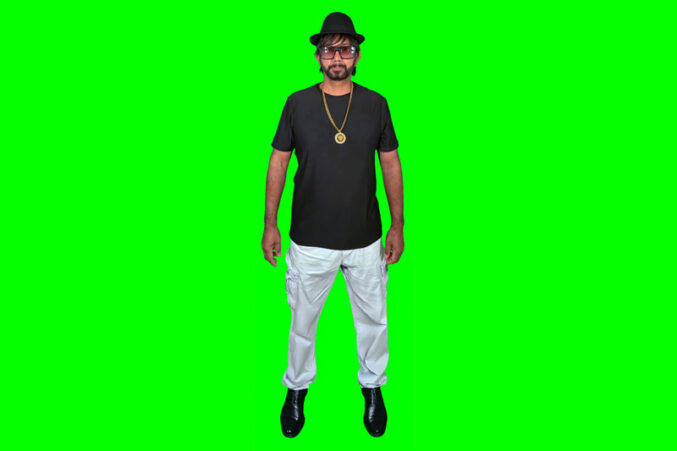
Here’s another example using a simple character video for demo purposes.
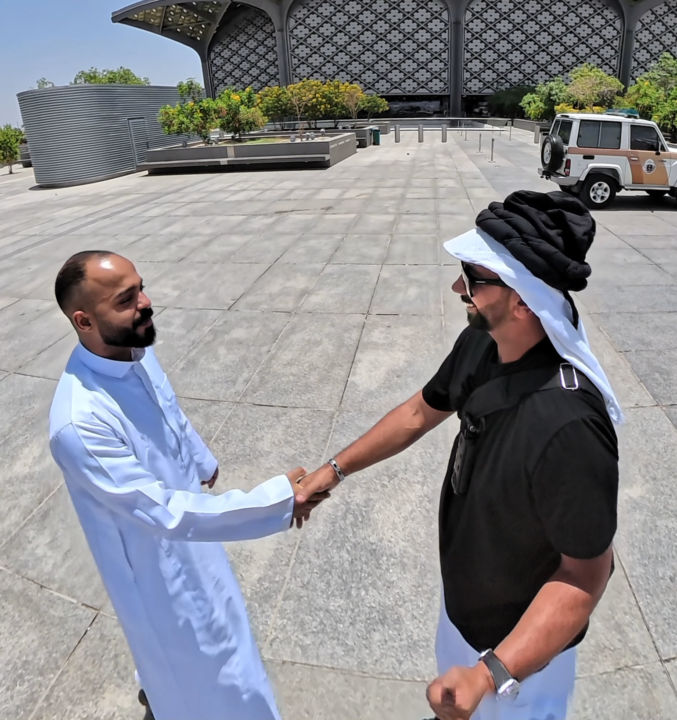
Madinah is one of the two holiest cities in Islam after Mecca, and it’s only 2 hours away by bullet train from Jeddah, the 2nd largest city in Saudi Arabia. While visiting the kingdom, I was able to complete a one-day trip to Madinah from Jeddah with the following itinerary.
Itinerary
Time
Activity
10 AM – 12 PM
Ride bullet train from Jeddah to Madinah
12 AM – 3 PM
Visit the Prophet’s Mosque (Masjid Al-Nabawi)
3 PM – 6:30 PM
Have lunch Visit the Qiblatain Mosque Visit the 7 Mosques Visit Mount Uhud Visit the Quba Mosque
7:30 PM – 9:30 PM
Ride bullet train from Madinah to Jeddah
Costs
Activity
Cost
Round trip bullet train ride between Jeddah and Madinah
$155
6-hour car + driver/tour guide
$120
Lunch at a Turkish restaurant for 3 people
$43
Transportation
Bullet train
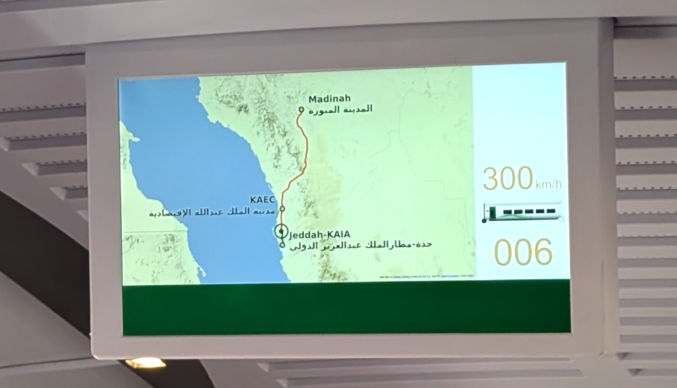
We purchased tickets online at https://rail.ninja/ for $72 per person. We chose the economy class because the business class didn’t seem worth the extra cost. The train travels at 300 km/h (186 mph). It’s clean, fast, convenient, and comfortable. There are 2 train stations in Jeddah, one in the north at the airport and one in the south.
Me at the train station in Madinah
Car + driver/guide
We thought about taking an Uber from place to place, but with so many places to visit, we didn’t want to waste time and try to figure everything out ourselves, so we decided to hire a driver for about 6 hours who could show us around. We were referred to Ibrahim, a Madinah local. He picked us up at the train station, took us to all the tourist spots, came with us inside the Prophet’s Mosque to show us around and explain things, had lunch with us and helped explain things to the waiter, and eventually dropped us off back at the train station. He doesn’t speak English, but I was able to communicate with my somewhat broken Egyptian Arabic I had learned while studying at the American University in Cairo, Egypt. If you don’t speak Arabic, you can always use Google Translate on your phone in “conversation” mode.
Ibrahim, our driver and guide in Madinah
Trip at a Glance
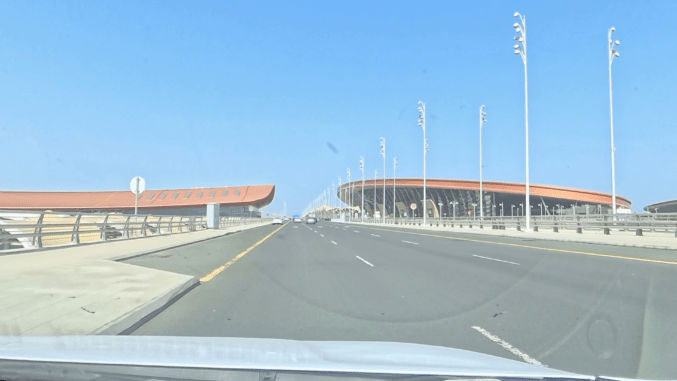
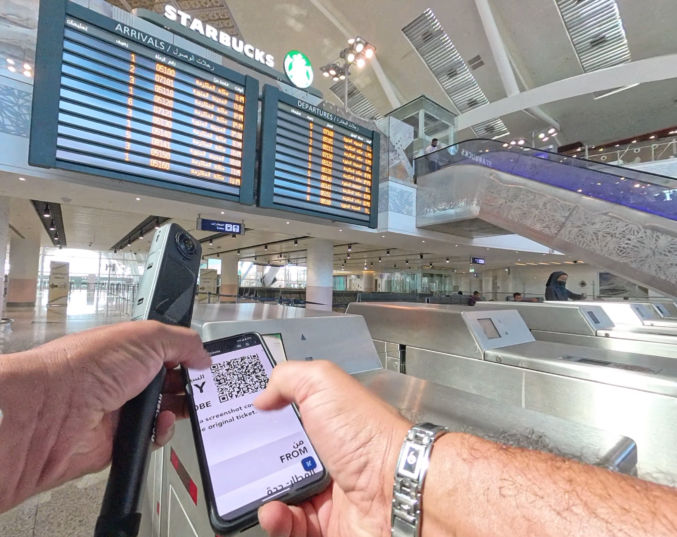
A friend dropped us off at the train station at the Jeddah international airport at 9:30 AM.
Left = train station, right = Jeddah International Airport
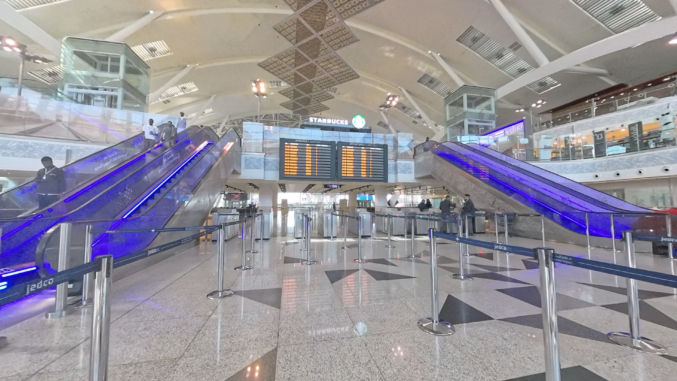
The train station was very spacious, clean, modern, and not crowded at all.
Train station at Jeddah International Airport
Your train e-ticket will come with a QR code. Just scan the QR code to open the turnstiles. And, of course, there is a Starbucks there with the Starbucks logo right above the arrivals and departures screens.
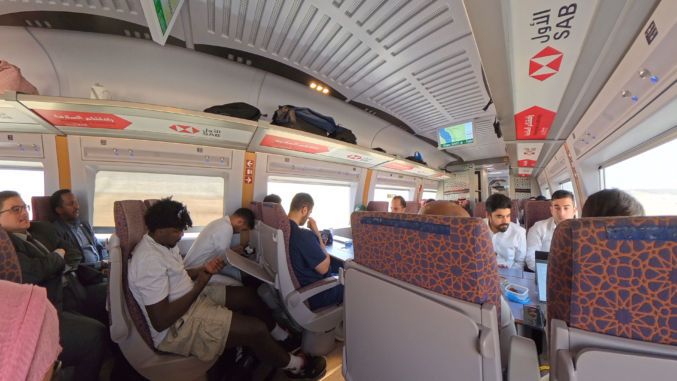
As you can see below, economy class was clean, comfortable, and spacious.
The bullet train travels at 300 km/h (186 mph).
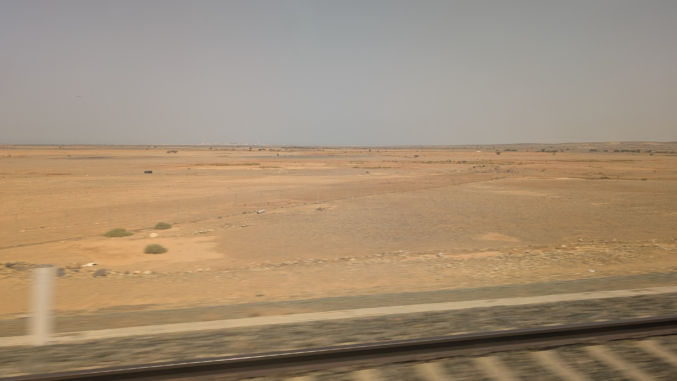
On the way to Madinah, the scenery is mostly just desert.
Ibrahim, the driver/guide, picked us up at the train station in Madinah.
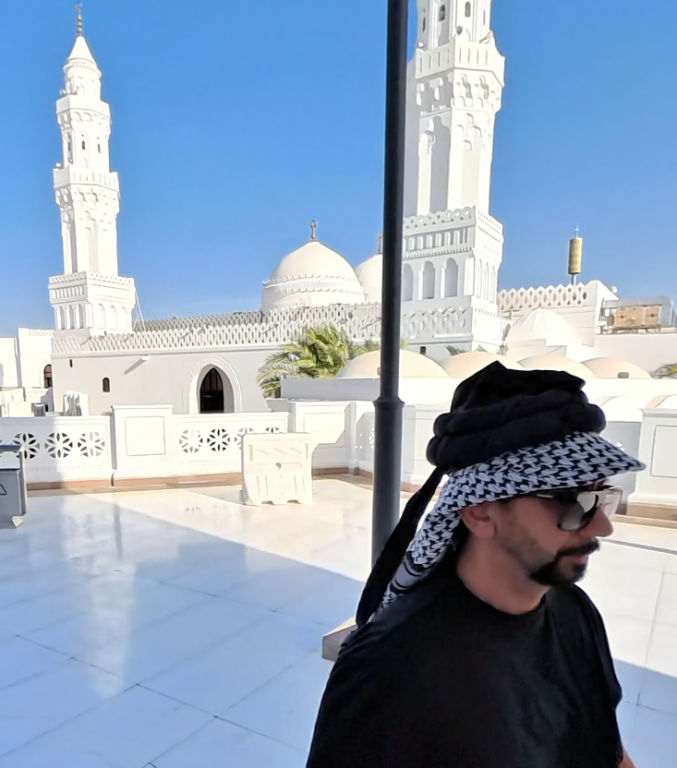
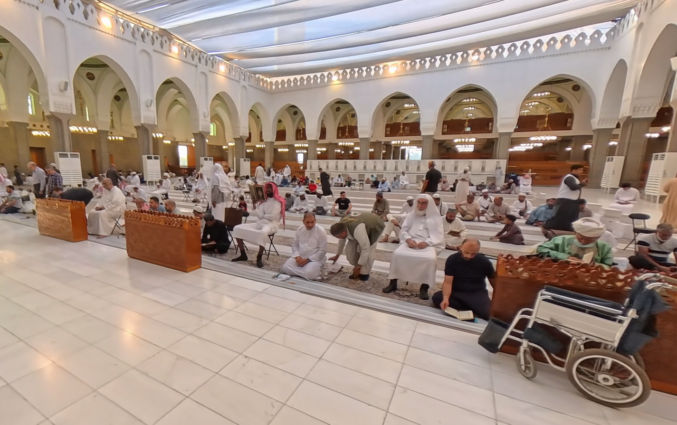
Our first stop was the Prophet’s Mosque (Al-Masjid Al-Nabawi).
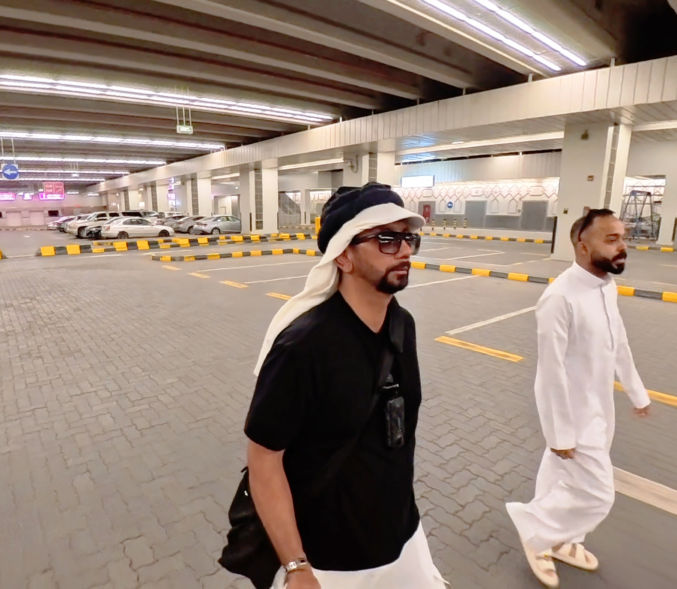
There was convenient and ample parking below the mosque.
Below is a Google Earth view of the mosque.
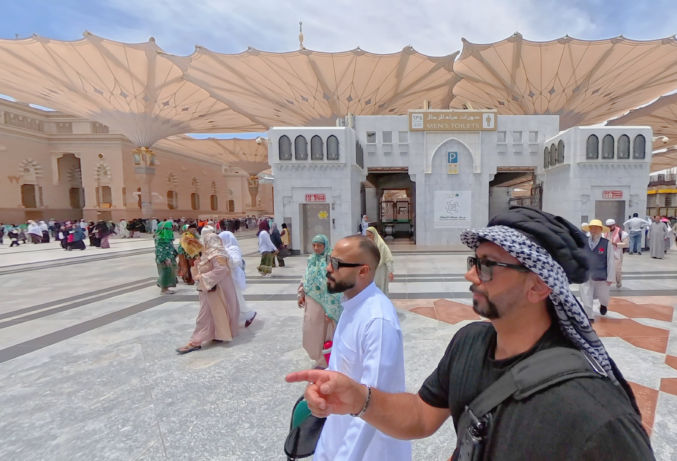
There are many restrooms all around the mosque and huge umbrellas to provide shade during the day.
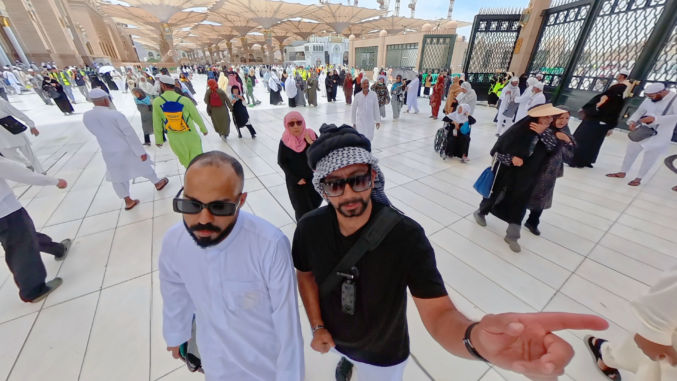
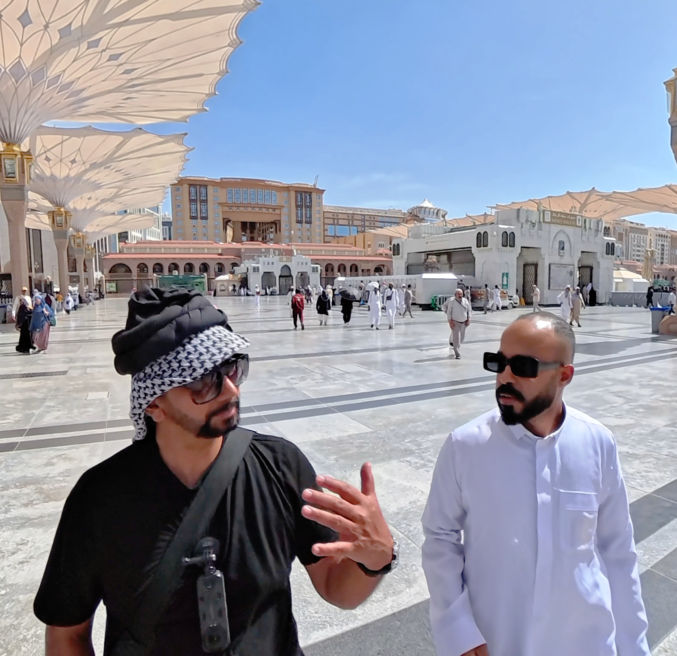
The Prophet’s Mosque is big. Ibrahim, our driver/guide, came with us inside to show us around and help guide us.
People from all over the world visit Madinah and the Prophet’s Mosque, like the person on the left, who may be from somewhere in Africa.
As we explored the mosque, I asked Ibrahim about various aspects of the mosque.
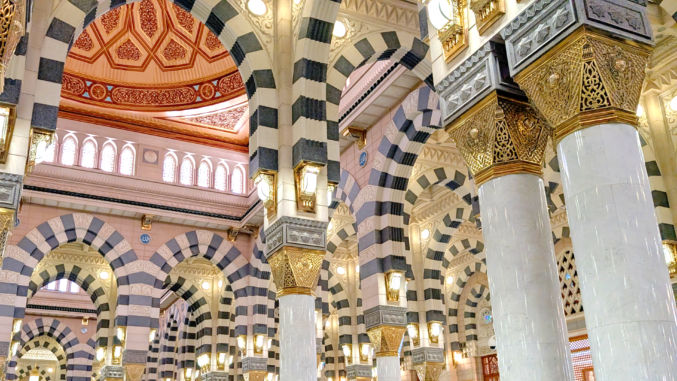
The interior design of the mosque was very elaborate with huge chandeliers.
I especially like the design of the striped arches.
People can be seen praying, relaxing, reading, and chatting in their ethnic attire.
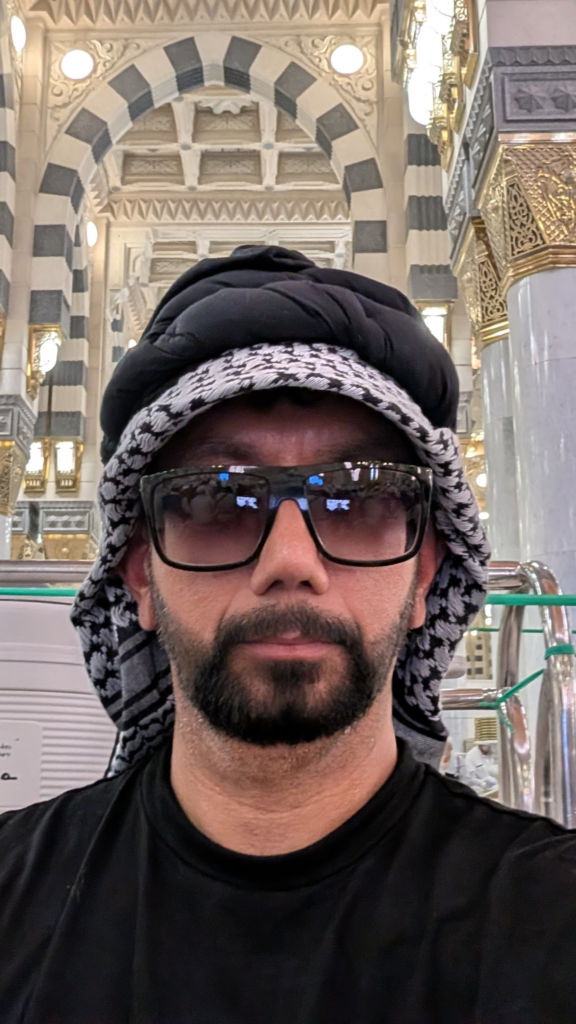
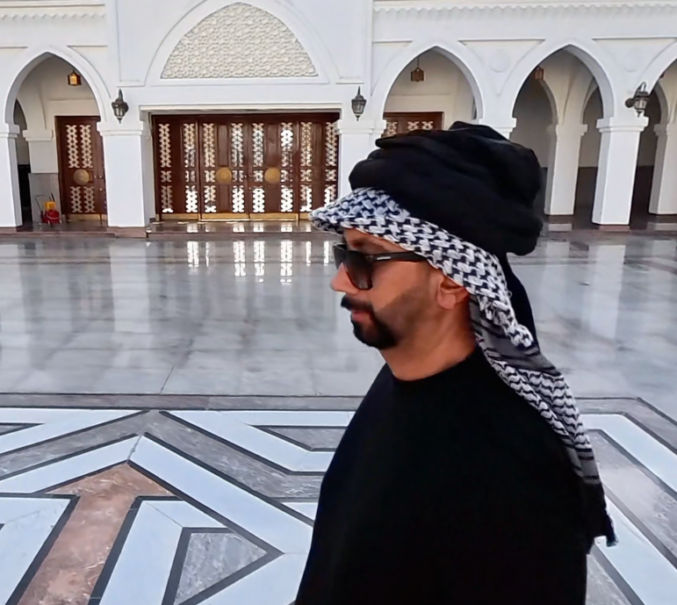
Being from the US, I normally wear a baseball cap and simple Western clothes, but I decided to dress more like a local for this trip. See photo below. The headscarf is commonly worn in Arabia whereas the black turban on top is more north African. I bought both on Amazon. When I tried the headscarf on, it kept moving around and looked messy, so I used safety pins to hold the shape I wanted. I also wanted a visor to provide some shade on my face, so I cut a visor off of an old had, stuck it in between the folded scarf, and secured it using safety pins. For the black turban on top, I didn’t want to mess around with folding and wrapping it on me, so I bought one that came pre-shaped that you wear like a hat. It had 2 straps on the back to tighten it to your head.
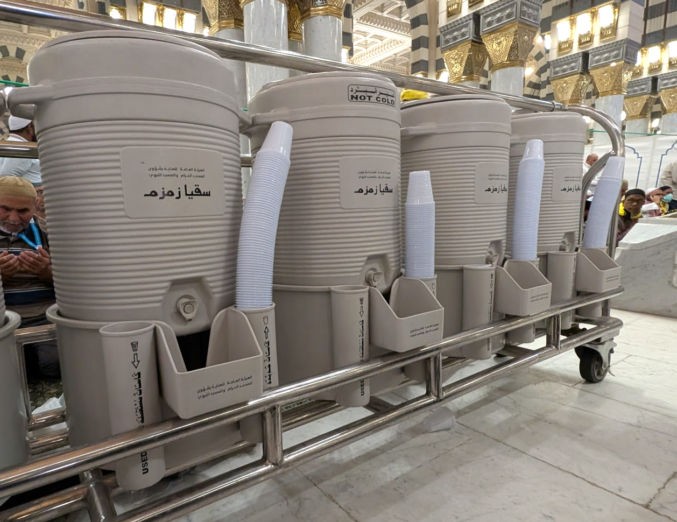
Inside the mosque, there were many water dispensers contain Zamzam water.
All over the mosque, both inside and out, you can find free Zamzam water, which was necessary considering the very hot climate.
I must have drank 10 of these cups of water. Next time, I would bring a water bottle with me.
If you visit Prophet Muhammad’s tomb, it will likely be very packed with people as shown in the photo below.
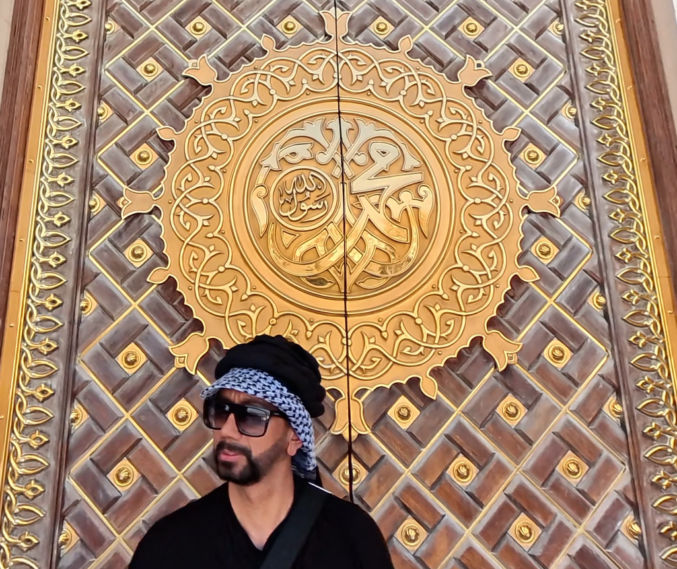
All around the mosque there are numerous golden doors with intricate designs.
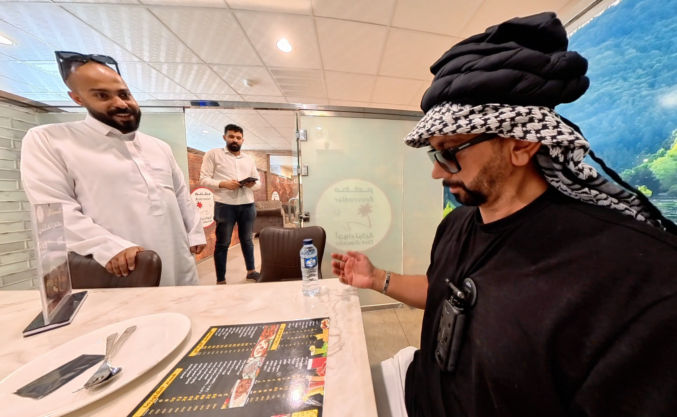
After visiting the Prophet’s mosque, we went for lunch. I wanted Turkish food. Ibrahim took us to a place somewhat distant from the touristy Prophet’s Mosque area where it wasn’t crowded and the prices were more reasonable. Though I was able to read the Arabic menu, I didn’t understand what everything was. Luckily, Ibrahim was able to explain everything to both me and the waiter, who happened to be Egyptian. Apparently, there are many Egyptians working in Saudi Arabia.
We ordered a mixed plate that was enough for all 3 of us, including the driver, Ibrahim. The food was acceptable and fair for the price.
We then went to the Qiblatain (Two Qiblahs) mosque, where prophet Muhammad was commanded to move the qiblah (prayer direction) from the Aqsa mosque in Jerusalem to the Haram mosque in Mecca.
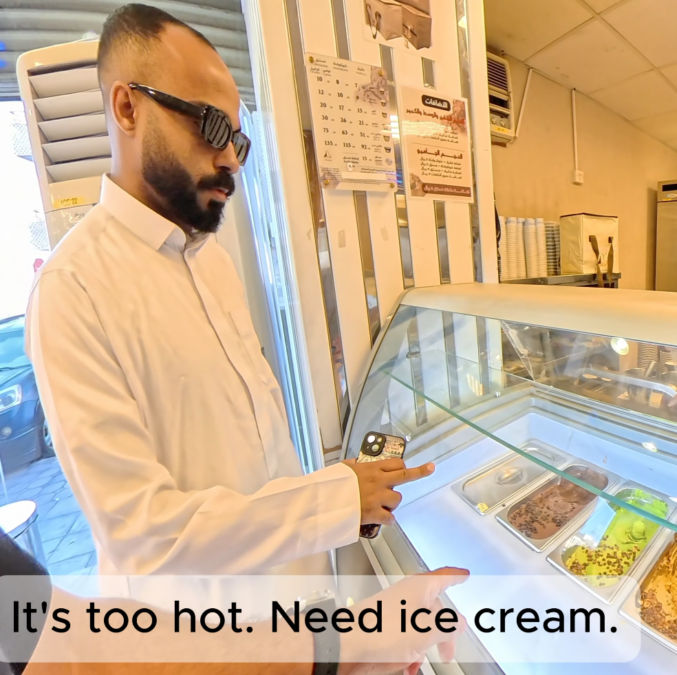
Since it was super hot, I asked our driver, Ibrahim, to take us to get some ice cream.
I ordered a mix of pistachio and vanilla ice cream with pistachio shavings on top. Pistachio seems to be very common in the Middle East, like in Turkey.
We then went to the Seven Mosques, a historical collection of small mosques.
We then went to Mount Uhud, a historical site where the prophet Muhammad had a battle with the polytheists of his Quraysh tribe.
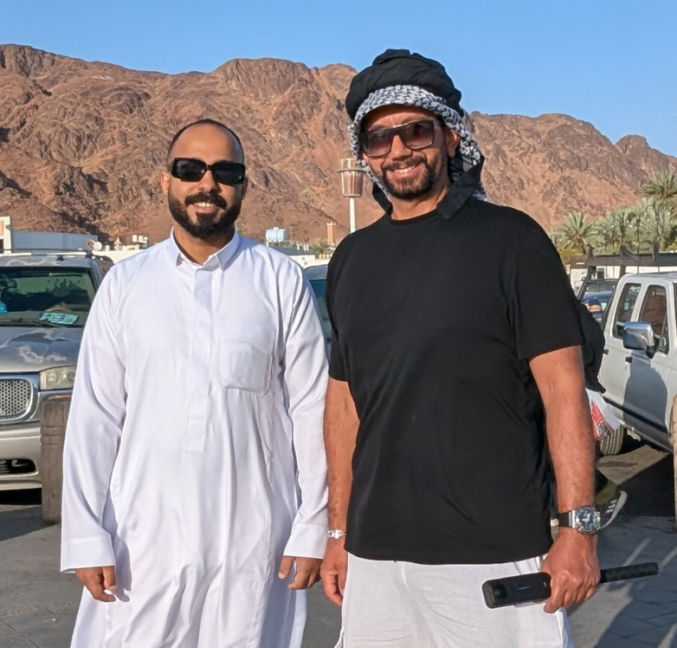
Here’s a photo of me (right) with our driver, Ibrahim (left).
Our last stop on our one-day Medina tour was to the Quba mosque, the first mosque to exist. This was one of the busier mosques we visited. Many people were praying and reading the Quran, and there were groups of kids learning something.
After that, Ibrahim took us back to the train station in time for us to catch our 7:30 PM train ride back to Jeddah.
Video
Watch the full video of my one-day excursion to Madinah.
As a real estate investor, I’ve had to replace many toilets. Normally, I do that while doing a complete renovation. The problem with many toilets is
the bolts to the toilet flange in the floor can get loose
the floor may not be perfectly level
These issues can cause a toilet to slide, rotate, and tilt.
Fixing a rocking toilet due to an uneven floor
After renovating many bathroom floors with both tile and vinyl, it’s unfortunate that despite a contractor’s best effort to create a perfectly level floor, a small imperfection could cause a toilet to not sit evenly on the floor. The easily way to fix this is by installing plastic toilet shims on the LOW side of the toilet. Make sure to install it on the LOW side as the weight of the toilet will help keep the shim in place.
Fixing a loose toilet due to loose bolts
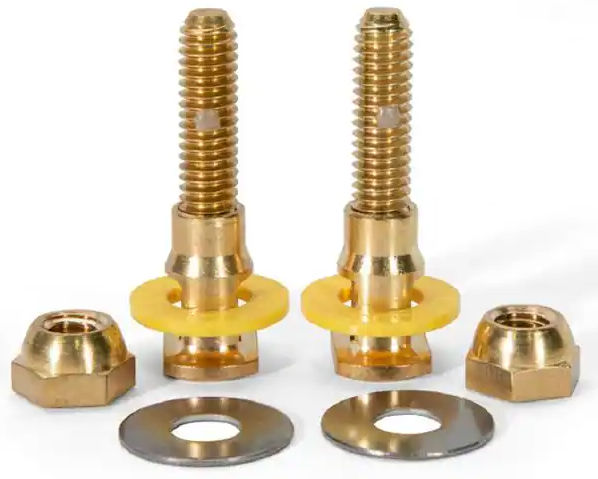
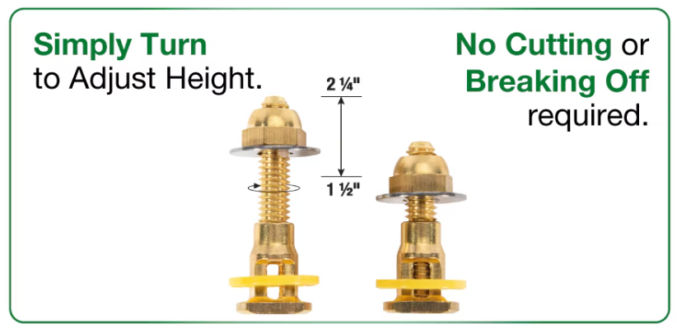
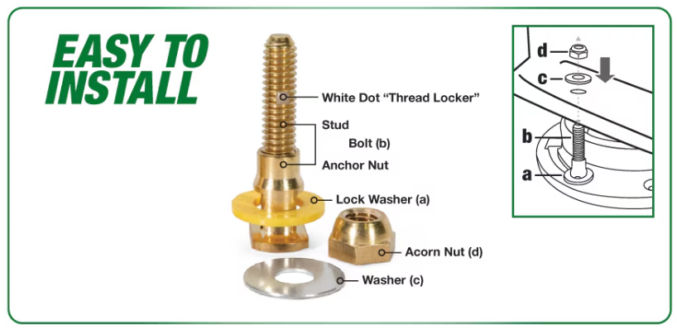
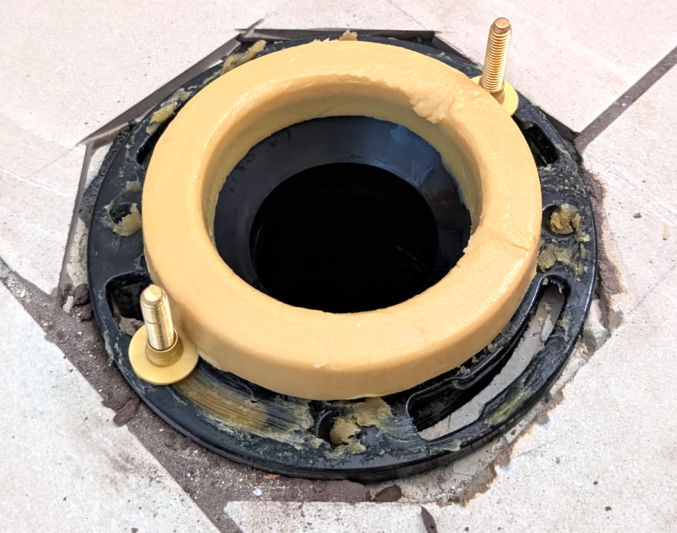
The bolts that come with many toilets are usually the cheap kind. Sometimes, they work just fine, but depending on your toilet flange and toilet, they may easily become loose, which is what happened to me. To remedy this, I replaced the cheap toilet flange bolts with the Fluidmaster SetFast 5/16 in. x 2-1/4 in. No-Cut Brass Closet Toilet Bolt Kit. Price at $8, which is about double the cost of the cheap bolts, these bolts don’t require any cutting and they securely hold your toilet in place. Unlike some other toilet bolts that come with a small head, the bolt head the Fluidmaster bolt is thick and wide, so the bolt remains within the toilet flange slot no matter what.
When you tighten the acorn nut, the height of the threaded stud decreases automatically.
The yellow lock washer is thick, which holds the bolt in place vertically as you place the toilet over the bolts. This is way better other toilet bolt kits, which either don’t come with a lock washer, or the lock washers are thin and flimsy.