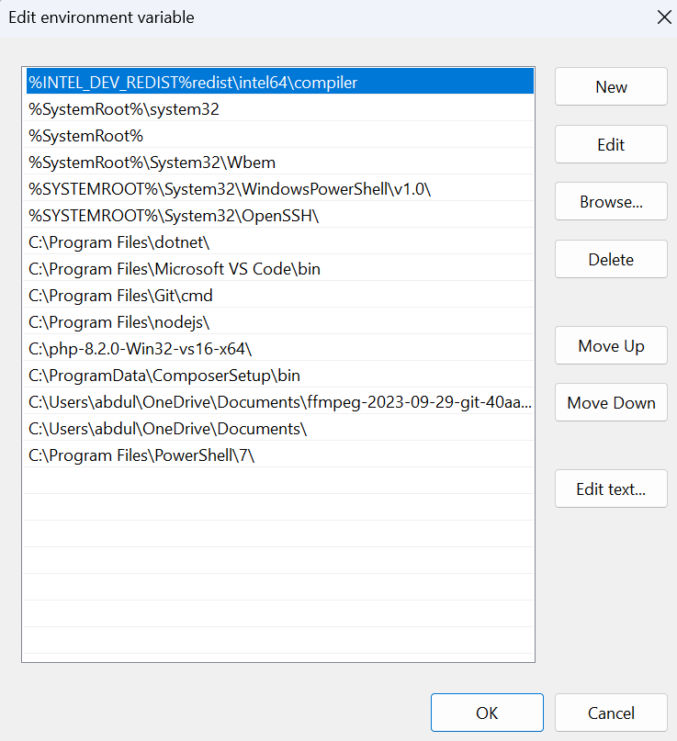
add the folder path containing the executables for both yt-dlp and ffmpeg to your Windows user or system path in the PATH environment variable (see screenshot below)
open a terminal / command prompt,
change to the folder where you want the downloads to go
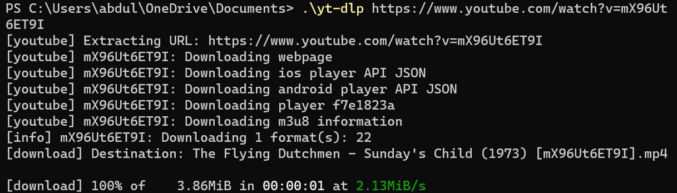
run .\yt-dlp URL (I’m using PowerShell)
Path environment variable
For example,
.\yt-dlp [Youtube Video URL]
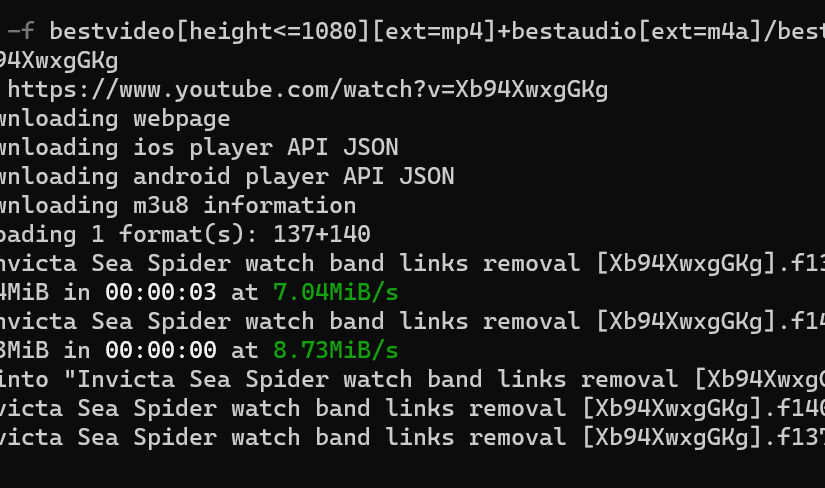
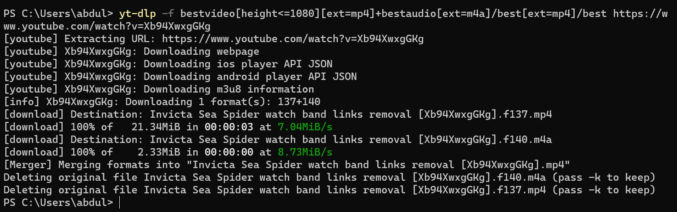
If you want to download the 1080p resolution of the video and it is available, run the following command.
yt-dlp -f bestvideo[height<=1080][ext=mp4]+bestaudio[ext=m4a]/best[ext=mp4]/best [Youtube Video URL]
This post is based on my personal experience. I don’t think I ever want to install pavers again.
Step 1: Remove sod
If you have grass, rent a sod cutter from Home Depot.
Cut the grass horizontally and then vertically resulting in a grid. This grid method makes removing the sod easier because you end up with squares of sod that are not too heavy to lift and are just easier to work with.
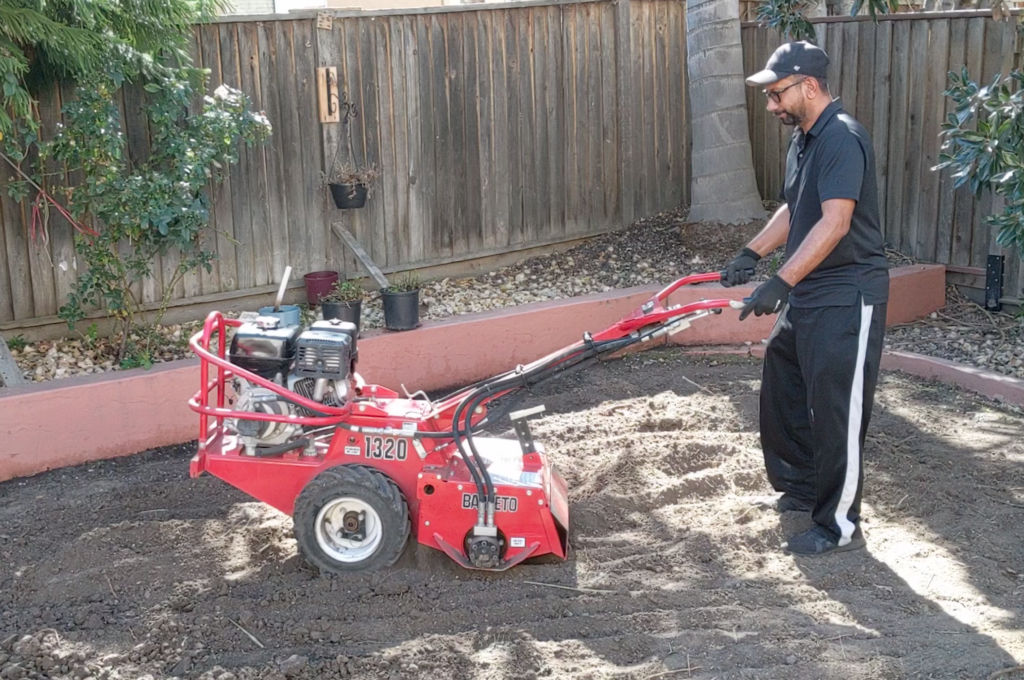
Step 2: Rent a tiller to break up dirt
You may need to remove some dirt so the top of the pavers will be where you want them. In order to remove dirt, you need to break it up (till it) first. The easiest and most powerful tiller I’ve used is a hydraulic tiller which you can rent at the Home Depot. I recommend this tiller over all the others.
Step 3: Remove broken-up dirt
Once the dirt is broken up, you can remove it using a shovel and a wheel barrow. This is the most tiring part of this project. For the wheel barrow, I recommend a 4 wheel instead of a single wheel one so you’re not having to lift it as you move it. You can easily dump the contents by lifting the yellow latch to unlock it.
If you need to remove a lot of dirt, then rent a mini excavator and tow it to your work site. This thing is less than 3 feet wide. You can also use it to push dirt to help spread it out.
Step 4: Get rid of dirt
To get rid of the dirt, you could take it do your local garbage dump. Note that if they charge based on weight, it can be expensive. I paid $360 to dump one pick-up truck full of dirt. There’s a dedicated dirt dump area near me which accepts only dirt. They charge $50 to dump dirt but require the dirt be plant-free and you have to have the dirt test and certified which costs $300.
Loading the dirt
To move the dirt, you could rent a pick-up truck from U-haul. I laid down a large tarp before loading dirt to make it easier to remove that last bit of dirt and to make cleanup easier. To transport the dirt from the backyard to the truck, I filled 3 buckets with dirt which fit perfectly in my Gorilla cart.
Since the truck bed sides are high, I first put the buckets on a work stand to raise them up. Then I’d stand on a stool next to it and lift and dump the buckets over the side of the truck bed and into the truck.
If you have a lot of dirt to move, you can also rent a mini skid steer.
Unloading the dirt
To unload the dirt, you could install a cargo bed unloader (available at Harbor Freight) onto the truck bed gate to make it easier to unload the dirt.
Note: if you line the cargo bed with tarp, make sure the black cargo bed unloader sheet is on top of the tarp, not under it. Otherwise, when cranking the level to remove the dirt, the unloader sheet will just slide under the tarp leaving the tarp and the dirt above it in place.
Step 5: Rake to level dirt
Use a metal rake to level the dirt as much as you can.
Step 6: Compact the dirt
Rent a plate compactor to compact the dirt.
Step 7: Lay weed fabric
This is necessary to help block weeds from coming up. It also makes the next steps easier since it keeps dirt from getting everywhere, in your shoes, etc.
Step 8: Mark perimeter and add sand
Using wood stakes and string, mark the perimeter of where your pavers will be. You can use a staple gun to easily secure the string to the wood stakes.
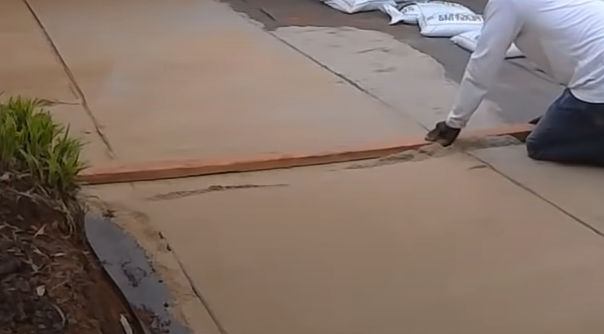
Step 9: Level sand, add paver base and pavers
The leveling sand should be 1/2″ thick. Use parallel 1/2″ diameter rebar and a 2×4 to screed the sand to achieve this.
Then, add paver base panels and cut them to length. Cut some panels in half and stagger the placement of the panels for better connections and less movement.
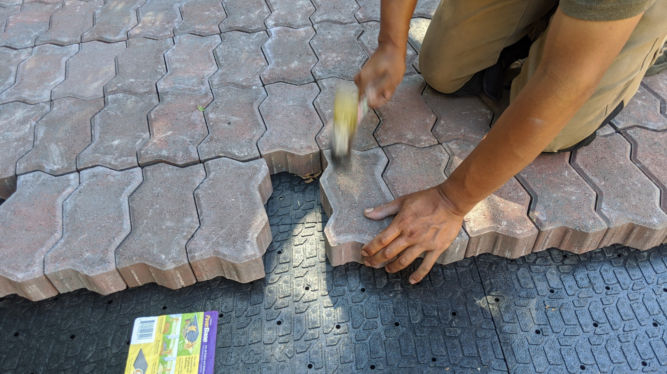
Work in two rows at a time. Before laying each panel, roughly level the sand by hand and then screed the sand using a 2″x3″ or a square dowel. For each panel, use a level to check for level. Place pavers and use a level to check for level again.
Where two panels meet, there is a greater chance the pavers will not be level. Use a mallet to hit and push down bumps. Check the pavers are level at the panel joints before putting pavers in the middle of the panels.
Wear knee protectors and pants instead of shorts so sand doesn’t get under the knee protector.
Idea: To simplify and save time leveling sand, try this:
Take one paver base panel
Attach on top of it a flat piece of plywood about the size of the panel
Attach on top of the plywood 4 cheap levels (2 vertically and 2 horizontally) about 20% from the edge
Lay the panel down and check for level
Where not level, tap down using a mallet to push sand out from under panel until all levels show level
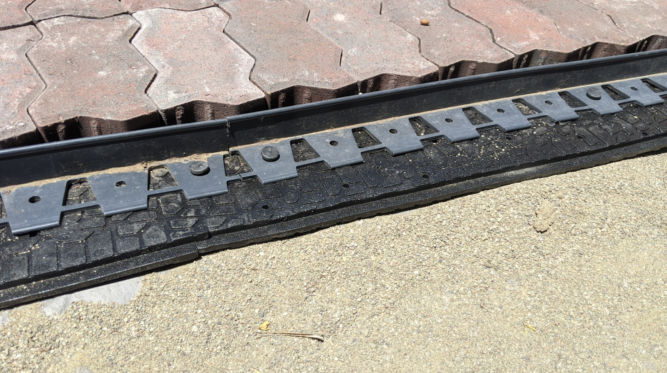
Step 10: Install paver edging
Drive stakes into paver edging such that the edging is flush against the edge of the pavers. Adjust the amount of sand below the edging so that top of edging is about 1/2″ below the top of the pavers.
Note:when laying down the paver base panels, it’s better to place them such that they bleed the outer perimeter of the final area of the pavers. In other words, they should extend about 3 inches beyond the perimeter so that when you install the paver edging, the edging will sit flush against the pavers.
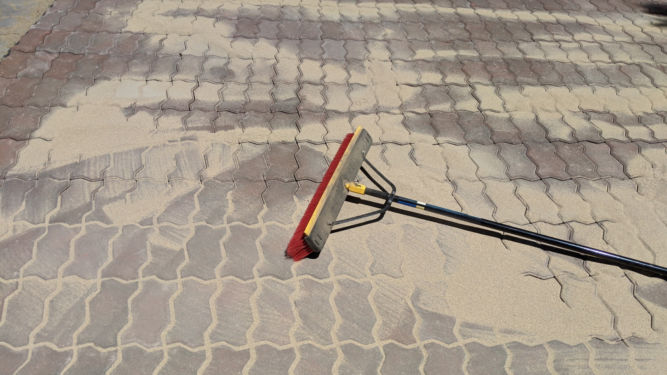
Step 11: Add joint sand
Pour paver joint sand and sweep it into the paver joints. The sand contains glue and will stick together after a while.
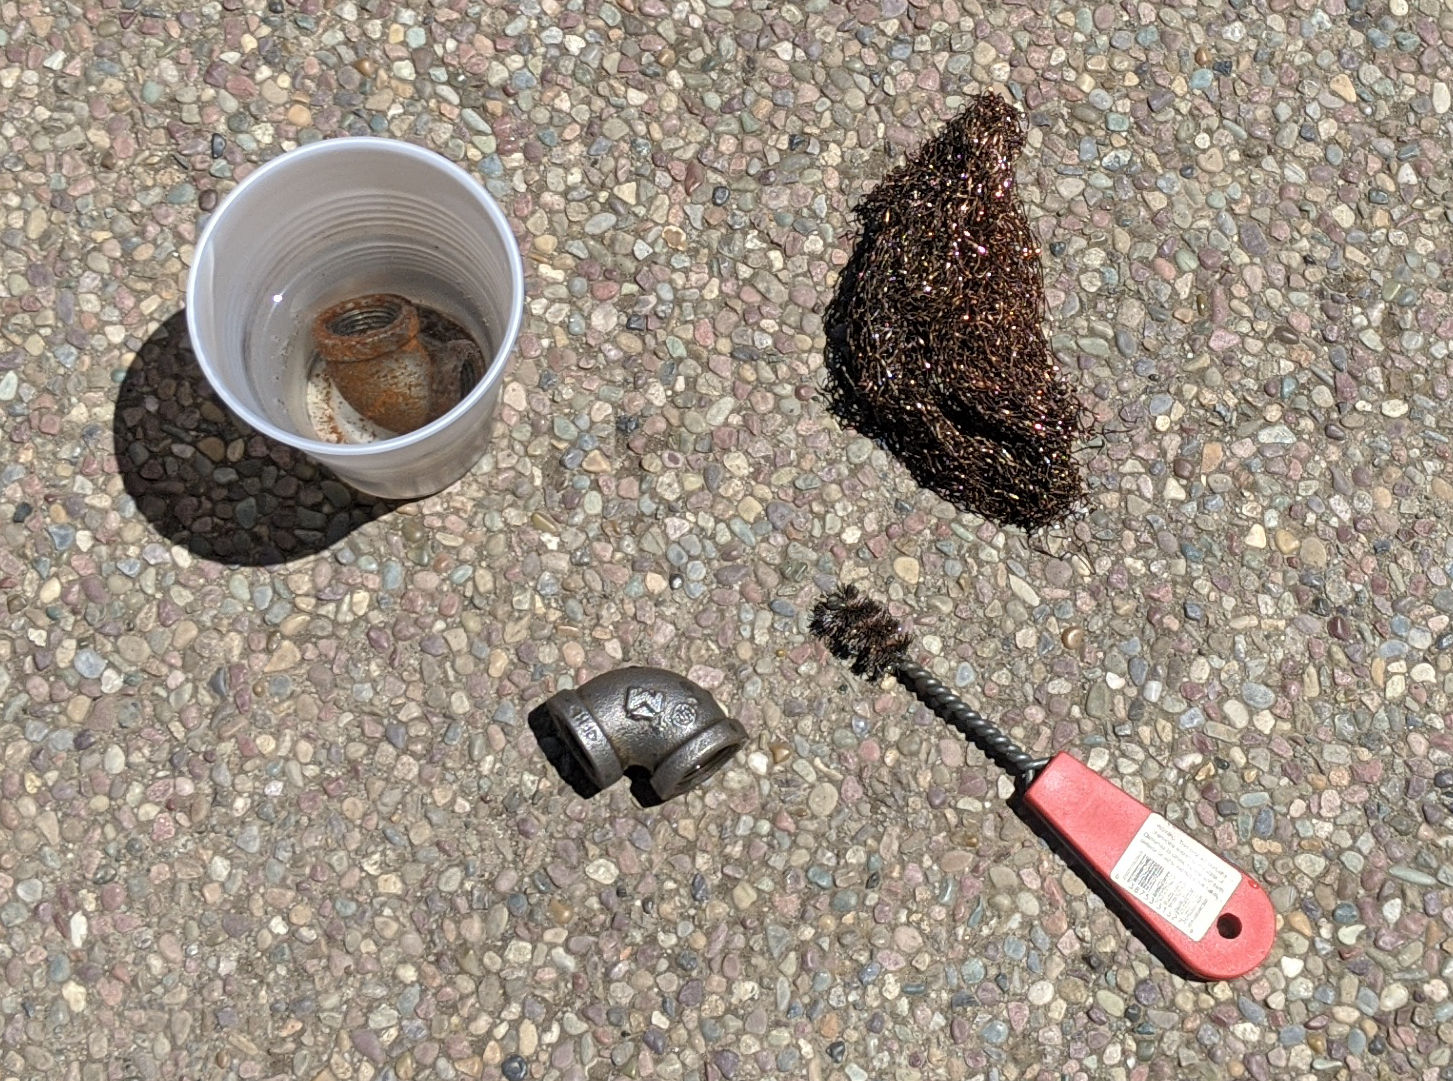
Don’t even bother with manual scrubber wire brush tools to clean barbecue grills. It’s so much easier using a wire brush angle grinder attachment. No chemicals even necessary.
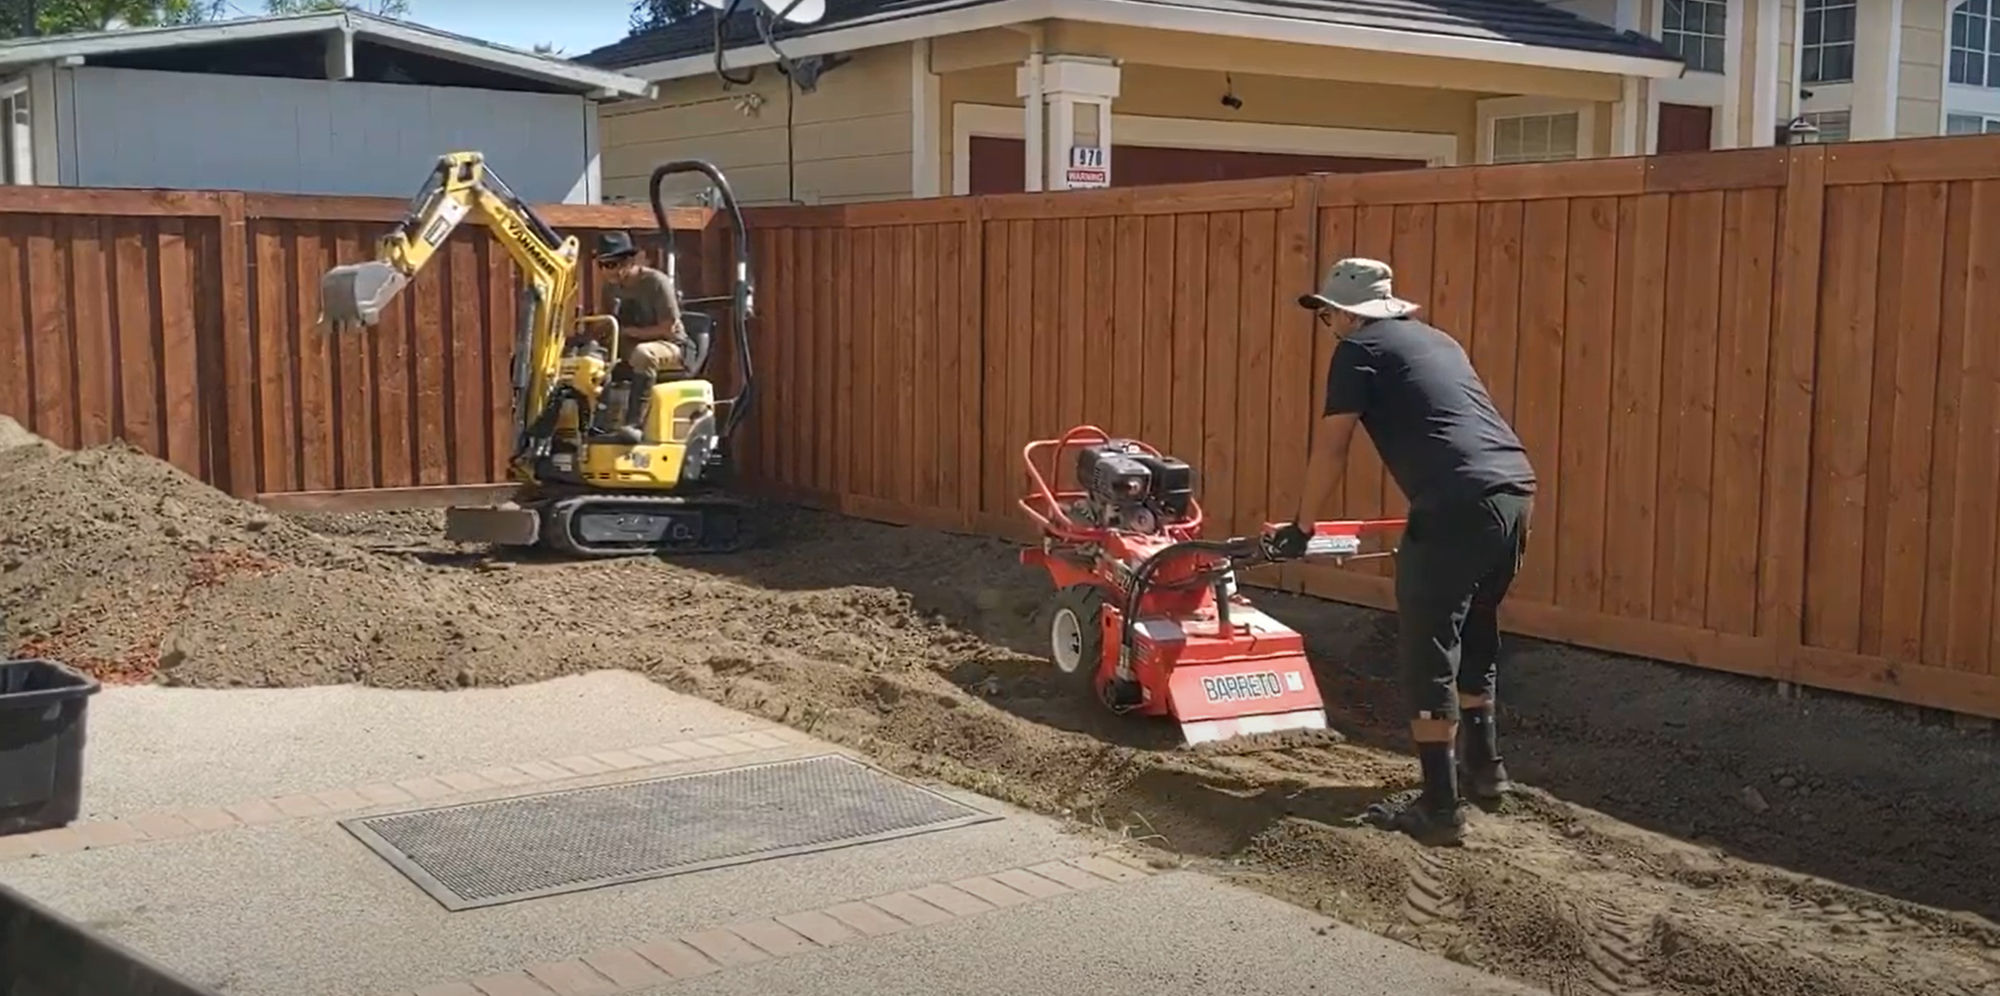
I need to remove quite a bit of dirt from my backyard and thought that breaking up the dirt with a rented tiller and then shoveling the dirt aside by hand was sufficient. The problem is it’s a lot quicker to break up the dirt with a tiller than it is to move the dirt by hand so you end up not being able to use the tiller often enough in a short period of time making rental cost expensive. Also, manually moving lots of dirt by hand is incredibly tiring and time-consuming. Though renting an excavator seems like overkill ad expensive for a residential backyard, it’s actually not considering how easy it is to use and how quickly you can get a project done.
With two people working, one breaking up dirt with a tiller and the other moving dirt using an excavator, the project of removing dirt took only a day. The following tools were rented from the Home Depot.
Baretto Hydraulic Tiller – ~ $159 per day
Yanmar Mini Excavator – ~ $350 per day
Note:
There are many tillers but the best is the Baretto hydraulic tiller. It’s huge but it can break up hard dirt that hasn’t even been softened with water. It’s also easy to use but due to its size, it can’t break up dirt along edges like along a fence. This tiller also comes with a mini trailer so you can just tow it.
The mini excavator is 2′ 4″ wide so it can fit through a standard 3′ wide fence gate. It takes diesel gas but is very efficient.
Tip:
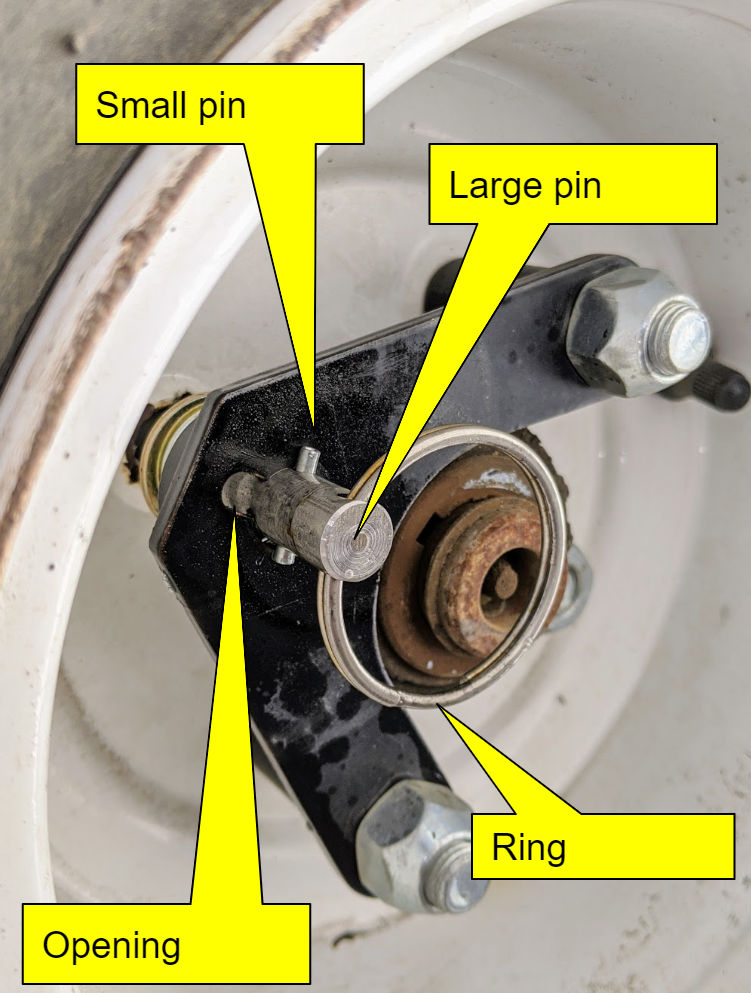
When using the tiller, you can pull the trigger to have the engine move the wheels forward and in reverse. However, the movement is very slow which is fine for when you’re actually tilling dirt. When you need to move the tiller from the trailer to your dirt, it’s must quicker and quieter to unlock the wheels and manually push the tiller with the engine off. To do that,
rotate the ring that’s attached to a large pin that goes into the wheel rim until the small pin that sits perpendicular to the large pin is aligned with the opening
pull the ring so that the small pin comes through the open and then rotate the ring so that the large pin is held out thereby unlocking the wheel from the engine. if you are unable to pull the ring, rotate it clockwise a few times and try again.
I have the MaxPower PivoTrim weed trimmer head because the spool type trimmer heads always get tangled. The MaxPower PivoTrim head makes replacing trimmer line super easy.
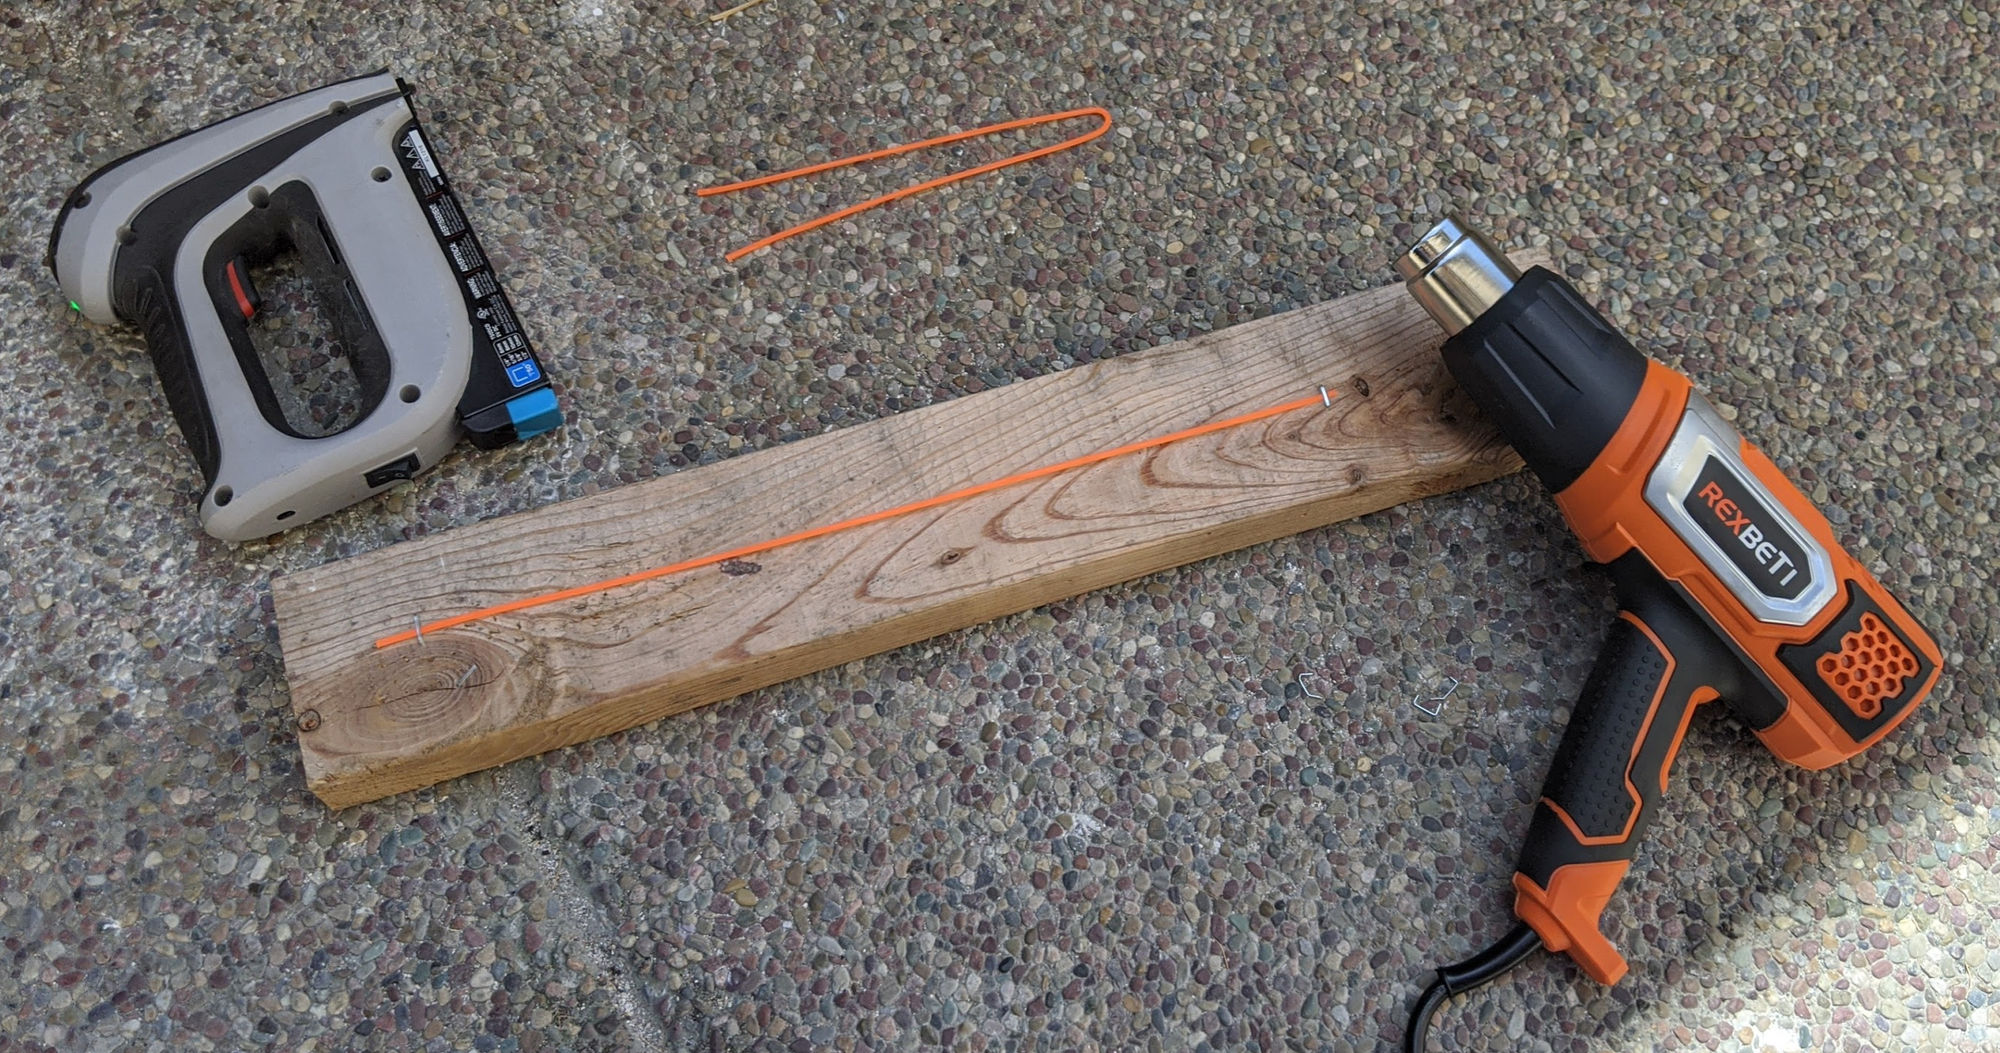
When I ran out of the trimmer line that came with the head, I bought a spool of new trimmer line. Unfortunately, when you cut some trimmer line and install it in the head, the line curves up or down instead of pointing straight out. So, I found a way to straighten the trimmer line. Below is a picture of the line straightened (left) and before it was straightened (right).
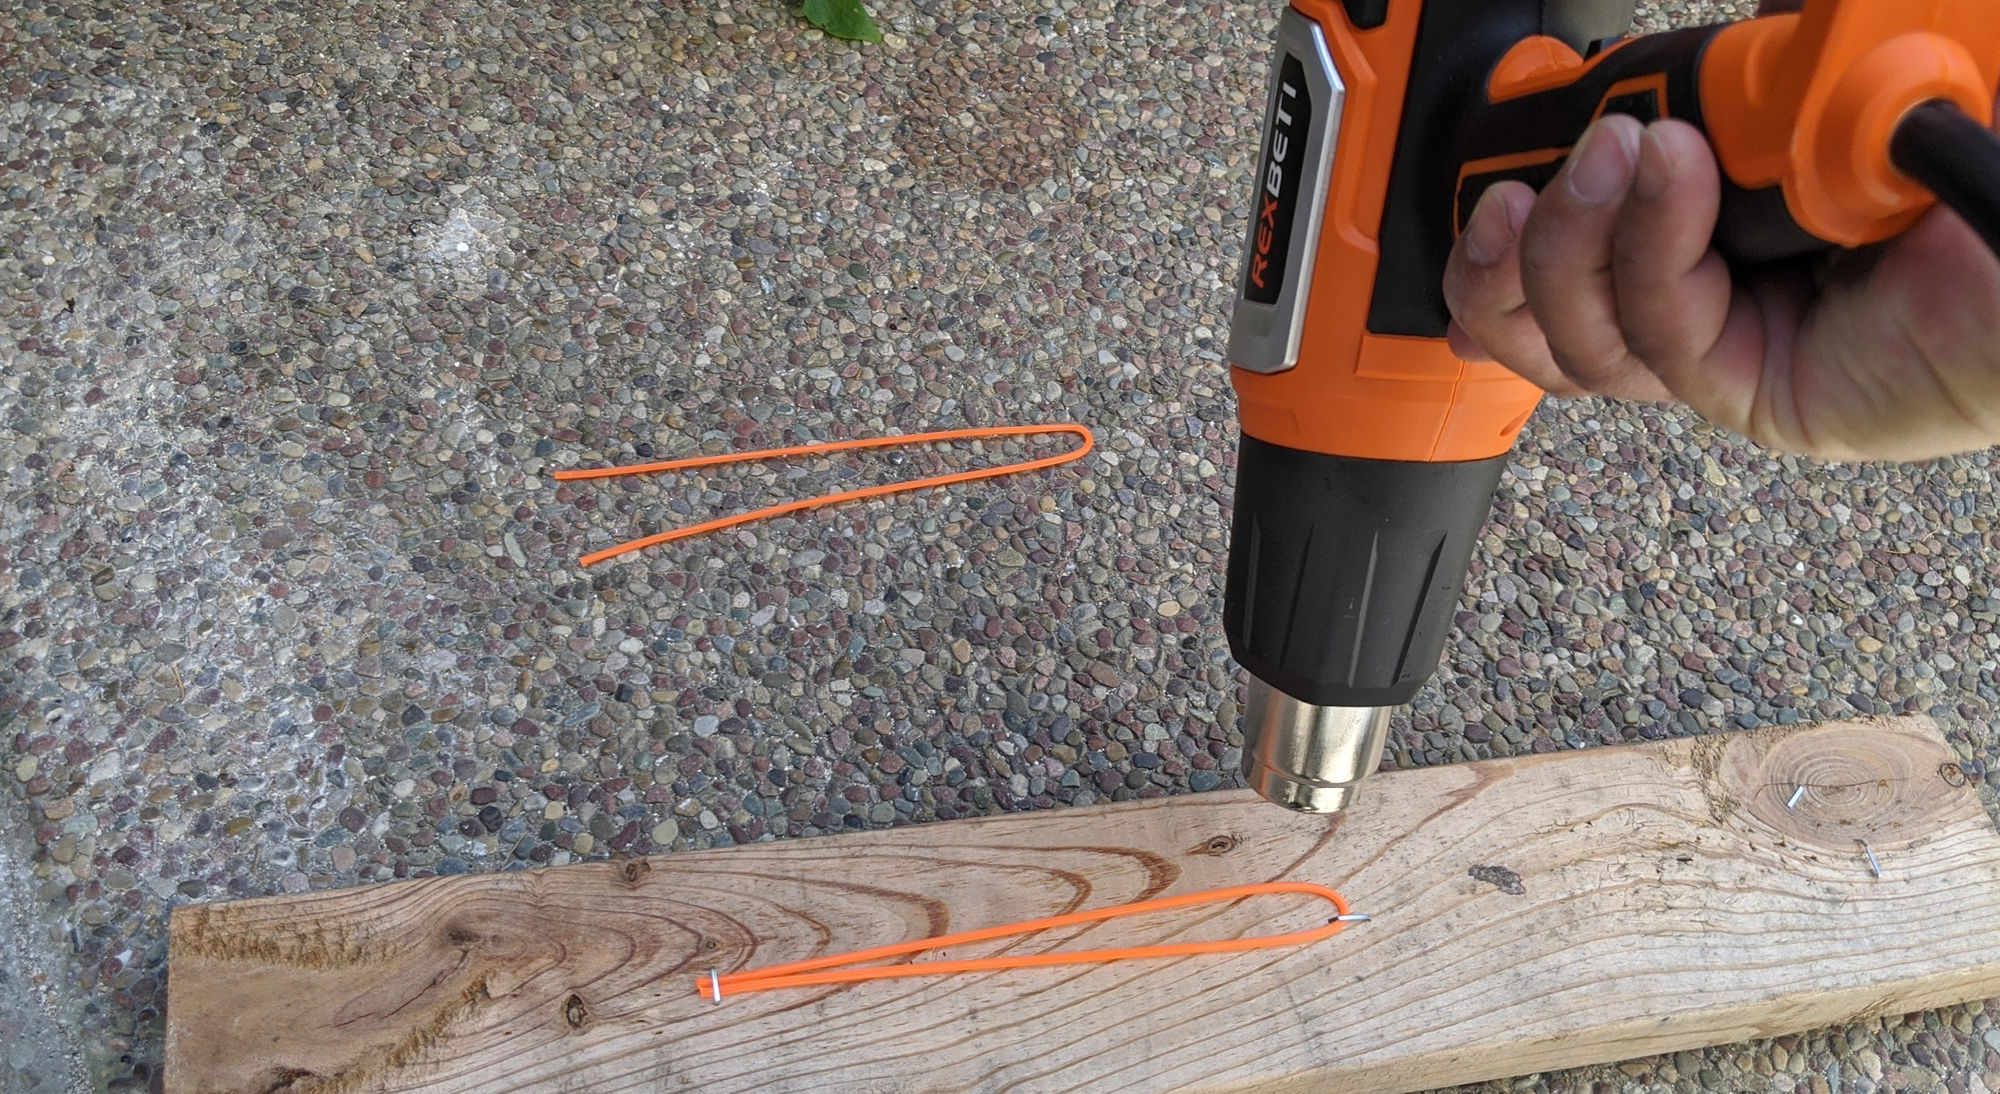
To straighten the line, I cut the line to length, stapled each end down to a piece of 2×4, took a heat gun and carefully heat up the plastic line to soften it and cause it to take on a new shape.
Then, I folded the straightened line in half and stapled each end down to the 2×4 and heat up the folded end so that it would remember that position.
The end result is trimmer lines that are straight and cut weeds better. Note, you may have better performance if you remove the plastic guard on the trimmer shaft.
If you take an mp4 (mpeg-4) video and put it in a video editing program like Corel VideoStudio and then render the same video without any other assets (images, audio, other videos, etc), then you may find that the resulting video becomes out-of-sync with the audio. To fix this, you can use Avidemux as follows.
Open the mp4 file in Avidemux
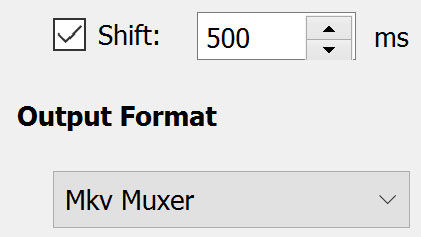
In the Audio Output section, check the Shift checkbox and enter a value in the time field. Note that 1 second = 1000 ms. For me, I found that 500 ms works.
Hit the play button and update the time shift value until the audio and the video are in sync.
In the Output Format section, choose Mkv Muxer. This will produce an mkv file. If you choose mp4 muxer, then the output audio will be out of sync with the video again. You can upload mkv files to YouTube.
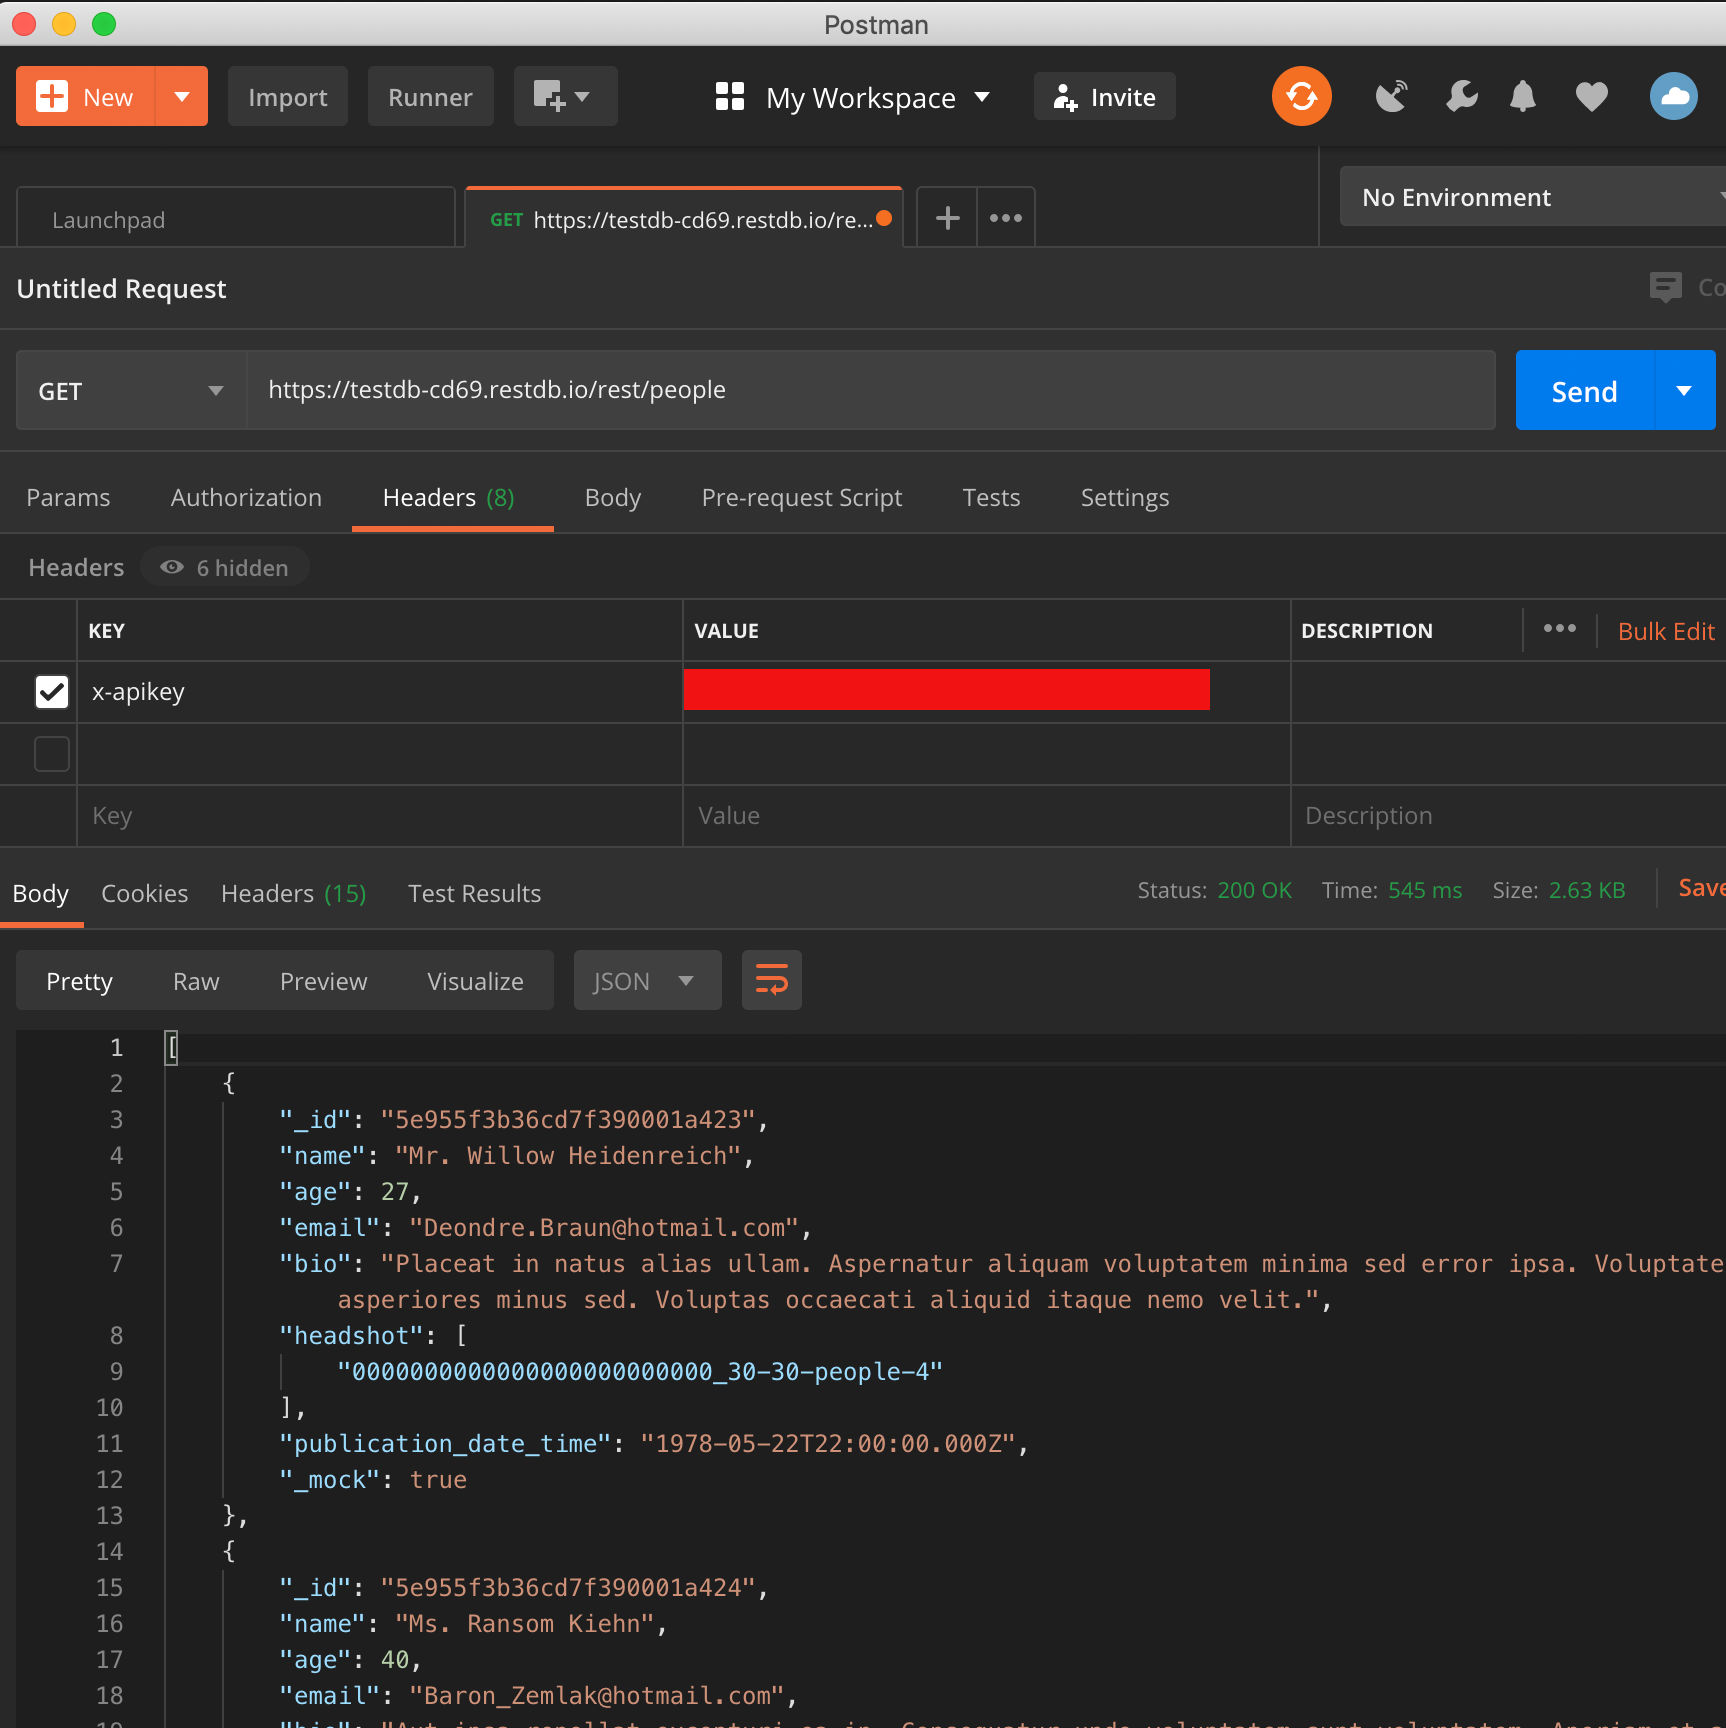
Testing HTTP connections and Rest APIs can easily be done using Postman. This handy tool allows you to provide HTTP headers, among many other things, to test connections and view responses.
Here’s a test of querying a Rest API from restdb.io. The query URL is https://testdb-cd69.restdb.io/rest/people. For authentication, an HTTP header called “x-apikey” is provided with its value (redacted). The response from the call is in the body panel in JSON format.
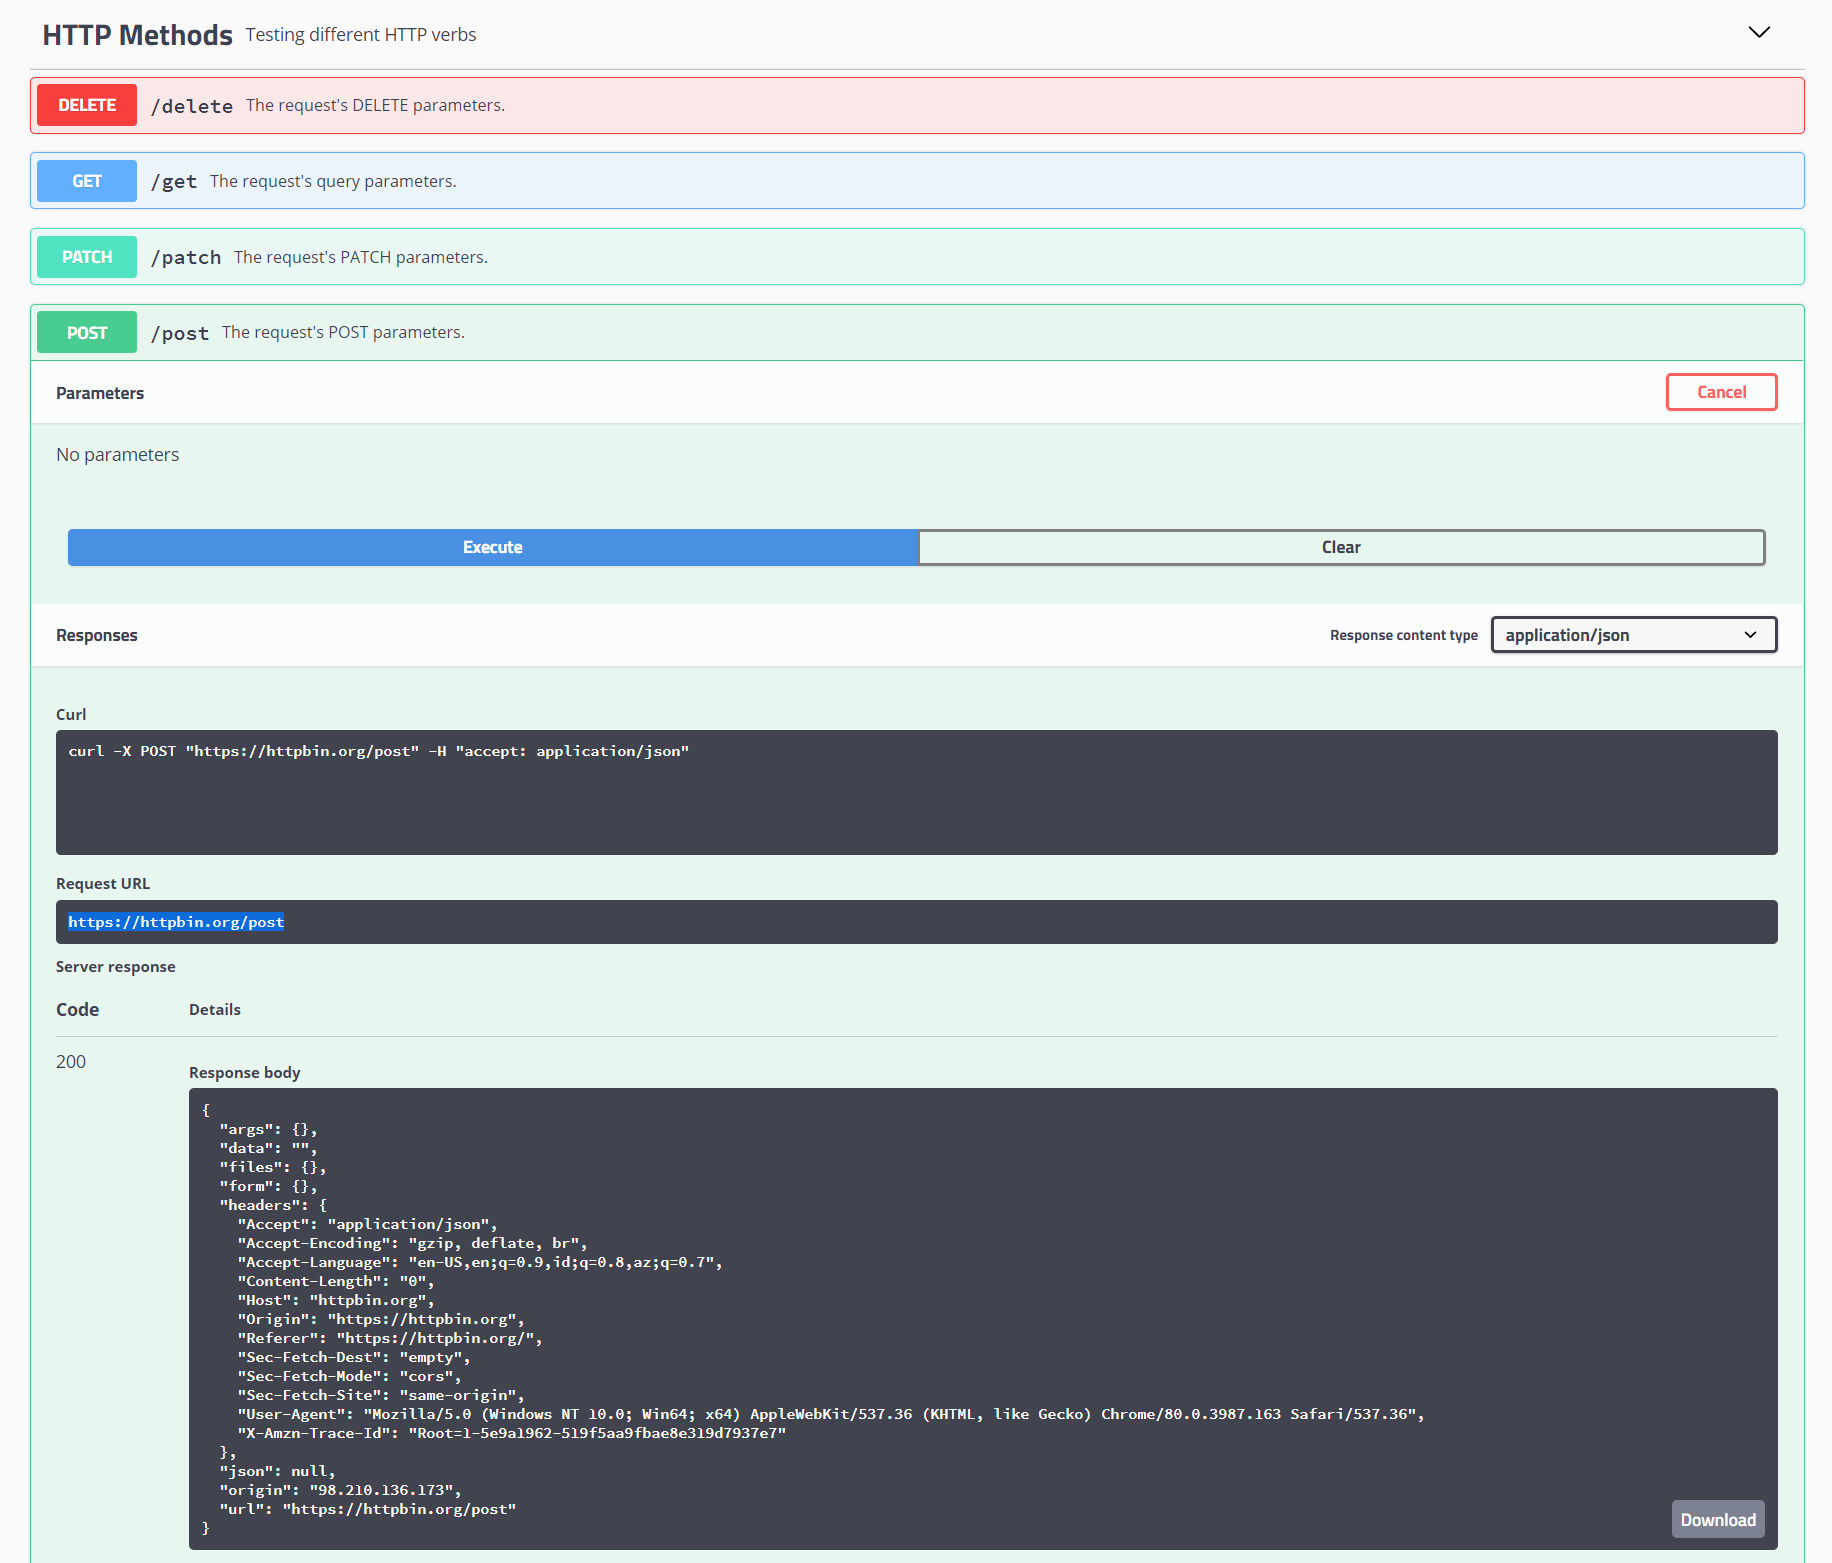
If you have a webhook or form that makes an http request to another system, you can test the request and see the response easily using httpbin.org.
For example, if you have a form that posts data, you can set the action attribute’s value to https://httpbin.org/post. Then, submit the form and you will see what the posts data looks like. This is great for testing.
If you need a quick and easy way to create a CMS (content management system) or a database backend for an app, then Restdb.io will amaze! Here are some features:
super developer-friendly with crystal clear documentation
affordable and even has a free plan
example code for popular programming languages, including client side JavaScript and server side NodeJS, which makes it quick to get up and running
webhooks whenever a record is created, updated or deleted
codehooks to run custom code before and after a record is created, updated or deleted, e.g. for data normalizing and validation. codehooks also support scheduled tasks like cron jobs.
auto-generate test data to seed a table
ability to import data from a CSV file
native and custom field validation
non-technical users can log in and add/edit/delete records using intuitive forms and controls without seeing any developer features
ability to upload and host images and files
Below is a tutorial on how to create a simple CRUD (Create, Read, Update, Delete) app using Restdb.io with a PHP backend.
1. Log in to Restdb.io account and create a table (collection)
After you log in, you’ll need to be in Developer Mode to create a table. When creating fields in the table, Restdb.io offers numerous field property options including native and custom field validation.
2. Add or import data
To populate the table, you can
Add data field by field, row by row
Import data from a CSV file
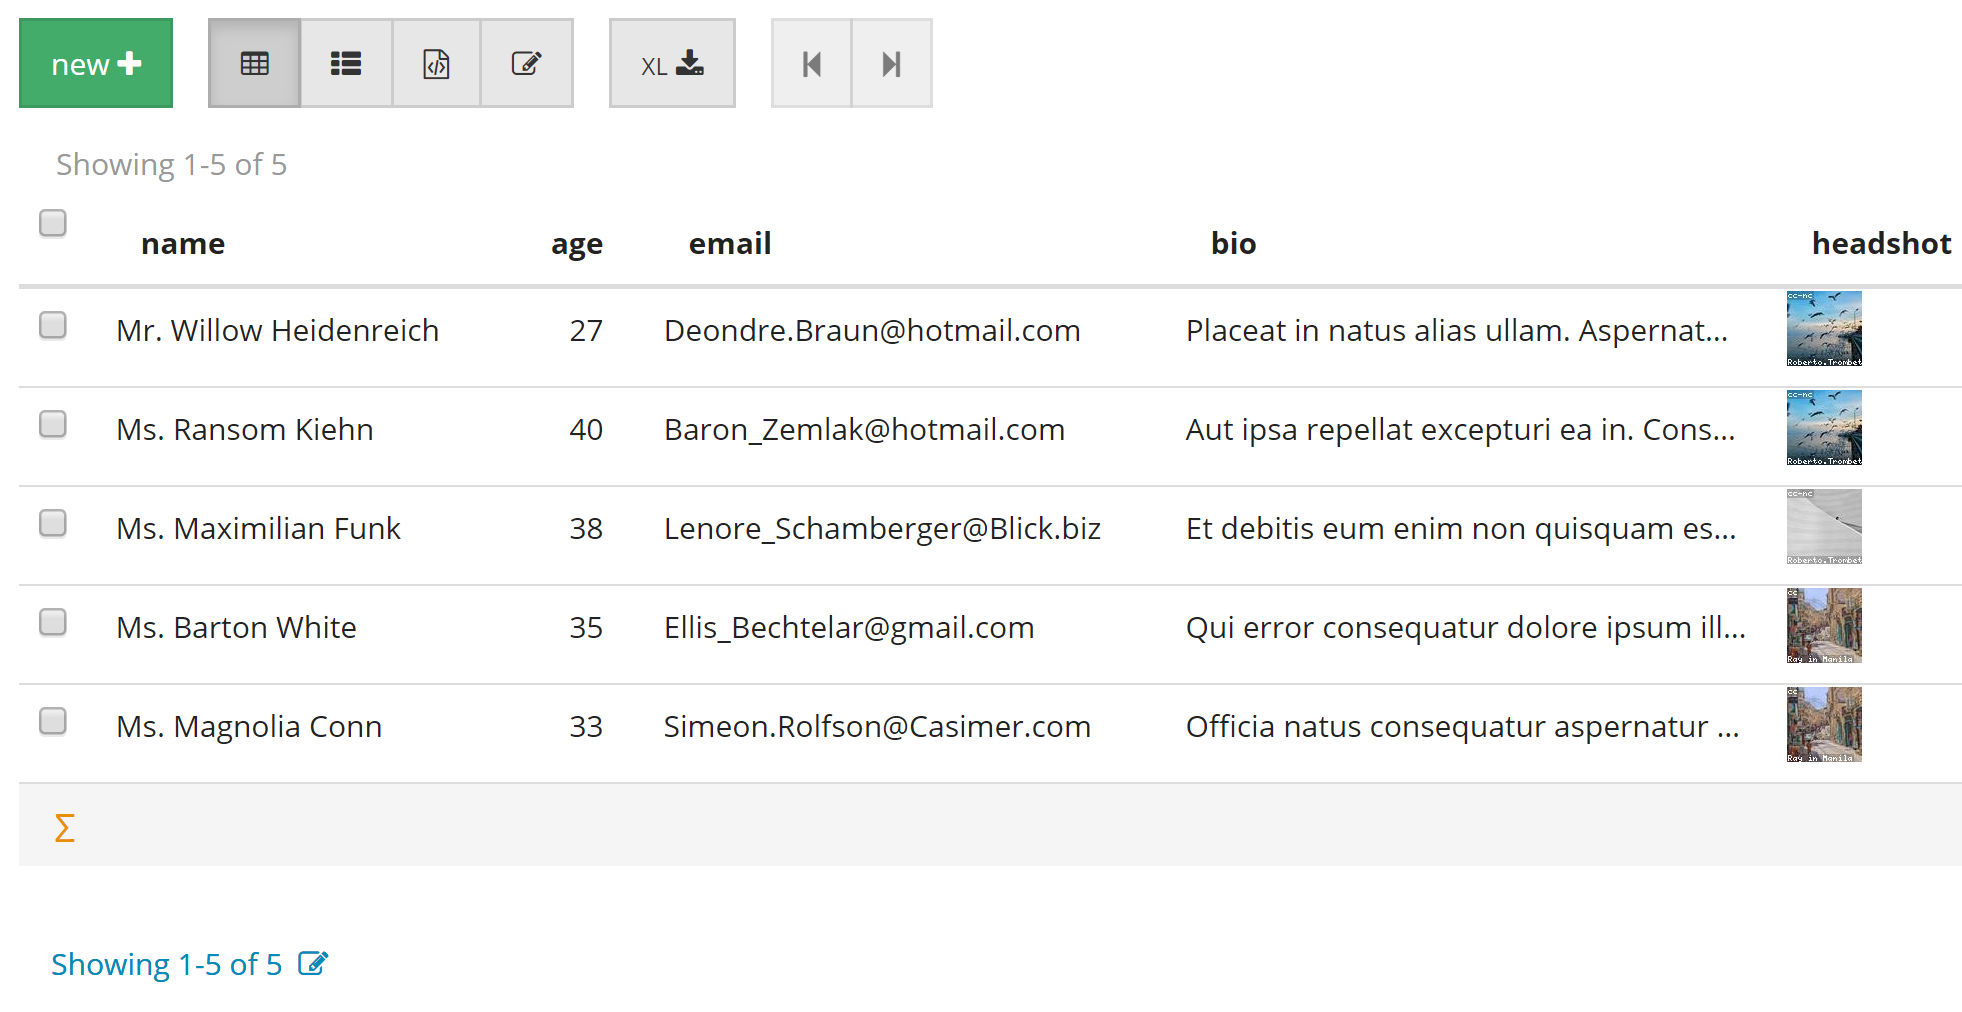
Auto-generate data by clicking on the Test Data tab
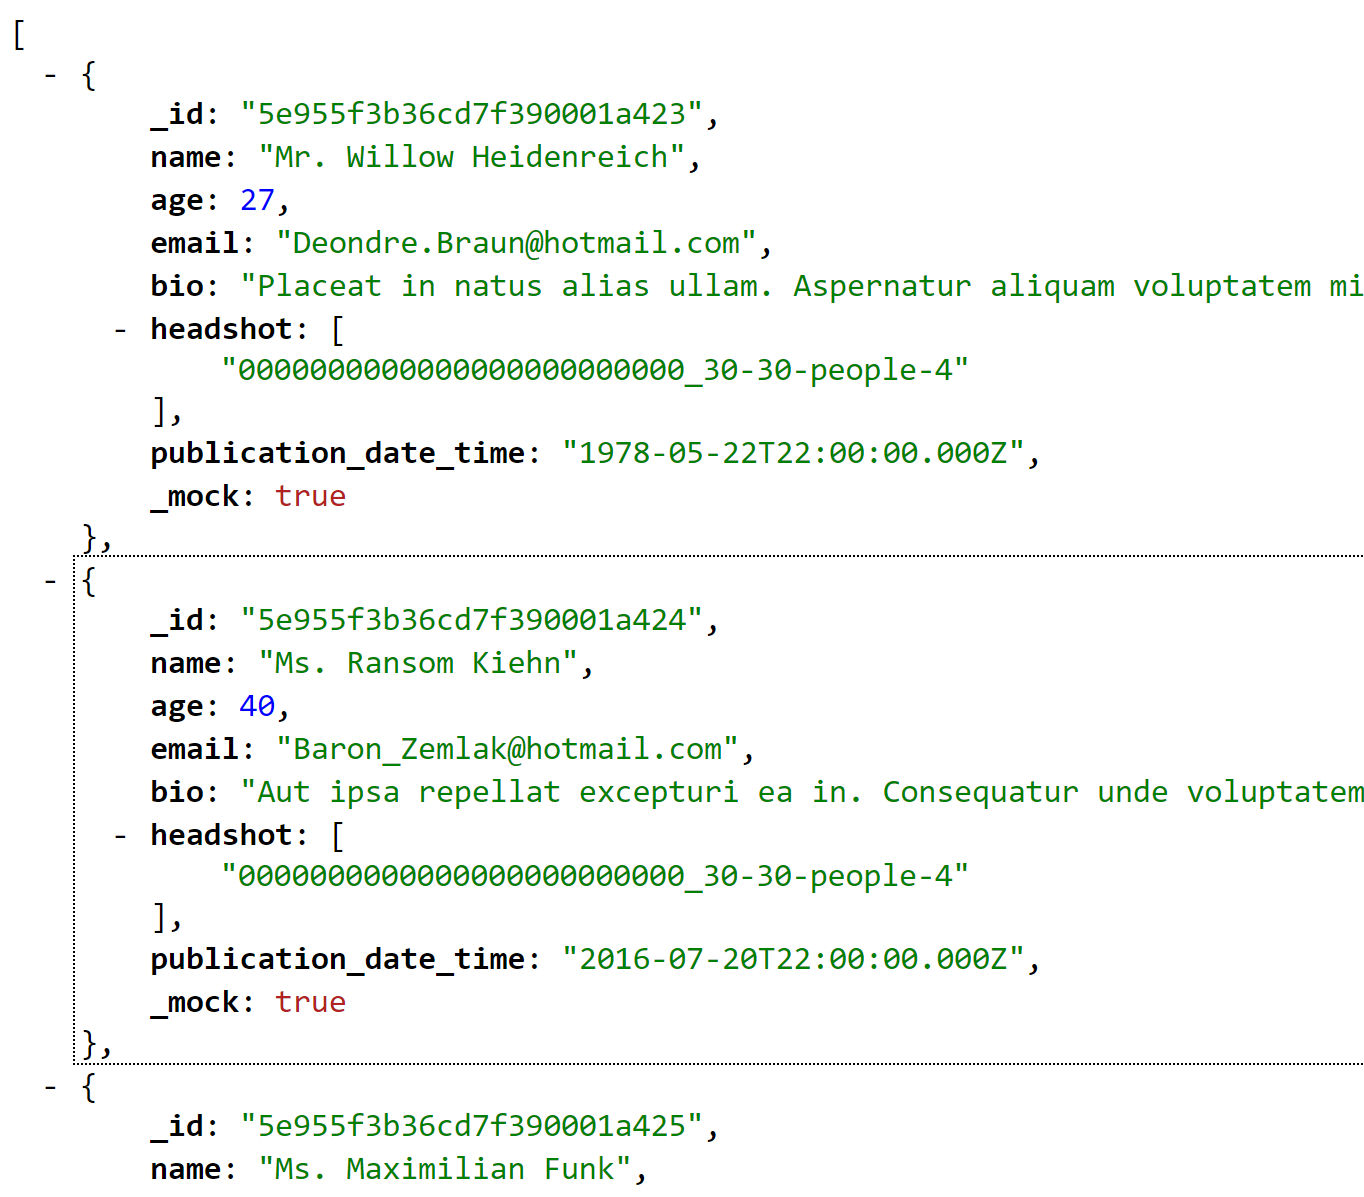
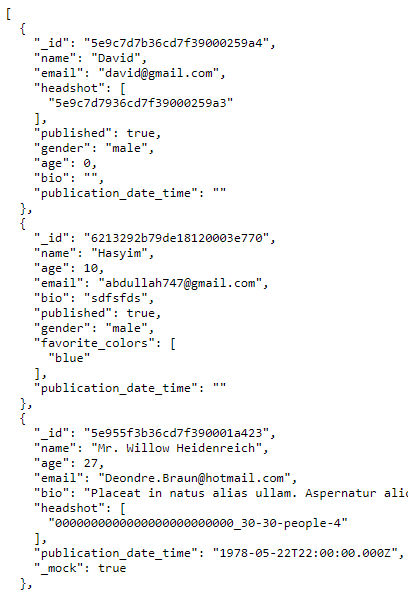
Using the Test Data option, I chose to generate 5 rows which gave me this.
3. Get sample CRUD code
Click on [Table] > API Docs and choose a language to see sample code for
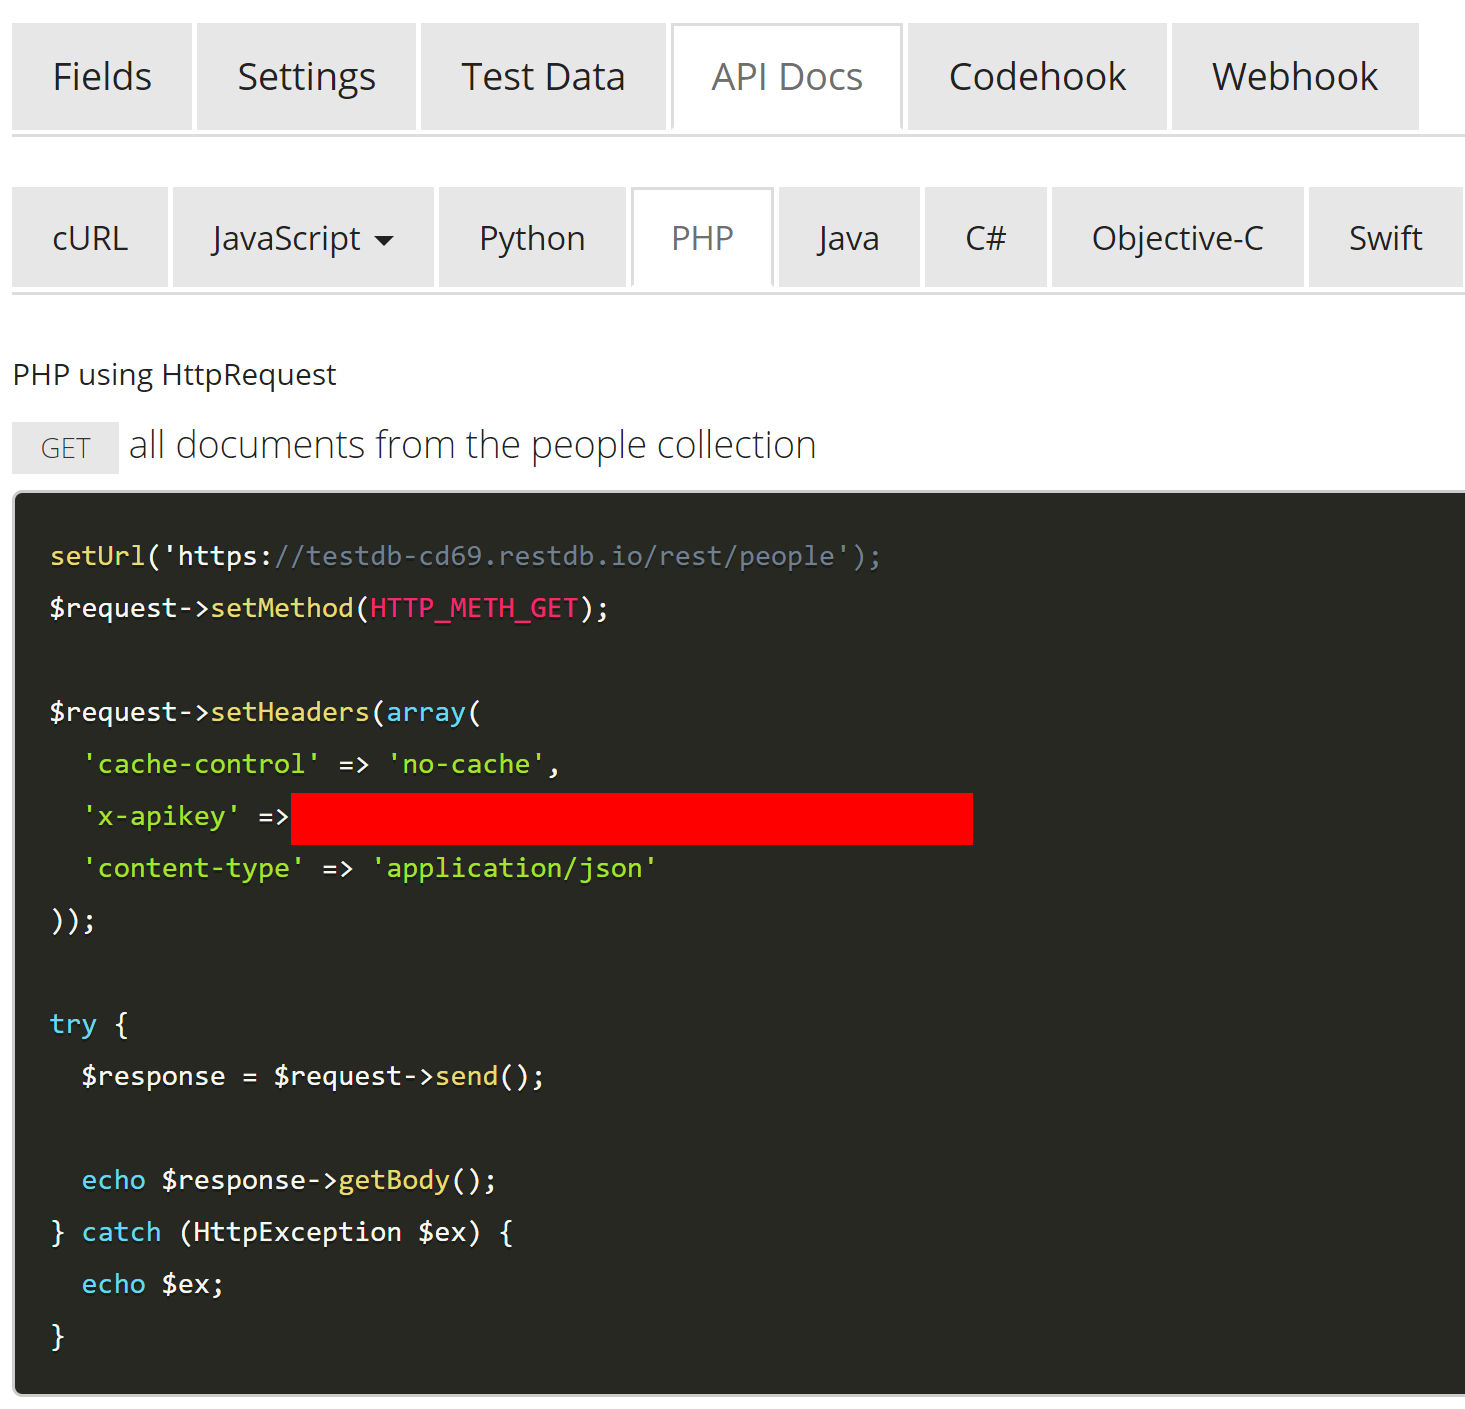
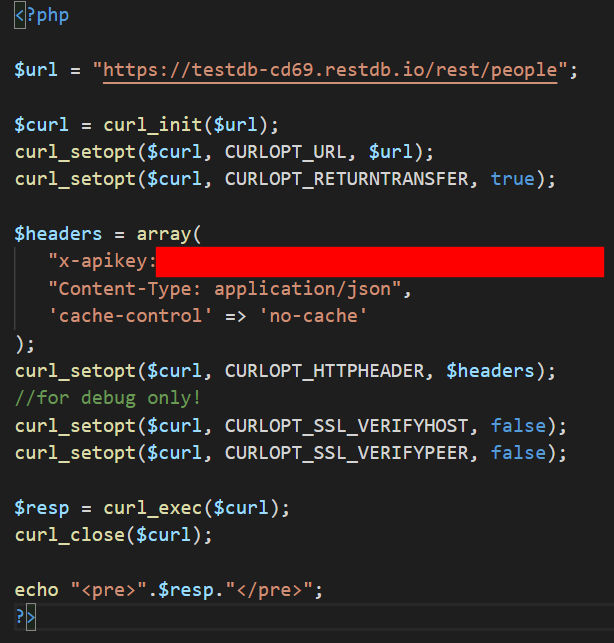
The sample PHP CRUD code provided by RestDB.io requires the use of the HttpRequest PEAR PECEL HTTP_Request extension. To avoid having to install this dependency, you can just use cURL which is included with PHP.
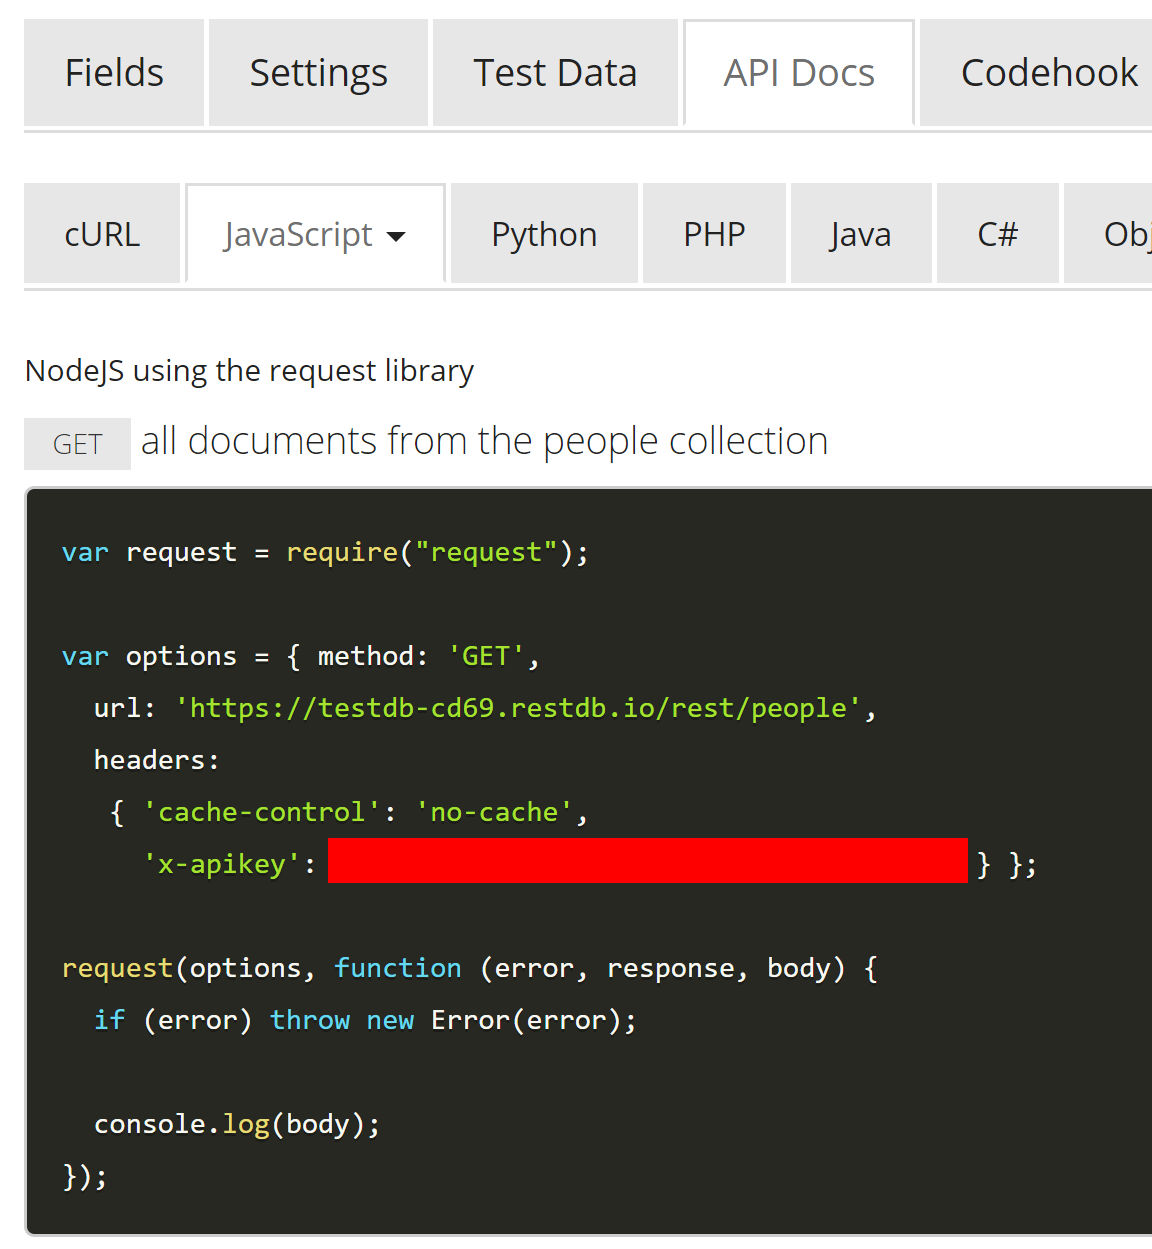
NodeJS
Below is a screenshot using NodeJS using the Request library.
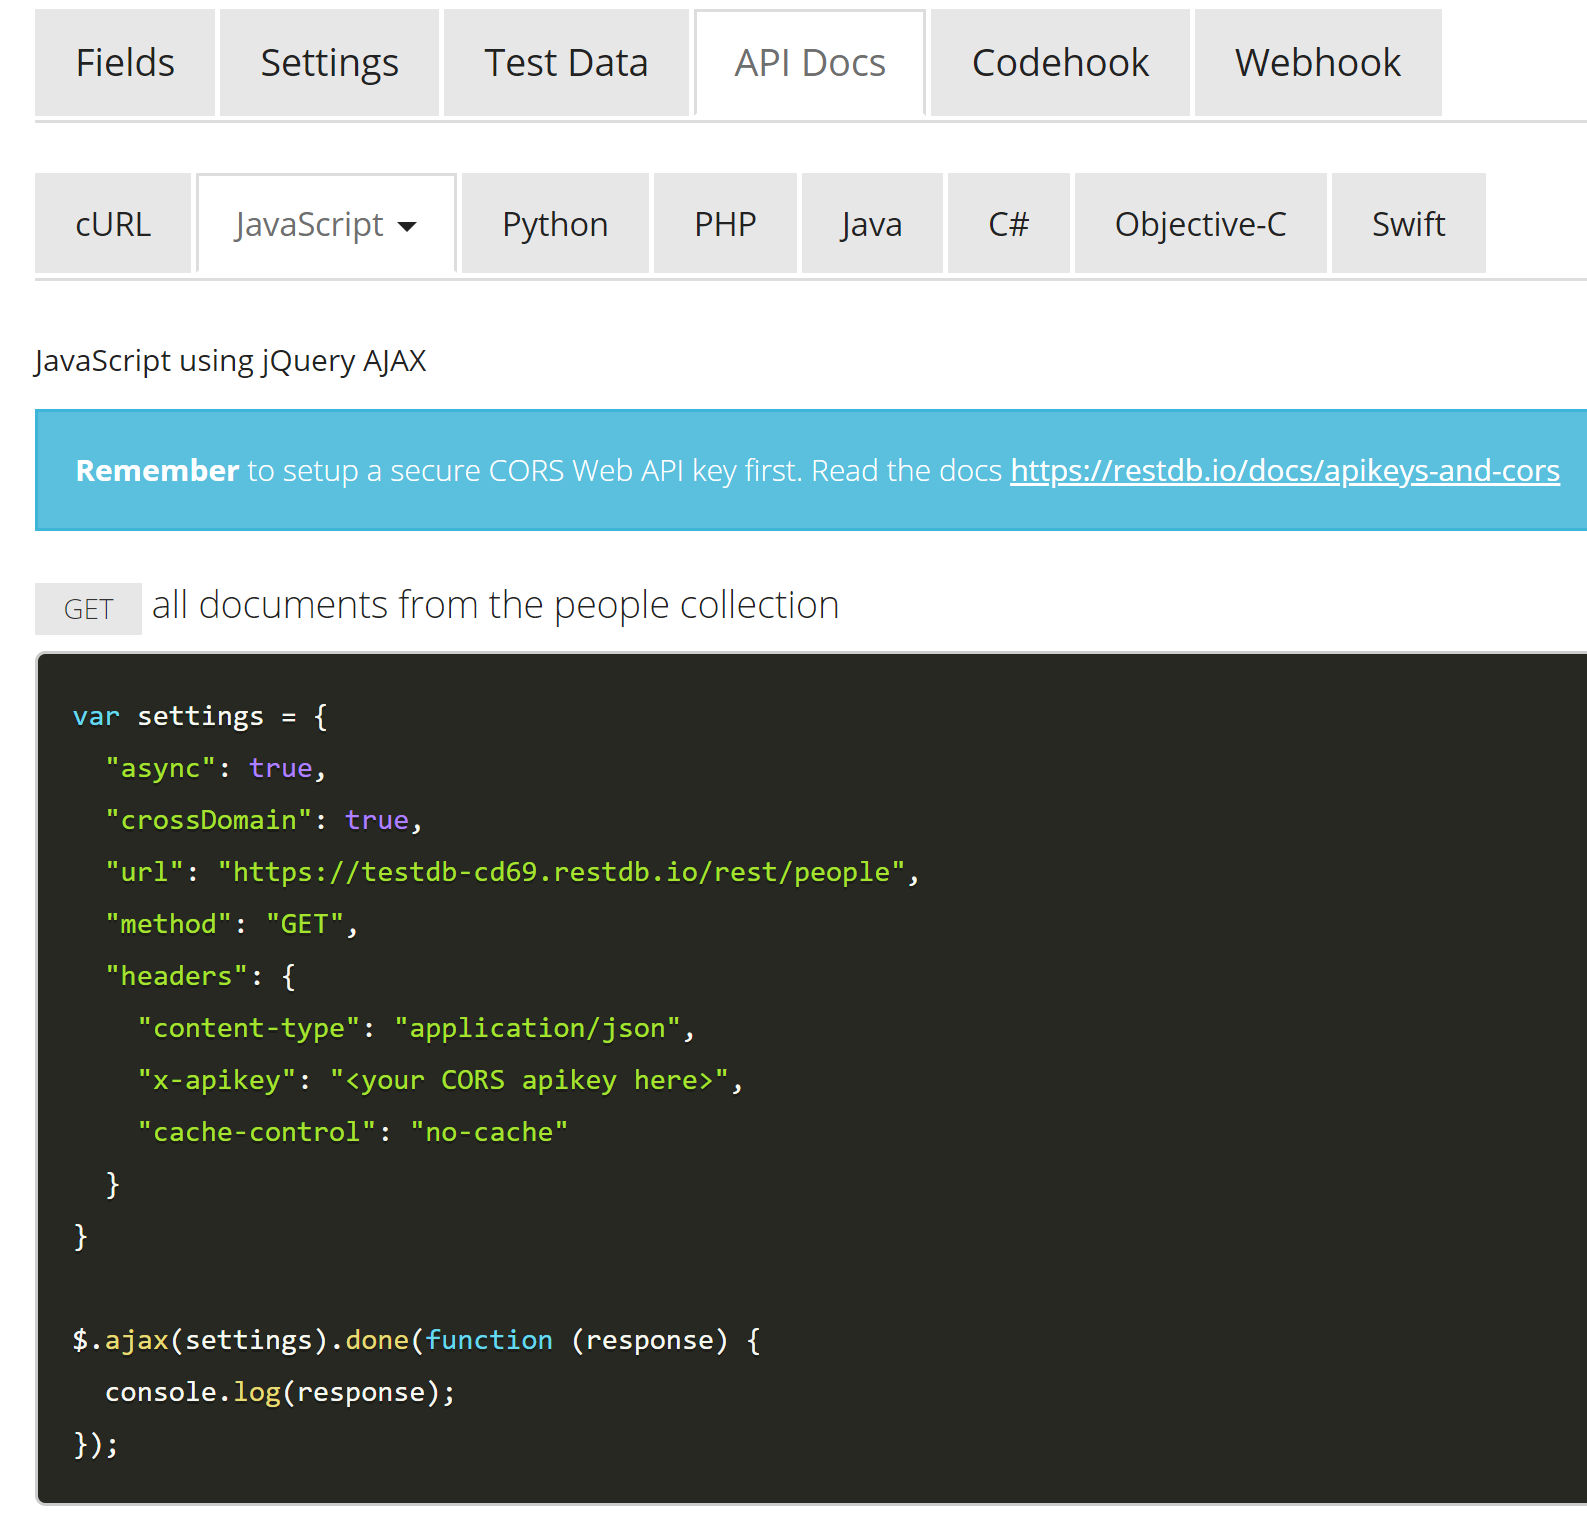
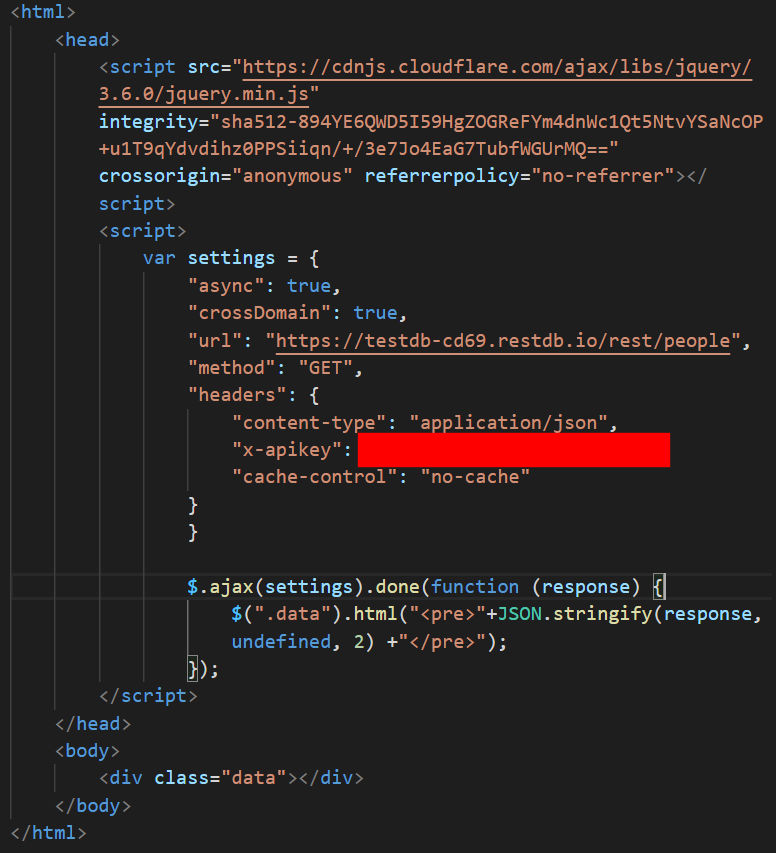
JavaScript using jQuery AJAX
You can also perform CRUD actions using client-side JavaScript but you need to set up CORS (cross-origin resource sharing). The example below shows JavaScript using jQuery AJAX.
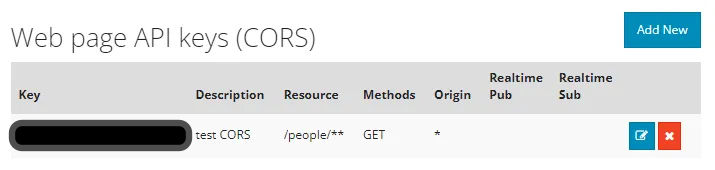
For client-side JavaScript, you need to generate a CORS API key. The screenshot below shows a CORS API key (redacted) that allows connections from any origin server but only allows the GET method to read data.
In the screenshot above, the API key would only work for the “people” table / collection. To have one key work for all tables / collections, use “/**” instead.
4. PHP: Create a file to test reading from the database
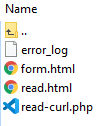
I created a test file called read-curl.php which uses cURL to connect to the remote database.
After uploading it to my web host, opening the file in a browser shows me the data in JSON format, as expected, which you can see live at http://zabuun.com/restdb.io/read-curl.php
You can also test the API by installing Postman (free), entering a query in the form of a REST URL, and entering your API key as an HTTP header.
4. JavaScript (jQuery + AJAX): Create a file to test reading from the database
I created a test file called read.html with the following code. This code uses the CORS key for cross-origin resource sharing.
After uploading it to my web host, opening the file in a browser shows me the data in JSON format, as expected, which you can see live at http://zabuun.com/restdb.io/read.html
If you have JSON data as in the example above, you can use Handlebars.JS to format the output in HTML.
5. Query data
When reading data from RestDB , you will often want to filter data based on conditions rather than retrieve an entire collection (all records). RestDB supports many MongoDB-like query syntax. Read the docs. Here’s an example of RestDB queries for equivalent relational DB SQL queries.
You can also aggregate data, e.g. min, max, avg, count, groupby, etc, using aggregation and grouping functions. Read the docs.
If you already have an entire JSON dataset and you want to query against it, you can use JSONata. JSONata is a lightweight query and transformation language for JSON data.
6. Auto-generate a web form
If you want to create a web form for public use, you can have restdb.io auto-generate one for you, complete with JavaScript validation and code to publish the data to your restdb.io database. See an example at
Below is a screenshot of my remote filesystem on a shared GoDaddy server. The error.log file is auto-generated.
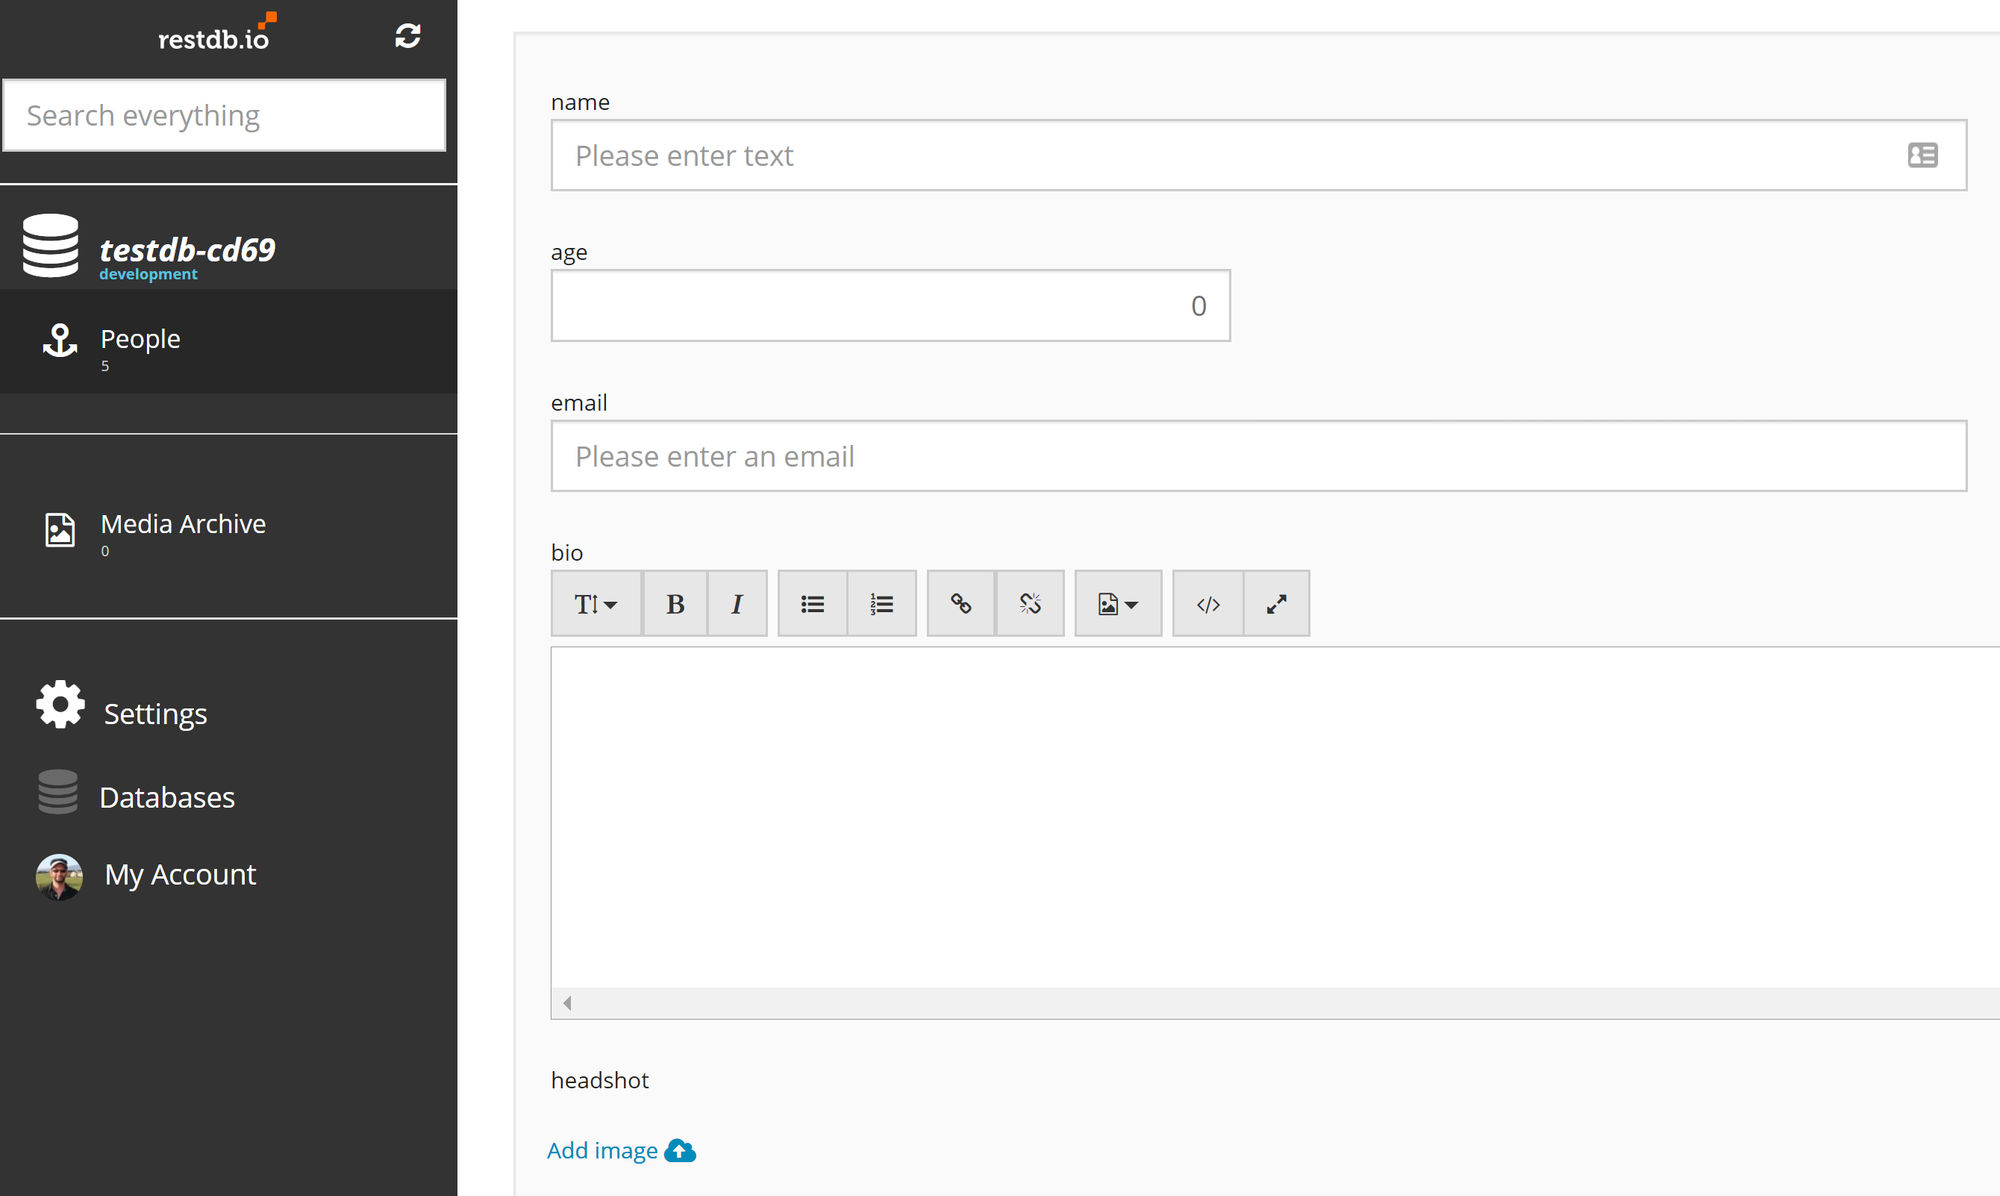
8. Create users with editor access
If you work with other developers or editors, you can give them role-based access to your restdb.io account to manage data. An editor, for example, will not see the developer features and can simply add records using a user-friendly web form like shown below.