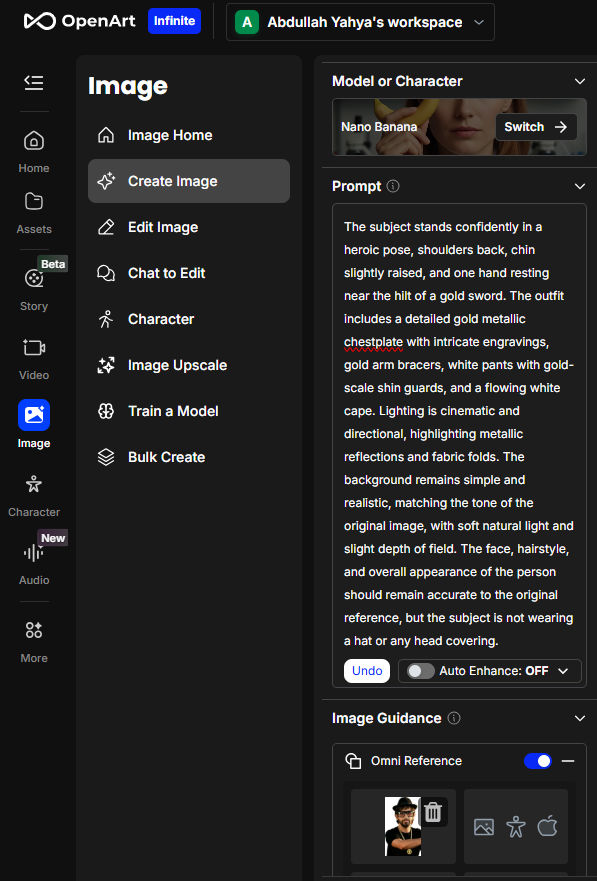
After testing various AI models to generate images of a character based on one or two reference character images, I have found SeeDream 4.0 to be the best. I’ve even found it to be much better than Google’s Nano Banana for this purpose. Here are some example SeeDream-generated images from two photos of me.
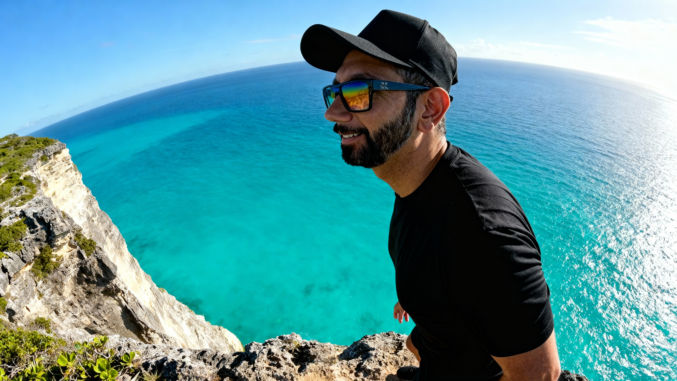
My Reference Photos


Prompts + Generated Images
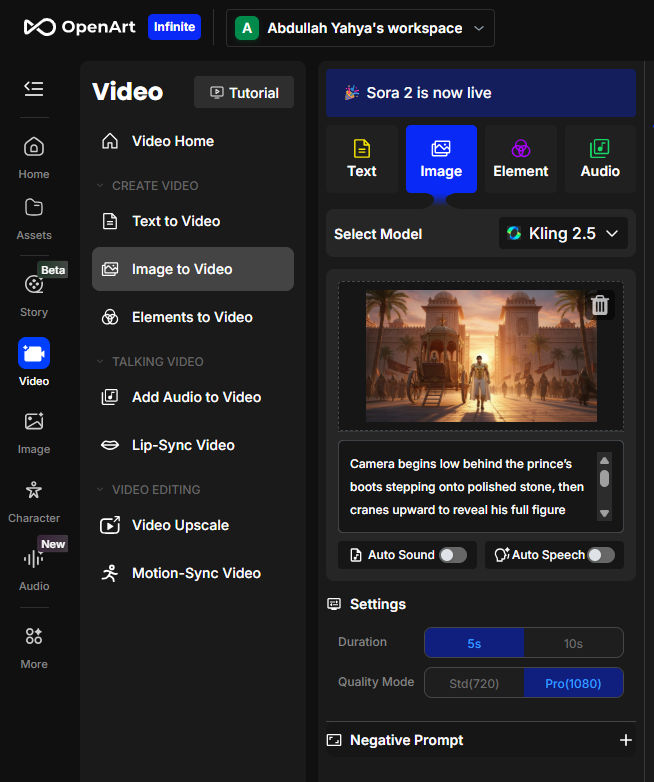
Note: With consistent character images, you can bring them into Kling AI as references to generate consistent-character videos.
Photorealistic cinematic medium shot of the man skiing, face uncovered, wearing his black hat and sunglasses, snow crystals clinging to his eyebrows and beard, breath visible in the cold air, cheeks flushed from exertion, eyes focused ahead, crisp alpine sunlight illuminating his face — ultra-realistic GoPro portrait with shallow depth of field and cinematic lighting. His entire face is visible.

Wide shot of the same man skiing down a pristine mountain slope, wearing a black baseball cap and semi-transparent gradient sunglasses. The camera faces him from the front, capturing his body leaning into a turn, powder snow flying, blue sky above, cinematic lighting, GoPro ultra-wide perspective.

Cinematic chest-up shot of the man wearing a black baseball cap forward and gradient sunglasses, ocean droplets on his face and shoulders, sunlight reflecting in his lenses, deep blue waves behind him, captured from a GoPro mounted near the surfboard’s nose.

Wide front-side GoPro shot of the man surfing a curling turquoise wave, wearing his black baseball cap and gradient sunglasses, camera facing him from low on the wave surface, dynamic water spray and cinematic sunlight.

Chest-up shot of the man free-falling through a bright blue sky, wearing a black baseball cap forward and gradient sunglasses, wind sweeping his jacket and straps, sunlight reflecting off his glasses, clouds far below, cinematic color and realism.

Wide cinematic shot of the man skydiving, body stretched out and stable, camera facing him from the front at mid-distance, black cap and sunglasses clearly visible, clouds and the earth below in vast perspective, soft sun haze.

Chest-up shot of the man riding a sports motorcycle, wearing a black baseball cap facing forward and gradient sunglasses, wind flowing through his clothes, warm golden-hour lighting, GoPro mounted near the handlebars, cinematic clarity.
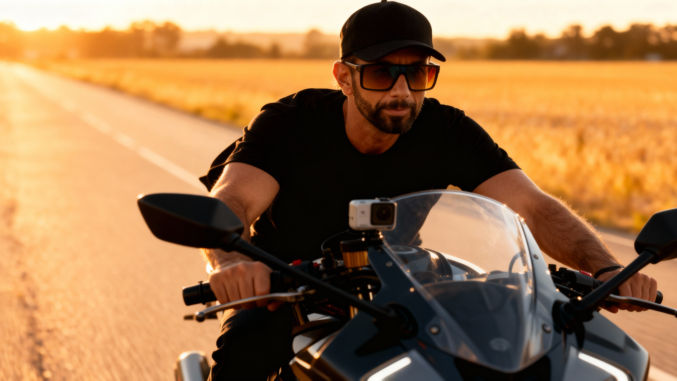
Wide front-side GoPro shot of the man on a motorcycle, black cap and gradient sunglasses visible, leaning slightly into a curve, mountain road ahead, trees and sunlight framing the motion, cinematic outdoor tone.

Wide underwater GoPro shot of the man swimming near a massive whale, camera facing him from the front, black swim cap and swimming goggles visible, sunlight streaming through the blue water, cinematic and peaceful tone.

Cinematic chest-up side-profile shot of a man in a helicopter cockpit, camera positioned slightly in front and to the left of him, showing the cockpit controls in front of him and his face in profile as he pilots, wearing a black baseball cap facing forward and semi-transparent gradient sunglasses, sunlight streaming through the windshield, clouds ahead, highly realistic lighting and detail.
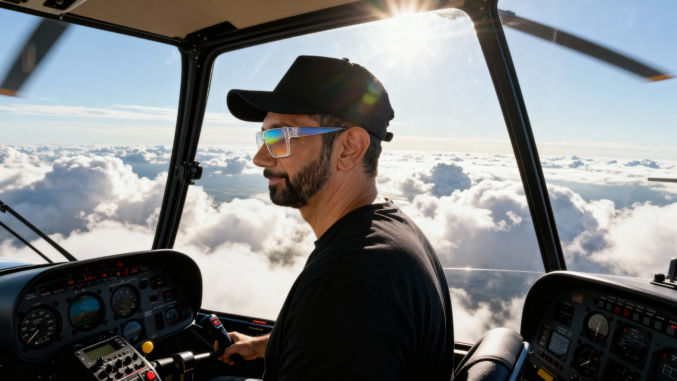
Wide front-side shot from outside the helicopter, camera hovering just ahead of the cockpit, showing the man’s face through the glass, wearing a black baseball cap and gradient sunglasses, mountain clouds around the aircraft, cinematic aerial composition.

Cinematic chest-up side-angle shot of a man actively climbing a rugged rock wall, camera positioned slightly below and to his right, angled upward toward his face. He’s wearing a black baseball cap facing forward, semi-transparent gradient sunglasses, and mountain-climbing gear with a harness, rope, and gloves. His left hand grips a rock hold firmly while his right hand reaches upward, sunlight illuminating his face and the textured stone surface. Sharp, realistic detail with warm mountain tones.

Wide front-side GoPro shot showing the man mid-climb on a tall cliff face, wearing a black baseball cap, gradient sunglasses, and full climbing gear. Camera positioned several meters away at a diagonal angle showing his full body against a vast mountain backdrop. His left leg is bent, right leg extended, and the valley below stretches into hazy sunlight. Cinematic scale and clarity.

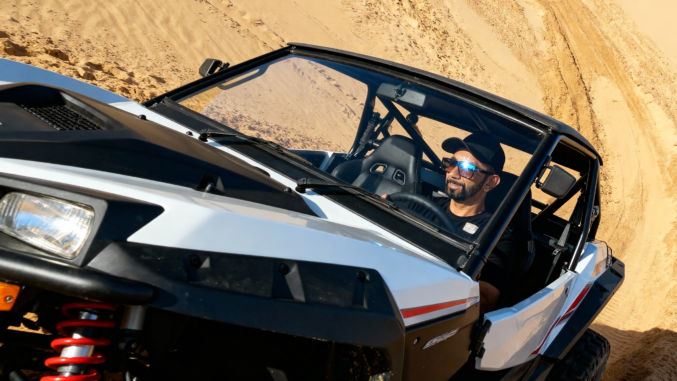
Chest-up shot from a GoPro mounted near the motorcycle’s front handlebars, camera angled slightly upward toward the man’s face as he rides. He’s wearing a black baseball cap facing forward, gradient sunglasses, and gloves. Dust trails swirl behind him under golden desert sunlight, with blurred dunes in the background. Cinematic and ultra-realistic motion energy.
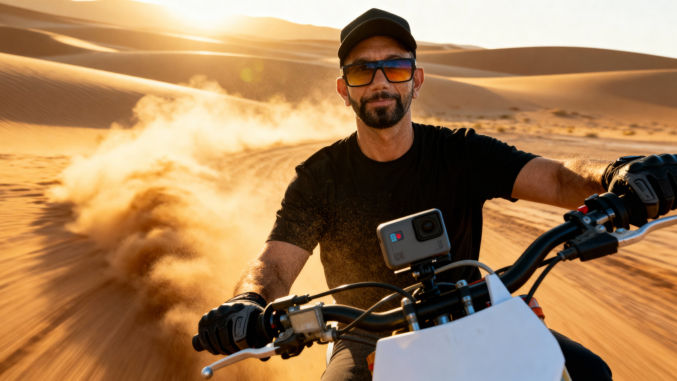
Wide front-side shot of the man speeding across desert dunes on a dirt bike, camera hovering ahead and slightly to the right of the vehicle. He wears a black cap, gradient sunglasses, and gloves. Sand sprays from his back tire as he leans into a curve, sunlight casting long shadows across rippling dunes. Cinematic wide desert action.

Chest-up shot from a GoPro mounted on the kayak’s bow, camera angled back toward the man’s upper body and face. He’s wearing a black baseball cap forward, gradient sunglasses, a water-resistant jacket, and a life vest. His arms are mid-stroke with a double-bladed paddle, water splashing upward, sunlight sparkling on droplets, dynamic river motion, cinematic realism.
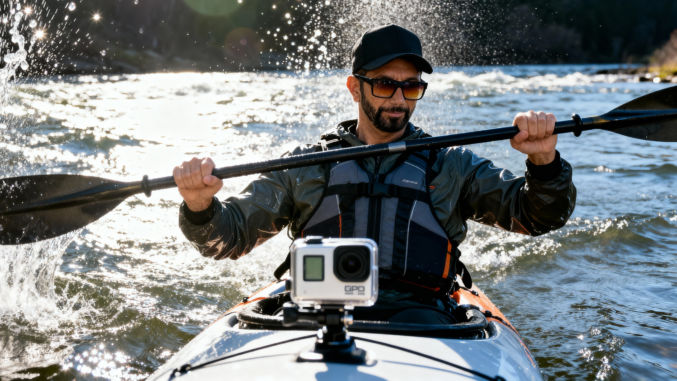
Wide front-side GoPro shot from low on the river surface, camera facing the man as he navigates a turbulent section of rapids. He’s wearing his black cap and gradient sunglasses, gripping the paddle firmly, kayak tilted slightly as water churns around him, cinematic sunlight filtering through mist.

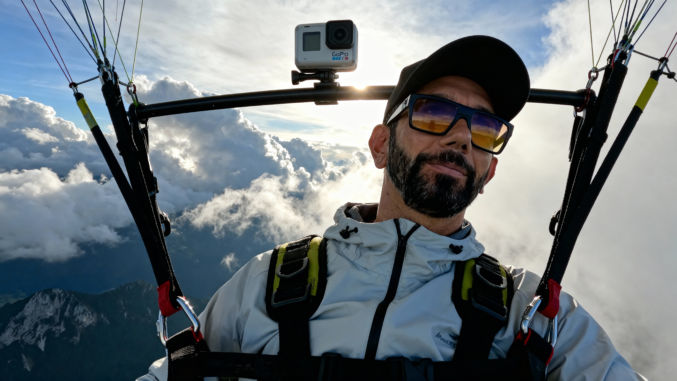
Chest-up shot from a GoPro mounted on the paraglider harness bar, camera angled slightly upward toward the man’s face. He’s wearing a black baseball cap facing forward, gradient sunglasses, a light windbreaker, and safety harness straps. Clouds drift behind him, sunlight flaring through, mountain peaks faintly visible below, cinematic aerial serenity.
Drone shot showing the man from the chest up as he hikes through a dense green forest. The camera hovers at eye level slightly ahead of him, capturing his focused face under a black baseball cap and gradient sunglasses. Sunlight filters through tree leaves, creating a shadow across his jacket and backpack straps, cinematic natural lighting.

Wide drone shot slightly elevated in front of the man as he walks between tall pine trees. His cap and sunglasses reflect the early morning light while his backpack swings gently with his steps. Mist floats through the shafts of sunlight, cinematic forest depth.

Drone hovering close to the cliff edge on the side of the man, capturing his profile from the chest up as he stands poised ready to jump from above the turquoise ocean below. His black cap and gradient sunglasses face forward. Behind him, the vast sea glimmers beneath a bright sky, cinematic tension and anticipation.
Wide drone shot halfway between the top of a cliff and the ocean below showing the side/profile of the man mid-air after jumping from the cliff, face down, feet up, and body stretched toward the turquoise ocean water below. His face and cap visible from the side, cinematic natural lighting and energy.

Drone hovering ahead of the man, showing him from the chest up as he snowboards down a slope. He wears a black cap, gradient sunglasses, insulated jacket, and gloves. Snow trails burst behind him as he cuts through the powder under a bright winter sky, cinematic frozen landscape.

Drone shot showing the man from the chest up as he wakeboards across a shimmering blue lake. The drone hovers ahead and slightly above, facing him directly. He wears a black cap, gradient sunglasses, and life vest, holding the tow rope tightly, droplets splashing midair, cinematic high-speed energy.

Wide drone shot showing the man wakeboarding across open water, his body leaning slightly as he balances on the board. The drone moves ahead and to the side, keeping his face visible as water trails behind him in sparkling arcs, cinematic energy and clarity. The drone is not visible in the image. He wears a black cap, gradient sunglasses, and life vest.

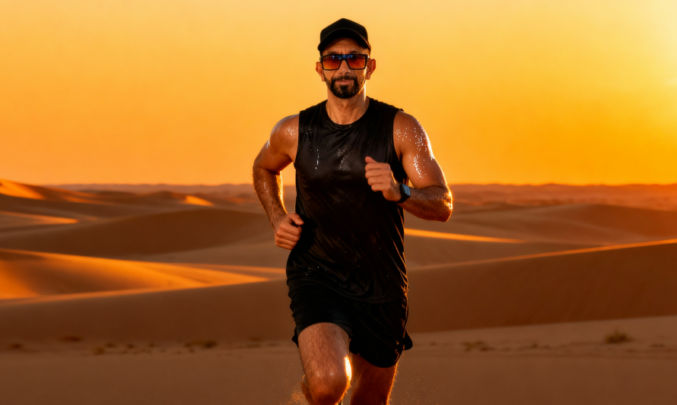
Drone hovering ahead of the man at chest height as he runs across a wide desert plain. His black baseball cap and gradient sunglasses stand out against the golden dunes. He wears a sleeveless athletic shirt, sweat and dust on his skin, sunlight glowing in orange hues, cinematic desert light.
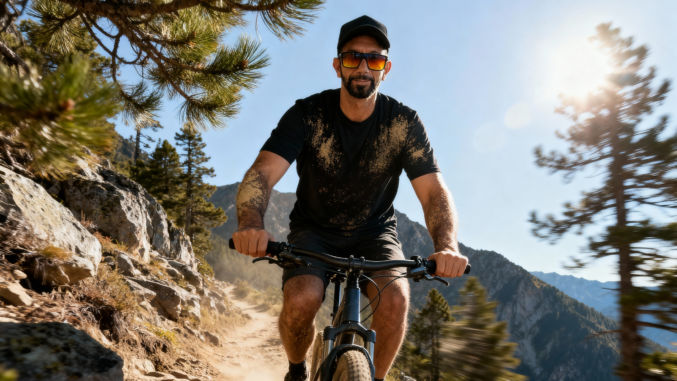
Drone hovering ahead of the man at chest height as he pedals up a rugged mountain trail, black baseball cap facing forward and gradient sunglasses catching the sunlight. His shirt and arms are dusted from the trail, and trees blur behind him as sunlight filters through pine branches, cinematic outdoor realism.
Wide drone shot from a front-side angle showing the man biking along a narrow ridge path surrounded by green valleys below. His black cap and sunglasses glint in the sun as the trail twists ahead, cinematic adventure composition.

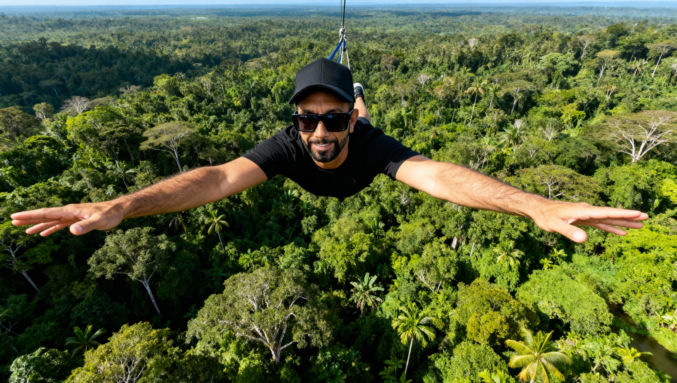
Drone hovering ahead of the man, chest-up shot showing him ziplining through a lush tropical jungle. He wears a black baseball cap and gradient sunglasses, his shirt rippling from the wind, treetops blurring behind him, cinematic motion and sunlight streaming through green canopy.

Wide drone shot capturing the man ziplining high over dense jungle canopy, seen from a front angle that shows his face. His cap and sunglasses are visible, body extended midair, forest stretching below in cinematic scale. The drone is not visible in the image.
Drone hovering just above the sailboat deck, chest-up view of the man at the helm steering through calm blue water. He wears a black baseball cap and gradient sunglasses, soft wind rippling his shirt, ocean horizon stretching behind him, cinematic ocean serenity.

Cinematic chest-up shot of the man standing inside a colorful hot air balloon basket. The camera is positioned level with his chest, facing his face at a 45-degree angle from the front as the balloon floats above scattered clouds. He wears a black baseball cap and gradient sunglasses, his face softly illuminated by golden morning light. The colorful canopy rises above him, adding visual warmth and adventure.

Cinematic chest-up shot of a man standing on the deck of a fishing boat, holding a fishing rod angled toward the sea. The camera is positioned at chest height, facing him slightly from the side so that both his expression and the ocean behind him are visible. He wears a black baseball cap and gradient sunglasses, wind brushing against his shirt, sunlight reflecting on the waves, cinematic natural realism.

Cinematic chest-up shot of a man riding a horse across an open golden plain at sunset. The camera faces him slightly from the front at chest level. He wears a black baseball cap forward, gradient sunglasses, and short hair (no long hair at the back). The sunlight warms his face, cinematic natural beauty and motion.

Wide cinematic shot showing the man on horseback galloping across the open field, the horizon glowing orange behind him. His face is visible under a black cap and sunglasses, short hair beneath. Dust and grass swirl around, cinematic sweeping grandeur.

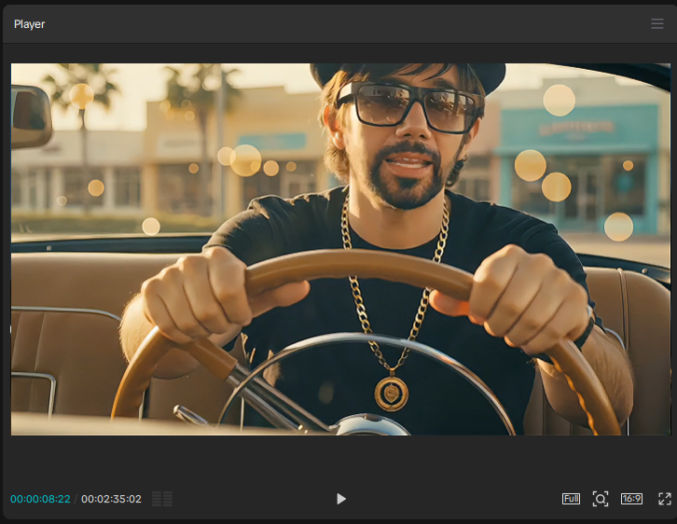
Cinematic chest-up shot of the man driving a vintage convertible along a coastal highway. The camera faces him from the passenger side, sunlight reflecting off his gradient sunglasses. He wears a black baseball cap forward and short hair, no long hair at the back. The ocean glimmers beyond the road, cinematic freedom and motion.

Cinematic chest-up shot of a man sandboarding down a tall golden dune, even though only his upper body is visible. The camera faces him from the front at chest level, capturing grains of sand flying around. He wears a black baseball cap forward, gradient sunglasses, and has short hair. His shirt ripples in the desert wind under warm sunset light, cinematic thrill and freedom.

Wide cinematic shot of the man carving across a massive dune while standing on a sandboard, his body angled into the slope as sand billows behind. The camera faces him from the front-side, 45 degrees from the front of his face, showing his all-black cap, and sunglasses illuminated by the sunset glow, cinematic desert scale. He has no hair at the back of his head.

Cinematic chest-up shot of a man trekking a rugged volcanic ridge, visible from chest up with his hiking backpack straps showing. The camera faces him slightly from below. He wears a black baseball cap, gradient sunglasses, and a determined look. Faint volcanic steam rises behind him, cinematic endurance and heat.

Wide cinematic shot from the side of the man walking along the sharp crest of a volcanic ridge. His face is visible under the black cap and sunglasses, catching the backlight, cinematic scale and strength.

Wide cinematic shot of a dune buggy going up the side of a steep sand dune, camera facing the front corner of the vehicle. The man’s face is visible through the open window, cap and sunglasses reflecting sunlight, cinematic rugged adventure.
Wide cinematic shot of the man crossing the middle of a long bridge stretched over a deep canyon, facing forward. His cap and sunglasses glint in sunlight, cinematic height and bravery.

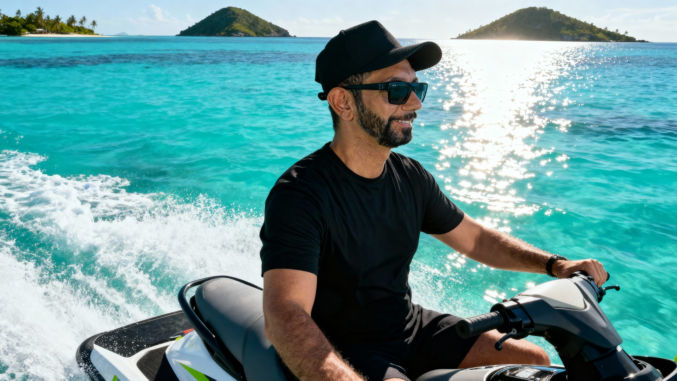
Cinematic chest-up shot of a man riding a jet ski across turquoise tropical water, visible from the waist up with the handlebar in frame. He wears a black baseball cap, gradient sunglasses, and a determined smile as spray splashes around, cinematic speed and excitement.

Wide cinematic side/profile shot of the man cutting across tropical turquoise water on his jet ski, small islands in the background. His face remains visible as sunlight glints off his sunglasses, cinematic power and summer vibrance.
Cinematic chest-up underwater shot of a man swimming alongside dolphins, visible from the shoulders up. He wears a black swimming cap, gradient sunglasses, and a joyful expression. Dolphins swim beside him as sunlight patterns ripple across his face, cinematic harmony and wonder.

Cinematic chest-up shot of a man standing on a paddleboard on a still mountain lake, visible from chest to hat top. He’s holding a paddle. He wears a life vest, black baseball cap, gradient sunglasses, and calm focus, reflections of clouds in the water, cinematic serenity.

Wide cinematic side shot showing the man paddleboarding toward distant mountains on mirrored water. The entire paddleboard and the man standing on it are visible in the side profile shot. His face is visible as he looks to the camera, cap and sunglasses glinting in the sunlight, cinematic peaceful scale.

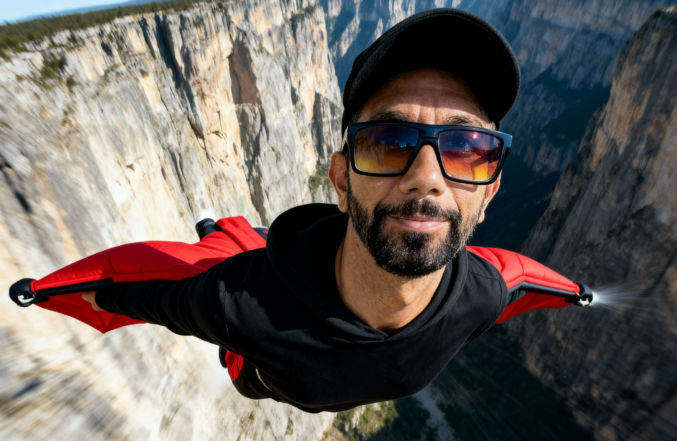
Cinematic chest-up shot of a man wearing a wingsuit mid-flight, camera facing him slightly from below to show air rushing around. He wears a black baseball cap, gradient sunglasses, with parts of the red wingsuit visible at his shoulders. Vast cliffs blur behind, cinematic thrill and velocity.
Cinematic chest-up shot of a man riding a camel across golden desert dunes, only his upper body and part of the camel’s saddle visible. He wears a black baseball cap, gradient sunglasses, and relaxed posture under warm sunlight. The horizon glows orange, cinematic calm and travel spirit.

Cinematic chest-up shot of a man ascending Mount Everest in climbing gear, rope visible over his shoulder, breath misting in the cold air. He wears a black beanie, gradient sunglasses, expression focused with snowflakes clinging to his jacket. Harsh sunlight reflects off snow, cinematic struggle and determination. He is not wearing a baseball cap.

Wide cinematic shot of the man scaling an icy slope near Everest’s peak, rope anchored below, prayer flags fluttering in the distance. His face is visible. He is wearing climbing gear, rope visible over his shoulder, thick gloves, a black beanie and sunglasses, cinematic grandeur and persistence. He is not wearing a baseball cap.

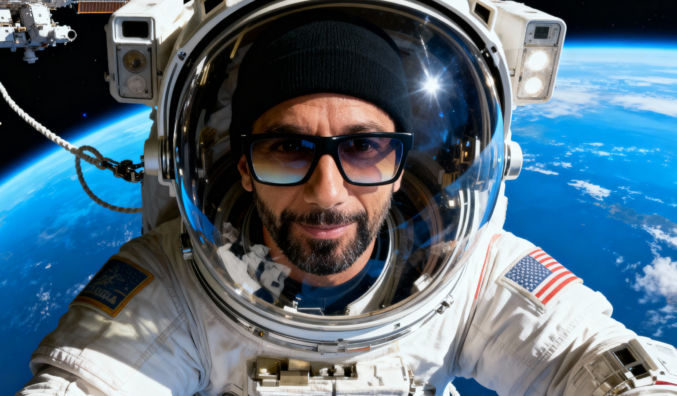
Cinematic chest-up shot of a man floating in space tethered to the International Space Station, wearing a detailed astronaut suit with a large glass helmet revealing his full face, he’s wearing a thin black beanie covering his hair and black sunglasses with a semi-transparent gradient lens. Earth glows blue below, cinematic awe and isolation. He is not wearing a baseball cap.
Cinematic chest-up shot of a man seated in a luxurious first-class cabin of an A380 commercial jet, eating a gourmet meal beside the window. He wears a black baseball cap, gradient sunglasses, short hair, relaxed smile, soft daylight illuminating his face and tableware. Background shows blurred clouds outside, cinematic comfort and refinement.