Panini Sandwiches Using an Air Fryer

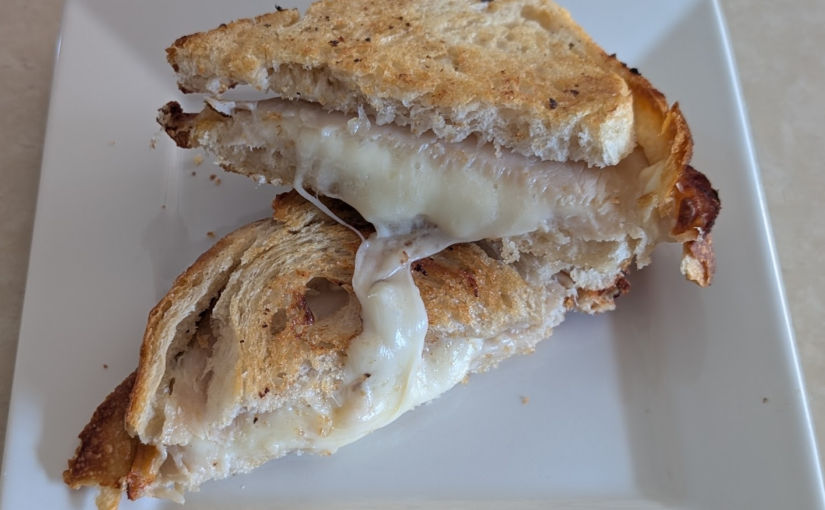
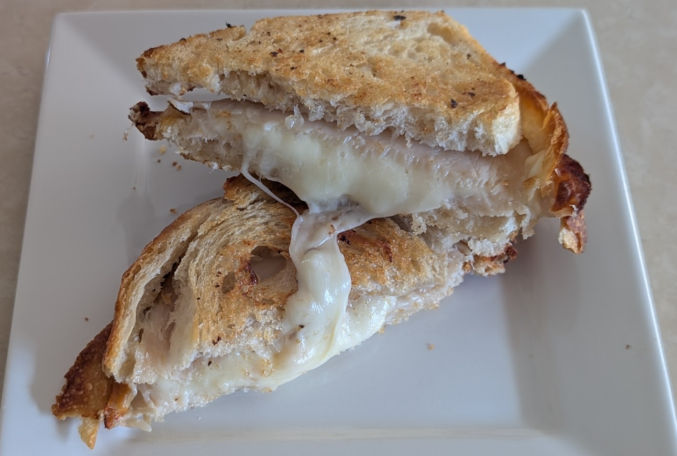
Panini sandwiches are usually made with a panini press, but I’ve found that using an air fryer is easier and better. Here’s how to make a turkey and cheese panini sandwich in an air fryer.

Ingredients

  • 2 slices of turkey
  • 2 slices of mozzarella cheese
  • 2 slices of bread (sourdough, etc)
  • mayo

Instructions

  1. Preheat the air fryer to 400 F
  2. Spread mayo on one side of each slice of bread
  3. Assemble the sandwich as follows
Bread slice (mayo on outside)
Turkey slice
Cheese slices
Turkey slice
Bread slice (mayo on outside)
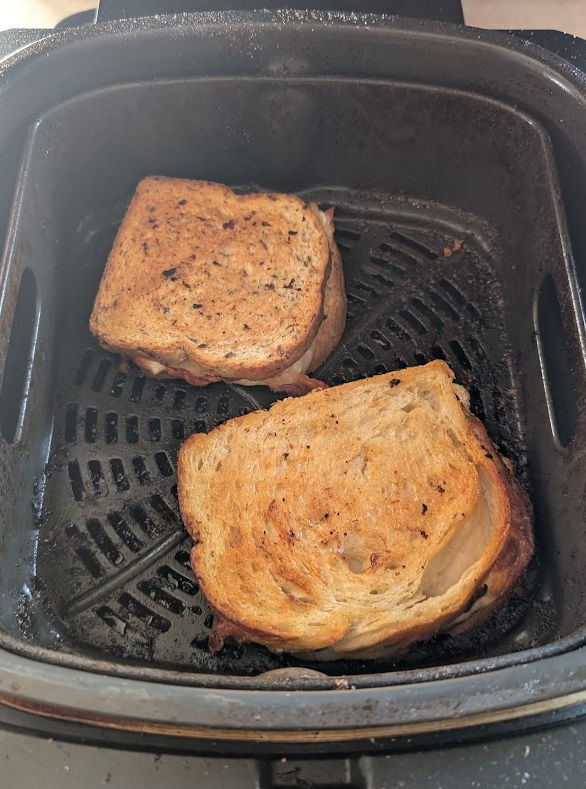
  1. When the air fryer is preheated, set the time to 10 minutes and place the sandwich inside
  2. After 5 minutes, flip the sandwich
  • Increase or decrease the frying time to suit

Here are some ingredient options for making different panini sandwiches. The ingredients are listed in the order of the sandwich layers.

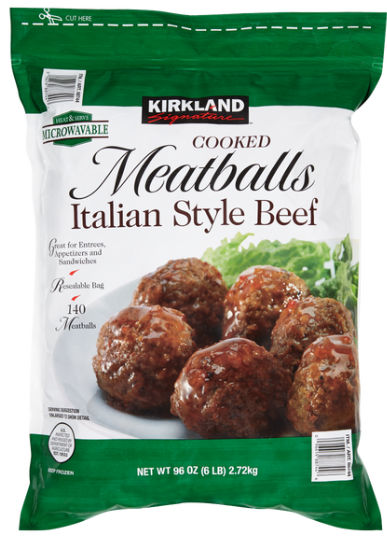
Meatball and cheese panini

  • mayo
  • bread slice
  • meatballs cut in half
  • pizza sauce
  • mozzarella cheese slices
  • bread slices
  • mayo

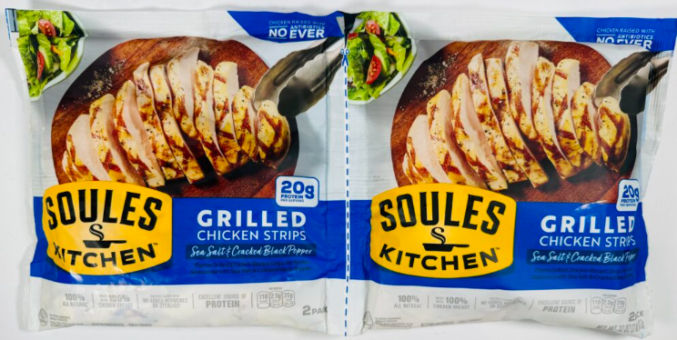
Chicken and cheese panini

  • mayo
  • bread slice
  • grilled chicken strips or sliced lightly breaded chicken breast
  • pesto sauce
  • roasted tomato
  • mozzarella cheese slices
  • bread
  • mayo

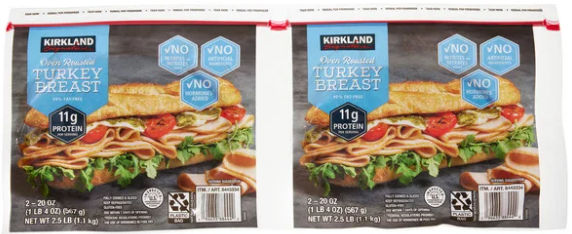
Turkey and cheese panini

  • mayo
  • bread slice
  • turkey slice
  • cheese slices
  • tomato slices
  • turkey slice
  • bread
  • mayo

BBQ chicken and cheese panini

  • mayo
  • bread slice
  • cheese slice
  • shredded chicken
  • bbq sauce
  • bread
  • mayo

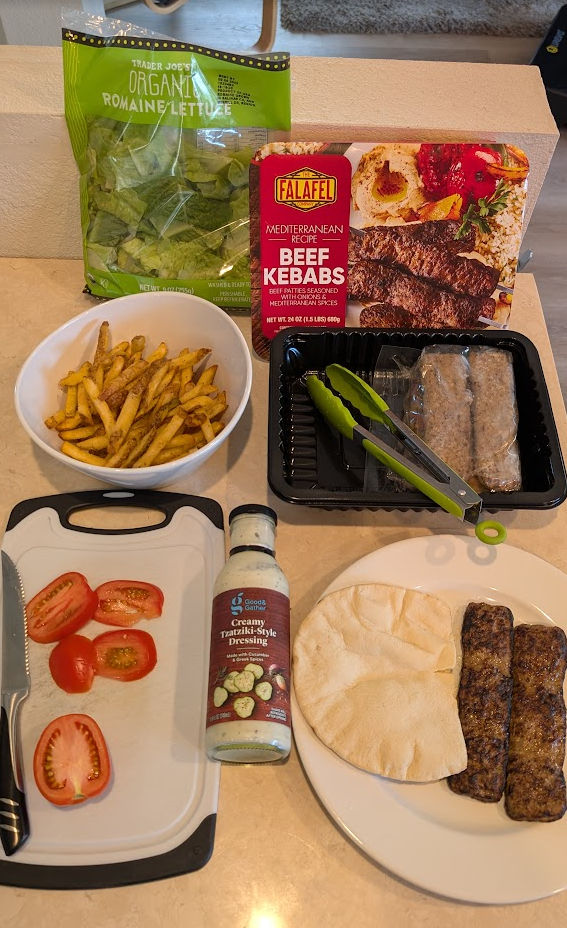
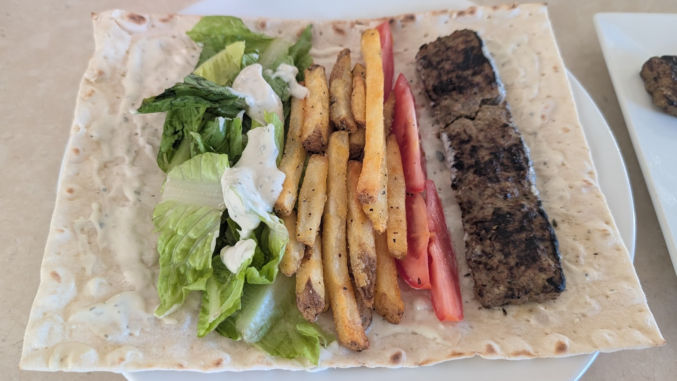
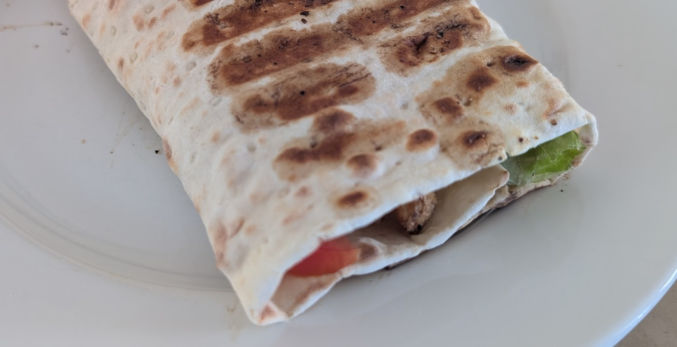
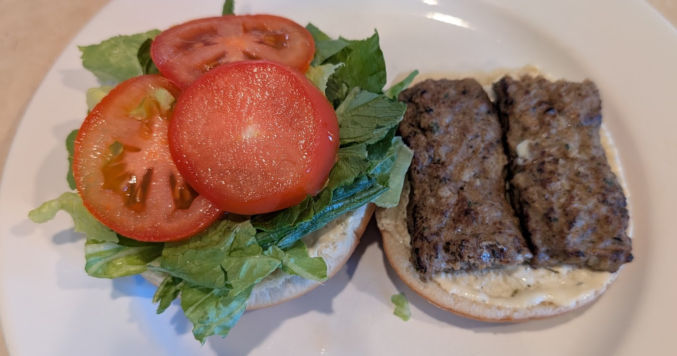
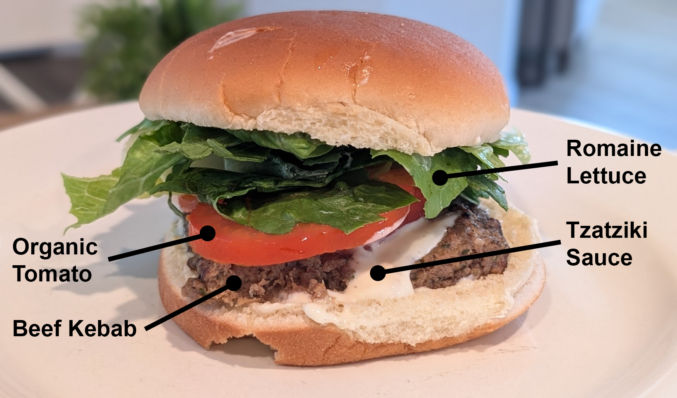
Kebab and cheese panini
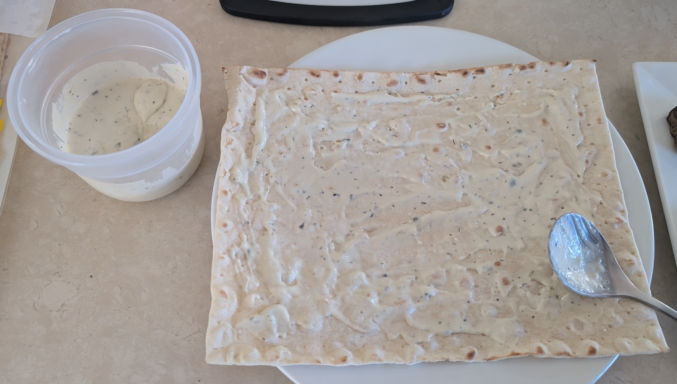
  • mayo
  • bread slice
  • cheese slice
  • kebabs
  • tzatziki sauce
  • tomato
  • bread
  • mayo

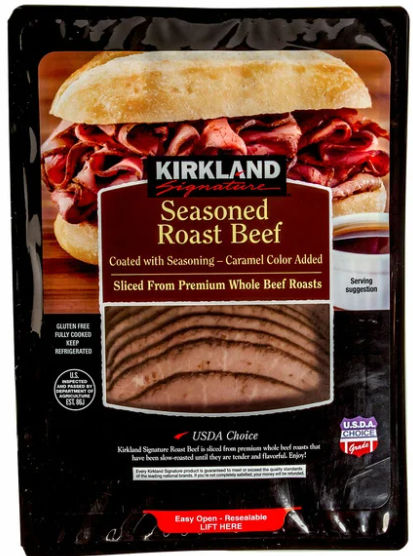
Beef brisket and cheese panini

  • mayo
  • bread slice
  • cheese slice
  • beef brisket
  • bread
  • mayo

Corned beef and cheese panini

  • mayo
  • bread slice
  • cheese slice
  • corned beef
  • bread
  • mayo

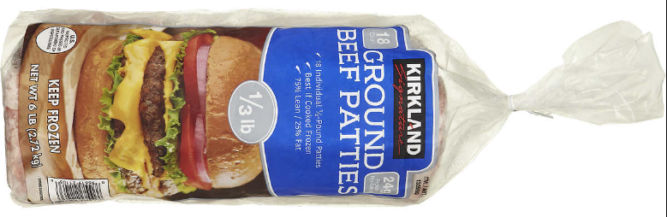
Following are different types of pre-cooked meat you can put in your panini and their prices.

$13 / lb at Costco
$10 / lb at Costco
$8.48 / lb at Costco
$13 / lb at Costco
$14 / lb at Costco
$6 / lb at Costco
$3.32 / lb at Costco
$12 / lb at Costco
$5.60 / lb

Quick ‘n Easy Fried Rice Recipe

Ingredients

  • 1 cup of Jasmine rice
  • 1.5 cups of water
  • 2 eggs
  • Cucumber
  • Tomato
  • Cilantro
  • Green onion
  • Instant Seasoning Paste for Fried Rice (There are many seasoning packets for fried rice, but I like this one the most)

Instructions

Note: if you cook the rice wrong, it will come out mushy. Carefully follow the rice-cooking instructions if you want the rice to come out good.

  1. Place the rice in a fine-mesh sieve or colander and rinse under cool running water. Gently stir the rice as you rinse. Keep rinsing until the water runs clear. This is critical for removing excess surface starch, which is the primary cause of gummy or mushy rice.
  2. Put the rice in a deep pan.
  3. Add the water to the pan and lay the rice out evenly. Note that adding too much water will make the rice mushy.
  4. Cook on medium until the water boils.
  5. Cover the pan with a lid, reduce the heat to low, and simmer the rice for 15 minutes or until all the water is gone.
  6. Turn off the heat and let the rice rest for 10 minutes with the lid still on.
  7. After resting, gently fluff the rice with a fork to break up any clumps and create individual, separate grains. Avoid stirring the rice while it’s very hot and moist, as this can cause it to break apart and become mushy. 
  8. Add chopped green onion, cilantro, and the seasoning paste to the rice and mix.
  9. Cook 2 eggs (I prefer sunny side up)
  10. Transfer the rice to a plate, put the eggs on top, and garnish with some chopped cilantro.
  11. Add slices of cucumber and tomato to the plate.
  12. Enjoy
The rice while cooking
The cooked rice (notice it’s not mushy)
The rice after adding green onion and the seasoning paste

Greek Gyro (yee-ro) Recipe

When I was a kid, there were 2 foods I ate a lot of

  1. Pizza
  2. Greek Gyro (pronounced “yee-ro”) Sandwiches

Pizza is available everywhere, but there aren’t many places that sell Greek Gyros in the San Francisco Bay Area. One place that has it is Nick the Greek, but at $12.50 for a small sandwich, it feels overpriced. So, I tried to make my own without the hassle of cooking the meat and making the Greek Tzatziki sauce. I couldn’t find precooked doner kebab (“doner” is Turkish for “rotating”) meat, like a rotisserie, but I did find kebabs at Costco, which take a minute to heat up in the microwave, come out juicy, and taste delicious. For the Tzatziki sauce, I bought Tzatziki salad dressing from Target. It tastes good, but it’s thick, so getting it out of the bottle required using a knife.

Ingredients

  • Precooked Beef Kebabs (from Costco, $12.50 for 12 kebabs)
  • Tzatziki Salad Dressing (from Target, $2.49)
  • Pita Bread
  • French Fries (I bought frozen ones from Costco and cooked them in an air fryer)
  • Tomato
  • Lettuce (I got chopped and pre-washed lettuce for convenience)

Instructions

  1. Cut 10% of the pita bread so you can open it like a pocket
  2. Toast the pita bread in a toaster
  3. Heat the beef kebabs in a microwave for 1 minute
  4. Smear the Tzatziki sauce on both inner sides of the pita bread
  5. Insert the kebabs in the pita bread
  6. Add some lettuce, sliced tomatoes, and french fries in the pita bread
  7. Enjoy

UPDATE

Stuffing a pita bread such that the ingredients are distributed uniformly so that you can taste each ingredient with each bite is a bit difficult to do. Instead of using a pita bread, you can use Lavash bread, shown below. It’s much easier to place the ingredients on Lavash bread. First, smear the Tzatziki sauce all over one side of the bread.

Then, place the ingredients as shown below (I added some extra Tzatziki sauce on the lettuce).

Then, roll the lavash and place it in a panini press.

Enjoy

You can also make it using a hamburger bun.

English Muffin Breakfast Recipe

A few years ago, I flew to Korea on Hawaiian Airlines and was served a warm English muffin containing a turkey patty and egg. As cheap and simple as it looked, I wasn’t expecting much, but it turned out to be so good, I had to try to recreate it. I think I figured it out. Here’s my recipe.

Ingredients

Instructions

  1. Spray some cooking oil on a frying pan.
  2. Fry the egg in the shape of the muffin. I like to use this egg pancake frying pan that I got on Amazon. Optionally, pierce the yolk.
  3. Sprinkle some salt and pepper on the egg and cover the pan so the top of the egg gets cooked.
  4. Slice the muffin into 2 halves.
  5. Heat the muffin in a microwave for 1 minute to warm and soften it up. This is especially necessary if the muffins were refrigerated, cold, and hard.
  6. Since the turkey patties are small, defrost 2 of them in a microwave for 2 minutes and 30 seconds.
  7. Spread some hummus on all inner sides of each muffin half.
  8. Cut one of the turkey patties in half so that one and a half muffins can cover most of the muffin.
  9. Put 1.5 turkey patties next to each other, cover it with half a cheese slice, and microwave for 25 seconds.
  10. Assemble the muffin as shown in the photos below.

Quick and Easy Cucumber Salad

Most salads contain multiple vegetables and leafy greens like lettuce, tomatoe, and onion. The problem with some of these ingredients is they go back fairly quickly, especially lettuce, which becomes slimy, discolored, and smells. Grape tomatoes tend to wrinkle and look unappetizing. One vegetable, however, seems to stay and look fresh for about 2 weeks – cucumbers. Cucumbers are also high in water content, which can help you feel full and eat less. They are also low in carbohydrates and sugar, and have a low glycemic index (GI). This means that cucumbers don’t cause a rapid increase in blood sugar.  They can be a good snack for people who want to lose weight or maintain a healthy weight. 

Here’s a simple recipe for a cucumber salad.

Ingredients

  • Cucumber (1)
  • Water (1/2 cup)
  • Salt (1 tsp)

Instructions

  1. Pour water in a bowl
  2. Add the salt and mix till dissolved
  3. Slice the cucumber, add to bowl and mix

Super Easy Slow Cooker Shredded Salsa Chicken

This was super easy to make and it was very flavorful. Eat it as is or as part of a burrito or over a plate for rice.

Ingredients

  • 1.25 lbs Chicken (I prefer chicken thighs because chicken breast is too dry)
  • 1 oz Taco Seasoning Mix – Low Sodium (I actually used a chicken taco seasoning mix but any would do)
  • 16 oz Salsa – Your choice of flavor and heat (I chose Del Real, Red Salsa, Fire Roasted. It was a bit spicy though)

Instructions

  1. Cut up/trim the fat off the chicken, if needed
  2. Place the chicken into the bottom of your slow cooker
  3. Sprinkle the Taco Seasoning Mix all over the chicken
  4. Pour the salsa over the chicken
  5. Mix everything
  6. Put the lid on and let it cook on low heat for 4-5 hours or high heat for 2-3 hours (the chicken should reach 165F/73C)
  7. Optionally, shred the chicken 15-20 minutes before it’s done by using 2 forks or meat shredding claws

Iced Cantaloupe Drink Recipe

This is a very refreshing drink to have, especially on a hot summer day.

Ingredients

  • 1 x Cantaloupe
  • 4 tbsp of sugar (I prefer all-natural monk fruit sweetener from Costco)
  • Water as needed

Instructions

  1. Slice the cantaloupe in half
  2. Use a tablespoon to scoop out and discard the seeds
  3. Use a melon scraper to scrape slivers of cantaloupe meat into a bowl
  4. Cut the melon slivers into short strips to make consuming easier. Or, before serving, blend the drink briefly to chop up the long slivers.
  5. Fill a 2.4L pitcher half full of water. I have this pitcher from Target.
  6. Add the sugar to the water and mix
  7. Add all the cantaloupe slivers into the pitcher
  8. Add more water to the pitcher until it’s full.
  9. Chill the drink in the fridge till it’s cold

Pictures

After blending very briefly

Set-It-and-Forget-It Cheeseburger Recipe

If you’re making a burger and your meat is not frozen, then you can stick a thermometer in your patty and let the thermometer beep when the meat is at your desired temperature. The problem with this is you may have to flip the burger one or more times and, if your patty is thin or not dense, it may be difficult getting the thermometer probe in the center and staying there. If your patty is frozen, like it is at many stores that sell packages of burger patties, then you can’t stick a thermometer in it.

Frozen burger patties may not taste the best, but they are still good. Since they’re frozen, they will last long as well. To simplify the cooking process, I use the T-fal Optigrill. It grills both sides and has a drip tray to catch all fatty juices.

Here’s how to cook a frozen beef patty in the simplest way possible.

  1. Press the power button to turn on the Optigrill
  2. Press the snowflake button because your patties are frozen
  3. Press the burger button since we’re making a burger. The Optigrill will heat up as indicated by the blue light. This takes about 5 minutes.
  1. When the Optigrill beeps, it’s done heating up. Open the lid and place your patties.
  2. The Optigrill will beep and change color every time the meat reaches a doneness level.

When the Optigrill has reached your desired doneness based on the color of the doneness cycle, remove your patties. In my experience, it takes about 7 minutes to get to medium-well.

For the buns, Artesano Bakery Buns are pretty good. Don’t toast these buns. They taste good as is at room temperature.

Almond Mocha Chocolate Latte Recipe

For this recipe, I’m using the PHILIPS 3200 Series Fully Automatic Espresso Machine w/LatteGo.

Ingredients

Instructions

  1. Add almond extract and chocolate sauce to the mug (I use a pipette to transfer the almond extract).
  2. Steam milk to make 1 cup (I put mine in a measuring cup).
  3. Add 1 shot (1 oz) of espresso to your mug.
  4. Pour steamed milk into mug and mix using heat-resistant, scratch-free silicone stirrer.
  5. Enjoy

Fried Rice Made Using Automatic Pot Stirrer

One thing I really dislike when cooking is having to occasionally stir the food. This is the case with fried rice, soups, and stir-fried vegetables. Fortunately, the Koreans feel the same way. A company called LAMPCOOK with the slogan “Innovative Cooking” sells this (overpriced) automatic pot stirrer on Amazon for $155. I normally would spend that much on a pot, but like I said, I really dislike manually stirring food every so often for 10-20 minutes while cooking.

I’ve had the pot for a couple of weeks now and it actually works. But, you can’t put it over heat higher than medium. If you do, you’ll see discoloration at the center.

In this post, I’ll share my recipe for a super simple fried riced cauliflower dish. Riced cauliflower has far fewer calories than rice, and it’s a healthier option. For the flavor, I’ve found either one of the following fried rice packets to be the best.

  • Indofood Racik Bumbu Spesial Nasi Goreng
  • Bamboe Nasi Goreng

Ingredients

  • 1 lb of frozen riced cauliflower (available in packs of 5 at Costco)
  • One of the two spice packets above
  • 1/2 cup of water
  • Oil spray

Instructions

  1. Spray pot with oil
  2. Add water and riced cauliflower
  3. Remove the glass window, turn on the stirrer, and cook on medium
  4. Set a timer for 20 minutes and go do something useful
  5. After 20 minutes, the water should have evaporated. Remove the lid and stirrer arm attachment.
  6. Add the spice mix and stir with a heat-resistant and scratch-resistant silicone spatula.
  7. Optionally, mix in precooked meat, vegetables, eggs, etc.
  8. Transfer to a plate or bowl and enjoy