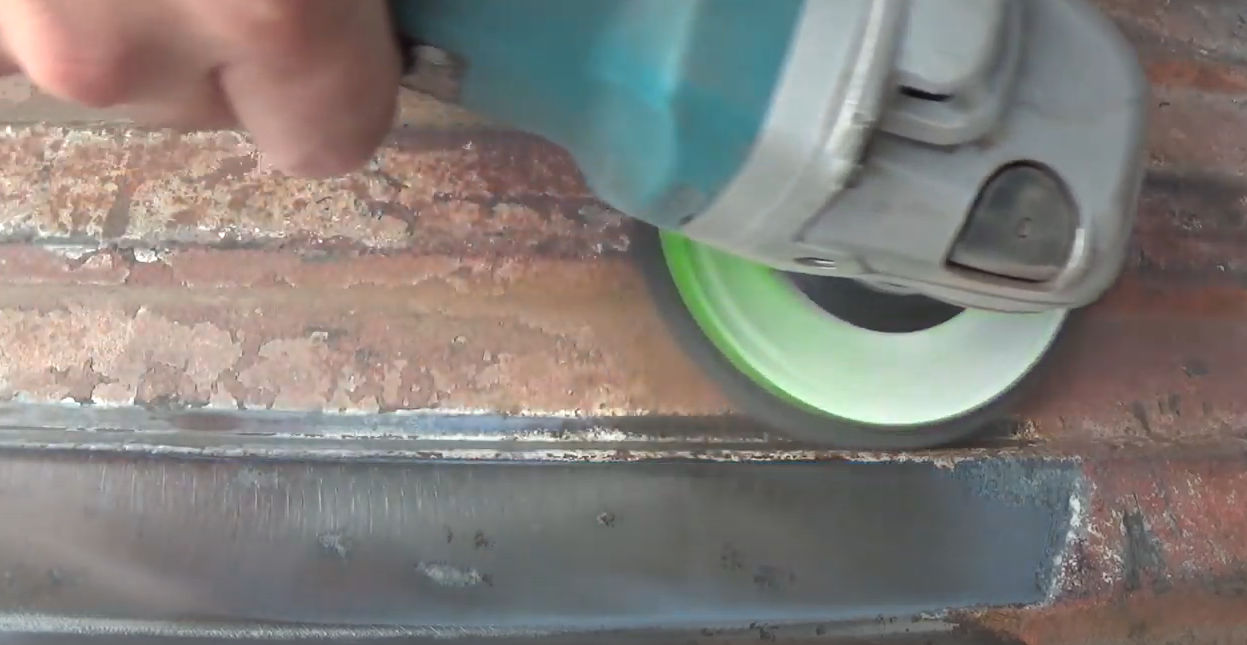
You’re probably thinking you should buy some chemicals to remove rust or even soak rusty items in Coca Cola, if they’ll fit in your container. These methods only partially work and take forever. Instead, just pick up a polycarbide abrasive wheel at Harbor Freight ($5) and attach it to an angle grinder ($15 at Harbor Freight) and get rid of dust with ease. You might be able to use it to clean your barbecue grill grates.
As I’ve said before, weeds are notorious for finding ways of growing through weed fabric and along yard edges.
Middle of yard
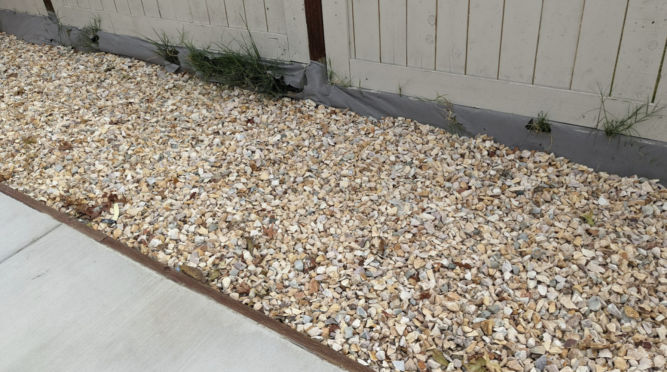
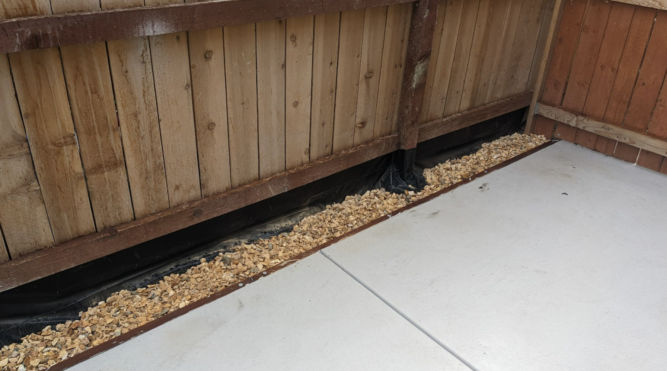
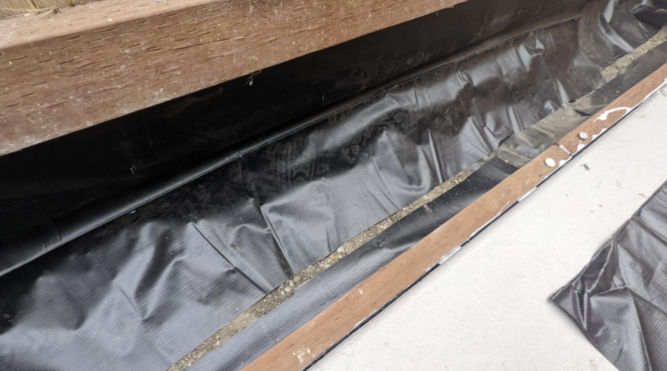
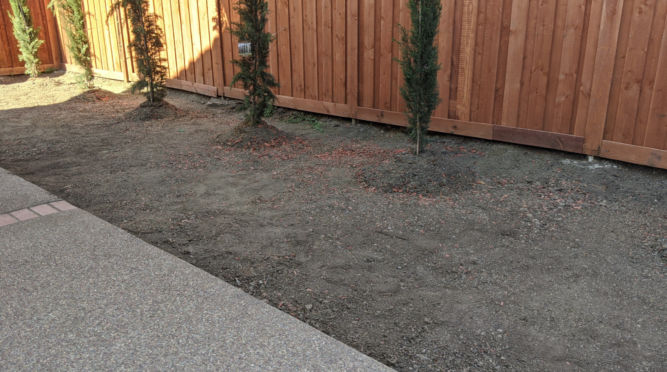
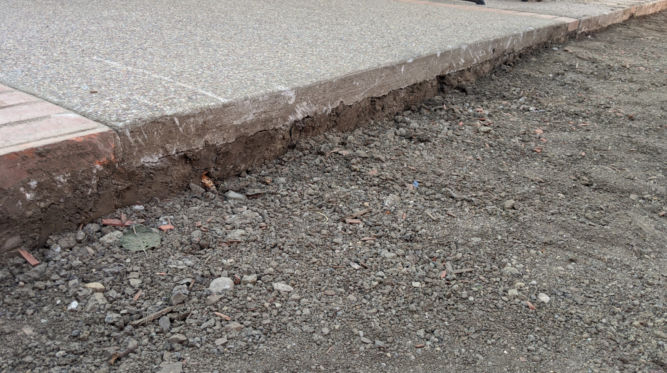
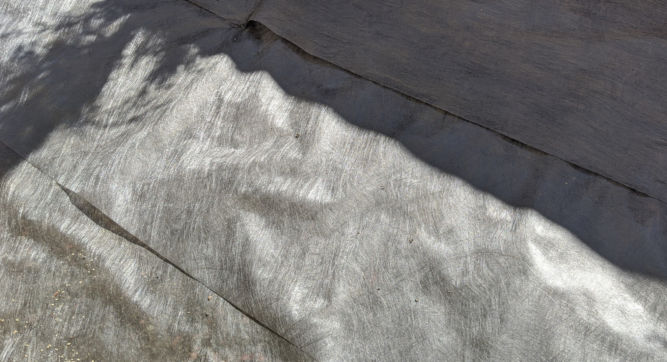
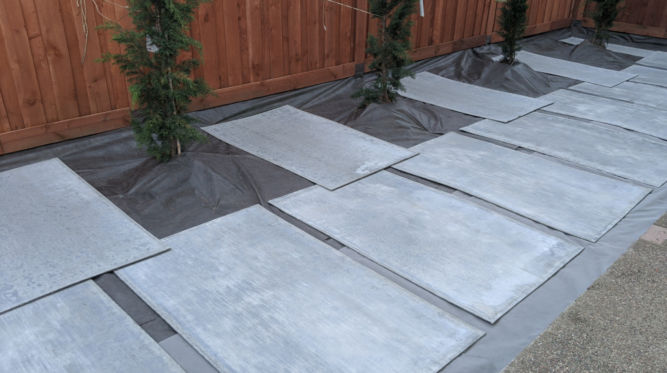
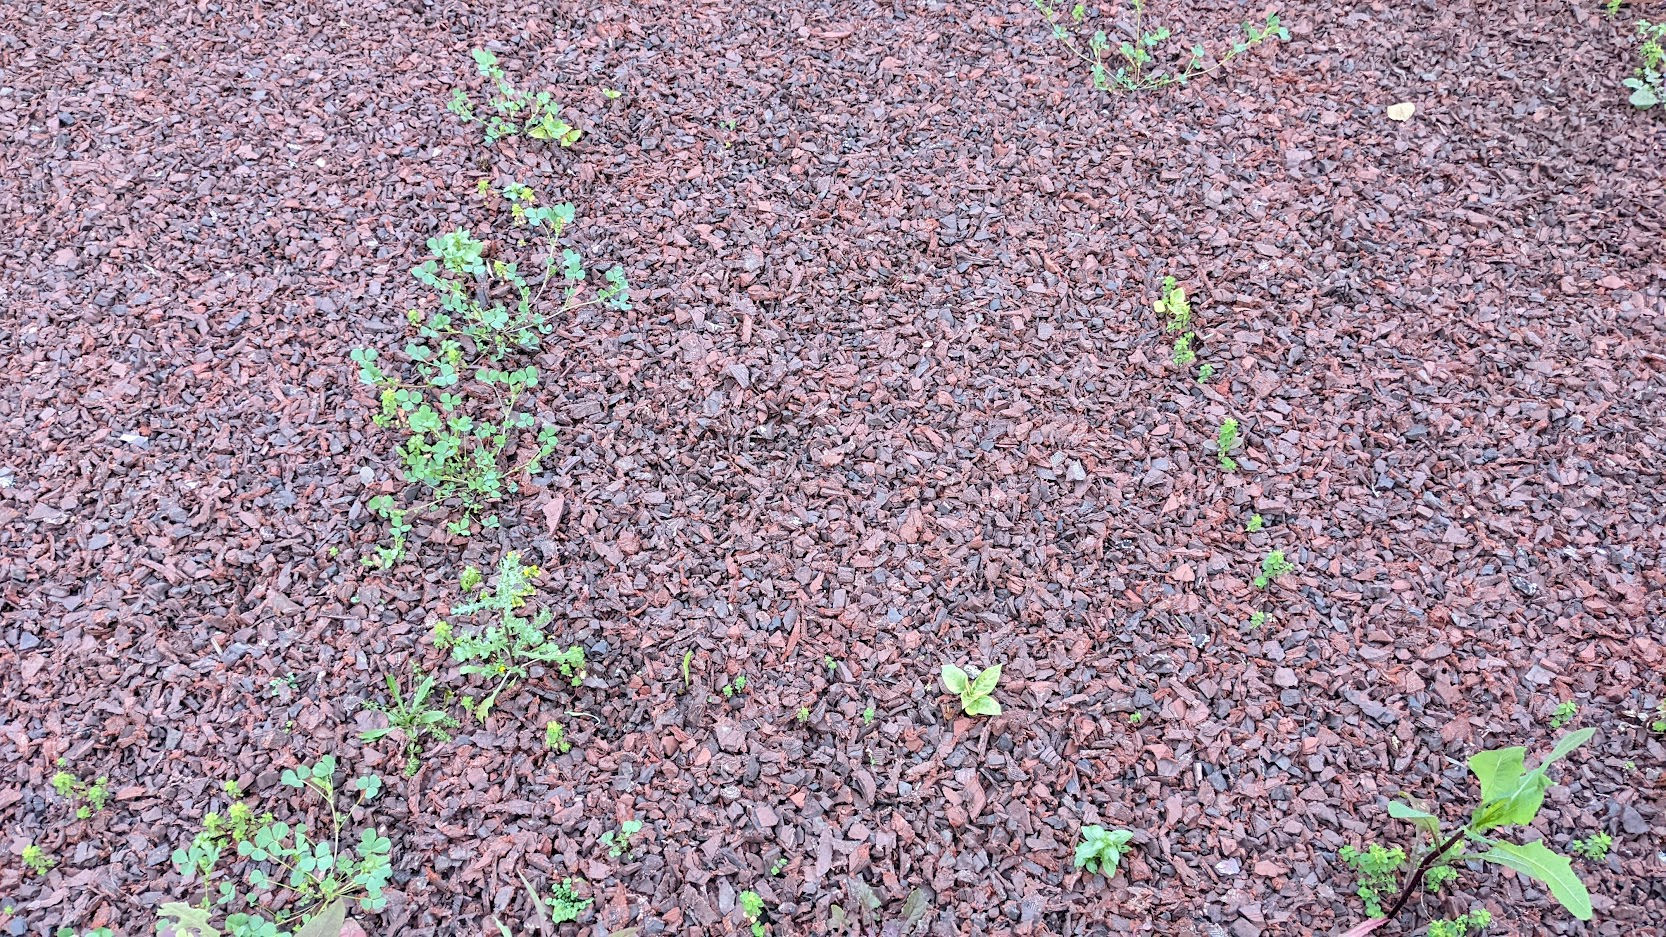
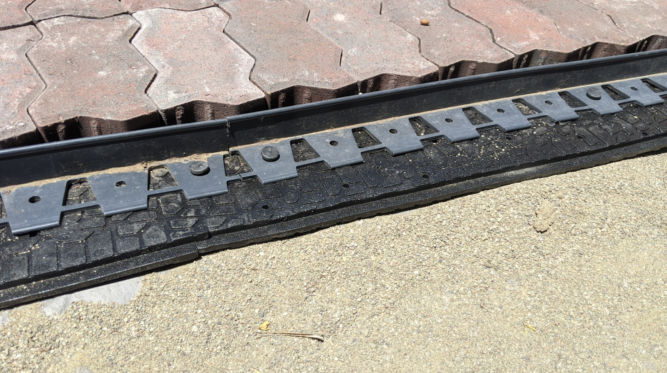
To combat weeds from popping up in the middle of your landscape, lay cement board everywhere. Cement board is porous so water can still drain through it. For the areas between the cement boards, weeds will grow. To prevent this from happening, cut pond liner and place it where the cement board gaps are. Pond liner is very strong, UV-resistant, and almost impossible to tear. Traditional weed fabric may be marketed with the claim that it can prevent weeds but it can’t. Weeds still manage to come through. Plus, if you use weed fabric along edges where it’s exposed, it can degrade and easily tear as shown in the picture below.
Now I have to replace that weed fabric with pond liner like I did along a different fence.
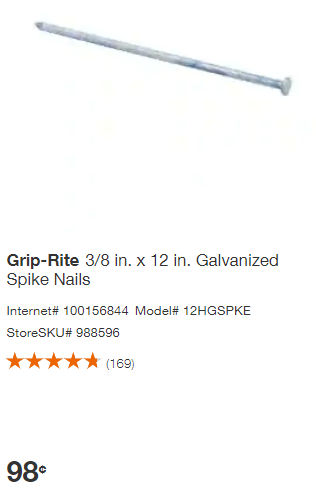
If there is no room to drill a screw into the concrete, e.g. if the edge is near a fence, then you can drill 1/2-inch holes in the 2×4 using a 1/2″ spade bit and drive 12-inch long, 3/8-inch galvanized nails through the holes into the ground.
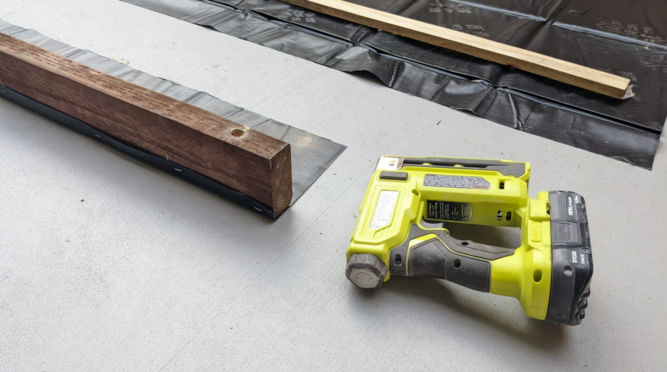
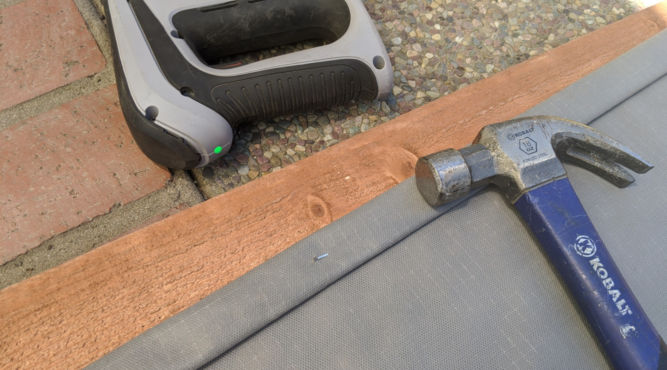
Cut some pond liner and staple it to the 2x4s. Don’t use traditional weed fabric. It will eventually fail and rip and weeds will come through it.
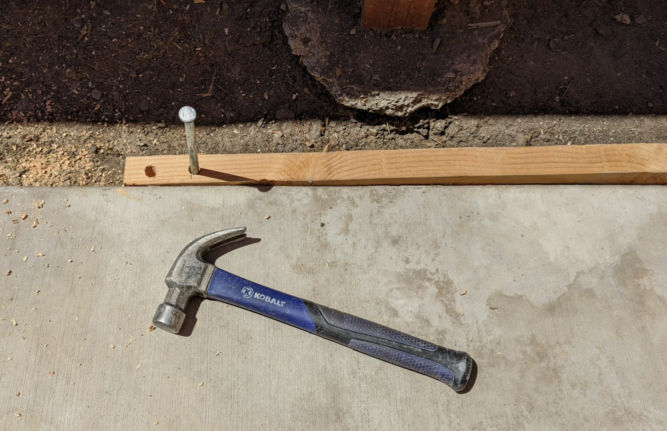
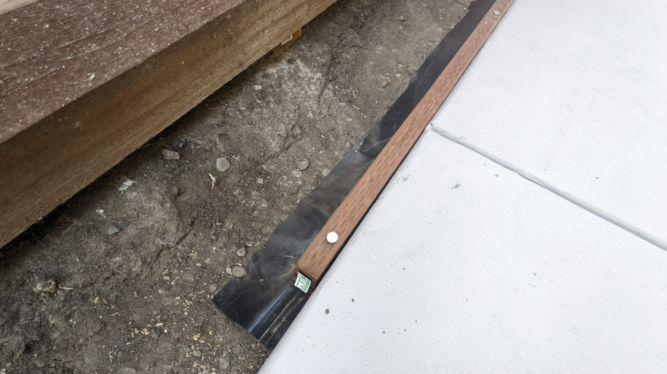
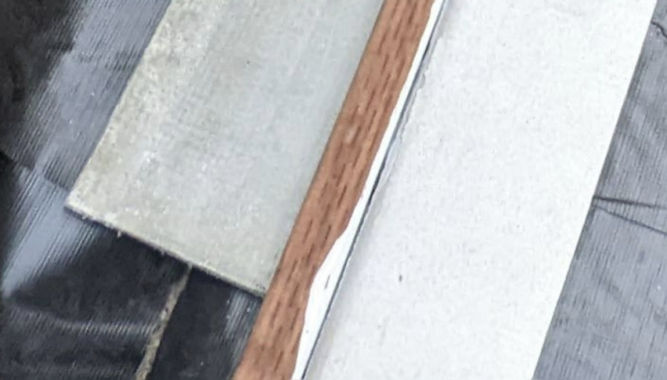
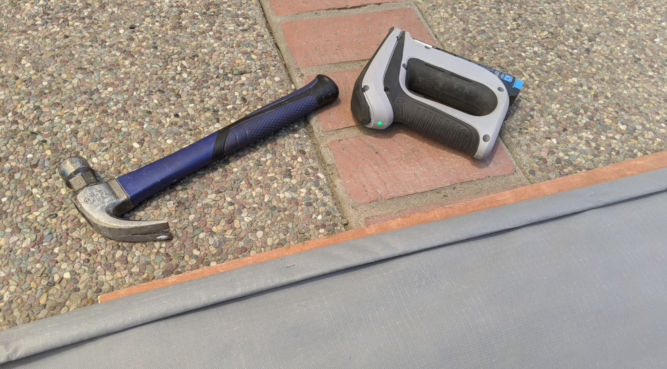
Hammer the large nails through the 2x4s and the pond liner into the ground along the edge of the concrete as shown below.
Allow some of the pond liner to extend beyond the end of the 2×4 so the next 2×4’s pond liner will overlap the first one and prevent weeds from growing in between the 2x4s.
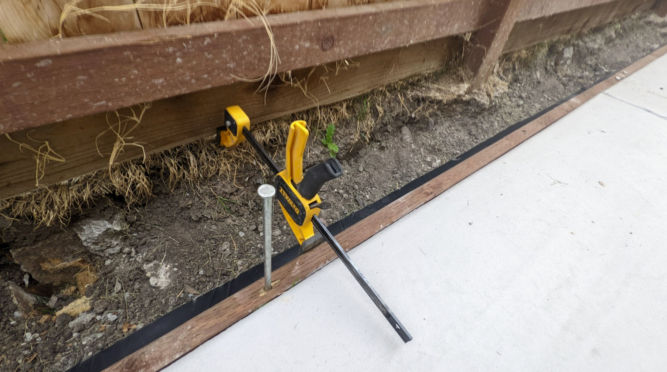
Since 2x4s may not be perfectly straight, you can push them against the concrete edge using a clamp.
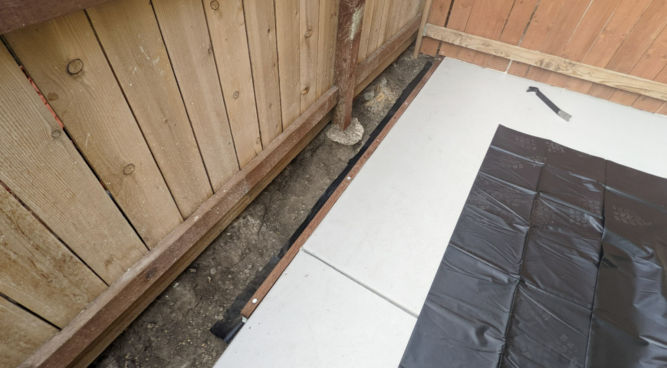
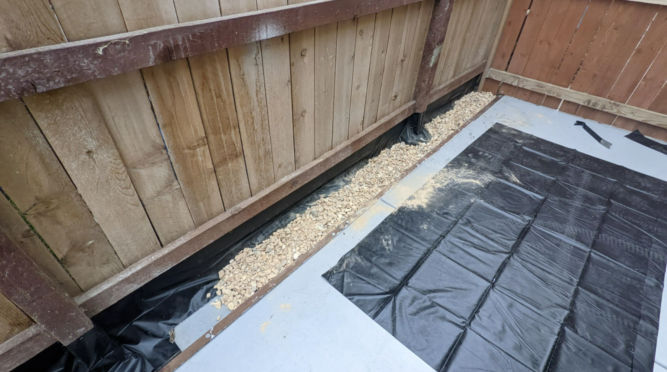
If the other side is a wood fence, you can simply staple some pond liner to the fence. In the picture below, the space between the concrete and the fence was narrow. I left a gap between the pond liner for drainage.
In this case, I placed the cement board over the gaps between the pond liner to prevent weeds from growing along the gap.
You can then put rocks like I did pictured below.
There will still be a small gap between the concrete edge and the 2x4s. Fill that cap with concrete control joint sealant. I like Sikaflex Self-Leveling Sealant. Learn more.
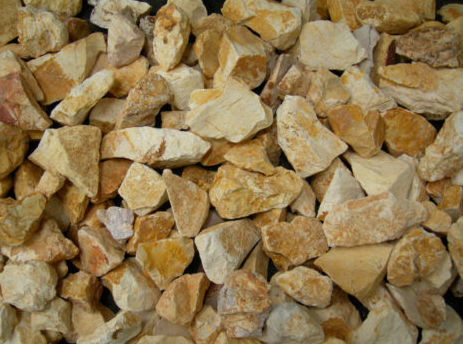
For the rocks, I used ¾-inch ginger rocks / Sonoma gold rocks.
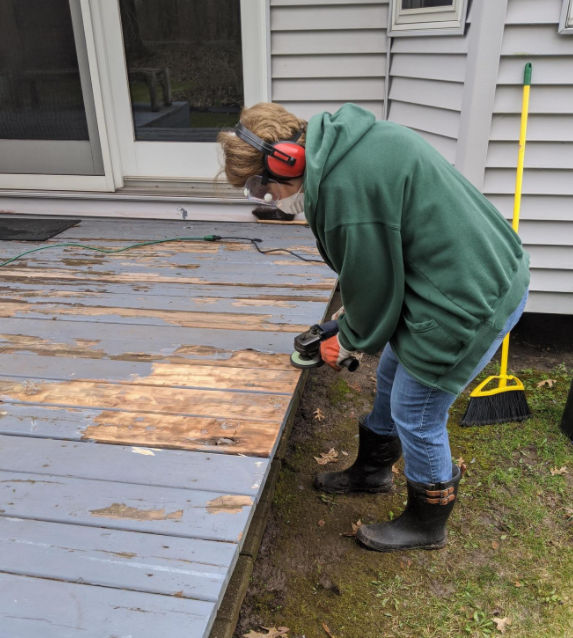
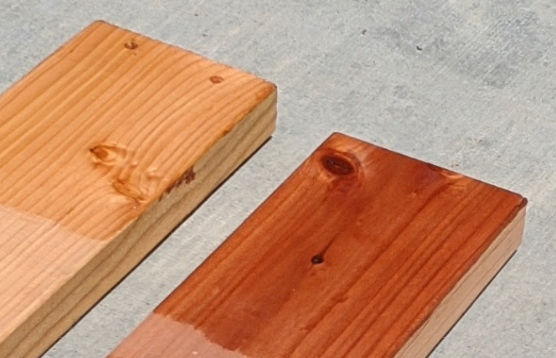
For the redwood, I didn’t want to change the color of the wood so I went with a transparent solution. However, I did want to accentuate the natural color and the grain. I also wanted a glossy look. Of all the sealers tested, the Varathane sealer looked the best to me. It also looked good on Douglas fir (cheap construction wood) as it also brought out the grain lines.
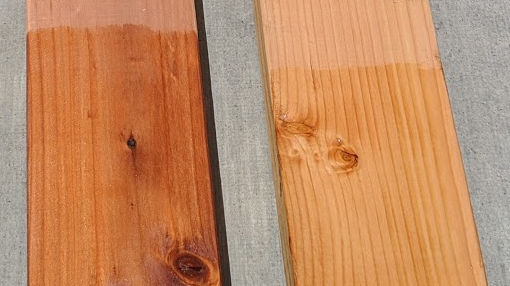
Here’s another look at the Varathane oil-based stain on redwood and douglas fir. Of course, the vibrancy of the color will differ in different lighting.
For interior wood, I find that the Minwax oil-based stain in the Gunstock color produces nice red results with clear grain lines followed by triple-thick glossy polyurethane.
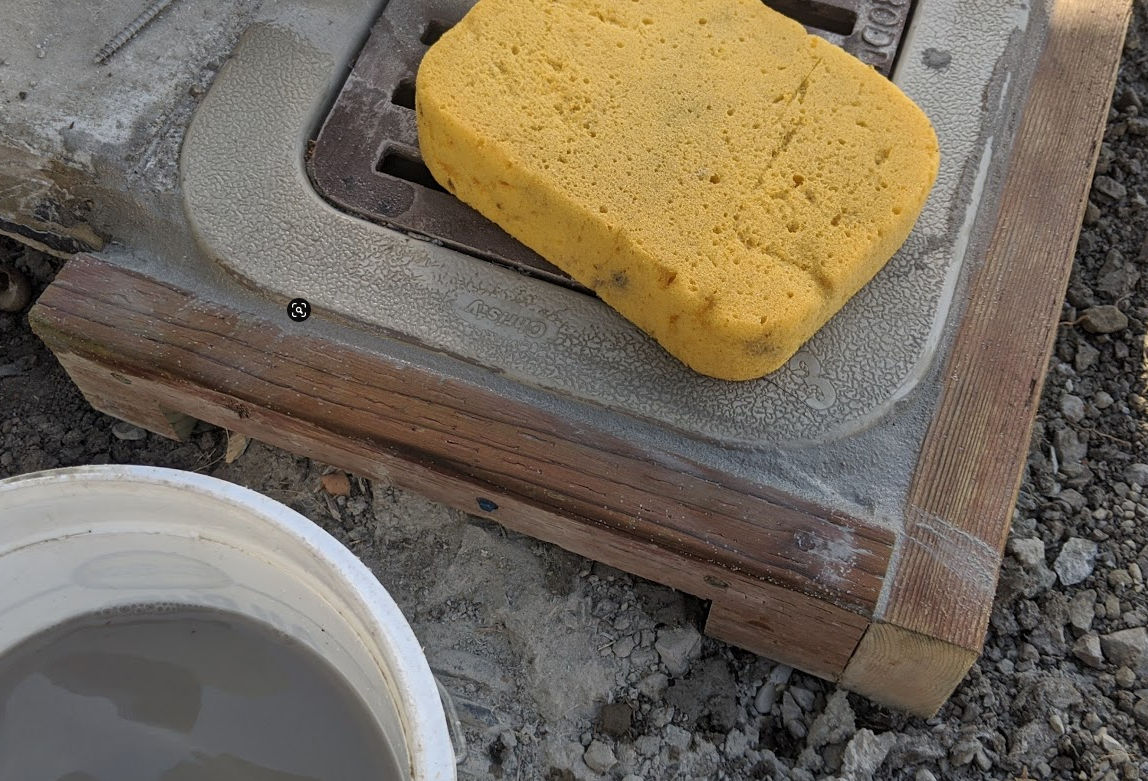
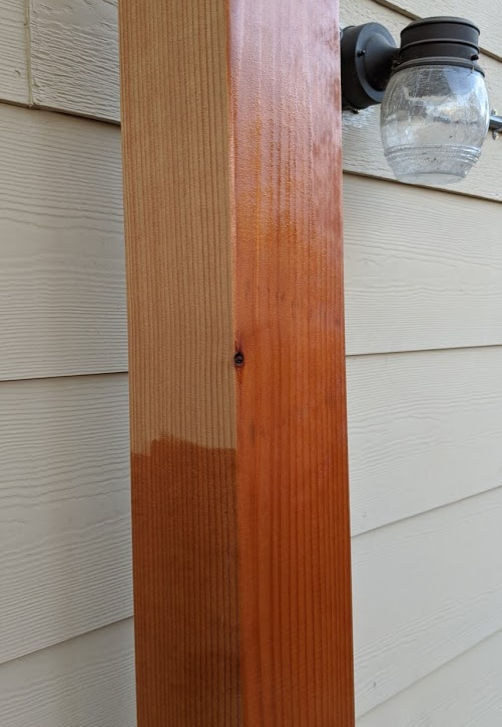
As you can see in the photo below, water doesn’t penetrate the wood because the sealer adds a protective layer on it.
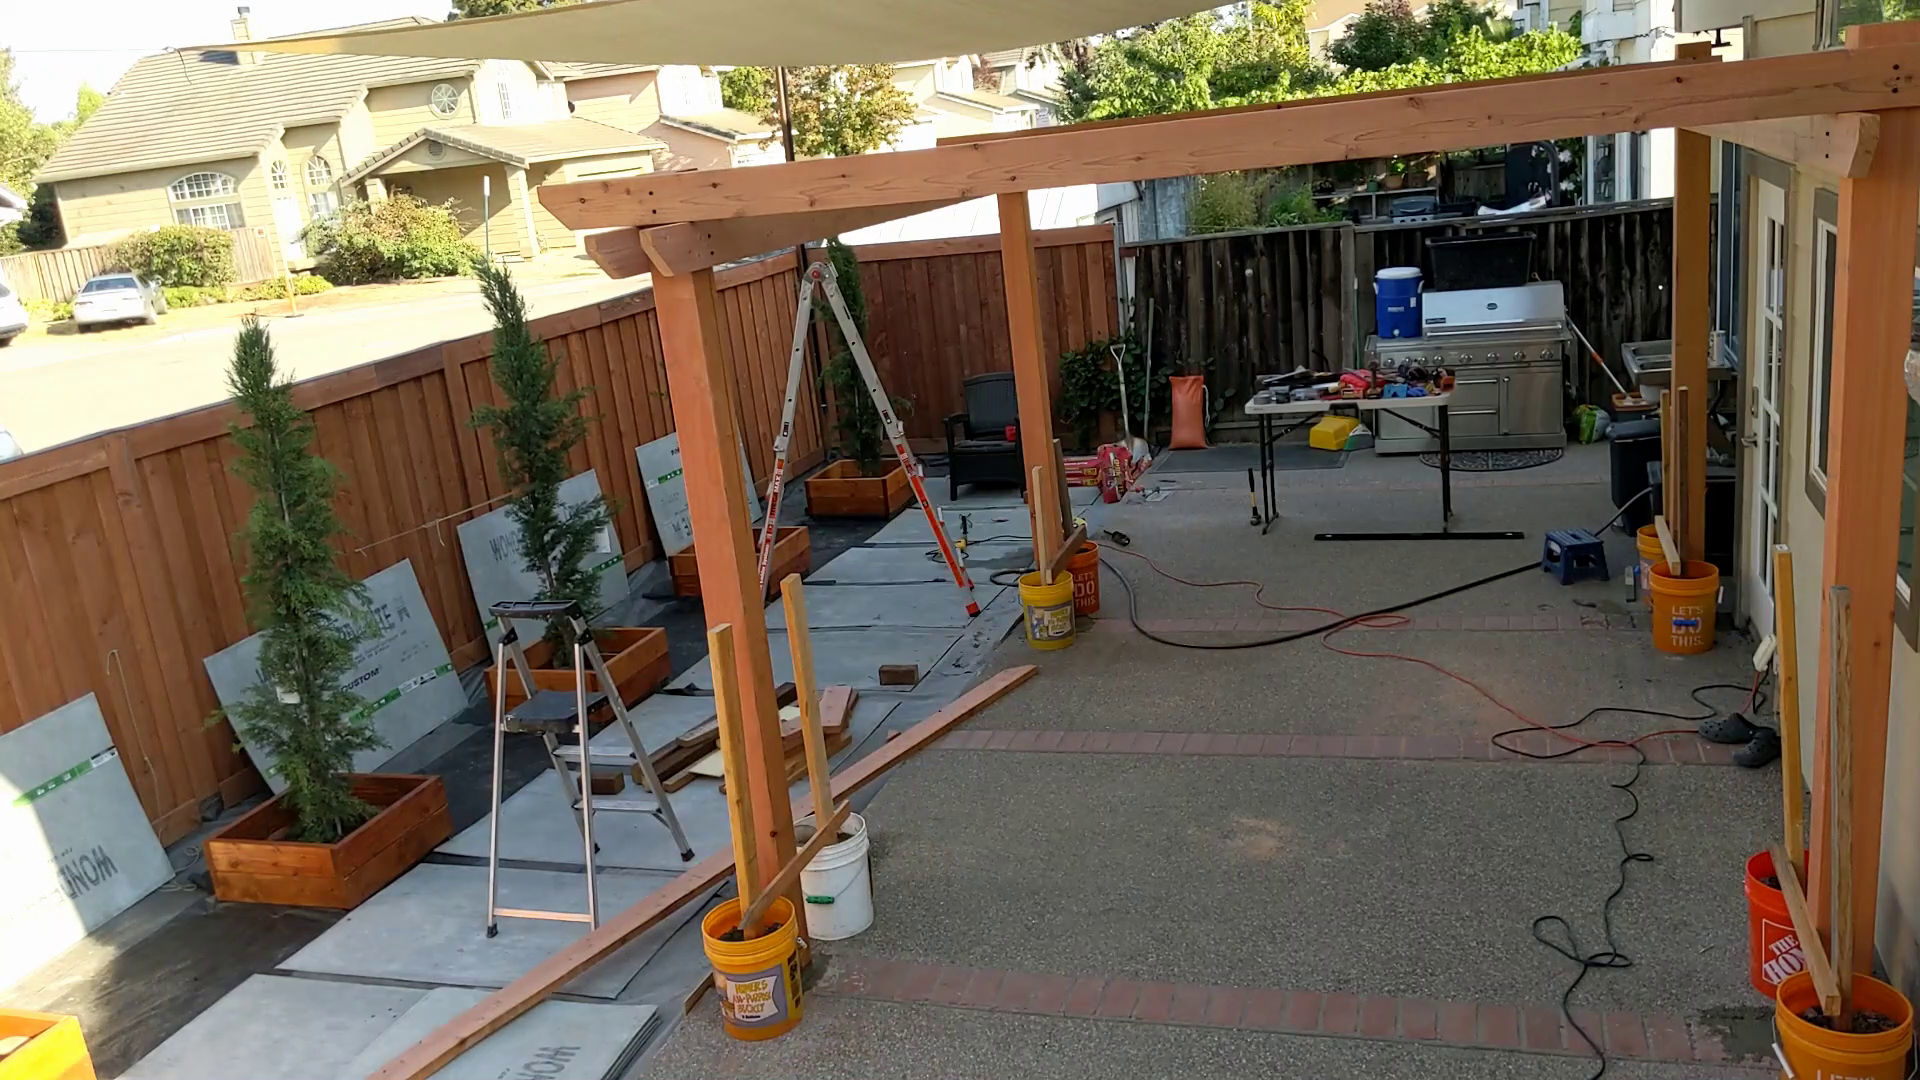
This weekend I built the frame of a pergola. The posts are 6x6x10 Redwood posts and they’re heavy. We had the posts go 15″ in the ground but before pouring cement, we wanted to make sure the posts were level and plumb.
To hold the posts in place while we measured, we filled buckets with dirt and temporarily secured each posts to them using either screws or clamps.
Once the posts were held in place, we installed the headers on top. This would hold the posts in place and, theoretically, help ensure the posts are plumb.
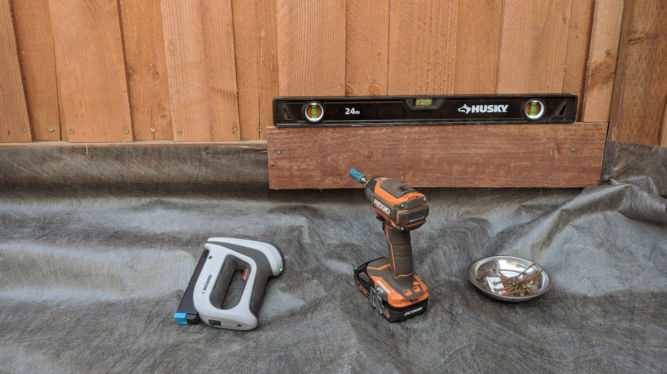
We then measured for level and plumb using straight levels and post levels.
We also measured the distance between posts to ensure corresponding sides were the same length. We could have also measure the two diagonal distances but we didn’t. We measured using a laser measure and a tape measure. Unfortunately, these can give inaccurate readings if, for example, the laser or tape measure isn’t perfectly level when taking measurements.
Despite measuring using levels and checking distances, we still found some posts were not lined up perfectly with other posts.
To make measurements easier, stick a nail near the top and bottom of each post at the same vertical position.
Then, hook the end of your tape measure to the nail head and pull to measure the distance to the corresponding nail on other posts.
Another, albeit extreme, way to ensure all posts are plumb and positioned perfectly is to use scrap 2x4s to temporarily secure all sides at the top and bottom. If you don’t have any 2x4s, you can use 2x3s. They are cheap at the Home Depot. If your 2x4s are not long enough, you can join / splice them together using metal plates or scrap plywood.
Again, you can temporarily secure the 2x4s to the posts with either screws or clamps. By securing these 2x4s around the top and bottom of the posts, and ensuring they are level, there’s no way the posts could end up being offset from each other or not plumb.
I wanted to build a pergola in my backyard. The patio is a cement slab. I could fasten post bases to it for the posts but I felt that that wasn’t as safe as having the posts sit 1.5′ in the ground. The control lines of the cement slab are just bricks with mortar. I figured I could just remove 3 bricks and dig to 1.5′ for each post hole. The concern was to not crack neighboring bricks and cement. Here’s how I managed to make rectangular holes with clean edges.
Drill
First, I drilled into a brick until I reached the dirt. This gave me an idea of how deep the slab was.
It wasn’t too deep.
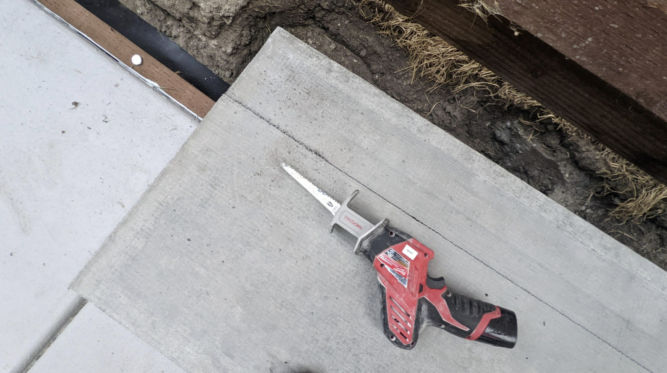
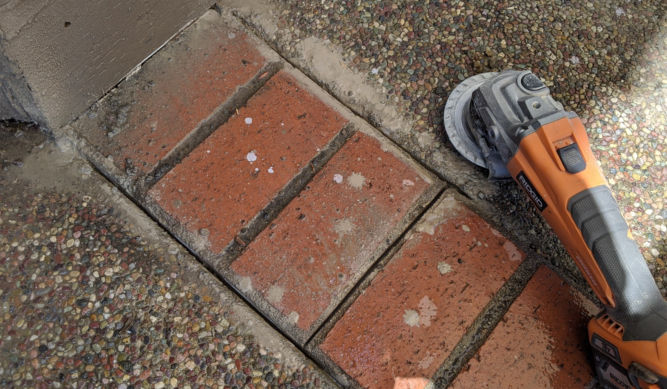
Cut
I then used a cordless angle grinder with a diamond blade to score the perimeter of my desired hole. This was especially important so as to not crack the brick next to the hole.
You could also use a circular saw with a diamond blade.
Demolish
I used a jack hammer to demolish the bricks.
I have the XtremepowerUS 2200Watt Heavy Duty Electric Demolition Jack Hammer Concrete Breaker which I got on Amazon.
It easily broke up the bricks into nice big chucks.
Below the brick was a layer of cement.
I broke that up, too, with the jackhammer.
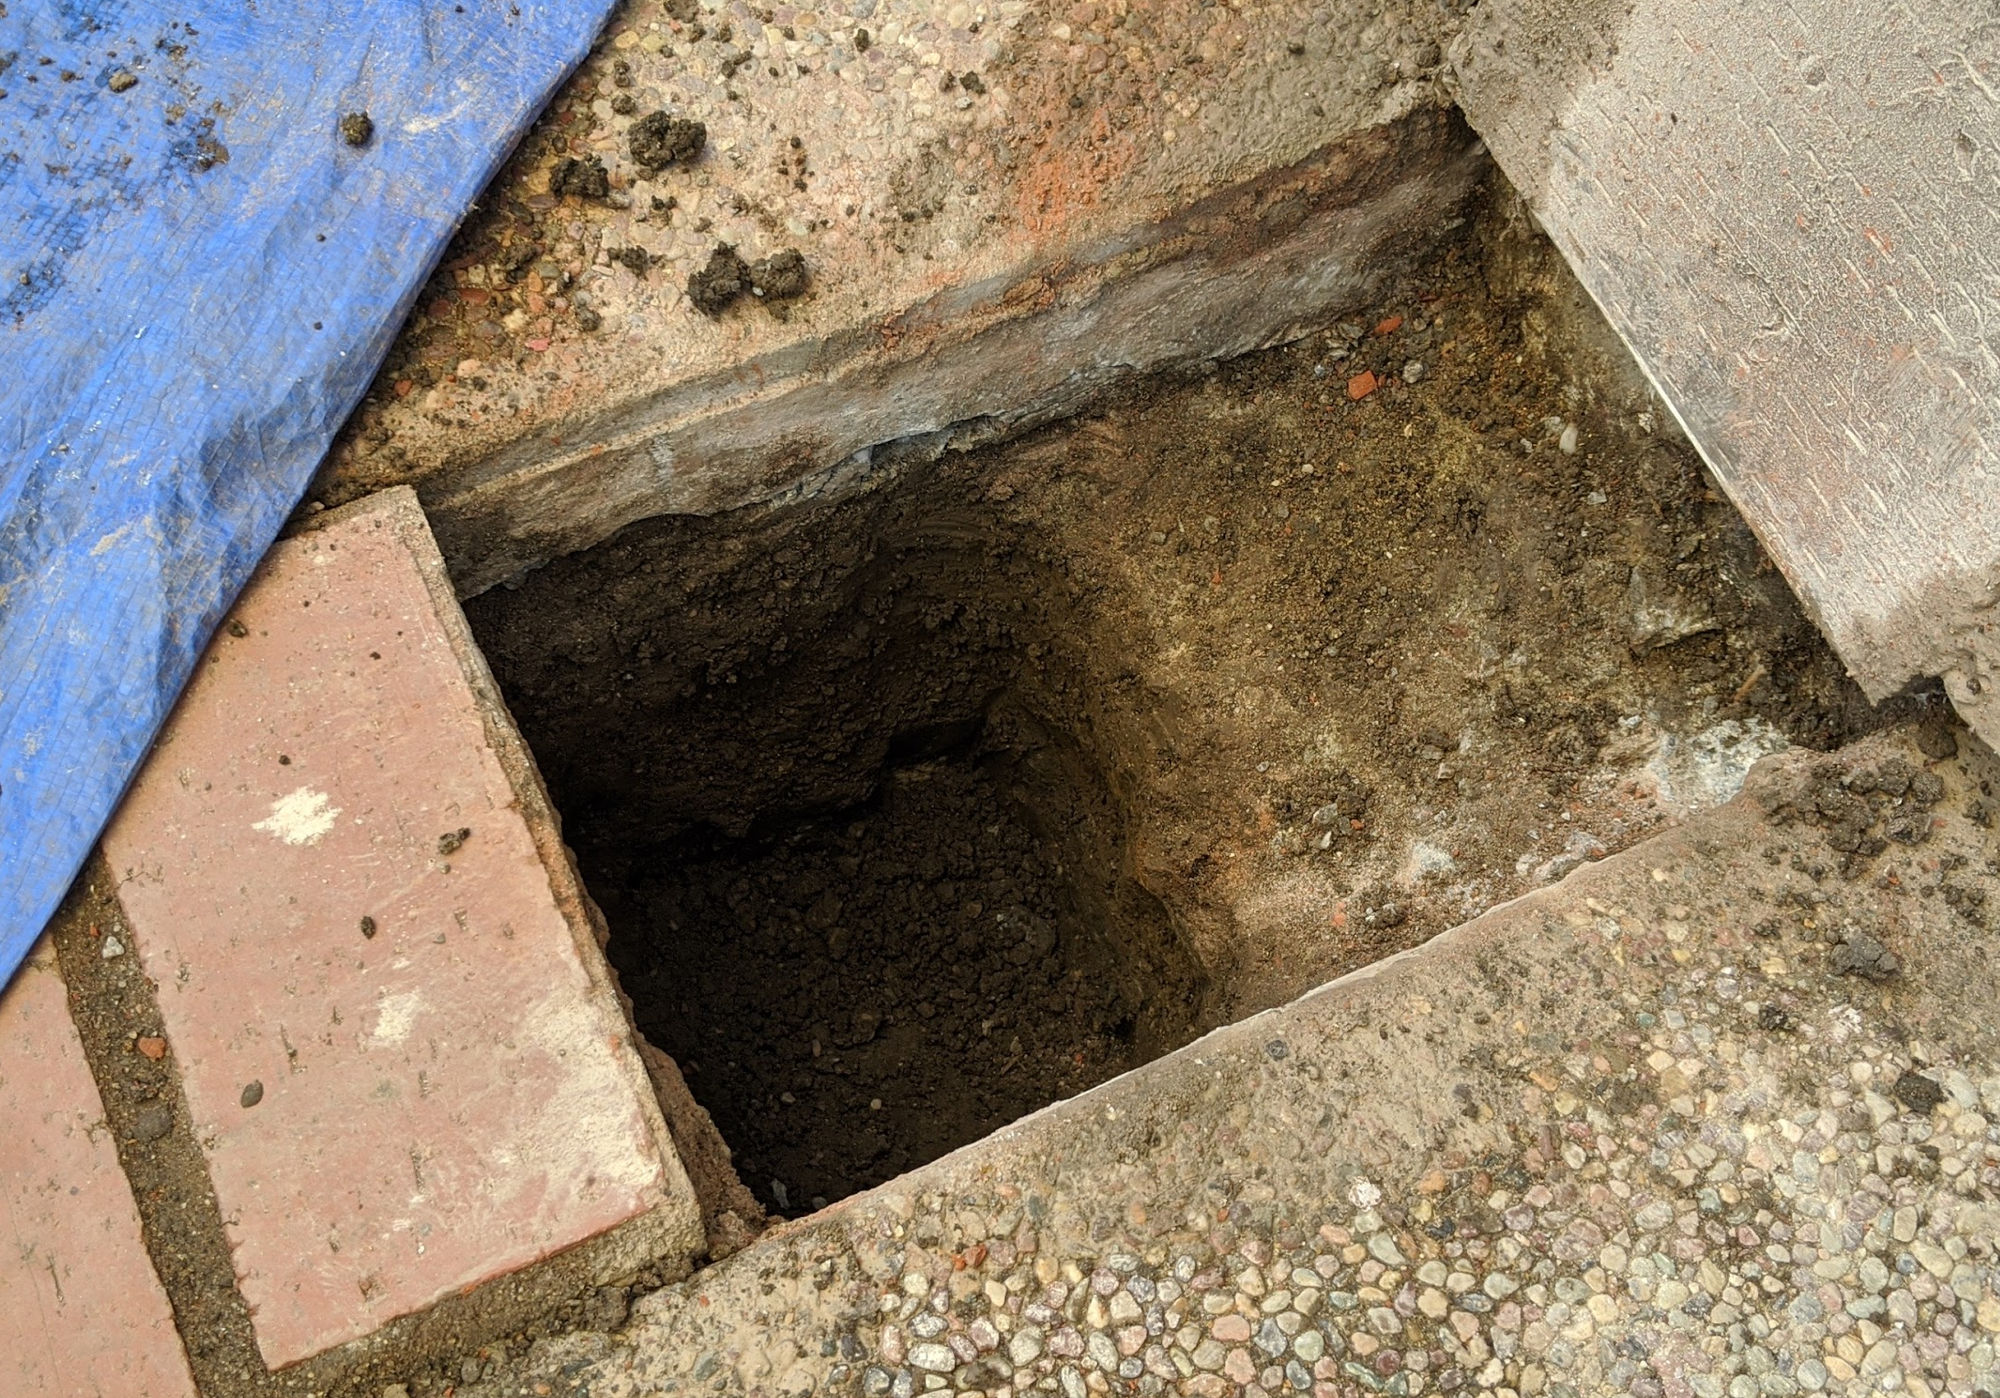
The next layer was dirt.
I dug into the dirt using the Bosch Bulldog Extreme jack hammer and a heavy duty drill with an auger drill bit.
Result: nice clean hole. I’ll have to put back two bricks for each hole but that’s easy.
Weeds are a nuisance. The grow quickly, often can penetrate thin layers of weed fabric, and definitely can pop up along perimeters where weed fabric meets a cement patio, for example. After losing a battle with weeds, I decided to take somewhat extreme but necessary measure to never have to deal with weeds again.
1. Remove dirt
If you don’t remove enough dirt, then your mulch will not be deep and if the top of the mulch is level with the surrounding area – in my case, cement patio – then the mulch will easily spill over and make a mess. I decided to remove 5 inches of dirt. This was a lot of work so I rented a heavy duty hydraulic tiller, a mini excavator and a mini skid steer.
2. Secure weed fabric to perimeter
Weeds will most definitely grow along the perimeter of your mulch area. For my mulch area, there’s a fence on three sides and a cement patio on one side.
For the fence sides, the weed fabric will be stapled to bottom 2×4 horizontal fence rail. Then, a fence board will be screwed horizontally over the 2×4 rail thereby sandwiching the weed fabric.
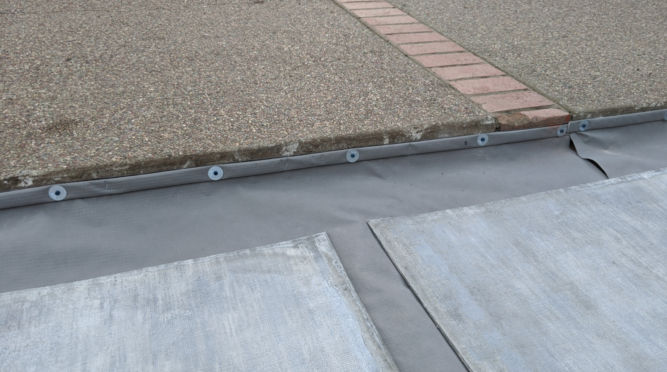
For the cement patio side, I wrapped weed fabric 3 times over a long piece of PVC moulding and screwed it into the cement using concrete anchor screws.
I first folded the edge of the weed fabric over the PVC moulding and stapled the two together over a piece of scrap wood (soft corkboard is better since it’s easier to remove staples from it). Then I flipped the moulding over and hammered the staple ends down to secure the staple in place.
After doing that along the 8′ length of the PVC moulding, I wrapped the weed fabric twice over the moulding and stapled it again to further secure it to the moulding.
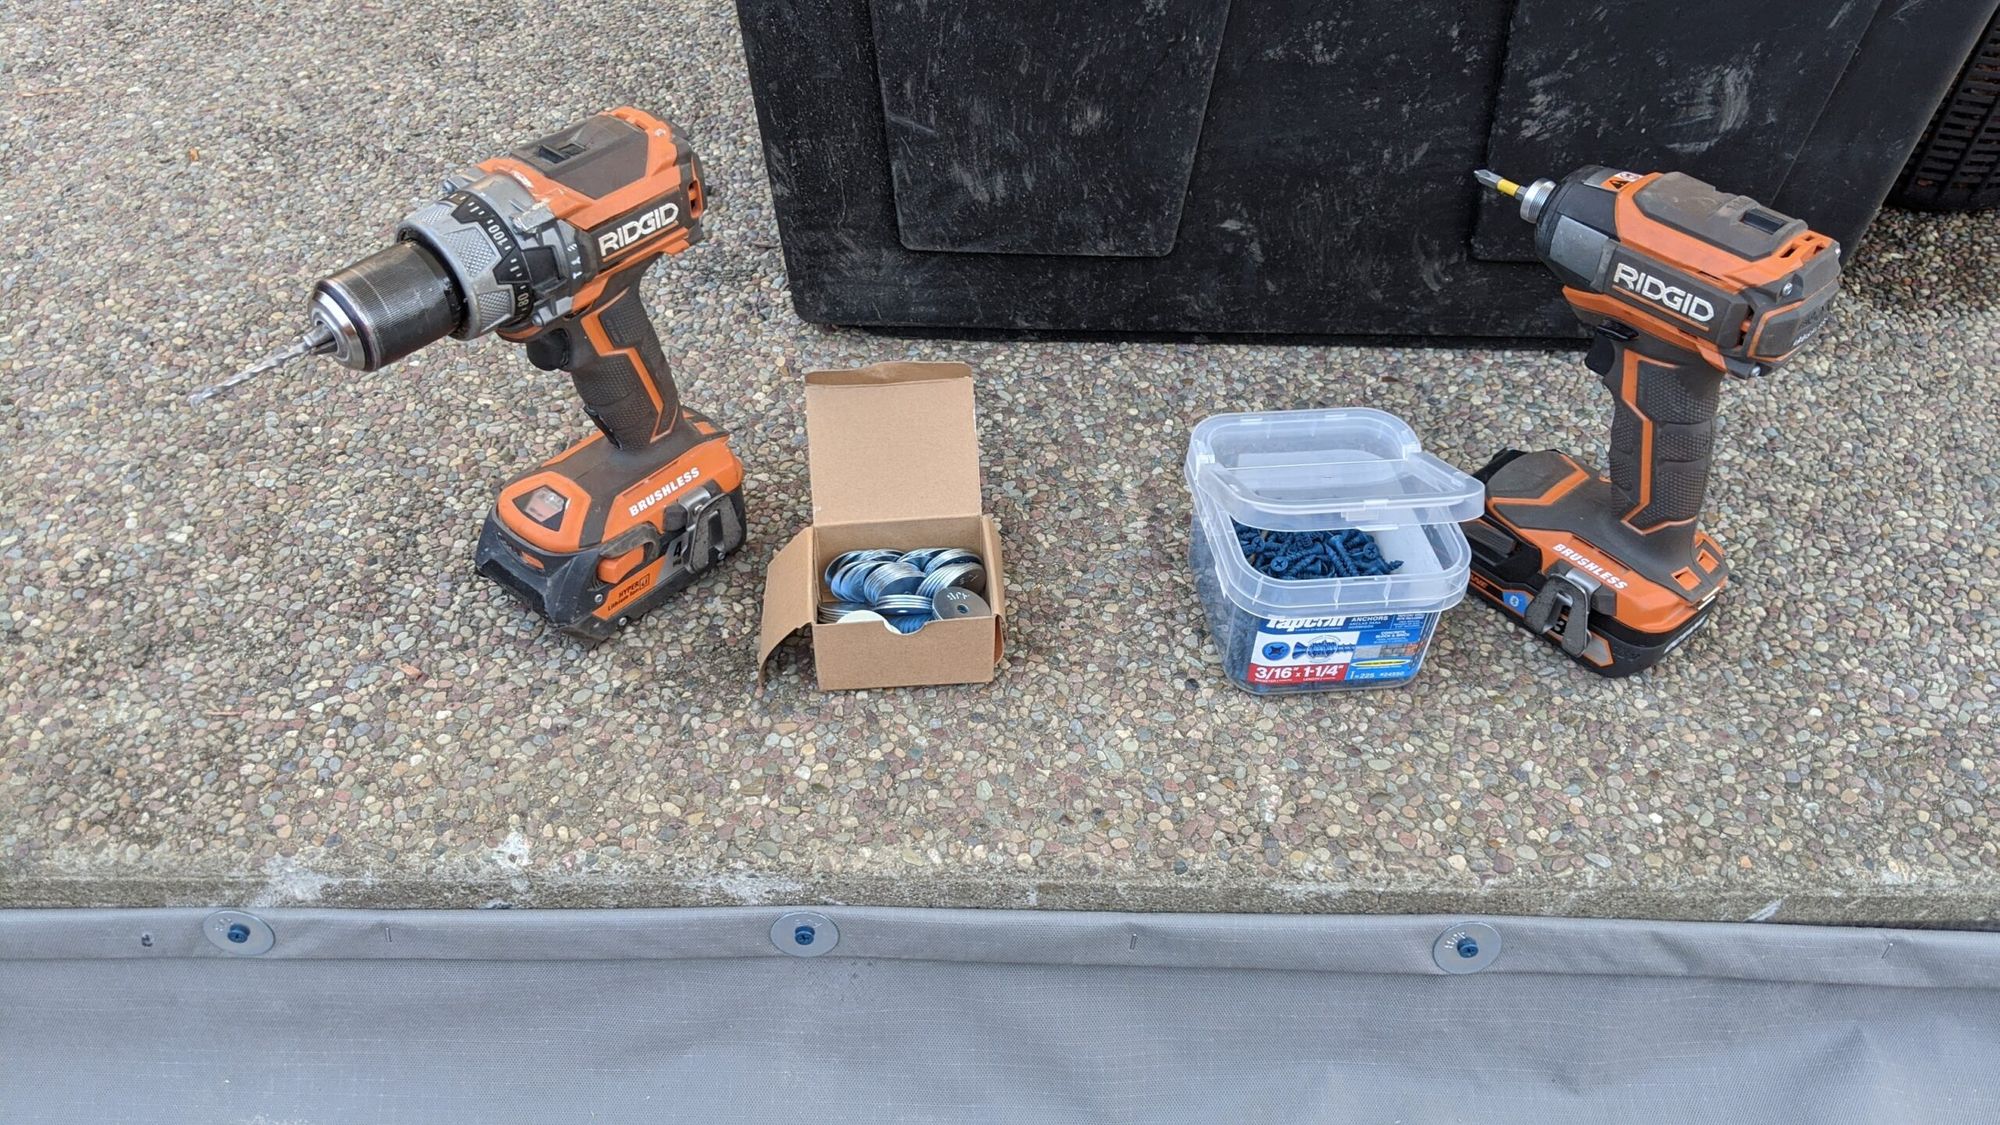
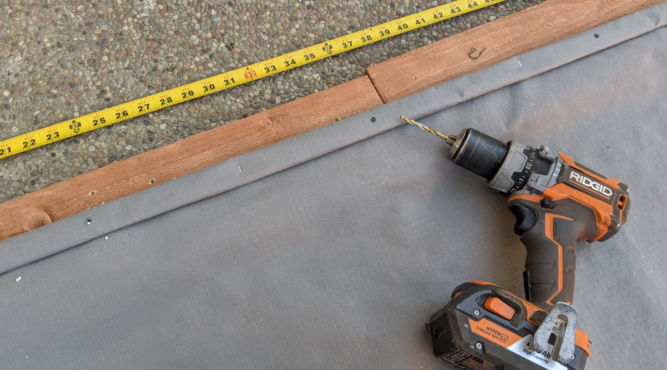
Then I predrilled holes in the moulding every 1 foot.
Then, using the special drill bits that came with the screws, I drilled holes in the cement through the predrilled holes in the moulding. When doing this, I used the hammer drill setting with high torque. Then I screwed the anchors through stainless steel washers.
The weed fabric is now secure and flush against the concrete.
Now, there’s no way any weeds could sneak their way up along this edge.
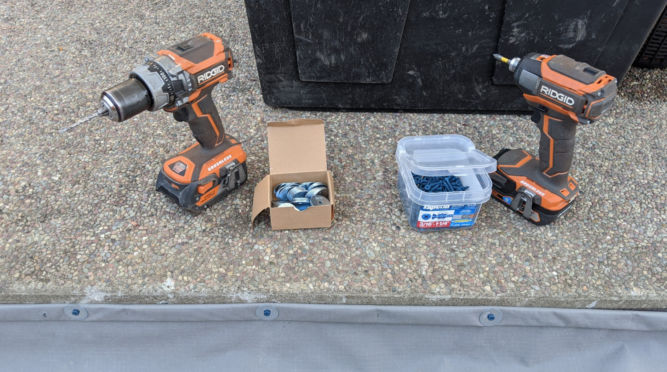
Note about drill/drive options
The drill I use is the Ridgid 18-Volt Lithium-Ion Cordless Brushless 1/2 in. Compact Hammer Drill. As you can see in the picture below, the
Drilling in hard materials such as brick, concrete, etc. use carbide-tipped bits and select hammer mode and use LO (1) speed
Drilling in materials with hard, brittle surfaces such as tile, etc. use carbide-tipped bits and select drilling mode
Drilling in soft materialssuch as wood, etc. use twist drills bits, hole saws, etc. and select drilling mode
Driving screws choose speed (LO – 1 or HI – 2), adjust torque ring, select driving mode
Torque Ring
When driving screws, increase or decrease the torque to help prevent the possibility of damaging screw heads, threads, workpiece, etc. In general, torque intensity should correspond to the screw diameter. If the torque is too high or the screws too small, the screws may be damaged or broken. The torque is greater when the torque adjustment ring is set on a higher setting. The torque is less when the torque adjustment ring is set on a lower setting.
NOTE: The torque adjustment ring only functions in drive mode.
When drilling or driving into a hard material, attach the auxiliary handle for more leverage.
Update:
Instead of using a regular drill with the hammer drill mode, use a heavy duty hammer drill like the Bosch Bulldog Xtreme. It’s takes an SDS plus drill bit which are available in 5/32 shaft diameters for 3/16″ screws.
This makes drill holes in concrete super easy. But, don’t drill in brick. Brick is too soft and screws will be loose.
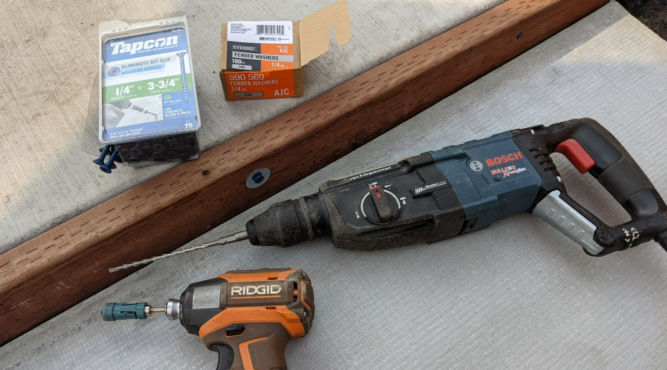
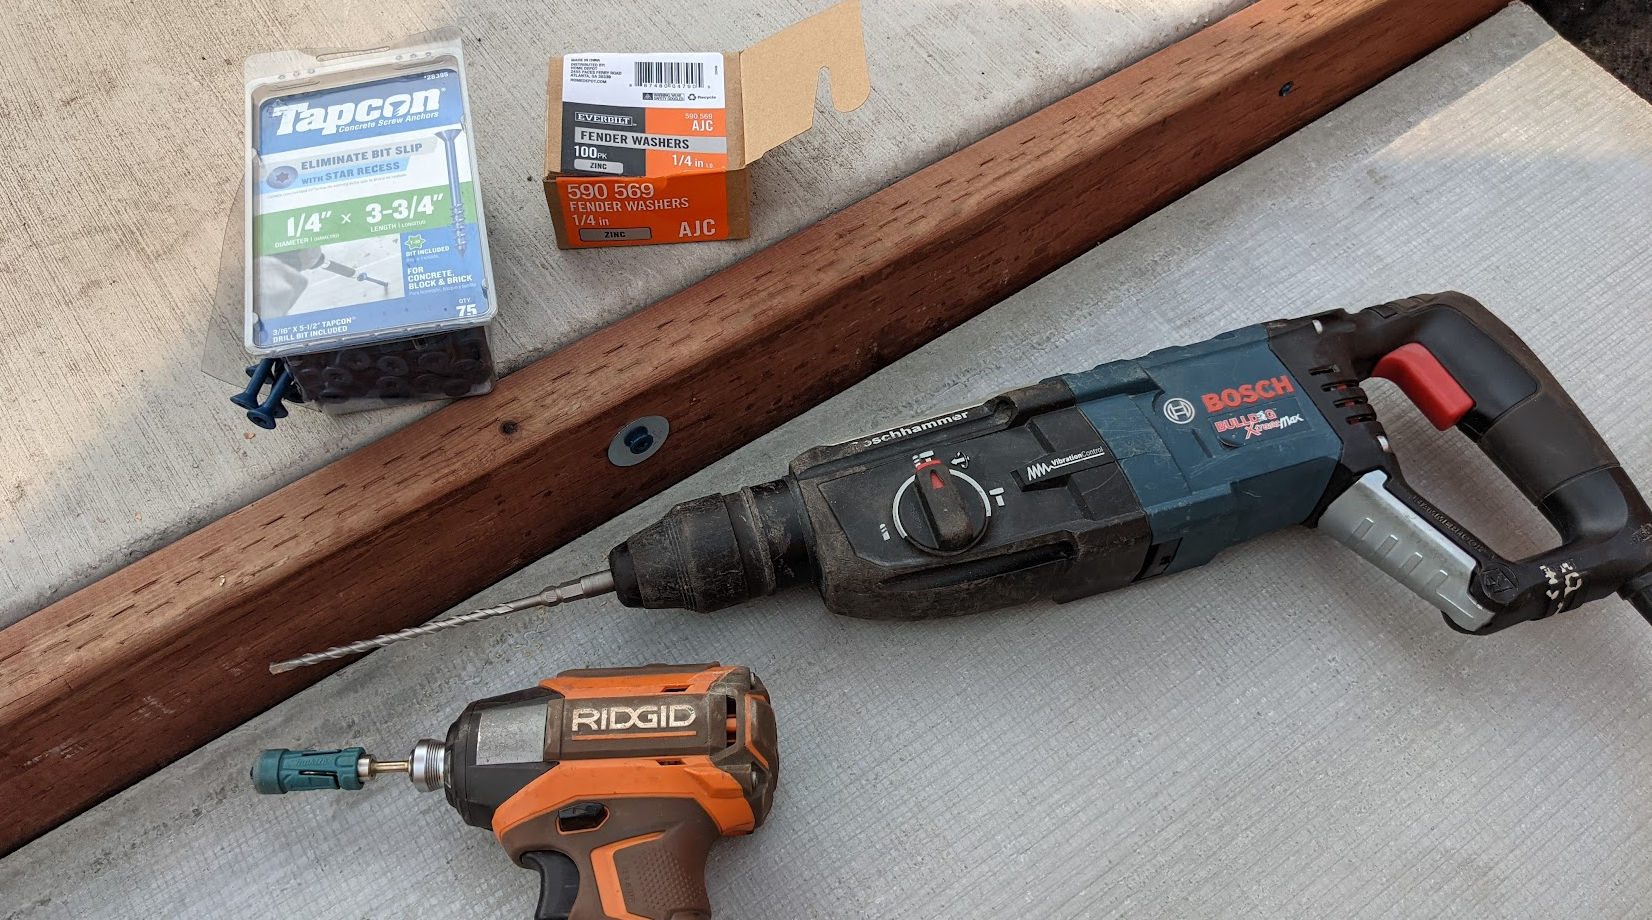
The PVC moulding is good in that it is waterproof but it is flexible which means weeds could slip their way behind it unless you use many, many screws fasten it to concrete. Therefore, I decided to use pressure-treated 2×4 wood which is rigid and only requires 3 or 5 screws per 8 foot length. If you use 2×4 wood, then I found the best screw to use is Tapcon 1/4″ thick x 3-3/4″ long screws with 1/4″ washers. Driving these screws in with washers really pull and secure the wood against the concrete edge. Another option is to use Steelworks 1-1/2-in x 4-ft Interior/Exterior Mill Finished Aluminum Solid bar but they are $7 per 4 ft length.
3. Overlap weed fabric by 50%
Lay down weed fabric overlapping each strip by 50%. Use landscape staples to secure fabric to ground.
When picking weed fabric, I find this matrix grid style to be good. Unlike the one pictured above, which I got at Costco, the one pictured below doesn’t have fine hairs that stick to things like mulch.
Cement boards are non-organic so they will not break down. I know this is extreme but it’s better than having to pull weeds every month or two. I used the thinnest and lightest cement board. To allow for water drainage, I placed each cement board a few inches apart. Since the cement board is heavy, there’s no need to secure it to the ground.
5. Add rubber mulch
I don’t want to have to keep adding mulch every year or two and I don’t want the color of the mulch to fade away so I chose to use rubber mulch.
Update Jan 25, 2022
So, the cement board worked to prevent weed growth but the weed fabric was mostly useless. Just use weed fabric along edges and everywhere else, overlap cement board.
This post is based on my personal experience. I don’t think I ever want to install pavers again.
Step 1: Remove sod
If you have grass, rent a sod cutter from Home Depot.
Cut the grass horizontally and then vertically resulting in a grid. This grid method makes removing the sod easier because you end up with squares of sod that are not too heavy to lift and are just easier to work with.
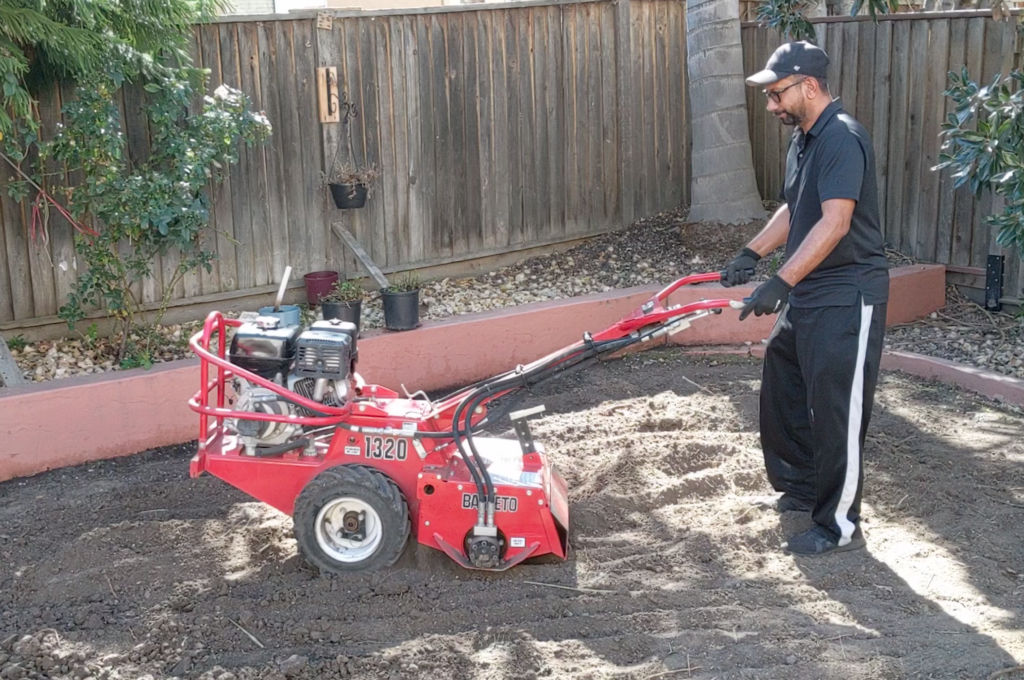
Step 2: Rent a tiller to break up dirt
You may need to remove some dirt so the top of the pavers will be where you want them. In order to remove dirt, you need to break it up (till it) first. The easiest and most powerful tiller I’ve used is a hydraulic tiller which you can rent at the Home Depot. I recommend this tiller over all the others.
Step 3: Remove broken-up dirt
Once the dirt is broken up, you can remove it using a shovel and a wheel barrow. This is the most tiring part of this project. For the wheel barrow, I recommend a 4 wheel instead of a single wheel one so you’re not having to lift it as you move it. You can easily dump the contents by lifting the yellow latch to unlock it.
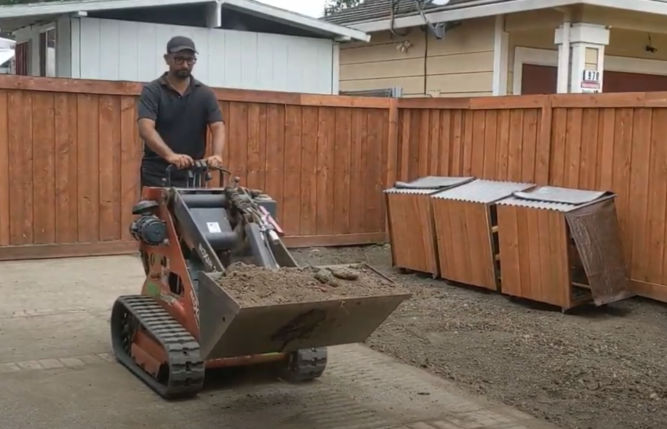
If you need to remove a lot of dirt, then rent a mini excavator and tow it to your work site. This thing is less than 3 feet wide. You can also use it to push dirt to help spread it out.
Step 4: Get rid of dirt
To get rid of the dirt, you could take it do your local garbage dump. Note that if they charge based on weight, it can be expensive. I paid $360 to dump one pick-up truck full of dirt. There’s a dedicated dirt dump area near me which accepts only dirt. They charge $50 to dump dirt but require the dirt be plant-free and you have to have the dirt test and certified which costs $300.
Loading the dirt
To move the dirt, you could rent a pick-up truck from U-haul. I laid down a large tarp before loading dirt to make it easier to remove that last bit of dirt and to make cleanup easier. To transport the dirt from the backyard to the truck, I filled 3 buckets with dirt which fit perfectly in my Gorilla cart.
Since the truck bed sides are high, I first put the buckets on a work stand to raise them up. Then I’d stand on a stool next to it and lift and dump the buckets over the side of the truck bed and into the truck.
If you have a lot of dirt to move, you can also rent a mini skid steer.
Unloading the dirt
To unload the dirt, you could install a cargo bed unloader (available at Harbor Freight) onto the truck bed gate to make it easier to unload the dirt.
Note: if you line the cargo bed with tarp, make sure the black cargo bed unloader sheet is on top of the tarp, not under it. Otherwise, when cranking the level to remove the dirt, the unloader sheet will just slide under the tarp leaving the tarp and the dirt above it in place.
Step 5: Rake to level dirt
Use a metal rake to level the dirt as much as you can.
Step 6: Compact the dirt
Rent a plate compactor to compact the dirt.
Step 7: Lay weed fabric
This is necessary to help block weeds from coming up. It also makes the next steps easier since it keeps dirt from getting everywhere, in your shoes, etc.
Step 8: Mark perimeter and add sand
Using wood stakes and string, mark the perimeter of where your pavers will be. You can use a staple gun to easily secure the string to the wood stakes.
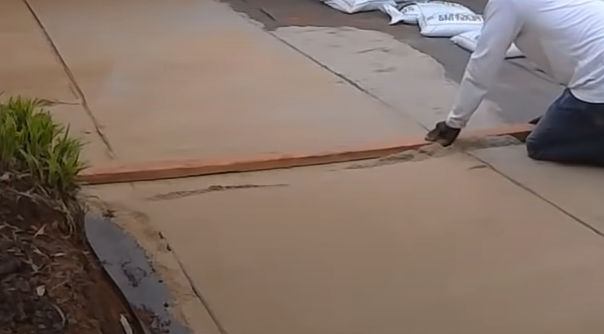
Step 9: Level sand, add paver base and pavers
The leveling sand should be 1/2″ thick. Use parallel 1/2″ diameter rebar and a 2×4 to screed the sand to achieve this.
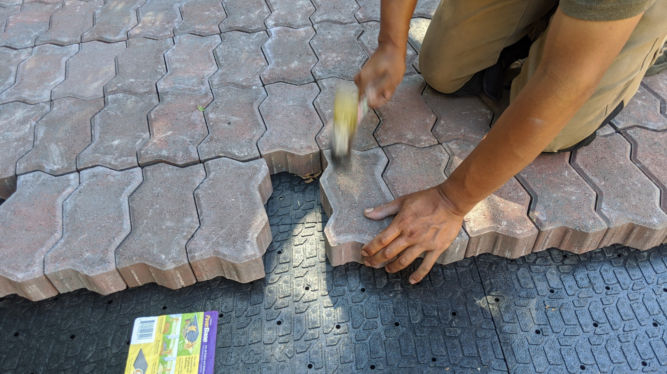
Then, add paver base panels and cut them to length. Cut some panels in half and stagger the placement of the panels for better connections and less movement.
Work in two rows at a time. Before laying each panel, roughly level the sand by hand and then screed the sand using a 2″x3″ or a square dowel. For each panel, use a level to check for level. Place pavers and use a level to check for level again.
Where two panels meet, there is a greater chance the pavers will not be level. Use a mallet to hit and push down bumps. Check the pavers are level at the panel joints before putting pavers in the middle of the panels.
Wear knee protectors and pants instead of shorts so sand doesn’t get under the knee protector.
Idea: To simplify and save time leveling sand, try this:
Take one paver base panel
Attach on top of it a flat piece of plywood about the size of the panel
Attach on top of the plywood 4 cheap levels (2 vertically and 2 horizontally) about 20% from the edge
Lay the panel down and check for level
Where not level, tap down using a mallet to push sand out from under panel until all levels show level
Step 10: Install paver edging
Drive stakes into paver edging such that the edging is flush against the edge of the pavers. Adjust the amount of sand below the edging so that top of edging is about 1/2″ below the top of the pavers.
Note:when laying down the paver base panels, it’s better to place them such that they bleed the outer perimeter of the final area of the pavers. In other words, they should extend about 3 inches beyond the perimeter so that when you install the paver edging, the edging will sit flush against the pavers.
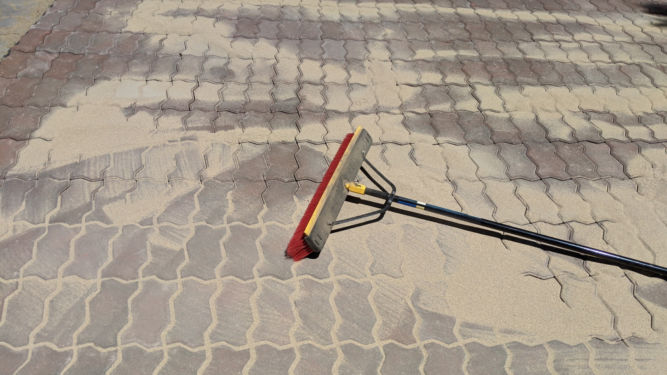
Step 11: Add joint sand
Pour paver joint sand and sweep it into the paver joints. The sand contains glue and will stick together after a while.
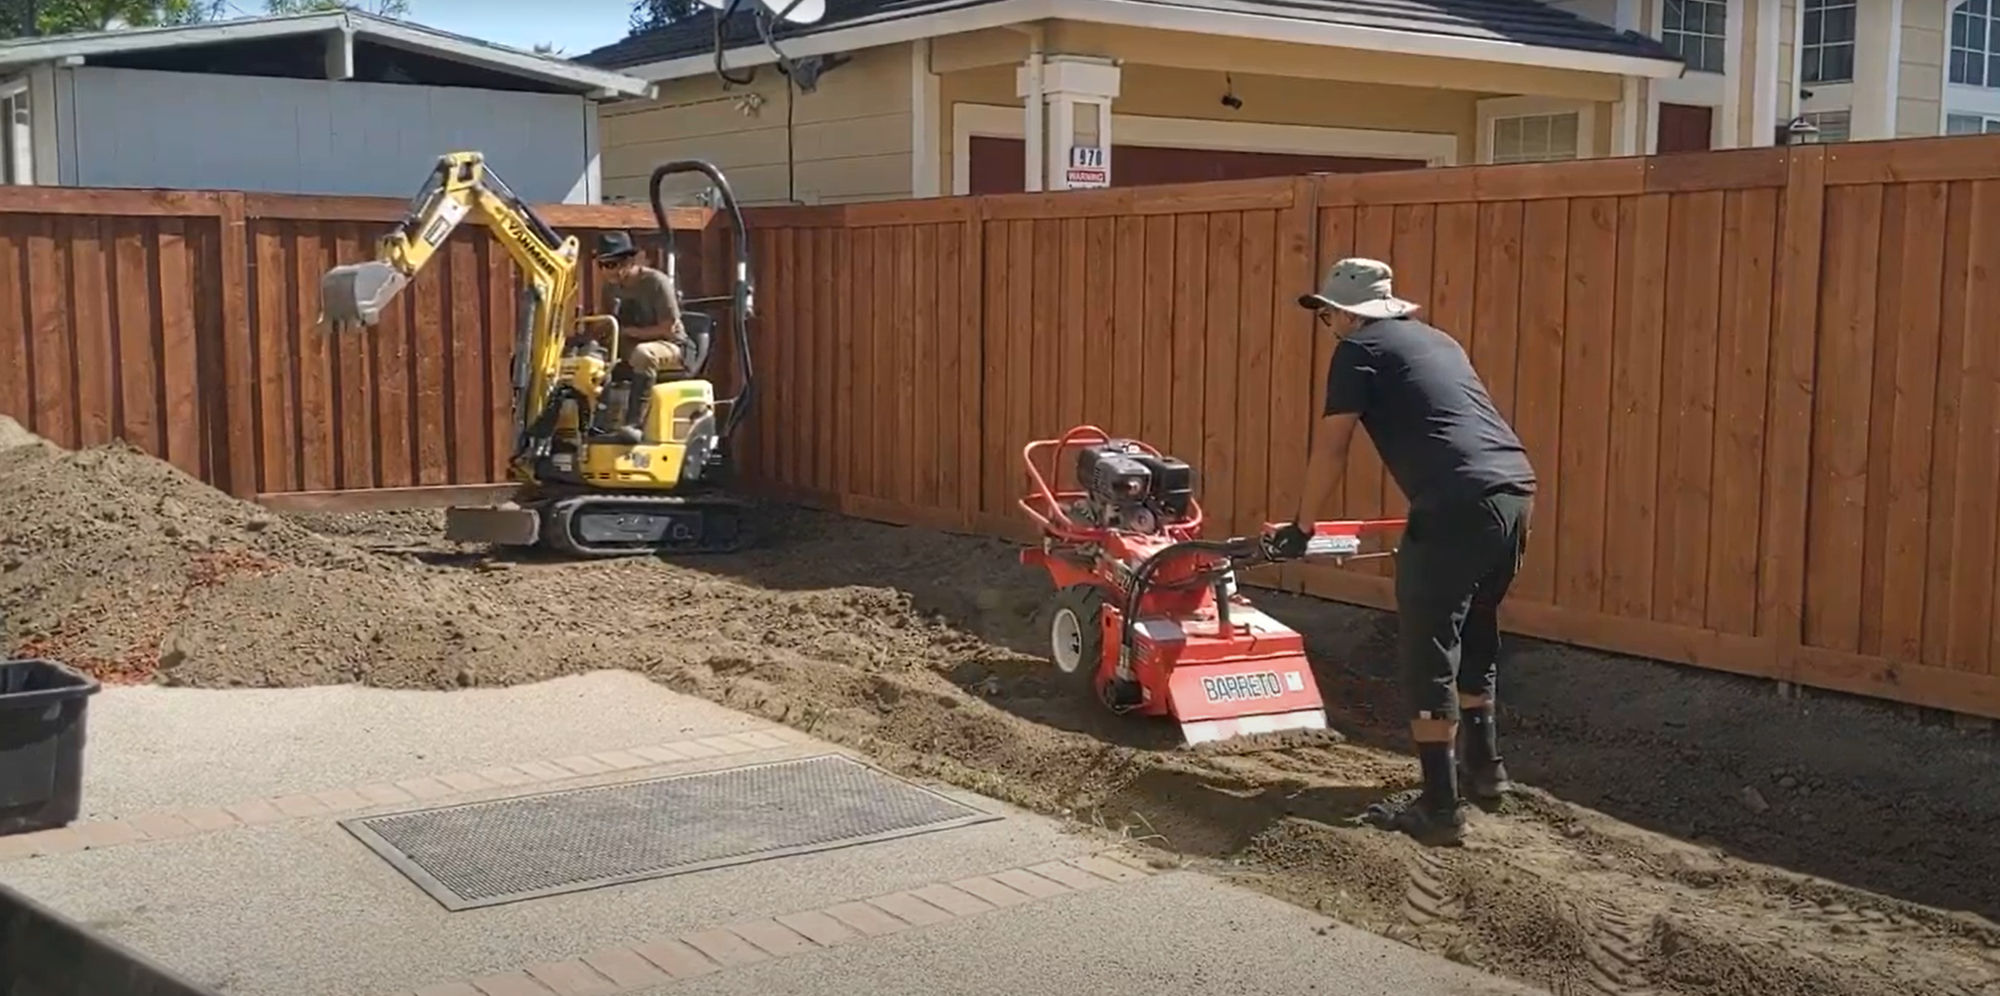
I need to remove quite a bit of dirt from my backyard and thought that breaking up the dirt with a rented tiller and then shoveling the dirt aside by hand was sufficient. The problem is it’s a lot quicker to break up the dirt with a tiller than it is to move the dirt by hand so you end up not being able to use the tiller often enough in a short period of time making rental cost expensive. Also, manually moving lots of dirt by hand is incredibly tiring and time-consuming. Though renting an excavator seems like overkill ad expensive for a residential backyard, it’s actually not considering how easy it is to use and how quickly you can get a project done.
With two people working, one breaking up dirt with a tiller and the other moving dirt using an excavator, the project of removing dirt took only a day. The following tools were rented from the Home Depot.
Baretto Hydraulic Tiller – ~ $159 per day
Yanmar Mini Excavator – ~ $350 per day
Note:
There are many tillers but the best is the Baretto hydraulic tiller. It’s huge but it can break up hard dirt that hasn’t even been softened with water. It’s also easy to use but due to its size, it can’t break up dirt along edges like along a fence. This tiller also comes with a mini trailer so you can just tow it.
The mini excavator is 2′ 4″ wide so it can fit through a standard 3′ wide fence gate. It takes diesel gas but is very efficient.
Tip:
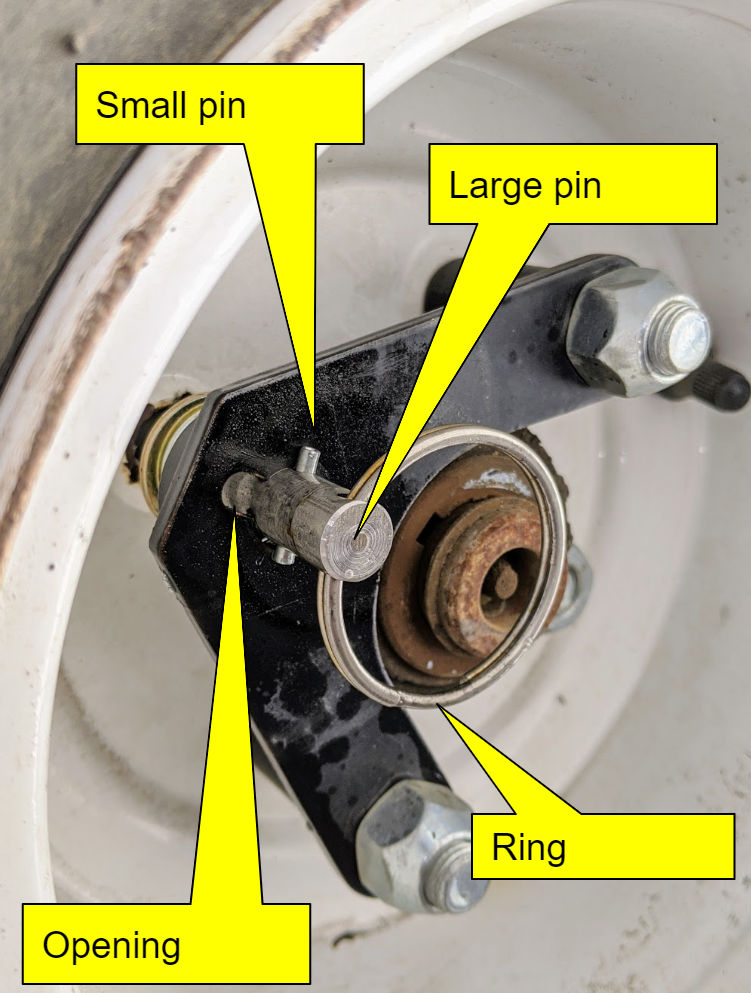
When using the tiller, you can pull the trigger to have the engine move the wheels forward and in reverse. However, the movement is very slow which is fine for when you’re actually tilling dirt. When you need to move the tiller from the trailer to your dirt, it’s must quicker and quieter to unlock the wheels and manually push the tiller with the engine off. To do that,
rotate the ring that’s attached to a large pin that goes into the wheel rim until the small pin that sits perpendicular to the large pin is aligned with the opening
pull the ring so that the small pin comes through the open and then rotate the ring so that the large pin is held out thereby unlocking the wheel from the engine. if you are unable to pull the ring, rotate it clockwise a few times and try again.
I have the MaxPower PivoTrim weed trimmer head because the spool type trimmer heads always get tangled. The MaxPower PivoTrim head makes replacing trimmer line super easy.
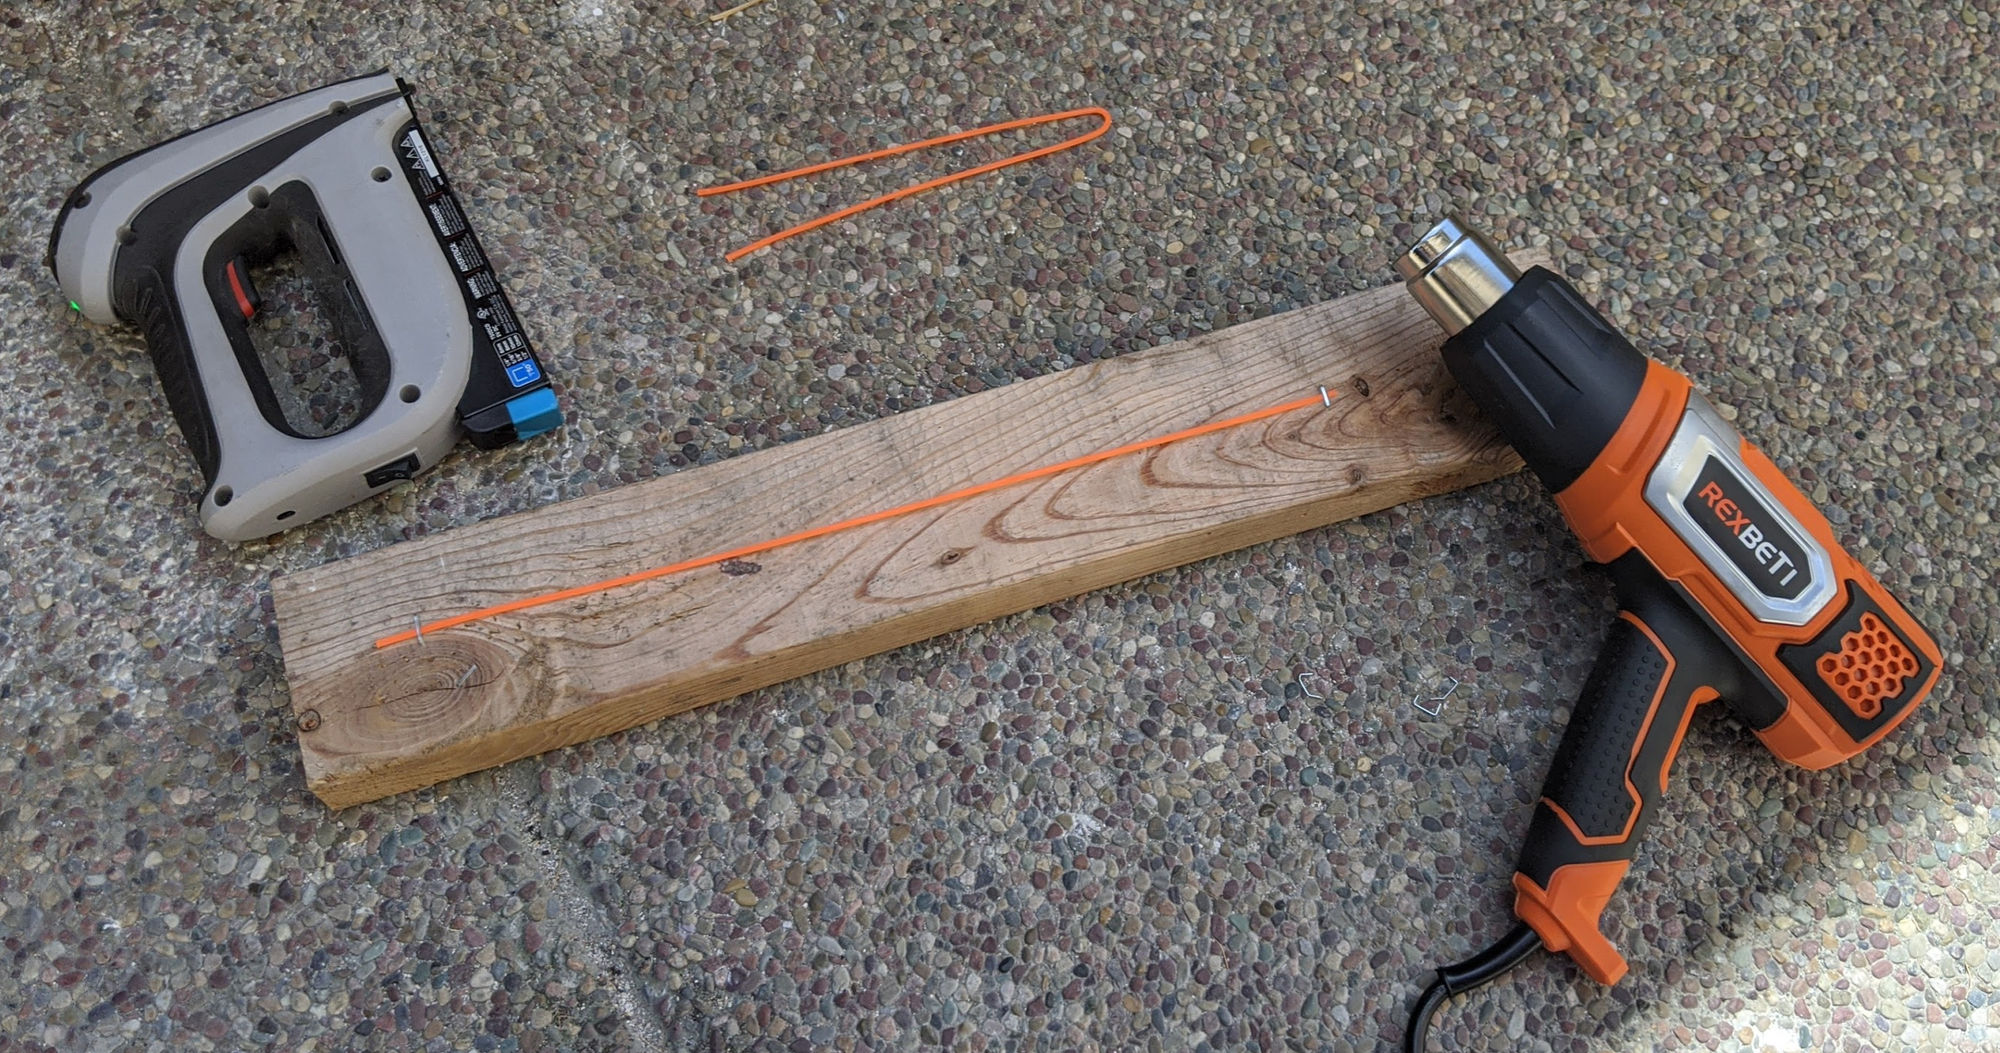
When I ran out of the trimmer line that came with the head, I bought a spool of new trimmer line. Unfortunately, when you cut some trimmer line and install it in the head, the line curves up or down instead of pointing straight out. So, I found a way to straighten the trimmer line. Below is a picture of the line straightened (left) and before it was straightened (right).
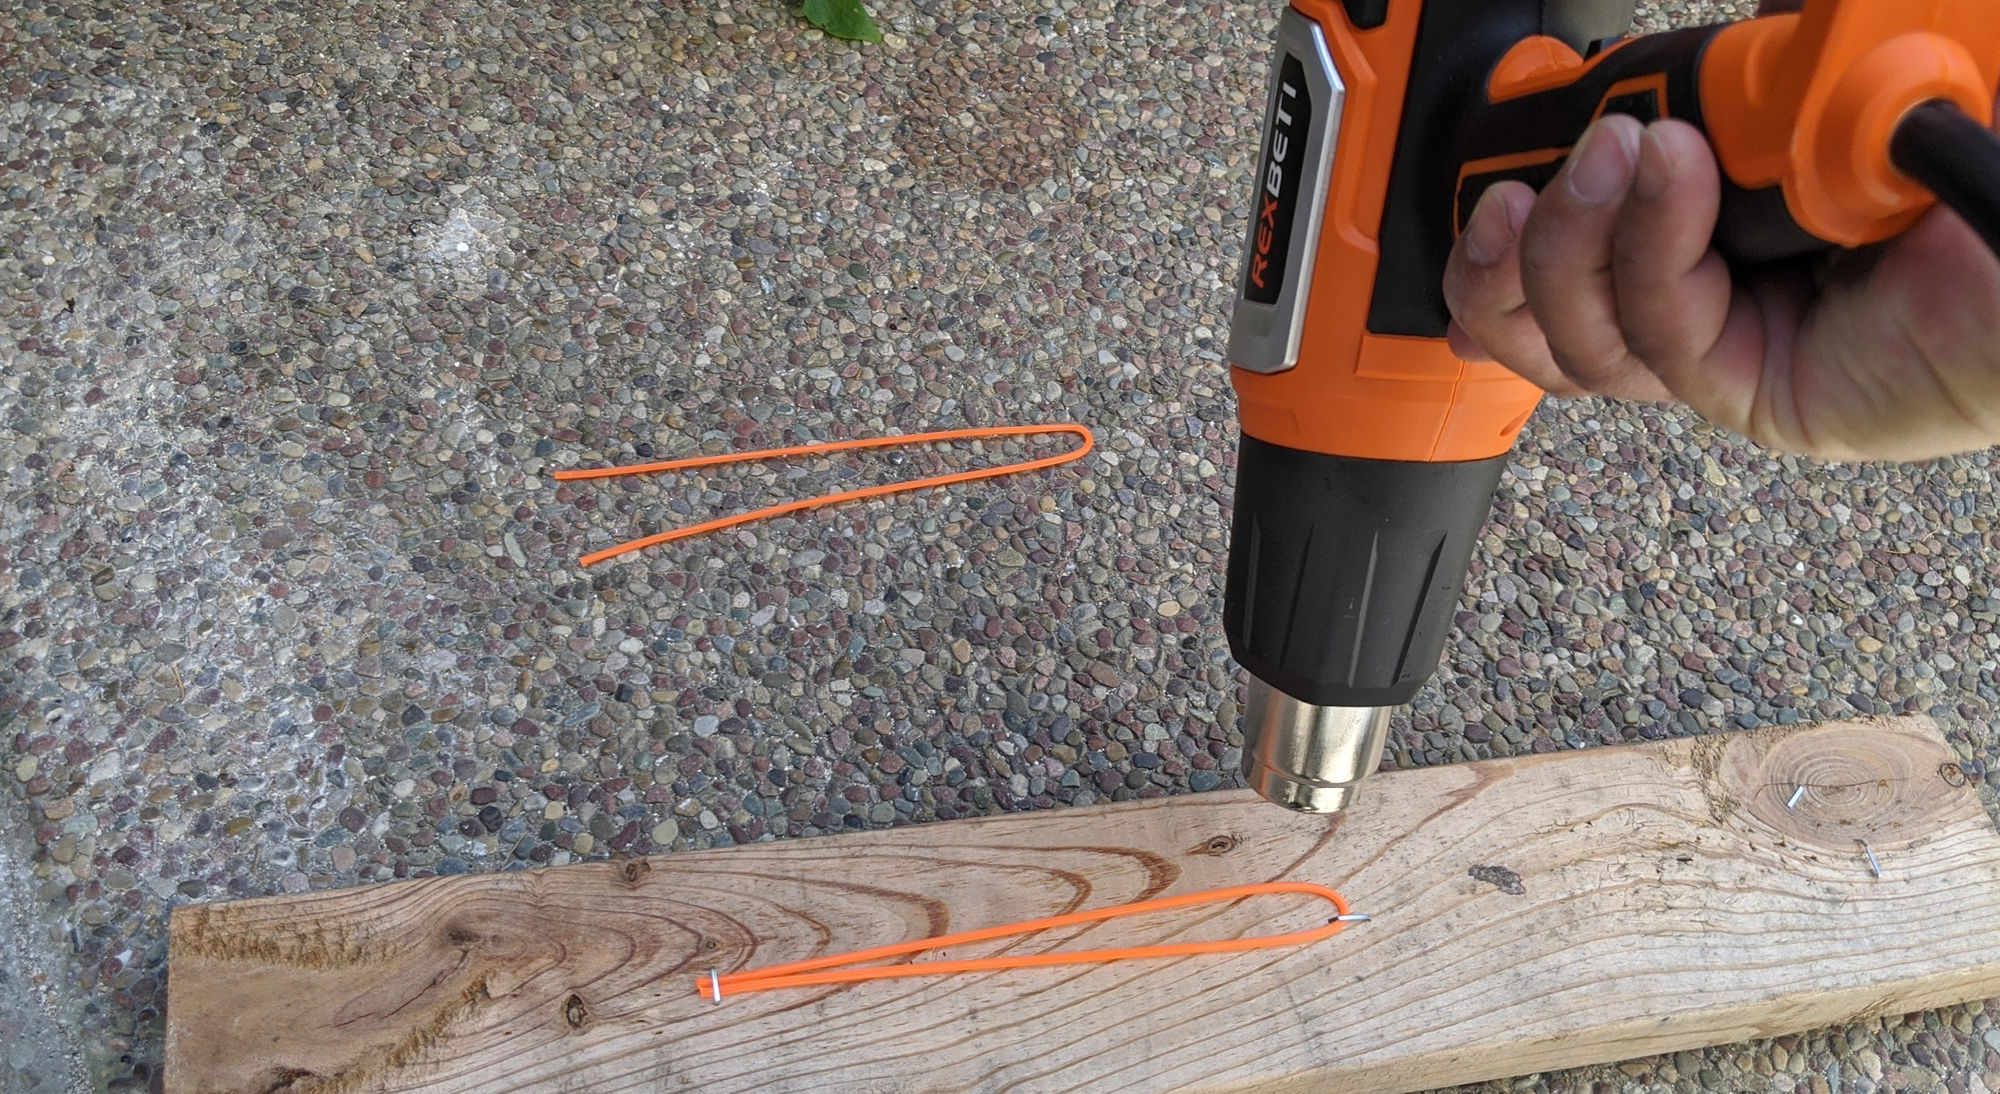
To straighten the line, I cut the line to length, stapled each end down to a piece of 2×4, took a heat gun and carefully heat up the plastic line to soften it and cause it to take on a new shape.
Then, I folded the straightened line in half and stapled each end down to the 2×4 and heat up the folded end so that it would remember that position.
The end result is trimmer lines that are straight and cut weeds better. Note, you may have better performance if you remove the plastic guard on the trimmer shaft.
I’ve tried various types of tillers that you can rent from Home Depot. The light duty mantis tillers and mid tine are really only good for soft dirt.
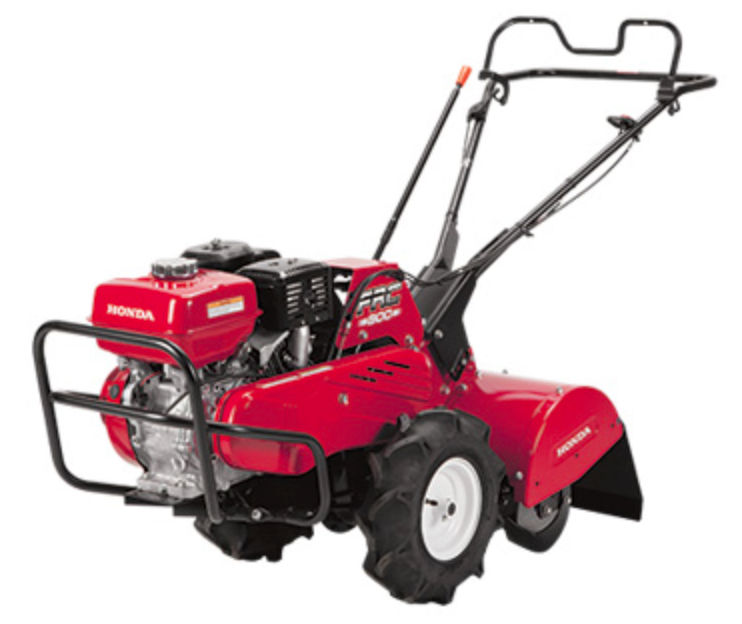
MTA Rear Tine Tiller (Model # FRC800K1A-656912)
This tiller is heavy duty and can break up hard clay BUT both the wheels and the tines move forward so unless the tines are partially underground breaking the dirt, you can easily be pulled forward and lose control of the machine. Though this is a heavy duty machine, I find it less easy to control compared to the Barreto Hydraulic tiller.
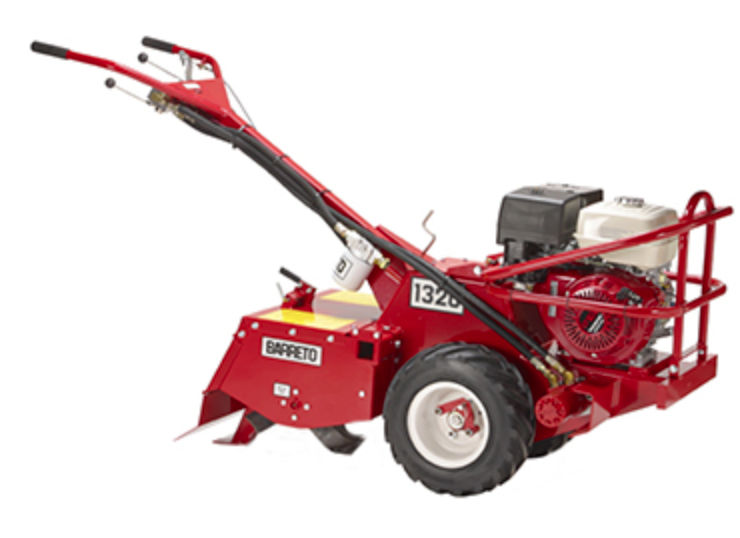
Barreto Hydraulic Tiller (Model # E1320HX)
This tiller is big and heavy but it’s easy to use, easy to control, and will destroy clay and hard dirt. The rear tines move in the opposite direction of the wheels so the machine never runs away from you moving you forward out of control. It’s the most expensive to rent, but the time savings and ease of use make it worth it. I personally recommend this tiller over all the others.