This method assumes the top and bottom plates are already in place.
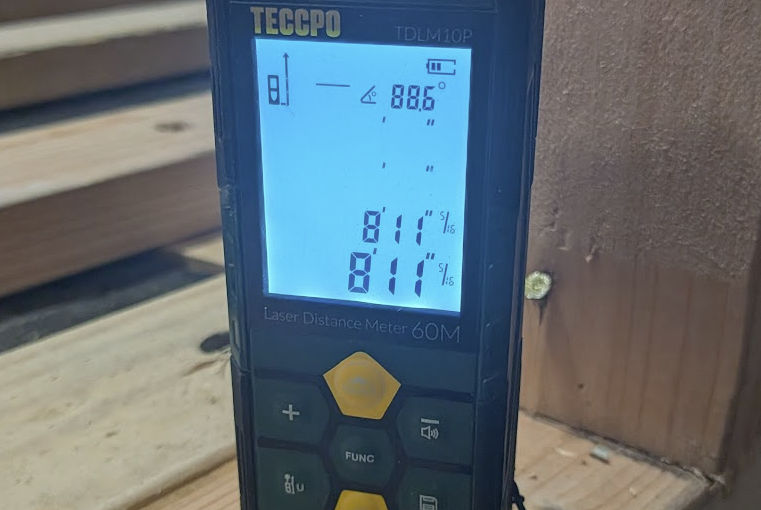
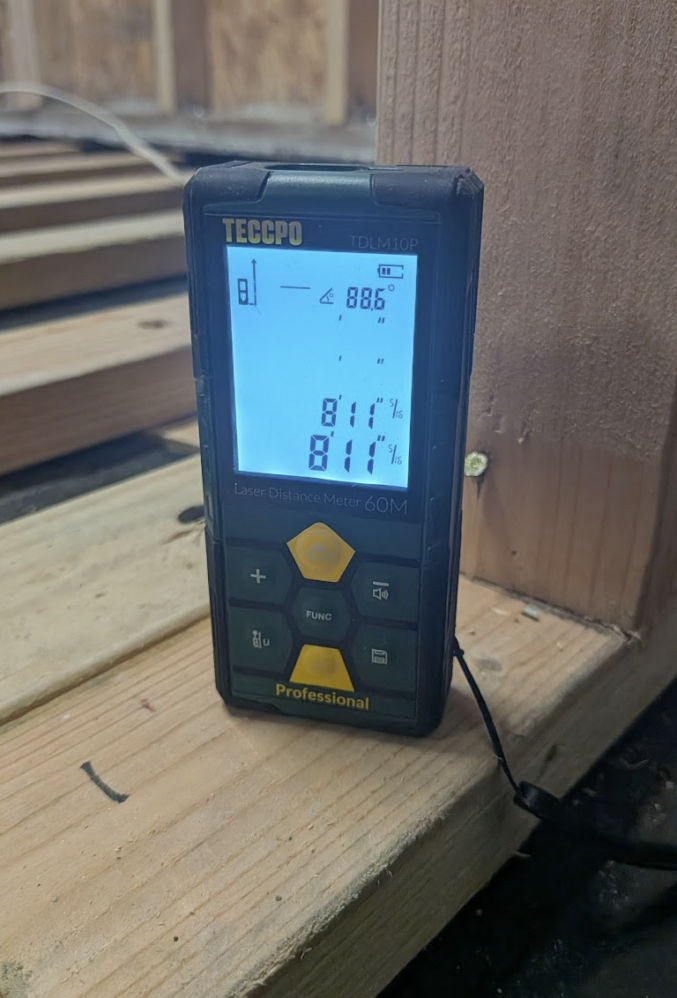
Use a laser measure like the one shown below. In this example, the reading shows 8′ 11″ 5/16″. If you prefer precision to 1/8 of an inch, you may be able to change the precision settings in your laser measure.
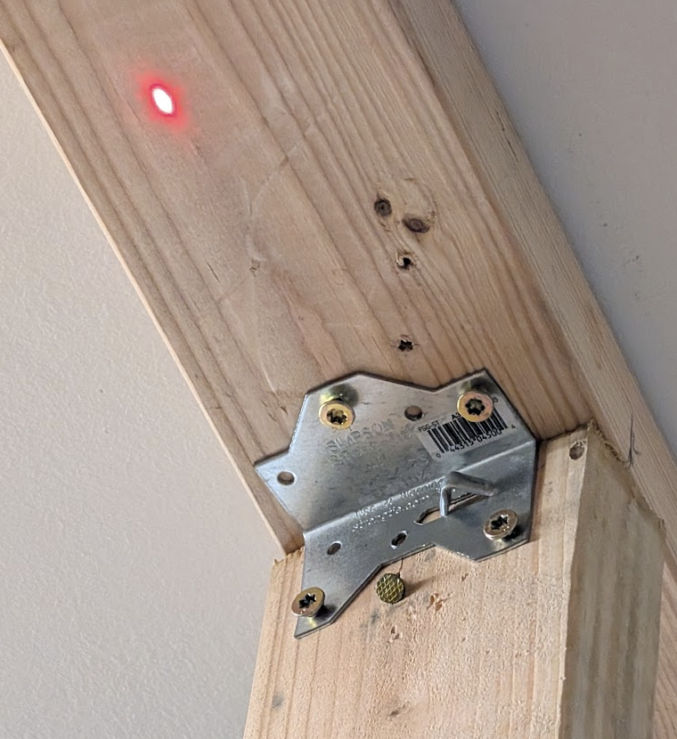
Make sure the laser dot is on the surface of the distance you want to measure.
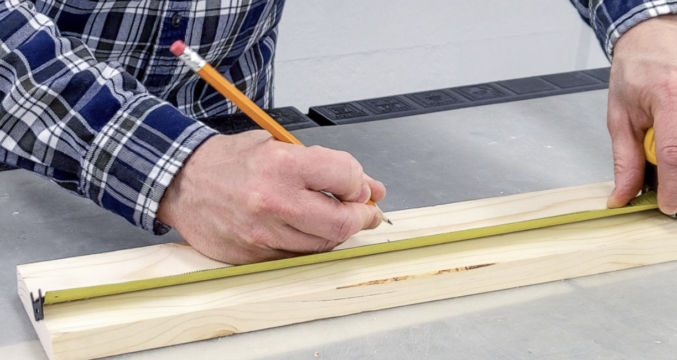
2. Then, using a measure, mark that length on your 2×4 wood.
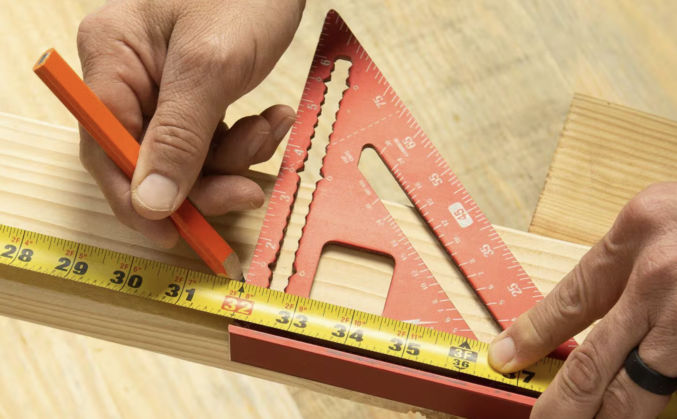
3. Use a carpenter square to draw a straight line at that mark
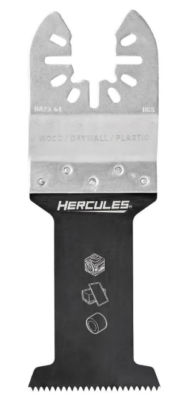
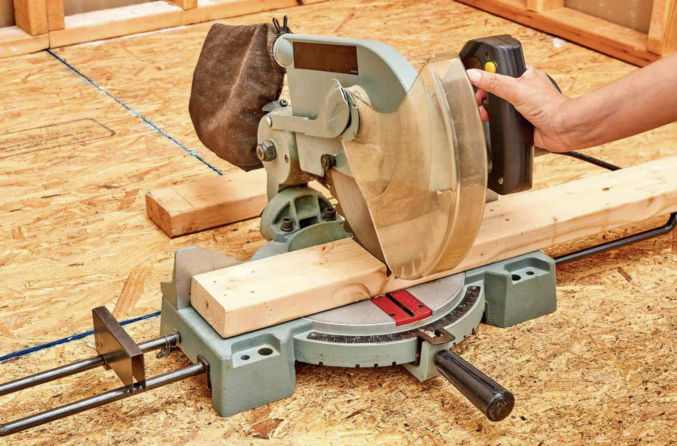
4. Cut the wood at that line using a miter saw.
If you want to dry-fit your studs before permanently fastening them with nails, you can use A34 metal brackets with screws.
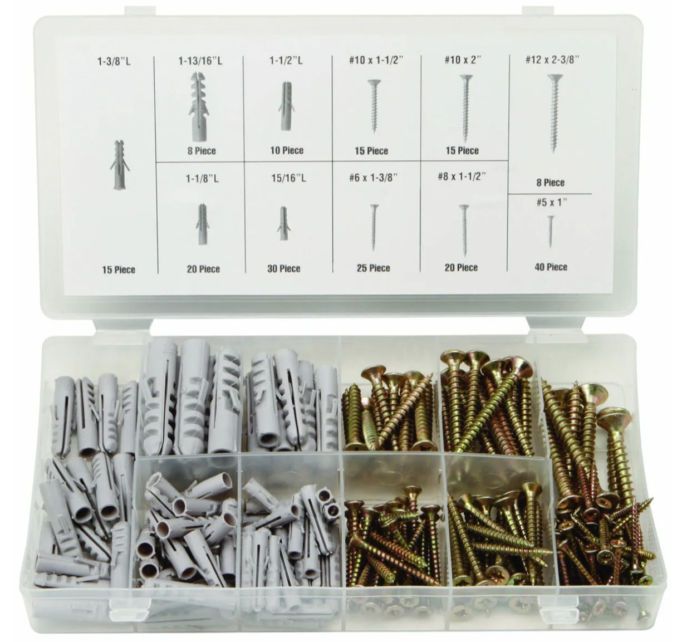
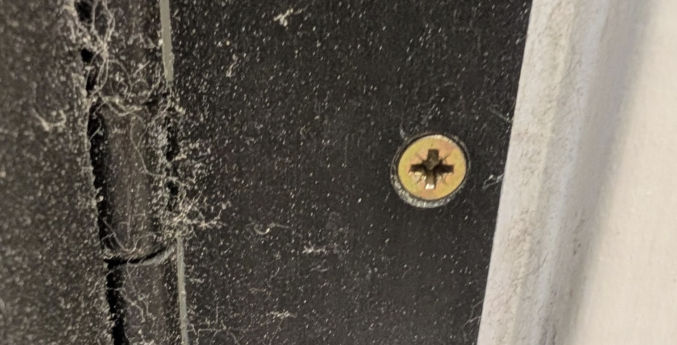
If you have a loose screw that just keeps turning when it’s fully inserted, some sources indicate you can stuff one or two zip ties in a screw hole before screwing the screw to fix that. I’ve tried that, but it only works occasionally. I’ve also tried the Screw-it-Again wood anchors, but those are no better. What actually works are these plastic anchors at Harbor Freight.
They are cheap and work consistently. Here’s how to use them. For standard residential door hinges, choose the smallest anchor (15/16″ long”) and the #8 x 1-1/2″ screw. You can also just reuse the screw that came with the hinge.
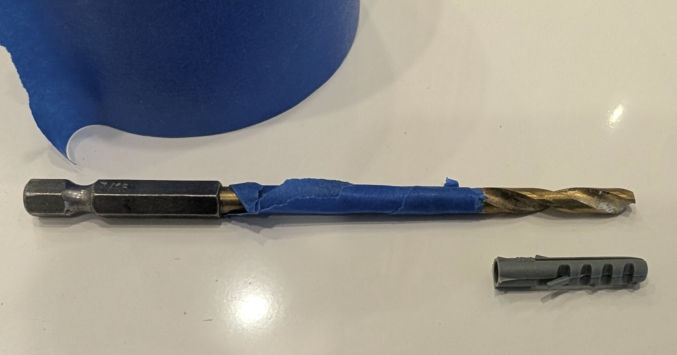
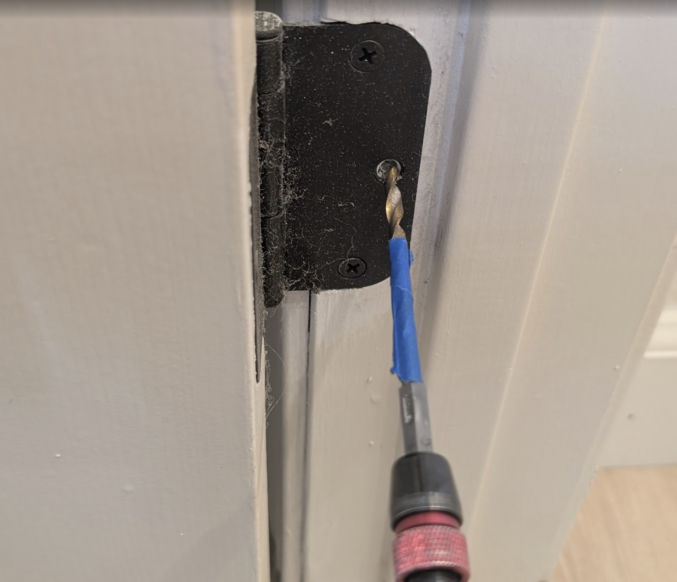
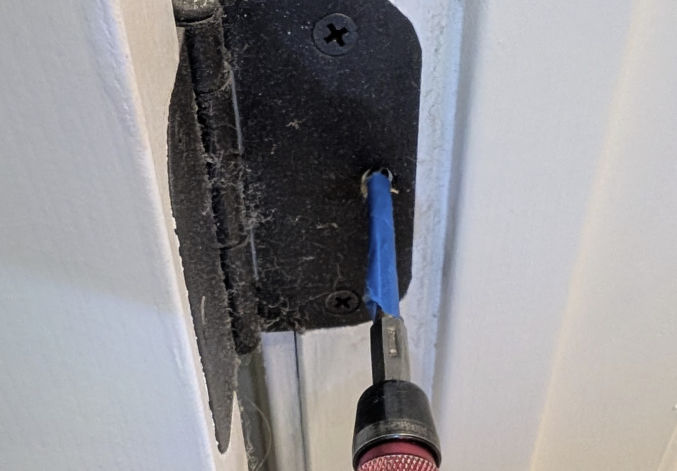
Wrap a piece of painter’s tape around a 3/16″ wood drill bit the length of the anchor from the tip so you know how far to drill without drilling longer than the length of the anchor.
Remove the existing screw and drill into the hole until you reach the tape.
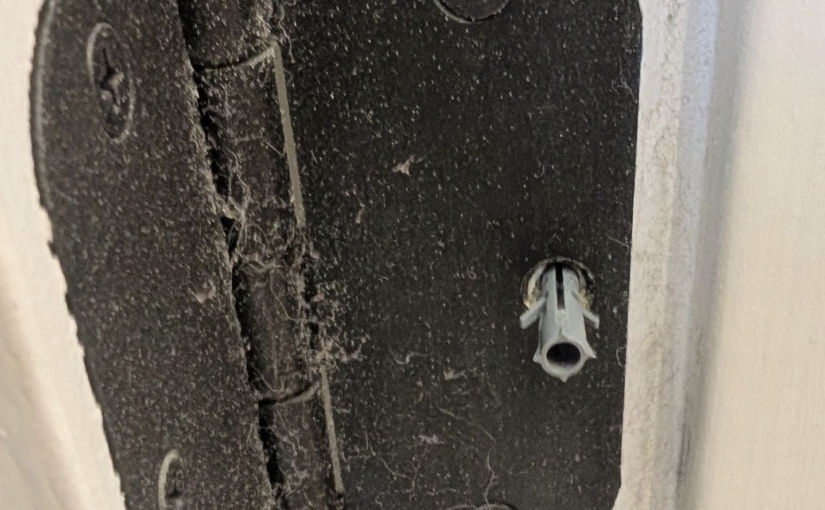
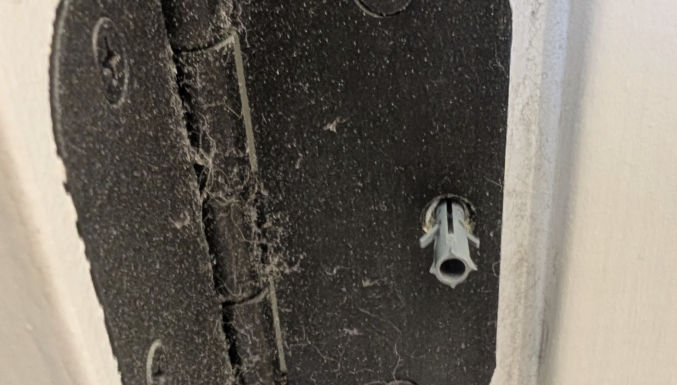
Insert the anchor into the hole.
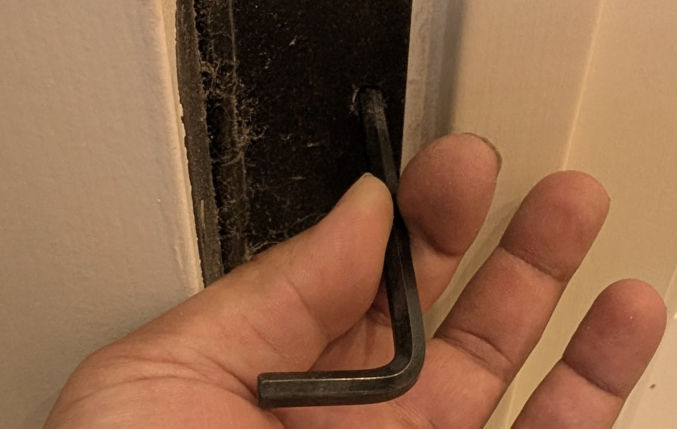
If you can’t insert it all the way into the hole with your hands, hit a hex key against it to push the anchor flush with the hole.
Screw either the existing screw or a #8 x 1-1/2″ screw into the hole. The screw will eventually stop turning when it’s tight.
If you need even stronger door hinges, these Zzem steel anchors may fit the bill.
If, after tightening all screws, your door is still slightly hitting the door frame, sand off the protruding part using a belt sander like the one below.
Repainting all the walls and ceilings in your house can really refresh your home and make it appear new and clean. As a landlord of multiple properties, I’ve repainted the interior of entire homes in as little as 6 hours. Here are my tips for whole-house interior painting.
Neutral Paint Color
My go-to paint color is Hazelnut Cream 750C-2 (Eggshell) by Behr (Home Depot). It looks good both during the day and at night and in different light color temperatures.
Same Wall and Ceiling Paint Color
Unless you’re really picky or enjoy spending time masking surfaces and painting, I recommend painting the walls and ceilings the same color. It greatly simplifies the painting process. If you have an MDF baseboard, you can also paint it the same color as your wall. Or, you can paint it pure white, which is the default color.
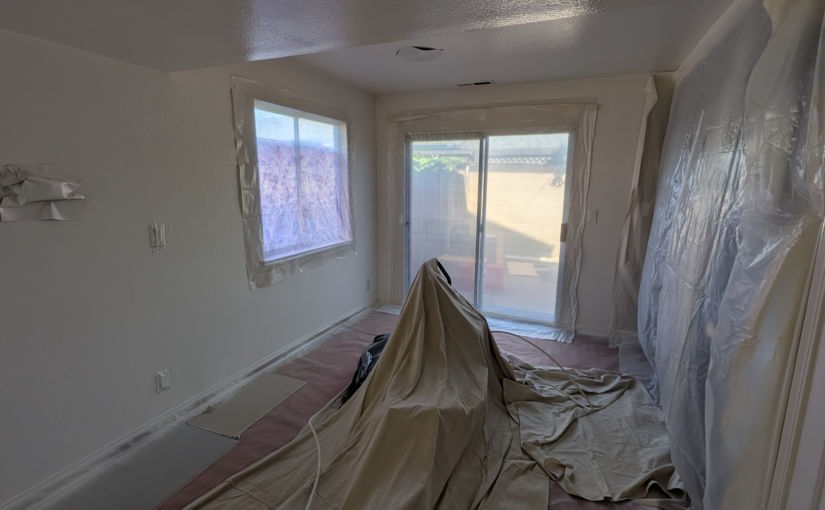
Masking
You’ll need to mask areas you don’t want to paint, like windows, ceiling lights, and doors.
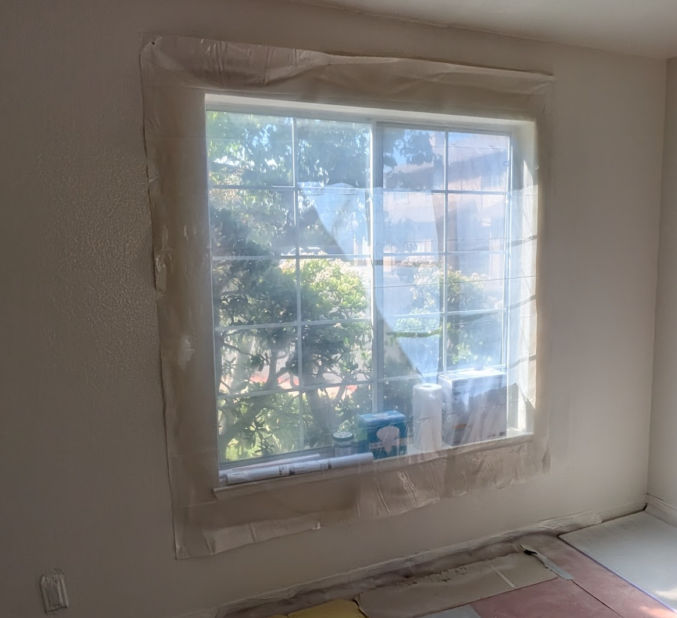
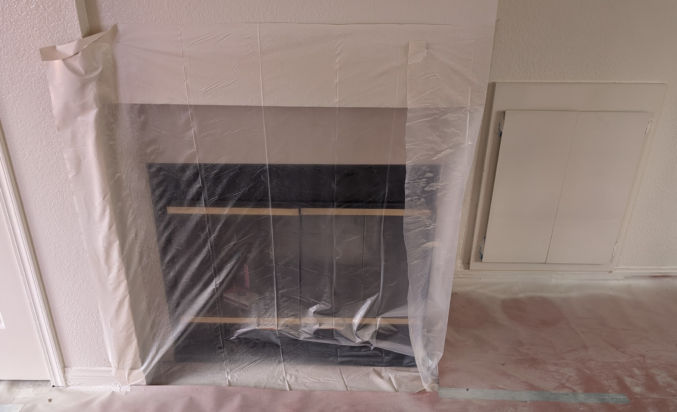
For windows, I like to staple somewhat thick (3.5 mm) transparent plastic. If it’s too thin, it’s harder to cut, it easily blows away, and it’s hard to secure to a surface. Also, stapling is much quicker and easier than taping all sides. The transparent plastic lets light in so you can see what you’re painting. Since the air pressure from spray painting can blow paint particles everywhere, I like to use a healthy margin around any objects I’m masking so that even if paint manages to get under the plastic, it won’t go far and reach the surface I don’t want painted.
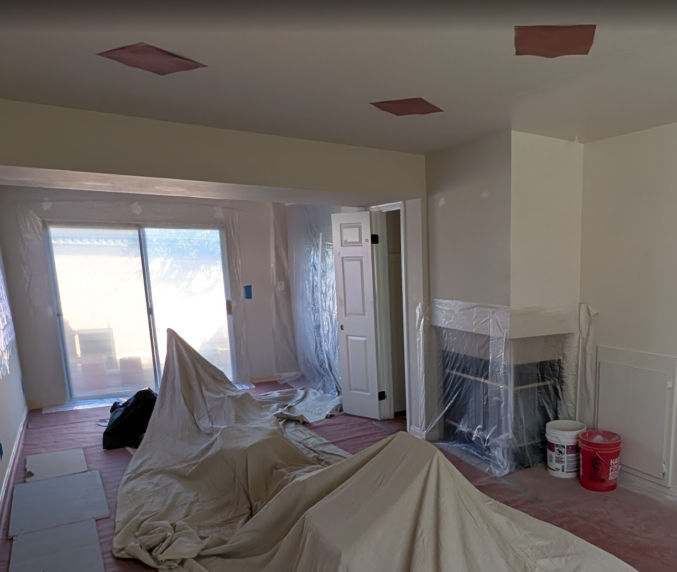
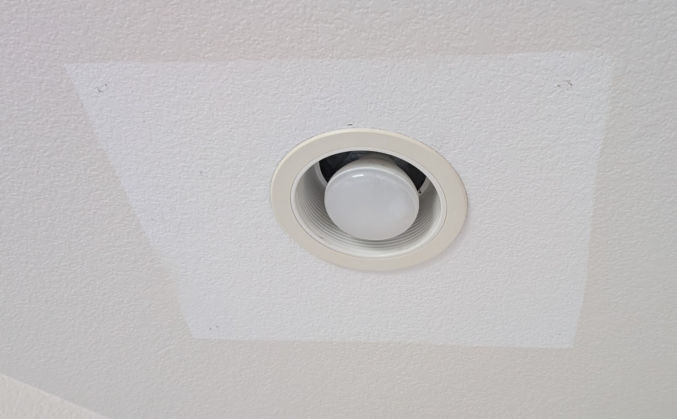
For ceiling lights, I like to staple heavyweight red rosin paper over them, as shown below. Taping is not necessary as long as the paper is large enough to prevent paint particles from reaching the lights from the gaps along the edges. Cutting rosin paper is easy using scissors or a utility knife.
For other surfaces that could fit under one piece of red rosin paper, I’ll use that paper. Otherwise, for surfaces that are too large for the red rosin paper, I’ll use the plastic.
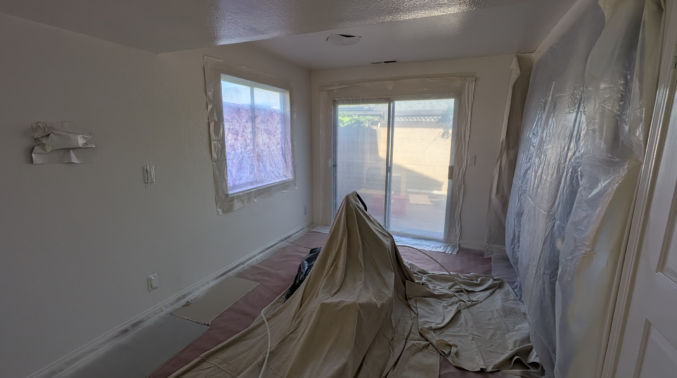
For the floor, I use red rosin paper taped to the top of the baseboard and I’ll use a plastic and fabric drop cloth for the middle of the floor.
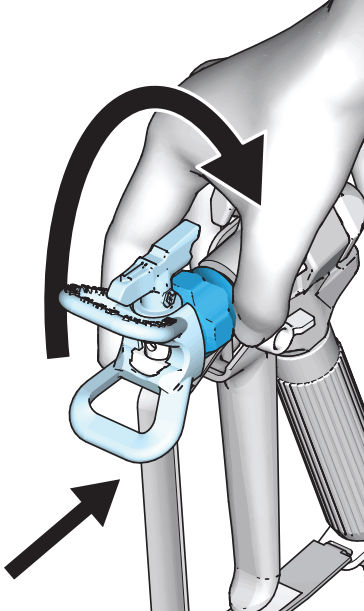
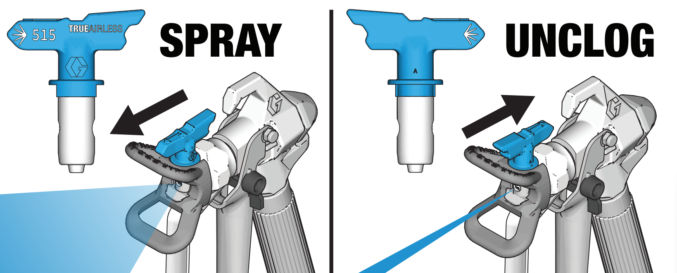
When screwing the spray tip guard assembly to the gun, make sure to only tighten by hand. If you tighten with a wrench, it may be too tight, preventing paint from coming out.
One way to tell if you’ve tightened it too tight is if you are unable to rotate the tip from the spray to the unclog position using your hand.
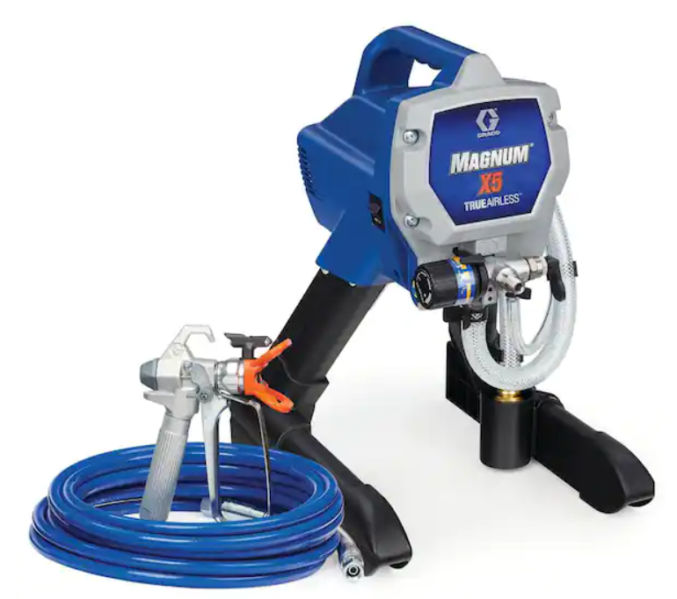
If you’re having trouble spraying paint, you might need to replace one or more parts, like the spray tip, spray gun and tip, and hose. Start with replacing the spray tip first since it’s cheaper than the other parts.
Clothing
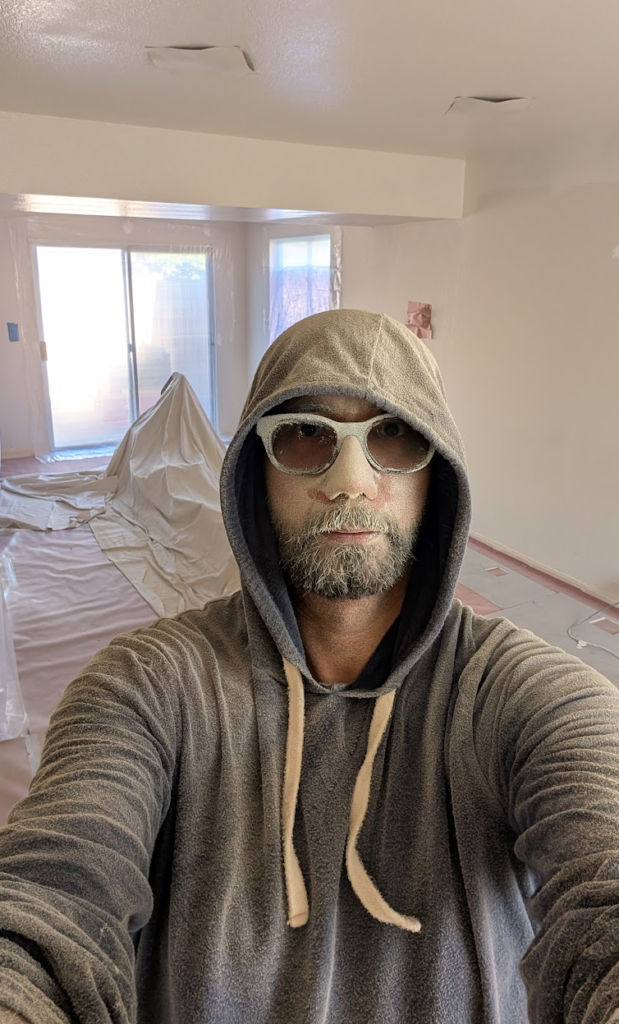
When spray painting, paint particles can go everywhere. You can buy and wear a painter’s coverall, but they are very uncomfortable. Instead, I recommend wearing sacrificial clothing that you don’t mind getting paint on. I wear a long-sleeve shirt with a hoodie so I can cover my arms and hair, leaving only my hands and face exposed to paint particles. If you wear glasses, I also recommend wearing old glasses that you don’t mind getting paint on.
Removing masks
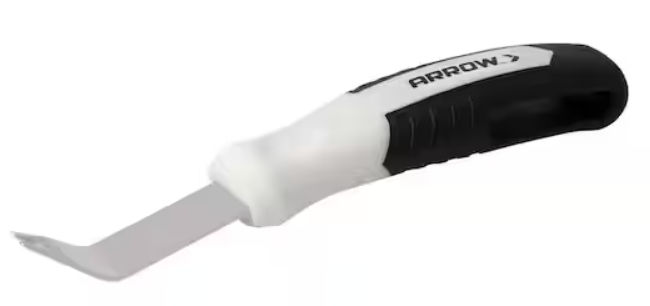
When removing plastic or red rosin paper that was stapled to a surface, I recommend using a staple puller. It makes removing staples and nails much easier than using other methods.
Painting Masked Areas
When you’re done spray painting and removing all masks, you can easily paint any masked surfaces manually using a paint roller.
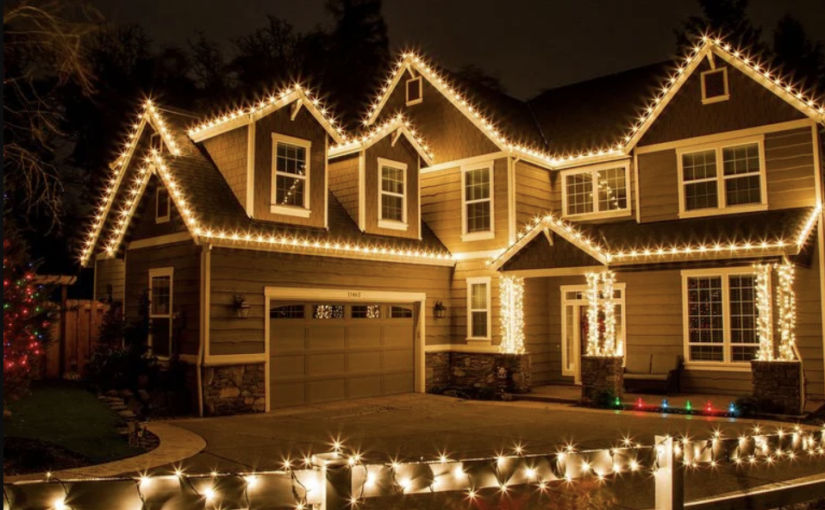
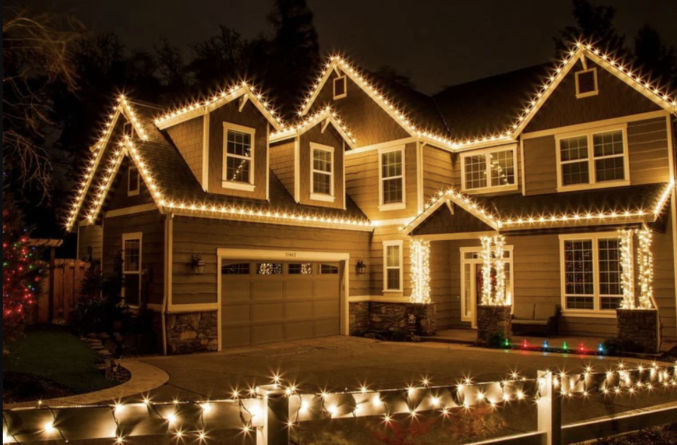
The Christmas season is here, and you may finally decide to put up some lights on your house. I personally like single-color, soft-white lights rather than multi-colored lights. Regardless of your color preferences, installing string lights can be difficult depending on your particular situation.
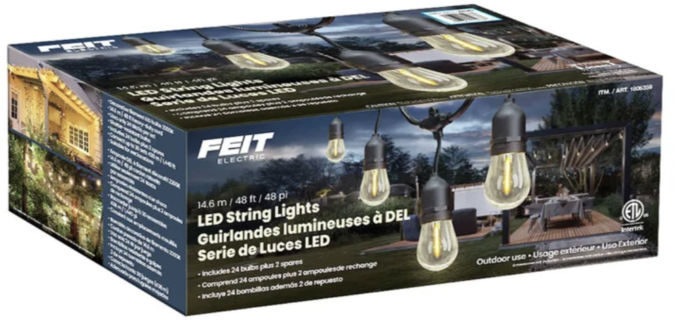
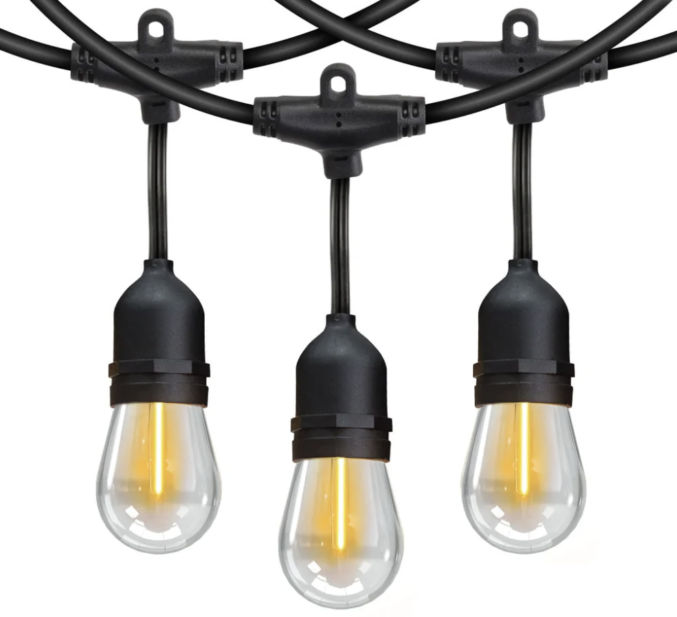
Though there are holes every 2 feet to fasten them, those holes don’t line up with rafters under the eaves of my house, so I couldn’t use them all.
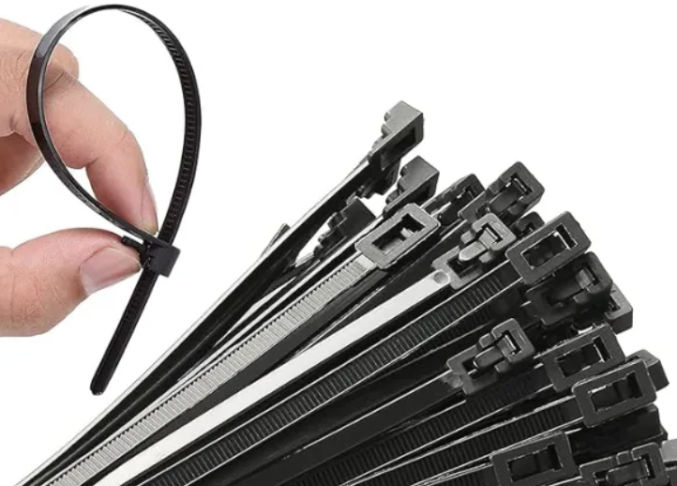
Regardless of the hole distance, one way to securely fasten any string lights, or cable, for that matter, is by using zip ties (I prefer the releasable kind) with a base mount.
Zip tie base mountReleasable zip ties
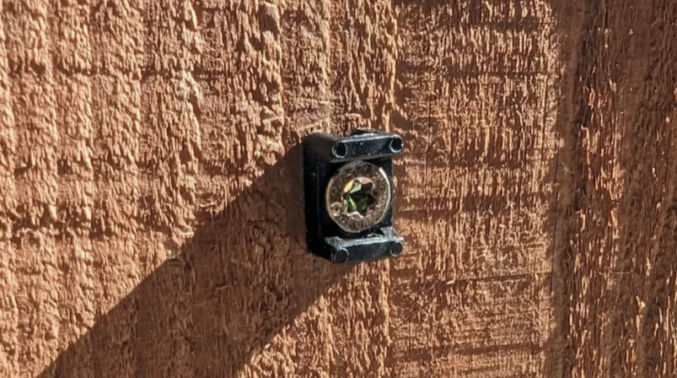
Just screw the base mount to your structure such that the slot where the zip tie would go in is in the direction you need it to be in.
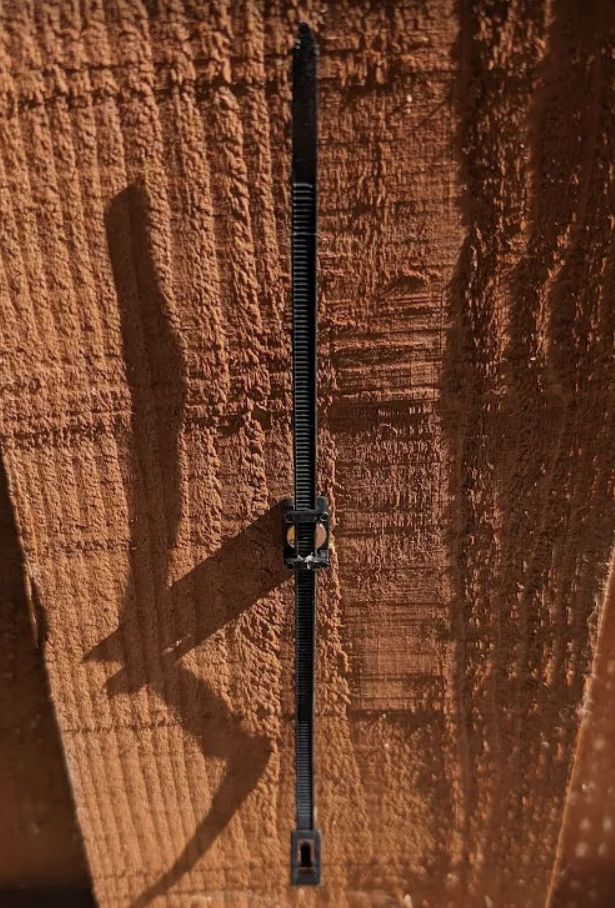
Then, slide the zip tie though the base mount and around your string light cable.
This doesn’t just work for string lights. You can fasten other types of cables and even multiple cables. Unlike plastic cable clamps, which can quickly deteriorate and crack from UV exposure, zip ties can last a long time. Also, unlike cable clamps, which don’t grab cables tightly, resulting in some slack, zip ties can be pulled until the cable they’re securing are tight. This is important if you want your string lights to be straight.
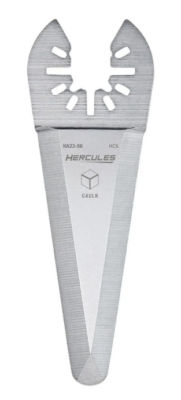
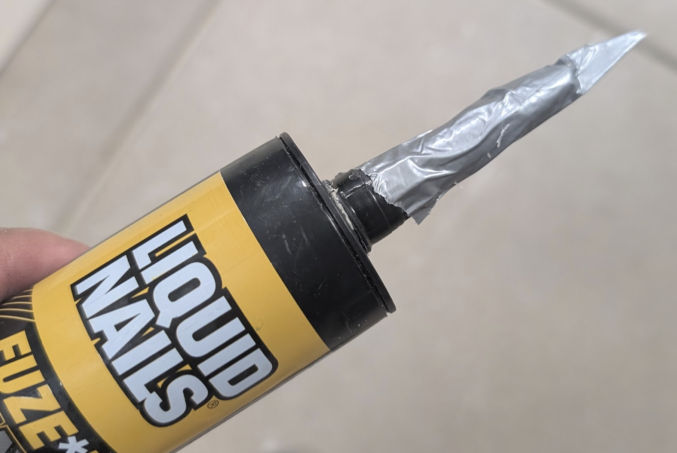
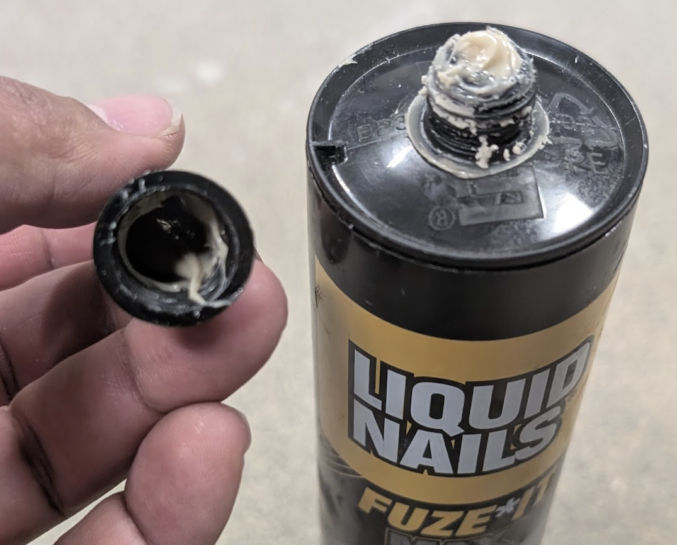
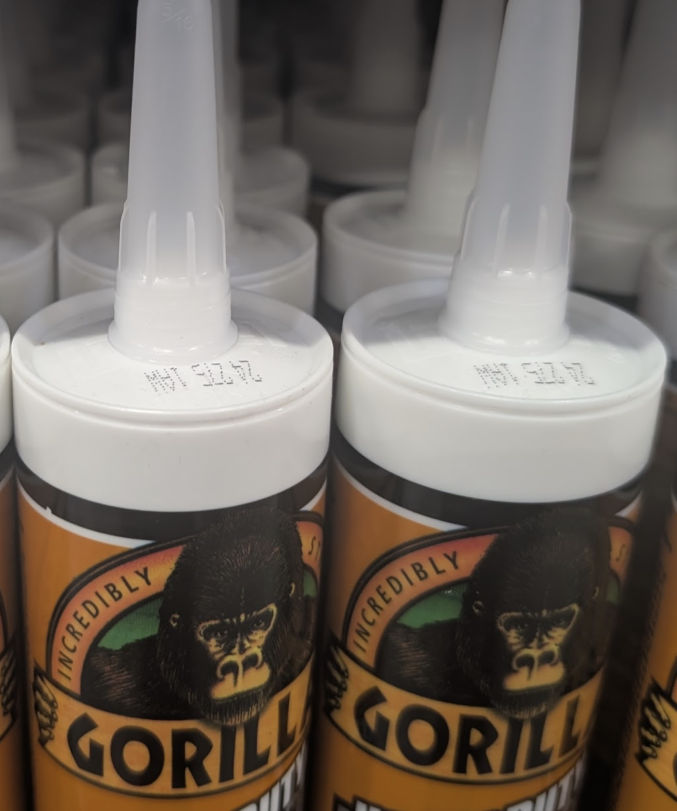
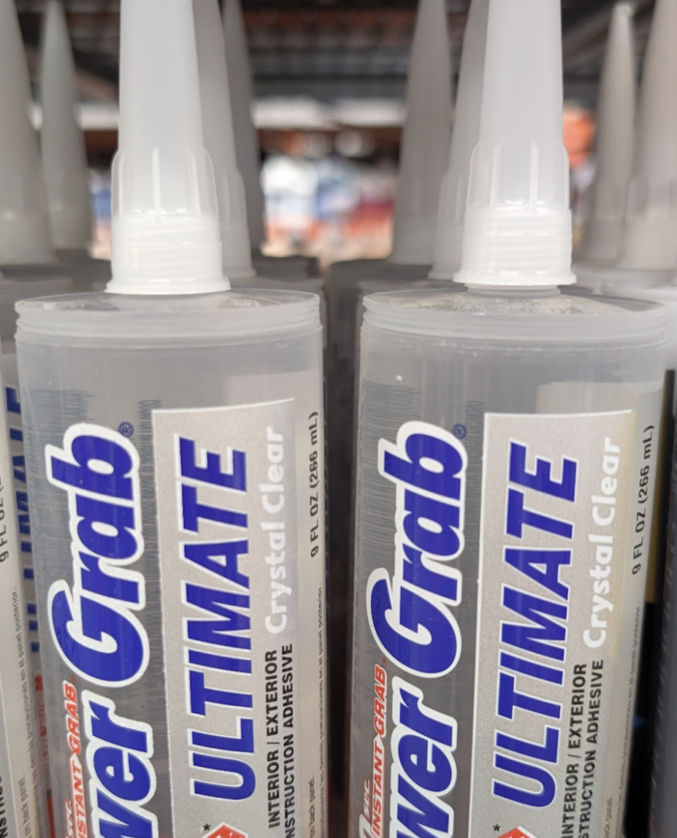
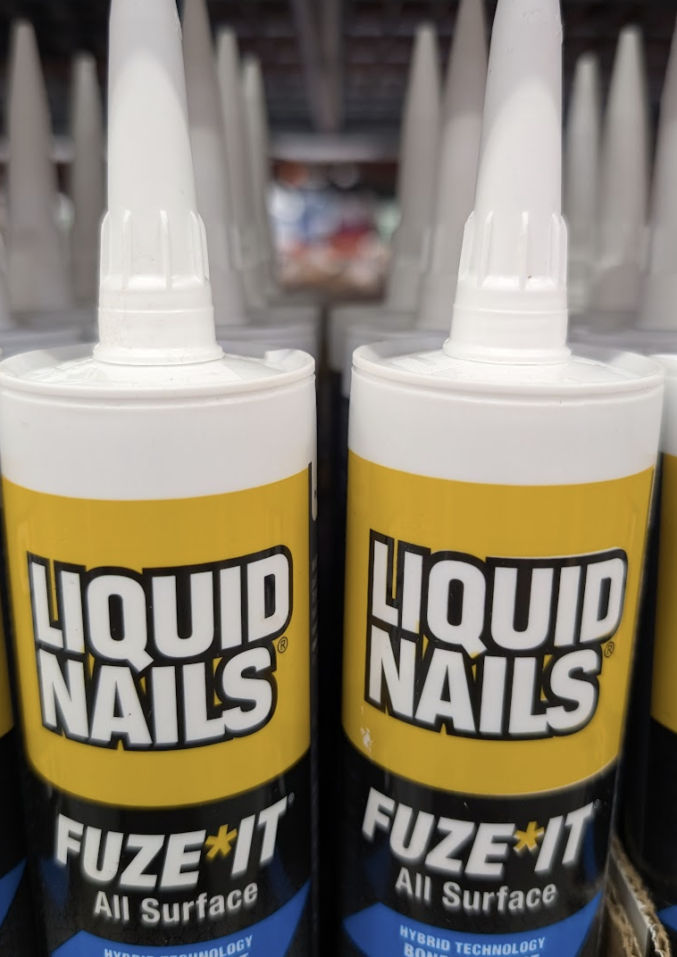
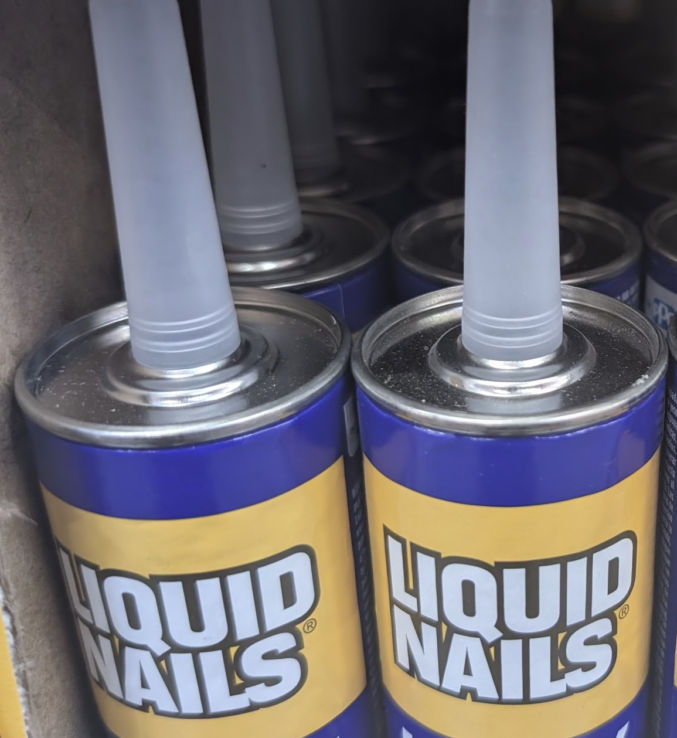
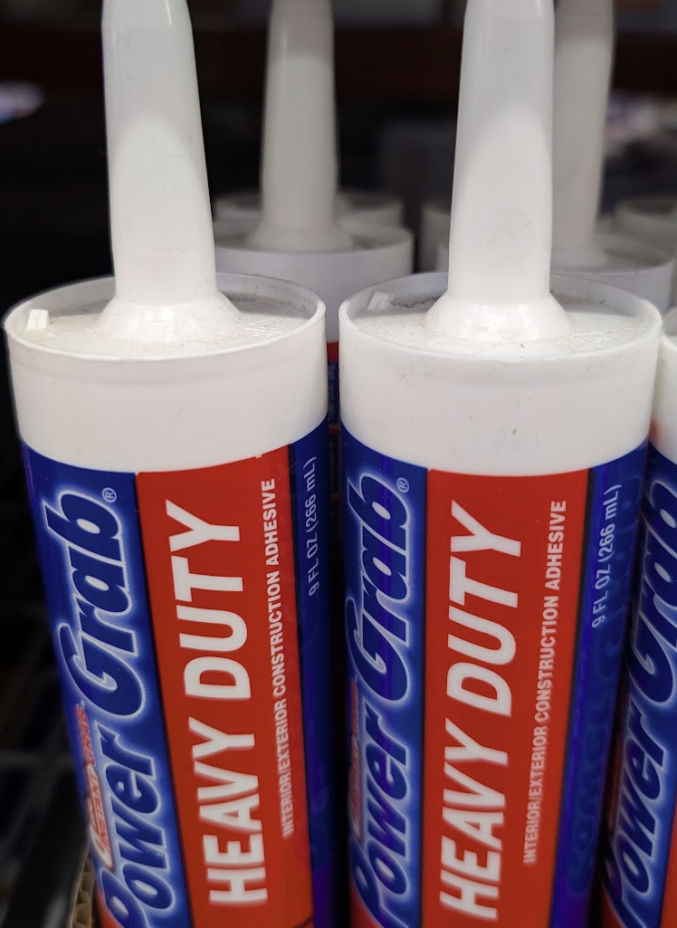
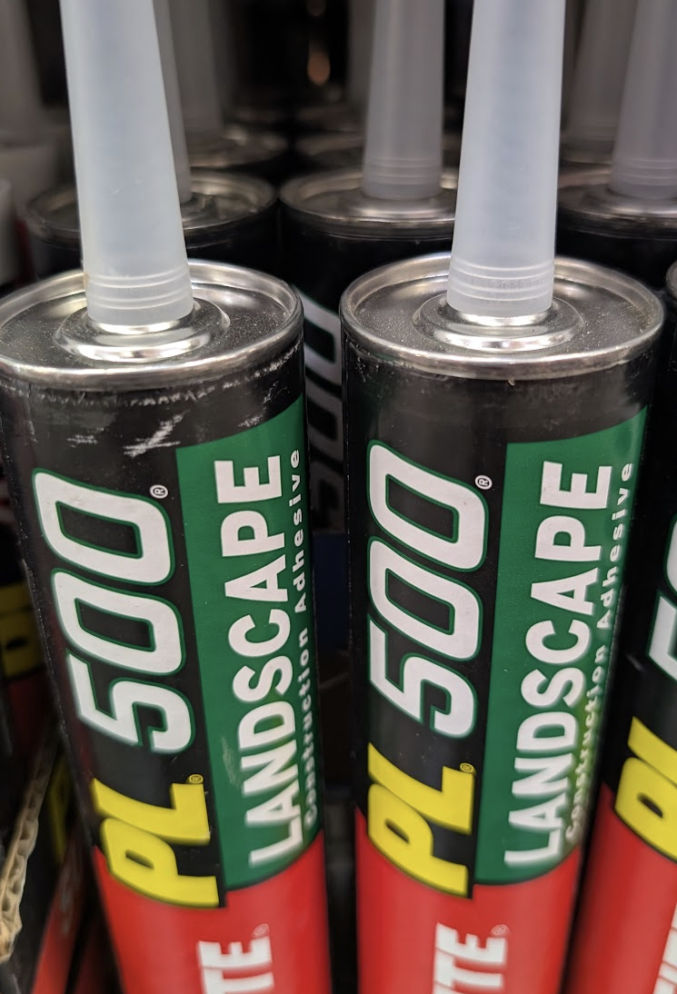
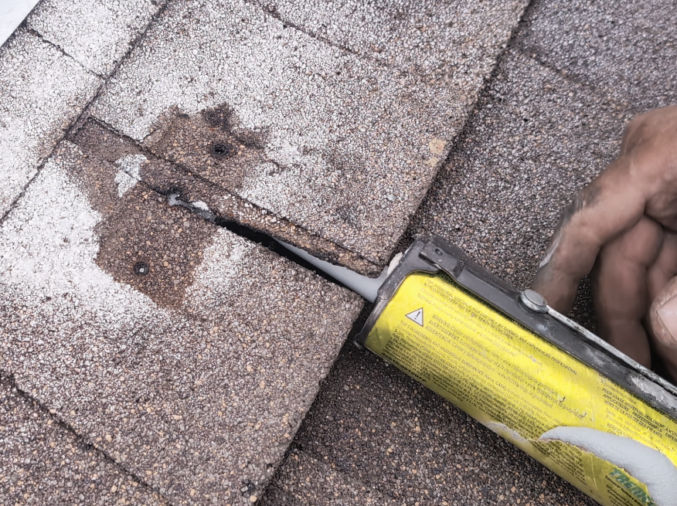
If you’ve bought glue that uses a caulking gun, you’ve probably run into situations where you’ve wasted a lot of glue because it’s clogged the nozzle, and you’ve probably tried sticking a screw or nail in the tip to prevent the glue from drying, only to find that that didn’t work either. You may have even tried covering the tip with tape, which also probably didn’t work. So, you ended up throwing away more than 50% of glue just because the tip was clogged. Well, fortunately, that won’t happen if you buy glue that has a removable nozzle, as shown below. When I’m done using some glue, I’ll wrap the tip in duct tape so that glue doesn’t slowly ooze out, and then I’ll put it away for future use.
When I need to use the glue again, I’ll use a utility knife to remove the tape and then see if any glue comes out. Normally, the nozzle will be clogged. I’ll then use pliers to unscrew and remove the nozzle. I’ll stick the seal puncture on the caulk gun through the nozzle, which easily removes any dried-up glue. With the nozzle clear, I just screw the nozzle back and I’m good to go.
I’ve renovated and remodeled many bathtubs and showers. Here are some tips I’ve learned along the way.
Bathtub
Though steel bathtubs are more durable, I prefer fiberglass/acrylic bathtubs. There are more design options and they are light-weight, making them easier to work with. They are also cheaper. For example, this one only costs $300.
Shower Pan
Unless you have a uncommon shower size, it’s much cheaper and more leak-resistant to buy a premade shower pan rather than to make one from tile. For example, this standard-size one only costs $270.
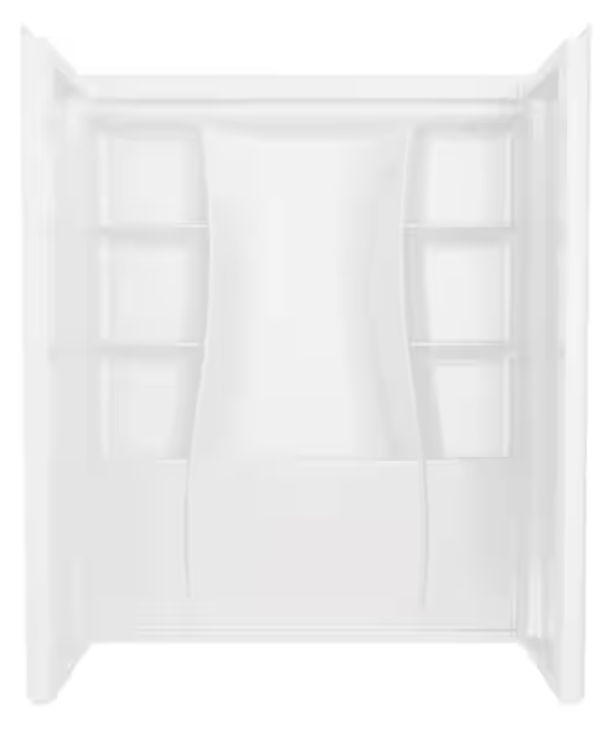
Bath/Shower Walls
Unless the size of your bath/shower is unusual, it’s much cheaper to buy pre-molded shower wall panels than to have tile walls. Pre-made shower walls screw directly to studs, eliminating the need to add a water-resistant backing, like you need before installing tile.
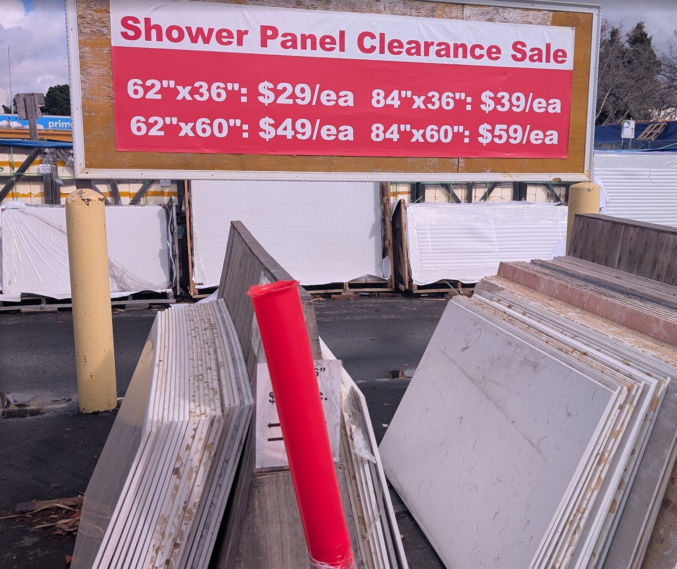
Another option is to glue shower panels to your shower walls. These panels can be found at Chinese home renovation stores. The ones shown below were from Uni Tile and Marble.
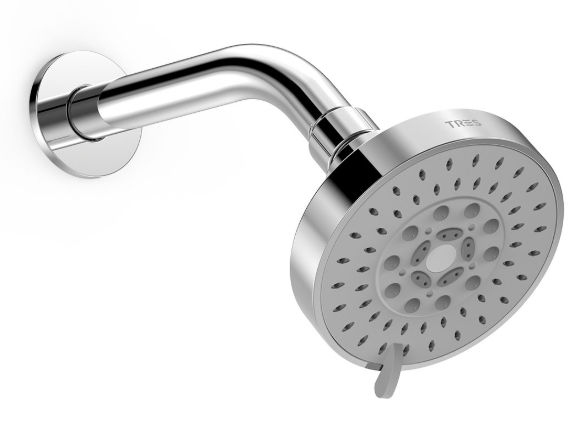
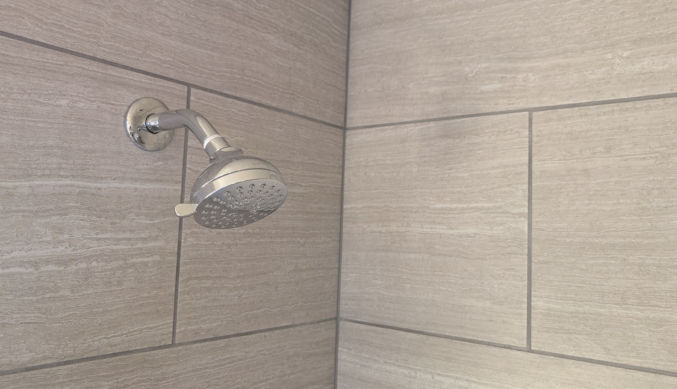
Shower Head Height
I don’t know why I keep seeing this in many homes, but many shower heads are position too low. When installing new plumbing for your shower head, make sure to tell your plumber to install it higher than usual. Not everyone is short. . For a shower I recently remodeled, I put the shower head pipe 7′ from the bottom of the shower pan. The actual shower head will be positioned lower than that because shower head arms bend downward, as shown below. This way, people who are even 6’4″ tall can stand under the shower without hitting their head on the shower head.
Shower Niches for Tiled Shower Walls
If you do end up installing tile on your shower walls, make sure you install niches as well. Otherwise, shower users would need to put their soap and shampoo on the floor. You can buy tile-ready plastic niches for relatively cheap, but you’ll end up paying for your tile guy to install tile inside those niches.
A better option and, ultimately, cheaper option is to buy a no-tile metal niche, like this one.
Shower Foot Step
Cleaning your legs and feet can be difficult if you have to bend all the way over. You can buy a shower bench, which you can sit on and rest your foot on, but that takes up space and will eventually be another thing to clean as soap scum sticks to it. If you don’t regularly need to sit in your shower, you can buy an in-wall shower foot step, like this one.
Bath/Shower Door
You can easily install a shower curtain to block water from wetting your whole bathroom, but water often still makes its way outside the shower by the wall where the shower head is. One option is to install a fixed glass shower panel, like this one, and use a shower curtain for the other half of the shower opening.
Or, you can just buy a sliding shower door, like this one for $330.
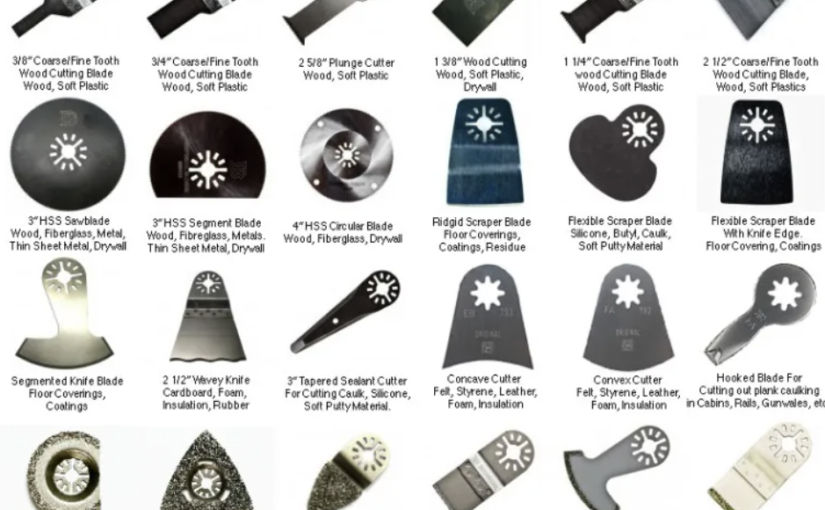
Drilling Through Tile
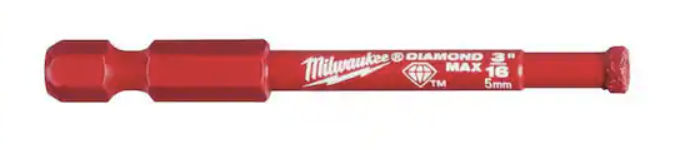
If you need to make a hole in ceramic or porcelain like, like when installing a sliding shower door, using quality drill bits will make a huge difference. There are primarily 2 kinds of bits available:
The carbide bit is good for marking hole location and drilling pilot holes, but if you try to use it to drill all the way through tile, it’ll take forever.
The diamond bit can drill holes through tile in a fraction of the time it takes to do so with a carbide bit, but the diamond bit shown above tends to wander when there is no pilot hole to keep it in place.
Recommendation: Use the carbide bit to mark hole locations and make small pilot holes. Then, use the diamond bit to drill all the way through tile. Periodically squirt water on the bit as it’s drilling or dip the bit in a bowl of water to keep it cool.
Water Walves
For your sink and toilet water valves, use 1/4-turn valves rather than multi-turn valves. Why turn a valve 360 degrees 3 or 4 times when you can just turn it 90 degrees once? Plus, the 1/4-turn valves are less prone to leaking and easier to use.
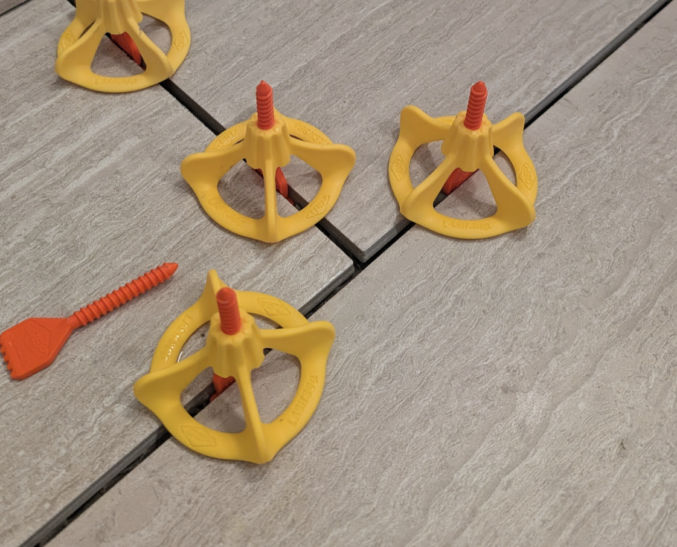
Tile
If you install tile, especially on the floor, porcelain is stronger, but more expensive than ceramic. This particular porcelain tile, in my opinion, looks good without being too expensive.
Grout
For the grout, I like there to be contrast between the tile and the grout so you can see the tile pattern. If your tile is light in color, then a darker shade of the same tile color is a safe choice. For the silver-colored tile above, I’d go with this Delorean gray, not this warm gray, which looks like silver. Make sure to get siliconized tile caulk for corners and edges in the same color. Here’s how it came out.
Baseboard
Though you can cheaply and easily install MDF baseboard in your bathroom, I prefer a tile baseboard, especially if the floor surface is tile.
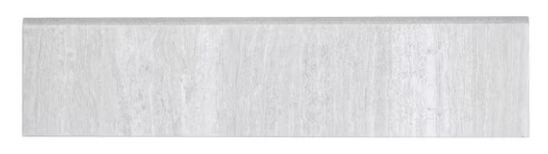
If you go with a tile baseboard, you can either use tile that come with a bullnose edge, but they tend to be expensive and not always available. For example, this bullnose tile, which matches the tile design above, costs $2.47 each.
Okay, that particular one is not that expensive, but many others are. So, another option, which I think looks just as good, if not better, is to cut the floor tile into strips and install metal trim. For example, the 12″x24″ tile shown above can be cut into 3 pieces lengthwise, resulting in three 4″x24″ pieces.
Frameless mirrors tend to be cheaper the framed mirrors, and you can see more of yourself in them because there’s no frame taking up space. But, they don’t look nice, especially when the fasteners (clips) are exposed. Instead, you can buy nice framed mirrors are discount stores like Marshalls, Ross, and TJ Maxx for the same price or less. Here’s what one of my bathroom mirrors looks like. I think I paid $40 for it at Ross.
Hanging Mirrors
When hanging mirrors, many people just drive some nails or screws into the wall and try to hang the mirror on them. There are many problems with this method. It’s hard to get the mirror perfectly level. The head of the nail or screw may be too big for the holes on the back of the mirror. And, you’ll end up with an unnecessarily large hole in the wall if you use screws. Instead, just buy proper picture hangers. They are much easier to work with and you can get perfectly level mirrors with ease.
Motion-Detecting Light Switch with Vacancy Detector
Apparently, some cities in California require a vacancy sensor light switch so that when a bathroom is vacant, the lights will turn off automatically. I went a step further and bought a switch that automatically turns the lights on when it detects motion, like when you enter the bathroom. It also comes with a dimmer that supports LED light bulbs. There’s also a switch if you want to manually turn on/off the lights.
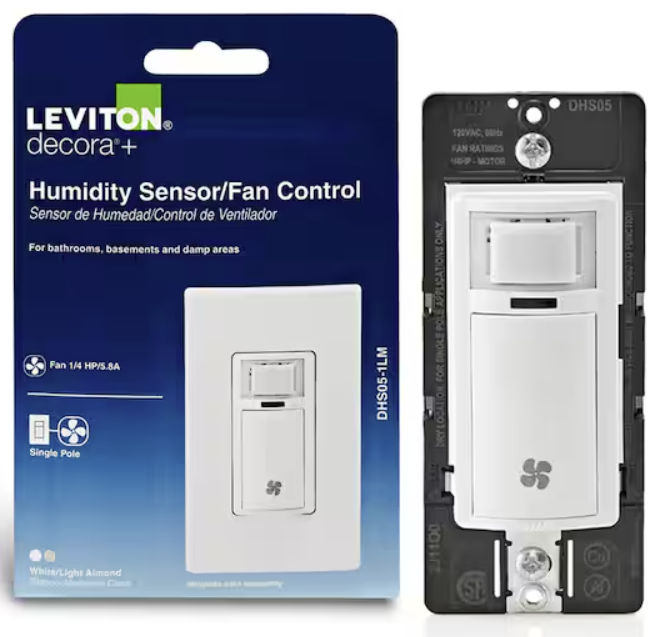
Exhaust Fan with Humidity Sensor
It’s annoying when, after taking a nice, long, steamy hot shower in the winter, your bathroom walls are wet and your mirrors are fogged up from all the steam. If you have windows, you don’t want to open them because you don’t want the cold air to come in. Solution: get install a good exhaust fan with a humidity sensor. It’ll turn on and off automatically when it detects humidity from shower steam.
If you want an easy-to-install, leak-free, durable sink P-trap, go with Simple Drain. I’ve installed them many times and they’ve never leaked. They’re way easier to install compared to PVC.
In this post, I’ll explain step by step how my HVAC guy replaced an old rooftop HVAC stand with a modern HVAC curb.
I had this done due to water leaking into the building from multiple places below the HVAC unit. The entire process took 6 hours nonstop. These steps can also be used to replace an old HVAC unit.
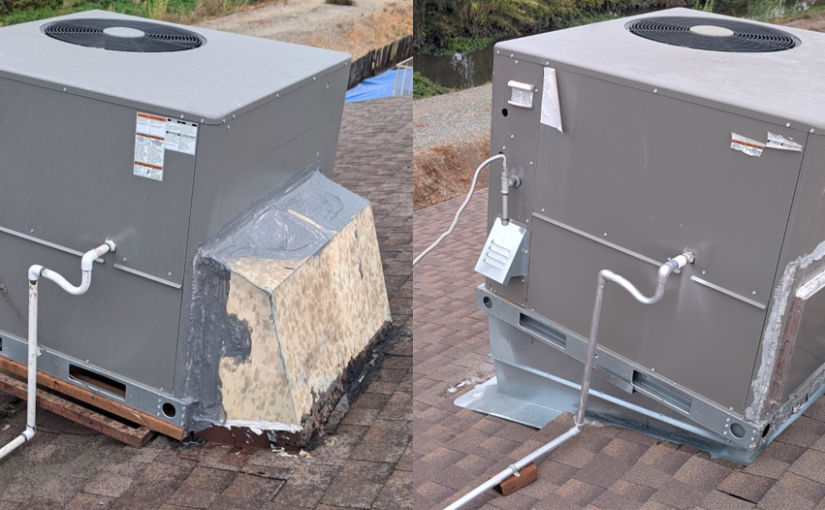
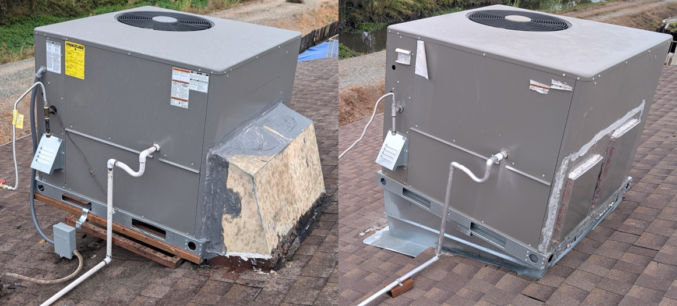
Below are before and after pictures showing the difference.
BEFORE
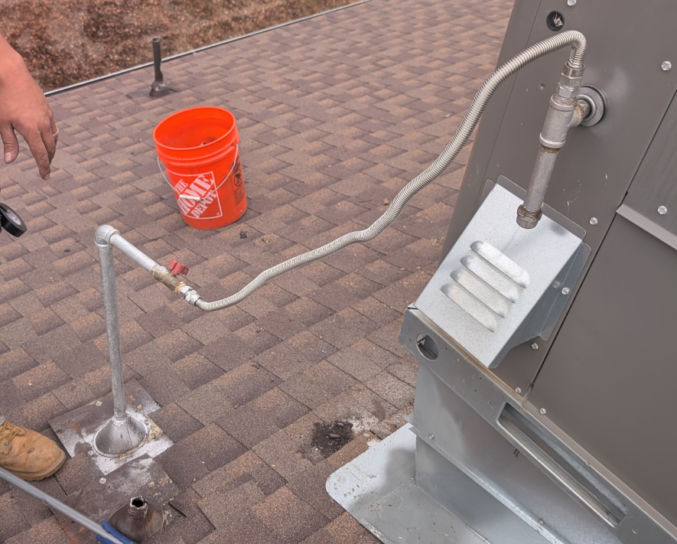
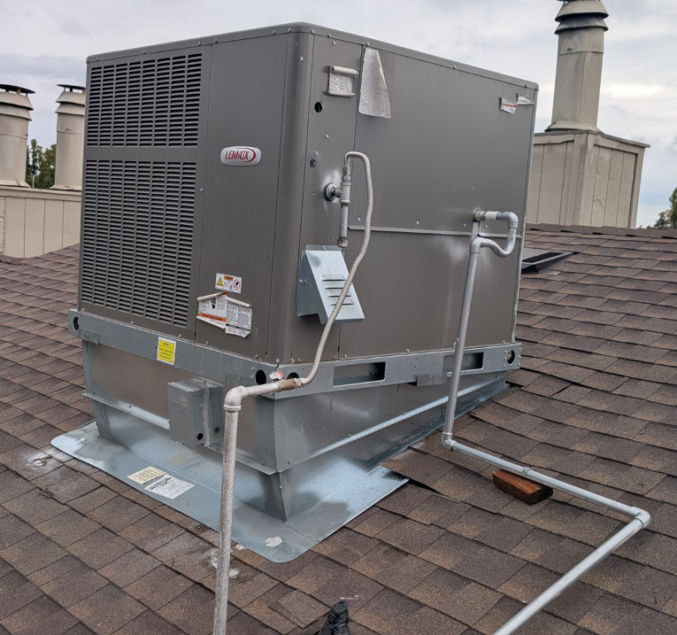
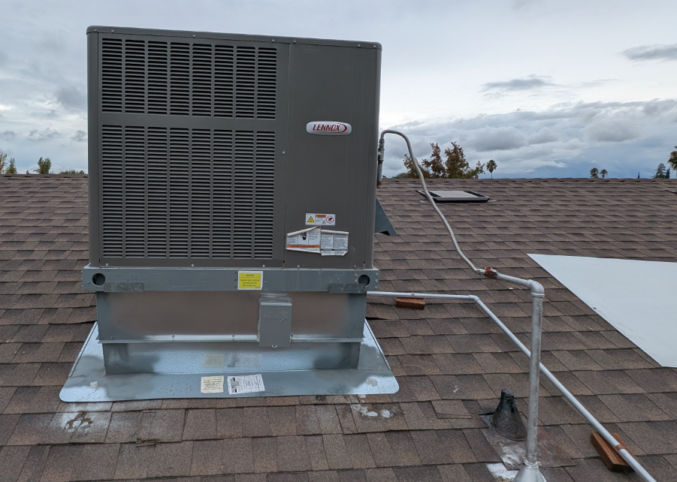
In the following photo, you’ll see the rusted metal stand below the HVAC unit. That stand was from 1978. The HVAC unit was replaced in 2025, but the HVAC contractor was cheap and didn’t replace the stand with a modern curb. Instead, since the new HVAC unit was too large for the stand, he strapped two pressure-treated 2x4s to the stand using a strip of thin metal.
In the photo below, you’ll also see the old “elbow” at the back of the HVAC unit where the air flows into the ducting in the attic and into the building. The elbow is from 1978. Had the HVAC contractor replaced the stand with a modern curb (shown in the “after” photo below), the elbow would be removed and air from the HVAC unit would flow straight down from below the unit.
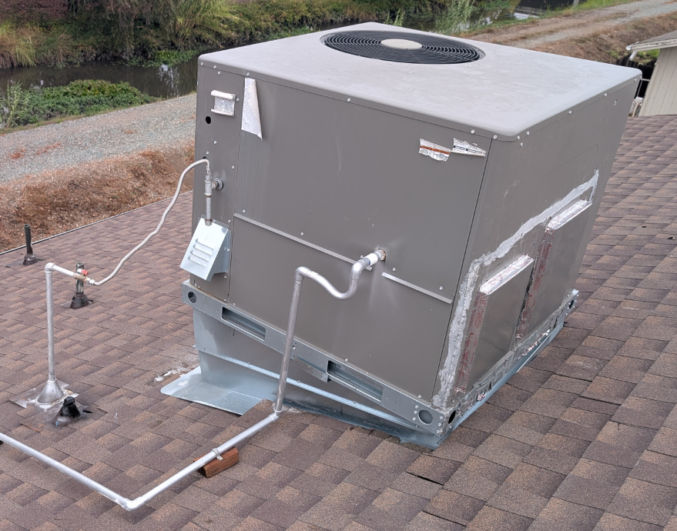
AFTER
In the following photo, you’ll see the old stand was replaced with a “curb”, which is an enclosed stand. Also, the elbow was removed and the air inlet/outlet on the back of the HVAC unit was closed off with sheet metal because the air now flowed into the building from below the HVAC unit. You’ll also notice the electrical wires (power and thermostat) come out of the roof below the HVAC unit rather than next to it.
If you’re replacing a rooftop HVAC unit, you won’t need to follow all of the steps here.
Note: Most of the screenshots below were taken from this corresponding video.
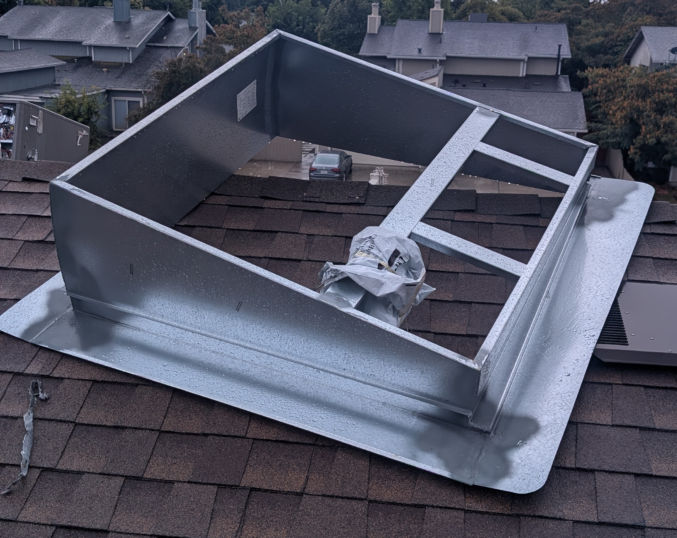
Order a curb that is designed for the HVAC unit you have. A curb looks similar to the picture below.
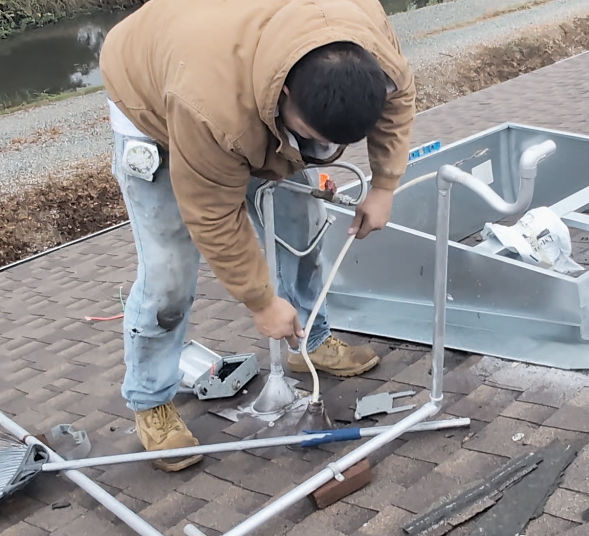
Disconnect everything from the HVAC unit so it can be lifted using a crane and replaced with the same or a newer one.
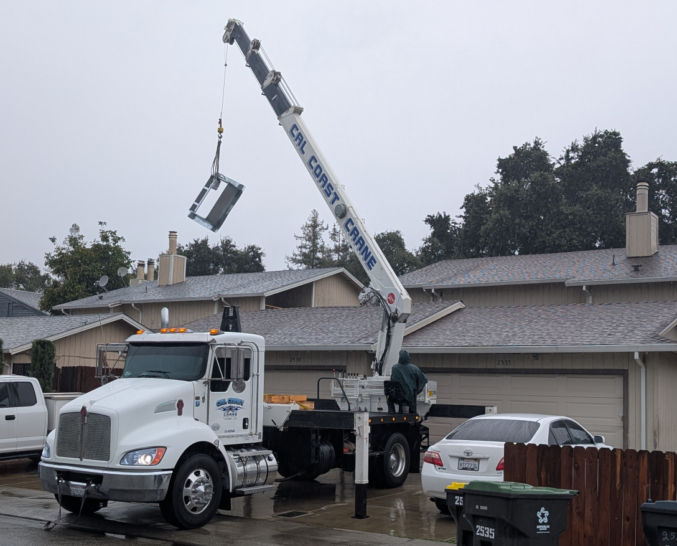
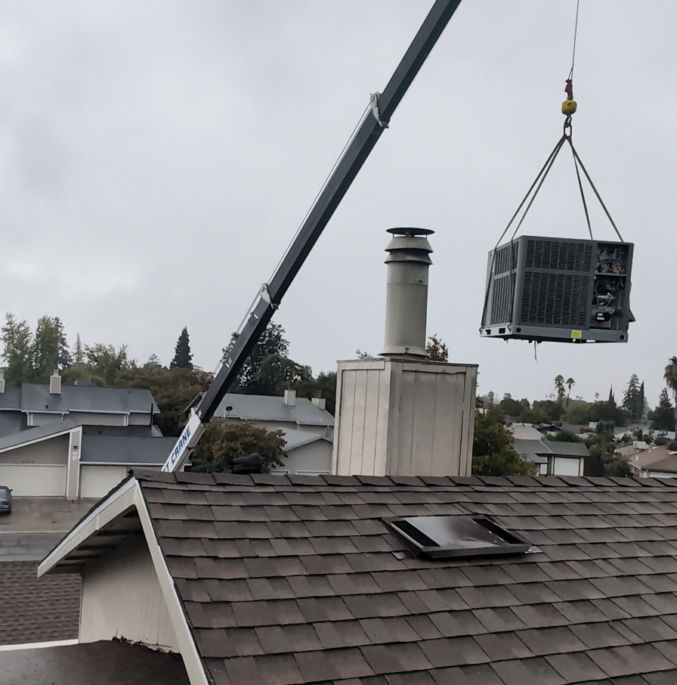
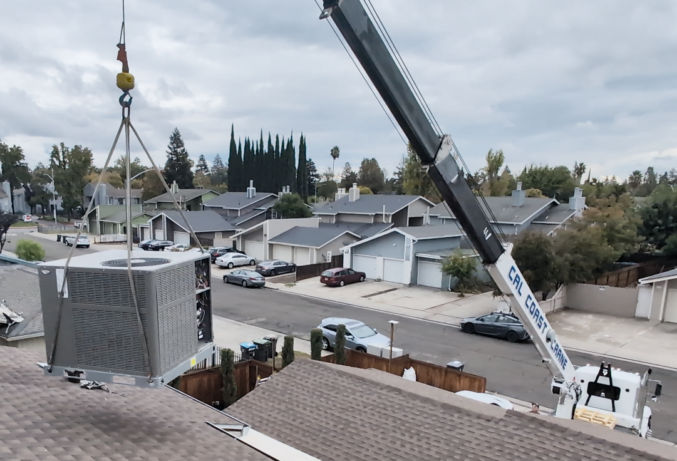
Have a crane operator come to lift the curb onto the roof.
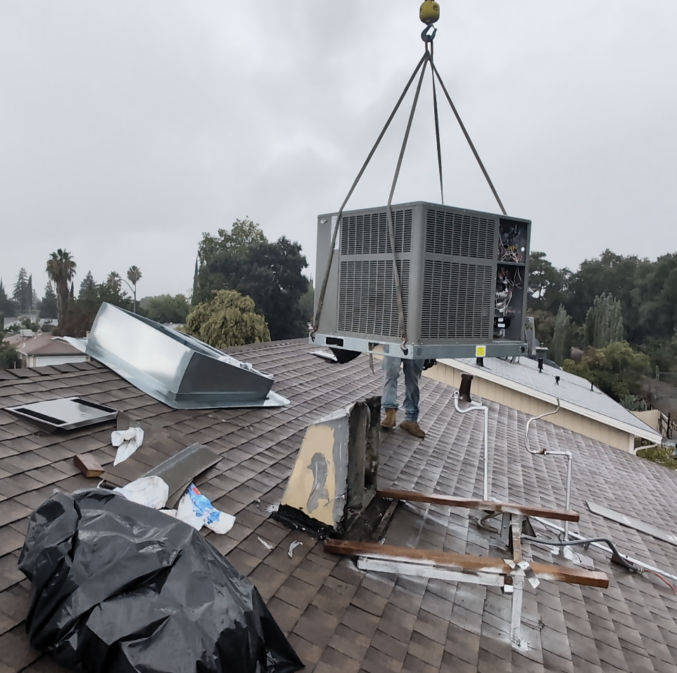
Connect the 4 rope hooks to the 4 holes in the metal base of the HVAC unit. Instruct the crane operator to life the HVAC unit and place it somewhere else.
In my case, since we weren’t replacing the HVAC unit itself, we just placed the HVAC unit on another area of the roof.
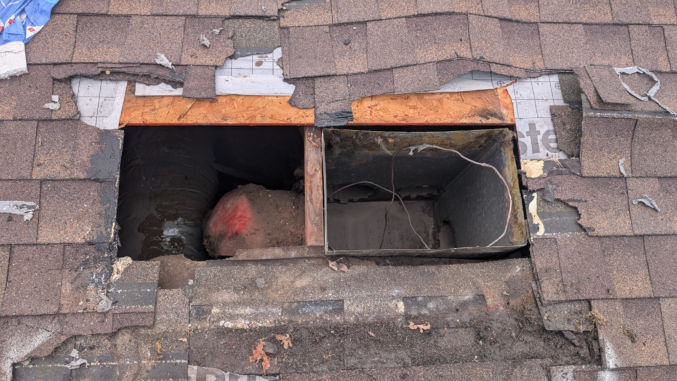
With the HVAC unit out of the way, we can see the old elbow and ducting that goes into the attic. The left duct is for air to return to the HVAC unit and the right duct is for conditioned air to flow into the building.
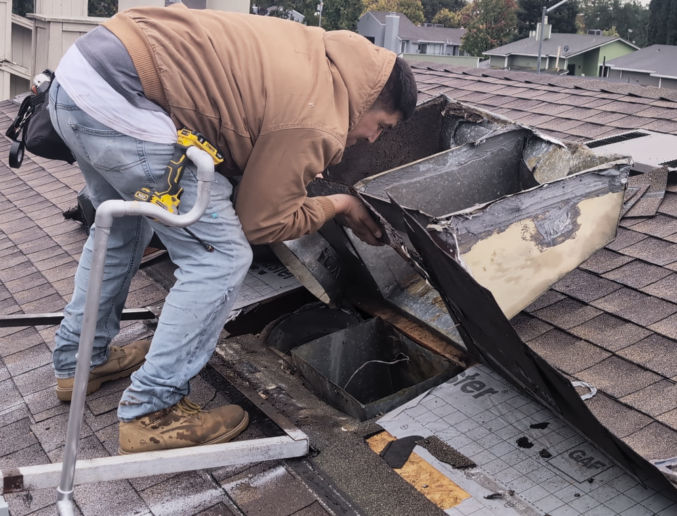
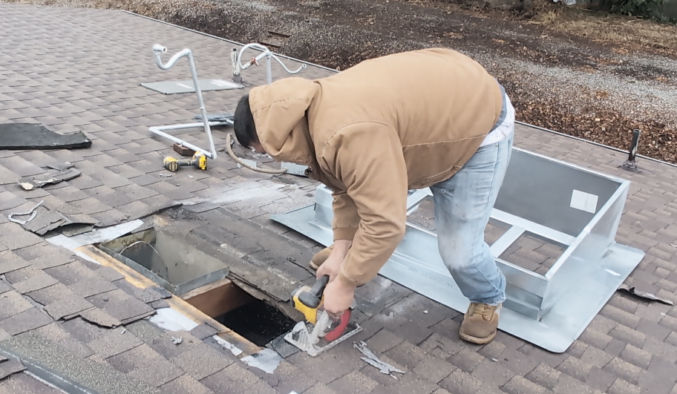
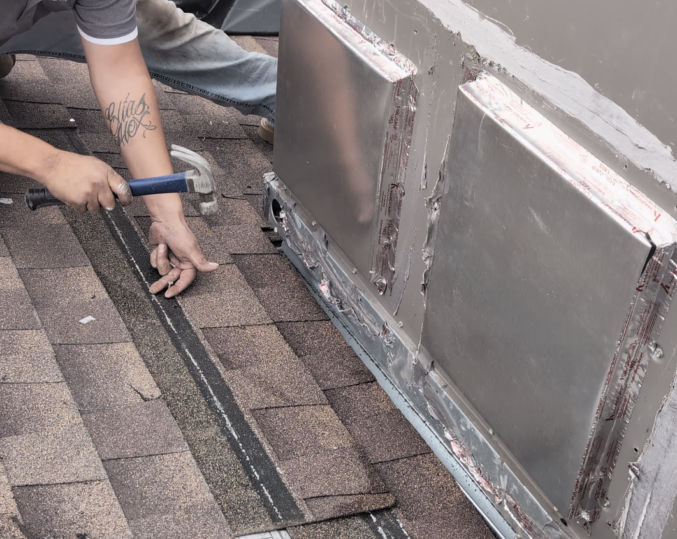
Remove the elbow. You may need a pry bar to lift some shingles and a utility knife to cut some sealant connecting the elbow to the shingles.
Here’s how the opening in the roof looks with the elbow removed.
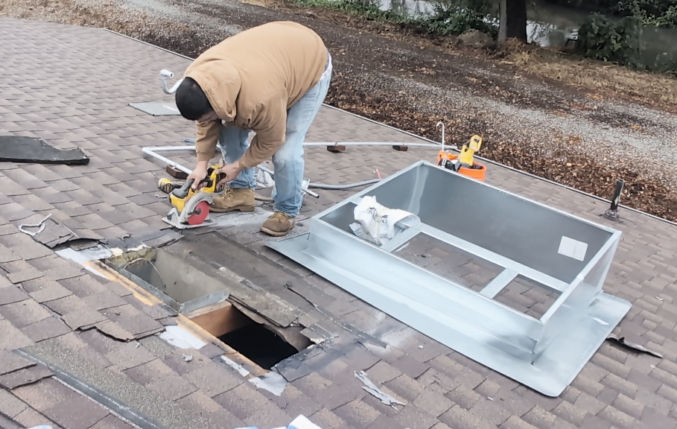
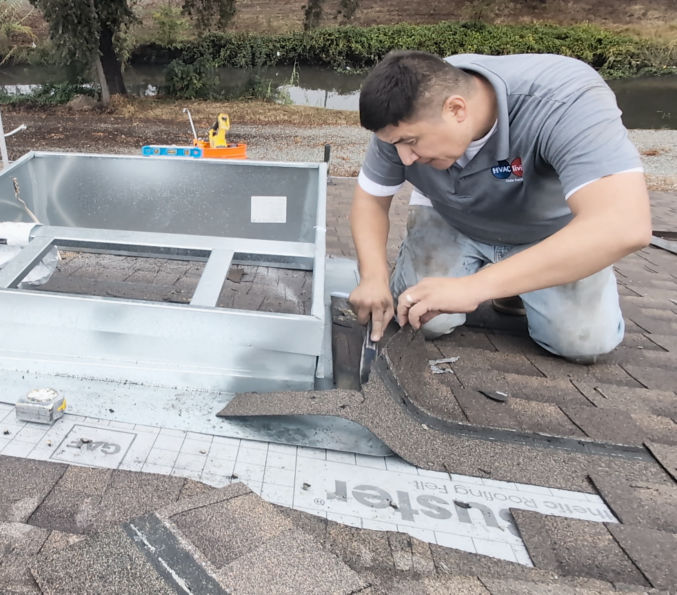
After dry-fitting the curb on the roof where you want it to go, mark along the inside perimeter and then cut the shingles along the left and right edges of the perimeter. If using a circular saw, adjust the blade cutting depth to avoid cutting deeper than the shingles.
Using a pry bar, a row or two of shingles at the top edge and a bit of shingles on the left and right edges.
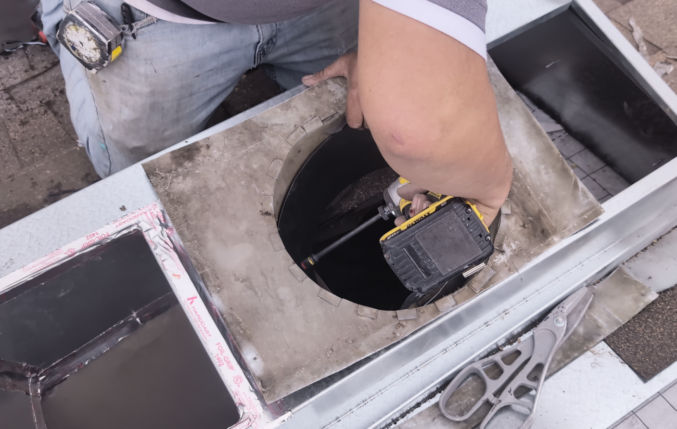
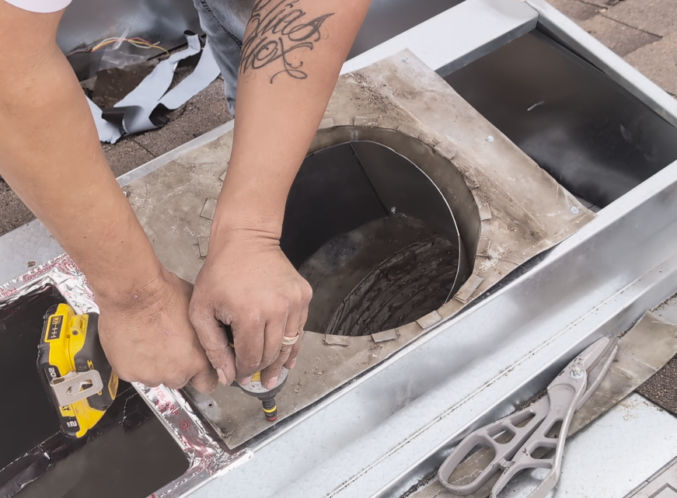
Drill a hole in the roof inside the curb so that the electrical cables can come up through the roof from below the HVAC unit rather than next to the unit.
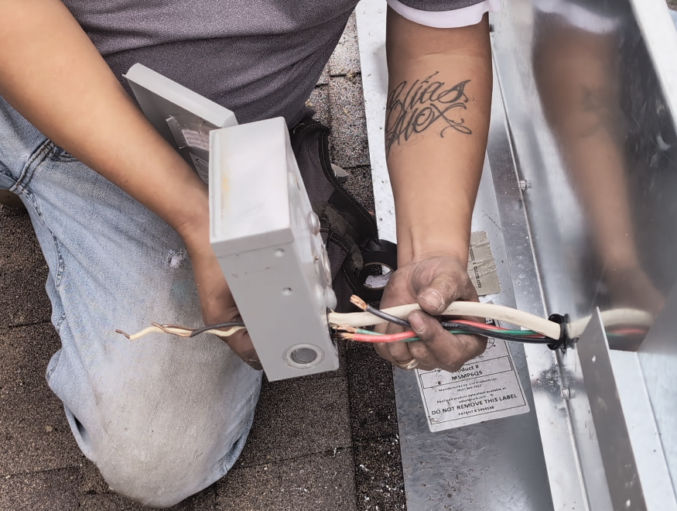
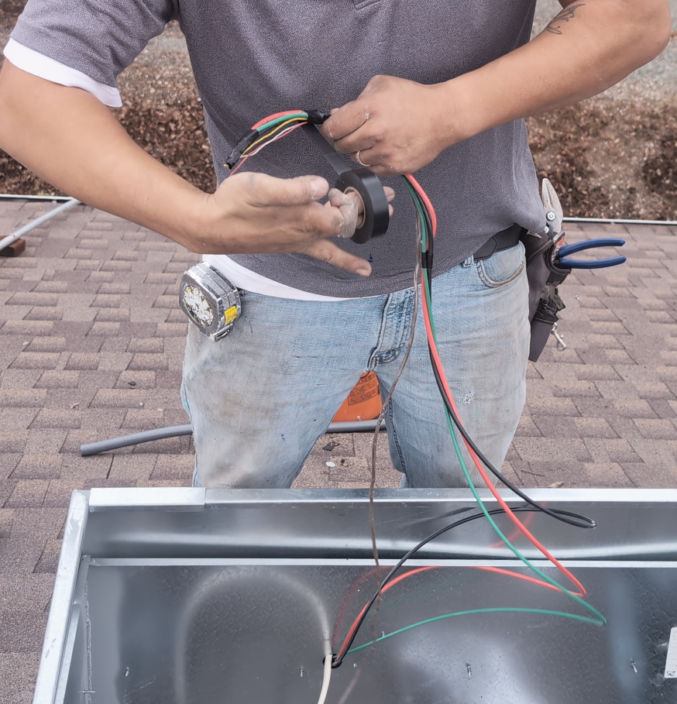
Turn off the circuit breaker to the HVAC unit and check for any voltage. My Lennox 2.5 ton package HVAC unit had two hot wires, red and black, each at 120V, for a total of 240V. The green wire was for ground.
Remove the line cable, which supplies electrical power from the circuit breaker box, from the HVAC electrical box.
Since the Romex line cable will be moved to come up through the roof from under the HVAC unit, we removed the conduit.
We then pushed the Romex back into the attic so we could push it through the hole in the roof we made earlier.
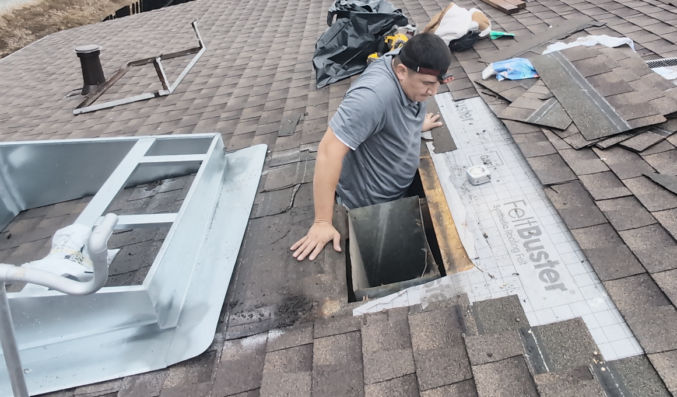
Then go into the attic so you can push the Romex cable through the new hole in the roof.
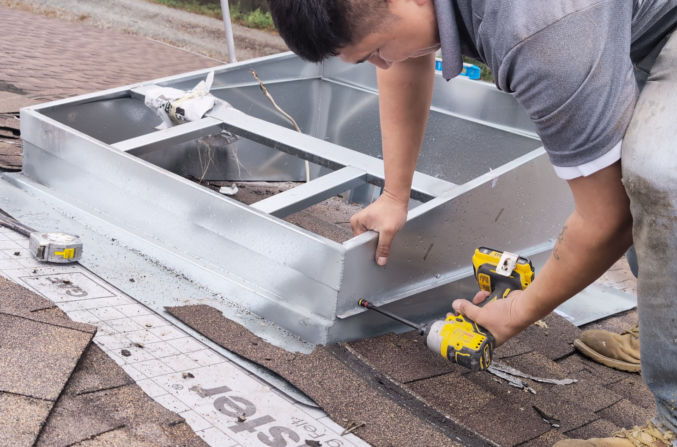
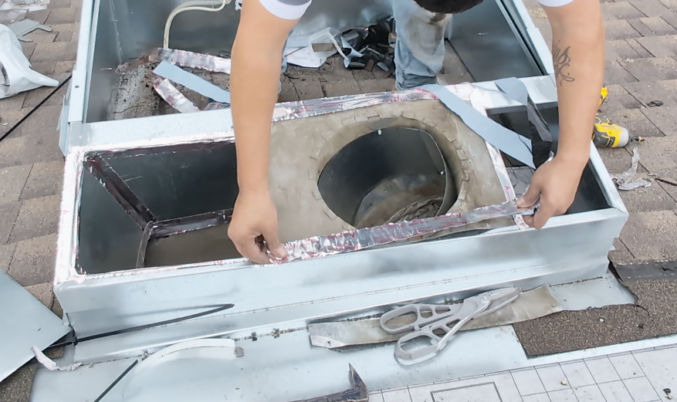
Slide the top half of each side of the curb under the shingles and move the curb into its final position.
You may need to remove some nails holding some shingles down.
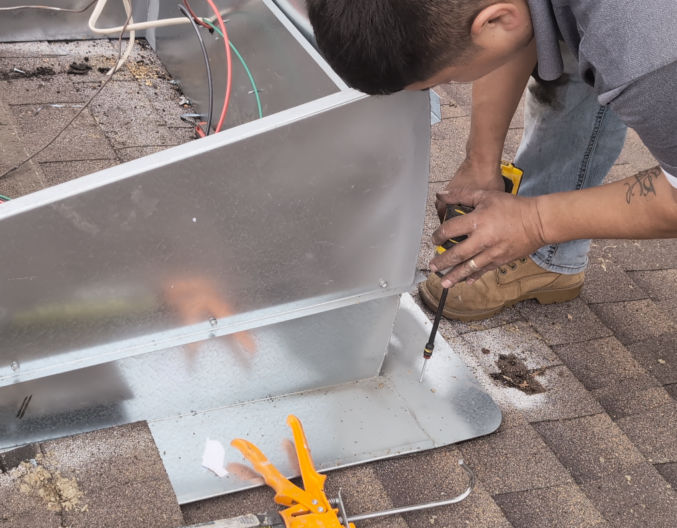
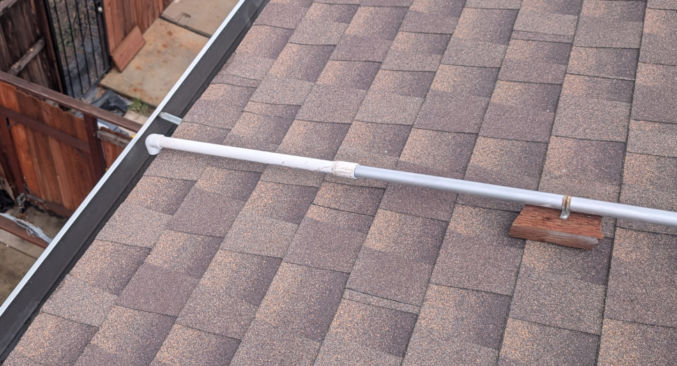
Place a magnetic torpedo level on one side of the curb, then lift the front of the curb up until the level shows it is level. This is so the HVAC unit will sit level on the curb rather than angled following the slope of the roof.
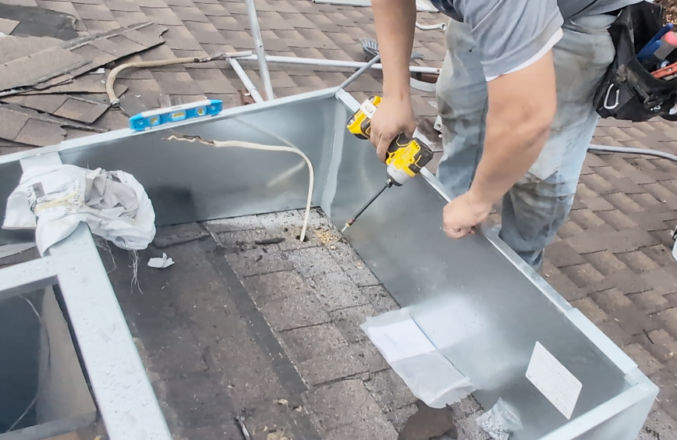
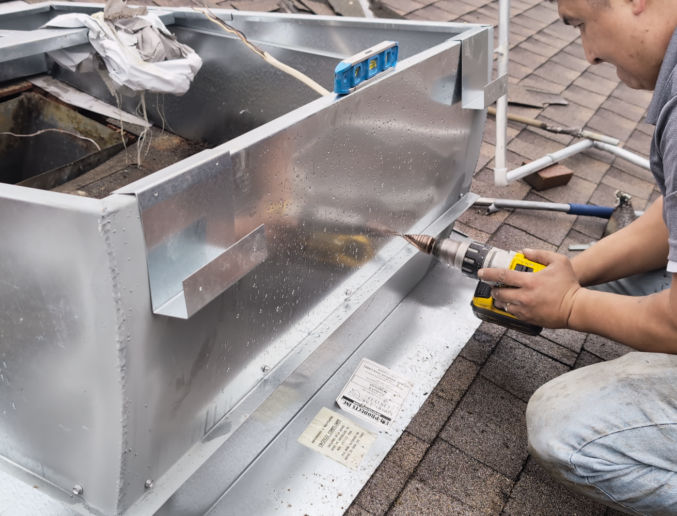
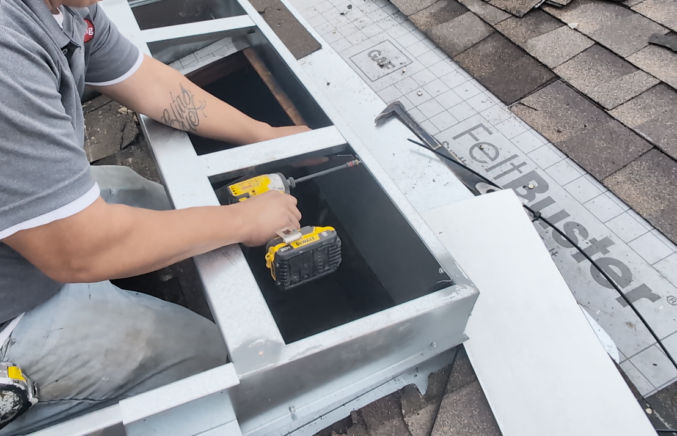
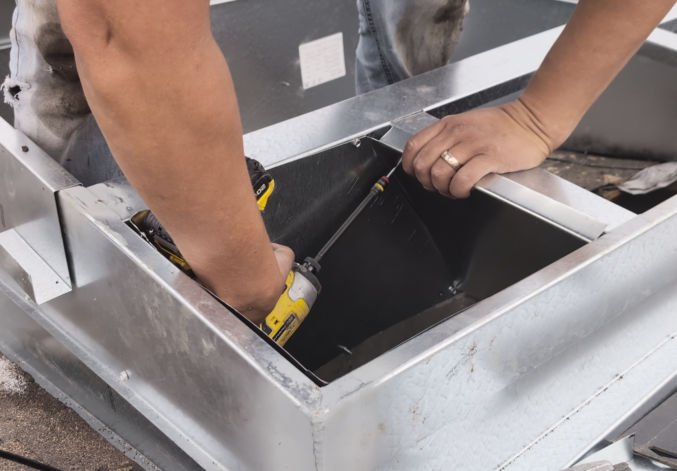
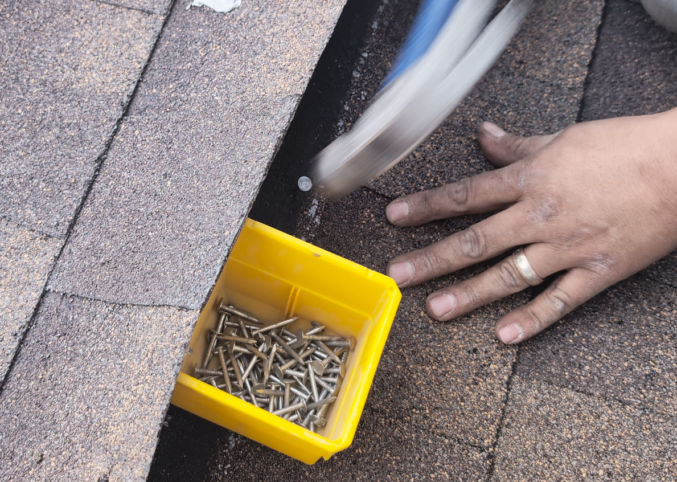
When it’s level, drill a self-tapping screw for metal from the outer side of the curb through the inner side of the curb to hold the outer side in place.
Drill screws in multiple places to ensure the top of the curb remains level and can support the weight of the HVAC unit.
Install the 4 brackets that came with the curb – 2 on the front and one on each side.
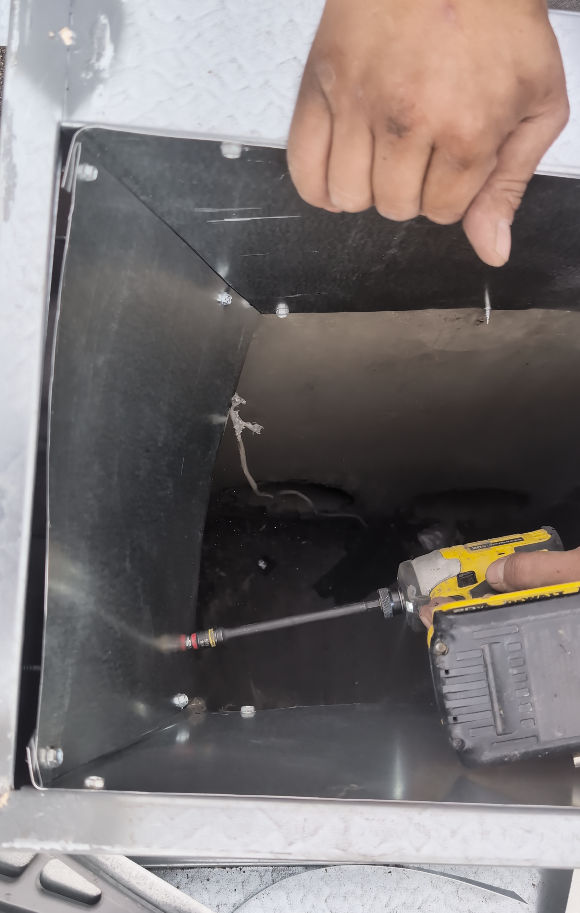
Drill a 3/4″ diameter hole in the front of the curb for the electrical Romex cable and the t-stat (thermostat) cable to go through.
We needed some sheet metal to connect some ducts and cover some openings. It’s much cheaper to buy a roll at a dedicated HVAC store than the big-box stores like Home Depot, which only sell small sheets. However, some HVAC stores only allow licensed contractors to buy from them.
The sheet metal roll is held in place using a long zip tie.
When going up and down the ladder, make sure to strap the ladder to the building, like an eye hook in the eaves, to keep the ladder from moving. Some city inspectors require this when they come for an inspection.
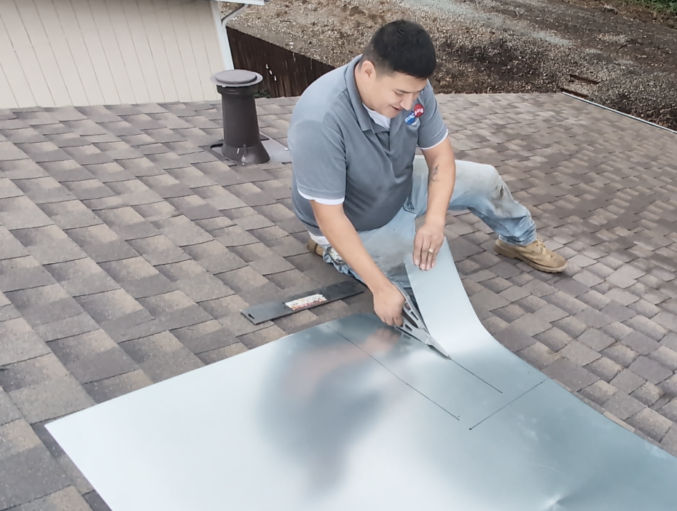
Cut pieces of sheet metal to connect the duct in the attic to the curb.
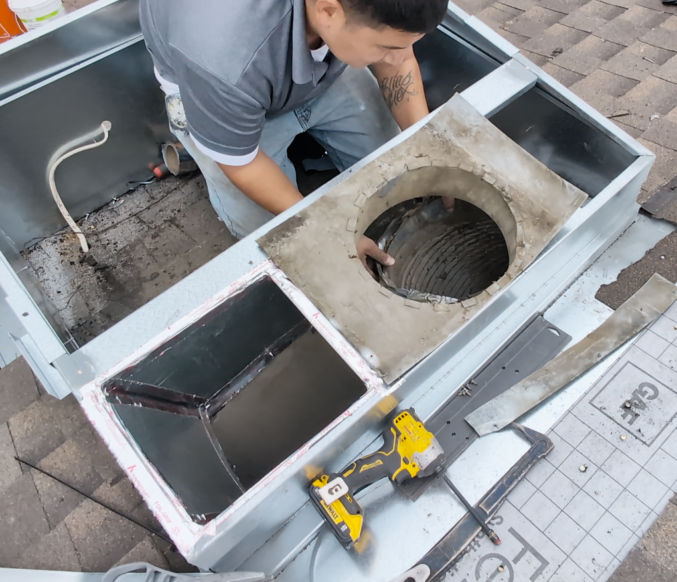
If it helps, you can reuse old duct parts to connect the duct in the attic to the curb. In the following photo, the left opening is where air flows into the building. The right opening is where air flows from the building back into the HVAC unit.
Connecting the duct to the curb can be tricky because there may not be enough slack in flexible ducts and you are sometimes working in tight spaces.
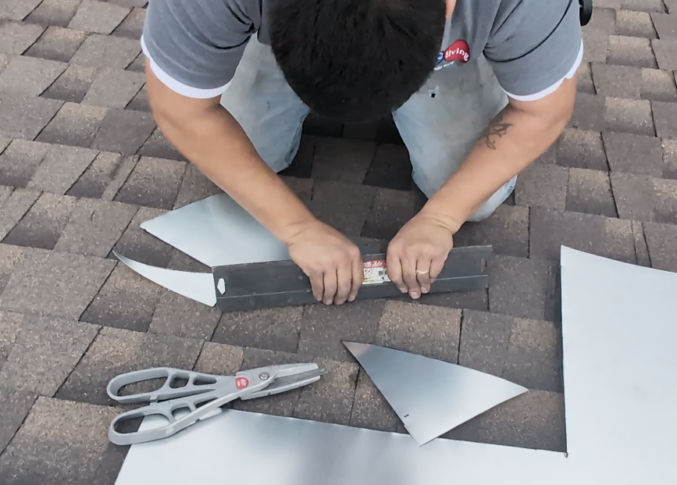
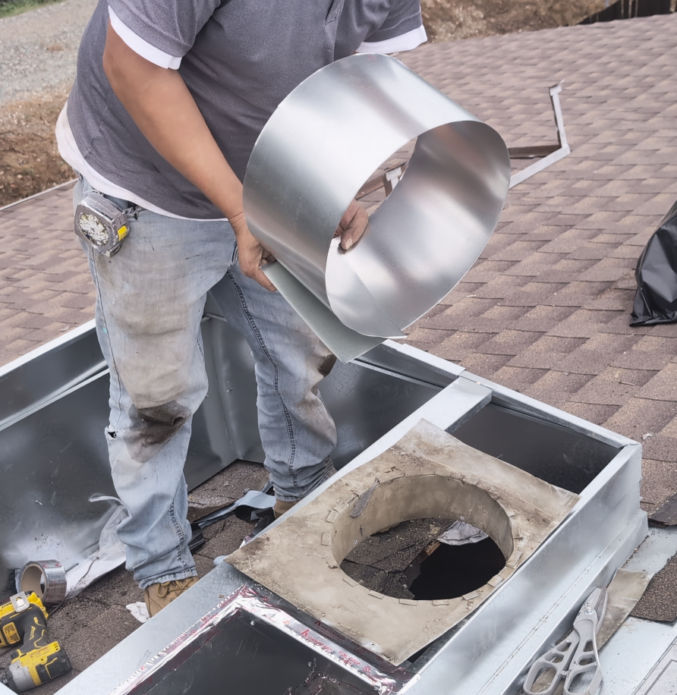
In this case, the contractor had to create a short circular duct to extend the flexible duct that was in the attic.
He inserted the duct at an angle since the flexible duct in the attic came in at an angle.
Then, he screwed in the extension piece using self-tapping sheet metal screws.
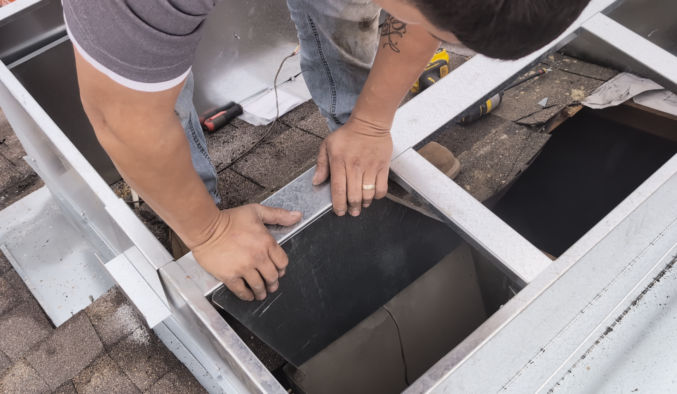
Then he screwed the flexible duct to the duct extension he just created.
And he applied HVAC tape to all duct and curb connections.
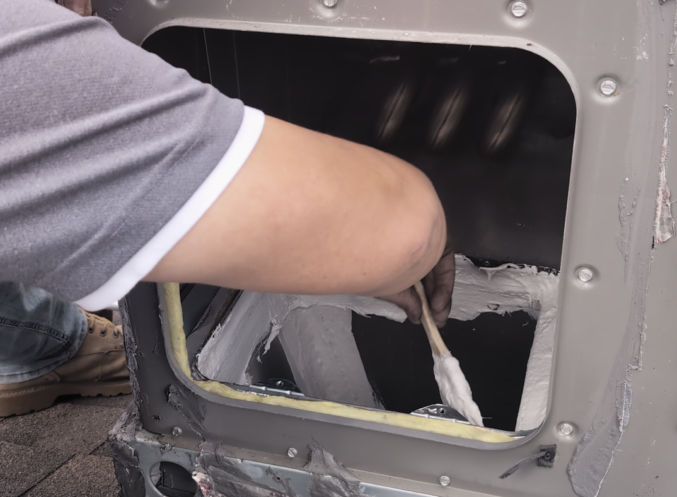
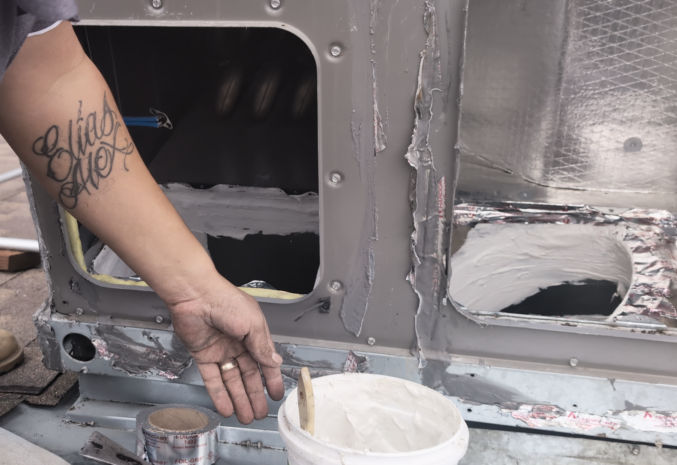
He also covered all gaps with HVAC tape. For big gaps, as shown below, the tape will serve as backing for the HVAC sealant (Pookie).
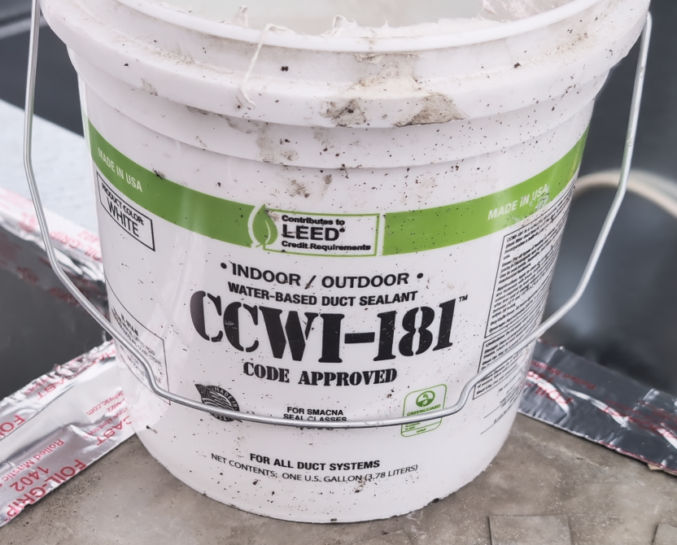
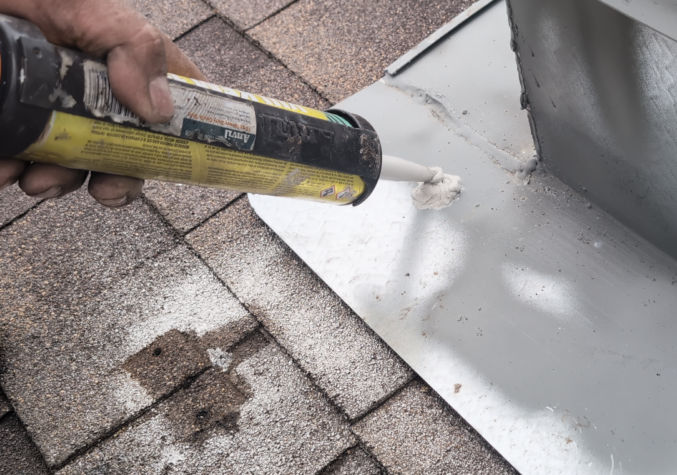
Apply HVAC sealant (Pookie) to all seams and connections. When dry, this sealant becomes very hard.
Stick the electrical line cable and load wires (red, black, and green) through the hole previously made in the curb. The load wires connect from the wires in the line cable to the terminals in the HVAC unit.
Insert a 3/4″ plastic bushing in the hole in the metal curb to prevent the wires from getting cut if they slide against the sharp metal hole in the curb.
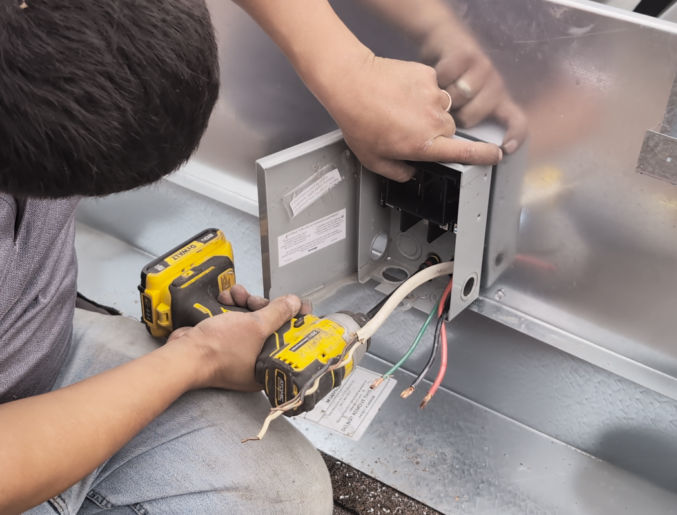
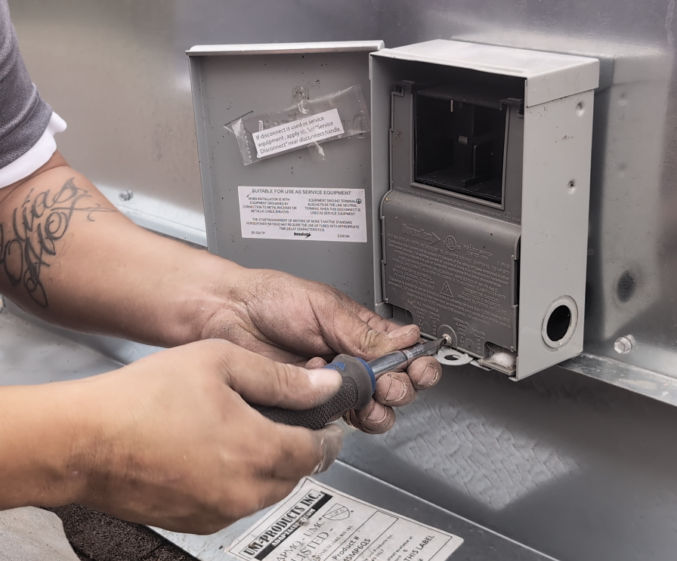
Stick the wires through the hole in the electrical box.
Screw the box to the curb.
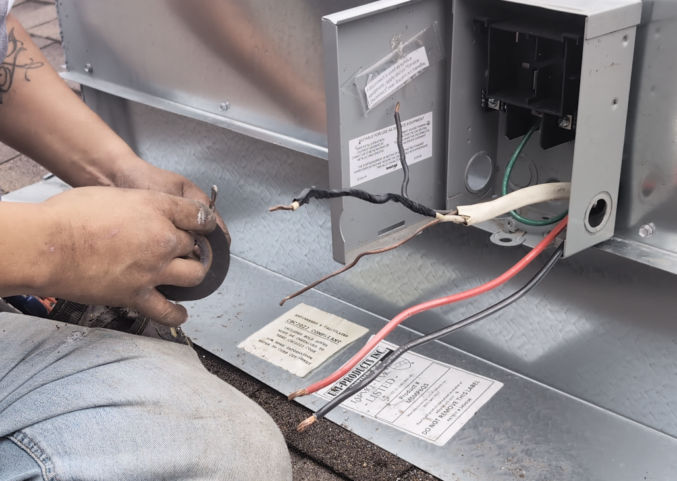
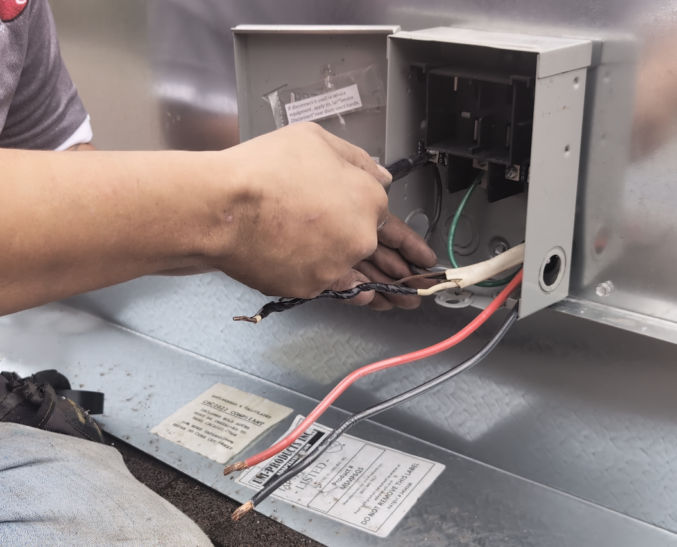
Since both the black and white wires in the line cable are hot (120V), the white wire must be colored black to indicate it is hot. You can cover a portion of the white cable sleeve with black electrical tape.
Connect the wires to the appropriate terminals in the electrical junction box.
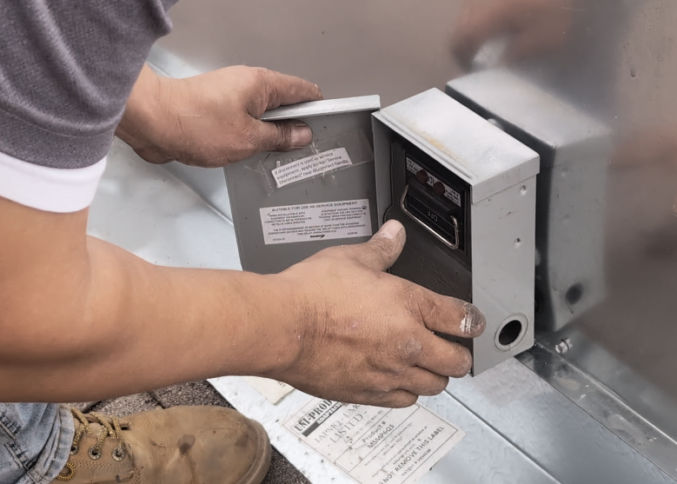
Screw the plastic cover over the terminals.
Insert the circuit breaker.
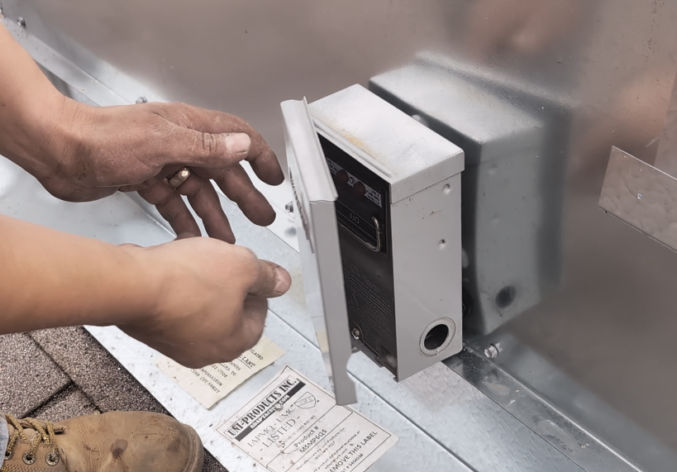
Close the box door.
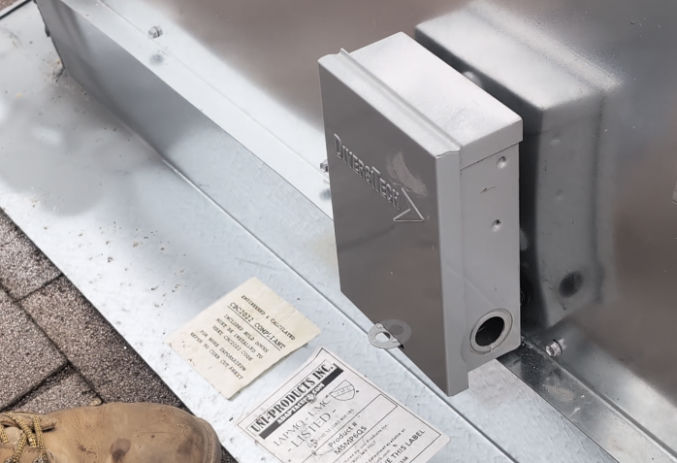
Optionally lock the door by inserting a lock through the hole.
Tape the ends of the load wires and the thermostat wires together to make it easier to access them when the HVAC unit is lowered onto the curb.
Screw the base of the curb into the roof at various places.
Drill a 3/4″ hole at the bottom of the HVAC unit near where the power and thermostat wires will connect to the unit.
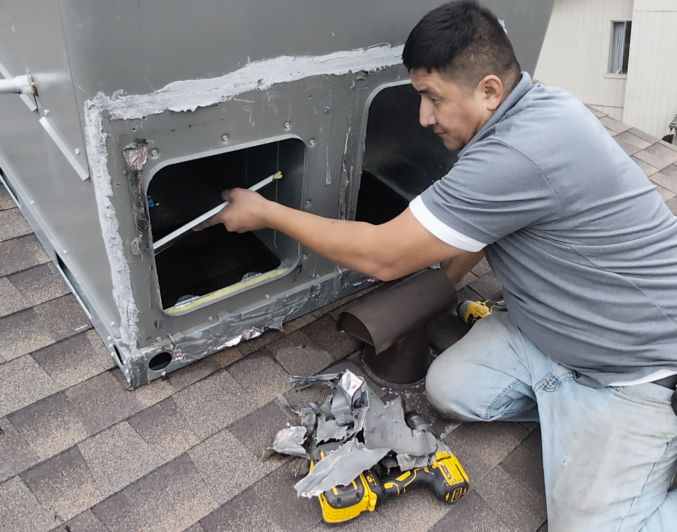
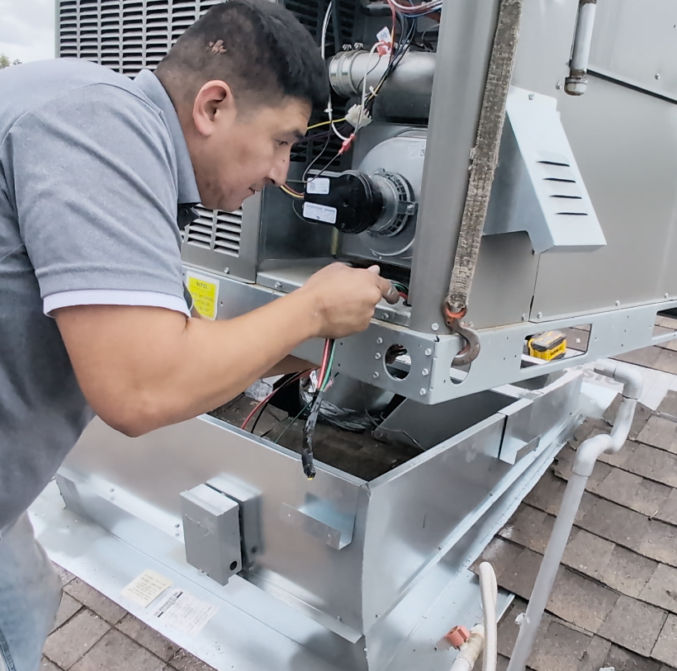
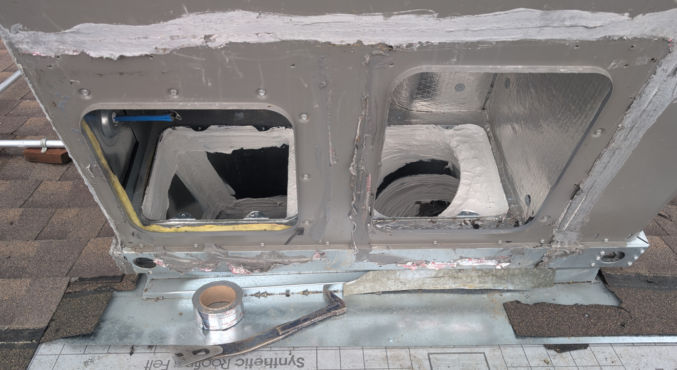
Since the previous HVAC contractor connected the unit to the elbow at the back of the unit, we had to remove the tape and sealant that remained after disconnecting the elbow from the unit.
The contractor unscrewed and removed the two panels at the bottom of the HVAC unit since airflow will flow through the bottom rather than the back.
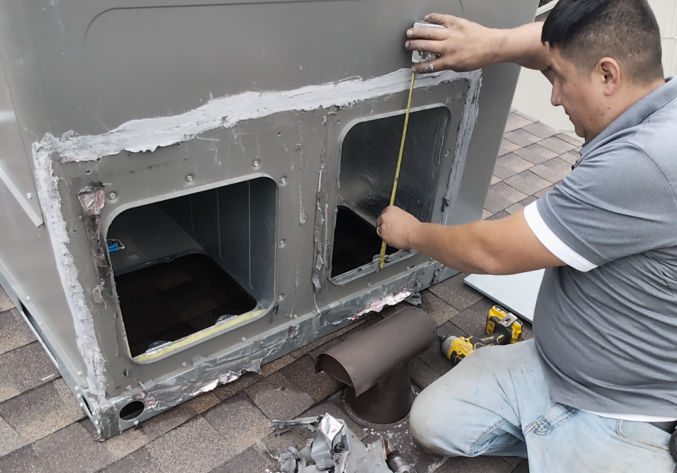
He then measured the openings so he could create some custom panels using sheet metal.
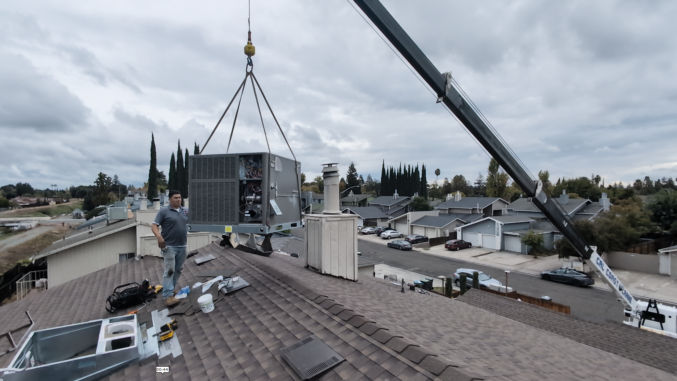
The crane returned to lift the HVAC unit and lower it onto the new curb. The contractor inserted the 4 hooks into the 4 holes at the base of the unit.
The contractor pulled the load and thermostat wire through the hole he made in the base of the HVAC unit.
The unit was then lowered onto the curb such that the base would sit on the 4 brackets around the top of the curb.
The contractor routed the wires to where they need to be connected.
He connected the load wires (black, red, and green) to the appropriate terminals.
He connected the thermostat wires to the corresponding color-coded wires in the HVAC unit.
He then connected the gas line to the unit.
He applied PVC glue to connect the drip line to the unit.
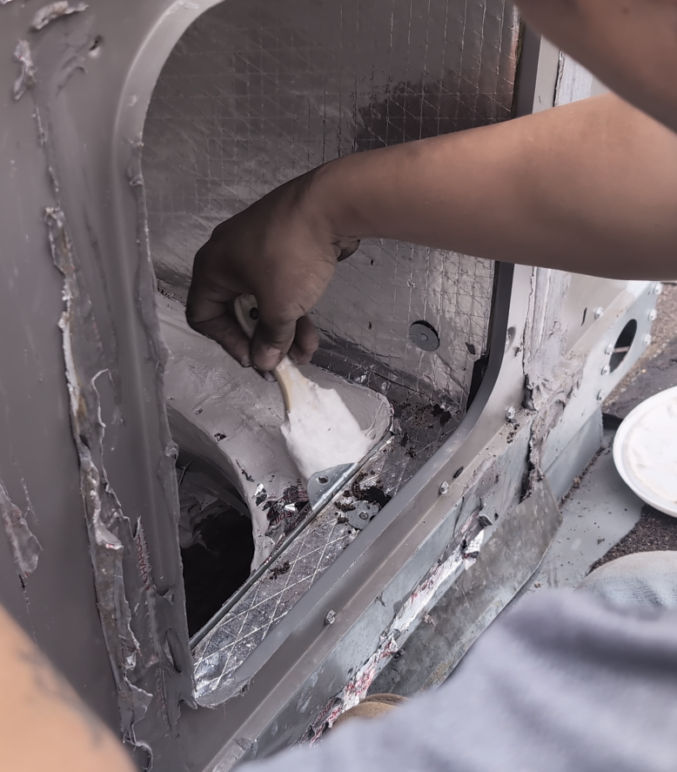
He put HVAC tape to close the gap between the openings at the bottom of the unit and the duct openings in the roof.
He brushed on some HVAC sealant (Pookie) over the tape.
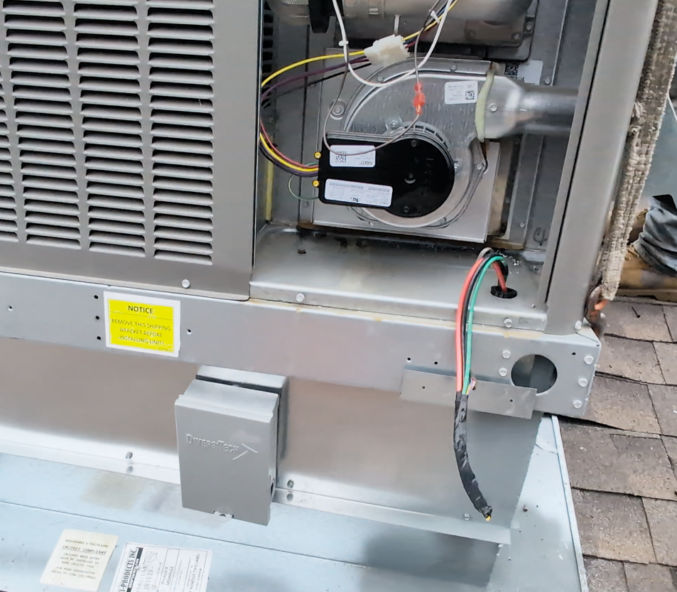
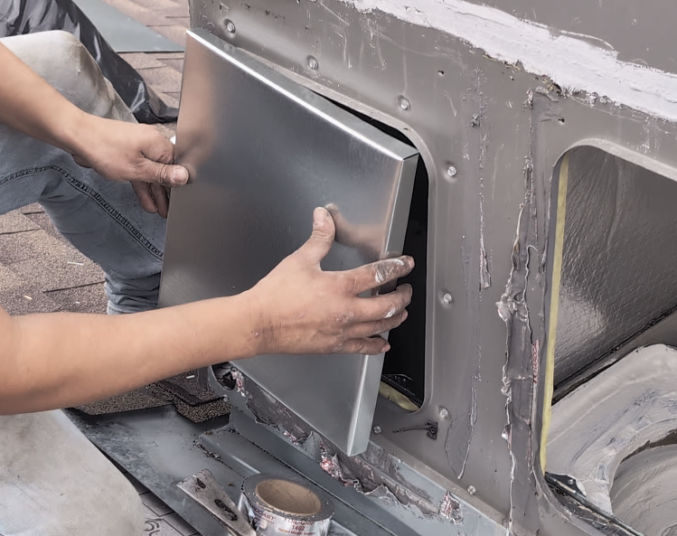
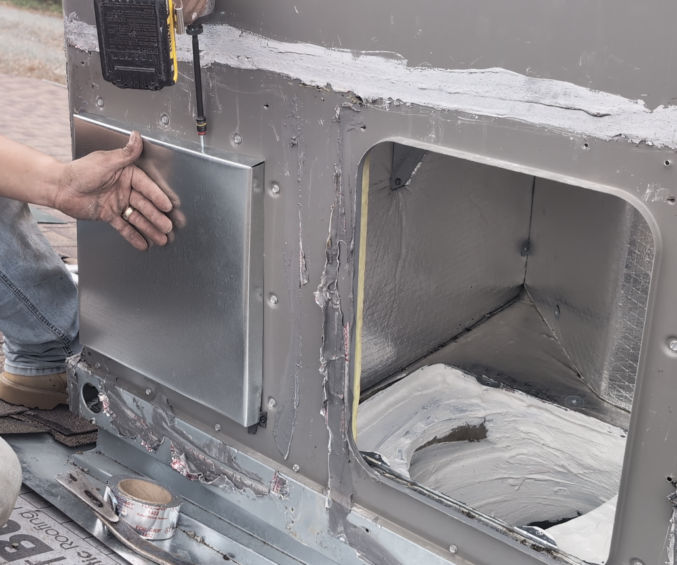
He cut some sheet metal to cover the two openings at the back of the unit.
He folded the 4 corners of the sheet to fit over the lip of the openings at the back of the unit.
And he screwed the panels in place
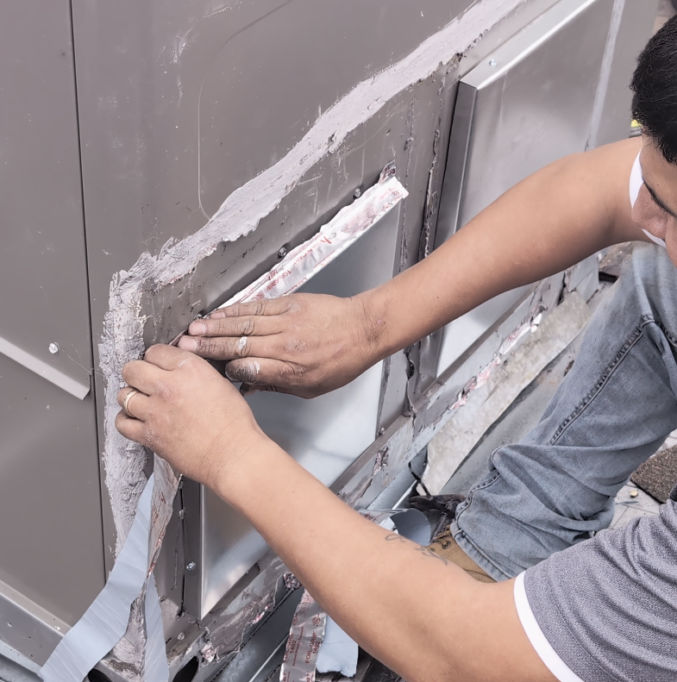
He put HVAC tape around the panels, but he didn’t apply HVAC sealant (Pookie) over the tape so that maintenance and inspection can easily be done in the future, if needed. (Pookie dries really hard and is hard to remove)
He screwed the electrical panel back on the unit.
He put new shingles over the area where he had to remove some old shingles.
Since replacing the stand with a curb, the HVAC unit was moved up, so he had to add an extension to the old PVC drip line.
Since the old electrical line cable was moved from outside the HVAV unit to under the unit, he covered the old hole in the roof with HVAC tape, which is very sticky tape.
He applied silicone sealant over screws that could result in roof leaks.
He also applied silicone sealant around the electrical box.
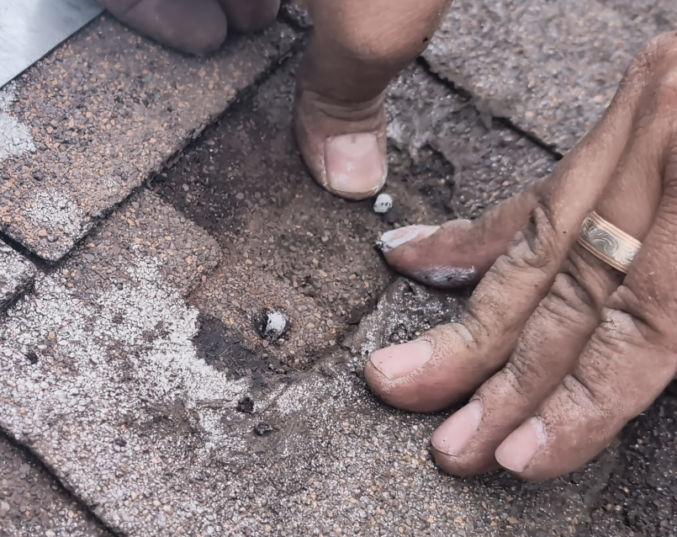
The feet of the old stand were screwed into the roof. He lifted the shingles where the feet were using a pry bar.
And applied sealant in the holes beneath the top layer of shingles.
He then pressed down on the top layer of shingles so the sealant would squeeze out of the holes.
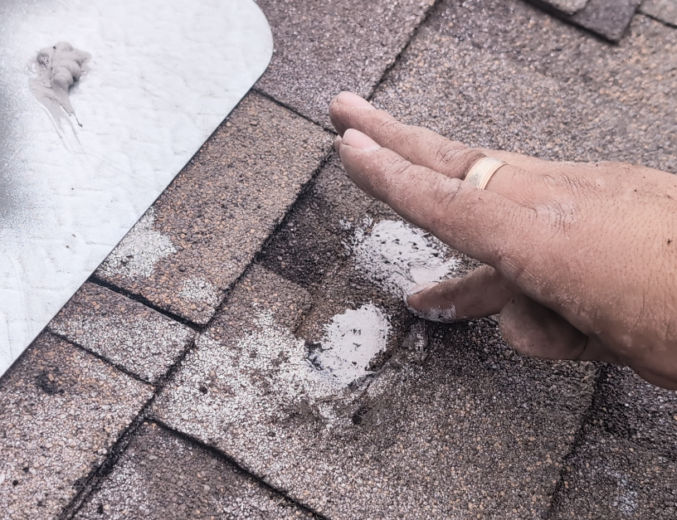
He smeared the sealant to completely cover the holes.
He also applied sealant over the tape that covered the hole where the electrical Romex line cable came out.
And here’s how everything looked when he was done.
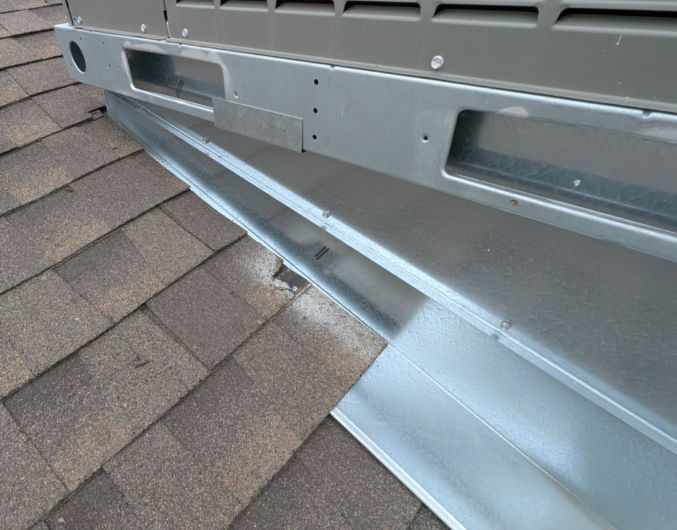
He only needed the shingles to cover the top half of both sides of the curb because the lip at the perimeter of the curb would force water to run down the roof rather than sideways.
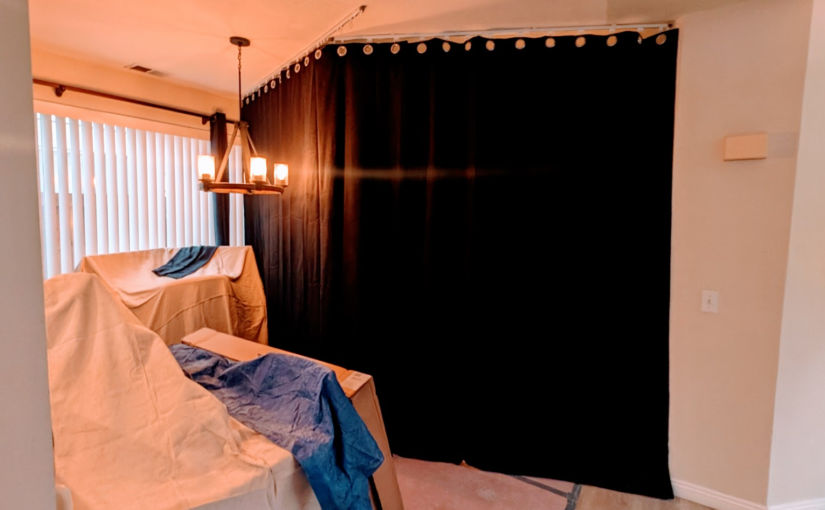
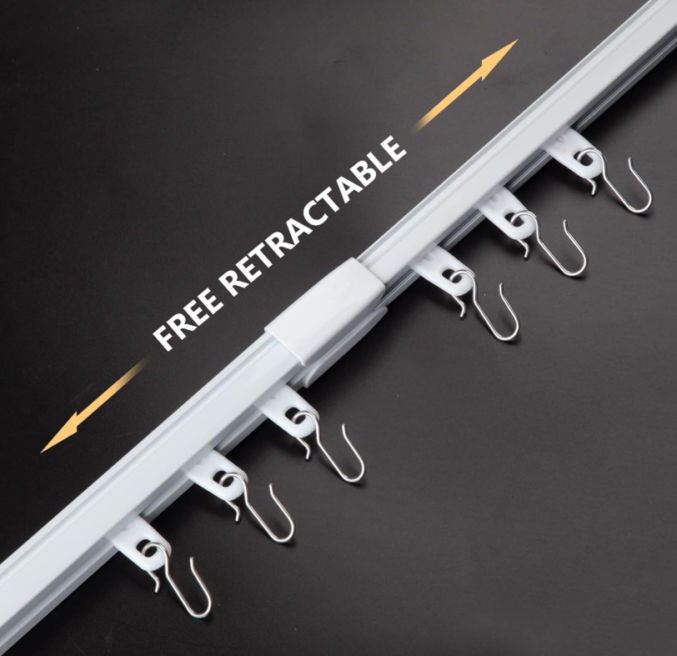
Some home improvement projects can produce a lot of dust, like when dealing with drywall, concrete, and mortar. Additionally, when you have contractors coming and going into your home, it’s nice to have a temporary partition for privacy. You can buy a plastic dust containment door at Home Depot for $30, but that’s expensive for a piece of plastic, and it only covers a 3′ x 7′ door opening. One option for covering a large space to both block dust and create privacy is by hanging blackout curtains on a sliding track, as shown below.
Note: if you don’t need to slide open the temporary wall, you can screw some 2×4 pieces of wood to the ceiling and then screw or staple the curtain to the 2×4 wood. You can also replace the curtains with thin (or thick) plastic or canvas drop cloth. In my case, I wanted the ability to easily slide the curtain wall open when the contractors weren’t working.
I first bought a lightweight shower curtain, but it was more expensive than the blackout curtains, and it filtered light, so anyone could see through both sides.
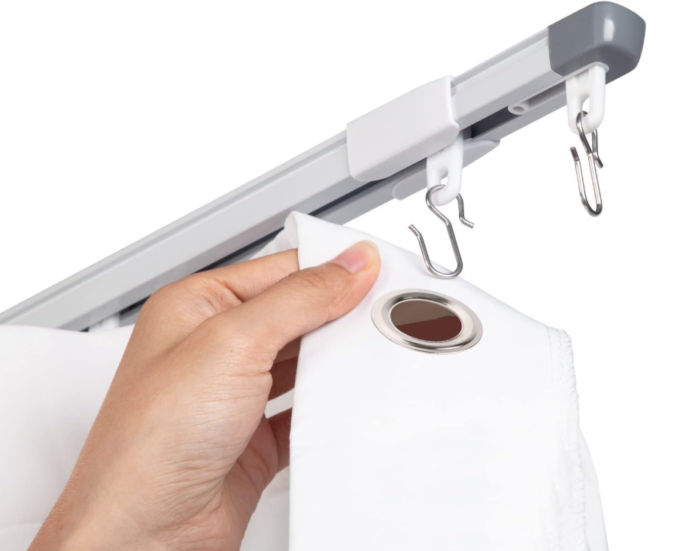
The curtain track just screws into your ceiling, either into joists or just drywall, using anchors.
You can also adjust the length of the track.
I went with two tracks and two curtains. Where the curtains meet in the middle, I had one curtain partially hang on the hooks of the other track for about 1 foot of overlap. This minimized any gaps in the middle for dust to get through.
CAUTION: While you might not think dust will get very far, you’d be surprised how wrong you are. Before I put up these curtains, dust managed to make it all the way to my living room, as I saw a thin film of it on my laptop cover. Also, there was a thin film of dust on the kitchen floor as well. While cleaning large flat surfaces like floors is easy, it’s not when dust gets into many nooks and crannies or in rugs.
The next time you need to do home improvement that could generate a lot of dust, or if you just need a temporary privacy wall, the ceiling track and curtain solution above may be just what you need, unless you want to spend all day removing dust everywhere.
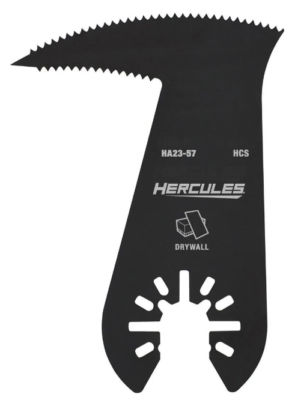
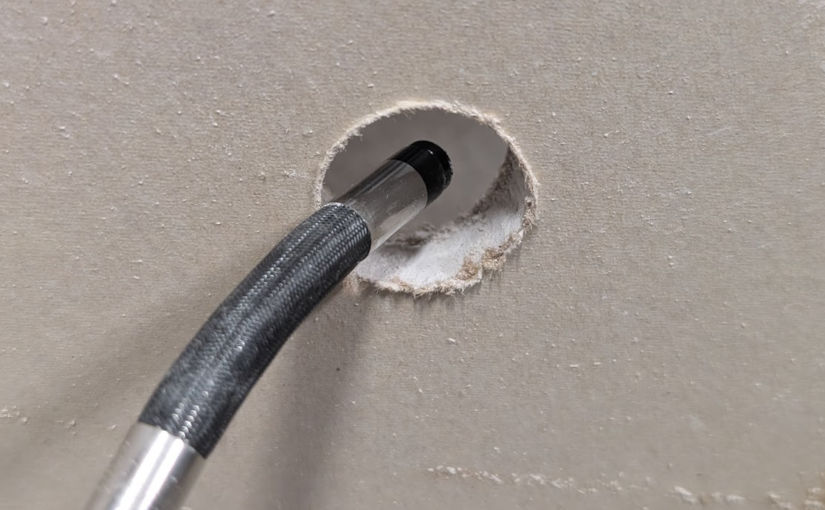
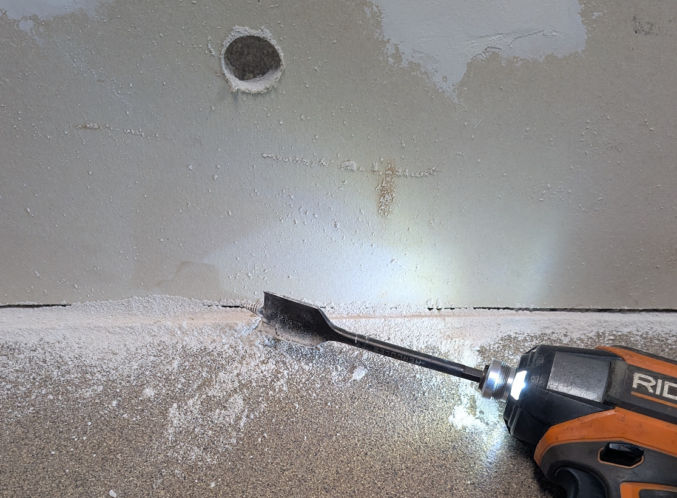
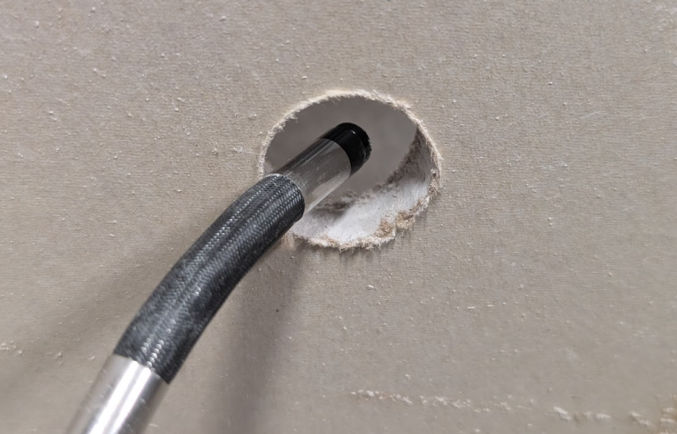
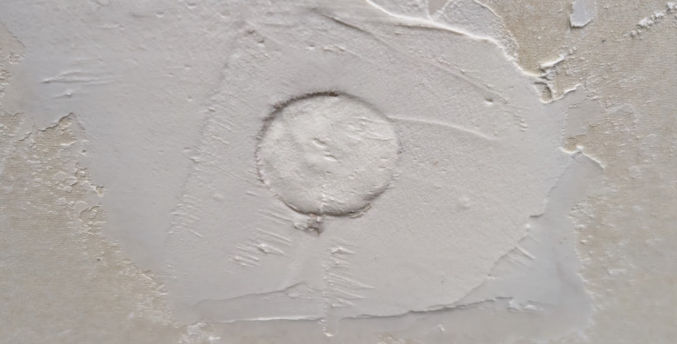
Most of the time, stud finders are sufficient to tell you what’s behind some drywall since most drywall just has 2×4 wood studs behind it. But what if you’re still unsure of what’s really behind some drywall. Here’s a simple way to visually peek behind drywall without making a mess or giving yourself a lot of work.
Note: When the joint compound dries, it will become very hard, and you can probably stick a nail or screw in it to hang something. For a one-inch hole, to keep things simple, I didn’t use any joint tape, and this method worked just fine without it.