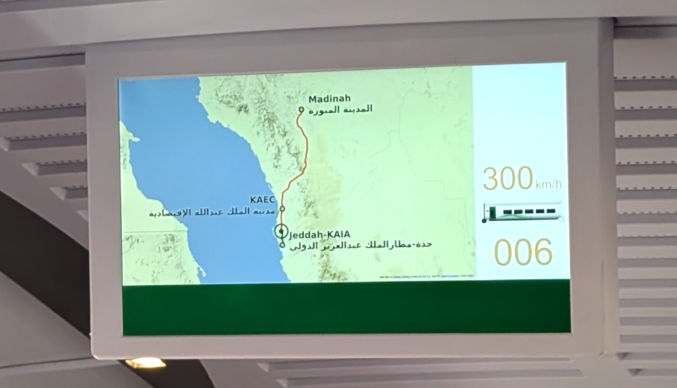
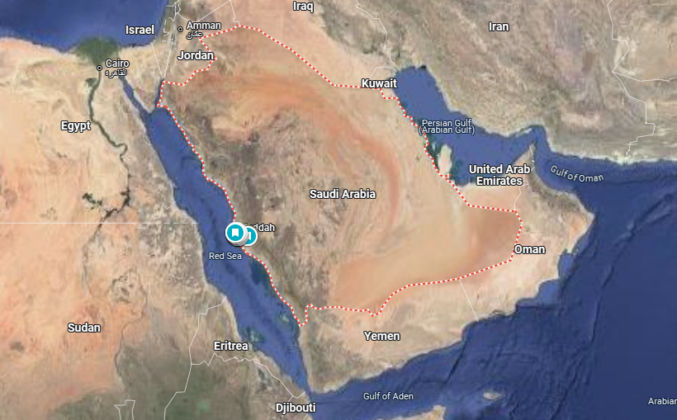
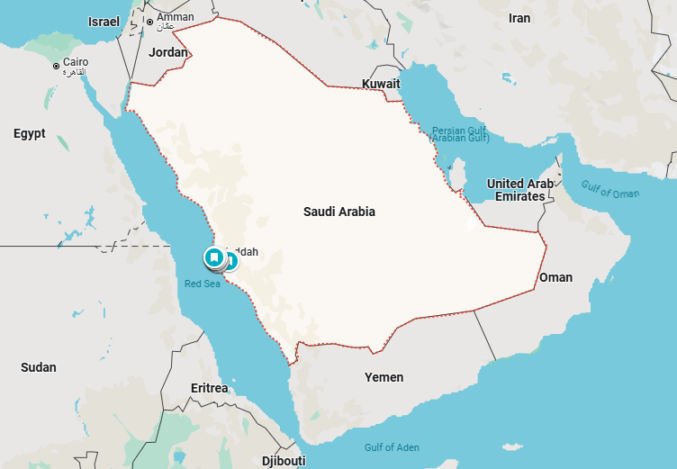
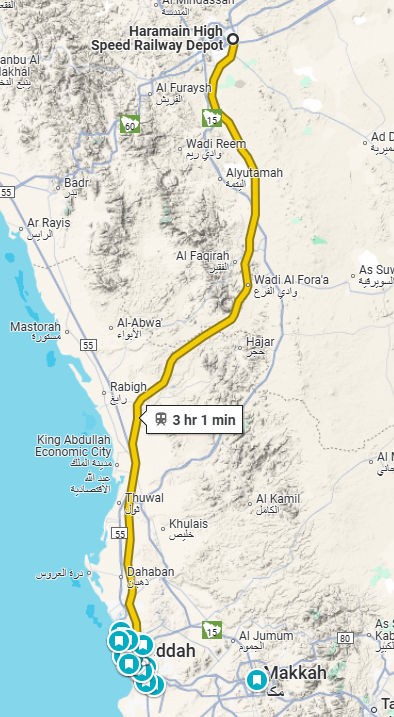
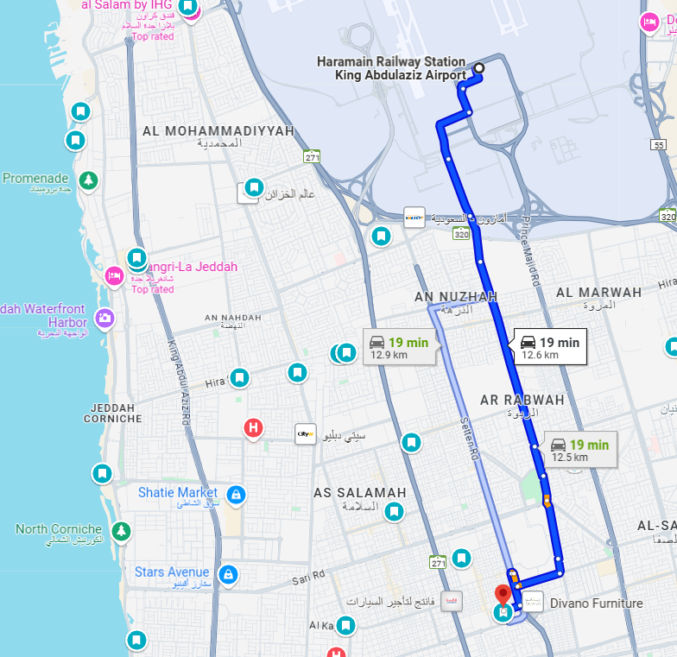
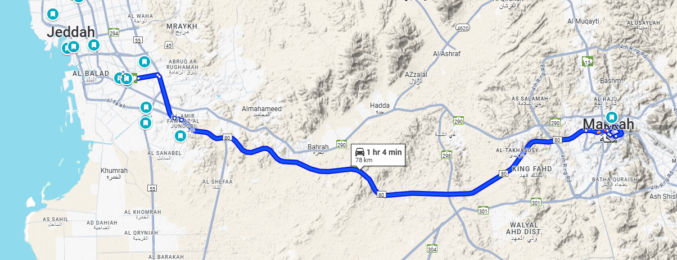
Madinah is one of the two holiest cities in Islam after Mecca, and it’s only 2 hours away by bullet train from Jeddah, the 2nd largest city in Saudi Arabia. While visiting the kingdom, I was able to complete a one-day trip to Madinah from Jeddah with the following itinerary.
Itinerary
Time
Activity
10 AM – 12 PM
Ride bullet train from Jeddah to Madinah
12 AM – 3 PM
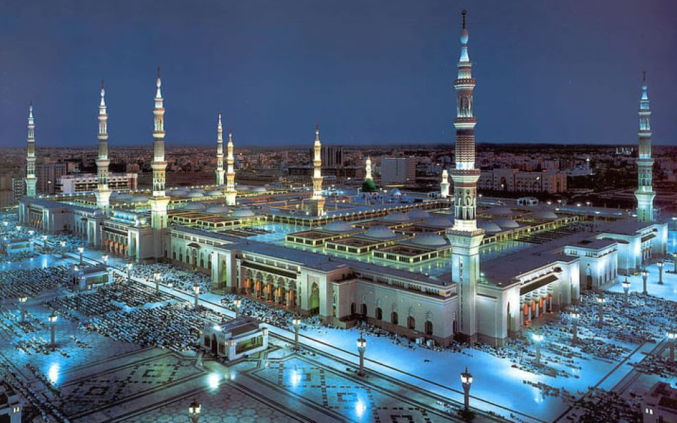
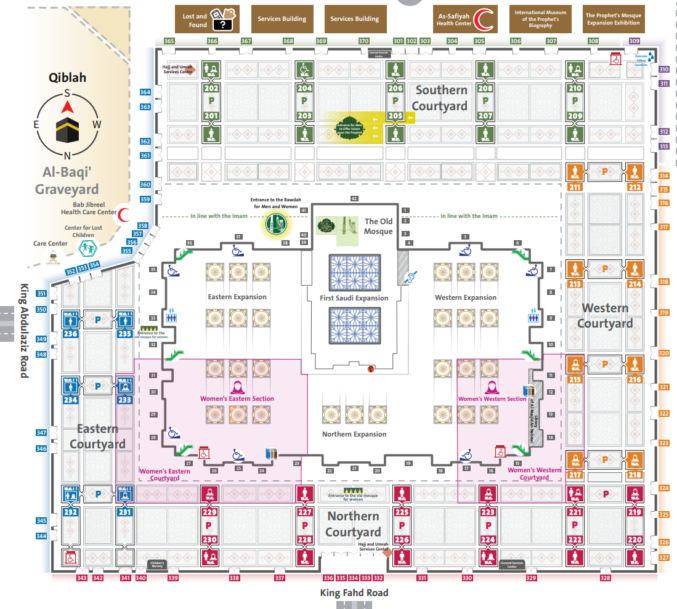
Visit the Prophet’s Mosque (Masjid Al-Nabawi)
3 PM – 6:30 PM
Have lunch Visit the Qiblatain Mosque Visit the 7 Mosques Visit Mount Uhud Visit the Quba Mosque
7:30 PM – 9:30 PM
Ride bullet train from Madinah to Jeddah
Costs
Activity
Cost
Round trip bullet train ride between Jeddah and Madinah
$155
6-hour car + driver/tour guide
$120
Lunch at a Turkish restaurant for 3 people
$43
Transportation
Bullet train
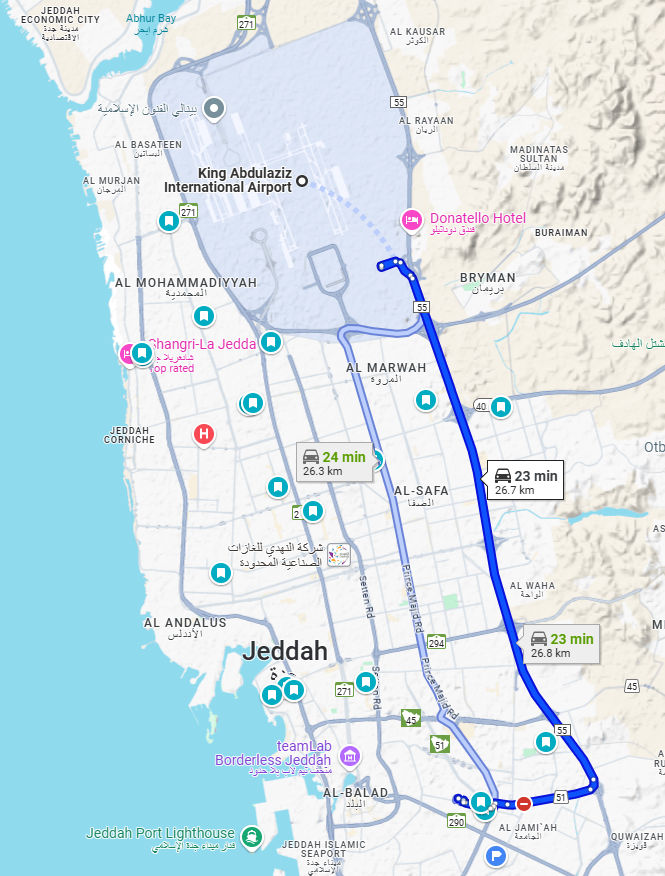
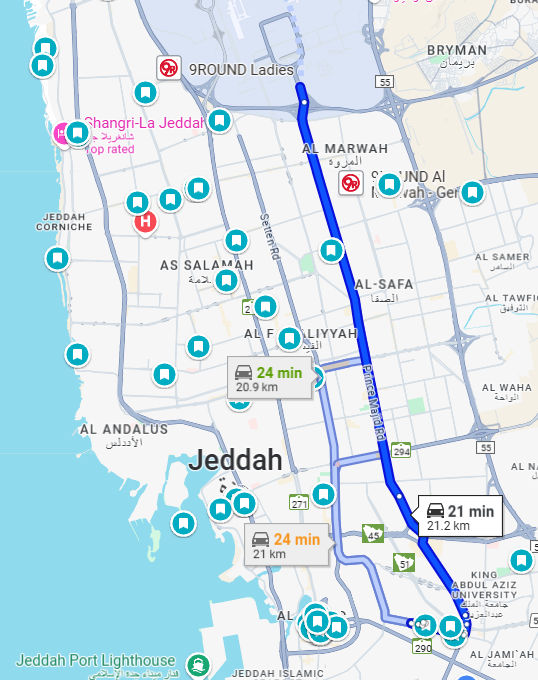
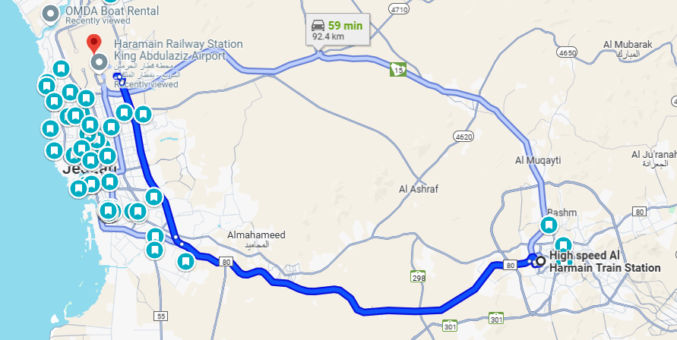
We purchased tickets online at https://rail.ninja/ for $72 per person. We chose the economy class because the business class didn’t seem worth the extra cost. The train travels at 300 km/h (186 mph). It’s clean, fast, convenient, and comfortable. There are 2 train stations in Jeddah, one in the north at the airport and one in the south.
Me at the train station in Madinah
Car + driver/guide
We thought about taking an Uber from place to place, but with so many places to visit, we didn’t want to waste time and try to figure everything out ourselves, so we decided to hire a driver for about 6 hours who could show us around. We were referred to Ibrahim, a Madinah local. He picked us up at the train station, took us to all the tourist spots, came with us inside the Prophet’s Mosque to show us around and explain things, had lunch with us and helped explain things to the waiter, and eventually dropped us off back at the train station. He doesn’t speak English, but I was able to communicate with my somewhat broken Egyptian Arabic I had learned while studying at the American University in Cairo, Egypt. If you don’t speak Arabic, you can always use Google Translate on your phone in “conversation” mode.
Ibrahim, our driver and guide in Madinah
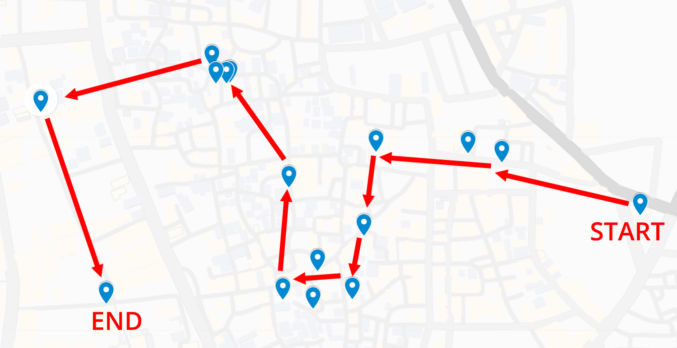
Trip at a Glance
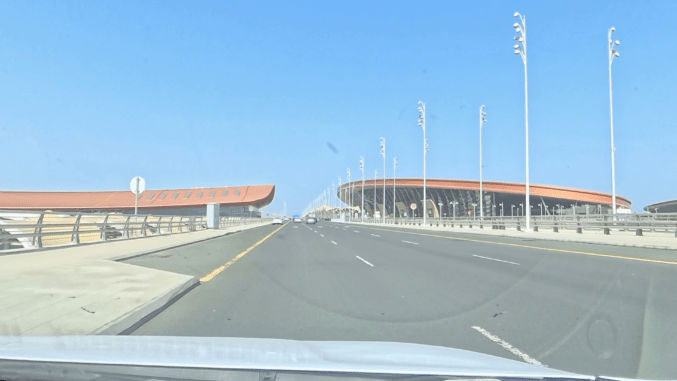
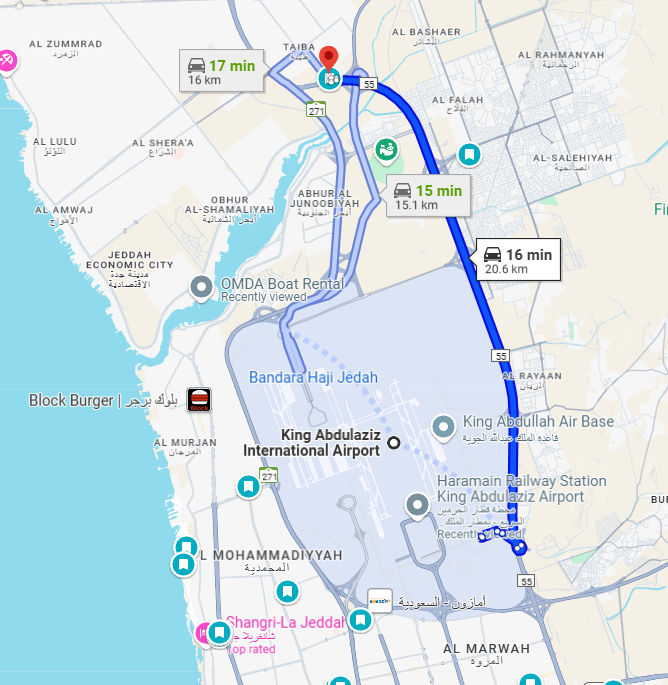
A friend dropped us off at the train station at the Jeddah international airport at 9:30 AM.
Left = train station, right = Jeddah International Airport
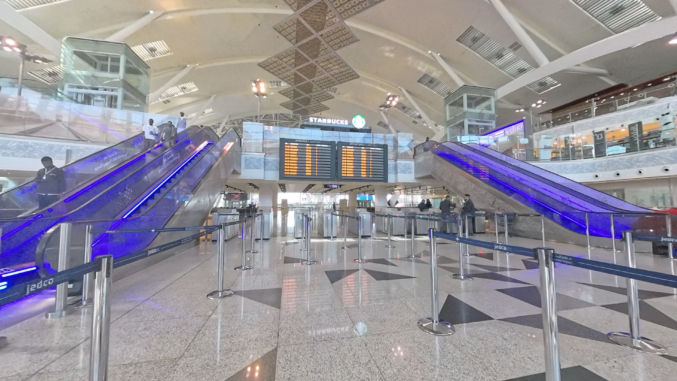
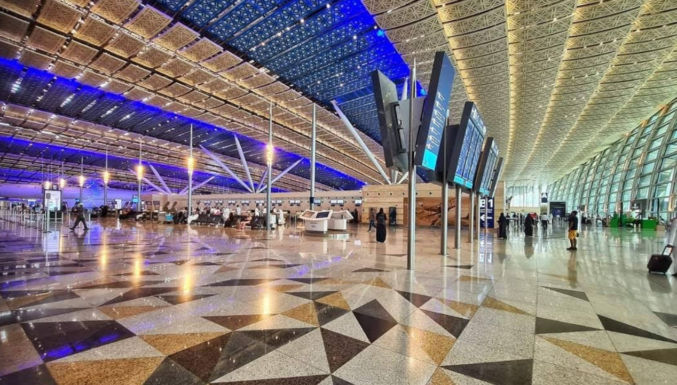
The train station was very spacious, clean, modern, and not crowded at all.
Train station at Jeddah International Airport
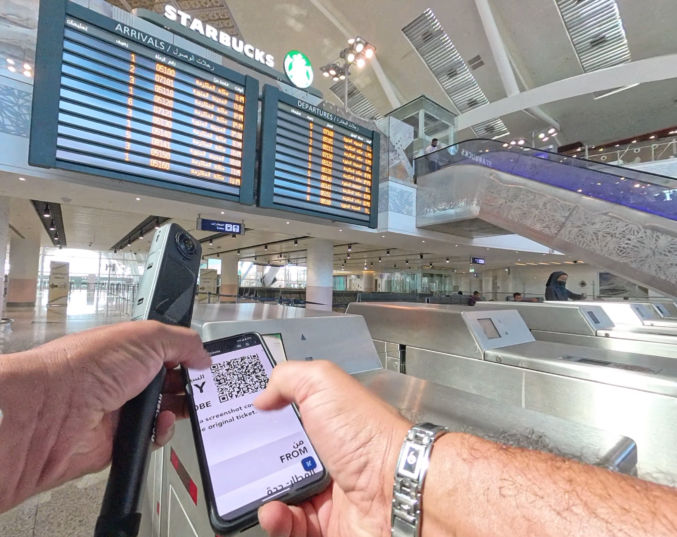
Your train e-ticket will come with a QR code. Just scan the QR code to open the turnstiles. And, of course, there is a Starbucks there with the Starbucks logo right above the arrivals and departures screens.
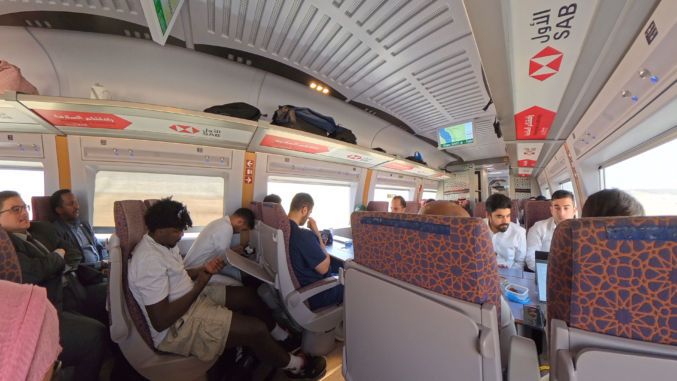
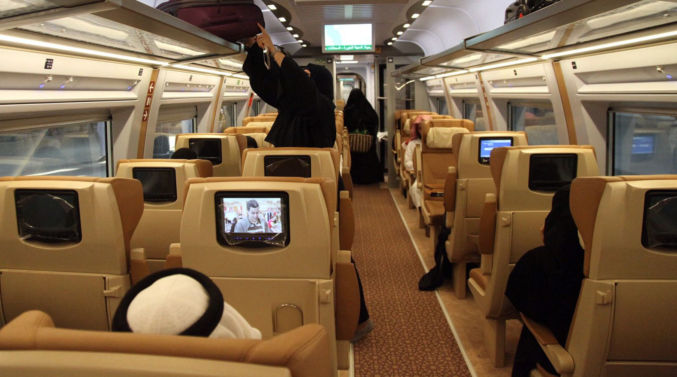
As you can see below, economy class was clean, comfortable, and spacious.
The bullet train travels at 300 km/h (186 mph).
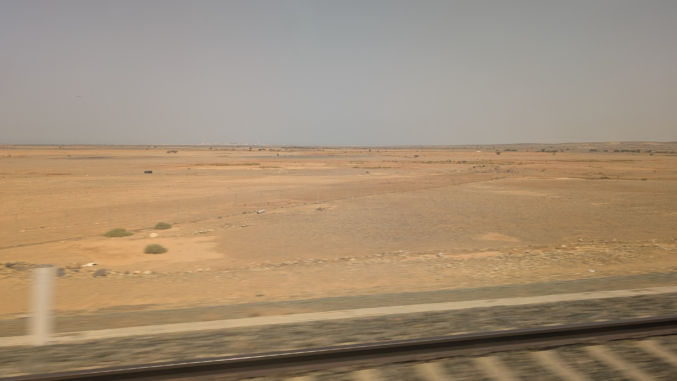
On the way to Madinah, the scenery is mostly just desert.
Ibrahim, the driver/guide, picked us up at the train station in Madinah.
Our first stop was the Prophet’s Mosque (Al-Masjid Al-Nabawi).
There was convenient and ample parking below the mosque.
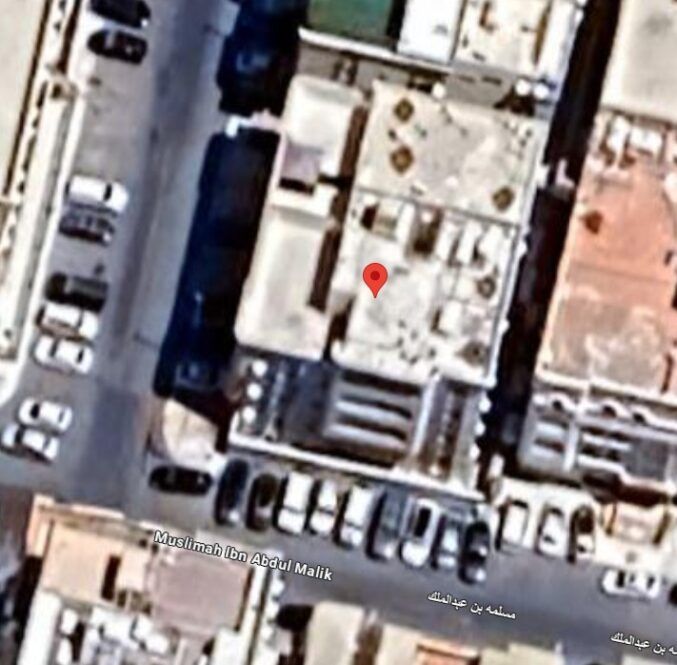
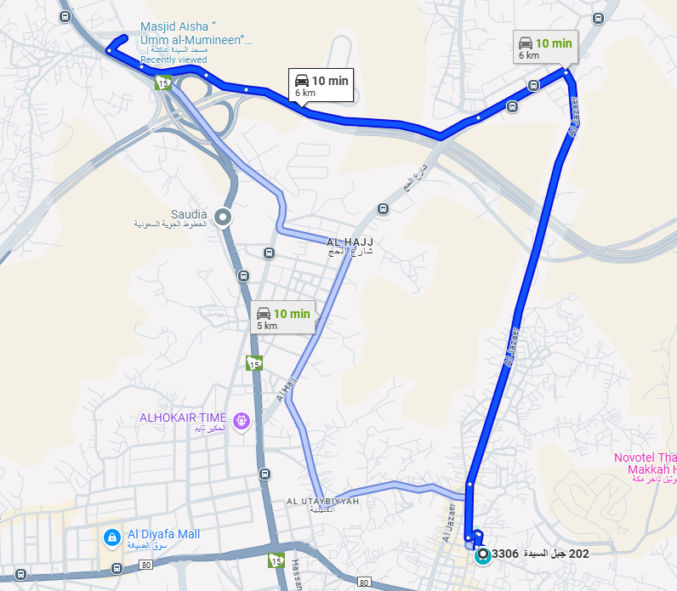
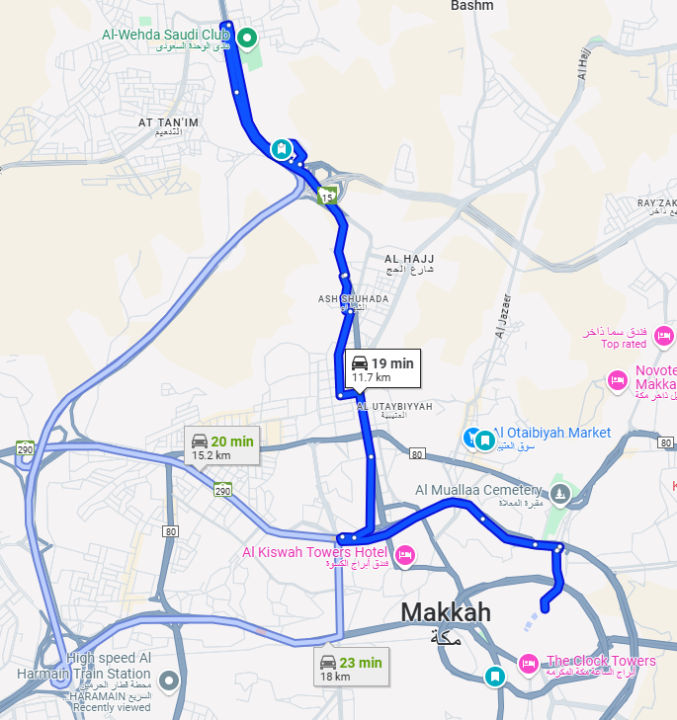
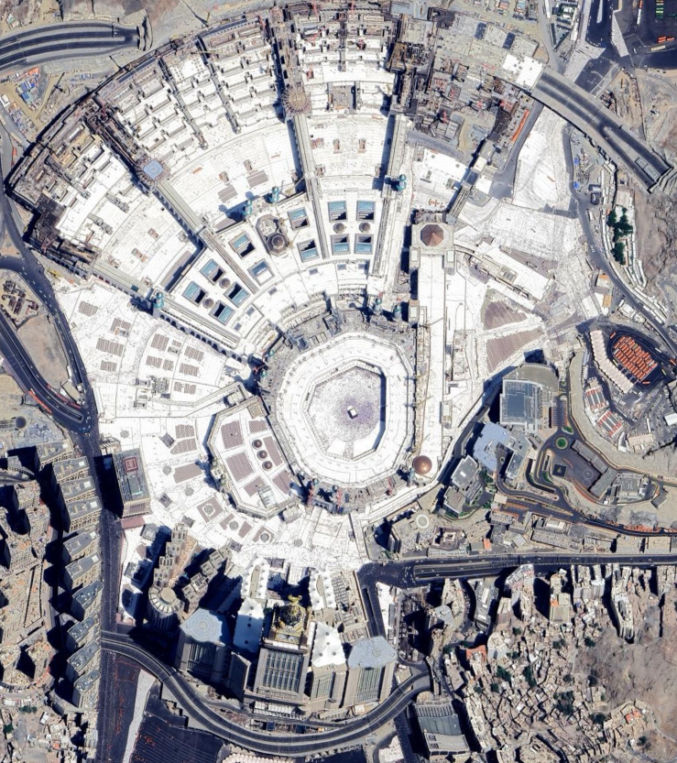
Below is a Google Earth view of the mosque.
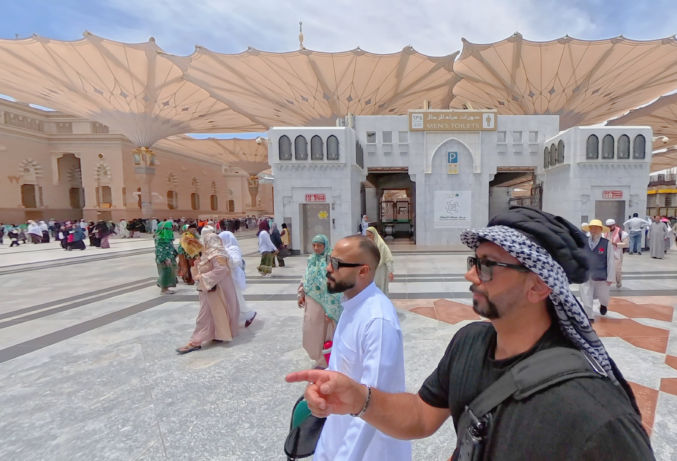
There are many restrooms all around the mosque and huge umbrellas to provide shade during the day.
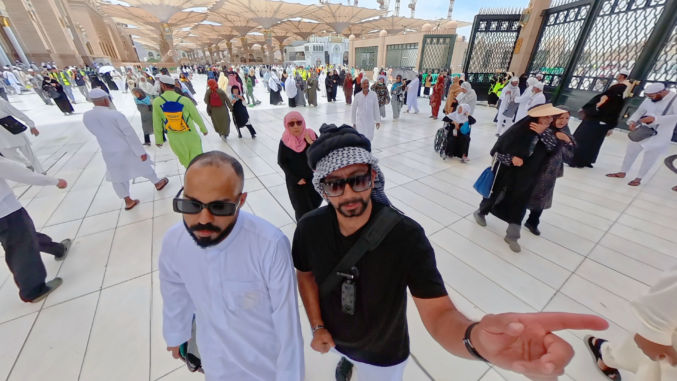
The Prophet’s Mosque is big. Ibrahim, our driver/guide, came with us inside to show us around and help guide us.
People from all over the world visit Madinah and the Prophet’s Mosque, like the person on the left, who may be from somewhere in Africa.
As we explored the mosque, I asked Ibrahim about various aspects of the mosque.
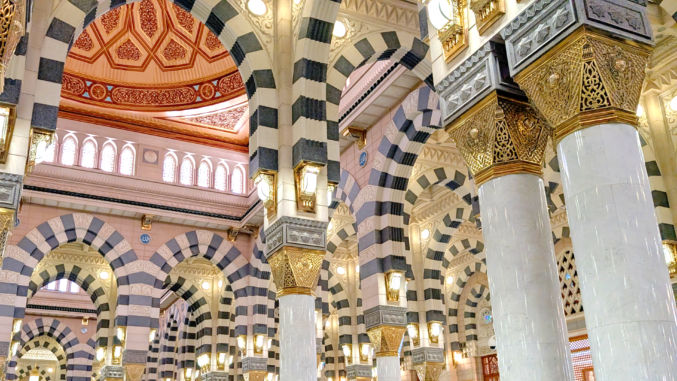
The interior design of the mosque was very elaborate with huge chandeliers.
I especially like the design of the striped arches.
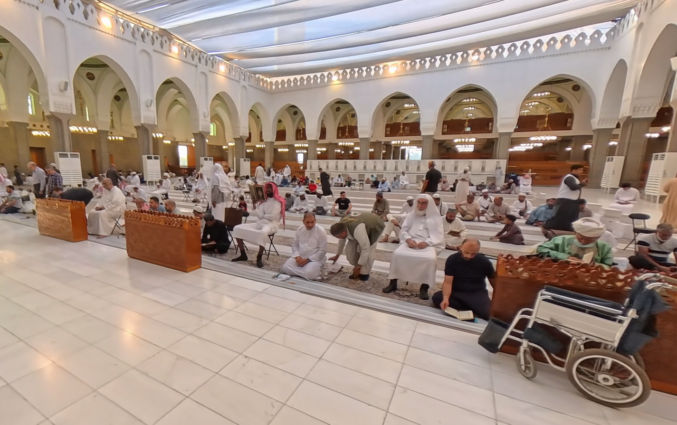
People can be seen praying, relaxing, reading, and chatting in their ethnic attire.
Being from the US, I normally wear a baseball cap and simple Western clothes, but I decided to dress more like a local for this trip. See photo below. The headscarf is commonly worn in Arabia whereas the black turban on top is more north African. I bought both on Amazon. When I tried the headscarf on, it kept moving around and looked messy, so I used safety pins to hold the shape I wanted. I also wanted a visor to provide some shade on my face, so I cut a visor off of an old had, stuck it in between the folded scarf, and secured it using safety pins. For the black turban on top, I didn’t want to mess around with folding and wrapping it on me, so I bought one that came pre-shaped that you wear like a hat. It had 2 straps on the back to tighten it to your head.
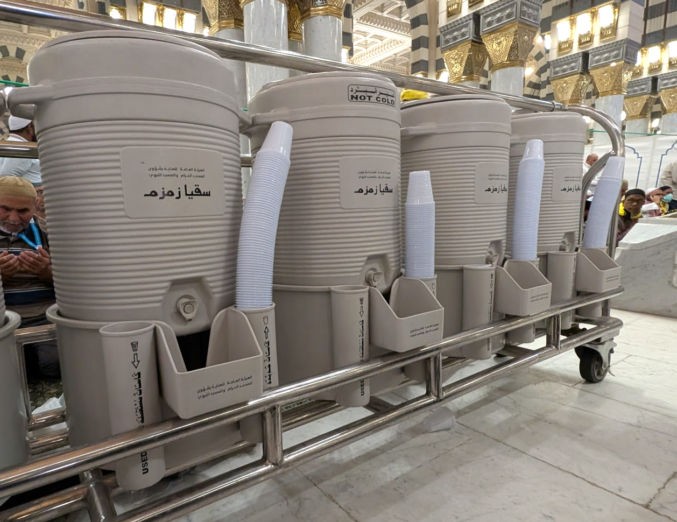
Inside the mosque, there were many water dispensers contain Zamzam water.
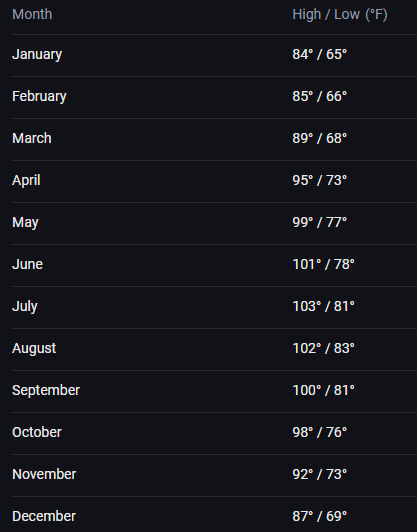
All over the mosque, both inside and out, you can find free Zamzam water, which was necessary considering the very hot climate.
I must have drank 10 of these cups of water. Next time, I would bring a water bottle with me.
If you visit Prophet Muhammad’s tomb, it will likely be very packed with people as shown in the photo below.
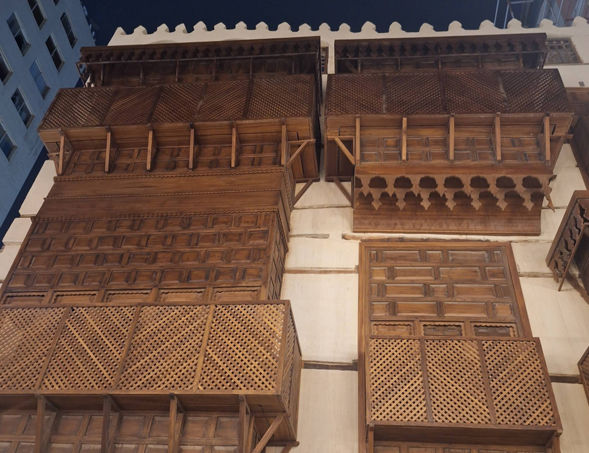
All around the mosque there are numerous golden doors with intricate designs.
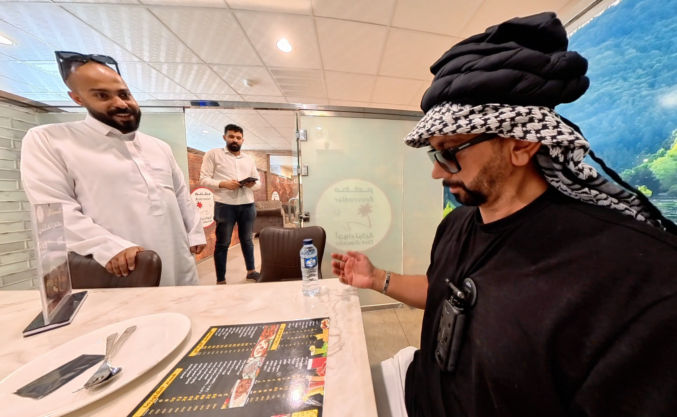
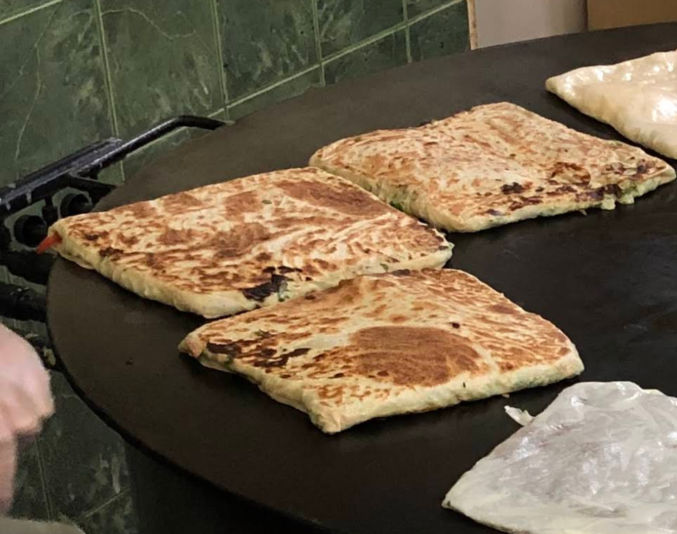
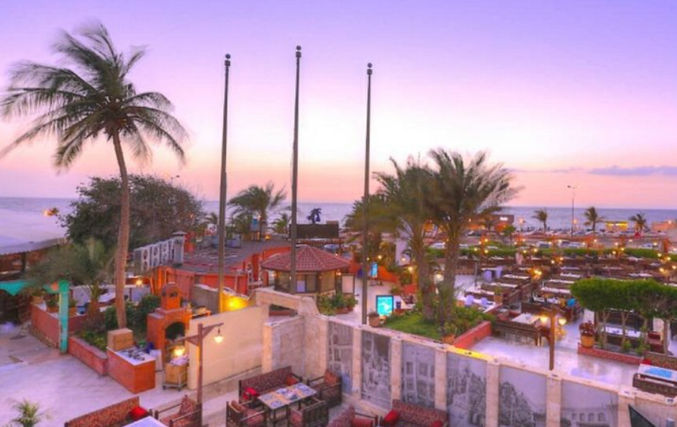
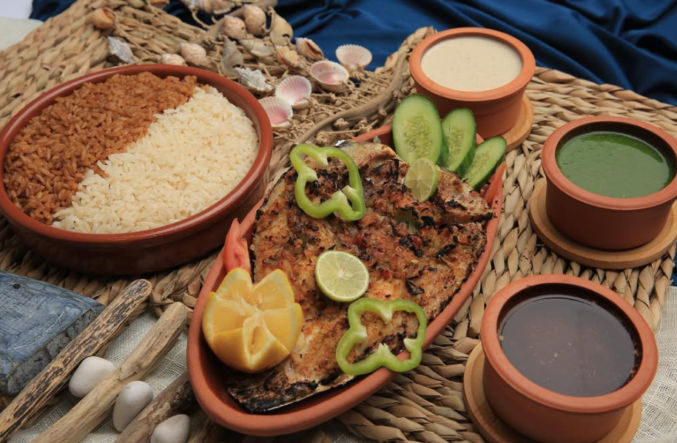
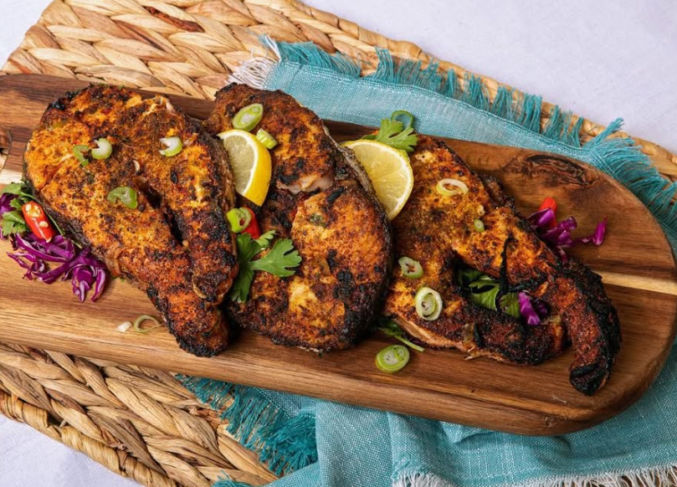
After visiting the Prophet’s mosque, we went for lunch. I wanted Turkish food. Ibrahim took us to a place somewhat distant from the touristy Prophet’s Mosque area where it wasn’t crowded and the prices were more reasonable. Though I was able to read the Arabic menu, I didn’t understand what everything was. Luckily, Ibrahim was able to explain everything to both me and the waiter, who happened to be Egyptian. Apparently, there are many Egyptians working in Saudi Arabia.
We ordered a mixed plate that was enough for all 3 of us, including the driver, Ibrahim. The food was acceptable and fair for the price.
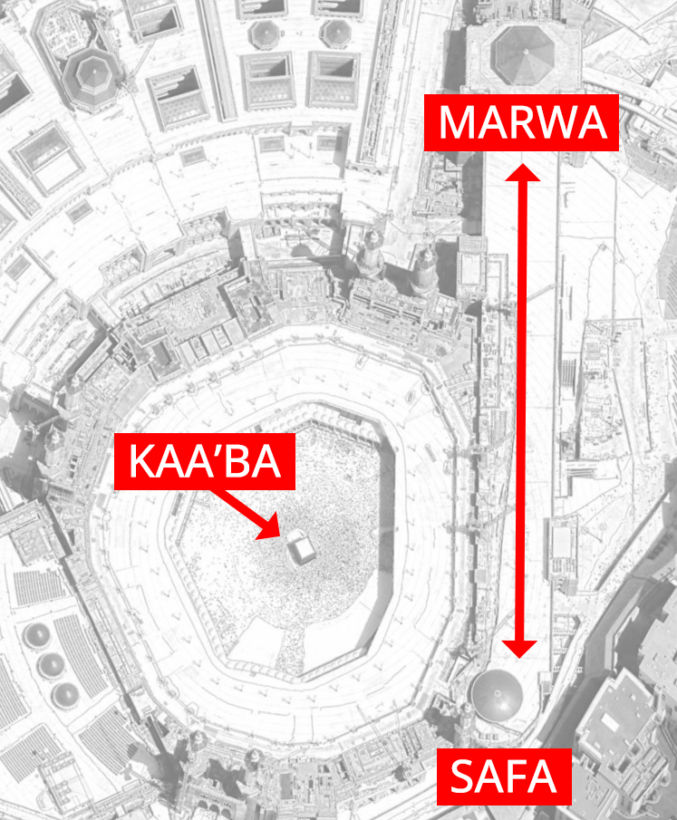
We then went to the Qiblatain (Two Qiblahs) mosque, where prophet Muhammad was commanded to move the qiblah (prayer direction) from the Aqsa mosque in Jerusalem to the Haram mosque in Mecca.
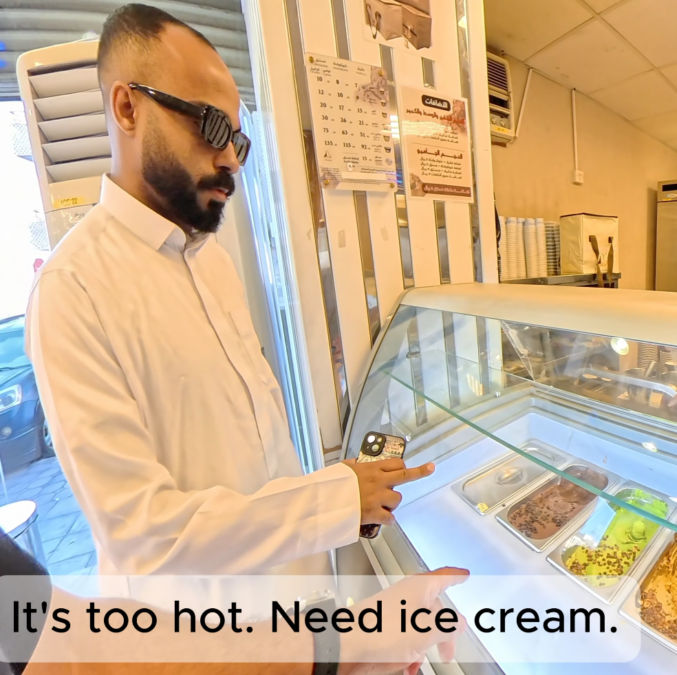
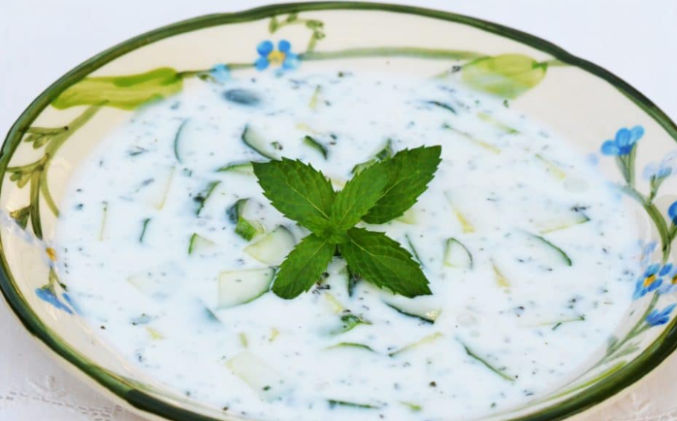
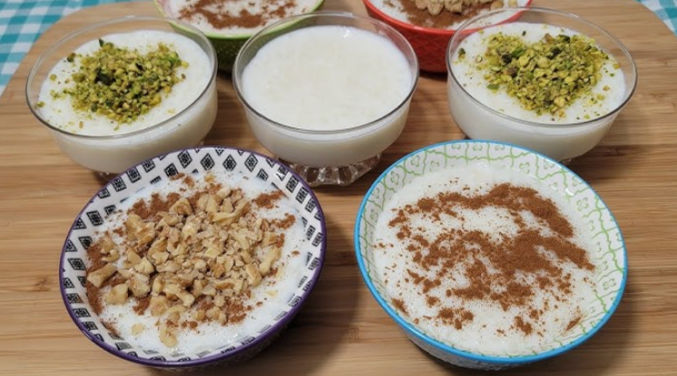
Since it was super hot, I asked our driver, Ibrahim, to take us to get some ice cream.
I ordered a mix of pistachio and vanilla ice cream with pistachio shavings on top. Pistachio seems to be very common in the Middle East, like in Turkey.
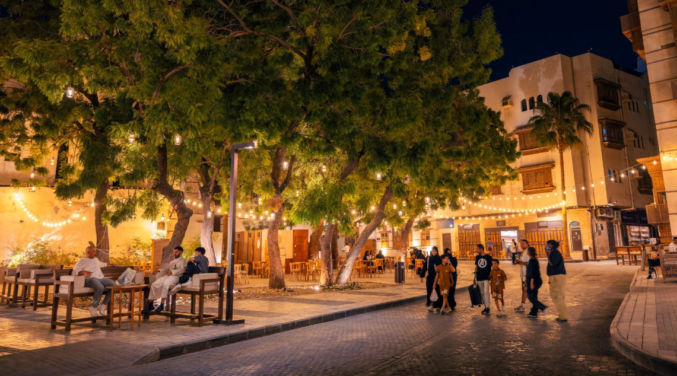
We then went to the Seven Mosques, a historical collection of small mosques.
We then went to Mount Uhud, a historical site where the prophet Muhammad had a battle with the polytheists of his Quraysh tribe.
Here’s a photo of me (right) with our driver, Ibrahim (left).
Our last stop on our one-day Medina tour was to the Quba mosque, the first mosque to exist. This was one of the busier mosques we visited. Many people were praying and reading the Quran, and there were groups of kids learning something.
After that, Ibrahim took us back to the train station in time for us to catch our 7:30 PM train ride back to Jeddah.
Video
Watch the full video of my one-day excursion to Madinah.
As a real estate investor, I’ve had to replace many toilets. Normally, I do that while doing a complete renovation. The problem with many toilets is
the bolts to the toilet flange in the floor can get loose
the floor may not be perfectly level
These issues can cause a toilet to slide, rotate, and tilt.
Fixing a rocking toilet due to an uneven floor
After renovating many bathroom floors with both tile and vinyl, it’s unfortunate that despite a contractor’s best effort to create a perfectly level floor, a small imperfection could cause a toilet to not sit evenly on the floor. The easily way to fix this is by installing plastic toilet shims on the LOW side of the toilet. Make sure to install it on the LOW side as the weight of the toilet will help keep the shim in place.
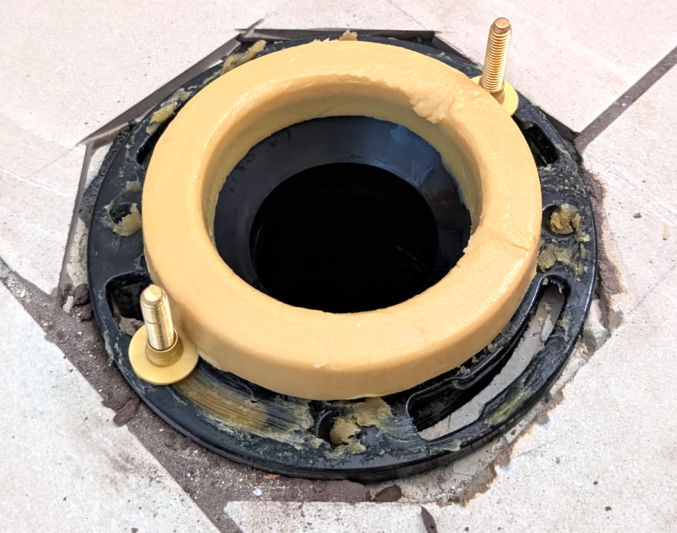
Fixing a loose toilet due to loose bolts
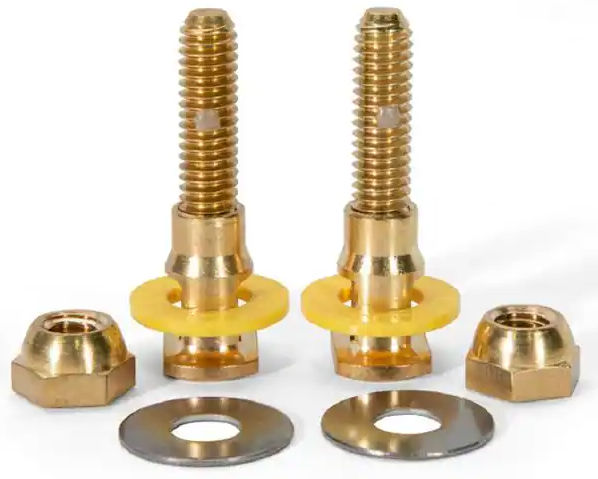
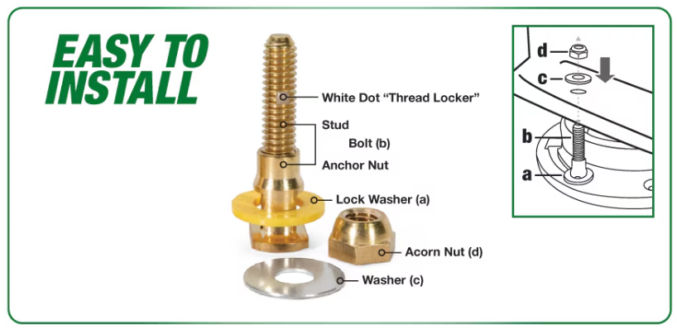
The bolts that come with many toilets are usually the cheap kind. Sometimes, they work just fine, but depending on your toilet flange and toilet, they may easily become loose, which is what happened to me. To remedy this, I replaced the cheap toilet flange bolts with the Fluidmaster SetFast 5/16 in. x 2-1/4 in. No-Cut Brass Closet Toilet Bolt Kit. Price at $8, which is about double the cost of the cheap bolts, these bolts don’t require any cutting and they securely hold your toilet in place. Unlike some other toilet bolts that come with a small head, the bolt head the Fluidmaster bolt is thick and wide, so the bolt remains within the toilet flange slot no matter what.
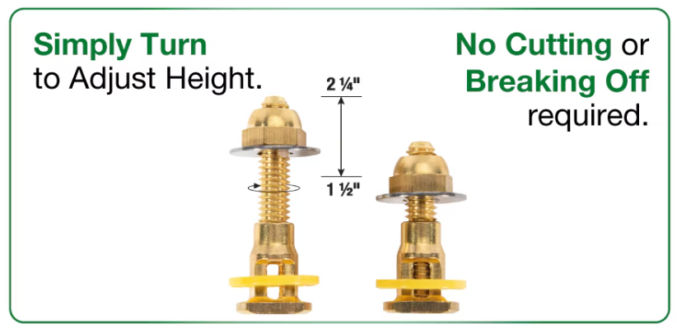
When you tighten the acorn nut, the height of the threaded stud decreases automatically.
The yellow lock washer is thick, which holds the bolt in place vertically as you place the toilet over the bolts. This is way better other toilet bolt kits, which either don’t come with a lock washer, or the lock washers are thin and flimsy.
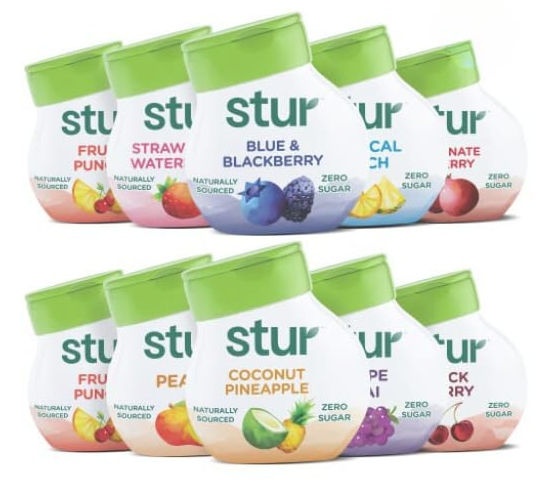
It seems like there are just more and more drink options available when you visit a supermarket. And while some of them are healthy, most of them are not. The ones that aren’t contain either too much sugar or artificial ingredients like sweeteners and food coloring. For a while, I’ve been making green tea sweetened with all-natural monk fruit mixed with Stevia. The problem with that is I’m often too busy to prepare it and it takes time for the tea to brew. Fortunately, there is now both a healthy and instant flavored drink alternative called Stur.
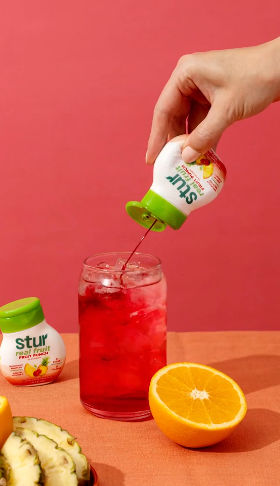
I’ve been trying Stur now for about a week, and I’m pretty impressed. It checks all the checkboxes for a healthy drink in addition to being super easy to prepare: just get a glass of cold water, squirt the liquid into the water, and drink. You don’t even need to refrigerate the small bottle, so you can bring it with you to restaurants where you can save a lot of money by not paying a huge markup for flavored drinks.
There are many flavors to choose from. So far, I’ve tried
Next.js is a React framework for building full-stack web applications.
What is React?
React lets you build user interfaces out of individual pieces called components. Create your own React components like Thumbnail, LikeButton, and Video. Then combine them into entire screens, pages, and apps.
Some Next.js Benefits
Automatic image, font, and script optimizations for improved UX and Core Web Vitals (Learn more)
Client and server rendering
Content pre-fetching with the <Link> component when the link is hovered or enters the viewport
Client-side navigation (JavaScript-based page transitions) using the <Link> component, which is faster than default browser-based navigation using the <a> tag
Optimized CSS
Layouts (shared UI) don’t rerender on navigation from one page to another
Automatic configuration of low-level tools like bundlers and compilers
View a listing of the various types of files in an Next.js app.
File-system-based Routing
Each folder represents a route segment that is mapped to a corresponding segment in a URL path. But, a route is not publicly accessible until a page.js or route.js file is added to a route segment.
Creating a Page
A page is UI that is rendered on a specific route.
export default function Page() {
  return <h1>Hello Next.js!</h1>
}
Creating a Layout
A layout is UI that is shared between multiple pages. On navigation, layouts preserve state, remain interactive, and do not rerender.
export default function DashboardLayout({ children }) {
  return (
    <html lang="en">
      <body>
        {/* Layout UI */}
        {/* Place children where you want to render a page or nested layout */}
        <main>{children}</main>
      </body>
    </html>
  )
}
The above is a root layout. It is required and must contain html and body tags.
You can also create nested layouts. Parent layouts wrap children layouts.
Dynamic segments
Dynamic segments allow you to create routes that are generated from data. For example, instead of manually creating a route for each individual blog post, you can create a dynamic segment to generate the routes based on blog post data. In the example below, [slug] is a dynamic segment.
Using searchParams opts your page into dynamic rendering because it requires an incoming request to read the search parameters from. Use the searchParams prop when you need search parameters to load data for the page (e.g. pagination, filtering from a database).
Static rendering
Client Components can read search params using the useSearchParams hook. Use useSearchParams when search parameters are used only on the client (e.g. filtering a list already loaded via props).
Linking between pages
You can use the <Link> component to navigate between routes. <Link> is a built-in Next.js component that extends the HTML <a> tag to provide prefetching and client-side navigation. Next.js automatically prefetches routes linked with the <Link> component when they enter the user’s viewport.
import Link from 'next/link'

export default function Layout() {
  return (
    <html>
      <body>
        <nav>
          {/* Prefetched when the link is hovered or enters the viewport */}
          <Link href="/blog">Blog</Link>
          {/* No prefetching */}
          <a href="/contact">Contact</a>
        </nav>
        {children}
      </body>
    </html>
  )
}
There are two types of server rendering, based on when it happens:
Static Rendering (or Prerendering) happens at build time or during revalidation and the result is cached.
Dynamic Rendering happens at request time in response to a client request.
Prefetching
Prefetching is the process of loading a route in the background before the user navigates to it. How much of the route is prefetched depends on whether it’s static or dynamic:
Static Route: the full route is prefetched.
Dynamic Route: prefetching is skipped, or the route is partially prefetched if loading.tsx is present.
Prefetching happens when the link enters the viewport. If this consumes too much resources, you can just prefetch only on hover.
app/ui/hover-prefetch-link.js
'use client'

import Link from 'next/link'
import { useState } from 'react'

function HoverPrefetchLink({ href, children }) {
  const [active, setActive] = useState(false)

  return (
    <Link
      href={href}
      prefetch={active ? null : false}
      onMouseEnter={() => setActive(true)}
    >
      {children}
    </Link>
  )
}
Traditionally, navigation to a server-rendered page triggers a full page load. Next.js avoids this with client-side transitions using the <Link> component. Instead of reloading the page, it updates the content dynamically by:
Replacing the current page with the prefetched loading state or a new page if available.
Keeping any shared layouts and UI.
Server and Client Components
Layouts and Pages are Server Components by default.
For example, the <Page> component is a Server Component that fetches data about a post, and passes it as props to the <LikeButton> which handles client-side interactivity.
Note that the <LikeButton> component has ‘use client’ at the top.
What is hydration?
Hydration is React’s process for attaching event handlers to the DOM, to make the static HTML interactive.
Pre-rendering vs no pre-rendering
With pre-rendering (using Next.js), HTML is rendered on the server (server-side static rendering) and sent to the client (browser), similar to how PHP works. Then JS loads in the browser to “hydrate” the DOM to make it interactive, including links that were created using the <Link> component rather than the <a> tag. If you disable JavaScript in the brower and load a page, the page will load, but it will not be interactive.
If you create a plain React.js app, then all page content is generated dynamically in the browser by JavaScript as a single-page application (SPA). That is why if you disable JavaScript in the brower and load a page, the page will load, but you won’t see anything.
Next.js has 2 kinds of pre-rendering:
Static Generation is the pre-rendering method that generates the HTML at build time. The pre-rendered HTML is then reused on each request. This is like using Next.js as a static site generator.
Server-side Rendering is the pre-rendering method that generates the HTML on each request. This is like how PHP sites, like WordPress, work.
Since Server Components are rendered on the server, you can safely make database queries using an ORM or database client. Turn your component into an asynchronous function, and await the call:
Fetching data in client components
There are two ways to fetch data in Client Components, using:
You can update data in Next.js using React’s Server Functions. A Server Function is an asynchronous function that runs on the server. They can be called from client through a network request, which is why they must be asynchronous.
Define a Server Function by using the “use server” directive at the top of an asynchronous function.
Server Functions can be inlined in Server Components by adding the "use server" directive to the top of the function body:
There are two main ways you can invoke a Server Function:
After performing an update, you can revalidate the Next.js cache and show the updated data by calling revalidatePath or revalidateTag within the Server Function:
CSS Modules locally scope CSS by generating unique class names. This allows you to use the same class in different files without worrying about naming collisions. Learn more
Global CSS
You can use global CSS to apply styles across your application.
Next.js recommends using
global styles for truly global CSS (like Tailwind’s base styles),
Tailwind CSS for component styling, and
CSS Modules for custom scoped CSS when needed.
External Stylesheets
In React 19, <link rel="stylesheet" href="..." /> can also be used.
Image Optimization
The Next.js <Image> component extends the HTML <img> element to provide:
Size optimization: Automatically serving correctly sized images for each device, using modern image formats like WebP.
Visual stability: Preventing layout shift automatically when images are loading.
Faster page loads: Only loading images when they enter the viewport using native browser lazy loading, with optional blur-up placeholders.
Asset flexibility: Resizing images on-demand, even images stored on remote servers.
Better to store images locally, if possible. Next.js will automatically determine the intrinsic width and height. These values are used to determine the image ratio and prevent Cumulative Layout Shift while your image is loading.
Next.js recommends using pnpm as it’s faster and more efficient than npm or yarn.
npm install -g pnpm
Then, to install packages, run pnpm i
To start the dev server, run pnpm dev
Common Folder Structure
/app: Contains all the routes, components, and logic for your application, this is where you’ll be mostly working from.
/app/lib: Contains functions used in your application, such as reusable utility functions and data fetching functions.
/app/ui: Contains all the UI components for your application, such as cards, tables, and forms.
/public: Contains all the static assets for your application, such as images.
Demo
This GitHub repo contains pages that demonstrate some of the concepts above. Browse the repo to see the code structure. The demo site is hosted on Vercel, the makers of Next.js.
In this post, I’ll share my process for how to make a traditional video in Capcut. Specifically, I’ll show how to make a video that:
comprises a collection of video and image clips
has a simple crossfade (mix, fade-in/fade-out) transition between clips
has background music with a crossfade between music clips
improves audio quality
uses AI to stabilize some shaky video footage
improves the color and lighting of some clips
animates some images with a subtle zoom effect
animates some images to create rolling credits
freezes a frame in a video clip
has text overlays
Download and install Capcut
Visit the Capcut website, download Capcut and install it.
Import video and image footage
Open Capcut
Create a new project
Click the default project name at the top center and rename it to something descriptive, e.g. My Vacation
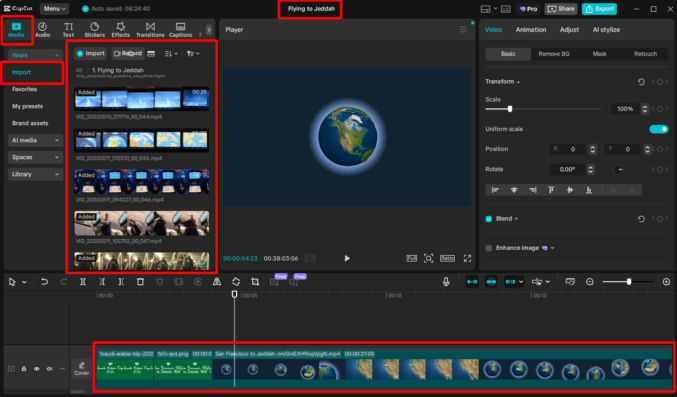
Click the “Media” tab at the top left and then click “Import” tab below it.
Click the “Import” button or drag your footage (audio, video, images) to the assets pane.
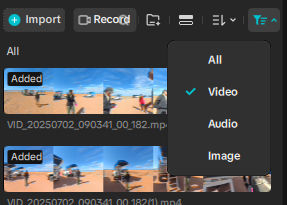
Use the filter dropdown to filter assets by type (video, audio, image, etc).
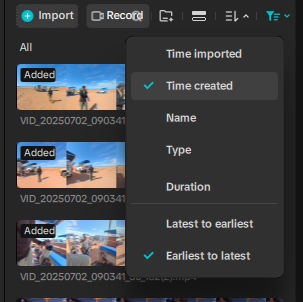
Use the sort dropdown to sort assets, e.g. by date created, etc. I find that sorting by “Time created” and “Earliest to latest” puts my assets in the order I want them in so I can just select all assets and drag them to the timeline.
Drag some or all of your footage to the timeline at the bottom
Drag the zoom slider at the top right of the timeline pane to zoom the timeline in and out.
Trim images
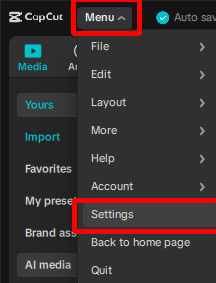
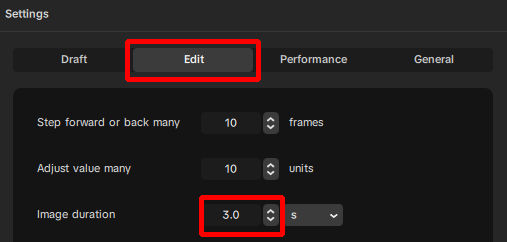
When you drag images to the timeline, the duration will be whatever the setting is under Options, which defaults to 5 seconds. If you want to change the default to, say, 3 seconds, go to Menu > Settings > Edit (tab) > Image Duration and change the value to 3.
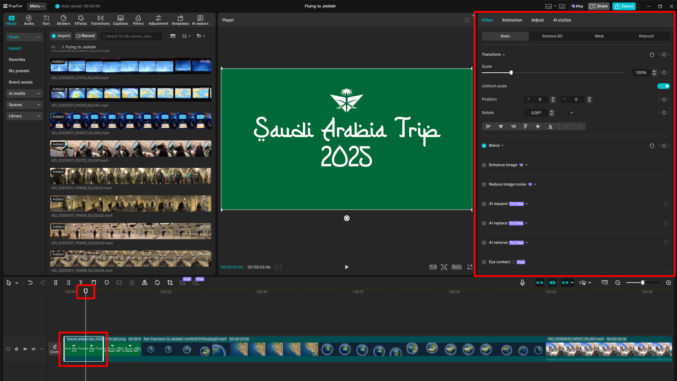
Click on an image in the timeline. In the right pane, you will see various options to edit the image.
The playhead is a visual marker that indicates the current position or frame being viewed in the preview pane. Drag the playhead to anywhere above the image in the timeline. You will see a preview of the image in the center in the preview pane.
Click the play button in the preview pane to preview how the image will appear relative to the rest of the video project.
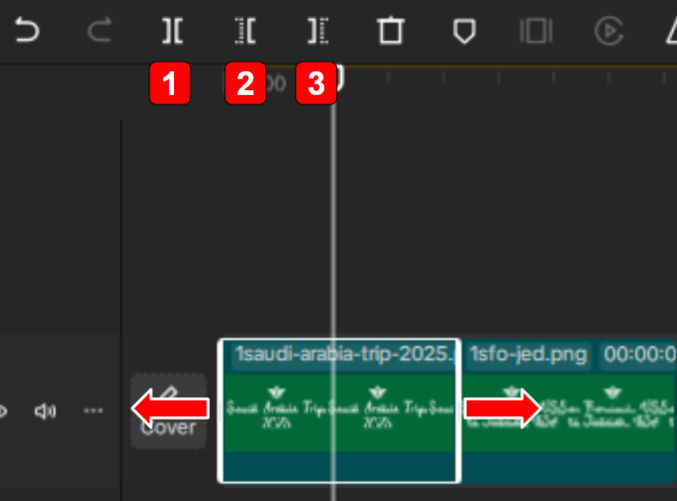
If the image duration is too short or too long, you can extend the duration by dragging the left or right edge of the clip in the timeline to the left or right. You can also position the playhead at a particular time and click one of the following buttons:
SPLIT: to split the image clip into two clips
DELETE LEFT: to delete the portion of the image to the left of the playhead
DELETE RIGHT: to delete the portion of the image to the right of the playhead
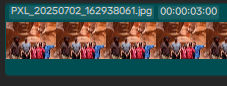
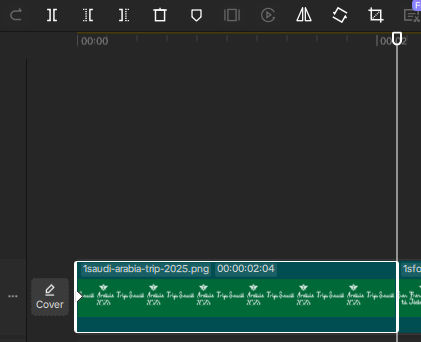
To see the duration of an image, zoom out on the timeline and look at the duration label on the clip in the timeline. For example, the image clip below is 3 seconds long.
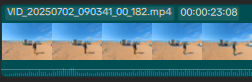
The video clip below is 23 seconds and 8 frames long.
Trim Videos
Trimming video clips on the timeline is similar to trimming images. Click on a video clip in the timeline. You will see a preview of the video in the preview pane. In the right pane, you will see various options to edit the video clip.
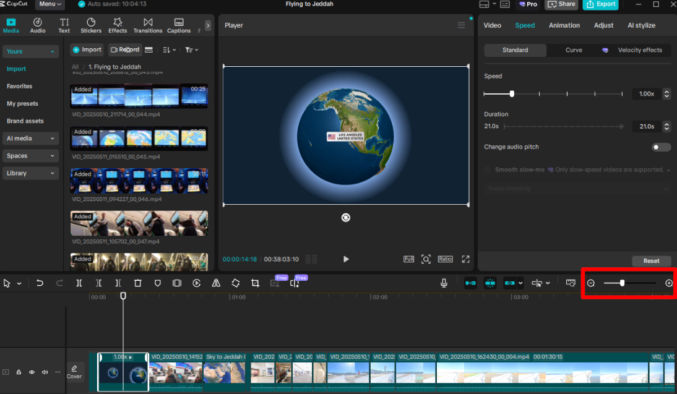
In the right pane, click “Speed” to see the video clip’s duration. If you change the duration value here, the video clip’s speed will change accordingly. If you don’t want to speed up or slow down the video, you’ll need to trim the video clip the same way you trim image clips:
drag the left end of the video clip in the timeline to the right
drag the right end of the video clip in the timeline to the left
split, delete left, or delete right the video clip relative to where the playhead is in the timeline
Speed up or slow down video clips
If your video clip is too slow or too fast, you can speed it up or slow it down. As in the previous step, click the video clip in the timeline and then click the “Speed” tab in the right pane.
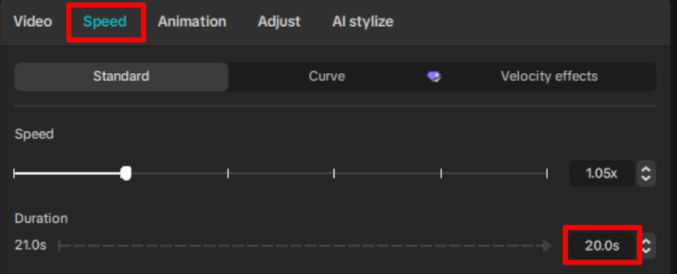
Speed up
To speed up the video clip, e.g, 2x for twice the speed, just drag the speed marker to the right. The duration of the clip will change accordingly.
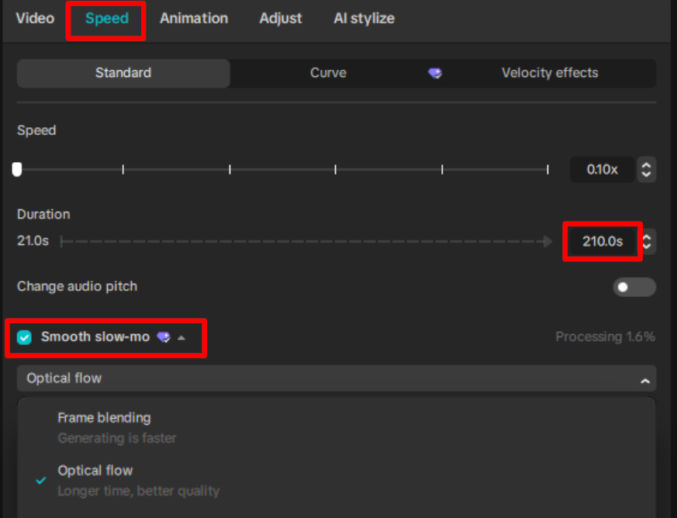
Slow down
To slow down the video clip, e.g. 0.5x for half the speed, drag the speed marker to the left. The duration of the clip will change accordingly. Note that if your video clip was shot at 30 frames per second (fps) and you slow down the clip by 50% (0.5x), the resulting video will stutter due to an insufficient number of frames. This is why you should shoot video at a high frame rate, e.g. 60 or 120 fps, if you know you want to play it back in slow motion, which is usually done for action scenes.
If you didn’t shoot at a high fps, you can use Capcut to smoothen the slow-mo effect by either
frame blending
optical flow
The results are not as good as a high-fps video, but they’re better than without smoothening, especially using the “optical flow” option.
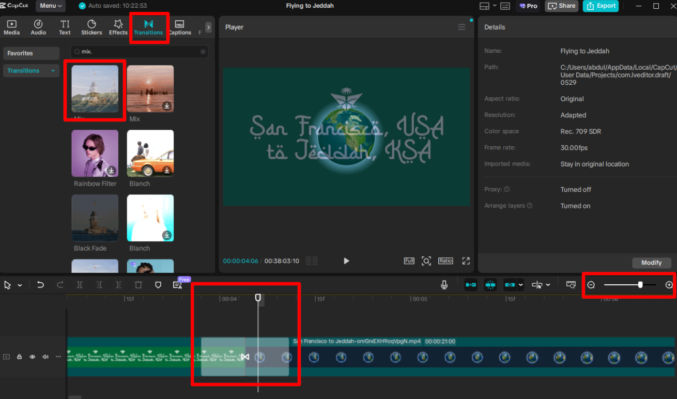
Add transitions between clips
There are many transition effects available. I prefer to use the simple crossfade (mix) transition, which gradually fades out one clip and fades in the next clip. To add this transition between two adjacent clips, click the “Transitions” tab in the left pane, type “mix” in the search field, and drag the mix transition icon down to the timeline between two clips. If necessary, zoom the timeline out. You’ll see a semi-white section between the two clips representing the transition. If you move the playhead to that transition area in the timeline, you can see a preview of the transition in the preview pane, showing a blending of the two clips.
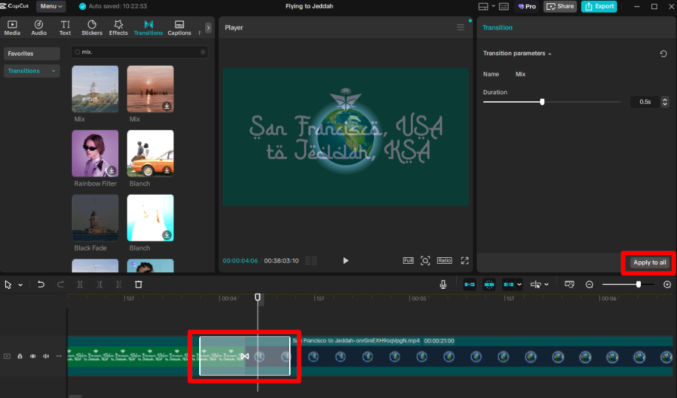
If you want to apply the same transition to all clips, click one transition in the timeline and then, in the right pane, click the “Apply to all” button.
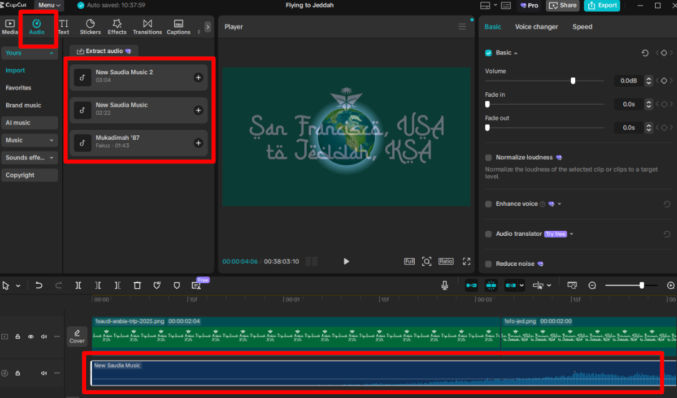
Add background music
Click the “Audio” tab in the left pane.
Click the “Import” button to import songs (MP3) from your computer.
Drag a song from the list of songs down to the timeline below the main video track.
As with still images and video clips, you can trim audio clips in the same manner.
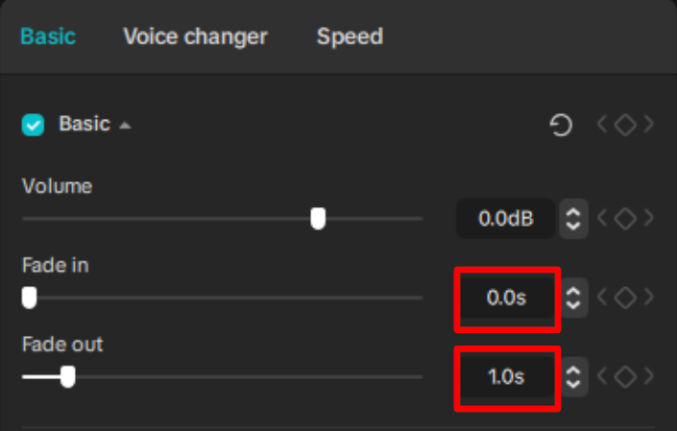
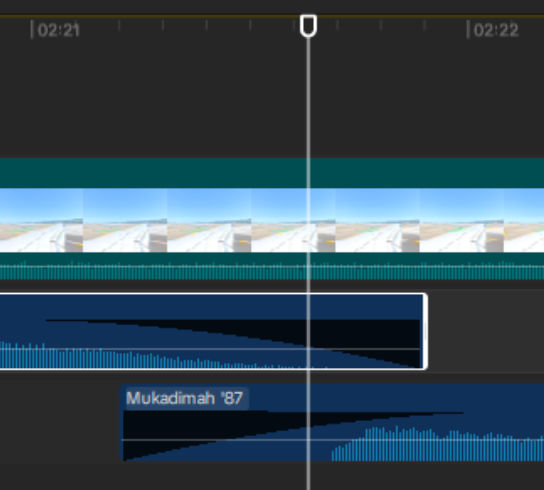
If you want to crossfade two adjacent songs,
put the 2nd song on a separate track below the first song’s track
zoom in on the timeline and scroll to where the two songs meet
click the 1st song and, in the right pane, set a fade out duration of, say, 1 second
click the 2nd song and, in the right pane, set a fade in duration of, say, 1 second
position the playhead just before the end of the first song
preview the audio crossfade in the preview pane
Notice the black curve in the audio tracks showing the fade effect.
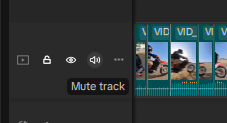
When you add audio or music track, if your video clips contain audio, you’ll hear audio from all tracks containing audio. If you want to mute all audio from all clips in the main track, click the audio icon as shown below.
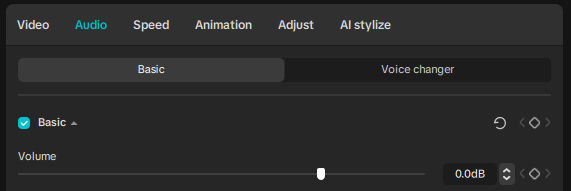
If you want to adjust the volume or mute just a single video clip, click on the clip in the timeline, then in the right pane, click the “Audio” tab and drag the volume slider.
Improve audio quality
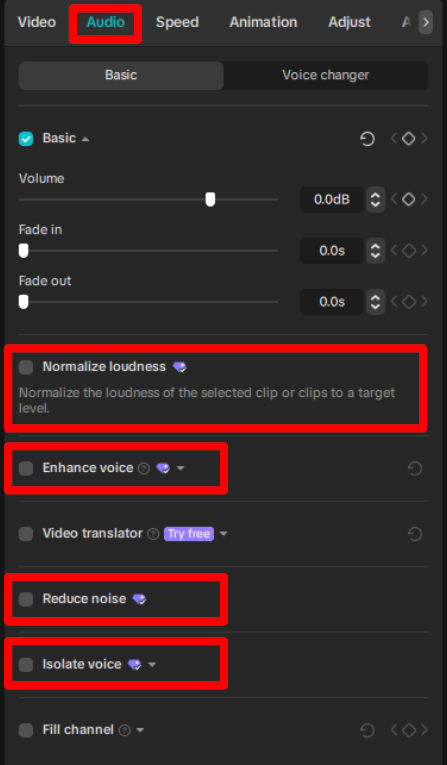
The audio in your video clips may contain background noise as well as vocals. To improve the audio quality, select the relevant clips and choose from the following options in the “Audio” panel.
To reduce background noise, e.g. humming or the sound of an engine, check the “Reduce noise” checkbox
To improve vocals, check the “Enhance voice” and/or “Isolate voice” checkboxes. Note that the “Isolate voice” options strips out all audio, leaving only vocals.”
To normalize the loudness of all background music clips, select all clips and check the “Normalize loudness” checkbox.
Slide the volume slider to increase or decrease the volume as needed.
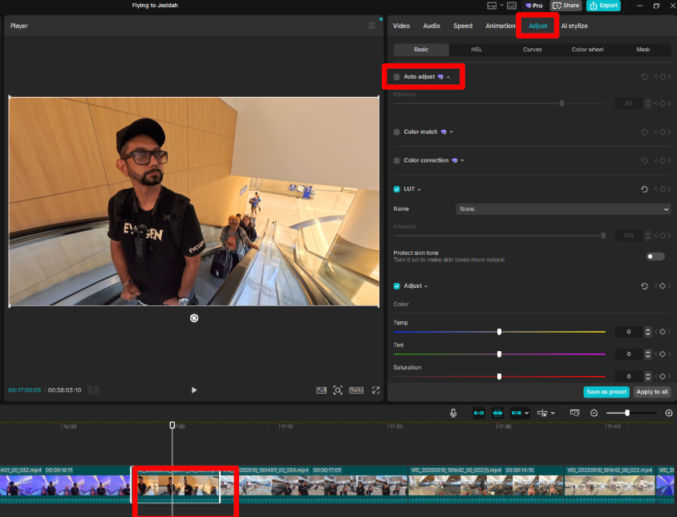
Adjust color and lighting
You can adjust the color and lighting for both image and video clips individually.
Click on a clip in the timeline
Move the playhead to that clip
In the right pane, click “Adjust” > “Basic” > “Auto adjust”
Slide the “Auto adjust” intensity slider until you like how the clip looks in the preview pane.
You can also manually adjust the color by tweaking various color settings in the right pane.
I find adjusting color is especially helpful for brightening a dark image or video. Here’s how one clip looks before and after applying “auto adjust”.
BeforeAfter
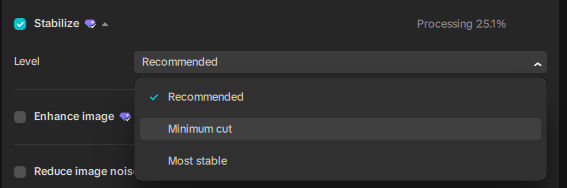
Stabilize a shaky video
If your video footage was taken with a camera that doesn’t include mechanical stabilization (like a gimbal) or software stabilization, then the resulting footage could be annoyingly shaky. Capcut can try to stabilize your footage at the expense of cropping a portion of the video. To stabilize a shaky video,
click on a video clip in the timeline
in the right pane, click the “Video” tab and check the “Stabilize” option.
Animate images
For certain photos, I like to apply a subtle zoom-out animation effect to them. To do this,
click on the image clip in the timeline
move the playhead in the timeline to where the image clip is
click the up arrow key to move the playhead to the beginning of the clip
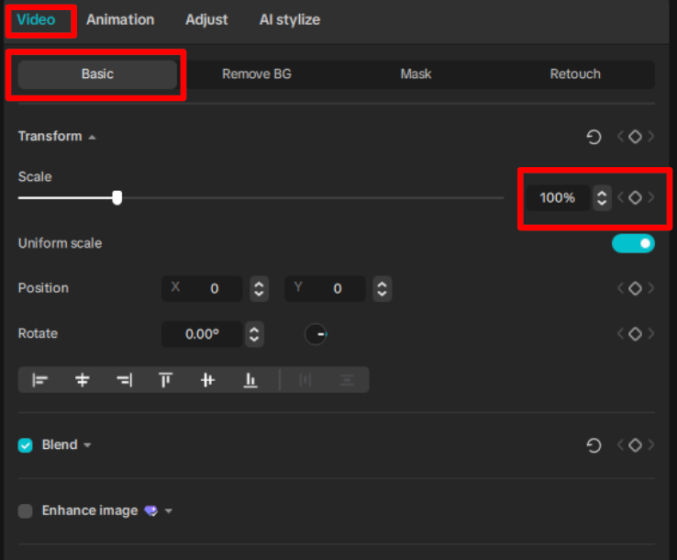
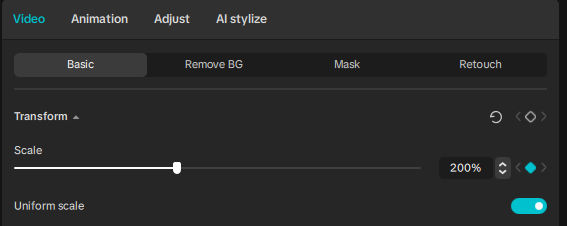
in the right pane, click “Video” > “Basics”, change the “scale” value to 200% and click the diamond icon to set a keyframe
click the down arrow key to move the playhead to the end of the clip
in the right pane, click “Video” > “Basics” and change the “scale” value to 100%
drag the playhead from the beginning to the end of the clip. You should see the image zoom out. You can also click the play button in the preview pane to preview the animation.
Playhead is at the beginning of the clipScale at 100%Scale at 100%Scale at 200%Scale at 200% with keyframe setPlayhead at end of clip
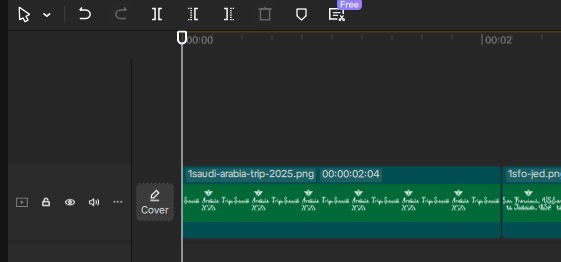
Create rolling credits
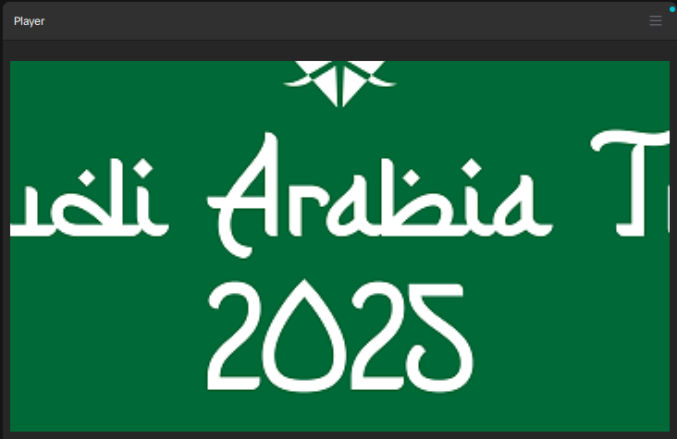
There are different ways to create rolling credits. The way I’m about to show you involves slowly animating an image’s position upwards. Therefore, you’ll need to create a tall image with the content you want in it, like this
Add this image to the timeline
Select the image in the timeline
Position the playhead in the timeline where the image is
Click the up arrow key to move the playhead to the beginning of the clip
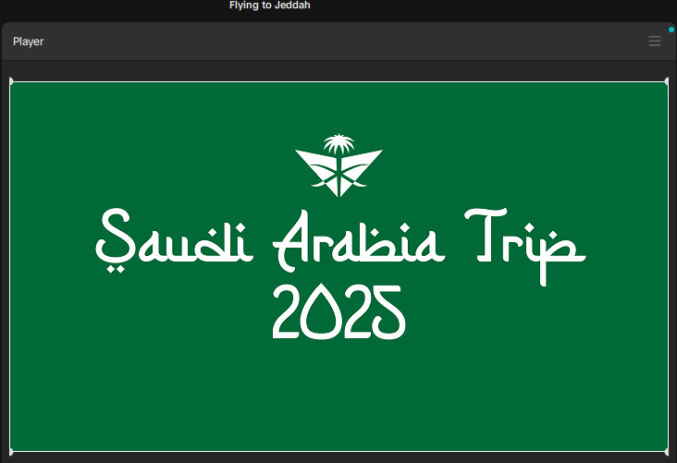
In the right pane, click “Video” > “Basics”
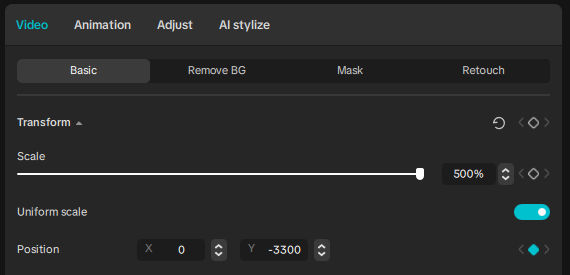
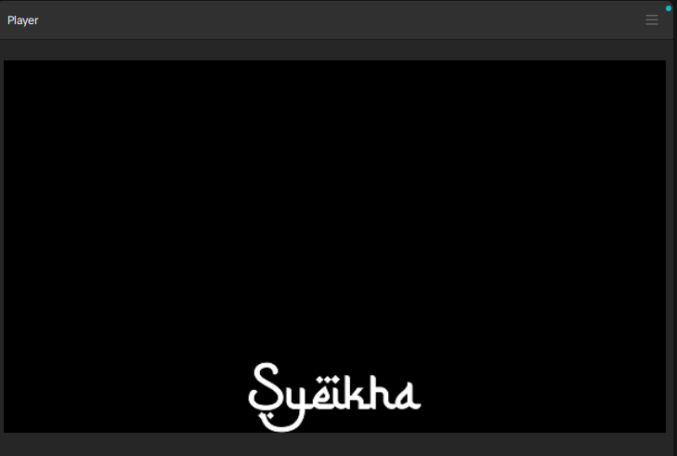
Change the “scale” value until you like how the credits image looks in the preview. In the screenshot below, I set it to 500%.
Change “position” Y value to a value that moves the top of the image near the bottom of the preview pane. In the screenshot below, I set it to -3300.
Click the diamond icon to set a keyframe
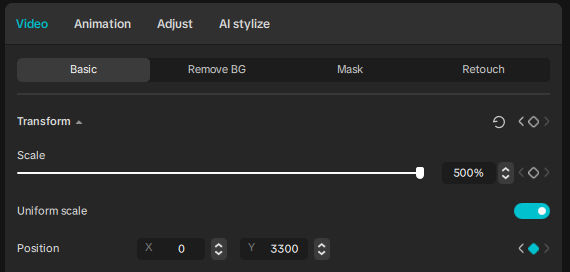
Click the down arrow key to move the playhead to the end of the clip
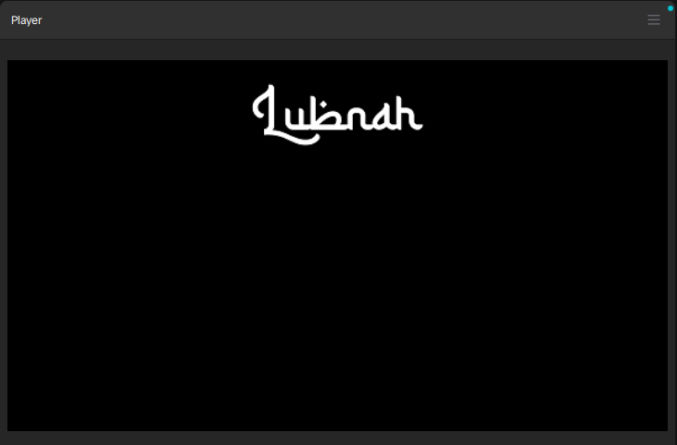
in the right pane, click “Video” > “Basics” and change the “position” Y so that the bottom of the image is near the top of the preview pane. In the screenshot below, I set the value to 3300.
Drag the playhead from the beginning to the end of the clip. You should see the image roll up. You can also click the play button in the preview pane to preview the animation.
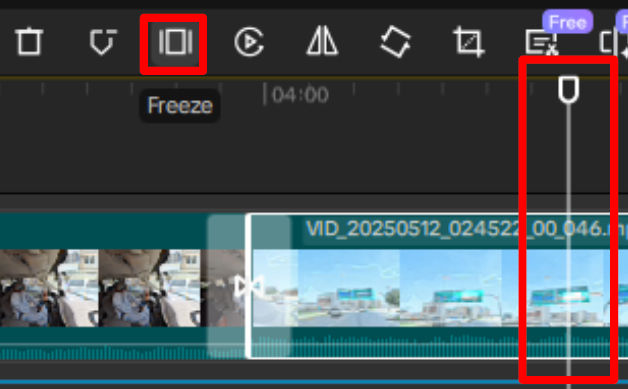
Freeze a frame in a video clip
Sometimes, you may want to freeze a frame in a video clip for a few seconds. For example, in the screenshot below, there’s a video clip of a vehicle moving along a road and a sign showing various destinations. To freeze the frame at the point when the sign is shown,
move the playhead to the timestamp where you want to freeze a frame
click on the video clip in the timeline
click the “freeze” button above the timeline
The video clip will be split at that point and you will see a still image of the frame added to it. You can then adjust the duration of the image. Make sure not to add any transitions between the video clip and the still image. You can group the two clips or create a component to prevent accidentally adding a transition between them.
After freezing the frame, the video clip is split and a still image of the frame is appended
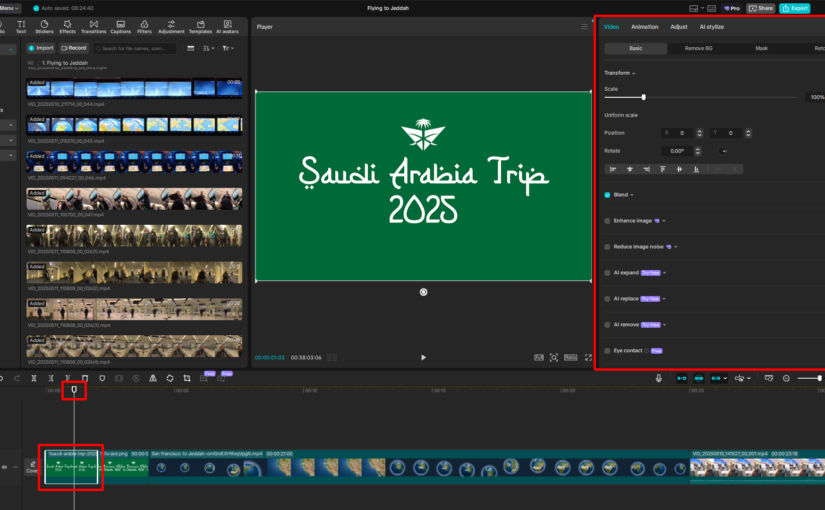
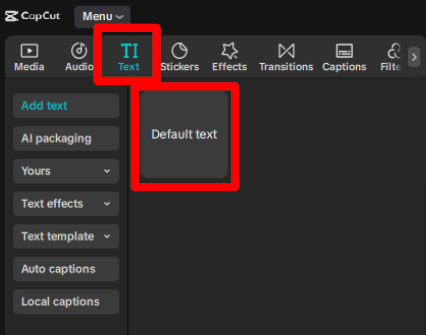
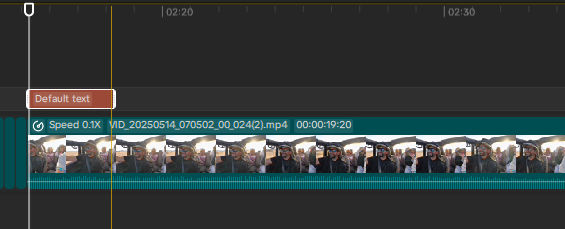
Add a text overlay
There will be times when you’ll want to overlay text on a scene to describe a location or what’s happening as in the following screenshot.
To do this,
click the “Text” tab in the left pane
drag the “Default text” item to the timeline on a track above the clip where you want the text to appear
drag the ends of the text clip in the timeline to increase or decrease the duration
click on the text clip in the timeline and, in the right pane, edit the text and various other properties, e.g. background color and background opacity
in the preview pane, drag the text overlay to where you want it. you can also drag the corners to resize it.
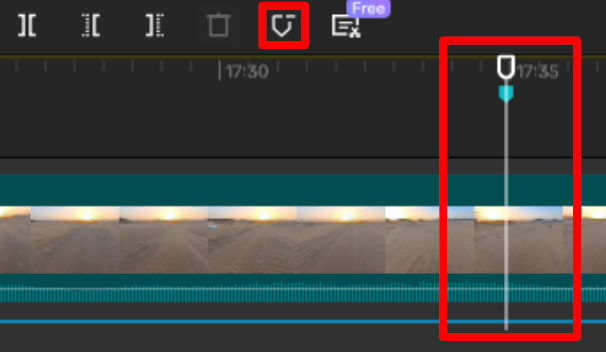
Add a marker on the timeline or a clip
When editing a video, it can be helpful to add markers at certain points to remind you where a specific moment is. For example, you may want to align some a music clip to a specific moment. To do this,
move the playhead to the timestamp where you want to add a marker
click the marker button above the timeline
You will see a light blue marker added on the timeline.
Export your video
Click the light blue “Export” button at the top right to export the video.
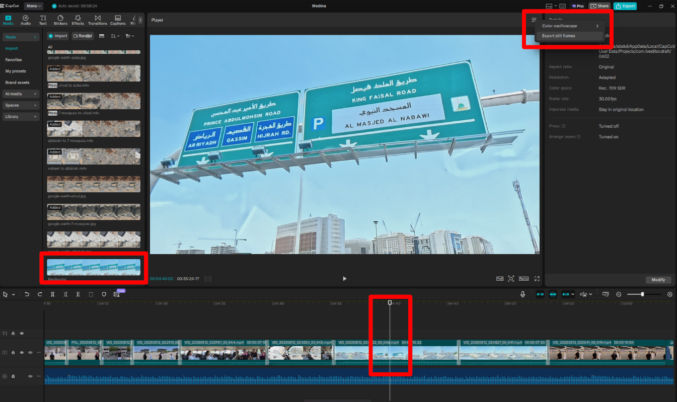
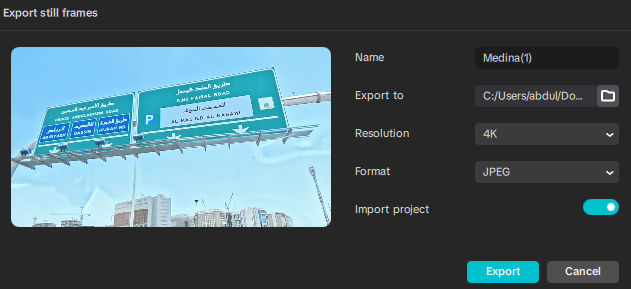
Export a still image of a video clip
move the playhead to the timestamp where you want to freeze a frame.
click the hamburger menu (3 horizontal lines) at the top-right corner of the preview pane
click “Export still frames”
if you don’t want the still image added to your project, uncheck the “Import project” checkbox
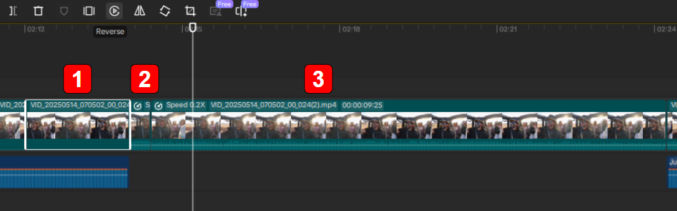
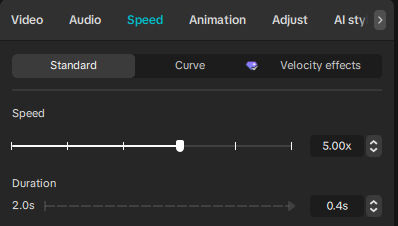
Create a fast-rewind effect followed by a slow-motion effect
For fast-moving scenes, you may want to replace the scene in slow motion. One way to do this is to show the original clip (1) followed by a fast rewind of the clip (2) followed by a slow-motion version of the clip (3) as shown in the screenshot below.
To do this,
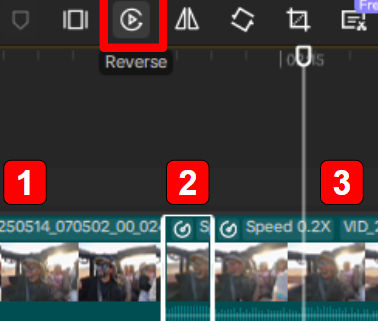
copy and paste the original clip twice and place the copies after the original clip on the timeline
click the 2nd clip to select it and then click the “Reverse” button above the timeline
Change the speed of the 2nd clip to something like 5x.
click the 3rd clip to select it and then change the speed to something like 0.2x.
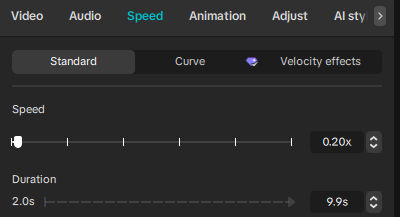
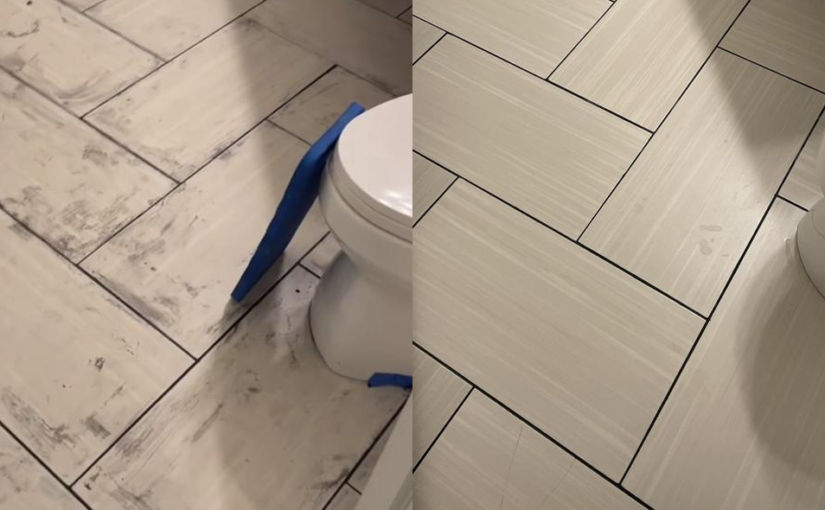
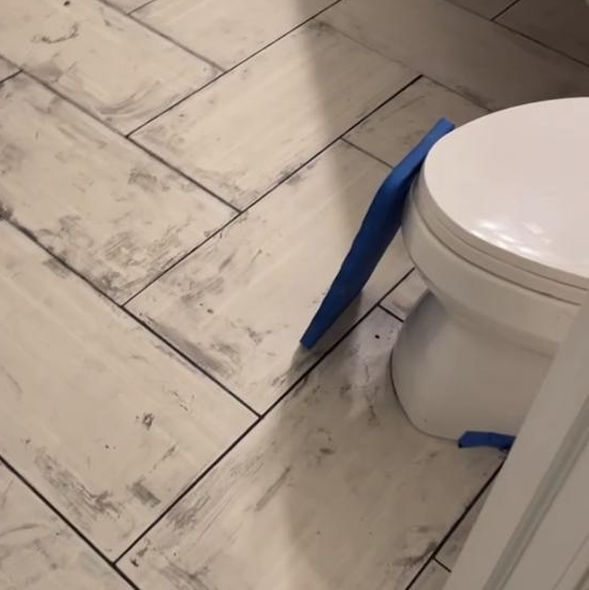
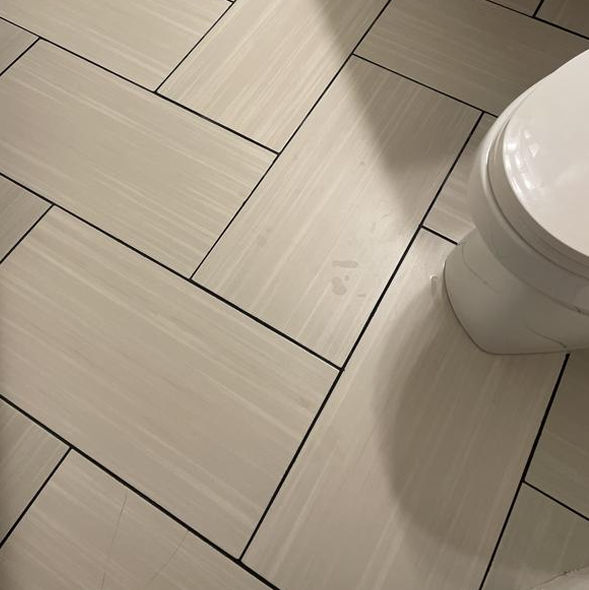
When applying grout to tile, you’re supposed to wait 15-30 minutes before wiping the grout of the tile while leaving the grout between each tile. This is easier said that done. No matter how good you are, you’ll probably be left with a thin layer of grout on your tile. If you use a light-colored grout on light-colored tile, you won’t notice the haze except at certain angles in certain lighting. The haze can resemble hard water stains. If you use a dark-colored grout on light tile or a light-colored grout on dark tile, the haze is more prominent, and your tile can look dirty. See example below.
Before
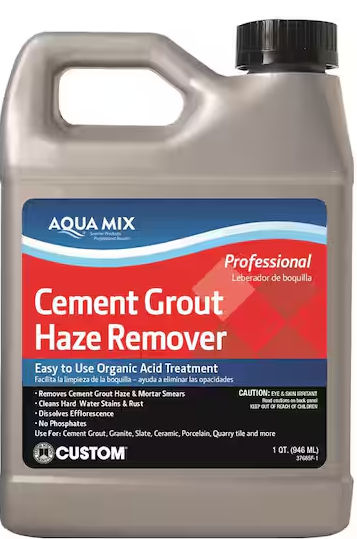
You can try to scrub with soap or even a steam cleaner, but that will have zero effect. Luckily, there is an amazing chemical product that can relatively easily remove the grout haze from tile. With Aqua Mix 1 Qt. Cement Grout Haze Remover by Custom Building Products, you just mix the liquid with water, pour some one the tile, wait a while, then rub the haze off. For tougher haze, don’t mix with water. In my case, I poured the liquid at full strength without adding water into a spray bottle, sprayed the liquid on the tile, then wiped the haze off with a rag. As most comments say on the Home Depot product page, this stuff is “amazing”!
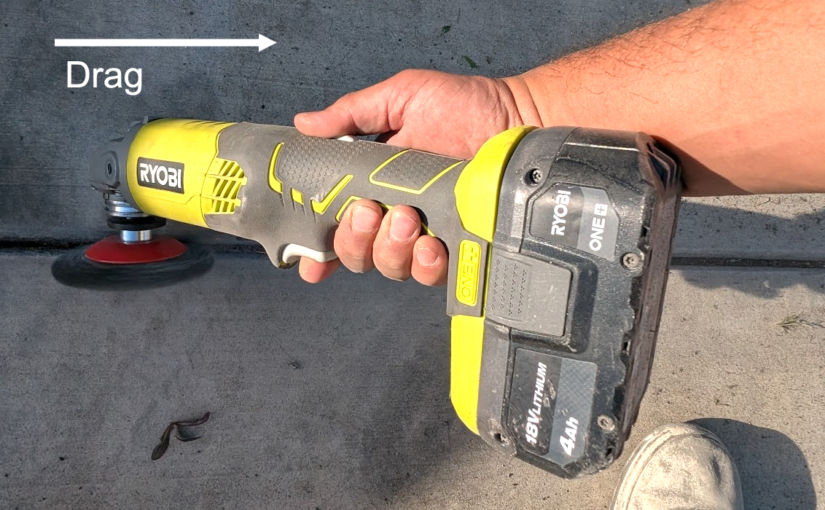
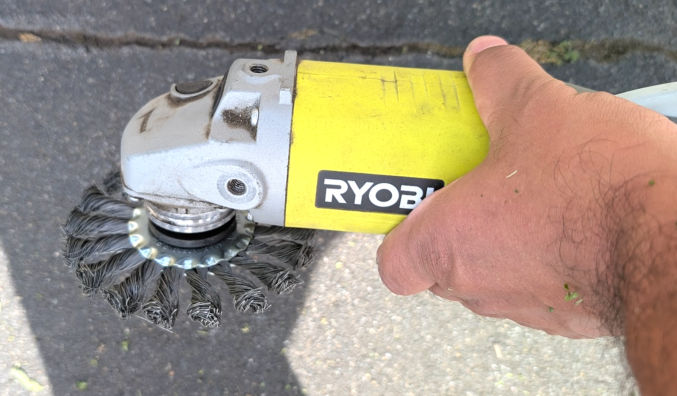
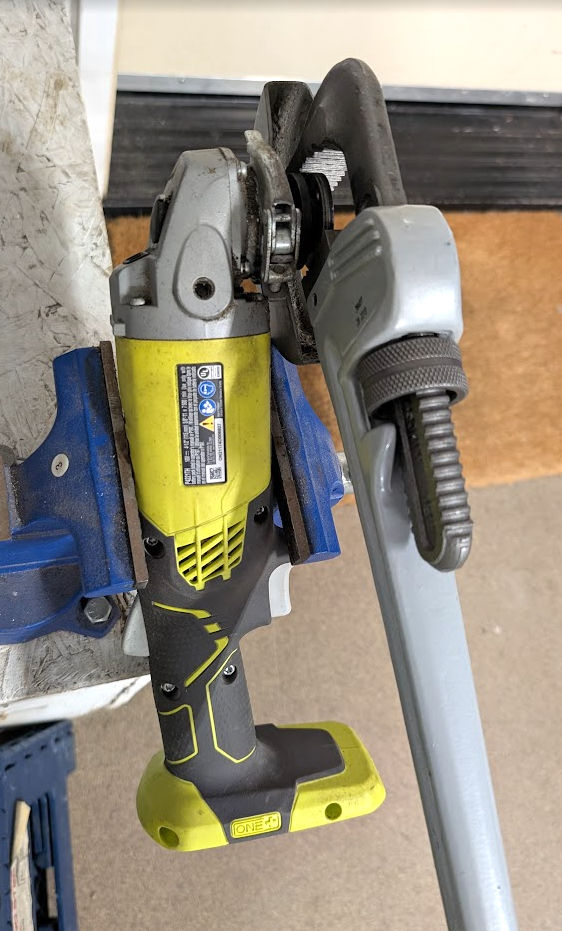
To easily remove weeds from control joints in your concrete driveway, use an angle grinder with a wire wheel. I use a 4.5″ Ryobi brushed, cordless angle grinder. Don’t use a brushless angle grinder because it can’t be used for this purpose. I prefer using a knotted wire wheel. A non-knotted wire wheel works as well, but I find it better for cleaning control joints after removing large weeds using the knotted one.
To prevent kickback, stand and drag the tool to the right as shown in the photo below.
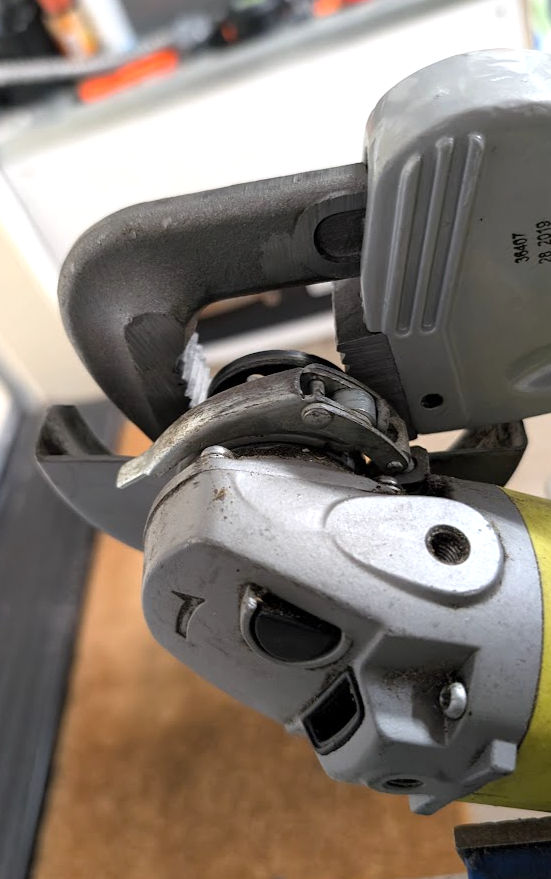
If the angle grinder flange lock nut is stuck, use either a pipe wrench or a thin wrench to unlock it. For convenience, clamp the angle grinder to a stationary vise.
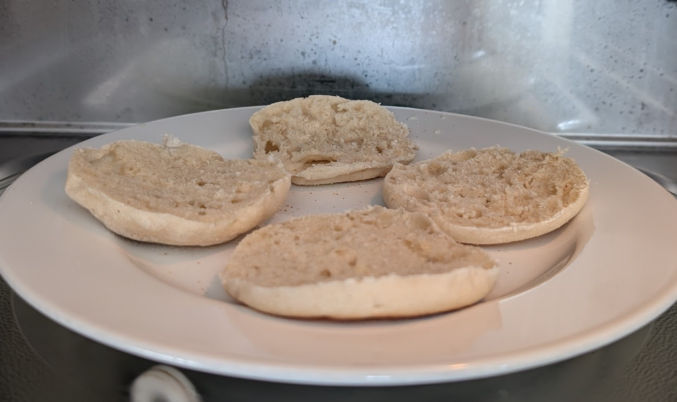
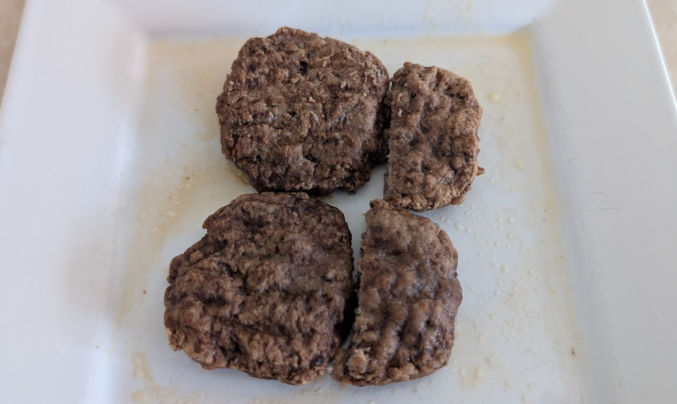
A few years ago, I flew to Korea on Hawaiian Airlines and was served a warm English muffin containing a turkey patty and egg. As cheap and simple as it looked, I wasn’t expecting much, but it turned out to be so good, I had to try to recreate it. I think I figured it out. Here’s my recipe.
Ingredients
1x English muffin (I keep the muffins in the fridge so they don’t go bad)
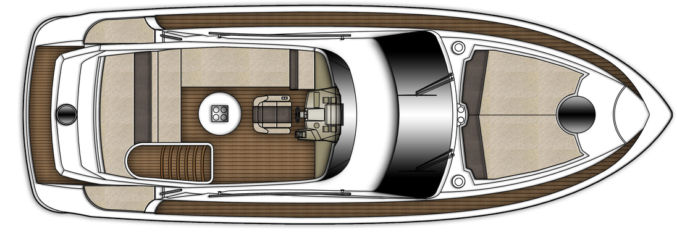
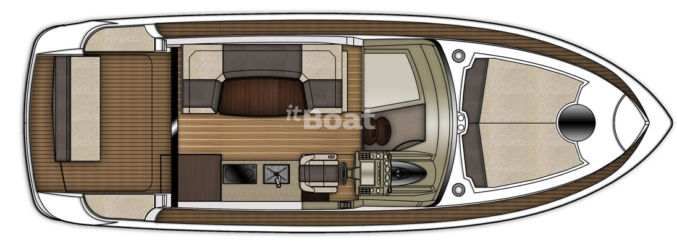
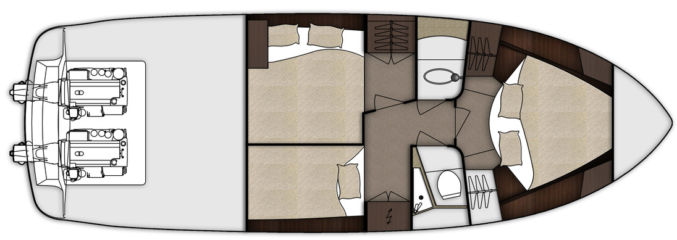
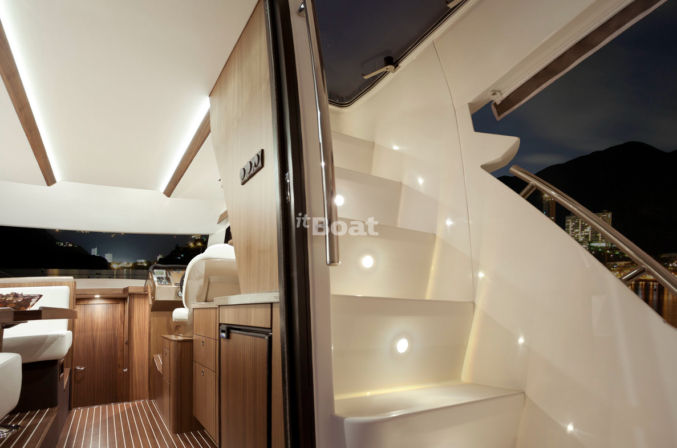
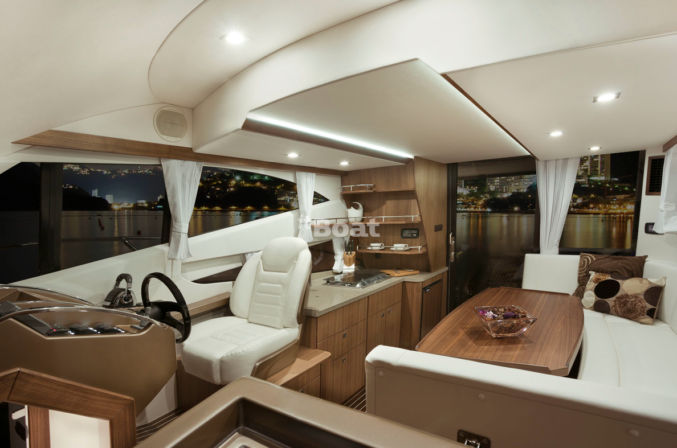
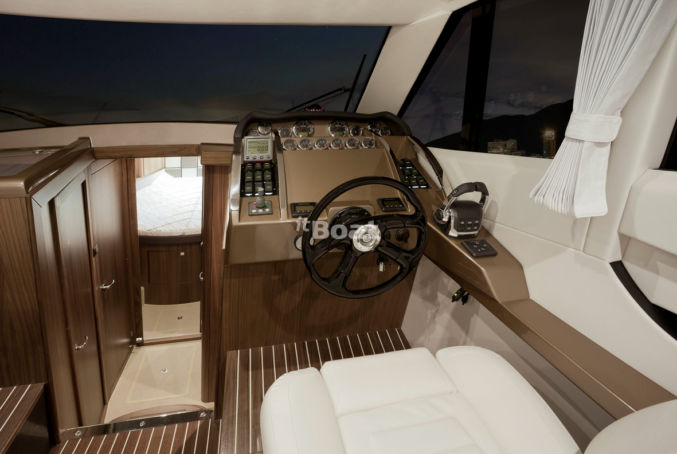
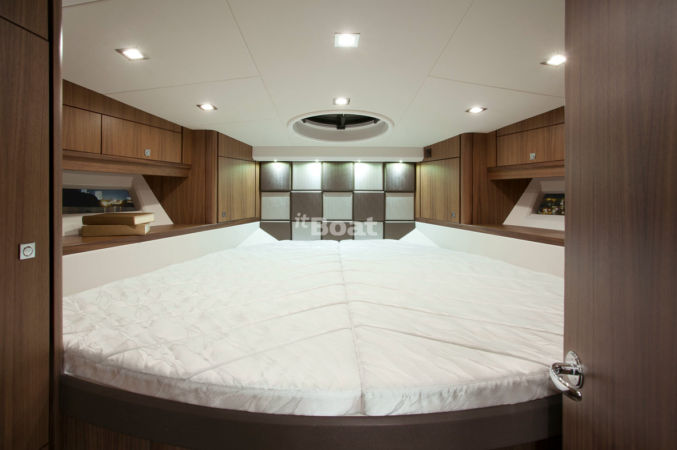
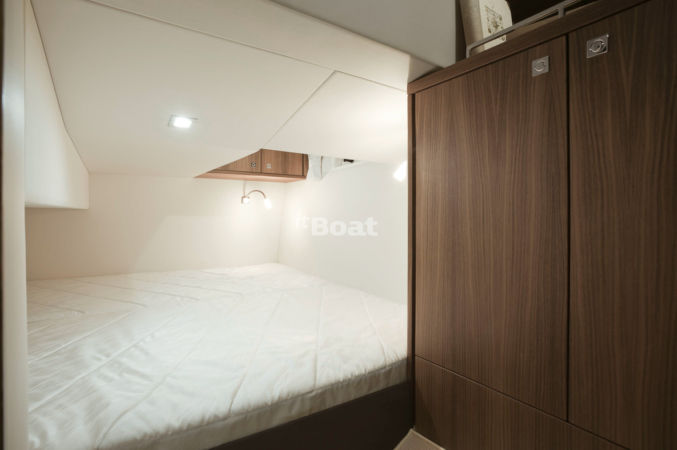
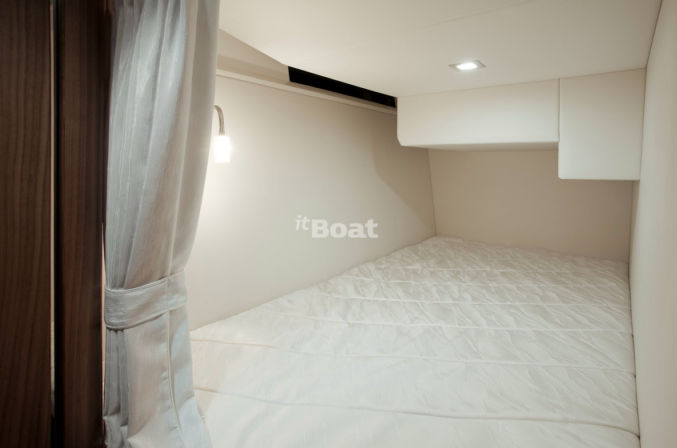
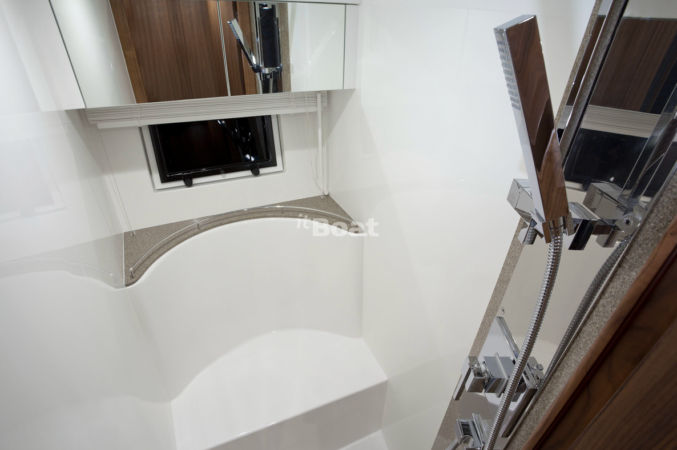
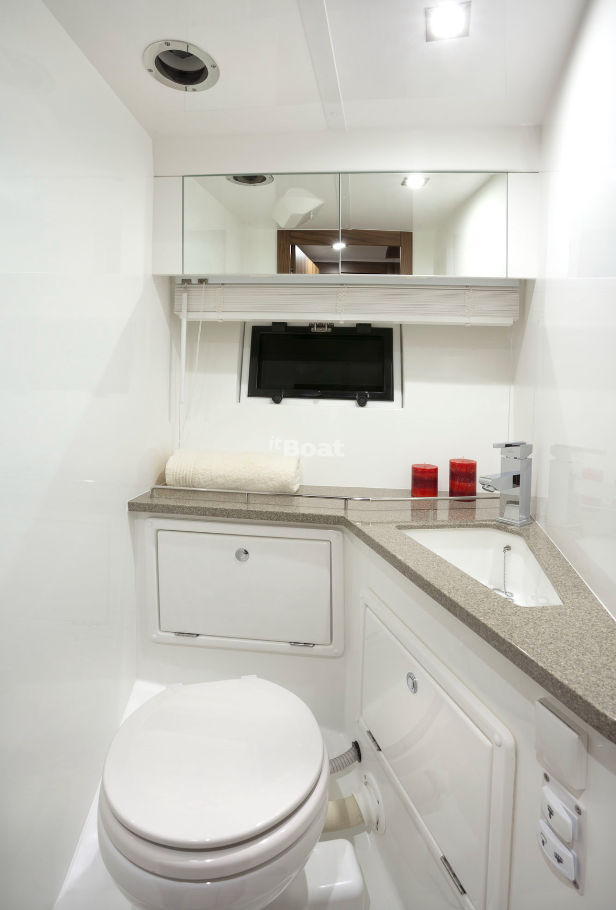
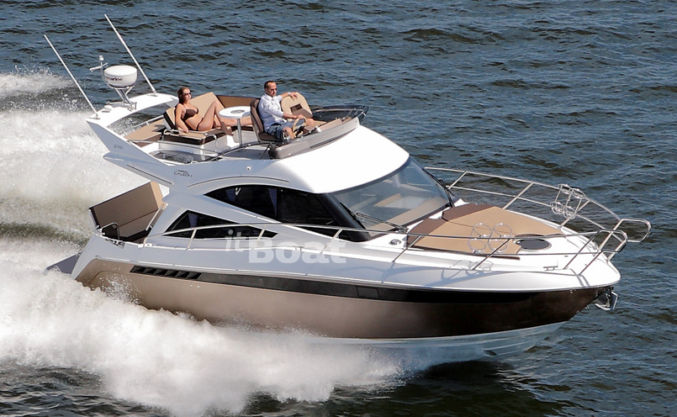
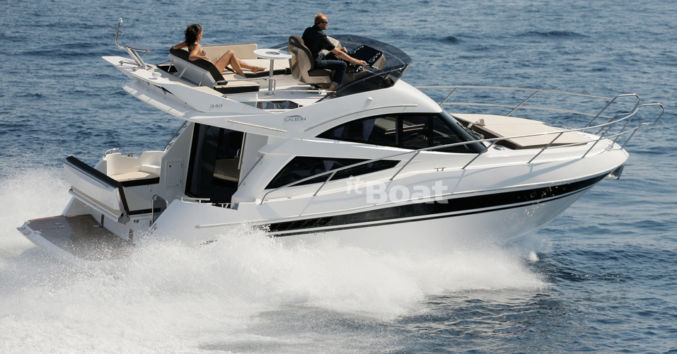
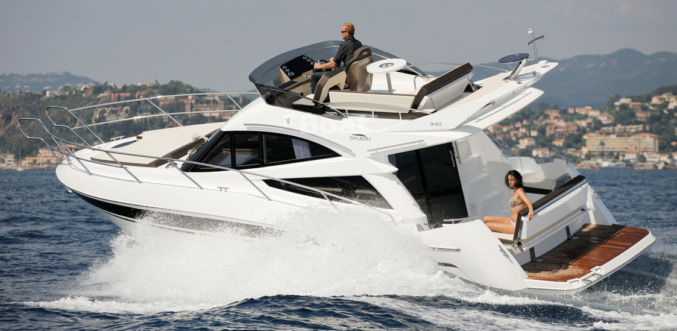
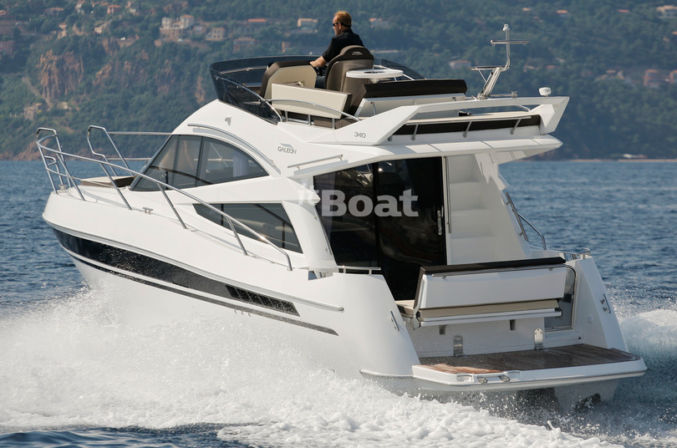
Galeon 340 Fly boatTop deck (seating at top)Middle deck (seating at back, seating in middle, seating on front deck)Bottom deck (3 bedrooms, 1 shower room, 1 toilet room)Middle deck, showing stairs to go to top deckMiddle deckMiddle deck, showing opening to lower deckLower deck, master bedroomLower deck, 2nd bedroomLower deck, 3rd bedroomLower deck, shower roomLower deck, toilet room
Play music using Bose portable speaker
Lip sync Cest La Vie at various scenes
On boat, change into captain outfit and make video tour of the yacht
Take pic looking out using binoculars
Give everyone plastic champagne glasses and pour apple cider
On boat, change into rastafarian hair and make video eating baklava in master bedroom or on front deck of boat
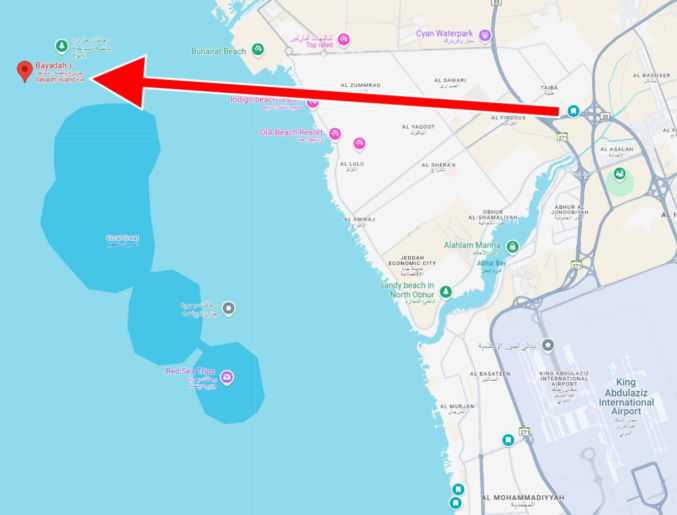
Upon arriving at Bayada, take a group photo using the 10′ selfie stick with everyone standing on the front deck of the boat. Take both a video and interval photos.
Get on inflatable lounger and float around boat while sipping on apple cider
Have Riyadh jump into the water near me to make me fall off the lounge
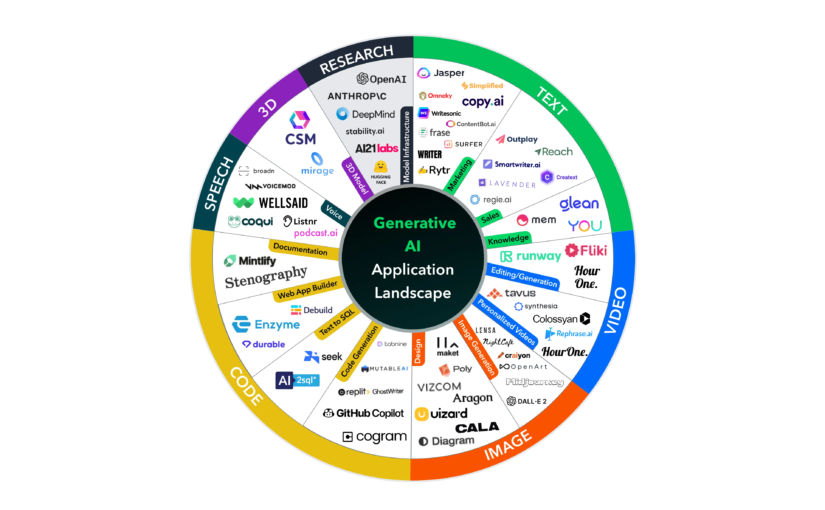
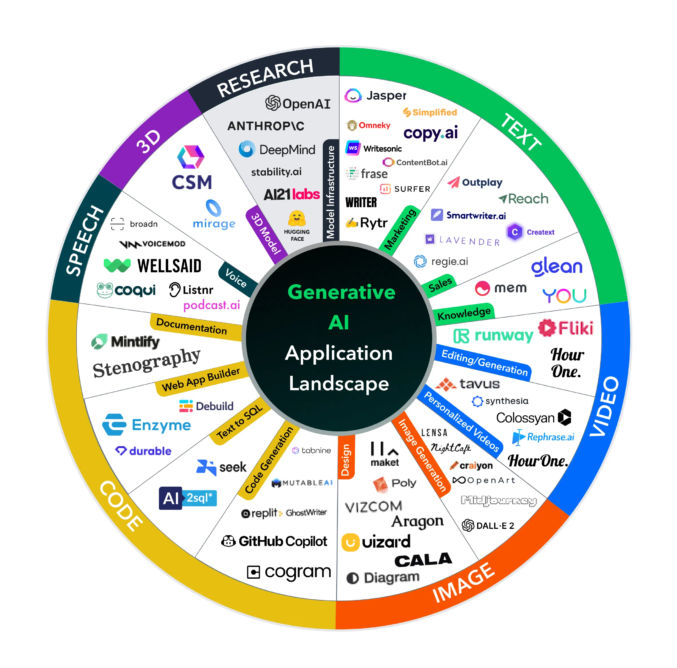
This is just a collection of AI tools I’ve used that I’ve found useful. With so many AI tools sprouting up, this list will likely be updated regularly as time permits.