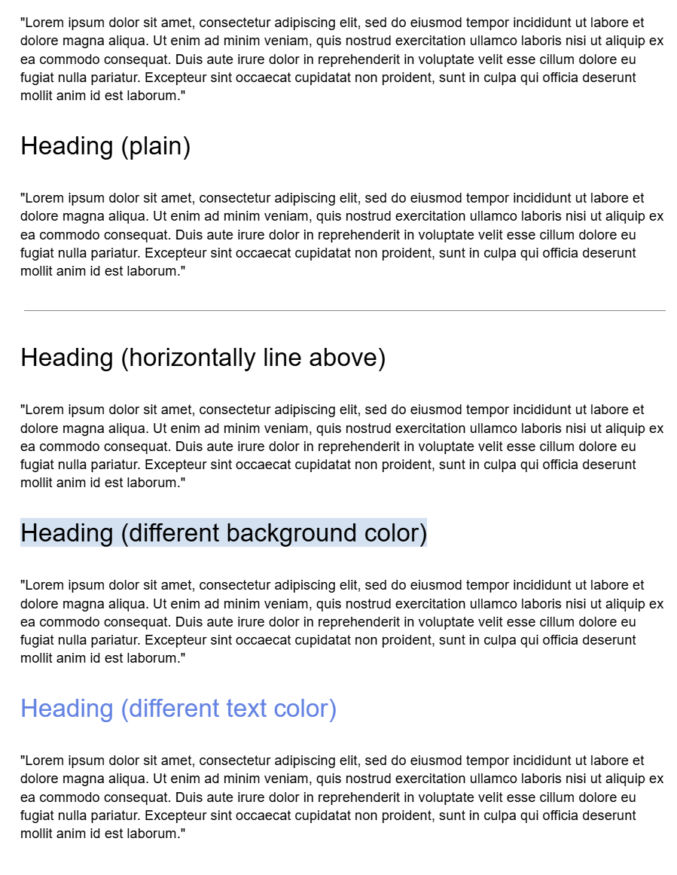
Document headings (Heading 1, Heading 2, …) are useful to show a document’s content hierarchy. But, unless styled, it can still be difficult to visually scan a document to quickly find different sections. Some techniques to add styling and improve visual hierarchy include
using a horizontal line to separate sections
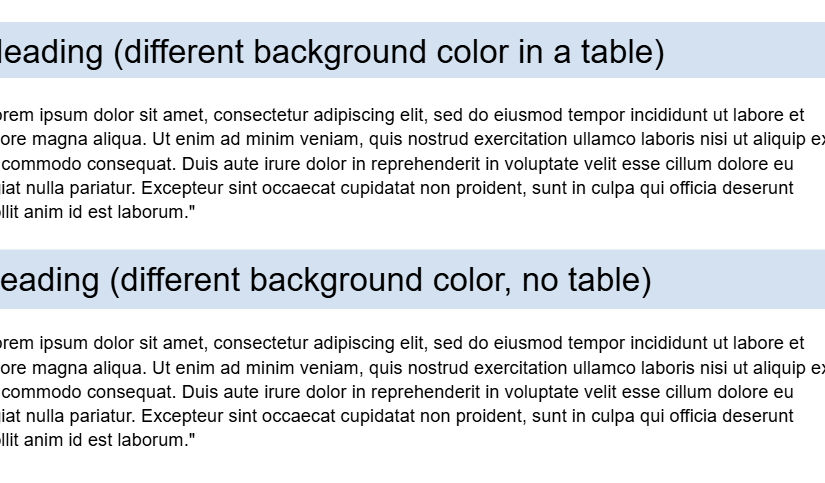
using a background color
changing the heading text color
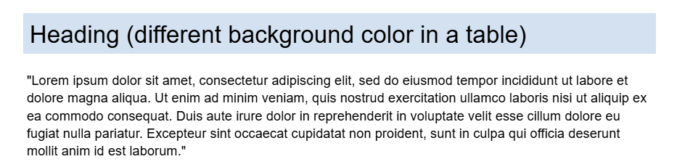
All of these styles, except the one with the different background color, look fine, but they may not suffice if you want high-contrasting section headings. You can put heading text in a 1×1 table, as shown below, but that’s not ideal, especially if your document may be parsed.
To create a table-less heading with full-width background color, do the following:
Type your heading on its own line
Select the entire heading line (triple-click to include whitespace after the text)
Go to Format → Line & paragraph spacing
Click Single
Click Remove space before paragraph
Click Remove space after paragraph
With the line still selected, go to Format → Paragraph styles → Borders and shading
Background color: e.g. #1F2933
Border width:0 pt (all sides)
Paragraph padding: e.g., 6 pt or 7 pt
You can optionally style the heading text and create a reusable heading style (Format → Paragraph styles → Heading 1 → Update “Heading 1” to match).
Here’s a link to the test document used in this post.
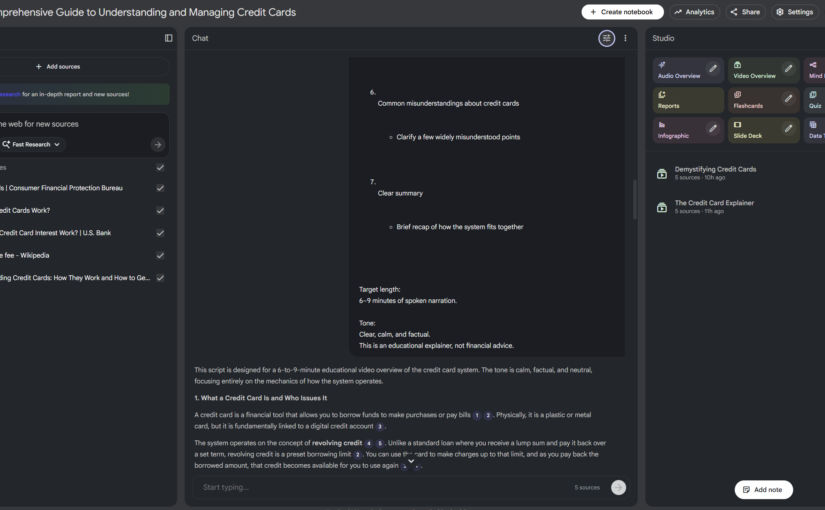
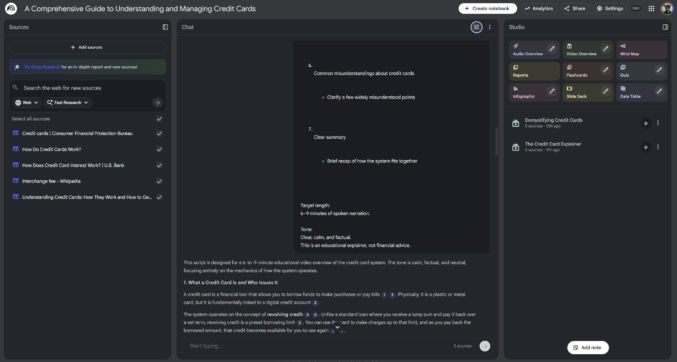
Here’s how I created this overview video in 5 minutes with just a single prompt.
Get Content
Gather the content for the overview video you want to create. The content can be local files (PDFs, text files, etc), copied text, and website URLs. In my case, I got these URLs to pages explaining how credit cards work:
In the left pane of NotebookLM, add your source content.
Add a Prompt
In the middle pane, add a prompt describing what you want NotebookLM to do. In my example, I asked ChatGPT to give me a prompt to tell NotebookLM to generate an overview video of the content in my sources, which I then pasted into NotebookLM.
Generate Overview Video
In the right pane, click “Video Overview” to have NotebookLM generate an overview video based on the content and your prompt. My 4-minute video was generated in a few minutes.
This is not a “build an app in 10 minutes” post. It’s a realistic guide to using AI coding agents the way you’d use a junior engineer: with specs, guardrails, and review.
In this post, I explain how to vibe code a web app using the following tools:
express-ejs-layouts (if you want template layout functionality)
Render.com (for hosting both frontend and backend)
Stripe (for payments)
3rd-party APIs (like kie.ai for text-to-image AI generation)
VS Code (code editor)
Resend (send emails using an API)
Zoho Mail (receive emails)
ImageKit (image optimization)
Note
You can use Next.js for both front-end and backend code using React and Next.js server actions, but for simplicity, I prefer to use static HTML, CSS, and JS for the front-end and Express.js for the backend. Also, you can use Typescript, but for simplicity, I prefer not to. I think these choices are fine for small apps. They definitely allow for faster vibe coding and simplify the codebase, which reduces the surface area for errors to occur, both during development and in production. If I used Next.js, I would host the app on Vercel, but since I’m not, I will host both the static frontend and Express.js backend/app server on Render.com, which simplifies deployment (push from GitHub, no CORS issues, free plan).
There are many, many, many ways to code/vibe code a web app, including using Claude Code, Cursor, Continue.dev, Gemini Antigravity, Gemini Conductor, and Agent Zero. The approach in this post is just the way I’ve found to work for me for now.
App Idea
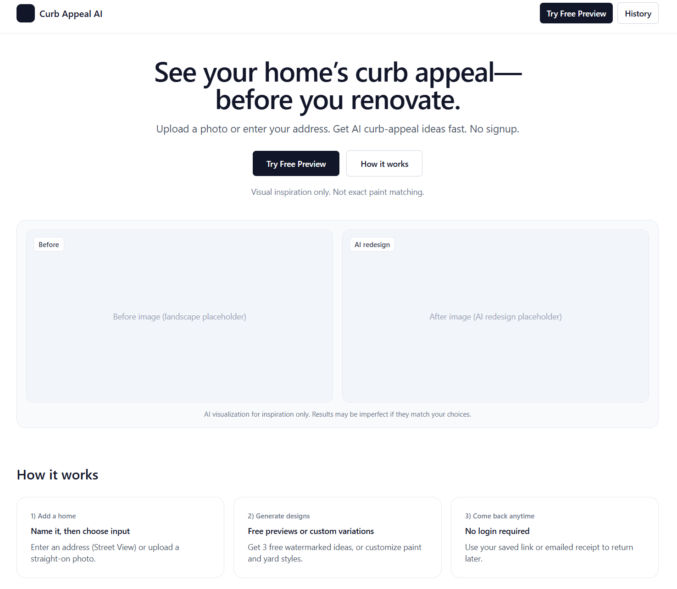
First, you need an app idea. Consult with ChatGPT regarding the business strategy, pros, cons, and anything else you have on your mind. If you are a solopreneur, it’s probably best to keep your app simple enough that you can manage it yourself. For example, you can create an app that lets people upload an image of the front of their home and redesign their curb appeal by changing exterior paint color, yard design, and driveway design using an AI text-to-image generator like Nano Banana Pro.
User Flow & Functionality
Discuss the user flow and app functionality with ChatGPT until you decide on the details that you want for your app.
Tech Stack
Discuss with ChatGPT what tech stack you should have for your app. In my case, I prefer the stack listed above.
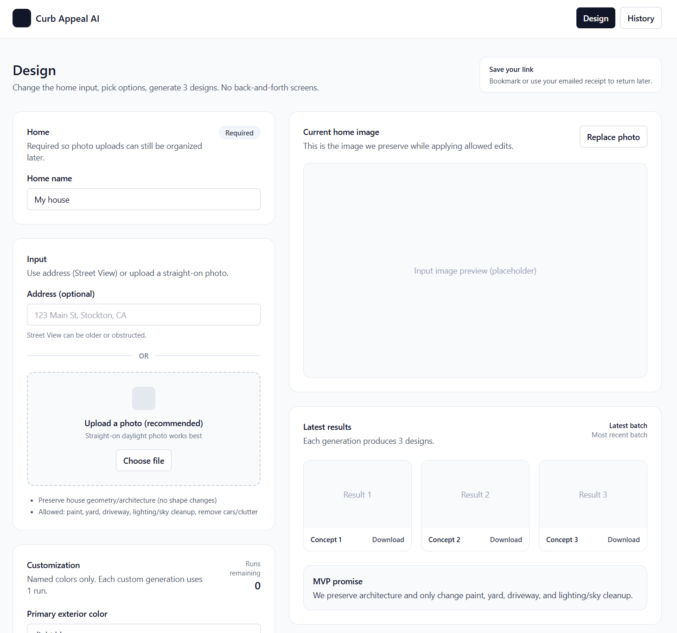
UI
Once you’ve decided on an app idea, ask ChatGPT to give you basic grayscale page designs using shadcn/ui and Tailwind UI components/blocks. You can try to use Google Stitch to generate more polished designs, but if you can’t, just start with a basic grayscale design first. ChatGPT can give you HTML + Tailwind CSS for these designs. For dev purposes only, just use the Tailwind CSS CDN to save time. Here are some example basic designs. Before going live, switch to compiled CSS using Tailwind.
Unique Interactive Elements
To minimize errors and guessing when the AI coding agent codes your app, have ChatGPT update all interactive elements (buttons, links, etc) with unique attributes so that the AI coding agent can uniquely target each element. For example, for buttons, have ChatGPT add a data-action attribution, e.g., <button data-action=”upload-image”…>
Database
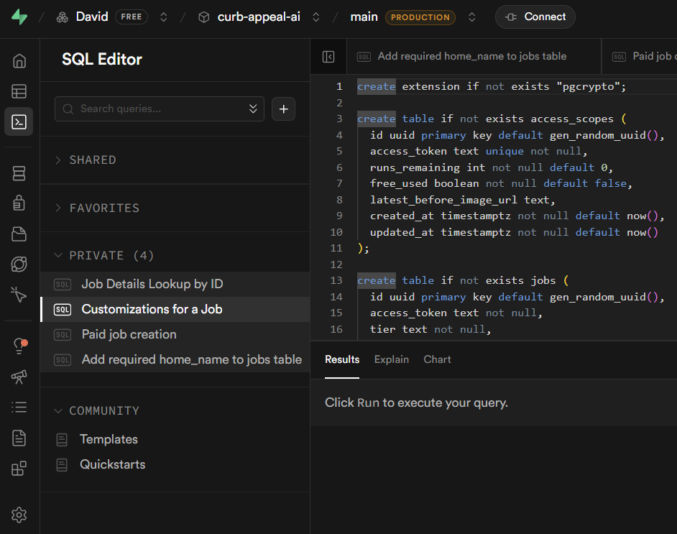
If your project requires a database, ask ChatGPT to propose a database schema. If you agree with the schema, have ChatGPT give you a SQL script to create all tables and constraints. Save the script in a file like 001_init.sql. For the database, I prefer Supabase PostgreSQL for its simplicity.
Create an account at Supabase.com.
Create a project
Click SQL editor
Paste the SQL script and run it to create the database tables.
File Storage
If you need to store files online, like PDFs or images, there are many options, like AWS S3 and Cloudflare R2 (similar to S3 but cheaper). If you’re already using Supabase for your database, you can just use Supabase Storage to store files.
Click “Storage”
Click “New Bucket”
Enter a bucket name
Make sure to make the bucket public if your users or app code needs to access files in it
Authentication
Discuss with ChatGPT the best way to handle authentication and user account management. If you need the usual auth with logins, you can use Supabase Auth. But, if you just need a simpler auth mechanism, like using access tokens, you can do that as well. Discuss the pros and cons of each option with ChatGPT and pick one.
Payments
If you will be accepting payments in your web app, you’ll need a payment processor. Everyone seems to use Stripe for this. It has a test mode, which simplifies testing.
Emails
Your app will most likely need to send emails. There are many popular 3rd-party API-based email service providers, including Resend, Postmark, and Mailgun. I personally prefer Resend for its simplicity. For receiving emails, I do not recommend Resend. It’s too complex for that. When you’re starting off and don’t want to spend a lot of money, you can use Zoho Mail for receiving email. Setup was super simple. In my case, I set up an email address in Zoho and forwarded it to my personal Gmail, keeping a copy in Zoho Mail. Then, in Gmail, I added a “Reply as” account so I could reply to emails using my app’s domain, e.g., support@zabuun.com.
Image Optimization
If you use Next.js, it can automatically optimize images for you. If you don’t use Next.js, or if you prefer to separate the image optimization process, there are many options available, including ImageKit, Cloudinary, and TwicPics. I personally prefer ImageKit. You can still host your images in Supabase Storage or S3 and use them as a custom origin in ImageKit.
3rd-party APIs
If you’ll be dependent on external APIs, like a text-to-image generator using Nano Banana Pro, decide on which APIs to use. I’ve been using KIE because the UI is simple and it’s cheaper than fal.
Project Folder
On your computer, create a folder for your project, e.g., curb-appeal-ai. Add the SQL script to it in a folder called “sql”, e.g., curb-appeal-ai/schema/001_init.sql
Environment Variables
Ask ChatGPT for a list of all environment variables you’ll need for the app, e.g.,
Create a .env.example file and a .env file in your project folder, create accounts with each 3rd-party provider (Supabase, KIE, Stripe, etc) and add the values for each of the required variables to your .env file (not your .env.example file)
.gitignore
Create a .gitignore file in your project folder and add any files/folders you don’t want to commit, e.g.,
node_modules
.env
.DS_Store
AGENTS.md
Have ChatGPT create an AGENTS.md file in the project folder, following the format at AGENTS.md, containing all the coding guidelines the AI coding agent will need to successfully code the app without any guessing. Ask ChatGPT if any part of the guidelines and initial setup would require the coding agent to guess/infer anything while coding. If ChatGPT says yes, then resolve them now and add any necessary clarifications to AGENTS.md.
Data Formats
Different APIs have different request and response formats. For all APIs you’ll be using, have ChatGPT add each format, e.g., JSON schema, for each API to the AGENTS.md file so the AI coding agent won’t guess what the structure is like.
Logging
Tell ChatGPT to add a logging specification to AGENTS.md so the AI coding agent will log EVERYTHING to the terminal, which will help significantly with debugging.
Initialize your project
Open your project folder in VS Code
Open a terminal
git init
git add .
git commit “first commit”
OpenCode
Follow the instructions at OpenCode to install OpenCode. Or, just ask ChatGPT how to install OpenCode.
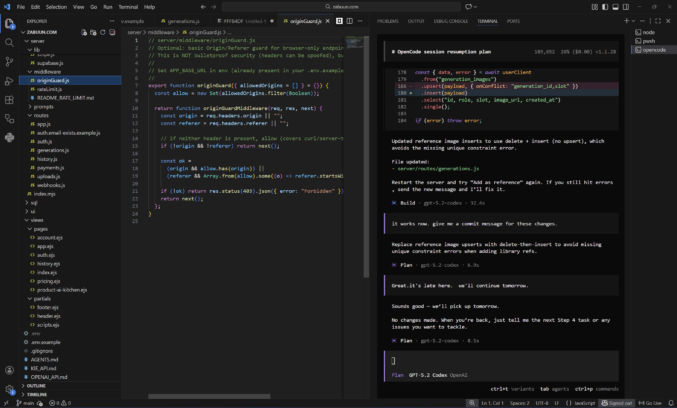
I like to run OpenCode in a VS Code terminal in a separate terminal beside other terminals I use for other purposes, like starting a dev server. In the screenshow below, you can see I have a terminal window for OpenCode and one for Node. I like to have my file explorer on the left, code editor in the middle, and terminals on the right.
AI Model
To use OpenCode, you need to connect to a model. You can use the OpenRouter API with OpenCode to easily switch between models like Claude, Gemini, and GTP Codex. However, you’ll have to buy and pay with credits. A cheaper solution is to use a ChatGPT Plus subscription, which is what I’ve been doing.
OpenCode + OpenRouter
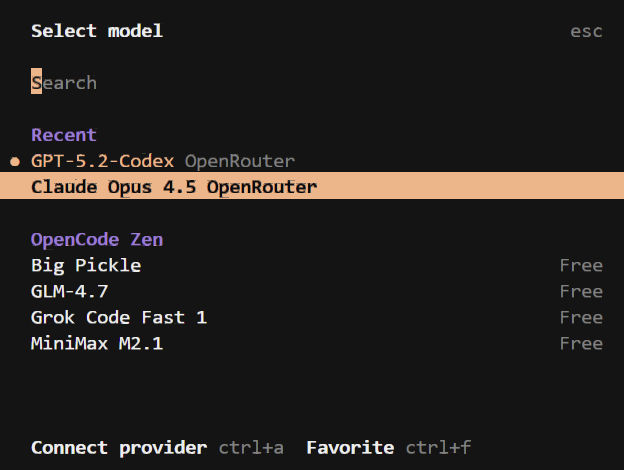
You can use many different AI models with OpenCode, however, you’ll probably want to stick with the best models for web development, which are ranked here. Currently, Claude Opus 4.5 is the best model, but it’s expensive. I’ve been using GPT 5.2 Codex, which is good and cheaper than Opus. Gemini 3 is probably just as good. Instead of creating an account with each LLM provider, it’s easier to just create an account with OpenRouter, which allows you to pay in one place and use a single API key while giving you access to all of the models it supports.
In VS Code,
open a terminal
type “opencode” to launch the OpenCode TUI (Terminal User Interface)
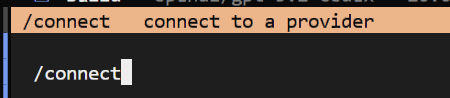
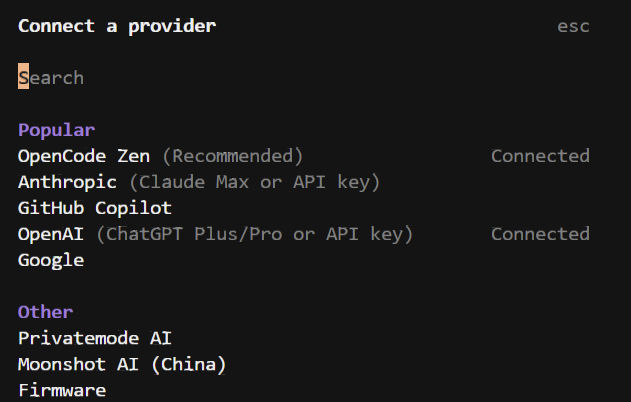
type “/connect” to connect to an LLM provider
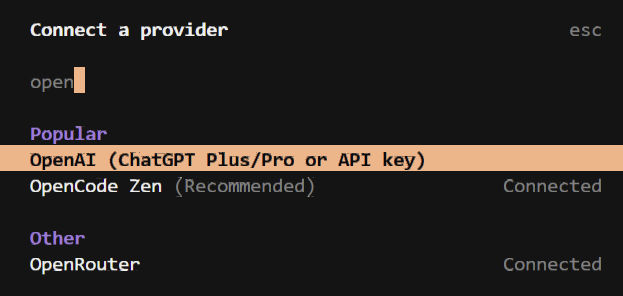
4. type “openrouter” to filter the list and click on “OpenRouter”
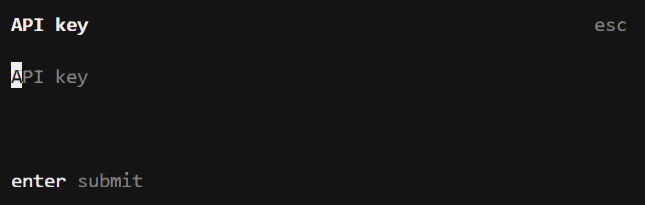
5. Copy/paste your API key from OpenRouter and hit Enter.
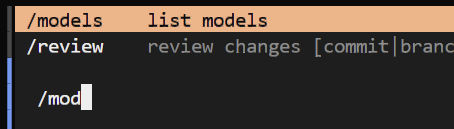
6. type “/models” to view the list of available models
7. Search/browse for the model you want and click on it.
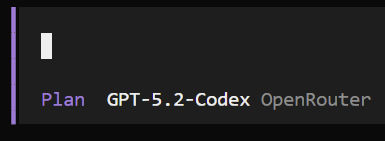
OpenCode has 2 modes: Plan and Build. Click the tab key to switch between modes.
The Plan mode reads your codebase, creates an AGENTS.md file if you don’t already have one, asks questions, and creates a coding plan. It doesn’t modify any files.
The Build mode is for coding.
If you enter a prompt in OpenCode and you get a “User not found” error, then you pasted your API key incorrectly. Re-enter your API key and try again.
OpenCode + ChatGPT Plus/Pro
To connect OpenCode to a ChatGPT Plus web subscription, type /connect to open the “Connect a provider” modal. Search for “OpenAI (ChatGPT Plus/Pro or API key) and click it. A link will appear. Open the link in a browser and log in to your ChatGPT account. That will connect OpenCode to your ChatGPT Plus/Pro web subscription account. I find this to be much cheaper than buying credits.
Plan
Switch to Plan mode by hitting the tab key. Ask ChatGPT to guide you through planning and development. In Plan mode, the agent can’t edit any files. Whenever you start a new OpenCode session, always tell the agent to read through AGENTS.md and, optionally, to audit the codebase. You can say things like
Read the AGENTS.md file and all files in the repo to get up to speed on what this app is about and what has been done
Let’s build this app one step at a time following a typical user flow, e.g., 1) sign up, 2) log in, 3) use app, etc
The “Forgot Password” feature gives an error. See attached screenshot. Please debug and propose a fix.
Modularize all header and footer HTML into partials using EJS
Build
When you are ready to have OpenCode code, switch to the Build mode. You can say things like
implement the plan you just described in Plan mode
Test & Debug
When OpenCode is done coding, you will need to test your app. I like to follow the following workflow:
Test functionality in browser
Switch to Plan mode
If there’s an error, tell the agent. Optionally include a screenshot.
The agent explains the error.
If the error is not related to code, e.g., Supabase config error, the agent tells me what to fix myself.
If the error is a minor coding error, I’ll just fix it myself.
If the error is more than a simple one-line fix, I switch to Build mode and have the agent fix the error.
Once the fix has been made, I test the functionality.
If functionality is fixed, I switch to Plan mode and ask the agent to give me a commit message.
I commit the code changes. Otherwise, I repeat from step 3 until the bug is fixed.
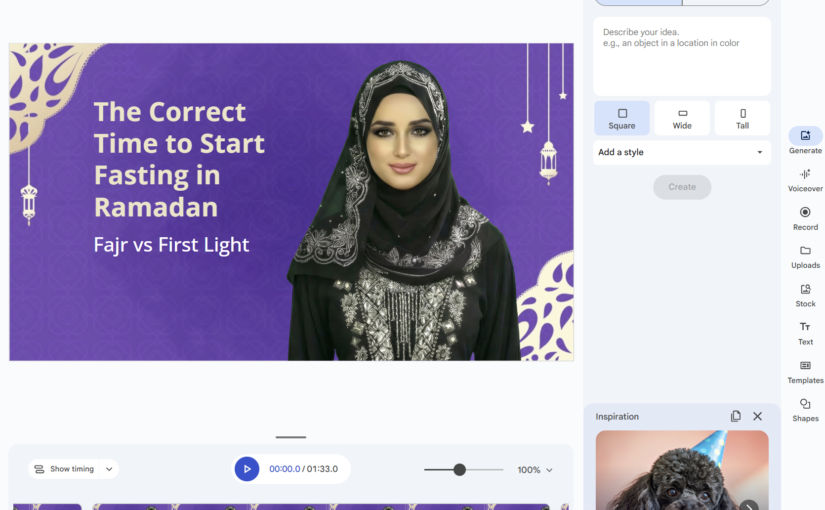
In this post, I’ll show how to easily create explainer videos using Google Slides and Google Vids. Here’s an example explainer video I made using these tools.
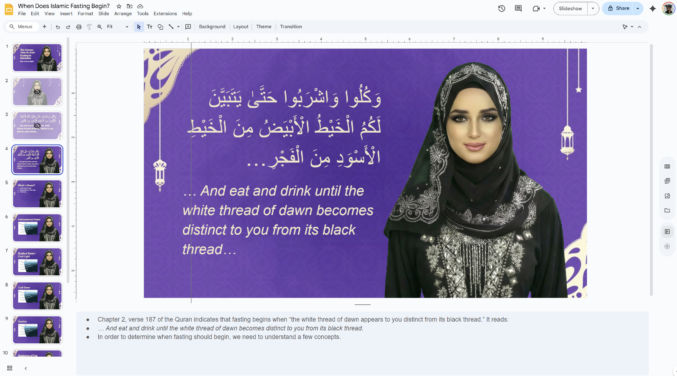
Create Your Slides
Go to Google Slides and create a slide for anything you want to show visually in your video. A slide can contain a background, text, images, videos, and more. When creating your slides, write your speaking script in the notes section below each slide preview. In my case, I took the slide design from here.
Import Slides into Google Vids
Click the “Convert to Video” button. This will open the presentation in Google Vids.
Choose the slides you want to import. You can also include AI voiceover, script, and background music. If you do that, Google Vids will use AI to create a voiceover script for you. If you want to use the notes you wrote in Google Slides, turn off this toggle.
Google Vids only supports videos that are 10 minutes long. If you have many slides with scripts that, once the voiceovers are generated, will result in a video that exceeds 10 minutes, you will need to delete some slides and voiceovers. If this happens, you will convert slides in batches, e.g., 20 or 30 at a time. When selecting which slides to import, you can click one slide, hold the “shift” key, then click the last slide to select all slides in between.
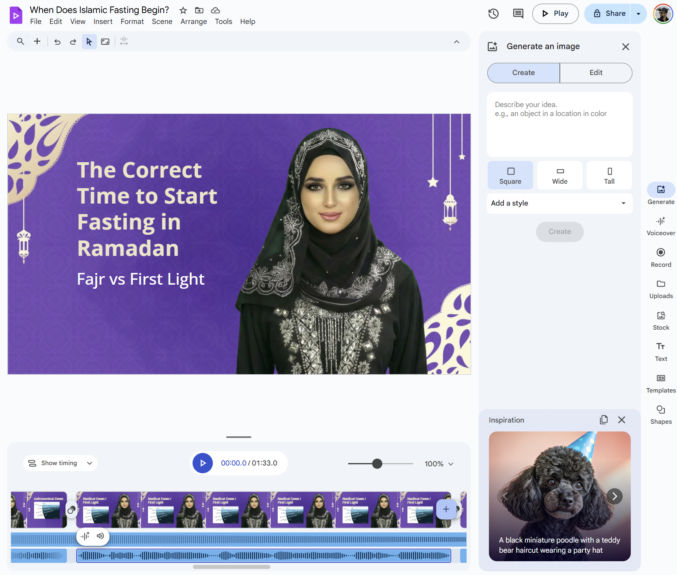
Edit the Video
Now that you’re in Google Vids, you can edit the video. You will see a video timeline at the bottom.
Move the playhead along the timeline to different sections of the video.
Click the “Play” button to preview the video.
Click “Voiceover” on the right to edit the script for each slide you imported, if needed. Here, you can change the narrator’s voice as well. At this time, Google Vids only supports English, Spanish, Portuguese, Japanese, Korean, French, Italian, and German. If you want a voiceover in a different language, you’ll have to import the audio or record your own voice.
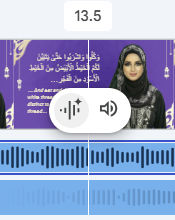
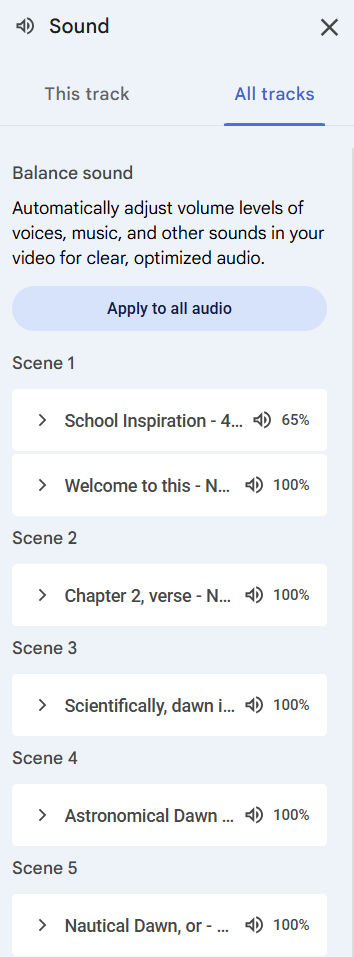
If you want to edit the background music,
click on the background music track,
click the speaker icon to the right of the waveform icon
You will see the Sound panel. Click the “All tracks” tab. You will then see the background music and narration audio for each scene. Clicking on each one will allow you to edit the audio for each scene individually. You can also click the “Apply to all audio” button to have your changes apply to all scenes.
Export Video
When you’re done making your changes, click “Share > Download as MP4” to generate and download the video.
Note
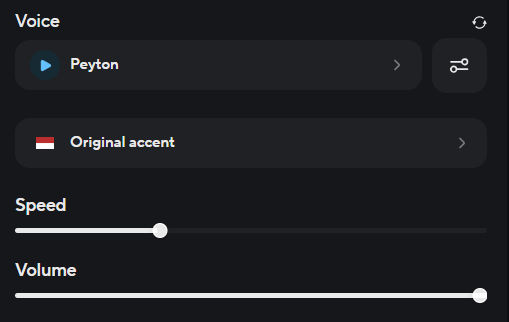
In the example video I created, I used HeyGen to create a lip-sync video of the narrator speaking. Google Vids doesn’t offer this feature, and you don’t need it to create explainer videos. If your video is in a language that is unsupported in Google Vids, e.g., Indonesian, and you want to create a lip-sync video, then you can simply paste the script into Heygen, preview the voiceover, and then generate the lip-sync video. HeyGen only charges for video generation, not text-to-speech previews. For a female voice in Indonesian, for example, I chose “Peyton” (voice ID = 6dd171c356f94a138cdbb5bd11ea8ee8) with “Original accent”.
If you only want to lip-sync some scripts, then it’ll be cheaper to paste those scripts in ElevenLabs. For an Indonesian text-to-speech, I chose Hannah’s voice, using the “Eleven Multilingual V2) model.
You can also clone your own voice in HeyGen and use it to create a lip-sync video.
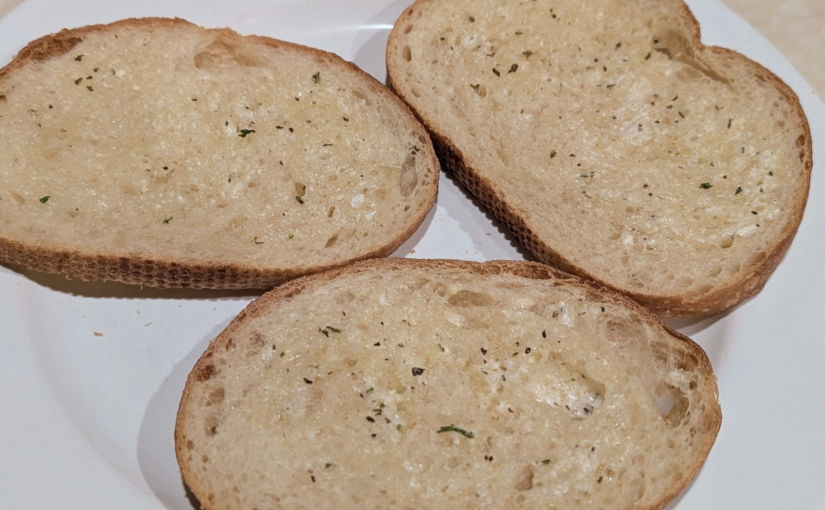
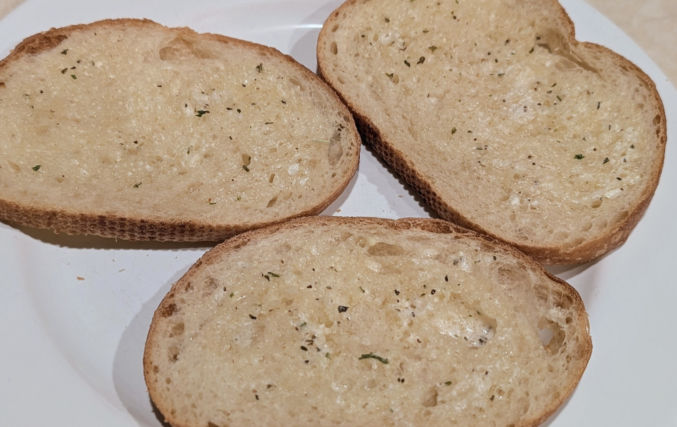
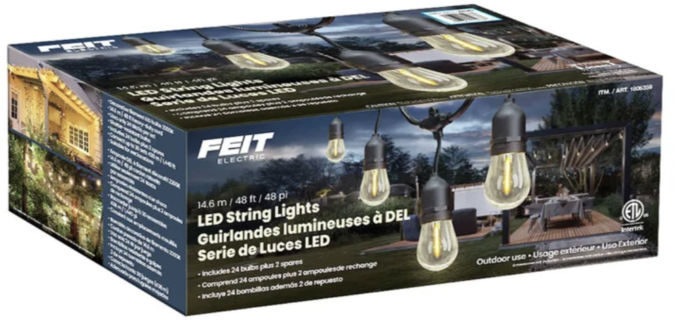
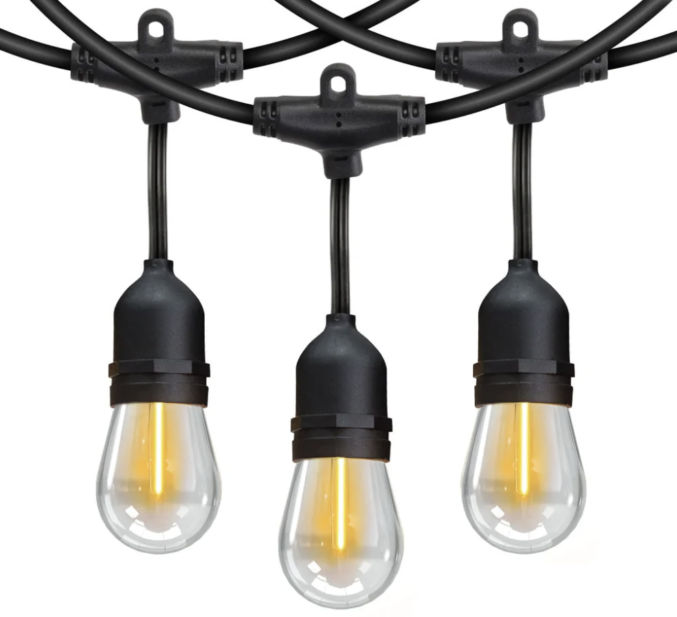
The Christmas season is here, and you may finally decide to put up some lights on your house. I personally like single-color, soft-white lights rather than multi-colored lights. Regardless of your color preferences, installing string lights can be difficult depending on your particular situation.
Though there are holes every 2 feet to fasten them, those holes don’t line up with rafters under the eaves of my house, so I couldn’t use them all.
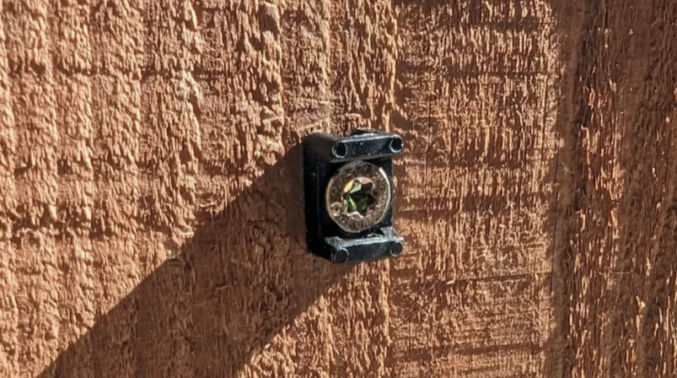
Regardless of the hole distance, one way to securely fasten any string lights, or cable, for that matter, is by using zip ties (I prefer the releasable kind) with a base mount.
Zip tie base mountReleasable zip ties
Just screw the base mount to your structure such that the slot where the zip tie would go in is in the direction you need it to be in.
Then, slide the zip tie though the base mount and around your string light cable.
This doesn’t just work for string lights. You can fasten other types of cables and even multiple cables. Unlike plastic cable clamps, which can quickly deteriorate and crack from UV exposure, zip ties can last a long time. Also, unlike cable clamps, which don’t grab cables tightly, resulting in some slack, zip ties can be pulled until the cable they’re securing are tight. This is important if you want your string lights to be straight.