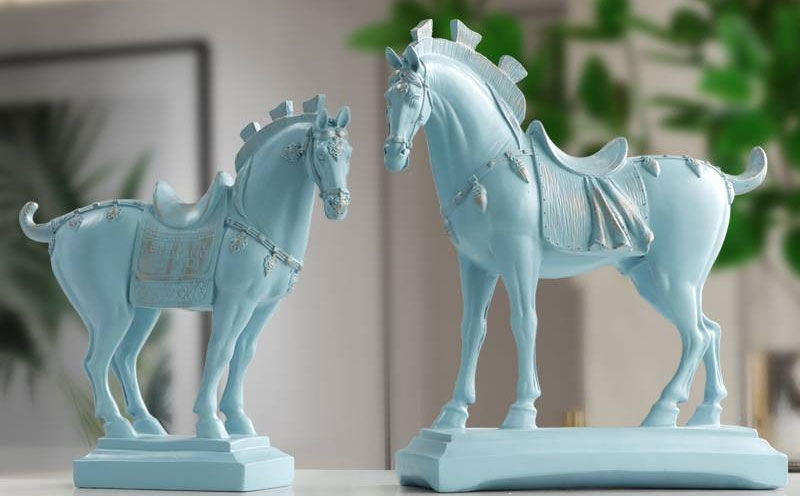
Many Muslims believe that having statues or images of living creatures is forbidden. However, there is no such law in the Quran as long as you don’t worship them.

Worshipping statues is forbidden
In verses 21:51-52, we see proof that specifically worshipping statues is forbidden.
| وَلَقَدْ آتَيْنَا إِبْرَاهِيمَ رُشْدَهُ مِن قَبْلُ وَكُنَّا بِهِ عَالِمِينَ |
| And We had certainly given Abraham his sound judgement before, and We were of him well-Knowing. (21:51) |
| إِذْ قَالَ لِأَبِيهِ وَقَوْمِهِ مَا هَٰذِهِ التَّمَاثِيلُ الَّتِي أَنتُمْ لَهَا عَاكِفُونَ |
| When he said to his father and his people, “What are these statues to which you are devoted?” (21:52) |
God allowed prophet Solomon to make statues
The word for statues used in the verse above is “tamatheel” (singular: timthaal). This word is also used in 34:13 which describes prophet Soloman instructing his jinn to make statues, among other things.
| يَعْمَلُونَ لَهُ مَا يَشَاءُ مِن مَّحَارِيبَ وَتَمَاثِيلَ وَجِفَانٍ كَالْجَوَابِ وَقُدُورٍ رَّاسِيَاتٍ ۚ اعْمَلُوا آلَ دَاوُودَ شُكْرًا ۚ وَقَلِيلٌ مِّنْ عِبَادِيَ الشَّكُورُ |
| They made for him what he willed of elevated chambers, statues, bowls like reservoirs, and stationary kettles. [We said], “Work, O family of David, in gratitude.” And few of My servants are grateful. (21:51) |
If making or having statues was forbidden, why would a prophet of God (Solomon) allow it as described in the Quran? Since the Quran is from God, then God must allow the making and having of statues.
It should be clear from the two examples above that it isn’t the making or keeping of statues that is forbidden but rather what the statues are used for.
Same religion, different prophets
Some Muslims may argue that having statues was allowed during the time of some prophets but not allowed in others such as the time of prophet Muhammad. This argument is unsupportable since, again, there is no mention in the Quran that statues are forbidden. Furthermore, we know from verse 42:13 that the same religion was inspired in all the prophets.
| شَرَعَ لَكُم مِّنَ الدِّينِ مَا وَصَّىٰ بِهِ نُوحًا وَالَّذِي أَوْحَيْنَا إِلَيْكَ وَمَا وَصَّيْنَا بِهِ إِبْرَاهِيمَ وَمُوسَىٰ وَعِيسَىٰ |
| He has ordained for you of religion what He enjoined upon Noah and that which We have revealed to you, [O Muhammad], and what We enjoined upon Abraham and Moses and Jesus … (42:13) |
We also know from verse 41:43 that nothing was said to Prophet Muhammad (pbuh) that was not said to the Prophets before him.
| مَّا يُقَالُ لَكَ إِلَّا مَا قَدْ قِيلَ لِلرُّسُلِ مِن قَبْلِكَ ۚ إِنَّ رَبَّكَ لَذُو مَغْفِرَةٍ وَذُو عِقَابٍ أَلِيمٍ |
| Nothing is said to you, [O Muhammad], except what was already said to the messengers before you. Indeed, your Lord is a possessor of forgiveness and a possessor of painful penalty. (41:43) |
Don’t prohibit what is lawful
Additionally, in verse 5:87 we are prohibited from making unlawful something which God has made lawful.
| يَا أَيُّهَا الَّذِينَ آمَنُوا لَا تُحَرِّمُوا طَيِّبَاتِ مَا أَحَلَّ اللَّهُ لَكُمْ وَلَا تَعْتَدُوا ۚ إِنَّ اللَّهَ لَا يُحِبُّ الْمُعْتَدِينَ |
| O you who have believed, do not prohibit the good things which Allah has made lawful to you and do not transgress. Indeed, Allah does not like transgressors. (5:87) |
Related articles
- Proof Muslim Women Don’t Have to Cover Their Hair
- Proof the Hadith is Not Valid Islamic Law
- Muslims Are Performing the Hajj Wrong
- Muslims Are Wrong About Zakat
- Lailat Al-Qadr Is Not What You Think It Is
- Most Muslims Start & End Fasting At the Wrong Time
- Islamic Misconceptions About the Call to Prayer (Adhaan)
- Most Muslims Are Wrong About Various Aspects of Prayer
- Islamic Ablution (Wudhu) Is Simpler Than Many Muslims Think
- Muslims Don’t Need to Perform Ablution (Wudhu) Before Touching the Quran
- Deferring Matters of Islamic Law to Religious Scholars Is Not Permissible. Studying and Understanding the Quran is Required.
- Proof That the Quran Is Complete and That the Hadith Books Are Not Needed
- Prayer Among Jews, Christians, and Muslims – A Quranic Analysis
- The Testimony (Shahadah) to Convert to Islam is Inaccurate
- Categories of People According to the Quran
- Jews and Christians Are Actually Muslims
- Abraham, Not Muhammad, Was the Founder of Islam
- Jewish, Christian and Islamic Scriptures
- The Fallacy That Descendants of Prophet Muhammad Are Superior to Everyone Else
- Islamic Prophets, Messengers & Scriptures
- What is God’s Name – A Quranic Analysis
- Aliens Do Exist – A Quranic Analysis
- Most Muslims Are Asian, Not Arab
- Proof That Relatives (Wives, Children, Descendants, etc) of Islamic Prophets, Including Muhammad, Are Not Automatically Righteous
- There Is No Punishment for Blasphemy in Islam
- Proof That Arabic is Not a Holy or Superior Language
- Proof That Prophet Muhammad Is Not Exclusive or Superior to Other Prophets
- Muslims (Submitters) and Mu’mins (Believers) Are Not the Same Thing
- Most Jews, Christians, and Polytheists Are Not Infidels (Kafir)
- There Is No Quranic Proof That Zamzam Water Is Blessed Holy Water
- Muslims Are Not Allowed To Force Others To Practice Islam. So Why Do Muslims & Islamic Governments Keep Doing It?
- If You Are a Sunni or Shia Muslim, Then You’ve Violated Islamic Law
- Contrary to Extremist Belief, Muslims Are Allowed To Sing and Listen to Music
- Muslims Are Allowed To Have Statues and Photos of People in Their Homes
- Dogs Aren’t Impure. Muslims Are Allowed to Have Pet Dogs.
- Muslims Are Allowed to Pay Interest, e.g. on a Car or Home Loan
- Prophet Muhammad Was Not Illiterate. He Could Read and Write.
- Jesus is Dead & He Ain’t Comin’ Back – A Quranic Analysis
- Many Muslims Are Wrong About Getting Help From Others on the Day of Judgment
- Wills and Inheritance Law According to the Quran
- Most Muslims Are Wrong About Halal Food
- Circumcision Is Not Required Among Muslim Boys / Men
- Muslim Women Are Not Exempt From Congregational Friday Prayers
- Muslim Women Are Not Exempt From Fasting, Praying, etc During Menstruation
- The Quran Doesn’t Support a Strictly Vegetarian Diet
- Summary of the Quran
- Summary of the Quran 2
- إثبات أن الحديث ليس شرعاً إسلامياً صالحاً
- إثبات أن النساء المسلمات لسن بحاجة لتغطية شعرهم
- Bukti Hadits Tidak Valid Hukum Islam
- Kekeliruan Bahwa Keturunan Nabi Muhammad Lebih Unggul Dari Semua Orang Lain
- Bukti Wanita Muslim Tidak Harus Menutup Rambutnya Dengan Hijab