Mix 1/8 teaspoon of double-acting baking powder (make sure it’s double acting) for every 2 eggs, mix, cook, done.
Mix 1/8 teaspoon of double-acting baking powder (make sure it’s double acting) for every 2 eggs, mix, cook, done.
This article explains how to remove a green background in a video using Corel VideoStudio Ultimate 2018 and the NewBlueFX Chroma Key.
When applying a chroma key to a video in VideoStudio, you have two options:
To use VideoStudio’s native chroma key feature,
From my experience, this feature doesn’t work well for imperfectly lit backgrounds. Unless you are filming in a professional studio, the chroma key results will likely be poor.
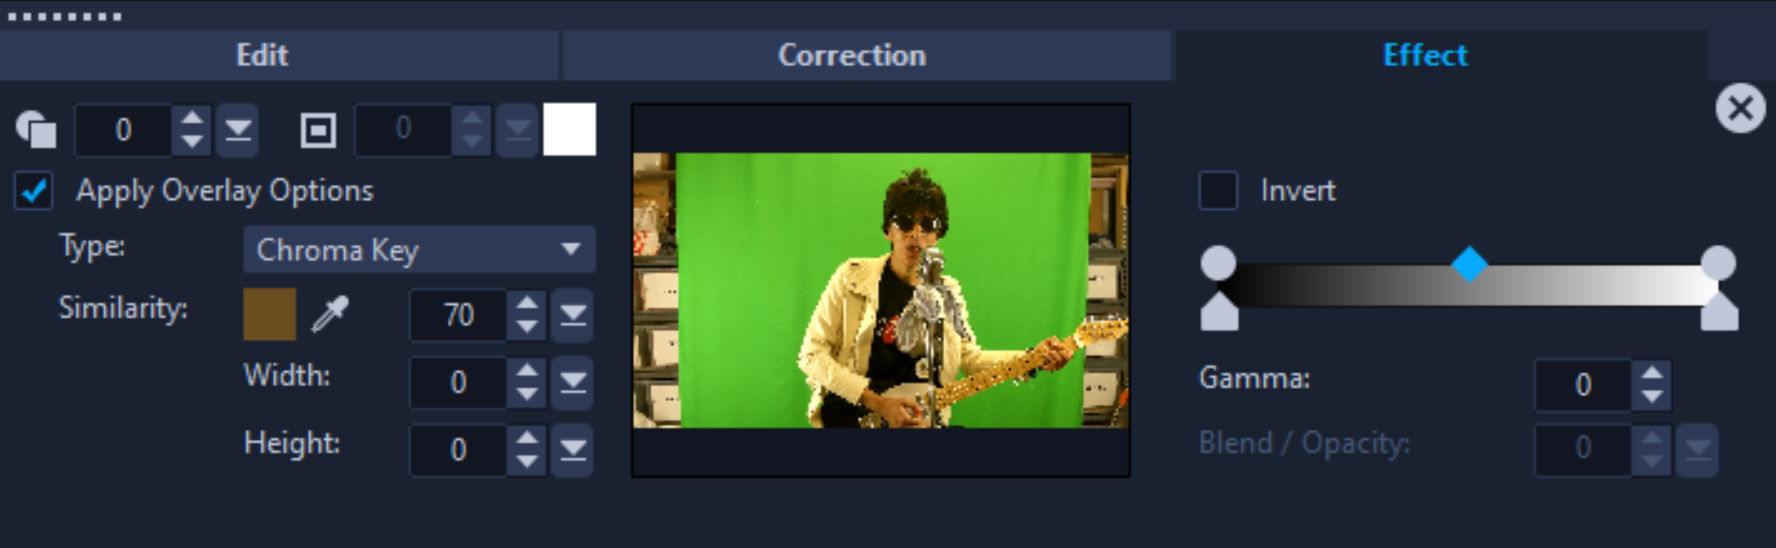
For better chroma key results, you can use the NewBlueFX Chroma Key filter. Disable the native VideoStudio chroma key by unchecking the “Apply Overlay Options” checkbox described in the previous steps. This will minimize confusion due to the application of multiple chroma keys. To use the NewBlueFX Chroma Key, do this:
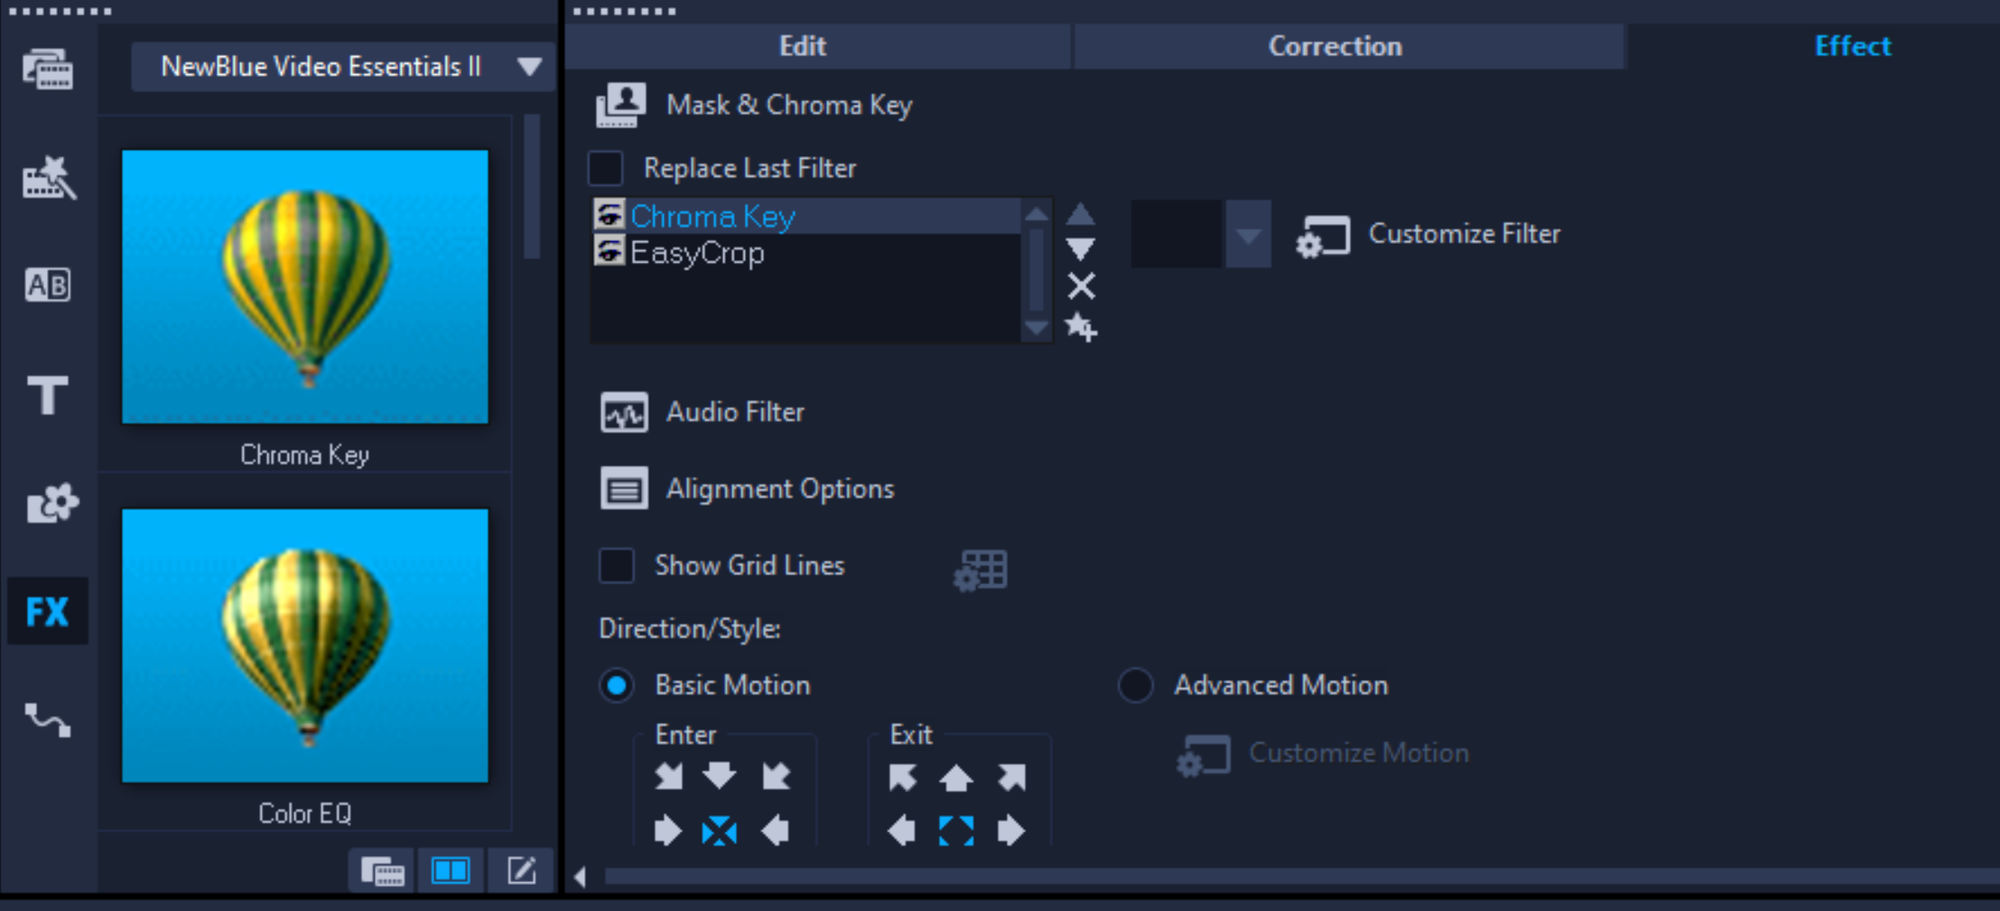
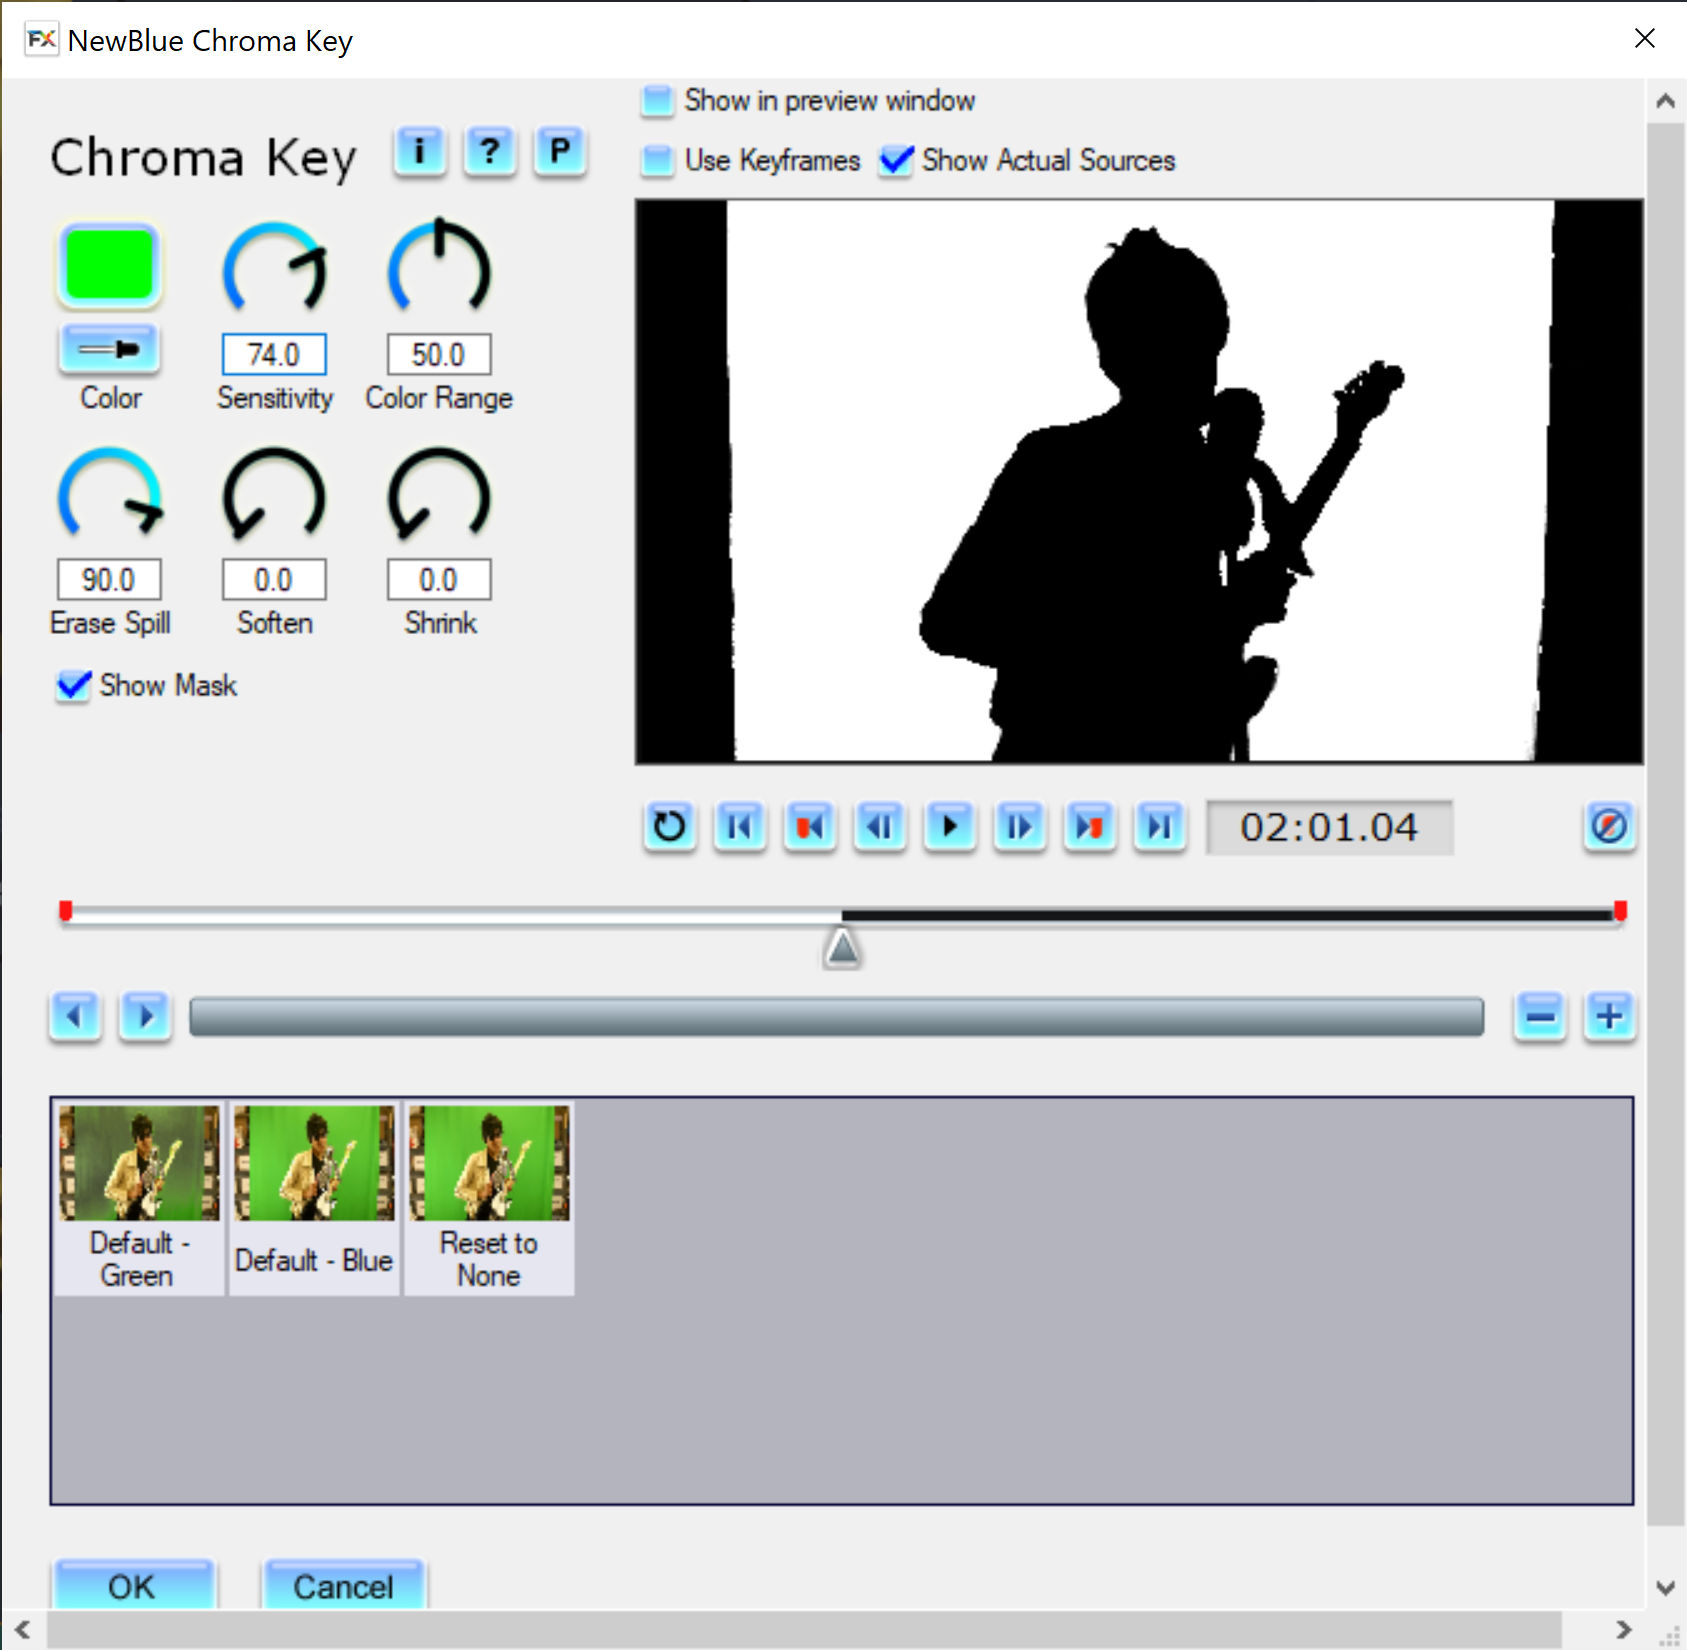
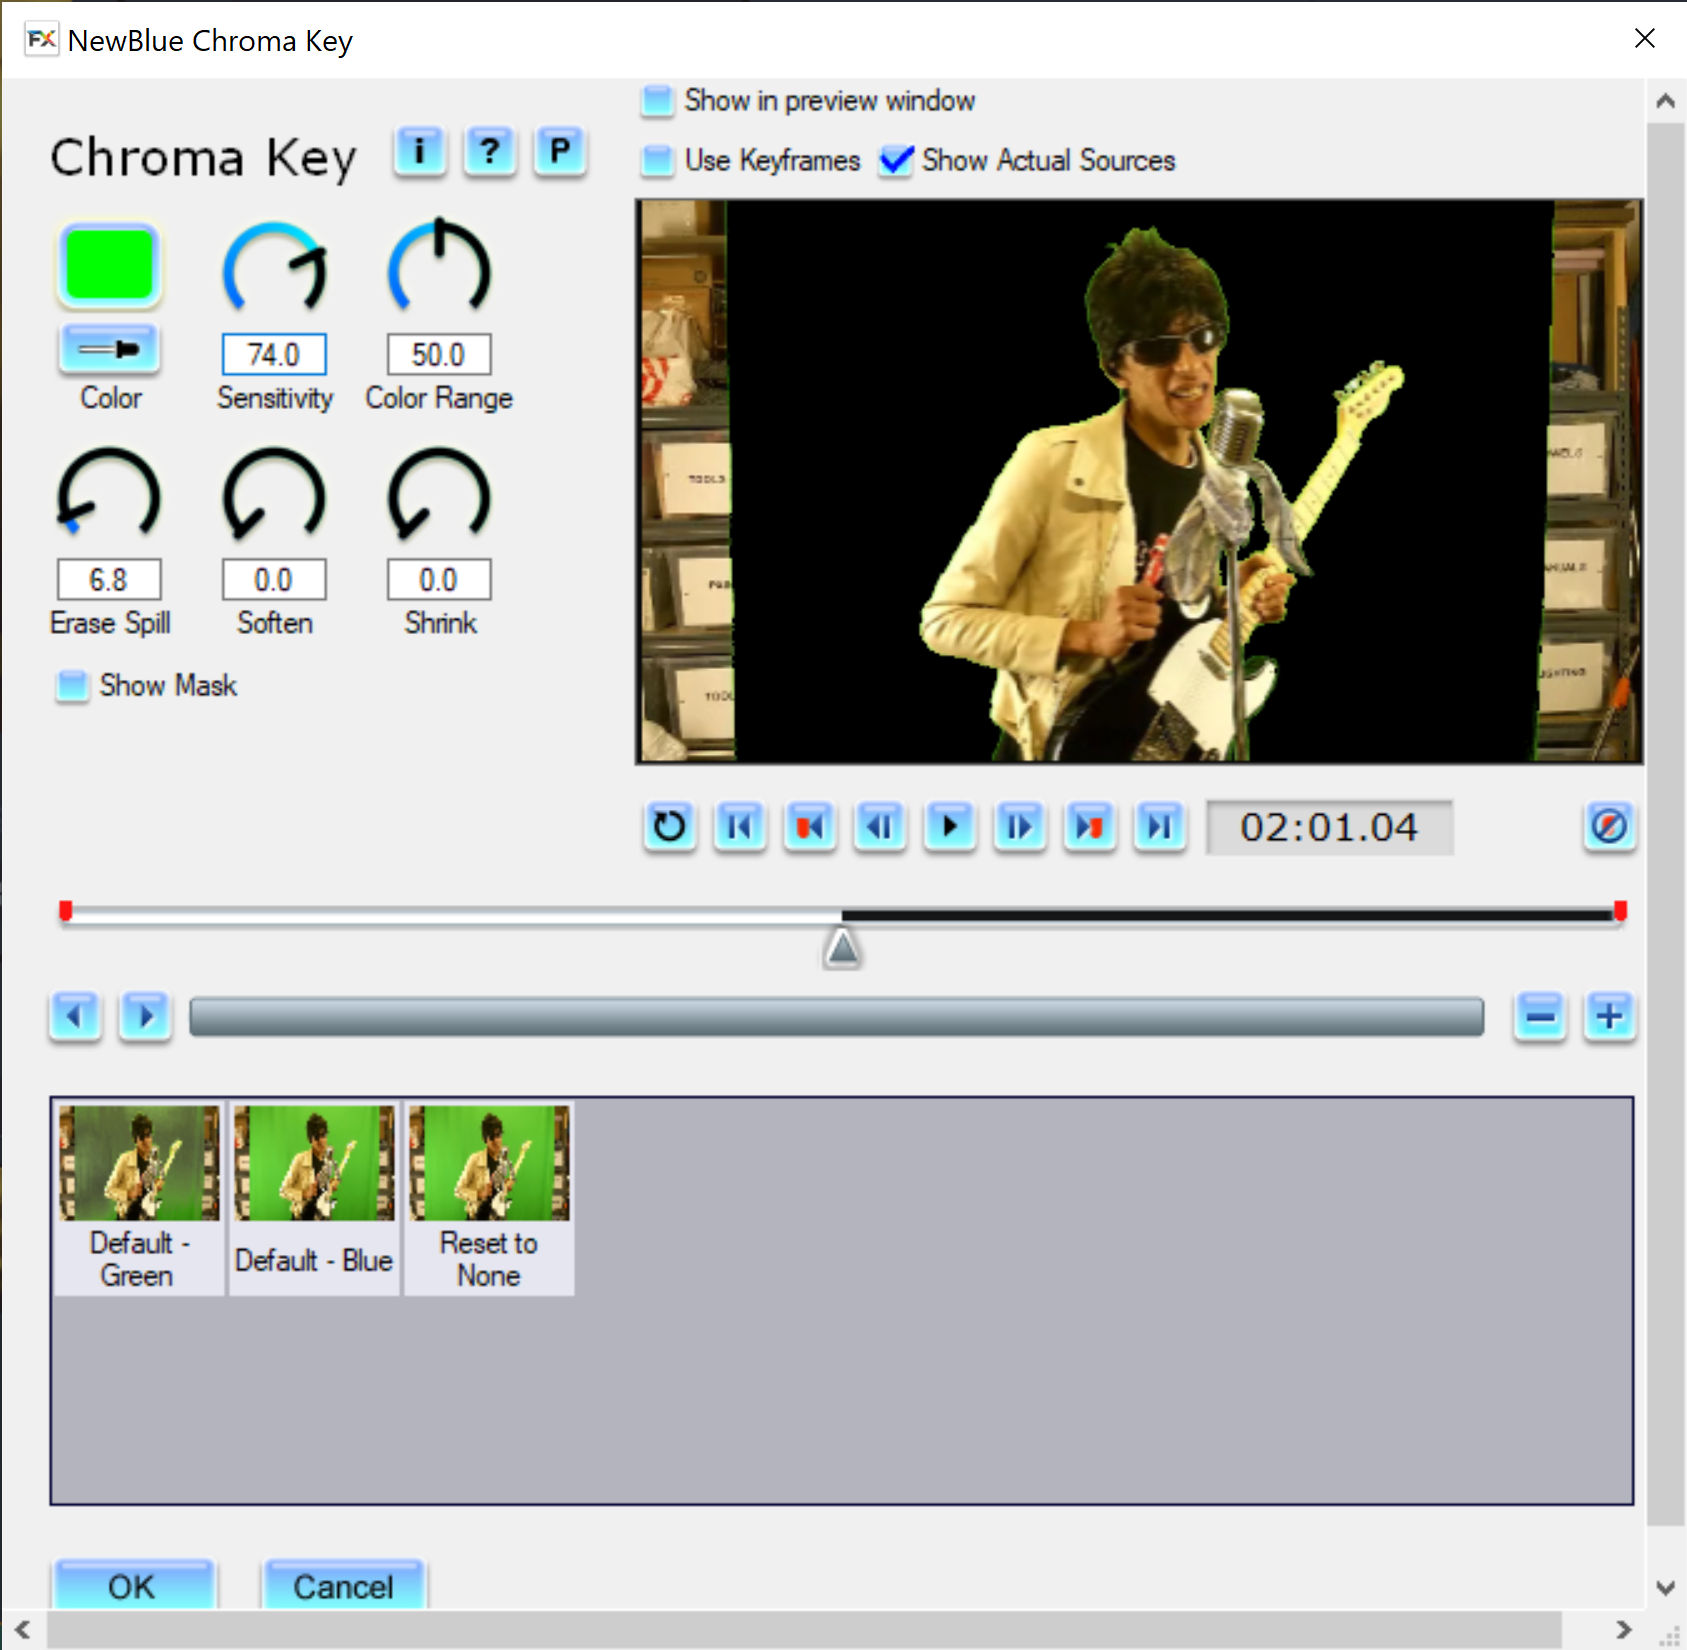
The NewBlue Chroma Key control panel will appear.
Nowadays, videos can be recorded at 4K resolution which is great for visual quality but bad for editing performance. To fix this, you can enable some settings in Corel VideoStudio under Settings > Performance as follows.
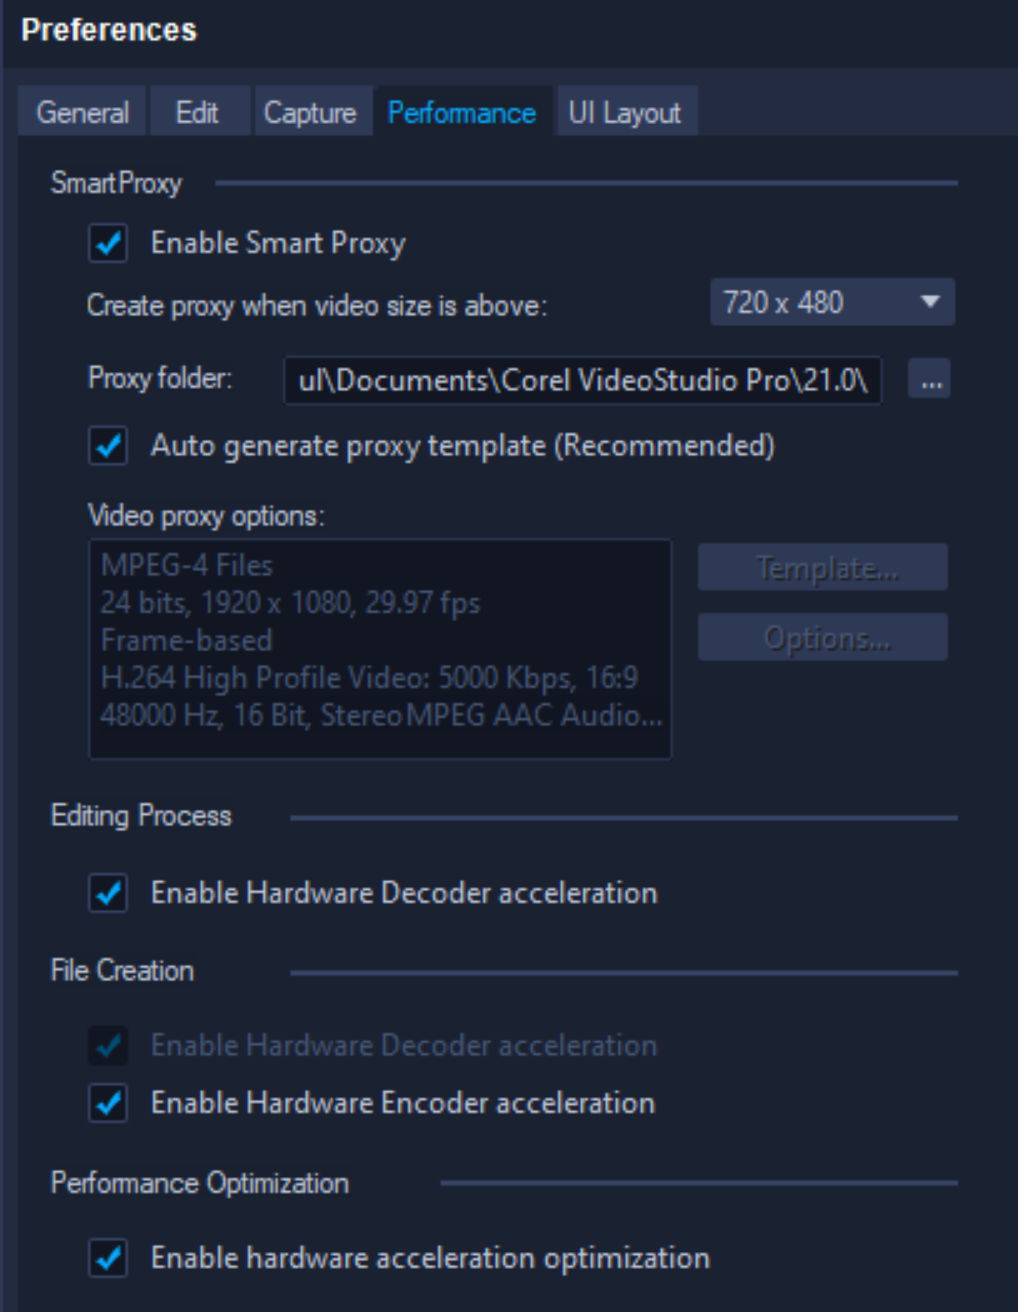
These settings will cause VideoStudio to generate a smaller version of a large video file so speedier editing. In the example settings above, if the source video is greater than 720 x 480, then a proxy file will be created in a SmartProxy folder. On my system, that folder is at
C:\Users\abdul\Documents\Corel VideoStudio Pro\21.0\SmartProxy
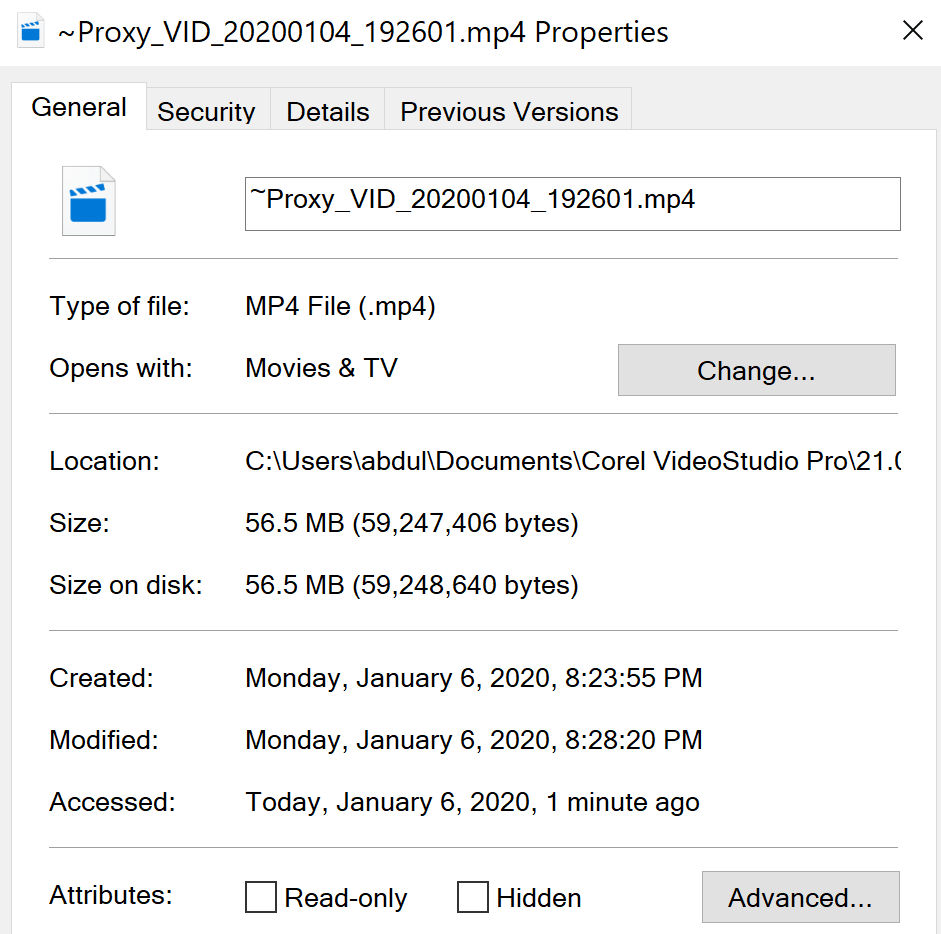
As an example, let’s compare the original video size to the proxy video size. In VideoStudio, if we select a video and view it’s properties, we see that its size is 636 MB.

If we look at the SmartProxy folder, it is currently empty. Now, if we drag the video to the timeline, VideoStudio will create a proxy file containing a lower quality version of that video. You can see the progress of the proxy file creation under Settings > Smart Proxy Manager > Smart Proxy Queue Manager.

When the proxy file has been created, you can inspect its size. As you can see, the size is only 56 MB. That’s a reduction of 91%!
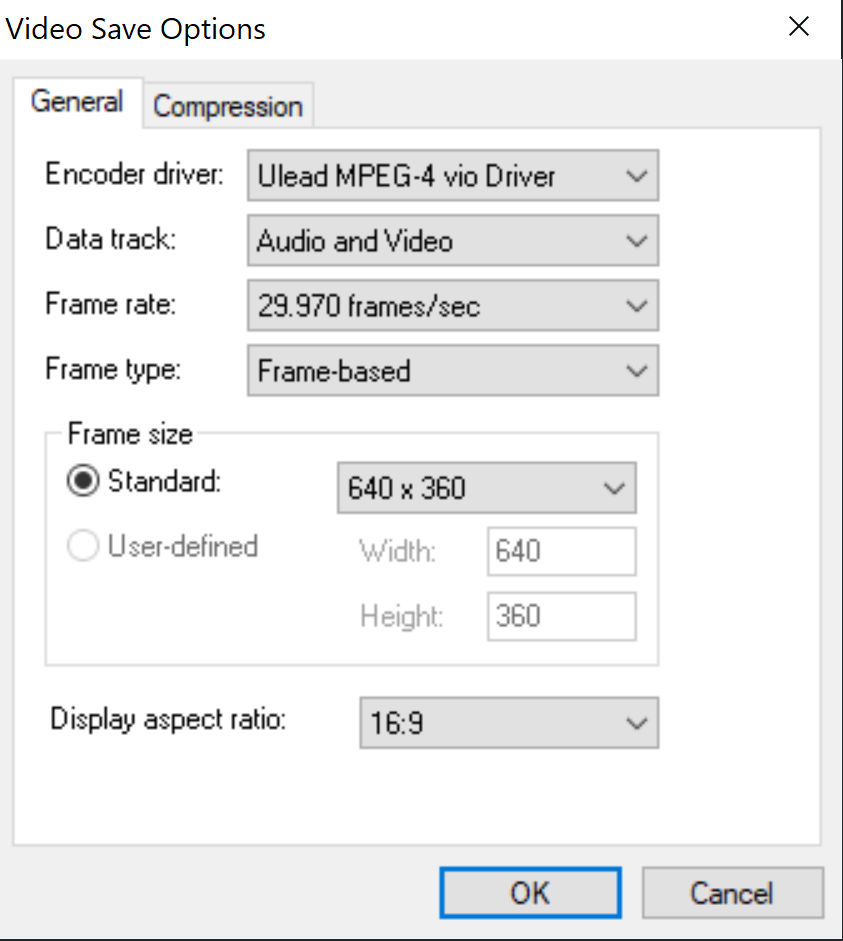
If the proxy file is still too large, you can tweak the proxy file settings to produce a lower quality file, e.g. instead of 1920 x 1080 frame size, you can choose 640 x 360.
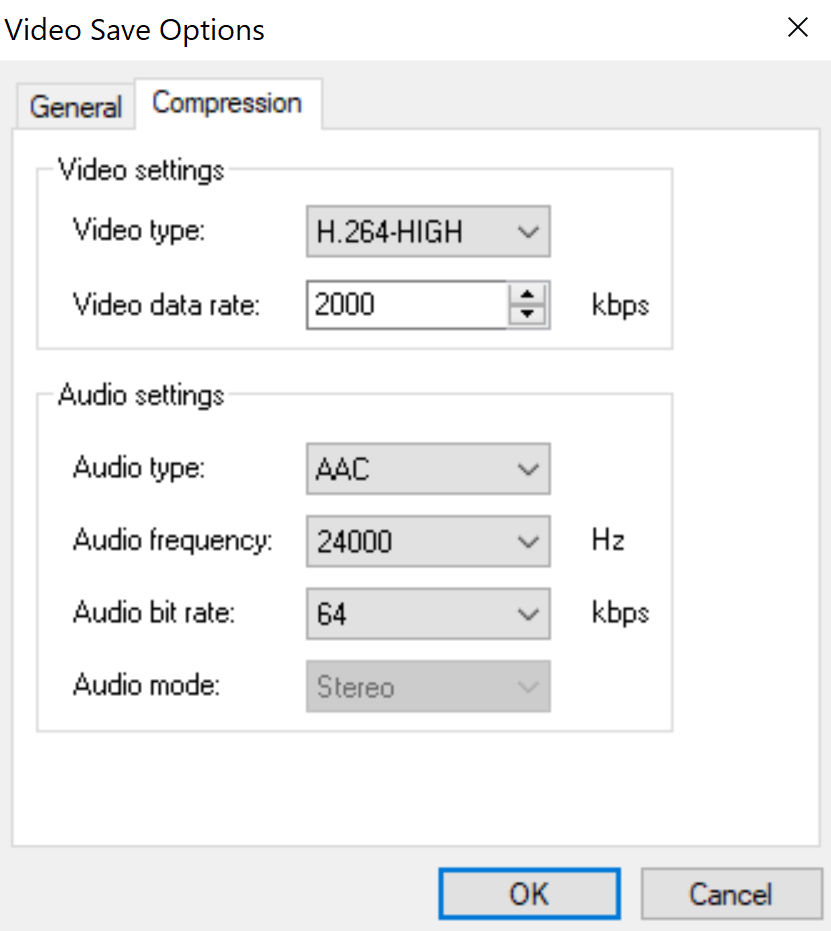
You can also tweak the audio and video compression settings.
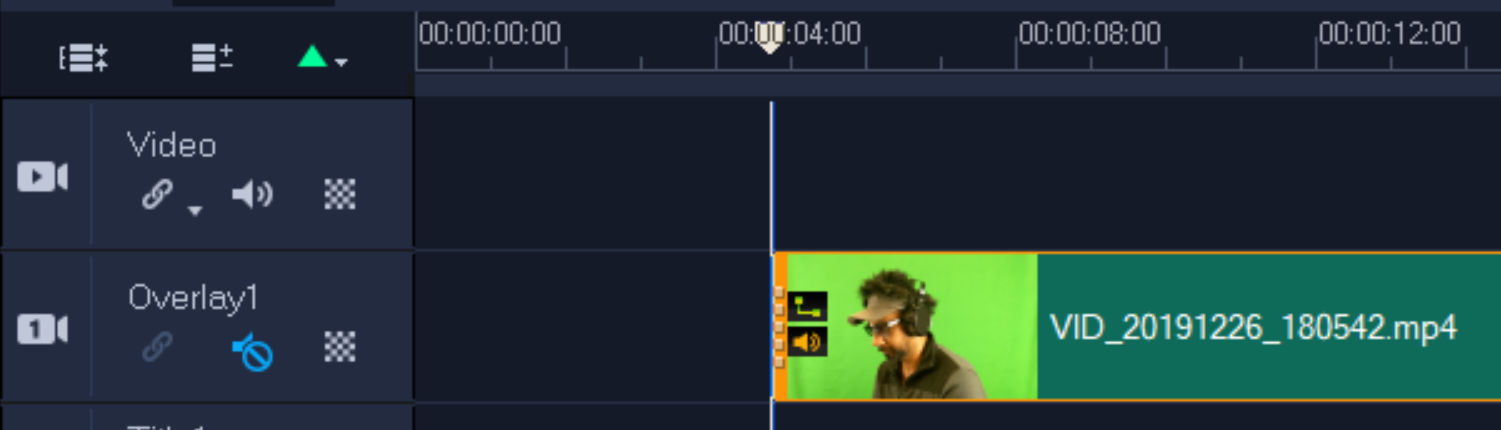
If you are unsure whether VideoStudio is actually using the proxy files instead of the original files, you can look for a specific icon on each video in the timeline. If there is a black and white icon as shown below, then the proxy video is being used.

Making a music video often requires transitioning between multiple video clips. Many video editing programs have many effects for transitioning between video clips. The most common transition effect is the cross fade. In Corel VideoStudio, you can apply this transition by dragging it over the two video clips where they meet. Since this is a cross fade, the duration of the two clips necessarily becomes smaller. If you have a separate audio track and you want the video track to be in sync with the audio track, the crossfade transition will cause the video to become out of sync with the audio track. To maintain synchronousness and for transitioning many video clips, use the track transparency feature. The instructions below are for making a music video with multiple video tracks and a separate audio track.
You can do this using your phone. Just remember to record in landscape. If you want to show a different background behind the subject, make sure to film against a green screen.
The assets are things like each source video, music files, background images and videos, etc. Make sure you name each file something descriptive to make it easy to identify them when working with many tracks.

The first track in the list of tracks is the video track. Unlike the Video Overlay tracks, the Video track must start at time 0. If the background video is abstract and can be looped but is too short, you can duplicate it back to back as shown below.
To start, each video can be positioned at time 0. Later, we’ll adjust the start time of each video so they are in sync with the music track. You can also mute each video track’s audio so the only audio heard comes from the music track.
This will make VideoStudio use a smaller version of each file to improve performance. See how to set up proxy files.
In this example, I positioned the start time of the music to 20 seconds to accommodate video clips that have a long but useless intro.
To do this, read this post.
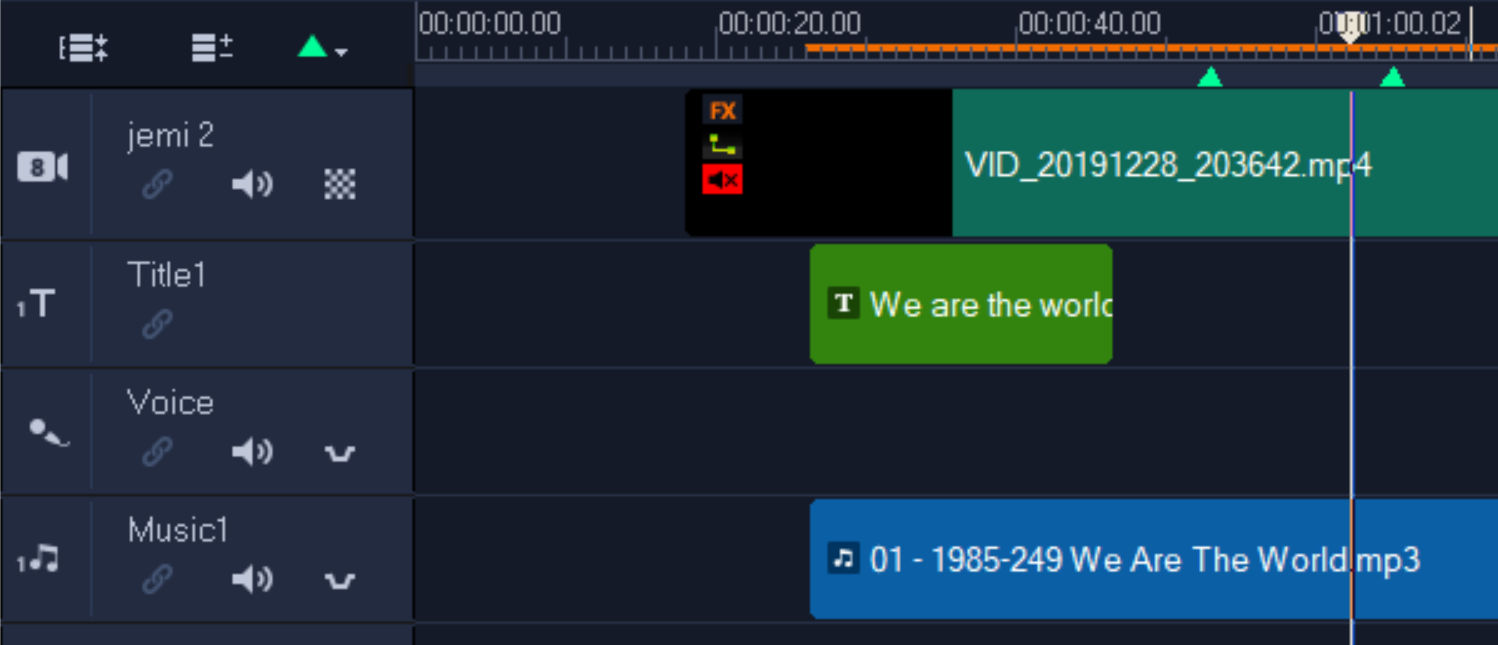
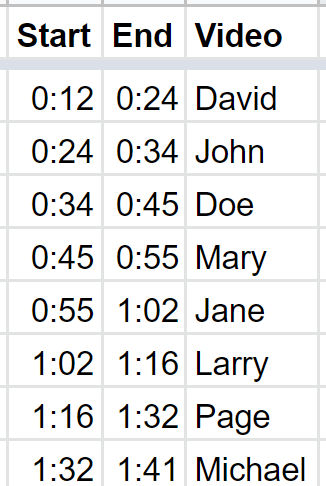
Let’s say you want to make a music video containing 5 different singers each singing a different part of the song. You’ll have at least 5 video tracks to work with. You’ll need to listen to the song and determine what times throughout the song to show different videos. You can do this by creating a spreadsheet like below.
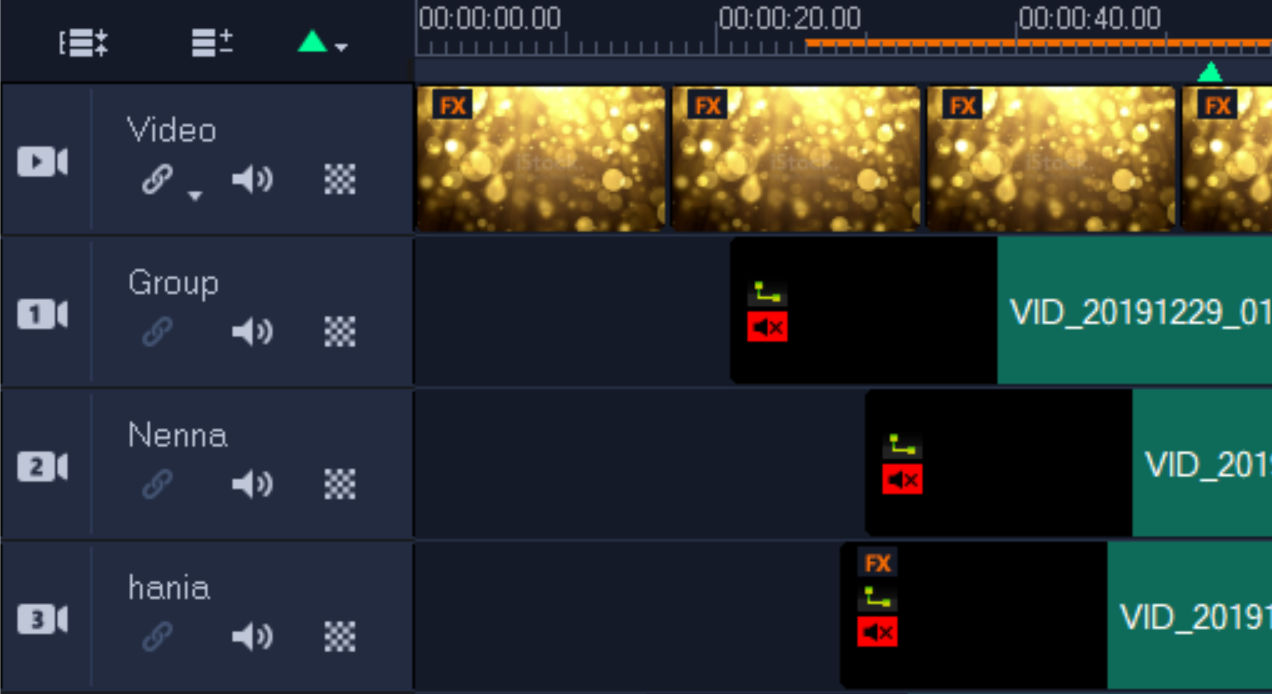
To make it easy to see start and end times for each video track, add a cue / marker (little green triangles below the timeline bar) on the timeline for each start time.
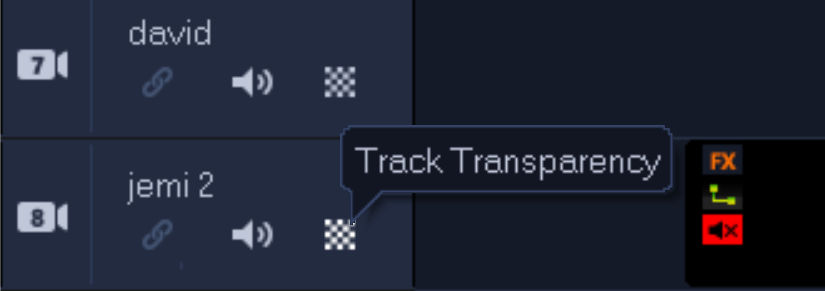
To do this, we’ll be adjusting each video track’s transparency. In order for this to work, you can’t cut any of the video clips in the timeline.
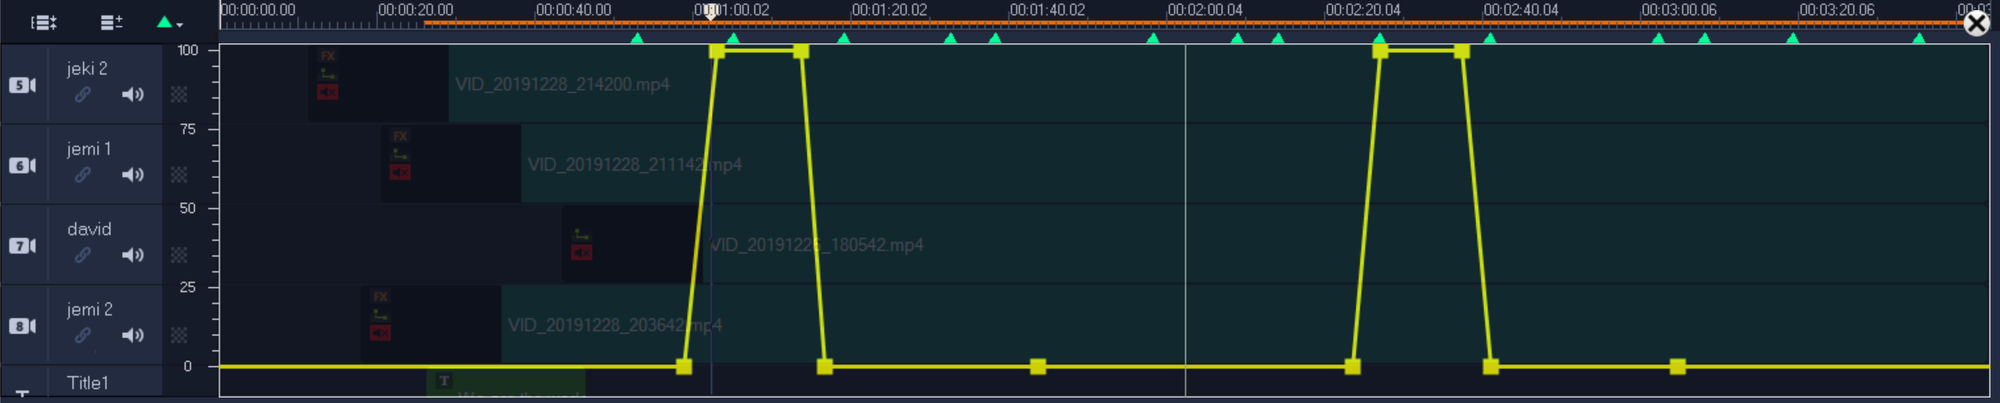
For each track, click on the Track Transparency button to reveal the transparency controls.
In the screenshot below. you see multiple video tracks but only the transparency track for one of them. The vertical position of the yellow line indicates the video’s transparency at any given time. When the line is at the bottom (0), the video is completely transparent (0% opaque). When the line is at the top, the video is completely visible (100% opaque). You create a fade by adding keyframes to the yellow line and dragging them.
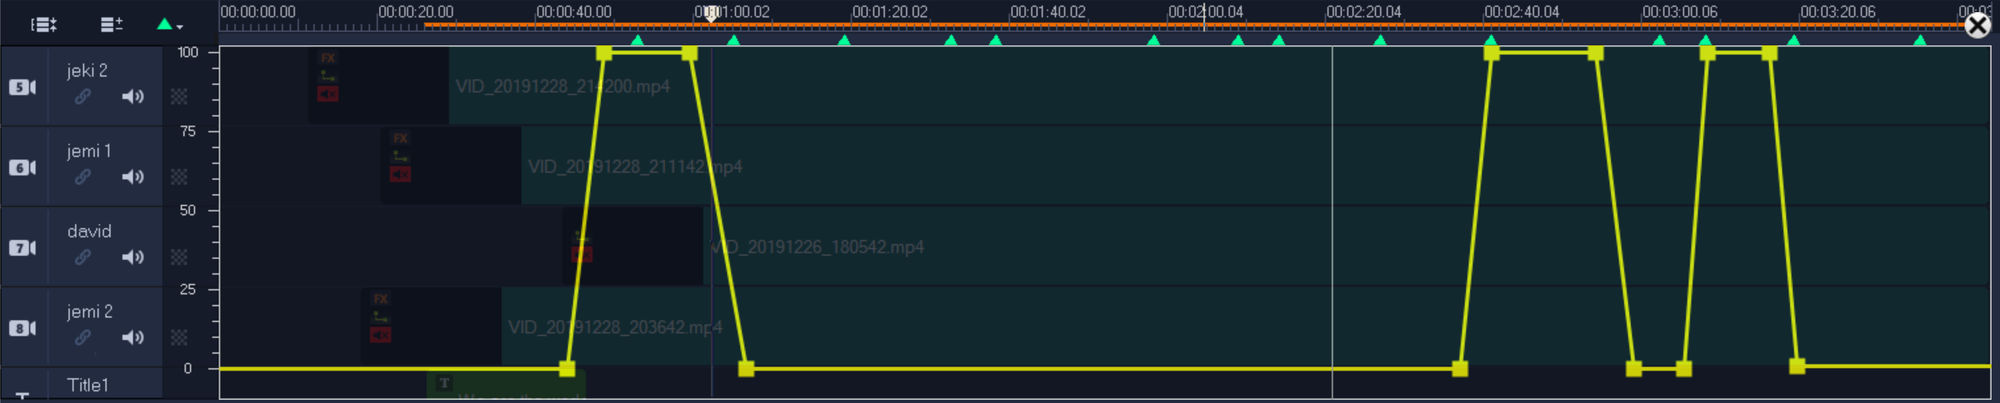
Below is a screenshot for a different video track. Notice how the transparency graph both of these video tracks are such that one video will fade out when the other fades in.
Let’s say you want to make a music video of you lip syncing to a song. You have two files:
When you add these two files to VideoStudio Pro, you’ll need to adjust the start time of one so that the lip movement in the video file is in sync with the audio. One way to do this is as follows:

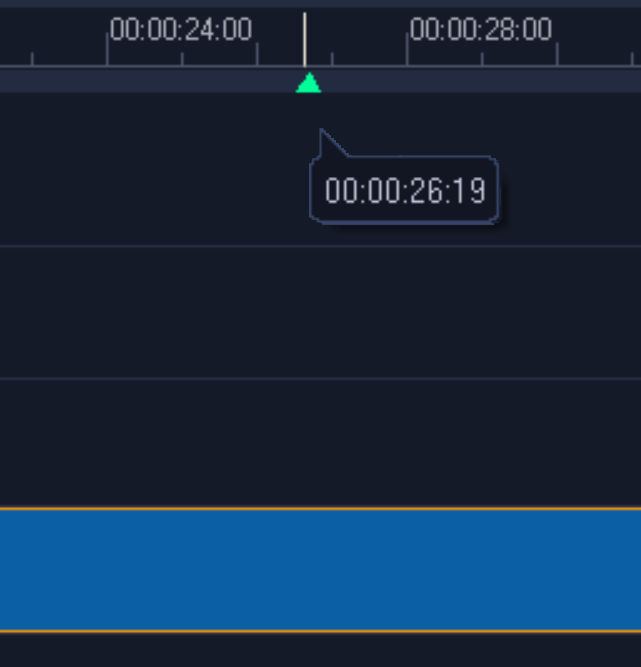
Play the music track until you hear the first point in time when you hear the vocals. At that point set a marker by clicking on the bar underneath the timeline. A green triangle marker will appear. If you make a mistake in placing the marker, you can drag it to another position.
If you are having a hard time finding the first vocal point, set a preview range around the time of the first vocal point. Then, keep playing the preview range and update the marker position. To set a preview range,
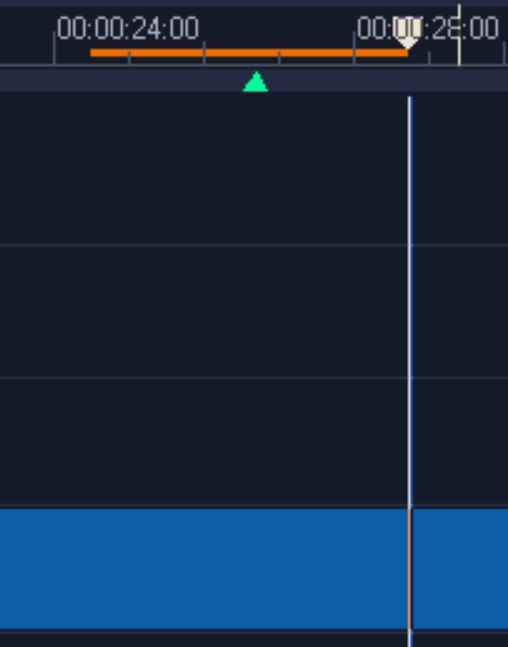
In the player control panel, you’ll see two yellow markers indicating the preview range relative to the entire project length.
In the timeline, you’ll see an orange bar indicating the preview ranger.

To play the preview range, make sure that “Project —” is selected / highlighted and not “Clip —”. Then click the play button. You can also click the loop button so the preview range plays repeatedly.
If the preview range appears very short, you can zoom in by clicking the + magnifying glass button.

Doing so allows you to see finer time increments in the timeline.

Don’t add the video to the Video track because doing so forces the video to begin from time 0 instead of a later time. Mute the audio in the Overlay 1 track by click the Mute icon.

Drag the video track to the left and right and repeatedly play the preview range until the lip movement in the video is in sync with the vocal sound from the audio track.
If you’ve got a blemish or an unsightly object in an image, you can hide it by using either the cloning brush or the healing brush.
Cloning is similar to copying some pixels elsewhere in an image and pasting it. This works in some situations but in others, it becomes obvious that you just copied and pasted.
The healing brush is similar to cloning except it tries to be smart so that the results look natural.
Here’s an example of a blemish in the sky.

And here’s the blemish gone with natural results using the healing brush.
With the healing brush, you tell Lightroom where the blemish is and then choose another area of the image to copy to fix the blemish.
Unsightly objects in the following images were removed using the healing brush.


When building websites, it’s inevitable that you’ll end up with a bunch of unused CSS as you make changes to the site. To remove unused CSS, you can use Sublime Text’s Get CSS Classes function to first find used CSS. Then, remove all CSS definitions that aren’t in that list.

Choose the “Curve” type of link
Click on the canvas to mark the starting point of the curve. Then click everywhere you want an inflection point. When you’re done, double-click to finalize the curve.

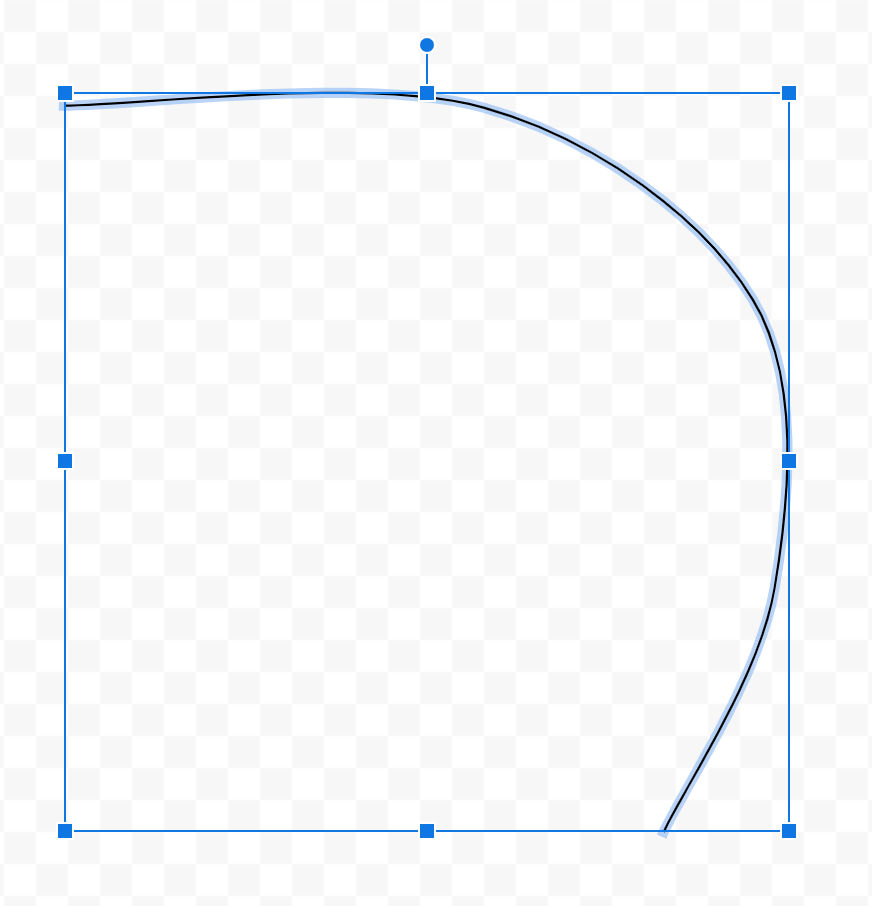
Click on the curve to show a bounding box with handles. Drag each handle to resize the curve.
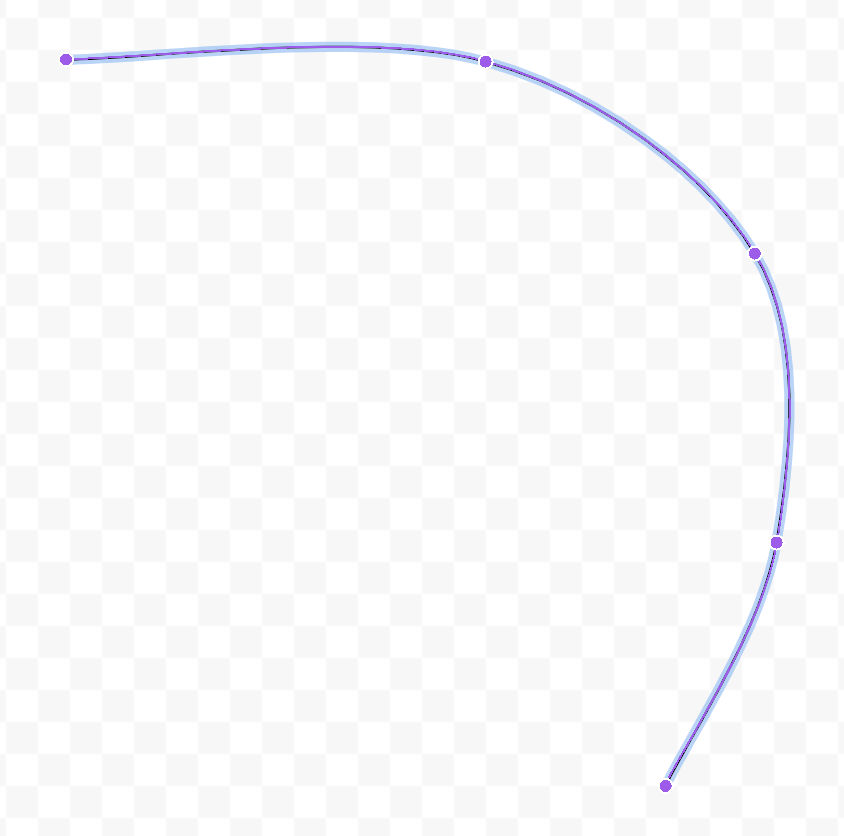
Double-click on the curve to show the nodes on the curve. Then drag each node to shape the curve.
Roasting turkey or chicken can often lead to very dry meat. The secret to getting most, tender, juice chicken or turkey meat is by smothering it in mayonnaise or plain yogurt.


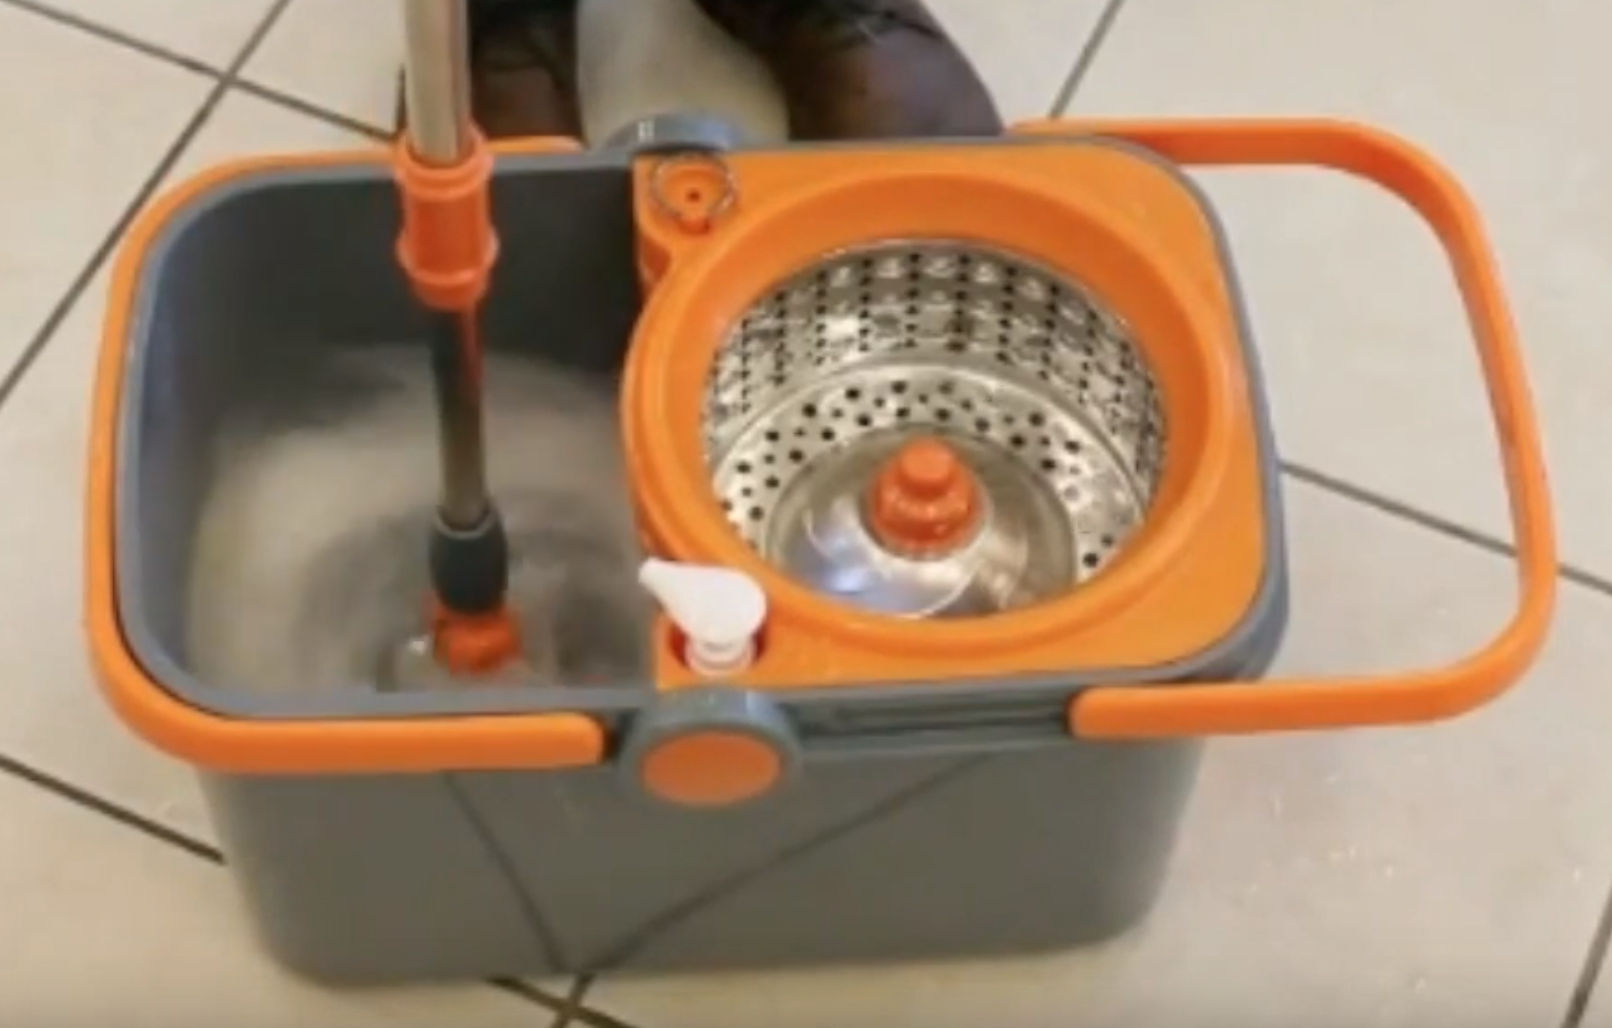
If you need to mop a large floor to just remove dust, then consider the Casabella Spin Mop. There are many spin mops on the market but this one not only spin dries the mop to remove excess water before each mopping, it also spin rinses the mop to remove dirt.


If, on the other hand, you need to mop a small area that has stuck-on dirt, like in a kitchen or bathroom, then the Bissel Steam Clean mop would do you well. The steam from the mop will melt dirt so it can be mopped away.