This is my usual workflow when filming and editing 360 videos using the Insta360 ONE X2/X3 and Corel VideoStudio Pro.
Hold or Mount the Camera
Selfie Stick in Hand
When I’m walking, I like to hold the selfie stick in my left (or right) hand with the stick extended such that the camera lens is at face height. Optionally, the point of interest could be behind me. In post-production reframing, I could rotate the view to sometimes face me and sometimes face some other direction.
Selfie Stick on Tripod
In certain situations, I’ll turn the selfie stick into a tripod and place it on the floor/ground or on a table.
Chest Mount (Body Cam)
When I don’t want to hold the camera for a long time or when I don’t want people to know that I’m filming them, e.g. when boarding an airplane, when standing in a subway car or bus, when buying something, etc, I’ll mount my camera to my chest.
There are many ways to hold or mount the camera. Read my other post to learn more.
Enable Quick Capture
This mode lets you push the shutter button to do two things at once
- Turn on the camera and start recording
- Turn off the camera and stop recording
While traveling, this can be really handy since you won’t have to waste time clicking two different buttons and waiting in between.
The recording mode will be the last mode used. If you switched the mode to timelapse and then turned off the camera, then the shutter button will turn on the camera and start recording in timelapse mode, not regular video mode.
Enable Standard Video Mode
This mode is for regular video shooting. Other modes are HDR, Timelapse, Timeshift and Bullet Time. HDR is only good for when you are filming on a tripod and not moving.
Disable Prompt Sound
By default, when you turn on and off the camera or start and stop recording, you will hear an annoying beep. Disable this “Prompt Sound”. To know whether the camera is on, off, or recording, just look at the light status.
- Light off = camera off
- Light solid blue = camera on
- Light slowly flashing red = filming in progress
Press The Shutter Button to Start Filming
Fingerprints on the lenses can result it blurry videos. Always wipe the lenses with a clean lens cloth before filming.
When you are out and about traveling and you want to start filming, just press the shutter button once. Since Quick Capture will be enabled, you won’t need to turn the camera on first. Note that there is a bit of a delay before the camera actually starts recording.
Press The Shutter Button to Stop Filming
When you are done filming, just press the shutter button once again. Since Quick Capture will be enabled, you won’t need to turn the camera off as it will turn off automatically (and save battery).
Install the Insta360 Studio Desktop App
https://www.insta360.com/download/insta360-onex2
Note: The latest Windows version of the Insta360 Studio app is version 4.3.0, which came out on 2022-05-24. The previous version is 4.2.2. I have found version 4.3.0 to have significant performance issues so I have reverted back to version 4.2.2 which performs just fine.
See Insta360 Studio versions
Download Insta360 Studio v4.2.2
Transfer Videos to Your Computer
Connect a USB cable between the camera and your computer. On Windows, it auto-detects the camera as an external drive. You can then copy and paste the .insv files. Note that each video contains 3 .insv files. For example, below there are actually only 2 videos.

Note that transferring video files from the Insta360 ONE X2 to your computer can be really slow. For example, when I transfer files from the Insta360 ONE X2 to my laptop over USB C, it transfers at about 30 MB/s.
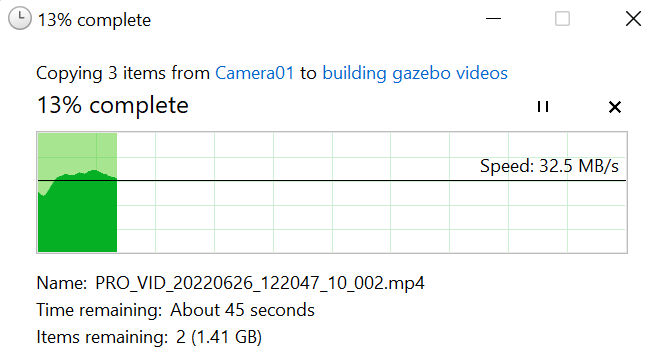
To speed this up, use a USB 3 card reader. I use this one: SanDisk MobileMate USB 3.0 microSD Card Reader- SDDR-B531-GN6NN

Back up files
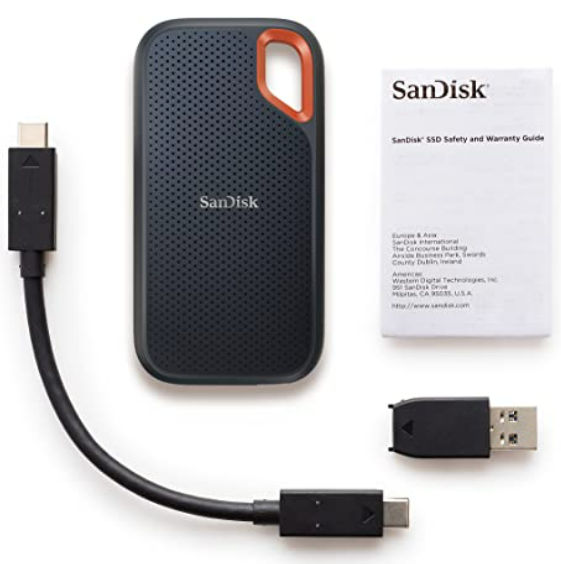
Video files are huge. You may not have enough space on your laptop to store video files. And even if you did, you should have a backup, e.g. on an external SSD. I like the SanDisk Extreme 1TB Portable External SSD Flash Storage Drive, which claims to have a data transfer rate of up to 1050MB/s.
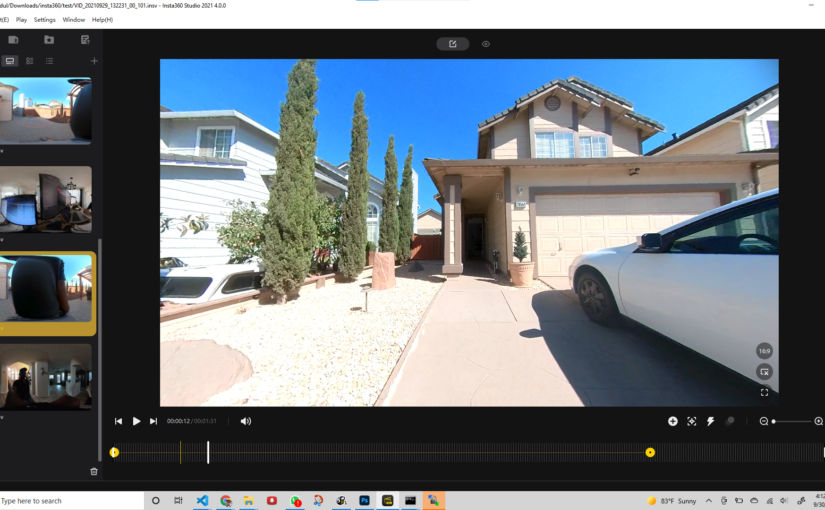
Import the .insv Files into Insta360 Studio
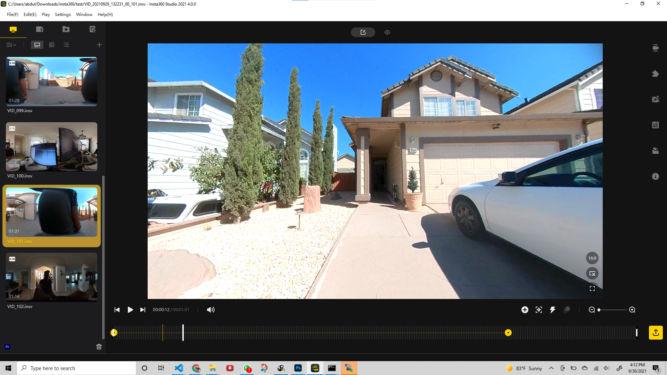
In the left pane, you will see thumbnails for all uploaded videos. .insv files are unstitched 360-degree files that can only be opened in the Insta360 Studio or mobile app.
Reframe the 360-Degree Video
In the right panel, you will have many options. Enable FlowState Stabilization so that the video isn’t jerky. If you want the video view to always face one direction (front), then enable Direction Lock.

At the top, you’ll see two icons. One for edit mode and one for view mode. Ensure edit mode is on. In the video preview window, you’ll see an option to change the video aspect ratio. The most common is 16:9, e.g. for TVs and YouTube.

To reframe the 360 video, you’ll need to first add keyframes at each timestamp where you want to change the angle and lens of the video. Drag the white vertical playback bar to the very beginning of the timeline and click the + icon.

This will add a yellow circle at that timestamp, indicating that a keyframe is there. Also, the + icon turns into an x icon in case you want to delete that keyframe. Clicking on the keyframe shows options where you can choose the lens type, e.g. fisheye, etc. Choose “Natural View”. Then, drag the video preview in any direction you want so that the video beginning at that keyframe will point in that direction.

When you click “Natural View”, the Field of View (FOV) value will change to the default value of 90 degrees.

Following is what the FOV looks like at 90 degrees.
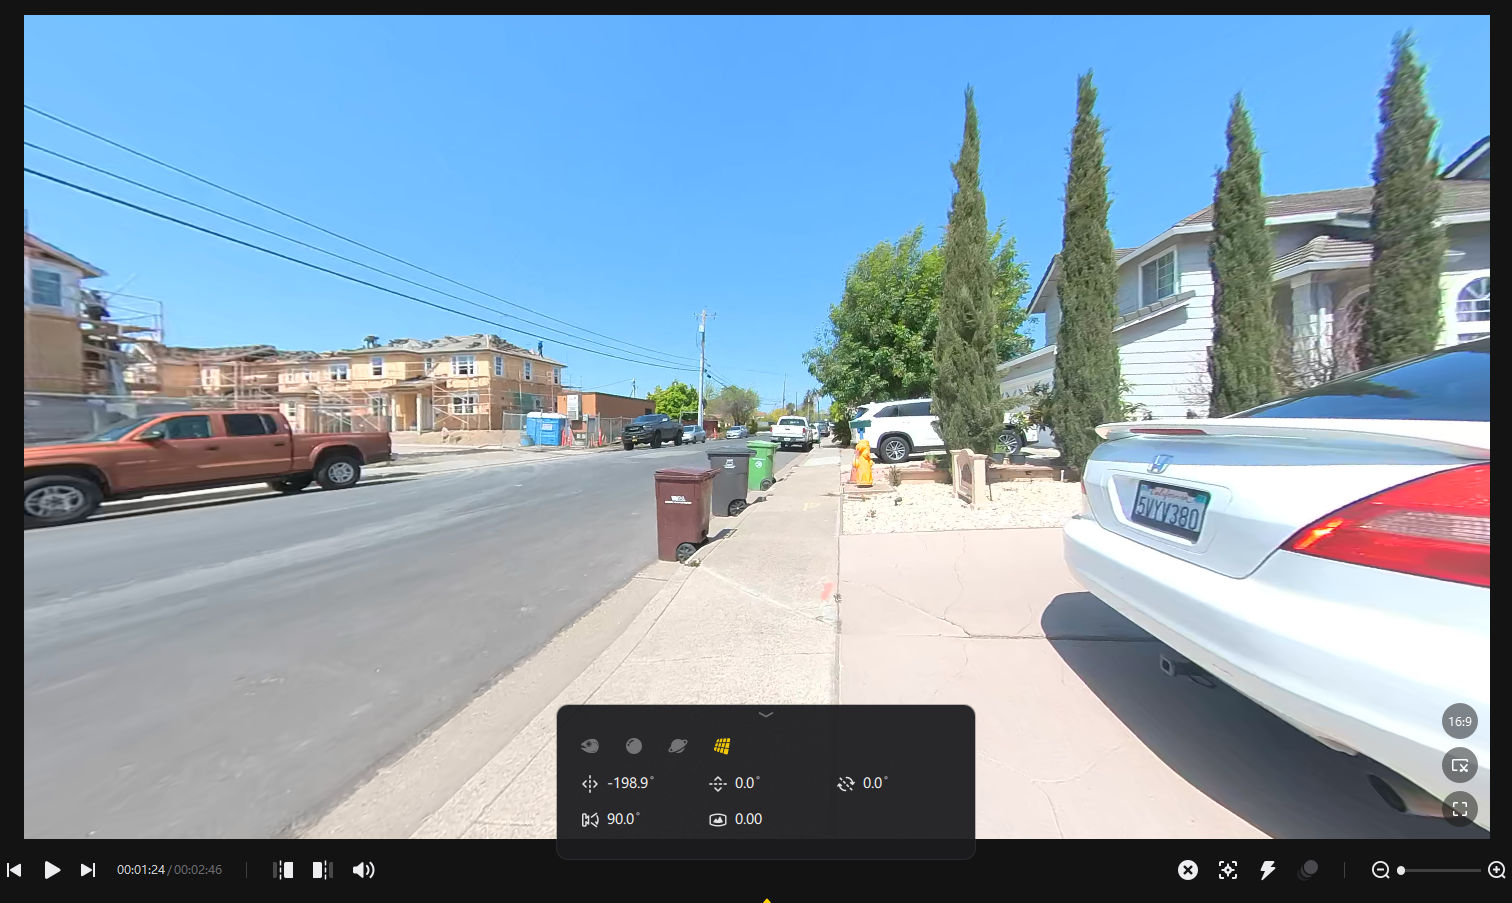
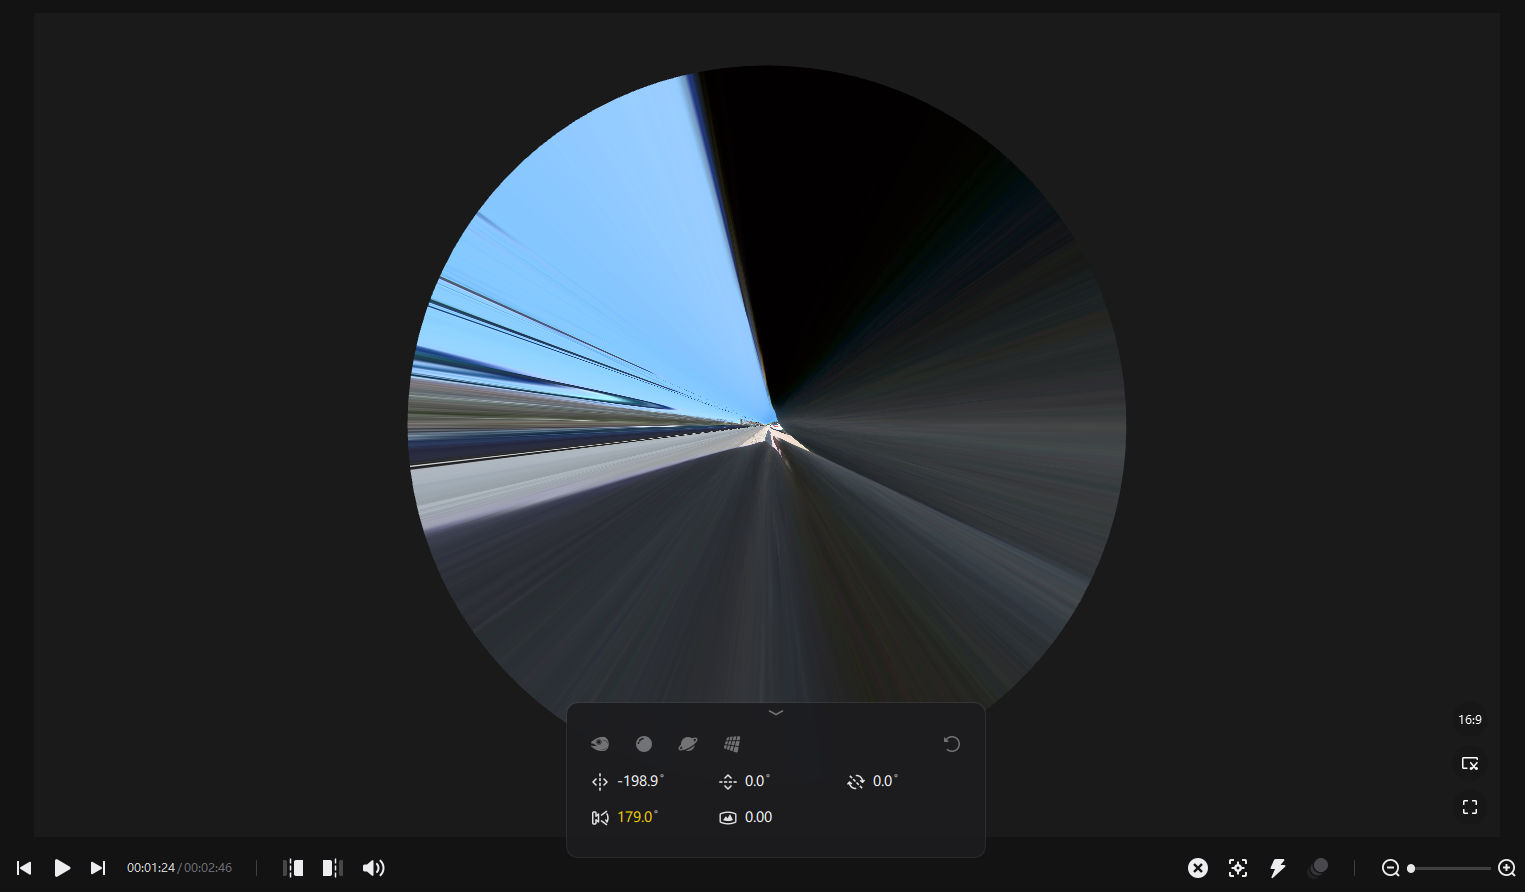
You can increase the field of view (like zooming out) and decrease the field of view (like zooming in). Since the ONE X2 is a 360 camera with two 180-degree lenses, you can increase the FOV to a max of 180 degrees (actually 179 degrees). You’ll end up getting a circle like the one below.
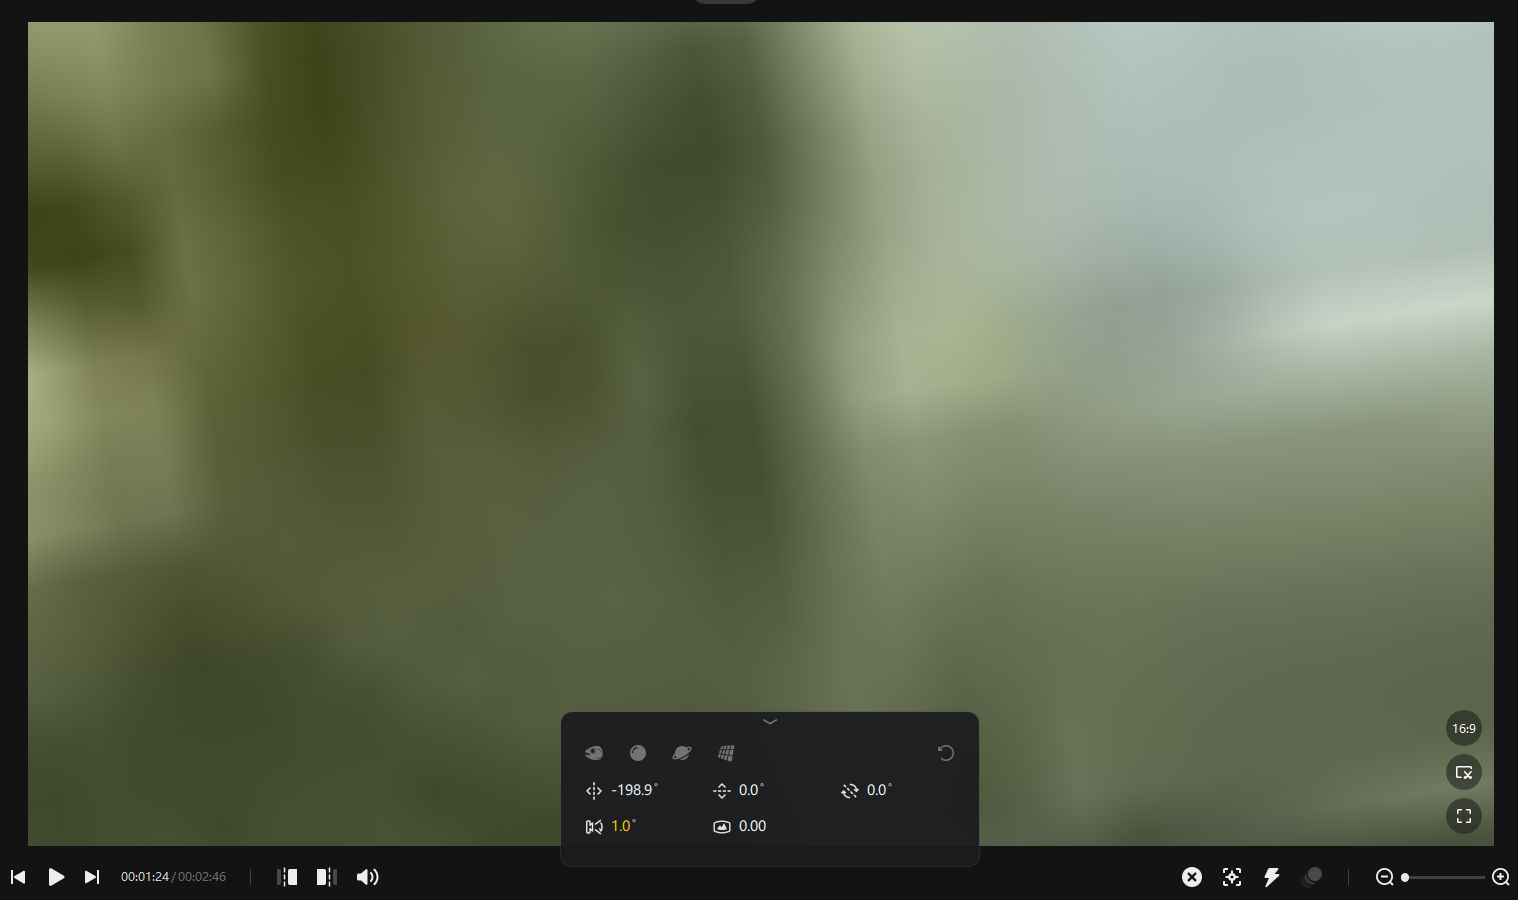
The smallest FOV is 1 degree, which results in such a zoomed-in view that is just blurry, like below.
Drag the playback bar to another timestamp and repeat the steps above. You will see a yellow line connecting the two keyframes.

Clicking on the yellow line will allow you to choose a transition between the two keyframes. “Smooth Dissolve” is a good transition. If you choose “None”, for example, and the camera angle is facing the sky in keyframe 1 and facing the ground in keyframe 2, then at the beginning of keyframe 2, the video will jump from facing the sky to facing the ground. With the “Smooth Dissolve” transition, the video will transition slowly from facing the sky to the ground.

Click the lightning icon to enable Timeshift.

Then drag in the timeline where you want the timeshift to occur and choose a speed from slowing down at 1/4x speed to speeding up to 64x speed. Sections that are timelapses will have their audio muted.

Note: Creating a timelapse in a video editing tool like Corel VideoStudio is easier and comes with more options. Also, it preserves the audio.
When you are done adding keyframes, setting camera angles, and adding timeshifts, adjust the picture color, if necessary. Click the media processing icon and compare the color when Color Plus or AquaVision 2.0 is enabled.
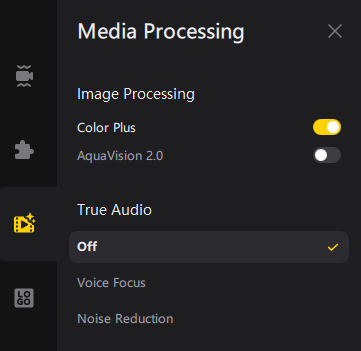
Below, you can see the difference in color between the default color and with Color Plus or AquaVision 2.0 enabled.


The AquaVision 2.0 setting is for taking underwater pictures. It produces a brighter picture. The Color Plus setting produces vivid, more saturated colors. It especially helps improve skin tone when the subject is in a shade.
Note: Adjusting color in Corel VideoStudio is better as you can tweak the color settings.
When you’re done adjusting for color, click the yellow Export button on the right of the timeline.

This will give you many options. Choose “Reframed Video” and leave the default as H.264. If you choose H.265, the video won’t open in certain programs like Corel VideoStudio Pro.
When exporting videos in the Insta360 Studio app, I tested various bitrate settings from 1 mbps to 200 mbps (max). I saw no difference in quality between 25 mbps and 200 mbps. I also did not see a difference in file size and quality between h.264 and h.265. So, I choose h.264 at 25 mbps.
Then, click the Start Export button.

Tweak video color in Corel VideoStudio
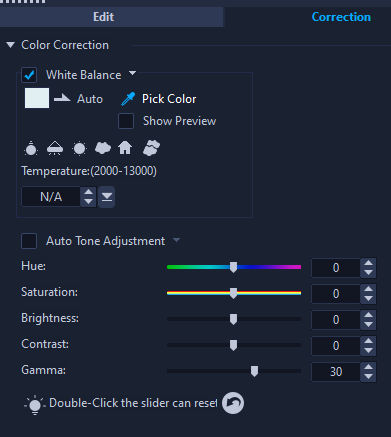
In VideoStudio 2018 Pro/Ultimate, double-click on a video clip in the timeline. In the Correction tab, slide the Gamma slider to the right to lighten the video. This may throw the white balance off. To fix the white balance, check its checkbox, click “Pick Color,” and click on a pixel in the video that should be pure white, e.g. a white napkin.
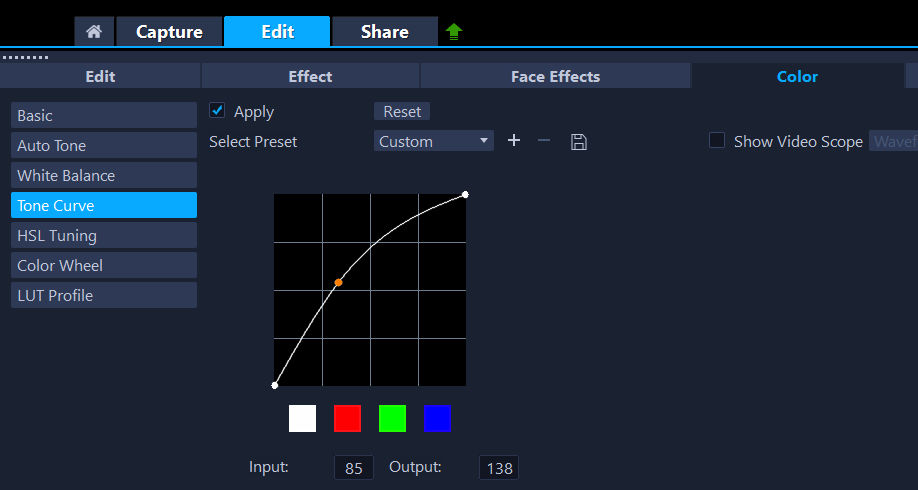
In VideoStudio 2018 Pro/Ultimate, double-click on a video clip in the timeline. In the Color tab, choose Tone Curve and drag the curve. Usually, dragging towards the top left produces a brighter picture.
Edit video in Corel VideoStudio 2022
Note: Corel VideoStudio 2018 used to work fine but, at least for me, it now hangs even after installing and running it on a brand new computer. Corel VideoStudio 2022, however, works fine.
This step assumes you have already reframed and exported the videos.
Under Settings, Smart Proxy Manager, ensure “Enable Smart Proxy” is checked. This will cause VideoStudio to create a small proxy video for videos that are large. This will help with video editing performance.
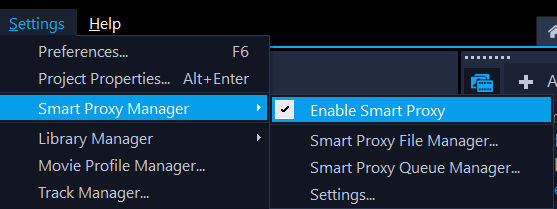
In the Edit tab, create a project, e.g. Korea, and drag all assets to it (photos, videos, audio, etc).
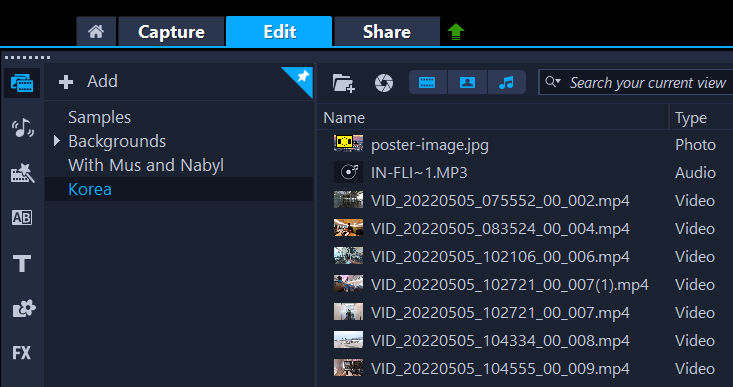
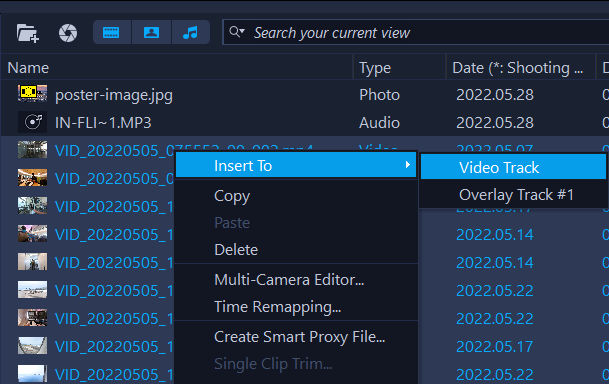
If the assets are in the order you want them inserted in the timeline, then select multiple assets, right-click, and choose “Insert To > Video Track”. This will make it quick and easy to insert multiple assets at once.
Go to Settings > Smart Proxy Manager > Smart Proxy Queue Manager. You may see a window like the one below. If you see video files in the list, that means VideoStudio is in the process of creating proxy video files. When it’s done, the list will be empty. Until it’s done, leave VideoStudio alone since editing before it’s done could be slow and possibly crash the program.

If you’ve added a song to the Music track, and you want to lower the volume of the song for a section of a video clip, e.g. when someone is talking, then do the following:
- Click the sound mixer icon
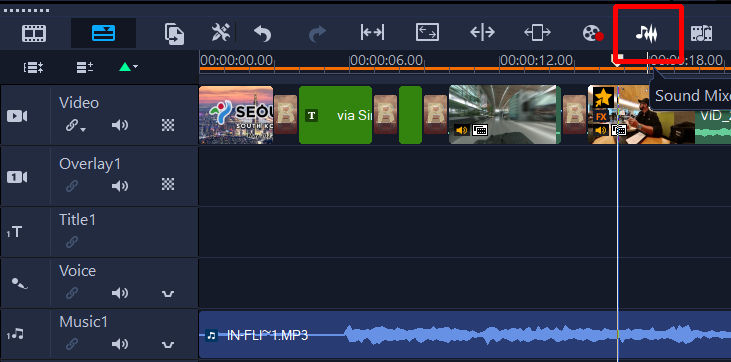
Then tracks will change like below.

The white line is the audio volume line. Notice how on the music track, the volume line goes down at one point and then up at another. This was done to lower the volume of the song during that time range only. To lower the volume, move the playback marker to the point along the orange line where you want to change the volume. Then, in the sound mixer, change the dB value for the track you want to change the volume of. In the screenshot below. the music track volume was lowered to -20 dB,
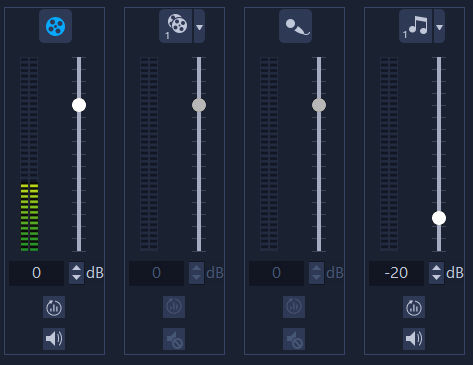
VideoStudio will gradually change the volume from one point to another. If you want the volume to change immediately, then you’ll need to add another marker next to the first one.
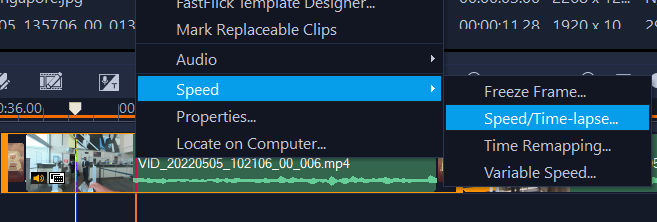
If you want to speed up a video clip, right-click on the clip and choose Speed > Speed/Time-lapse…
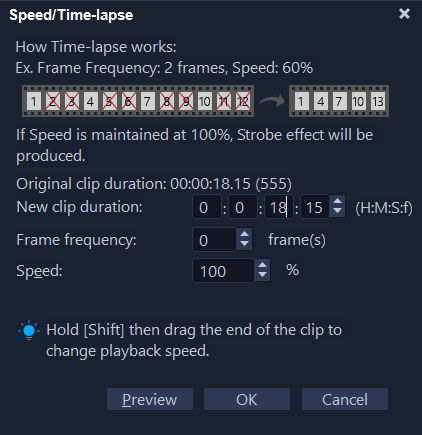
This will open a dialog like the one below. Change the duration of the new clip, e.g. from 18 seconds to 8 seconds, and then click the Preview button. If the preview looks good, click OK to apply the timelapse.
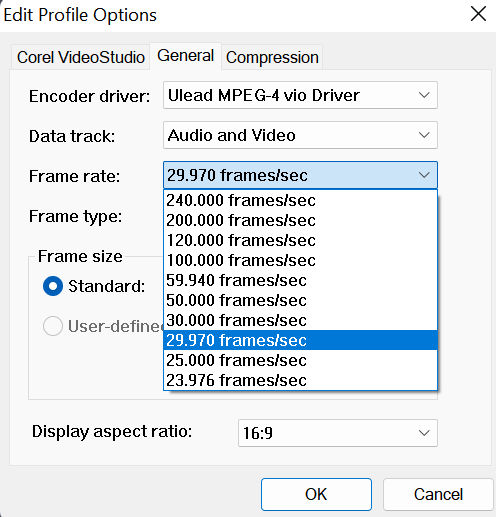
Before you export the video from Corel VideoStudio, note that the input video clips exported video from Insta360 Studio have 29.97 frames (still images) per second (fps).

Corel VideoStudio may default to choosing export settings of 30p (30 fps). If you choose this setting, the audio will not be in sync with the video.
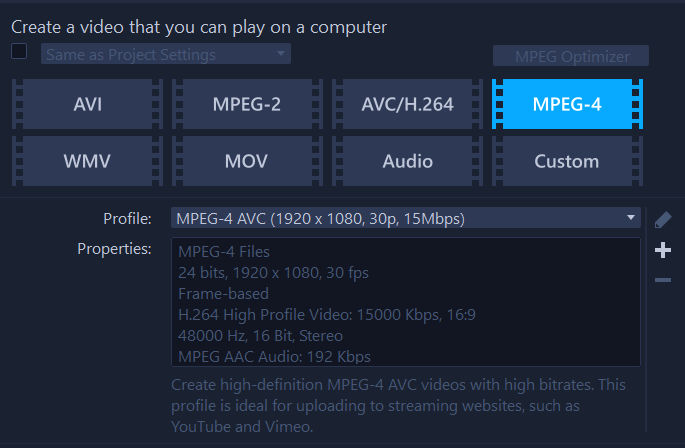
Corel VideoStudio doesn’t have a preset for 29.97p (29.94 fps).

So, you’ll need to create your own profile preset and choose a frame rate of 29.97 fps.
Workflow Summary
- Take 360 videos
- Transfer videos to SanDisk external SSD drive
- Open 360 videos in Insta360 Studio. 360 videos have huge file sizes.
- Take snapshots, if going to make video of pics.
- Convert them to natural view mp4s which are much smaller. For each video,
- Enable ColorPlus, if necessary
- Set start and end positions, if necessary
- At start position, set the field of view (FOV) to “Natural View”
- Add additional FOV points to change viewing angle, as necessary
- Click the Export button, chooses “Reframed Video”, set bitrate to 25 Mbps (25000 kbps), h.264 (not h.265), and click “Add to Queue”
- When done editing each video, click “Export All”

- When the batch of 360 videos has been converted to mp4s, select them all in Insta360 Studio, right-click, and select “Delete Original File” to delete the large 360 videos.

- If you want to extract many clips from a single video clip, use Shotcut.
- If you want to merge many video clips almost instantly, use LosslessCut.
- Open Corel VideoStudio and add all assets (photos, videos, etc)
- Edit videos as usual
- When exporting the video, make sure the following settings are set to prevent an unnecessarily large file from being generated.


