

Free, Quick, and Easy Website Builder With Optional Password-protected Pages

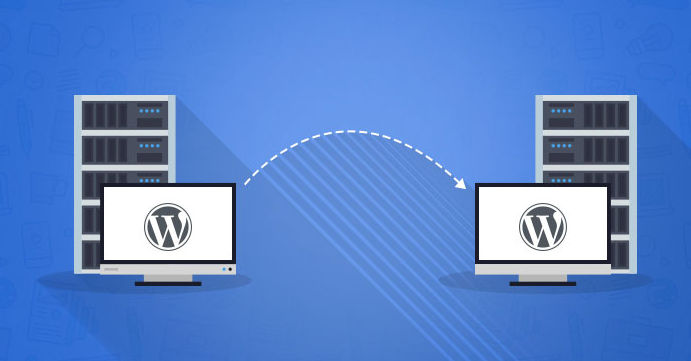
Many people just need to create a simple website. There are many online website builders that offer this including Google Sites. However, what if you also need to simply password-protect some pages. WordPress.com makes this very easy. Following are steps on how to create a clear, no-frills website using WordPress.

1. WordPress.com

Go to https://wordpress.com/ and create an account. You can choose all of the free options and pick any theme.

2. Simple Theme

There are many free themes to choose from. But, if you want the most basic and intuitive theme, click on Appearance > Themes > search for the “Twenty Fifteen” theme and activate it.

3. Create Pages

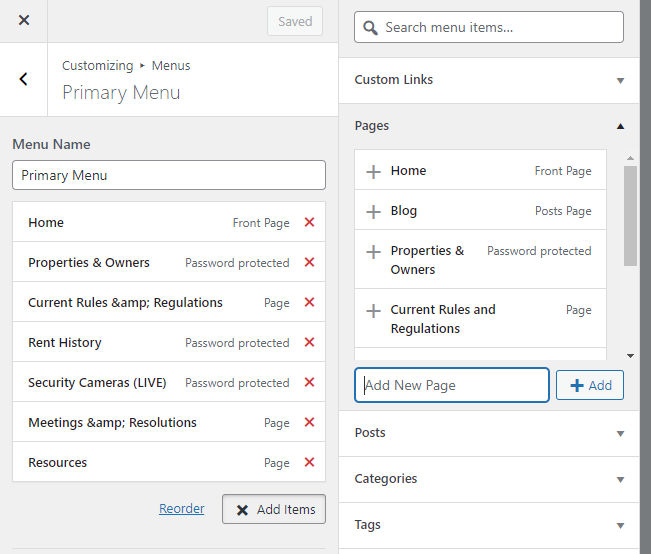
Click to “customize” the theme and then choose “Menus” > Primary Menu. There will be two pages by default: Home and Blog. If you are not creating a blog, you can delete the Blog page. Then, click “Add items” > Add New Page” and add as many pages as you like. You will then need to drag the pages from the right column to the menu in the left column.

4. Edit Pages

While still in the Customize view, you can preview the site in the right column and click on the various menu links you just created. For each page, you can click the “Edit” link which will take you to the page editor view.

5. Paste Images

The nice thing about the page editor is you can just paste images where you want them and WordPress will upload the images for you. There’s no need to have an image file on your computer and then browse to it to upload it.

6. Password-protect Pages (Optional)

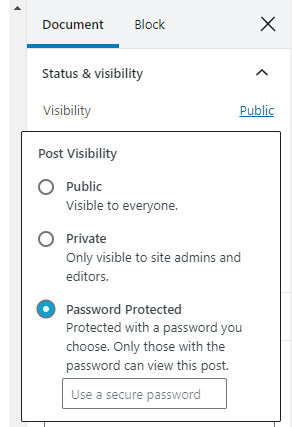
If you want to password protect some pages, then in the right column of the page editor view, click Document > Public > Password Protected and type in a password.

Once you publish your site, password-protected pages will appear as follows:

Once you enter the password, you’ll have access to the page’s content.

7. Publish

Now, you can click the “Publish” button to publish new page and the entire site. The site will be accessible at XXXX.wordpress.com where XXXX is customizable. You can also pay to buy a custom domain and link it to your new site.

Batch Save for Web JPGs in Photoshop

We often take pictures with our smart phones which may save photos at very high resolutions resulting in large file sizes. What if we want to quickly resize and compress these images for uploading to a website or sharing via email. One quick was is to use Photoshops Image Processor Automation Script.

File > Script > Image Processor

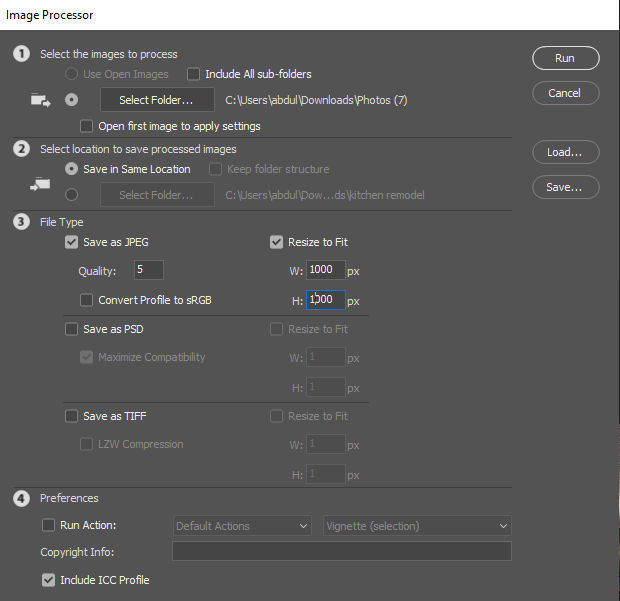
You’ll then see a dialog where you

  1. select a folder containing the large images
  2. select a location to save the processed images
  3. check a file type (JPG) and optionally resize the image to fit within a specified width and height

Then, just click the Run button and Photoshop will do the work.

360° Virtual Tours and Wide Panoramic Images

To create a 360° virtual tour, you’ll need a few things:

360° camera

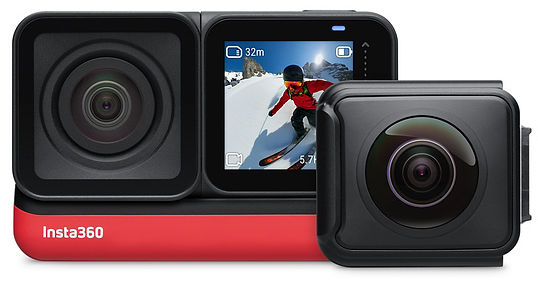
Insta360 One R Twin Edition

The Insta360 One R Twin Edition camera seems like a good choice because it can double as an action cam. It’s currently on sale for $410.

Pros:
  • Modular and therefore can add modules that offer different / better features
  • HDR (high dynamic range) for better image quality
  • More advanced desktop editing software
Cons:
  • Modular and therefore can be a hassle to have to switch modules, especially quickly in order to capture a moving target

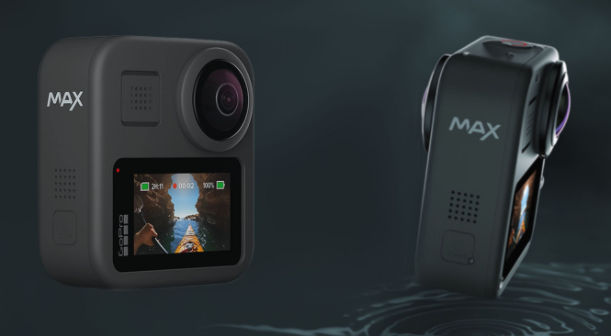
GoPro Max

Pros:
  • Easy to use without having to assemble modular parts
Cons:
  • No HDR (high dynamic range)
  • Desktop editing software not as powerful as the Insta360 Studio

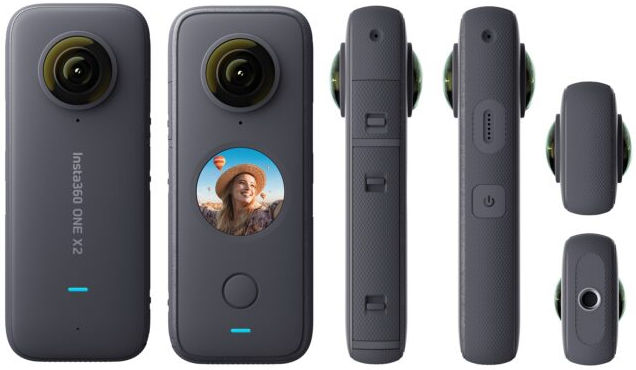
Insta360 One X2

Pros:
  • Small
  • HDR (high dynamic range) for better image quality

Ricoh Theta SC2

After testing the GoPro Max, Insta360 One X2, and the Ricoh Theta SC2, it clear that the Insta360 One X2 is the better camera.

Virtual Reality / 3D Panorama Software

Marzipano

Marzipano is free and open source. You can use the Marzipano tool to quickly upload 360 photos and then download a complete website with all code to host yourself. However, you can only zoom out so much as shown in the screenshot below.

Kuula

Kuula lets you upload 360 photos and embed a 360 viewer of your photos on your website. You can also zoom out much more than with Marzipano as shown in the screenshot below.

You can then take a screenshot of the zoomed out 360 photo which doesn’t show very warped and curved lines.

Metareal

Metareal is a great alternative to MatterPort. You can create floorplans as well and pay a nominal fee to have Metareal convert your 360 photos into virtual tours for you.

Photoshop

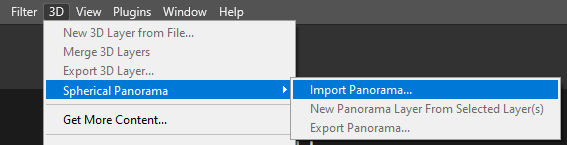
In Adobe Photoshop, you can import a 3D panorama photo

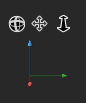
In the lower left corner, when you have the white grid enabled, you will see orbit, pan and dolly buttons to move the image around.

Under Properties, you can adjust the Vertical FOV (Field of View) to zoom in and out.

GoPro Player Desktop App

The GoPro Player desktop app will also open 360 photos and let you rotate and zoom in and out. But, unlike Photoshop and Kuula, you’ll get a fisheye view as shown below.

Google Photos Mobile App

The Google Photos mobile app has a Panorama feature but you have to move your camera horizontally or vertically to capture create the panorama. It’s not a full 360 degree panorama but it does support scrolling in Google Photos.

Insta360 Studio

The Insta360 Studio desktop app is definitely better than the GoPro Player desktop app. It’s got more features and is intuitive to use.

Convert Text to Speech Using Google API

If you go to Google Translate, you can not only translate text from one language to another, but you can also listen to the translation. For example, this English to Chinese translation allows you to listen to the pronunciation of the Chinese text.

Google’s Cloud Text-to-Speech API allows you to programmatically generate mp3s of any text. Below are steps to do it on Windows using PHP.

1. Follow These Instructions

https://cloud.google.com/text-to-speech/docs/quickstart-client-libraries#client-libraries-install-php

2. Set Environment Variable

When you follow the steps above, you will download a JSON file containing your credentials. You need to set an environment variable by opening a command prompt and entering

set GOOGLE_APPLICATION_CREDENTIALS=path-to-json-file

You can then verify it is set by typing “set”.

That environment variable is temporary and will persist for the duration of the terminal session. To set the environment variable permanently, follow these steps.

3. Install PHP Composer

https://getcomposer.org/download/

Composer will need a php.ini file. If one doesn’t exist, it will create one.

4. Update php.ini

To ensure your SSL certificates are up-to-date, download the latest cacert.pem from https://curl.haxx.se/ca/cacert.pem. Then, edit php.ini as follows:

curl.cainfo=”/path/to/downloaded/cacert.pem”

5. Create PHP Script

Copy and paste the example code from the instructions in step 1. This is a PHP script so wrap the code in <?php … ?>. Save it as test-text-to-speech.php somewhere.

6. Run PHP Script

At the command prompt, verify the Google environment variable is set and then run the PHP script. If PHP is in your path, you can run, for example,

This will output an audio file (output.mp3) in the same folder. By default, the text is “Hello, world!” and the language code is en-US. You can change the text to Chinese, for example: 这是一个测试 and change the language code accordingly to cmn-CN. Then, you’ll get the same speech as what you hear in Google Translate.
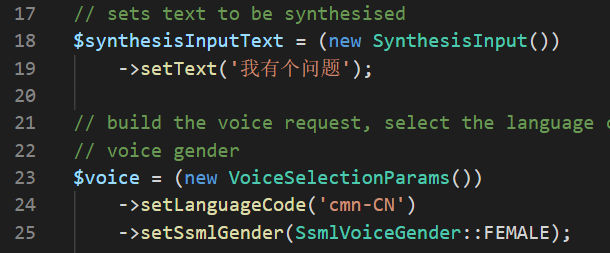
See list of text-to-speech voices (language codes)

There are two types of voice synthesis models: standard (parametric) and Wavenet. Wavenet is more expensive but sounds more natural.

Google Text-to-Speech pricing is based on the number of characters processed.

For additional customization of text to speech, use Speech Synthesis Markup Language (SSML).

Web Paint: Simple Chrome Extension to Annotate on Screen

Have you ever needed to make notes on screen like a web page to then share with others. You might first take a screenshot and then edit it in some program or buy an app like TechSmith SnagIt. A simpler option would be to install the Web Paint extension in Chrome. When you click on the extension, it opens this panel

Then, you can type, draw, add arrows, and so on then take a screen capture and share with others, e.g.

Quick JSON-based Web Forms

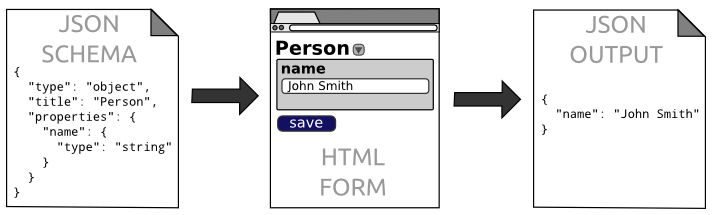
Many, if not most, web forms are backed by a database. But what if you just need a simple data store, like a JSON file, and you want to quickly and easily provide users with a user-friendly web form to make updates to the JSON data. JSON Editor takes a JSON Schema and uses it to generate an HTML form.

The generated JSON output can then be used by a templating language like Handlebars for building a web page.

JSON Editor supports many options including the ability to quickly style a form using CSS frameworks like Bootstrap.

For example, the following JSON schema

{
  "type": "object",
  "title": "Car",
  "properties": {
    "make": {
      "type": "string",
      "enum": [
        "Toyota",
        "BMW",
        "Honda",
        "Ford",
        "Chevy",
        "VW"
      ]
    },
    "model": {
      "type": "string"
    },
    "year": {
      "type": "integer",
      "enum": [
        1995,
        1996,
        1997,
        1998,
        1999,
      ],
      "default": 2008
    },
    "safety": {
      "type": "integer",
      "format": "rating",
      "maximum": "5",
      "exclusiveMaximum": false,
      "readonly": false
    }
  }
}

using the Bootstrap 4 CSS framework produces the following web form.

You can see a live demo in the JSON Editor interactive playground.

JSON Schema also supports validation so you can ensure your users are not submitting invalid data. For security reasons, this solution may not be good in a production environment by non-trustworthy people but it could work well in a secure, internal environment among coworkers.

Create an inline website editor using contenteditable

Let’s say you have a website and you’re tired of making constant updates to some portion of oft-changing content, e.g. a conference agenda. It would be nice to offload this tedious work to a content owner who so often makes typos. But this content owner is non-technical and is a visual person. They need a WYSIWYG editor that would allow them to make changes directly on what it is that they want to edit, not directly in a database or something cryptic like a JSON file.

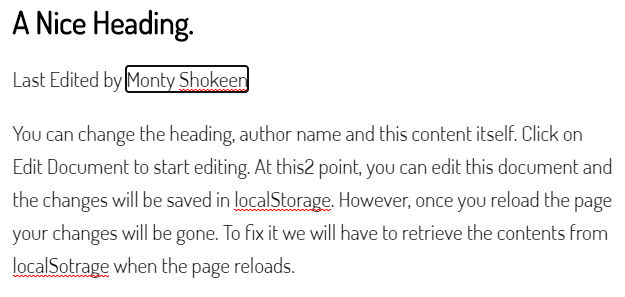
HTML5 supports the contenteditable attribute which makes any element editable. In the screenshot below, on a part of the byline is made editable.

Simple add the attribute “contenteditable=true” to the tag that wraps the text you want to make editable.

<p>Last Edited by <span id="author" contenteditable="true">Monty Shokeen</span>
</p>

When the content owner clicks on the text to editor, a black outline appears making it look like a form field.

The contenteditable attribute can be added to as many HTML elements as you want. Here is a live example showing three different editable fields with changes saved to local storage. Here’s an example showing how you can save the changes in JSON format and post it to a URL endpoint using AJAX or Fetch.

editor.js – a web-based WYSIWYG editor that outputs JSON

Many web developers are familiar with online editors like TinyCME. If you’ve edited a blog post in WordPress using the classic editor, then you know what I mean.

The problem with this type of editor is it’s too easy to accidentally output garbage HTML. WordPress has switched to offering a block style editor.

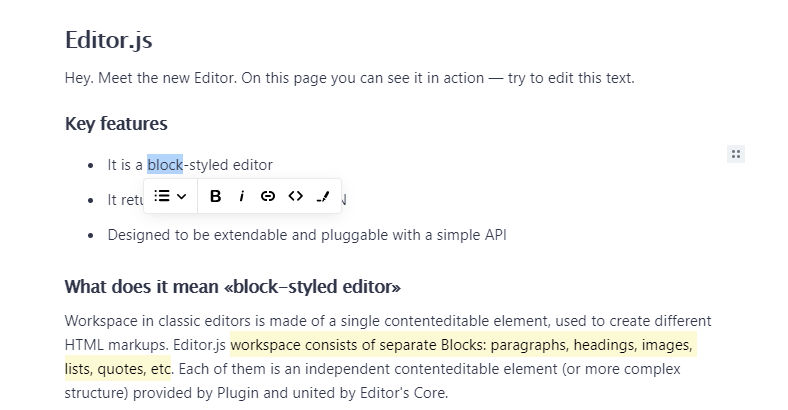
If you need to create a similar editor for your web project, editor.js offers inline block-style editing and it outputs clean data in json format.

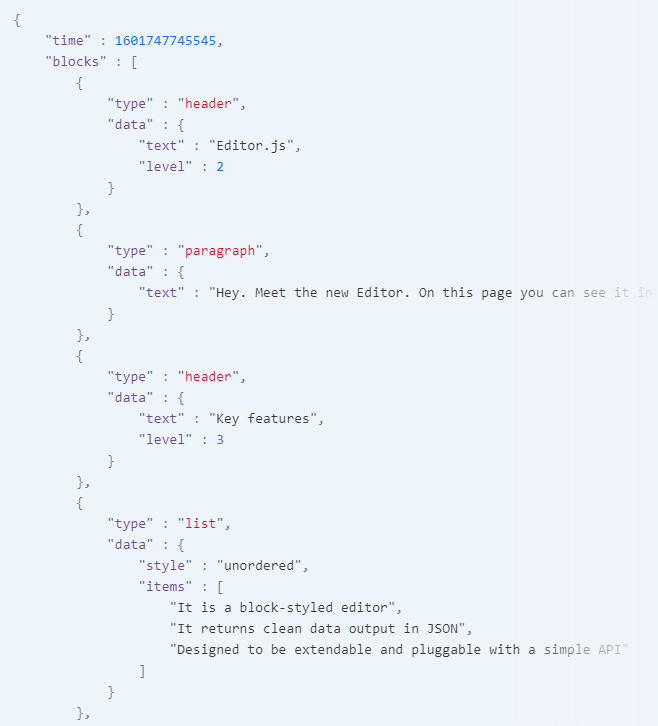
Here’s a screenshot of example JSON output which can then be used with

This JSON data can then be used with a templating language like Handlebars to build web pages.

Need Icons For a Website? Use FontAwesome!

Icons make a big difference in the look of a website. When placed beside text links, they make the links stand out. They can be used to replace text links, especially on mobile. They accompany text to make boring, text heavy pages easier to read. But, finding icons or creating them can be difficult. FontAwesome solves this by offering thousands of icons that are easily searchable. If I search for car, here’s what I see.

To use an icon, e.g. of a car, just paste this HTML code.

<script src="https://kit.fontawesome.com/8758af3809.js" crossorigin="anonymous"></script>

<i class="fas fa-car"></i>

Here’s a demo.

Batch Search and Replace in VisualStudio Code

Have you ever needed to do search and replace multiple times against the same file or set of files. If so, the Batch Replacer extension for VisualStudio Code makes this very simple.

  1. Open a folder or file in VisualStudio Code
  2. Create a new file (no need to save it) and enter some search and replace instructions, e.g.

In the example above, I want 3 different replacements done in the order shown and I only want the replacements done to a specific file. The “in” command is followed by the path of the file relative to the root of the workspace open in VS Code. If the file is open, you can get it by right clicking on its tab and selecting “Copy relative path”.

3. Execute the replacer script

To run the batch replacements, you active tab must be the tab containing your replacement instructions. Then, hit CTRL+SHIFT+P -> Batch Replace. A status window will appear in the bottom right corner telling you how many files have been modified. If you want to batch replace across all files in your workspace, don’t include the “in” instruction.