I like to make travel videos, but I don’t like to hold a camera or make it obvious that I’m filming people around me. I’ve been using the Insta360 X Series cameras with this magnetic chest mount, but it’s very heavy, bulky, and uncomfortable to wear.
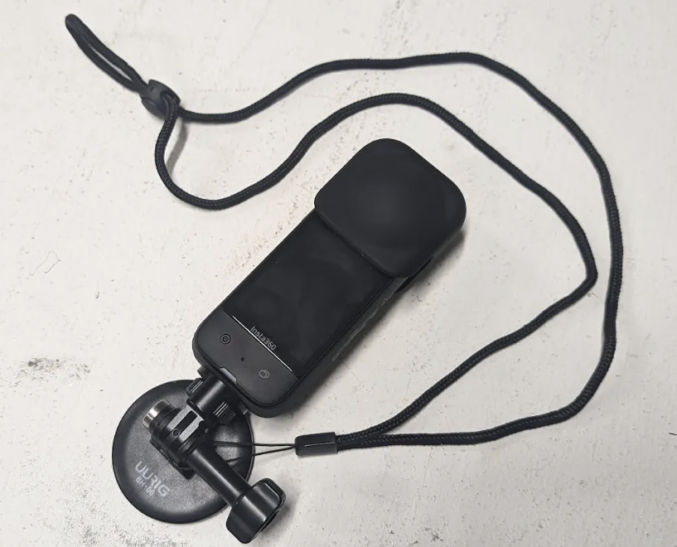
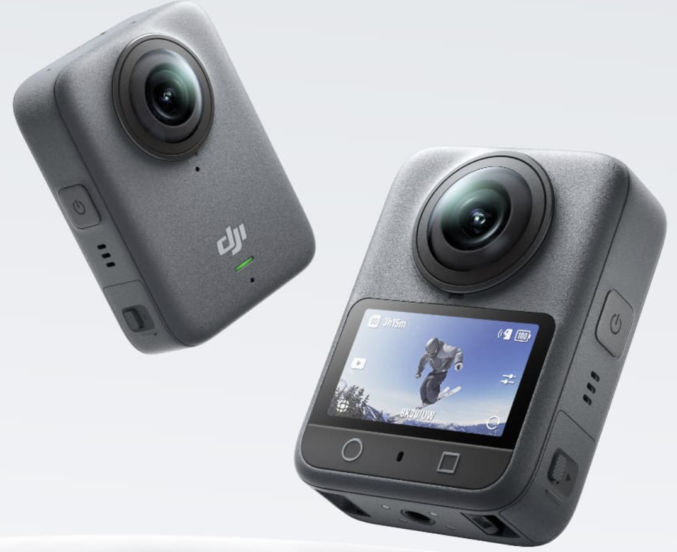
Fortunately, DJI recently came out with their own 360 camera, and it’s lighter and compact.
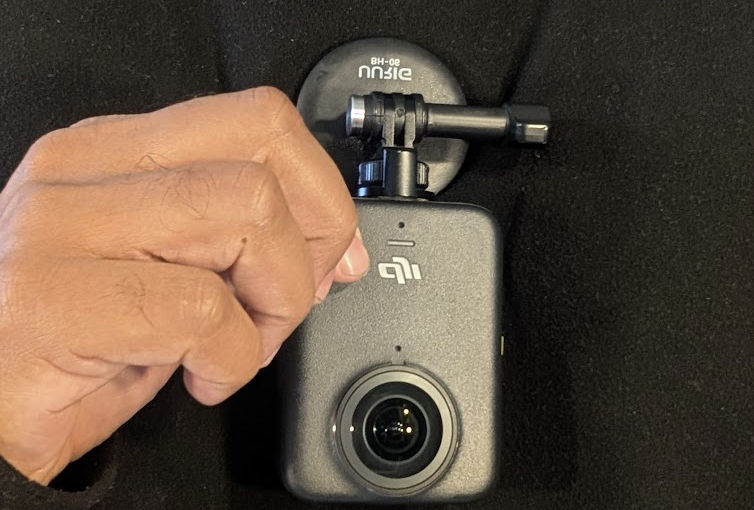
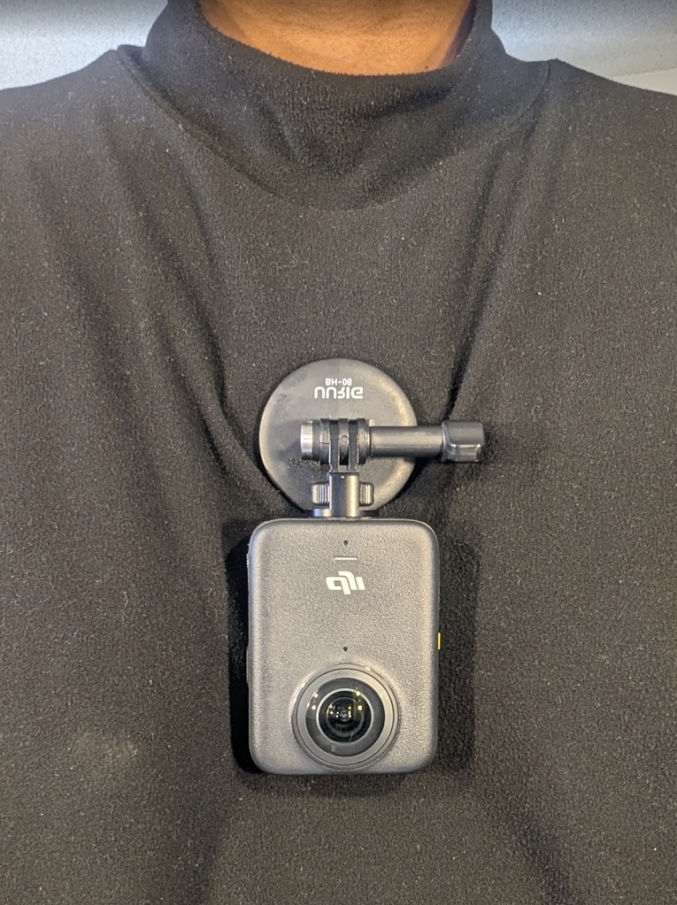
Just wear magnetic chest mount necklace, placing the magnetic mount under your shirt. Then, screw the complementary magnetic mount to the camera and rotate the round magnetic surface to mount the camera as shown above.
Since the camera takes 360-degree videos, you can adjust the angle in post-production, so you don’t need to worry of the lens is facing down or up to to the side.
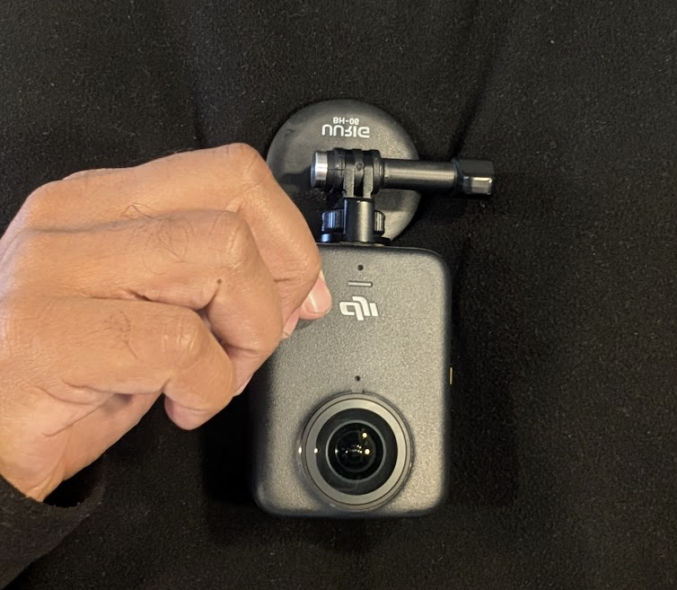
With the Snapshot feature, filming is as easy as clicking a button. With the camera off, just press either the record or function button to turn the camera on and start filming. To stop and turn off the camera, just press either button again.
I like to have the screen facing my shirt so no one can see that I’m filming them. You can have the screen turn off automatically, but it will take at least 3 seconds before it turns off.
With this setup, discreet POV filming is super simple and hands-free. My workflow is
When I’m ready to start filming, e.g., while boarding a plane, I press the record button. The camera turns on and starts filming in 360.
When I’m ready to stop filming, I press the record button again. The camera stops filming and turns off.
When I’m done filming for the day, I transfer the 360 videos to my laptop using a USB cable and I import the videos into the DJI Studio app for post-production (changing angles, trimming, converting to a flat video, etc).
Lastly, I import the flat videos into a video editing app like Capcut to combine the footage with other footage, like footage from holding my Insta360 X5 on a selfie stick.
I recently picked up an e-scooter and have been having fun scooting around on it. Now, I want to explore more places and make animated route maps. To do this easily, and to film my rides, I’ve come up with the following setup and process.
The Scooter (and accessories)
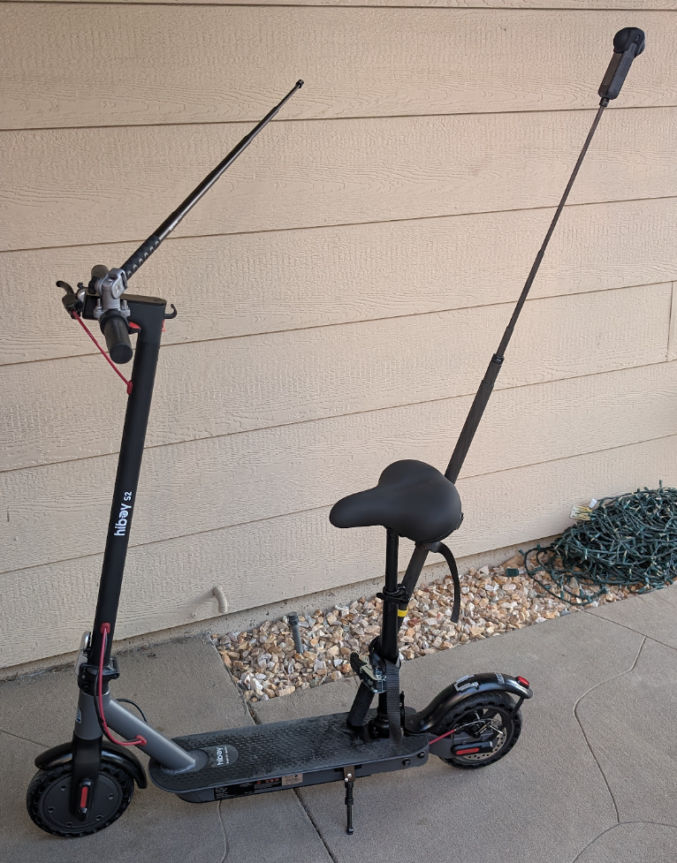
I have the HiBoy S2 electric scooter with seat.
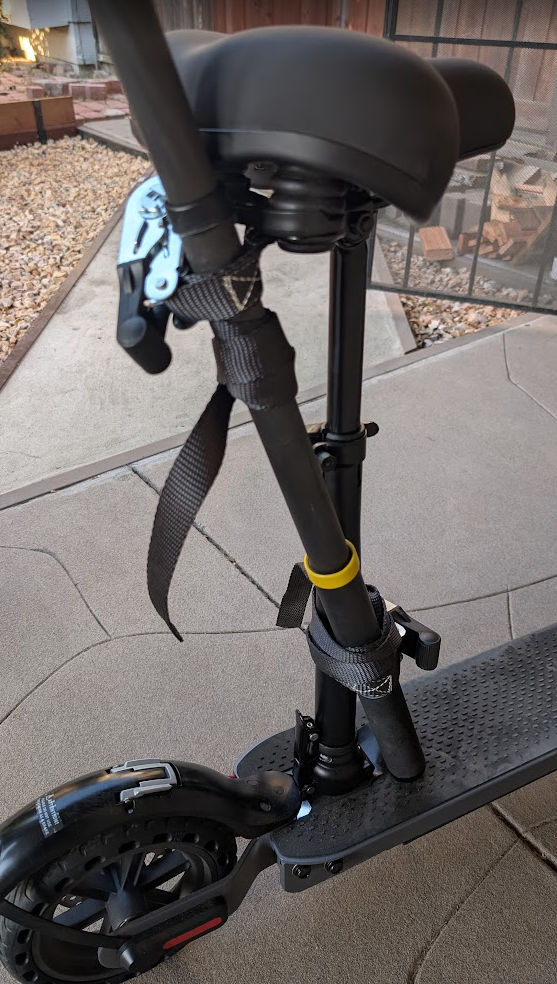
I strapped a 10′-selfie stick to the back so I can take footage like this.
I used two short ratchet straps.
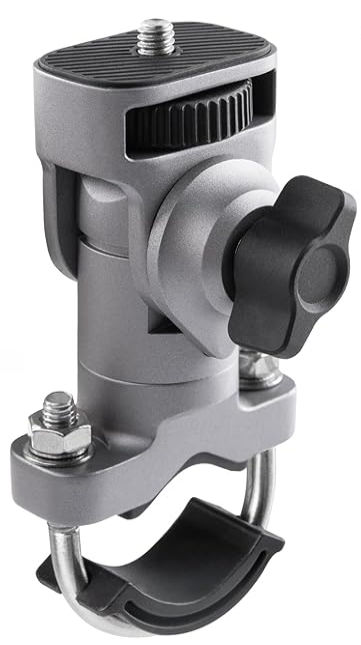
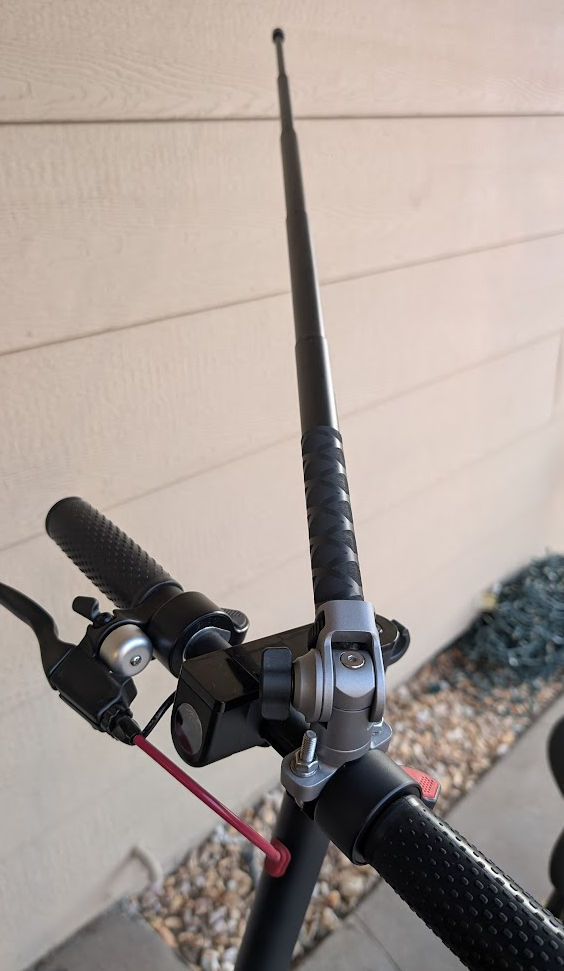
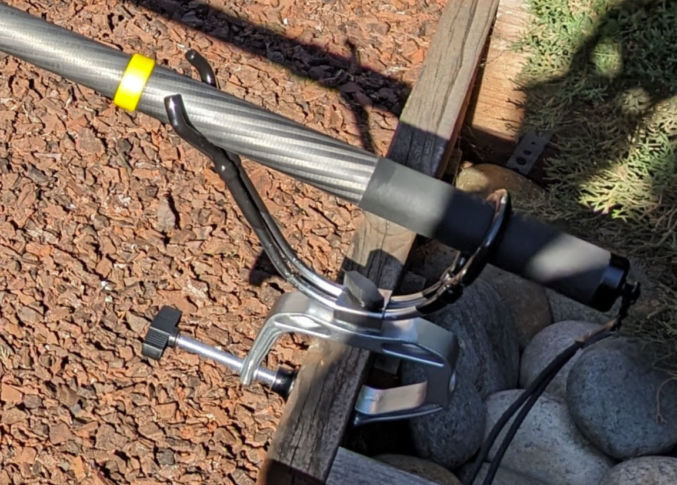
I installed this U-bolt mount on the handlebar to mount another selfie stick to get footage from the side like this.
and like this
depending on the angle and length of the stick.
Here’s what the U-bolt mount looks like.
For the camera, I use the Insta360 X5. Since it’s a 360-degree camera, it can capture everything around you.
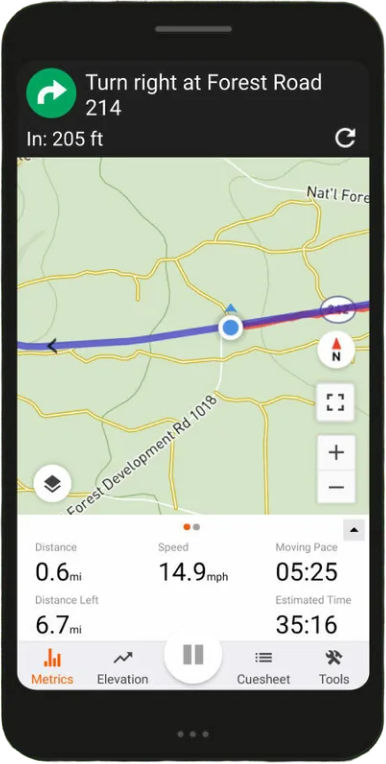
Make sure to get a handlebar phone mount, like the one below, so you can easily see turn-by-turn directions on your phone.
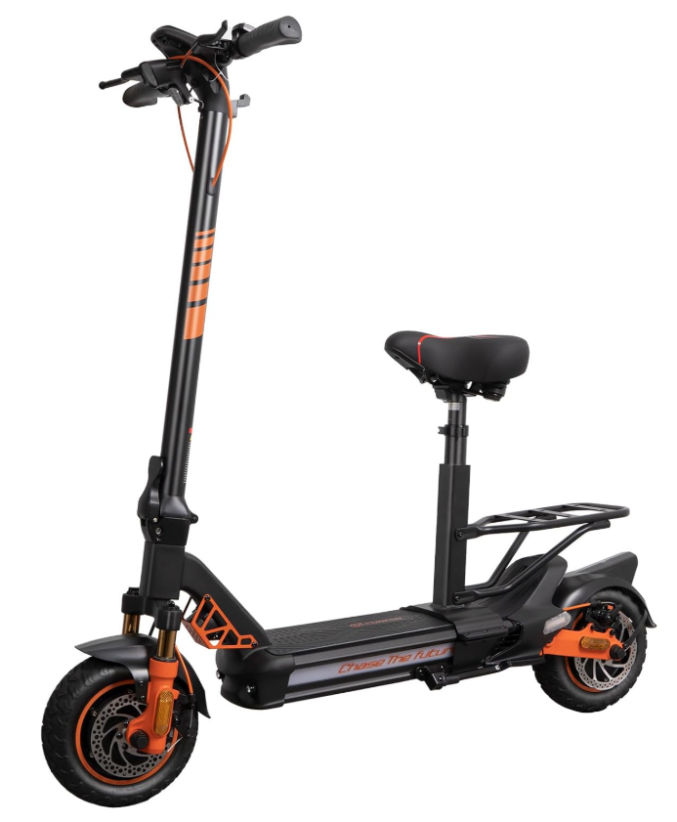
Next time, I might get this more powerful scooter instead.
Create a Bike Route
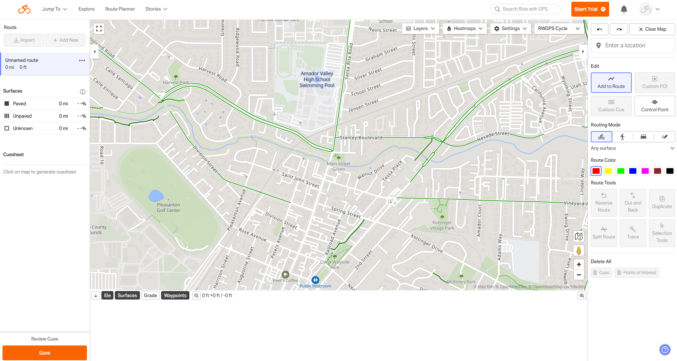
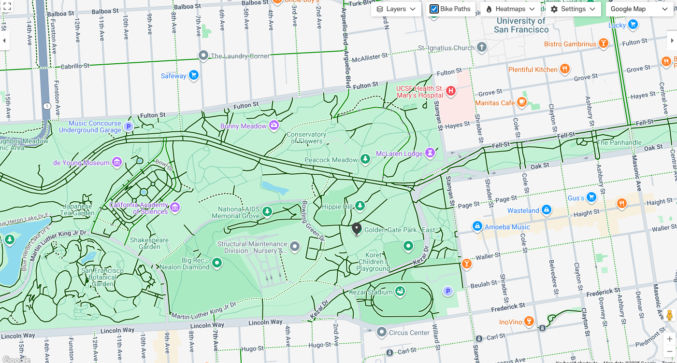
To create a bike route, I like to use the Ride With GPS website. Create a free account and then click “Plan a Route”. By default, you will see something like this.
I like to change the map from “RWGPS” to “Google Map”.
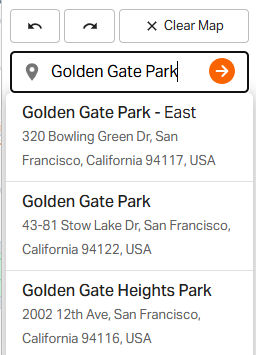
Let’s say we want to create a bike route in Golden Gate Park. Type “Golden Gate Park” in the “Location” field and choose one of the matches.
The map will show a location in Golden Gate Park.
Check “Bike Paths”.
You should now see a bunch of dark green lines representing bike paths.
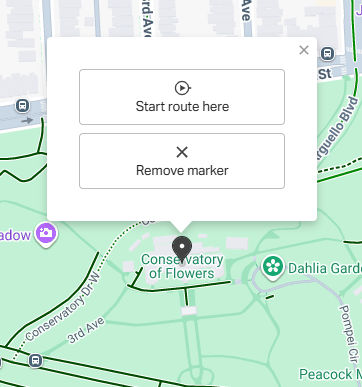
Let’s start the bike route at the Conservatory of Flowers. Search for it in the location field. A popup will appear on its location on the map. Click “Start route here”.
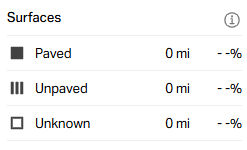
There’s a legend showing you the various surfaces. Paved trails are solid. Unpaved trails are dotted. Plain trails are unknown.
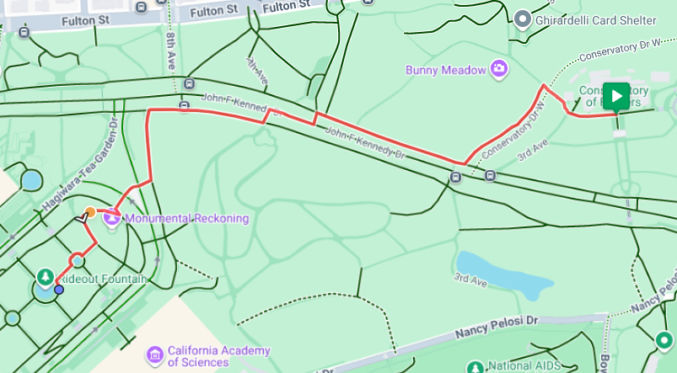
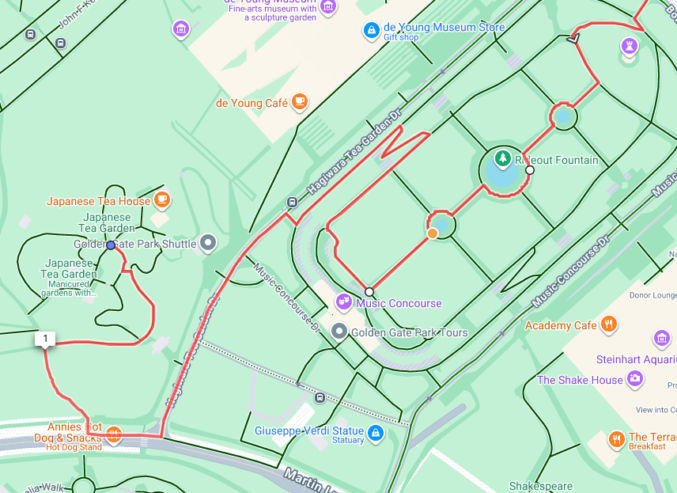
Let’s ride from the Conservatory of Flowers to Rideout Fountain. Click on a path by the Rideout Fountain. RideWithGPS will automatically create a travel segment following paved bike trails between those two locations.
If you make a mistake, you can click the left arrow to undo your changes.
Now, let’s go to the Music Concourse and the Japanese Tea Garden. Click on the paths near those locations to continue the route.
Since there is no direct path from the Music Concourse to the Japanese Tea Garden, Ride With GPS shows the route going backward a bit before making a U-turn to head to the Japanese Tea Garden.
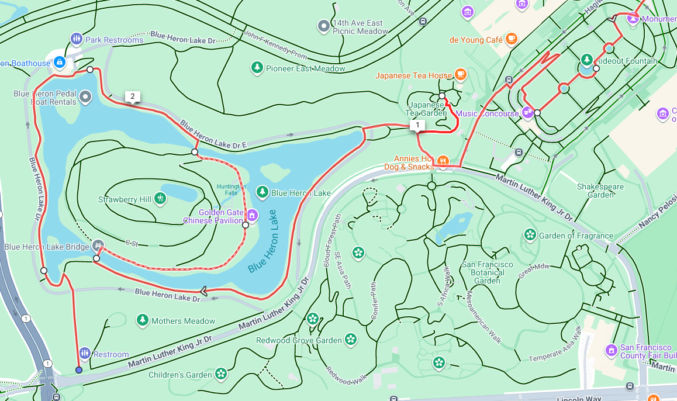
Now, let’s ride around Blue Heron Lake and across Strawberry Hill. Click on points along paths where you want to go. This is what I came up with.
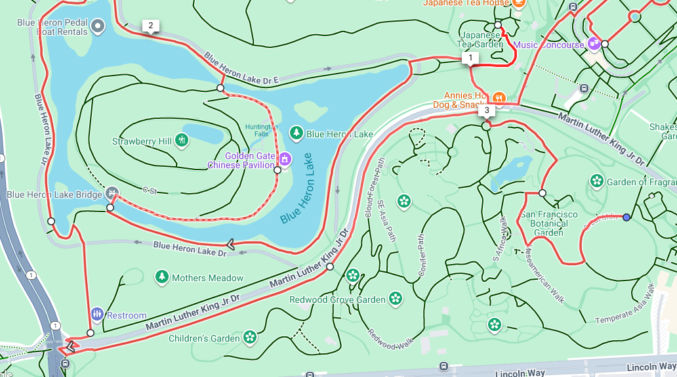
Now, let’s see if we can ride through the San Francisco Botanical Garden. Click on points on various paths where you want to ride your bike/scooter. Since the bike paths aren’t all connected, the following is what Ride With GPS gave me.
Now, let’s ride to the California Academy of Sciences and then head back to the starting point (the Conservatory of Flowers). This is what I got.
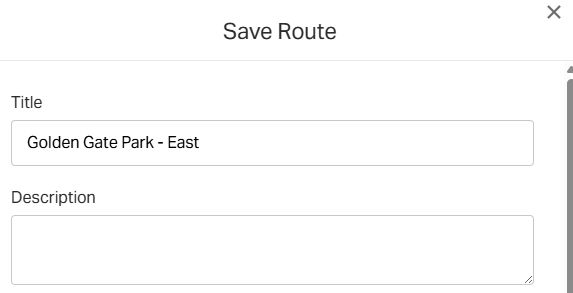
Click Save and name the route.
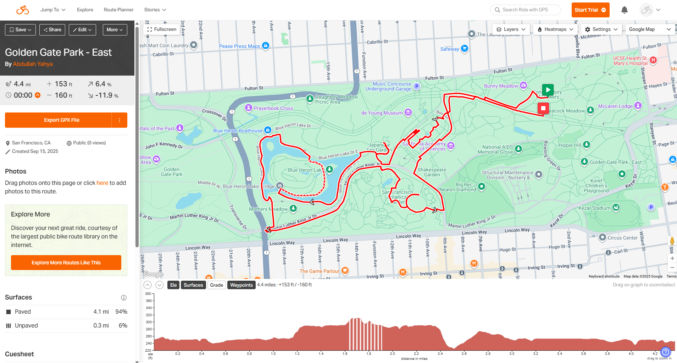
Click “View Route”. You will see the entire route, the elevation, and the total distance (4.1 miles).
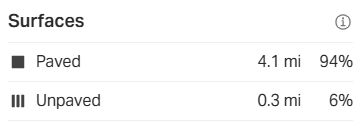
You’ll also see the distance and percentage on paved and unpaved trails.
You’ll also see the cuesheet, showing turn-by-turn directions.
Create an animated route video in AvoMap
In Ride With GPS, click “Export GPX File” and download the .gpx file.
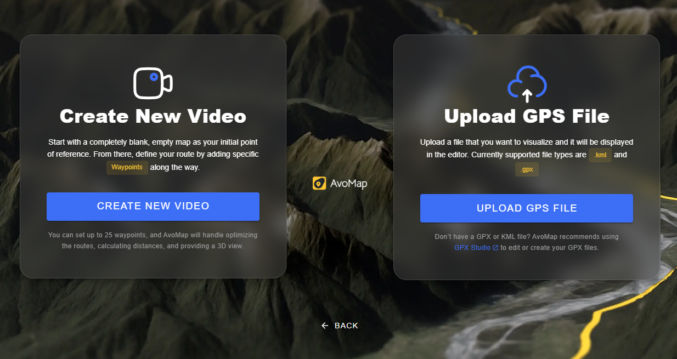
Go to AvoMap.com, create a free account and log in. You can create a video by specifying waypoints, or you can upload a GPS file. Since we already created a route and we have a GPX file, click “Upload GPS File” and select the .gpx file you just downloaded from Ride With GPS.
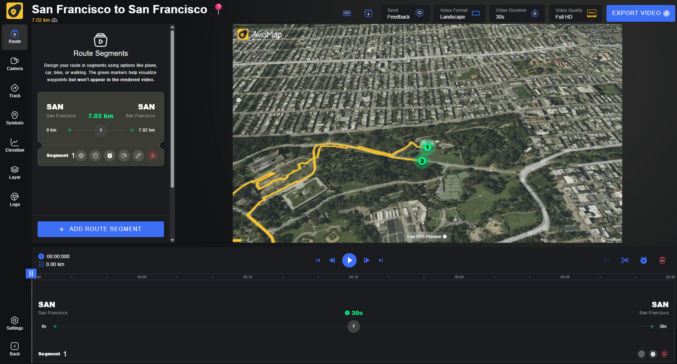
You should see something like this.
Now, on the left, you can adjust various settings, e.g.
change units from metric to imperial
enable “Dynamic camera”
add “Fly-in” animation with a duration of 8 seconds, a zoom level of 100 km
add “Fly-out” animation with a duration of 8 seconds, a zoom level of 100 km
“Traveled Distance” activated
Elevation enabled with “Chart background” disabled
If you buy credits, you can export the video, which would look something like this.
Get Turn-By-Turn Directions
When you’re about to go on your ride, you can get turn-by-turn directions using the Ride With GPS mobile app. However, this is a paid feature. If you don’t ride often, you can buy the monthly subscription for $10 a month and just cancel before the end of the first month.
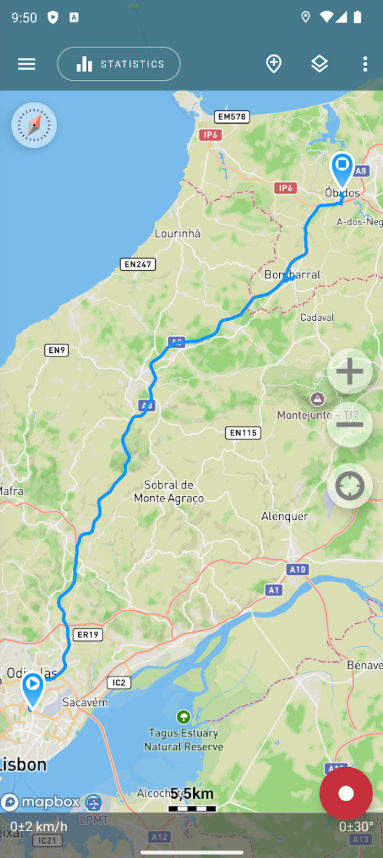
Recording Your Ride’s GPS Data
When you ride, you may not necessarily follow your planned route. If you’d like to track your actual route taken, you can record your GPS data live while you’re riding. You can do this with the paid version of the Ride With GPS mobile app or with the free Geo Tracker Android app. Just tap the red record button to start logging your GPS data, including while the app is running in the background. When you’re done, tap again to stop recording. You can then export the GPS data in GPX format, which you can then import into AvoMap to create a video.
Convert a Google Map to GPX
If you want to create a travel route using Google Maps and then make a video in AvoMap using the Google Maps route, just create directions in Google Maps, optionally with multiple stops, and then copy and paste the URL into https://mapstogpx.com/. Download the GPX file and upload it to AvoMap.
E-scooter Riding Laws in California
Must have a driver’s license
May not ride on any sidewalks
Must ride on designated bike lanes
May ride on car roads where the speed limit is < 25 mph
E-scooters are not allowed on the Golden Gate Bridge, but e-bikes are allowed on both sidewalks.
E-scooters are allowed only on designated bike paths in Yosemite National Park, whereas e-bikes can be used on both bike paths and park roads. Learn more
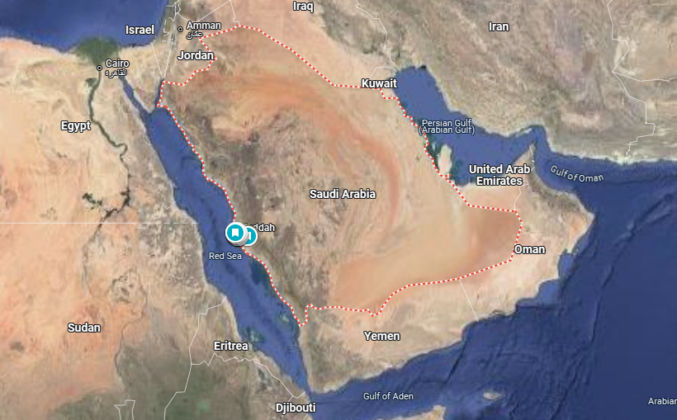
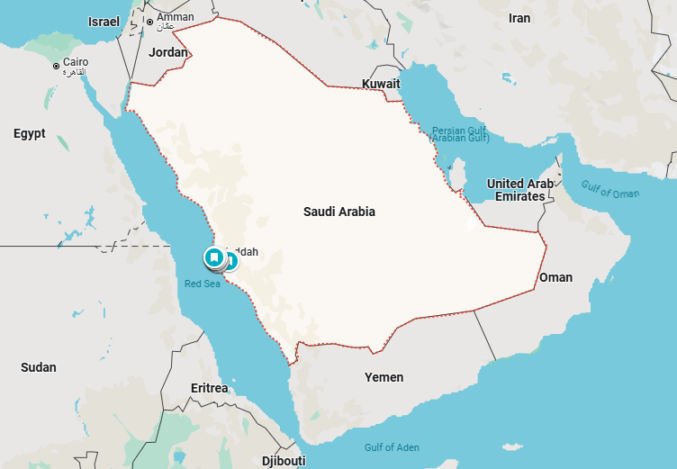
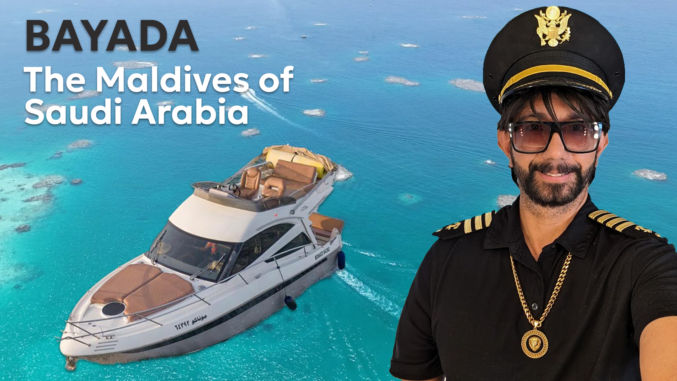
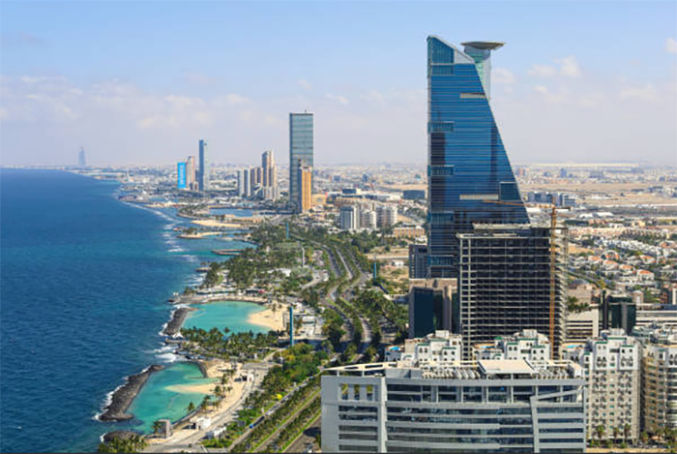
A few months ago, I charted a small yacht for a 6-hour trip from Jeddah, Saudi Arabia to Bayada in the Red Sea. Since I had a great time, I highly recommend it for anyone visiting Jeddah. Unfortunately, planning such a trip and making a reservation isn’t easy due to the limited marketing and communication efforts by businesses there. So, this post will detail my experience along with recommendations so if you do decide to go on this trip, you’ll have a better experience. I’ll share my experience in chronological order.
Yacht Reservation
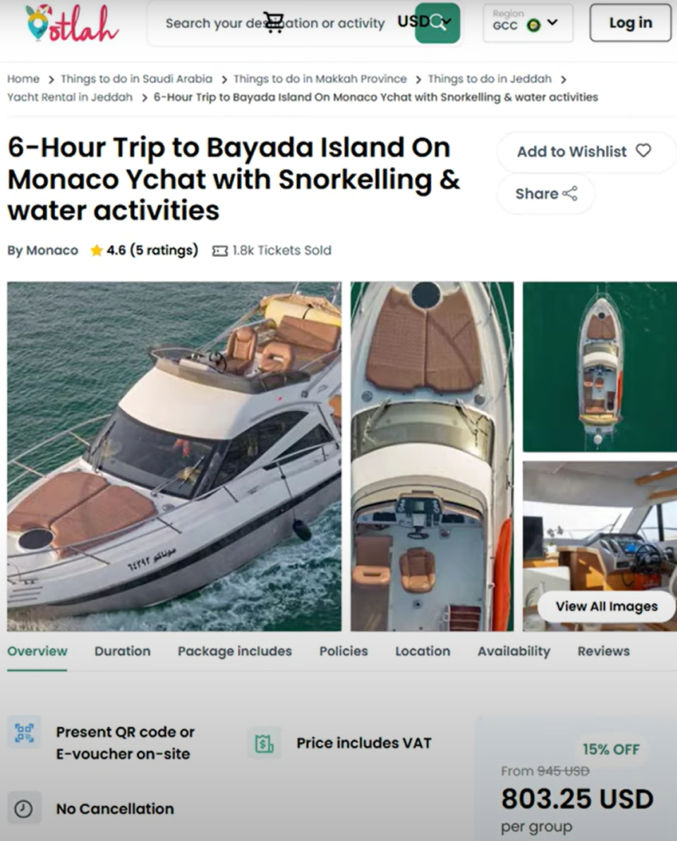
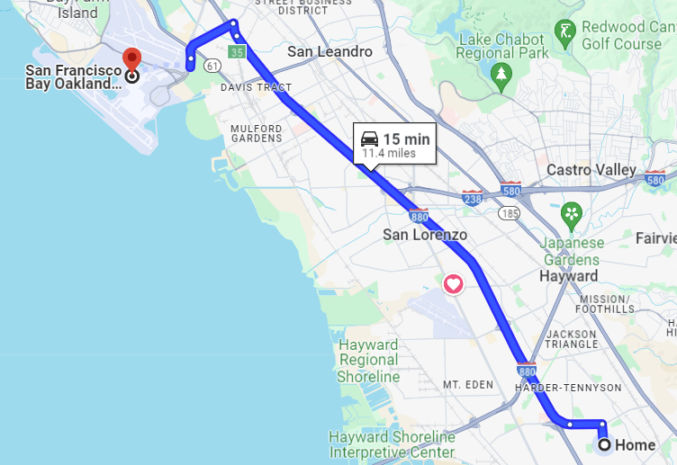
I live in the San Francisco Bay Area. Since I was visiting Saudi Arabia for just one week, I wanted to make sure I had a reservation for the Red Sea trip. I found a tour company on Otlah.com, an online UAE-based vacation marketplace. Below is one of the trips available.
The trip details, the yacht, and the price all looked good, but the communication was bad. There was no way to ask questions until after I paid for the non-refundable trip. With no better option available at the time, I crossed my fingers and booked the trip. On the confirmation page, which was shown just briefly before I get redirected to some other page, showed some contact information. Luckily, I was able to quickly take a screenshot, so I was able to contact the trip provider, who confirmed they had my reservation.
Yacht Out of Service
While, in Jeddah, two days before the scheduled trip I got a message from Otlah, the middleman, saying that the trip provider said the yacht was out of service because they just discovered an issue required a part that would not be available for a week or two. Otlah offered some other boats, but they were ugly and I don’t think they even had an on-board restroom. I decided to get a refund from Otlah and find another yacht at the marina in Obhur, Jeddah. Fortunately, I was staying with local relatives who were able to help with this. We went to the marina and the gatekeeper told us which boats were available, their cost, and other details.
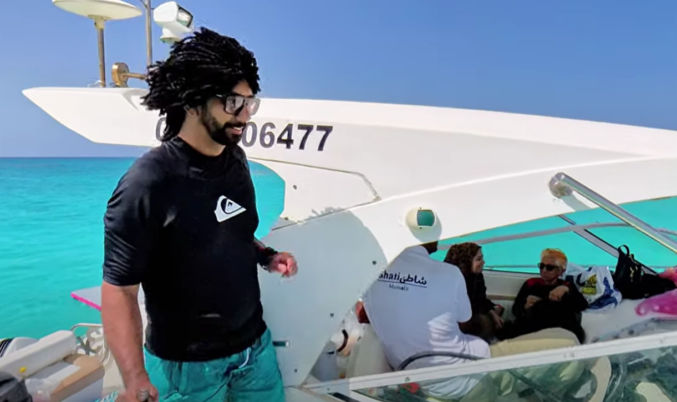
Second Yacht Reservation
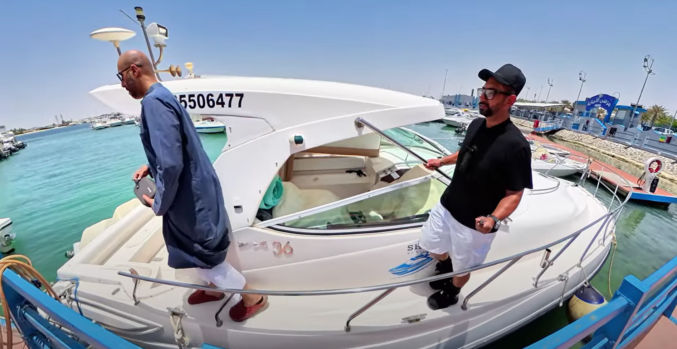
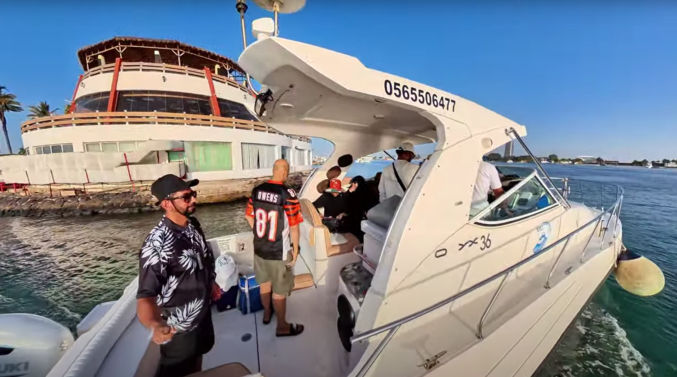
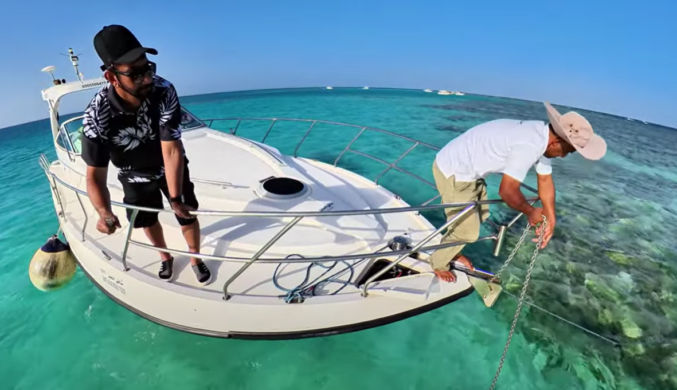
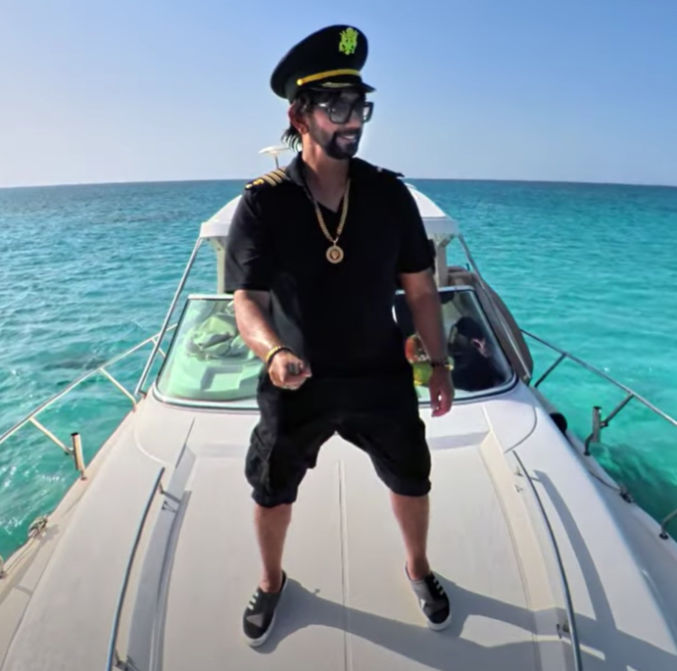
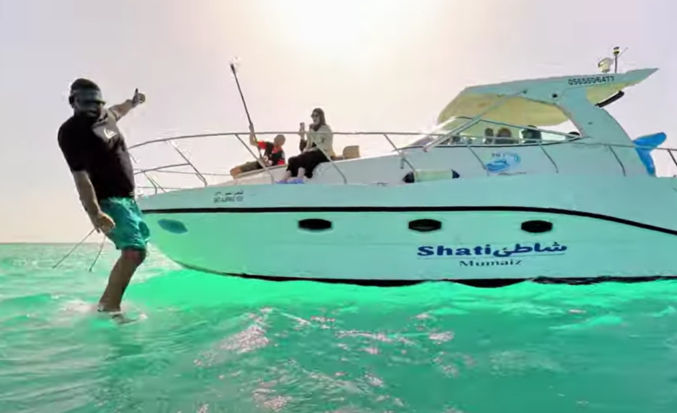
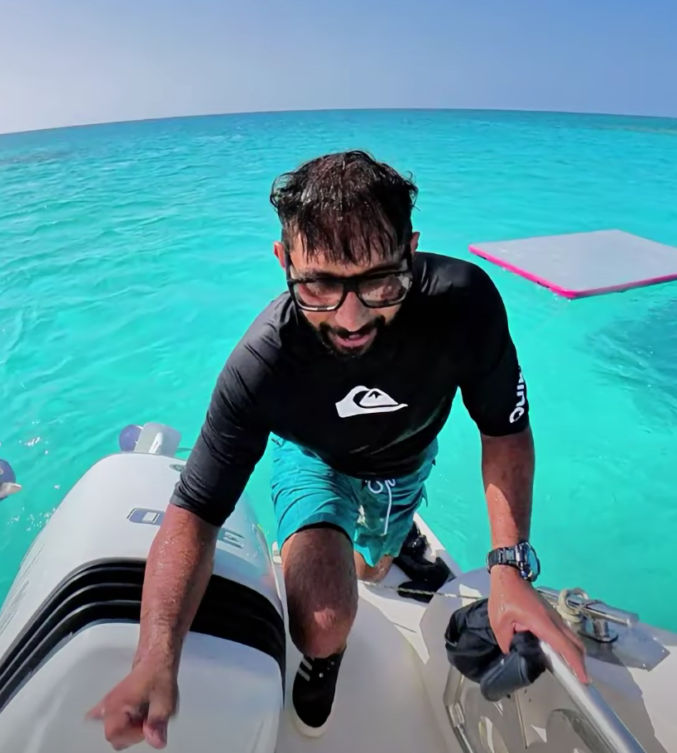
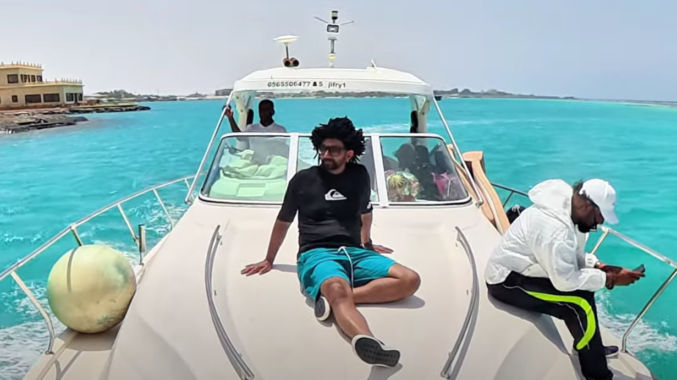
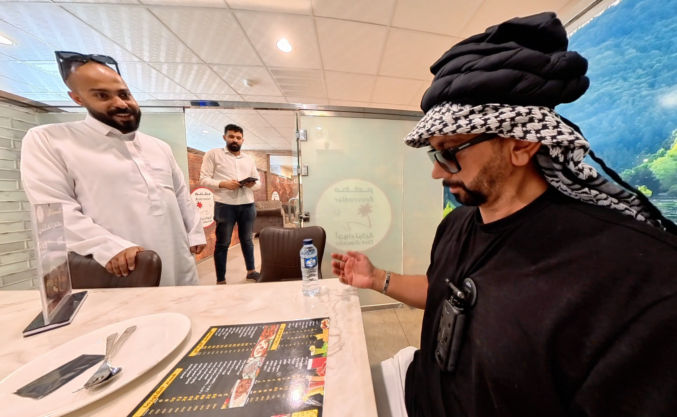
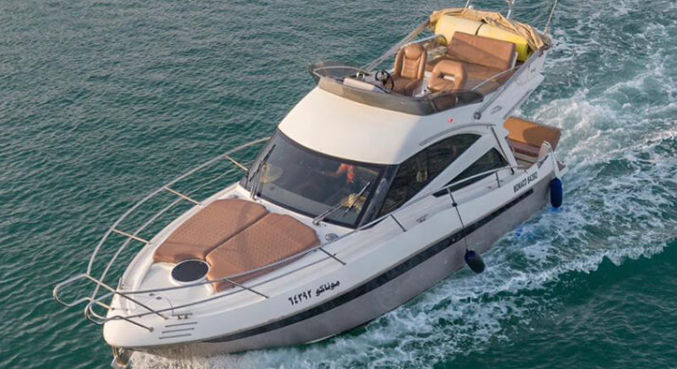
Below is the photo of me checking out the one and only yacht available for the dates we wanted.
The yacht was not as nice as the one on Otlah.com, but it had one thing that made it better – a Seabob water scooter, which could be rented for an additional $100. The total cost for the yacht charter with captain and Seabob rental came out to about $900. I ended up choosing this yacht and provider, and I did not regret it. Here’s the provider’s contact information.
Sohaib Jifry (Abu Yaseen) 0-56-550-6477 (Saudi Arabia) 966-56-550-6477 (International) linktr.ee/sohaib119
There were 2 time slots per day: 7 AM to 1 PM and 1 PM to 7 PM. We chose the morning slot so the weather wouldn’t be so sizzling hot like it is mid-day and in the afternoon.
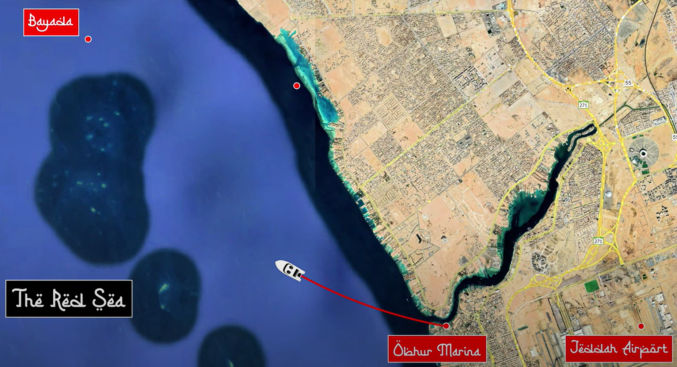
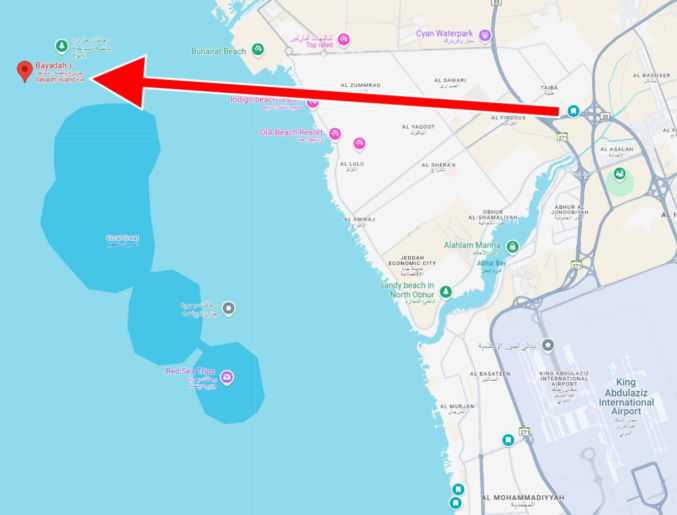
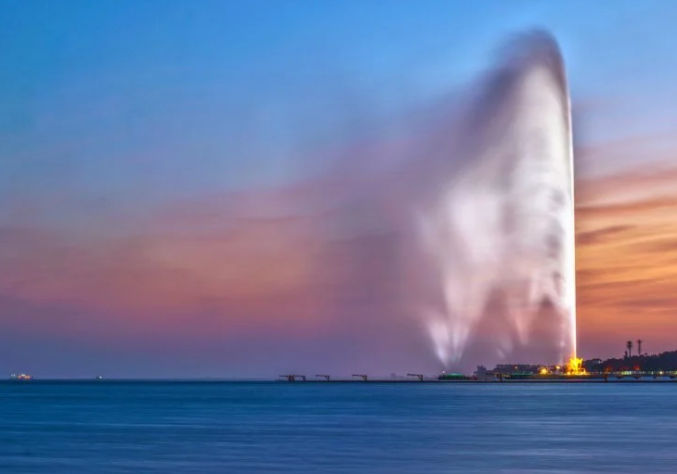
Going to Bayada in the Red Sea
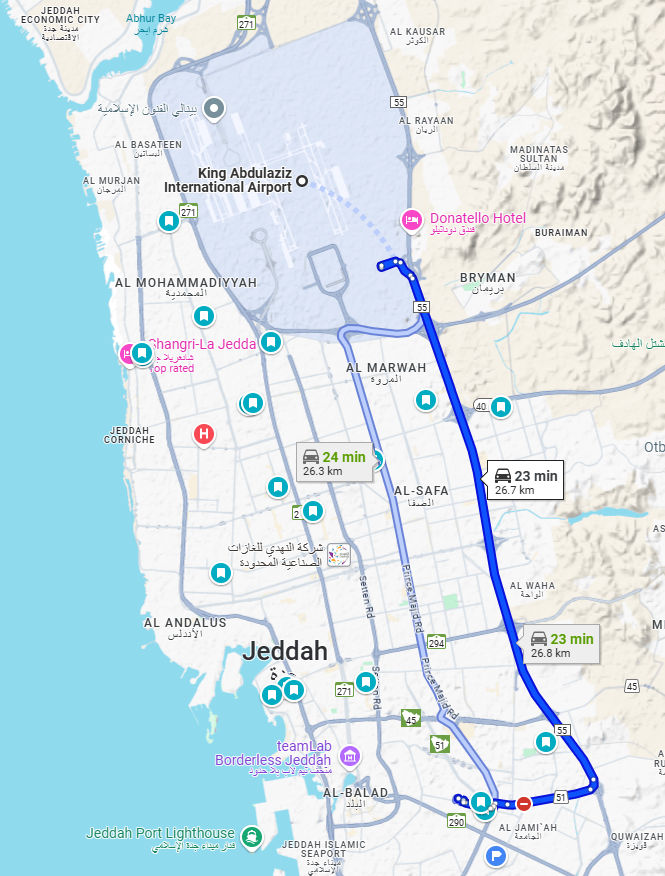
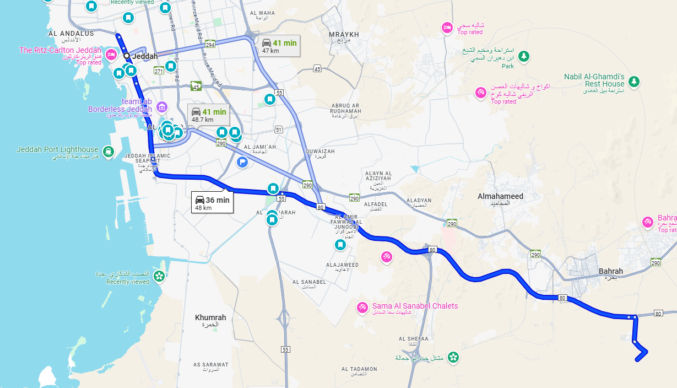
Bayada is located just 40 minutes away from Jeddah by boat.
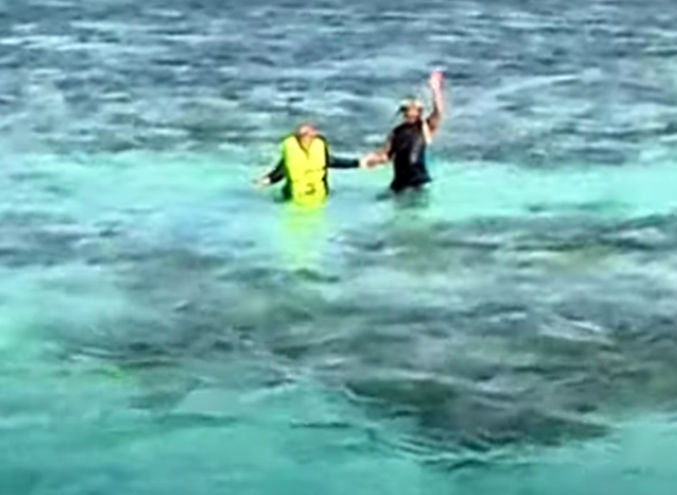
Many people call Bayada an “island”, but it’s not really an island in the traditional sense. Rather, it’s an area with land where the surface is a few feet below the water. You can stand on it, but you’ll be partially in the water. I didn’t stand on it, but others who did said it’s very pointy, so you should definitely bring water shoes with you.
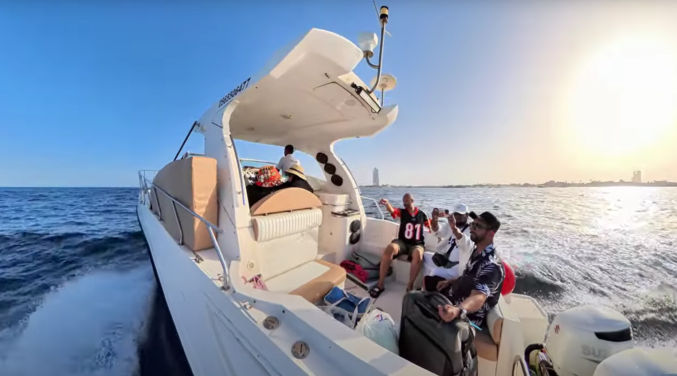
We left Jeddah around 7 AM. Before entering the open sea, we had to stop by a government dock. Normally, we’d have to show our IDs or passports for all passengers, but for some reason they just let us go.
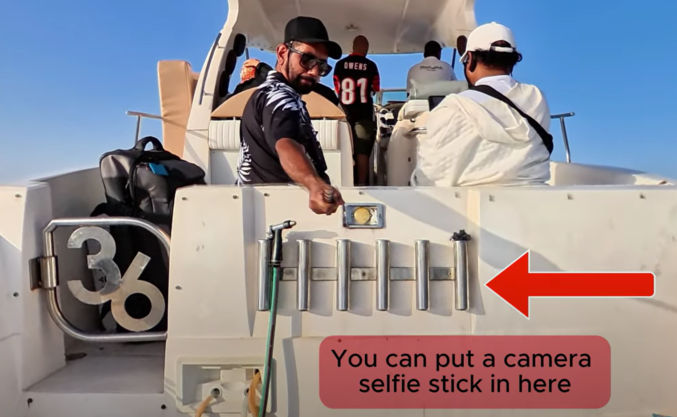
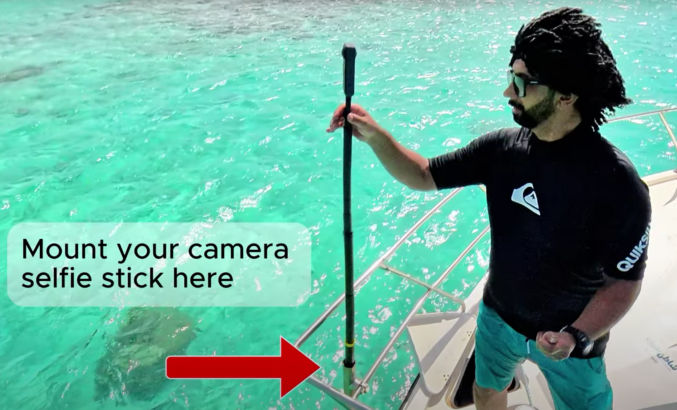
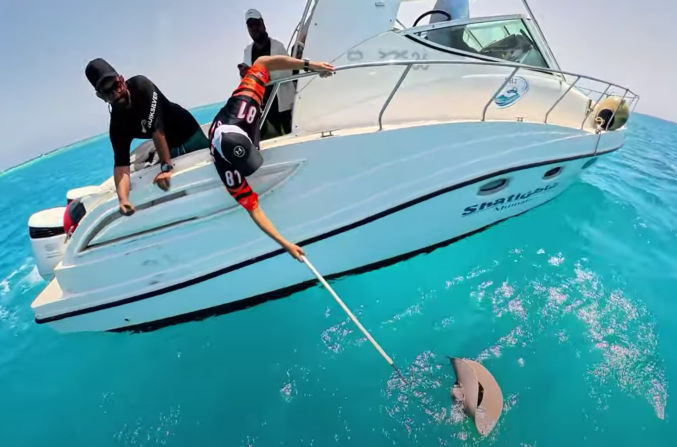
I brought the Insta360 X4 and X5 cameras with me to take 360-degree videos. Around the yacht, like on the back, as shown in the photo below, there are tubes, which I think are for putting a fishing rod. They were perfect for putting a selfie stick, so I wouldn’t have to hold the camera all the time.
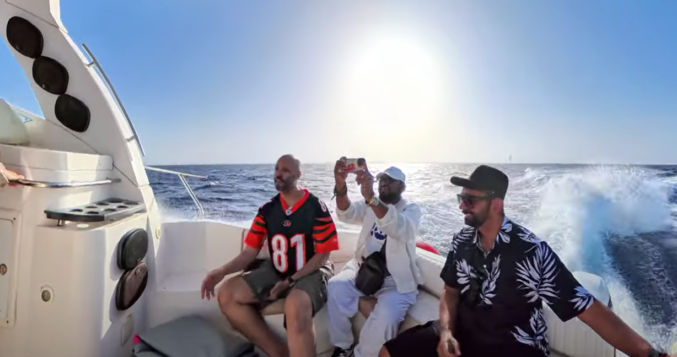
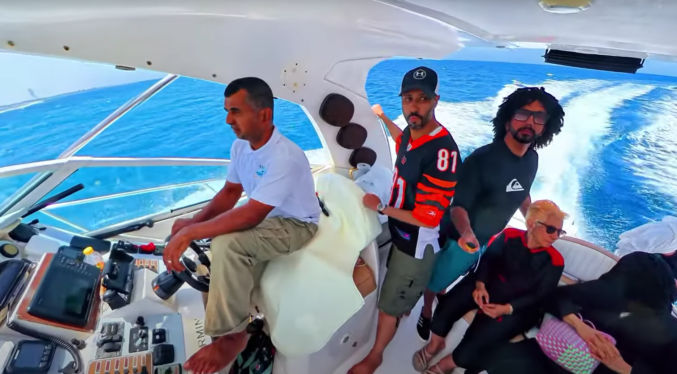
Even though it was already pretty hot int he morning, the wind kept us cool as we zoomed to Bayada, passing other (slower) boats beside us. The ride was a bit bumpy due to the waves, but the cushioned seats made it painless.
The yacht came with speakers with Bluetooth support. We were able to connect our phones to it to play our own music.
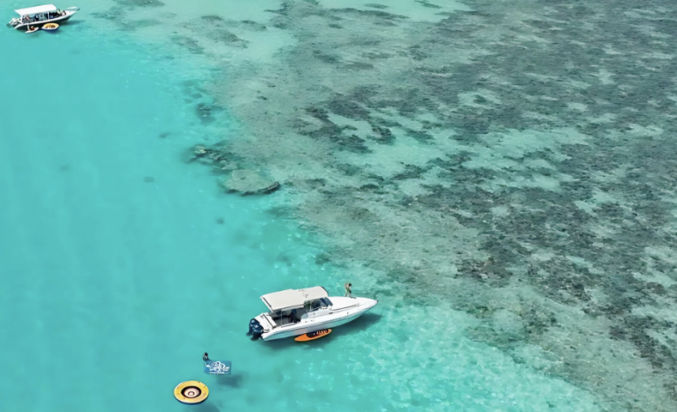
When we got to Bayada, a few other boats had already arrived. Our captain anchored our yacht to what appeared to be underwater rocks. This was necessary to prevent drifting back to Jeddah. Note that despite the anchor, the yacht still rocked slightly due to the waves. If you get sea or motion sickness, be sure to take Dramamine the night before the trip.
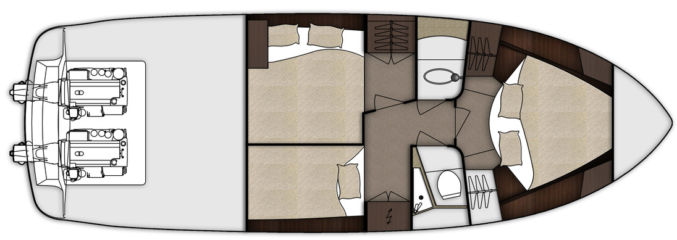
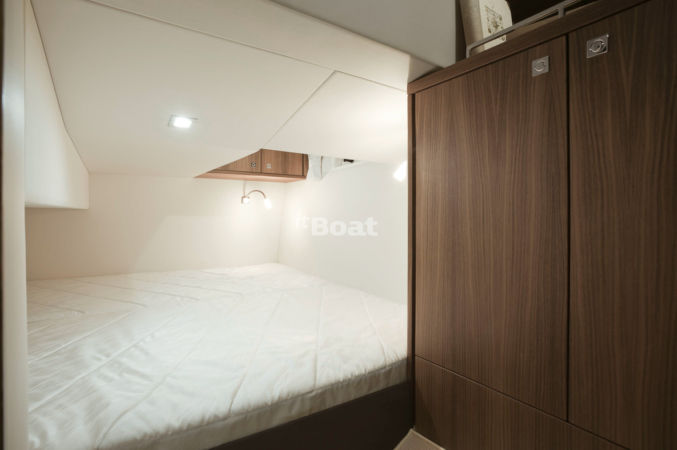
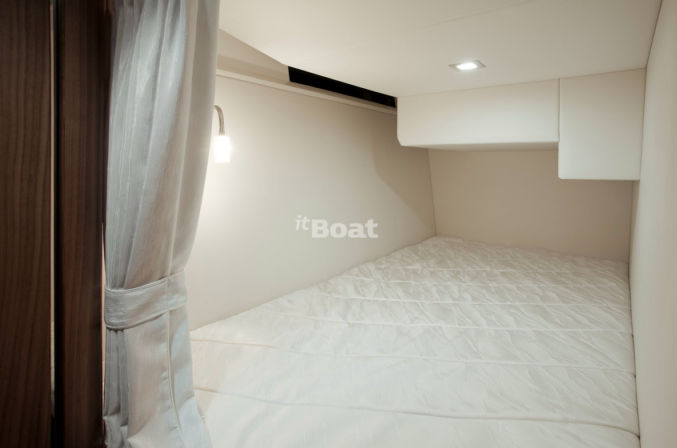
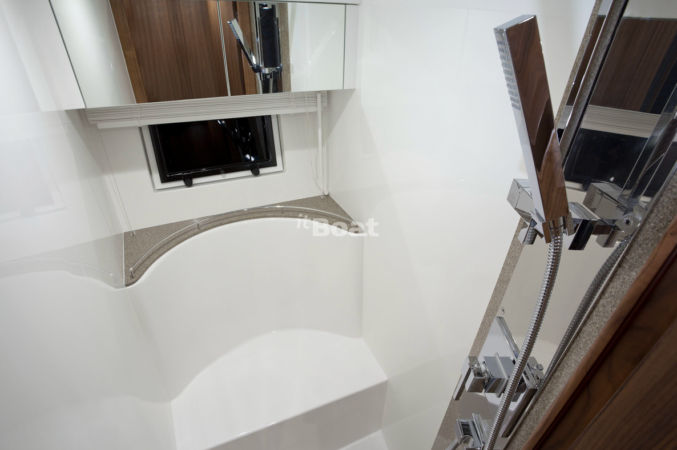
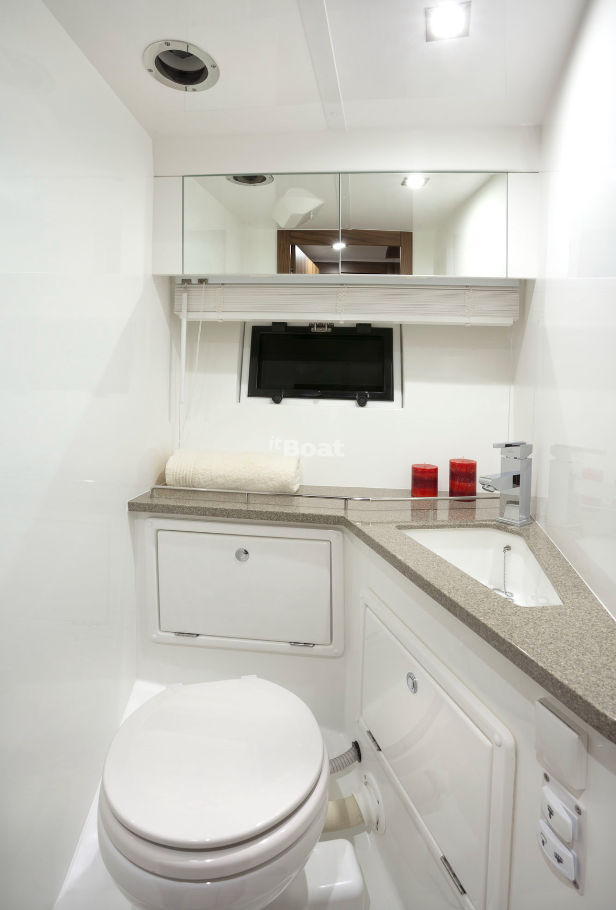
In the lower deck of the yacht, there was a master bedroom, a second bedroom, a tiny kitchenette, and a tiny bathroom with toilet, sink, and shower. This is important in case you need to use it during the 6-hour trip.
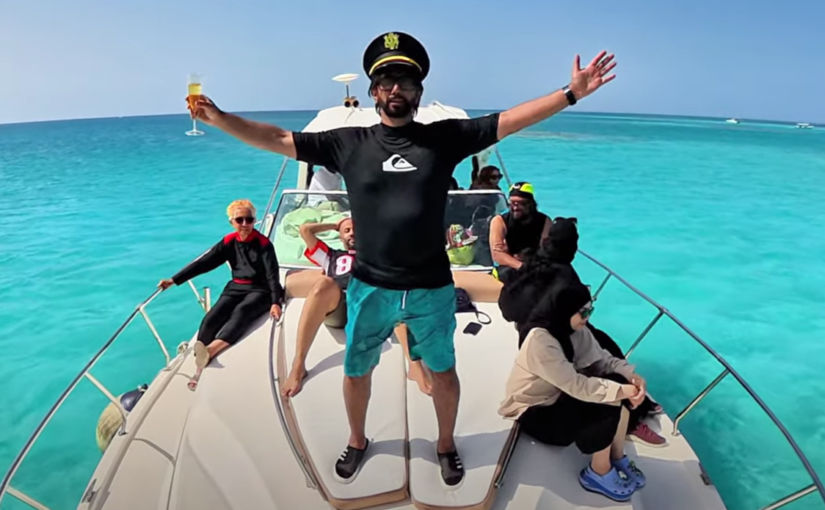
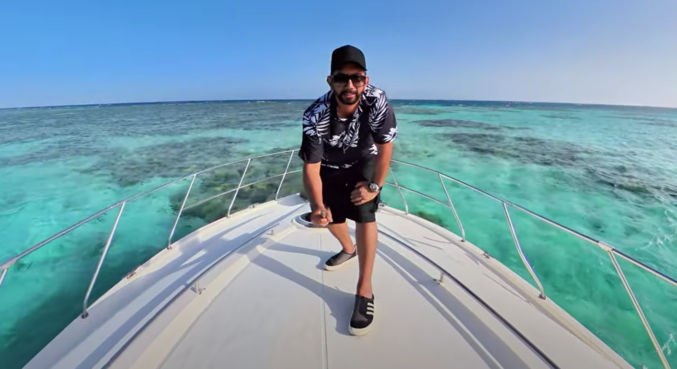
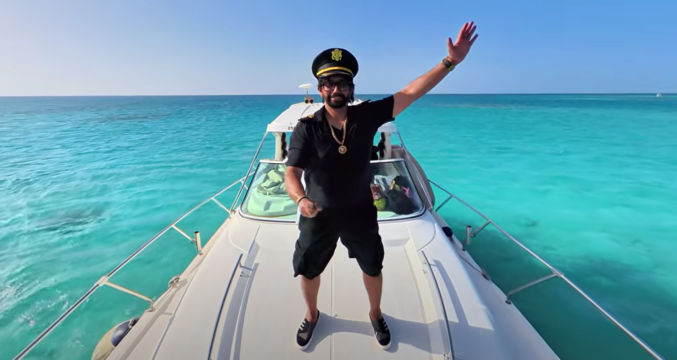
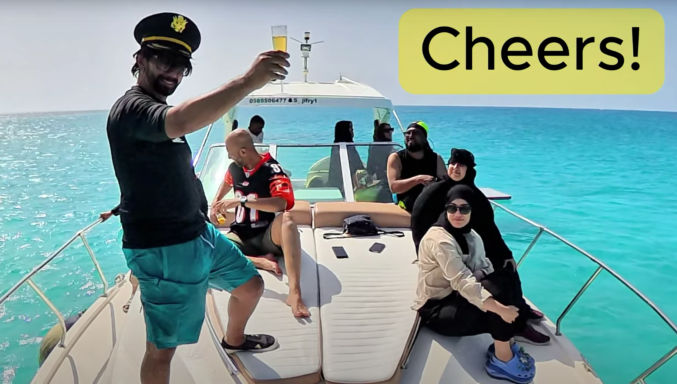
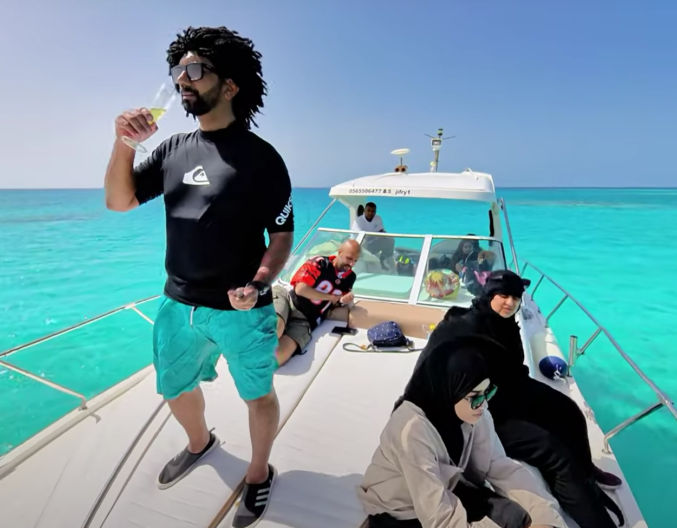
For the trip, I brought a captain outfit just for fun.
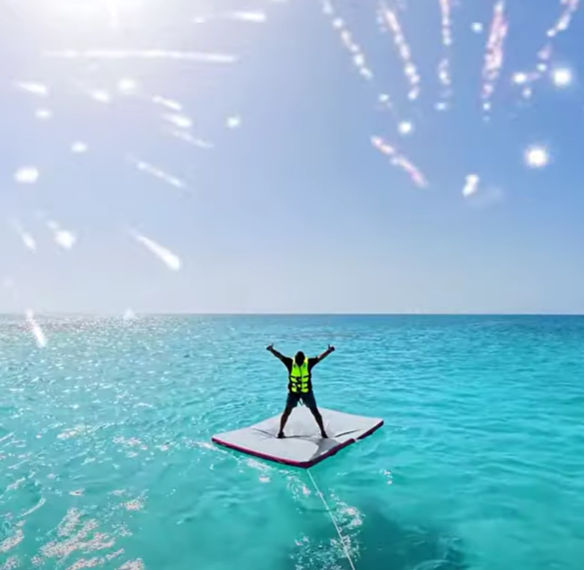
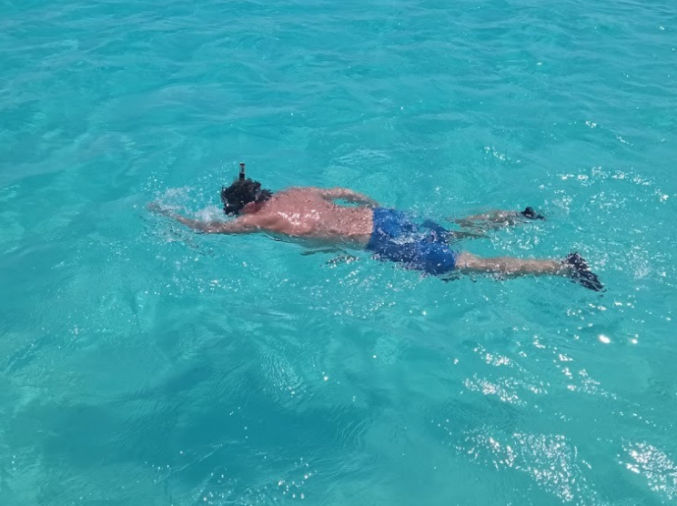
At Bayada
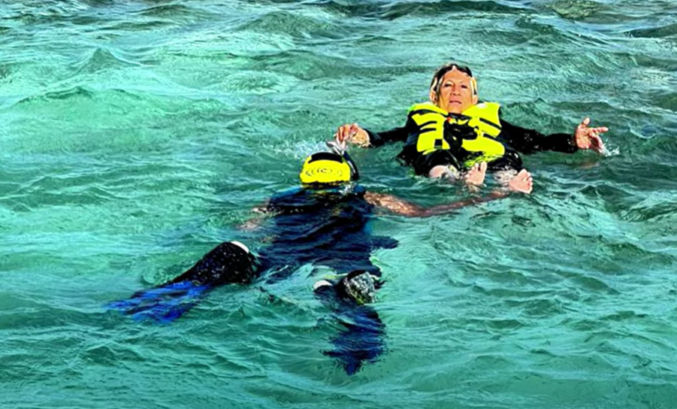
When going in the water, even though it looks like a massive swimming pool, it’s a sea, so you should wear a life jacket unless you are an experienced open-sea/ocean swimmer, which most people aren’t. The waves appeared gentle, but the current was strong enough to quickly cause fatigue. This deserves emphasis.
WARNING 1: WEAR A LIFE JACKET!
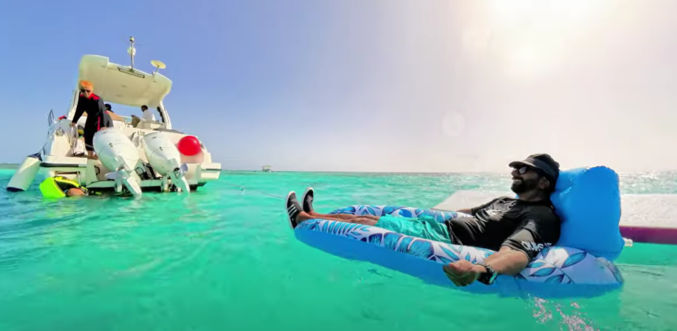
Since I wanted to relax in the water, and I didn’t know what water toys would be available on the yacht, I brought an inflatable lounge with me. I also brought a battery-powered inflater, but our captain inflated the lounge for me using his heavy-duty inflater, which he also used to inflate his raft.
The inflatable I brought was very good. My body and legs were partially in the water, which felt good, and the back rest was sufficiently firm. I paid $20 for it on Amazon.
WARNING 2: All such inflatables should be tied to the yacht to prevent drifting out to sea. If you don’t tie them to the yacht, the inflatable, along with you, if you are on it, will definitely drift out to sea!
Since I had not tied my inflatable lounge to the yacht, but the raft was tied to the yacht, I just held on to the rope that was tied to the raft.
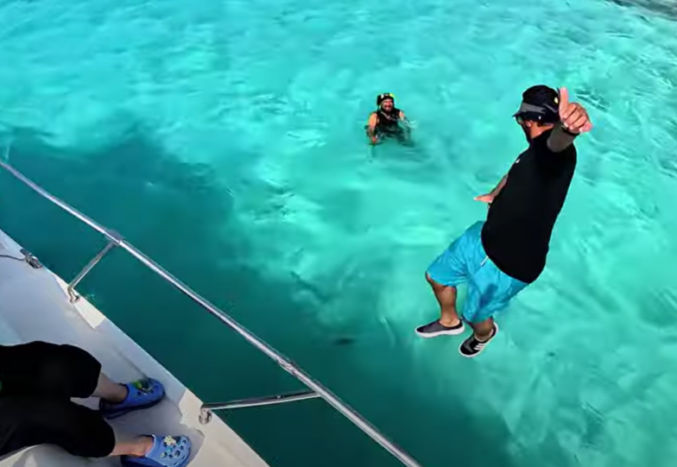
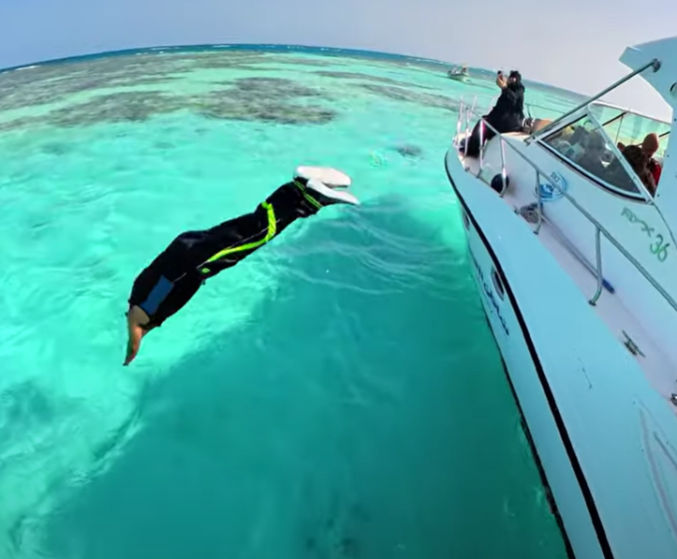
I also jumped into the water from the deck. Unfortunately, the railing made it difficult to do so, so I only did it once. I wish the yacht had a plank like a jumping board.
Even though we didn’t land far from the boat, swimming back to the boat was very tiring, especially without a life jacket.
By the time we reached the yacht, we were exhausted and out of breath!
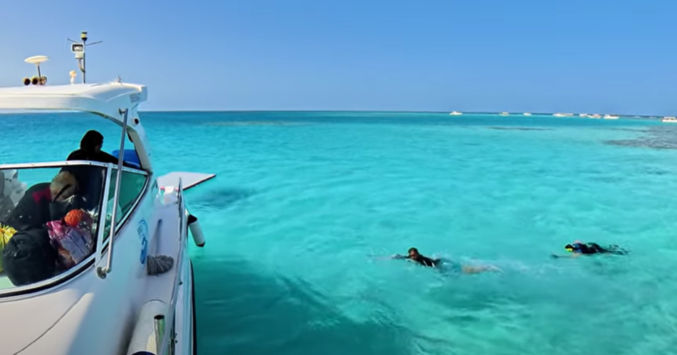
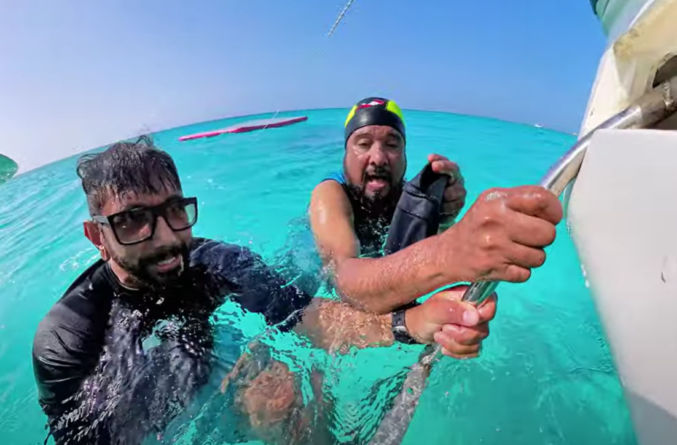
If you decide to go in the water, no matter how you do it, make sure to test it first slowly by swimming around near the stairs. To be safe, wear a life jacket and hold on to a rope in case you realize you need to pull yourself back to the boat.
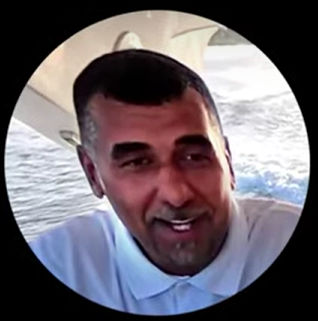
This guy (Mustafa), who came with us, was a pro. He used to dive often. If possible, bring an experienced swimmer with you on the trip in case someone needs help in the water. Again! The Red Sea may look like a big swimming pool, but it’s anything but.
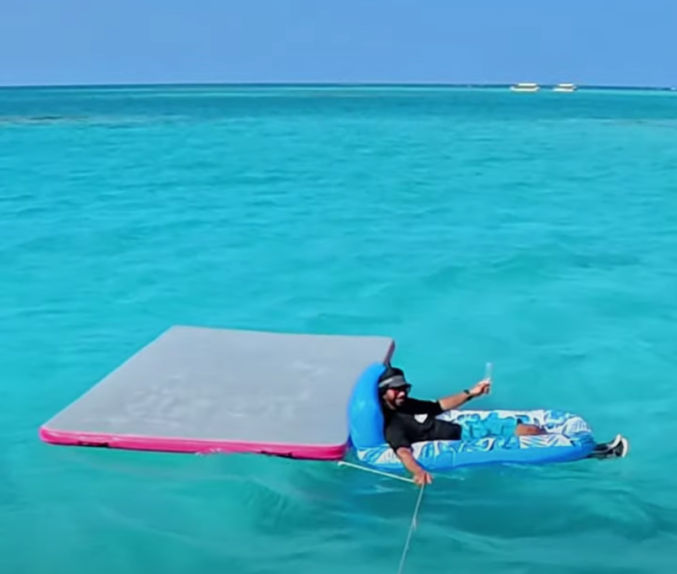
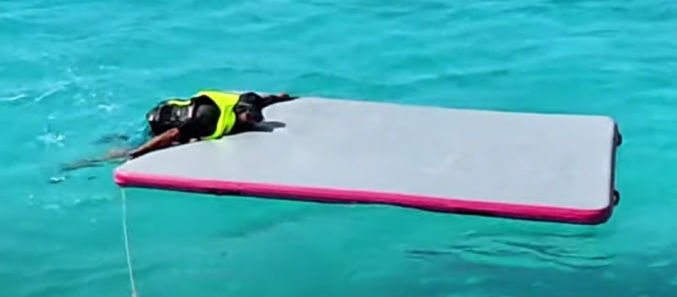
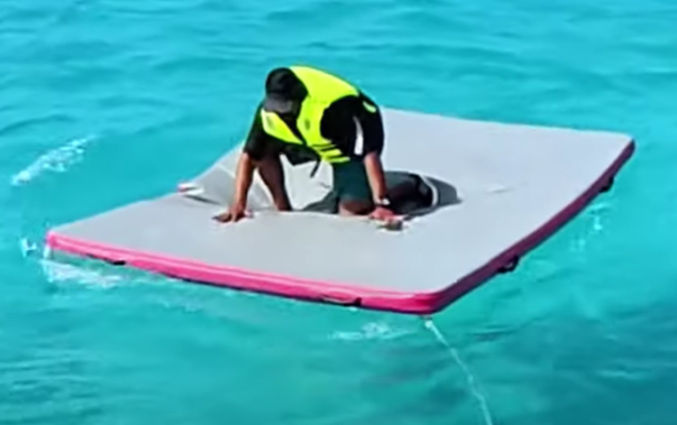
If you have an inflatable raft, like the one pictured below, realize that it is very difficult to get on it in the water.
It’s also very hard to stand on it in the water.
But it’s not impossible.
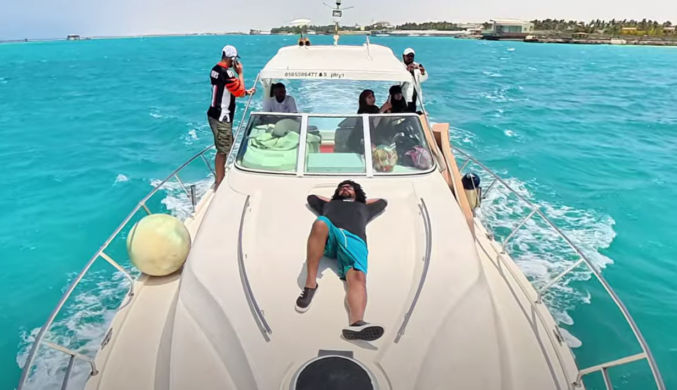
The yacht comes with cushions for lounging on the front. Make sure to stay hydrated by drinking plenty of healthy drinks.
If you don’t want to sit on the front deck and you want to avoid the sun, you can sit under the roof near the captain’s seat is.
At the front of the yacht was another fishing pole holder. I used it to hold my camera selfie stick.
This allowed me to take shots like this
and this
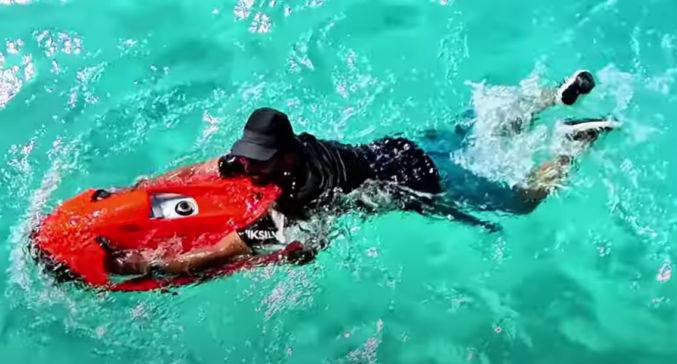
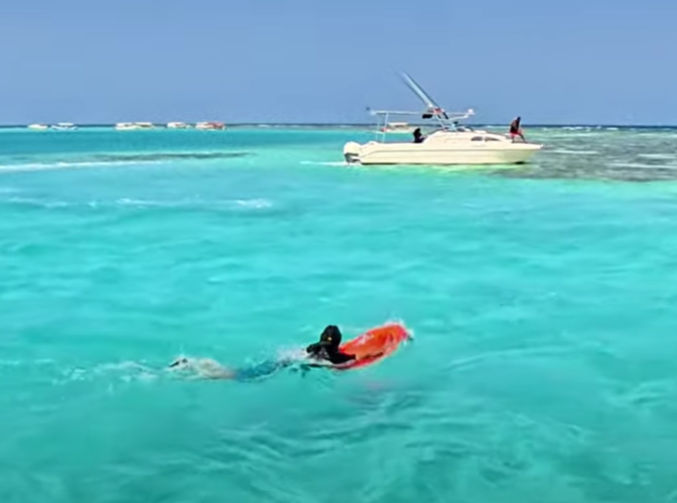
For me, the most fun thing to do was to ride a Seabob, pictured below. You grab on to both handles and push the button with your right hand to have the Seabob propel you through the water. The feeling is refreshing and exhilarating as you feel the water flow over your body and you effortlessly cruise around the water.
If you wear a hat, make sure to hold on to it when the boat is moving, otherwise it could fly off into the water.
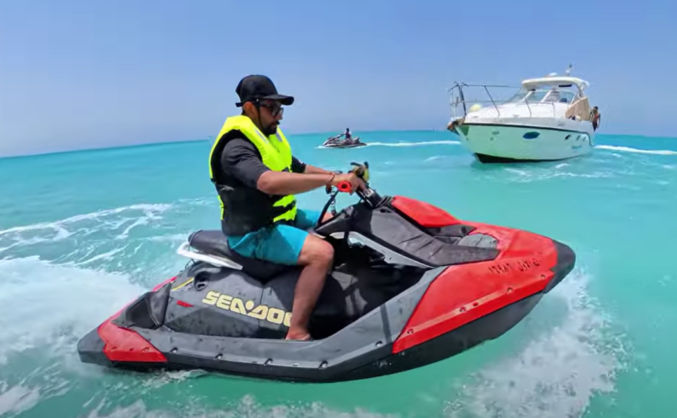
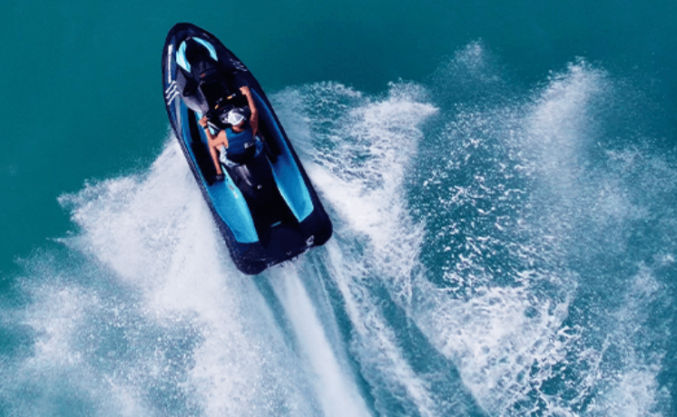
After Bayada, we went to a private place near the shore to ride a jet ski.
While on the trip, make sure to spend some time to relax and enjoy the sea breeze, whether your sitting or laying down.
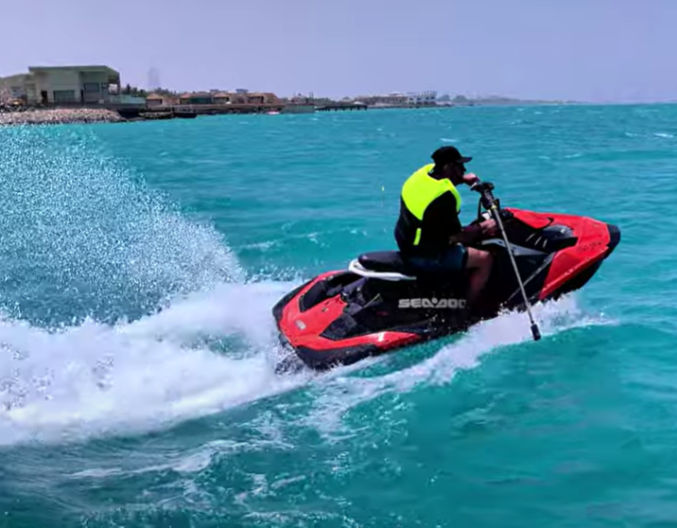
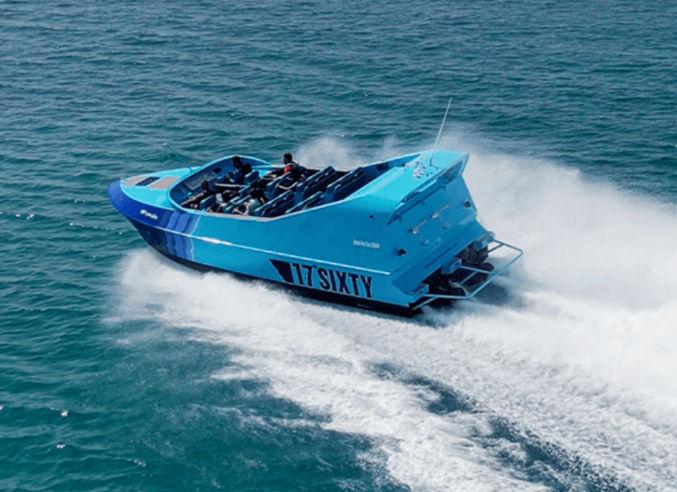
The jet ski I rented was very lightweight and fast.
I strapped my camera selfie stick to the handle using ratchet straps so I could get 3rd-person video footage, like the one pictured above.
I couldn’t go to fast because the waves made my ride very bumpy.
After the jet ski ride, we headed back to the marina and reached it at 1 PM.
Overall, the trip and experience was amazing and totally worth the cost. I’m glad I was able to capture almost all of it on video, which you can watch below.
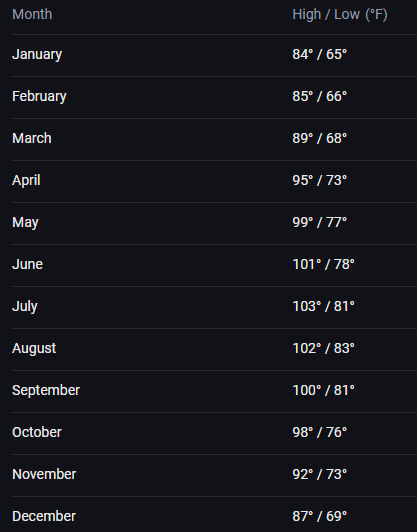
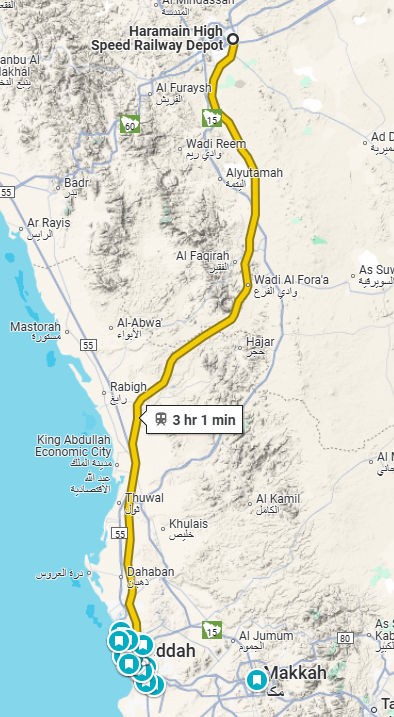
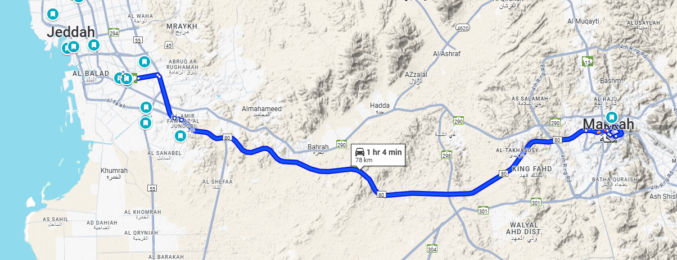
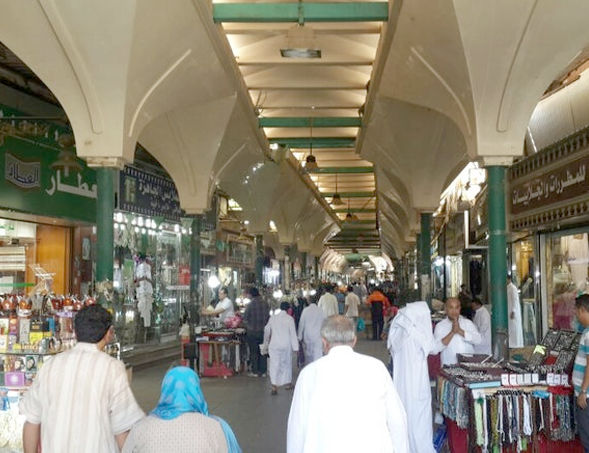
Madinah is one of the two holiest cities in Islam after Mecca, and it’s only 2 hours away by bullet train from Jeddah, the 2nd largest city in Saudi Arabia. While visiting the kingdom, I was able to complete a one-day trip to Madinah from Jeddah with the following itinerary.
Itinerary
Time
Activity
10 AM – 12 PM
Ride bullet train from Jeddah to Madinah
12 AM – 3 PM
Visit the Prophet’s Mosque (Masjid Al-Nabawi)
3 PM – 6:30 PM
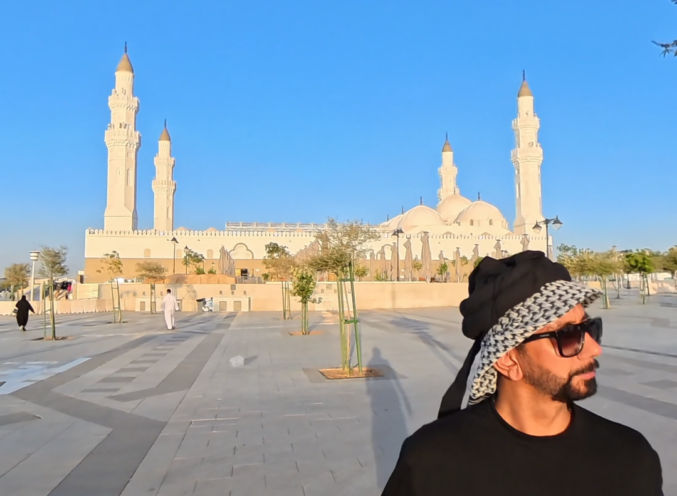
Have lunch Visit the Qiblatain Mosque Visit the 7 Mosques Visit Mount Uhud Visit the Quba Mosque
7:30 PM – 9:30 PM
Ride bullet train from Madinah to Jeddah
Costs
Activity
Cost
Round trip bullet train ride between Jeddah and Madinah
$155
6-hour car + driver/tour guide
$120
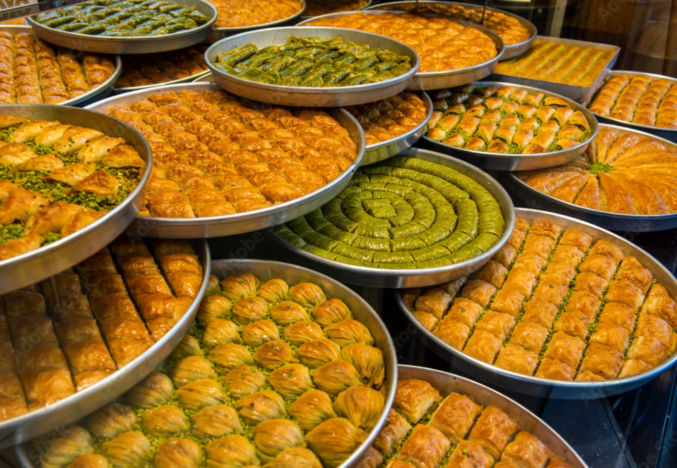
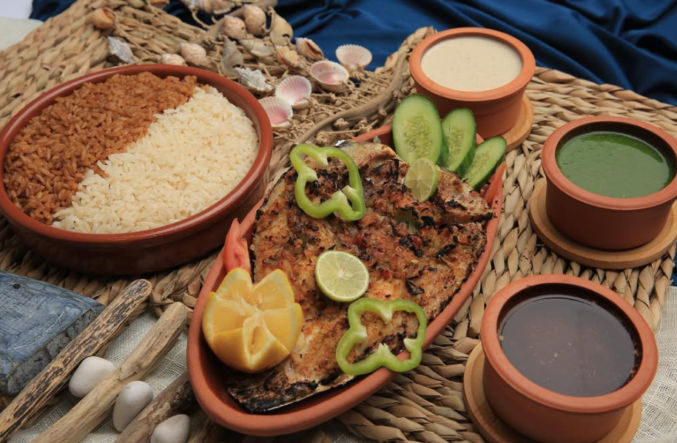
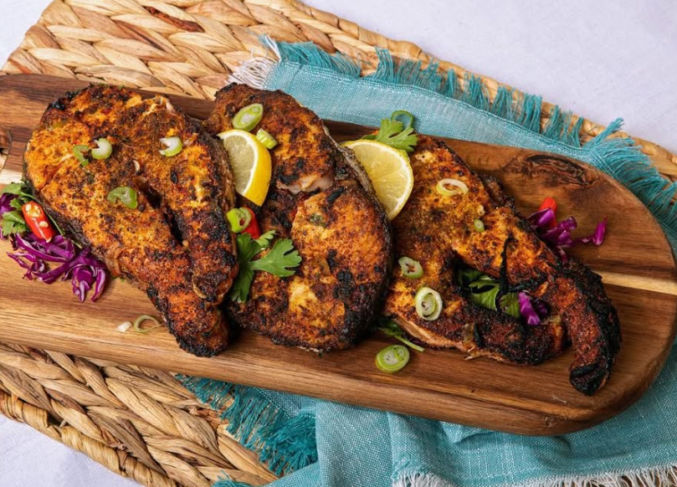
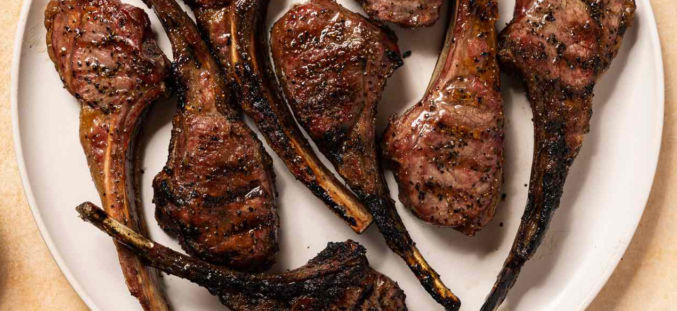
Lunch at a Turkish restaurant for 3 people
$43
Transportation
Bullet train
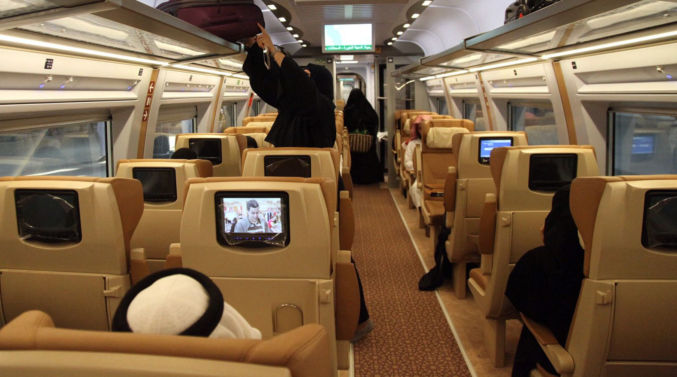
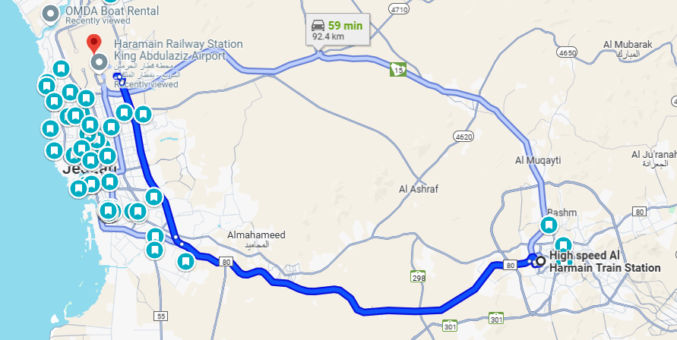
We purchased tickets online at https://rail.ninja/ for $72 per person. We chose the economy class because the business class didn’t seem worth the extra cost. The train travels at 300 km/h (186 mph). It’s clean, fast, convenient, and comfortable. There are 2 train stations in Jeddah, one in the north at the airport and one in the south.
Me at the train station in Madinah
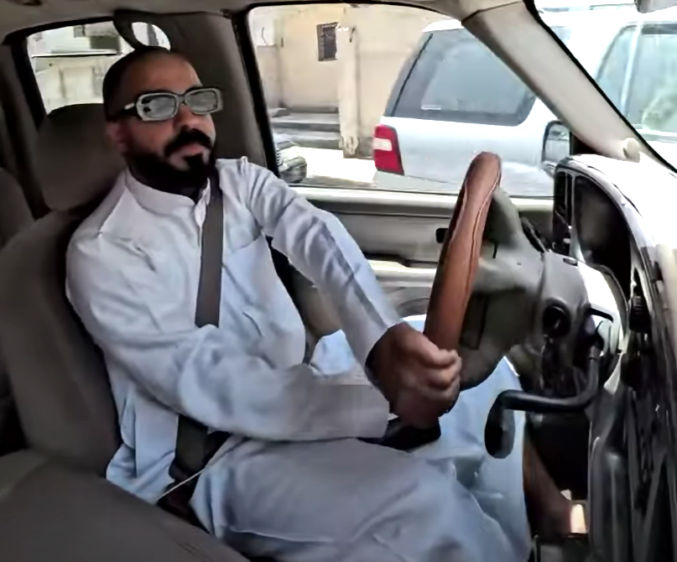
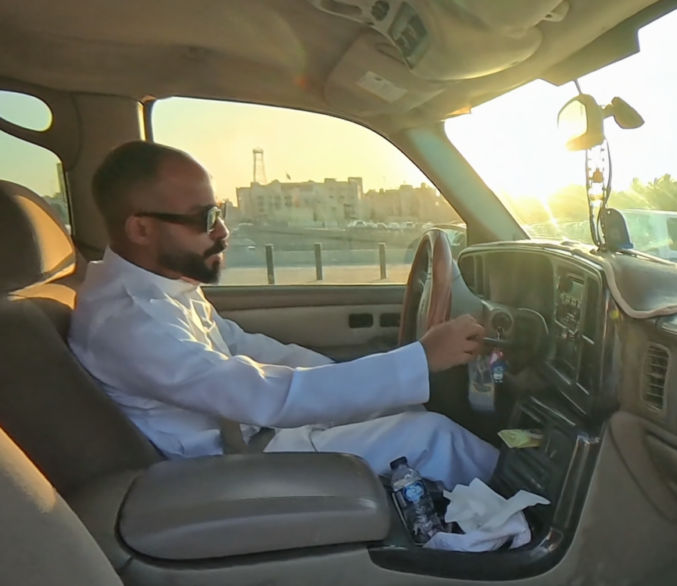
Car + driver/guide
We thought about taking an Uber from place to place, but with so many places to visit, we didn’t want to waste time and try to figure everything out ourselves, so we decided to hire a driver for about 6 hours who could show us around. We were referred to Ibrahim, a Madinah local. He picked us up at the train station, took us to all the tourist spots, came with us inside the Prophet’s Mosque to show us around and explain things, had lunch with us and helped explain things to the waiter, and eventually dropped us off back at the train station. He doesn’t speak English, but I was able to communicate with my somewhat broken Egyptian Arabic I had learned while studying at the American University in Cairo, Egypt. If you don’t speak Arabic, you can always use Google Translate on your phone in “conversation” mode.
Ibrahim, our driver and guide in Madinah
Trip at a Glance
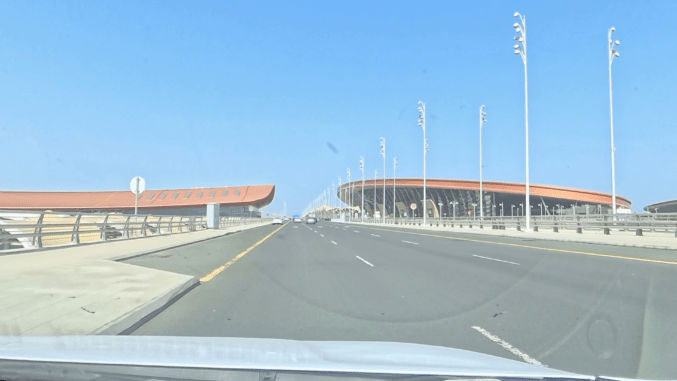
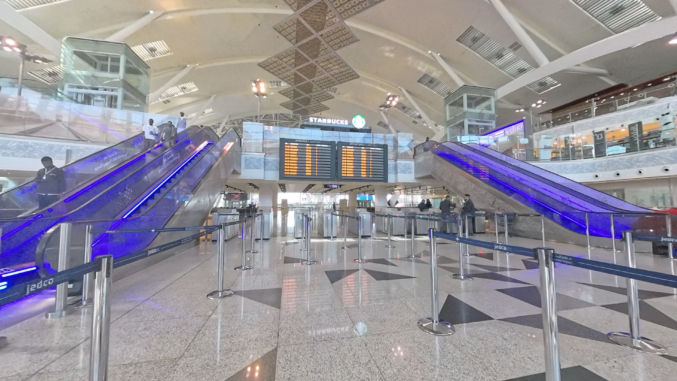
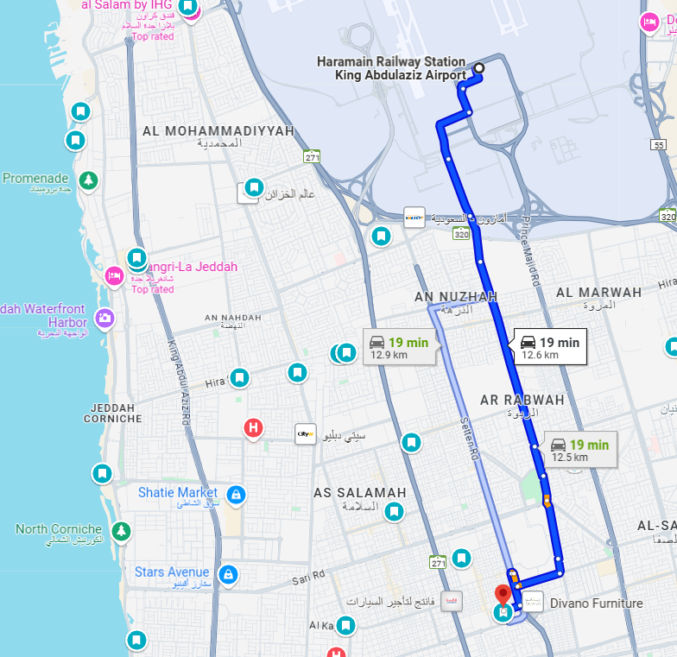
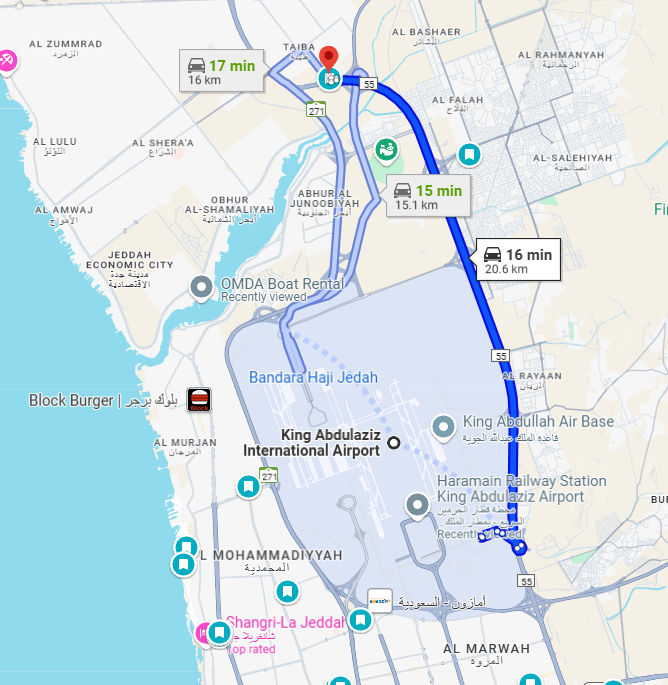
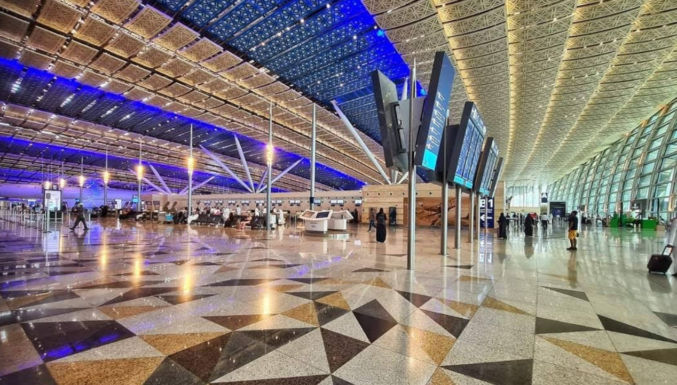
A friend dropped us off at the train station at the Jeddah international airport at 9:30 AM.
Left = train station, right = Jeddah International Airport
The train station was very spacious, clean, modern, and not crowded at all.
Train station at Jeddah International Airport
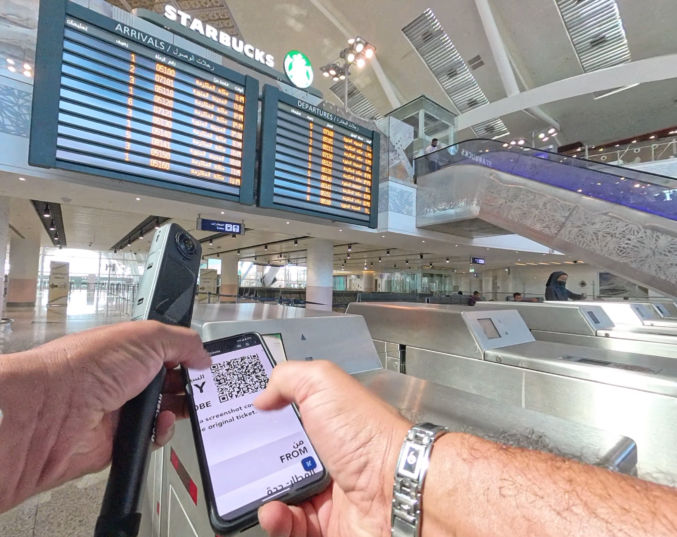
Your train e-ticket will come with a QR code. Just scan the QR code to open the turnstiles. And, of course, there is a Starbucks there with the Starbucks logo right above the arrivals and departures screens.
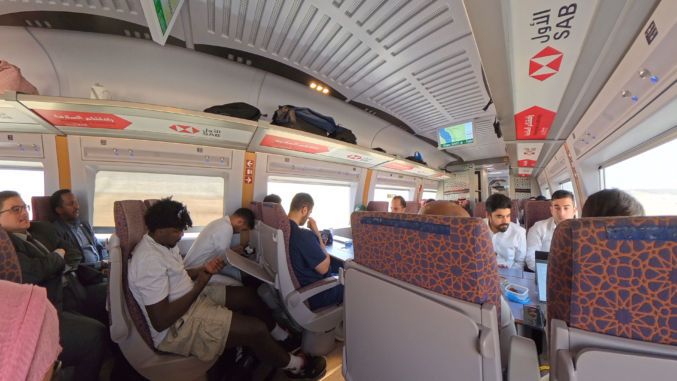
As you can see below, economy class was clean, comfortable, and spacious.
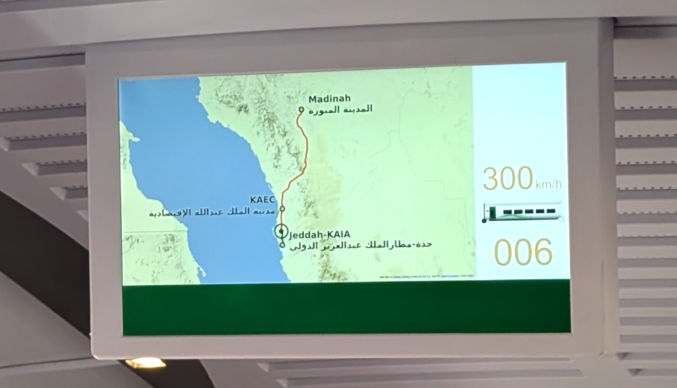
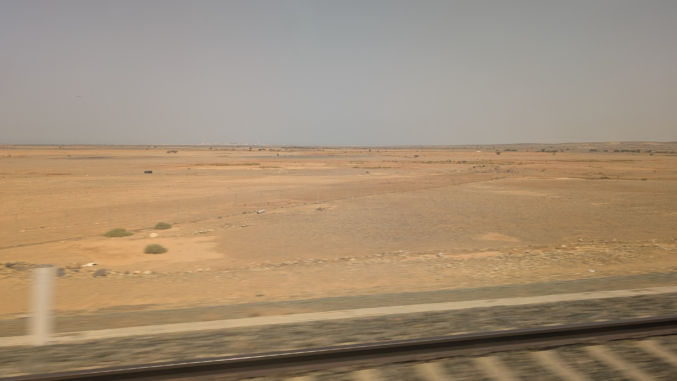
The bullet train travels at 300 km/h (186 mph).
On the way to Madinah, the scenery is mostly just desert.
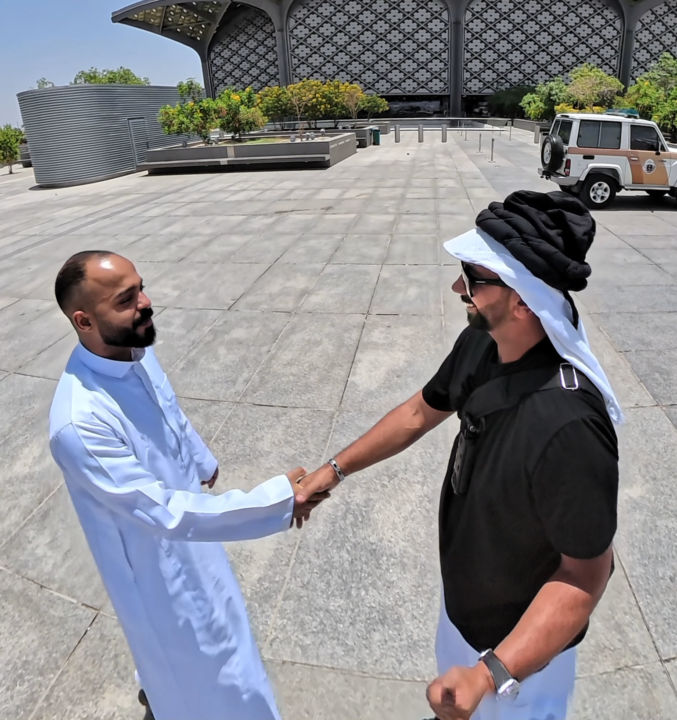
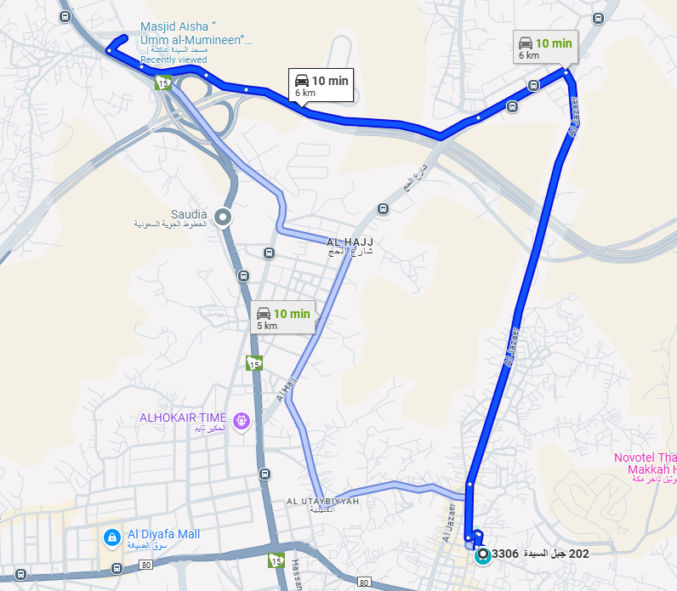
Ibrahim, the driver/guide, picked us up at the train station in Madinah.
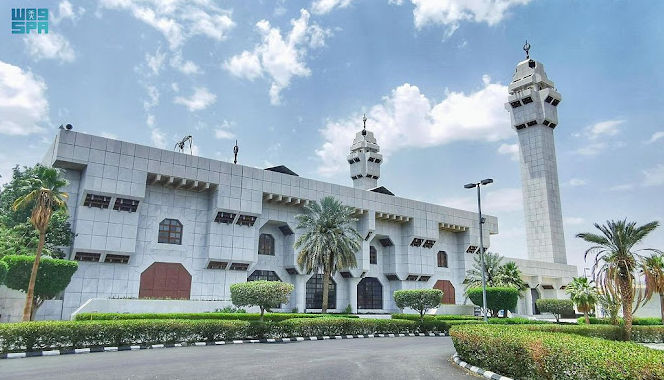
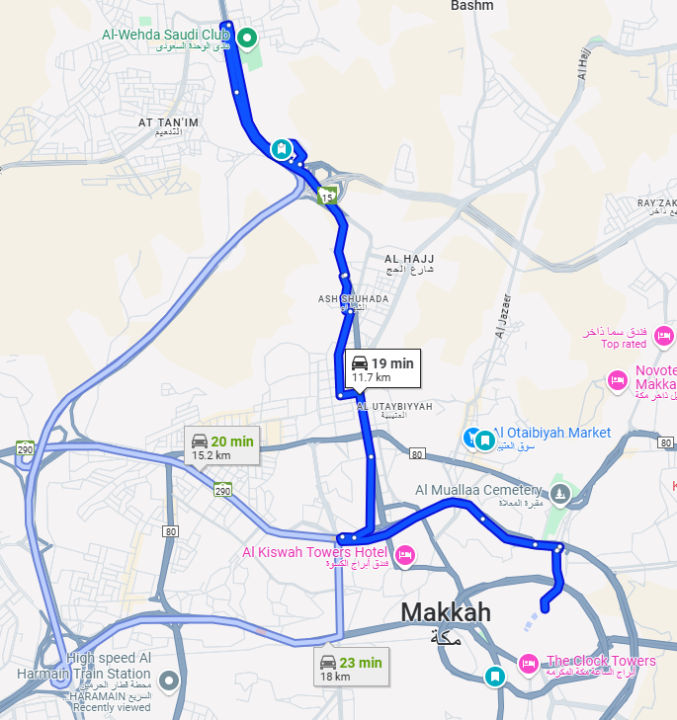
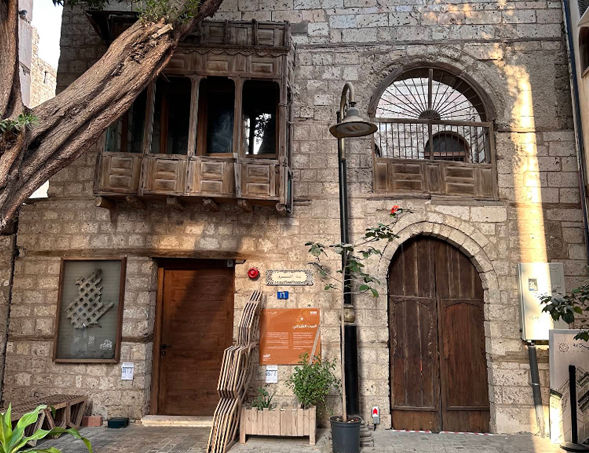
Our first stop was the Prophet’s Mosque (Al-Masjid Al-Nabawi).
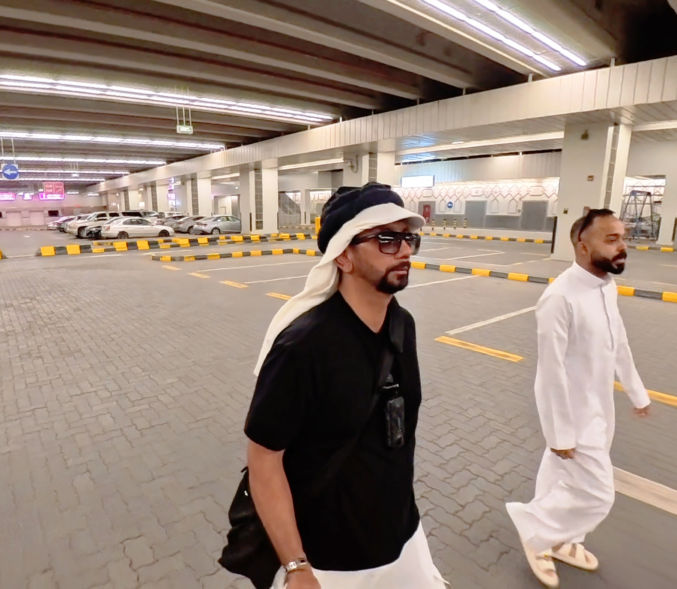
There was convenient and ample parking below the mosque.
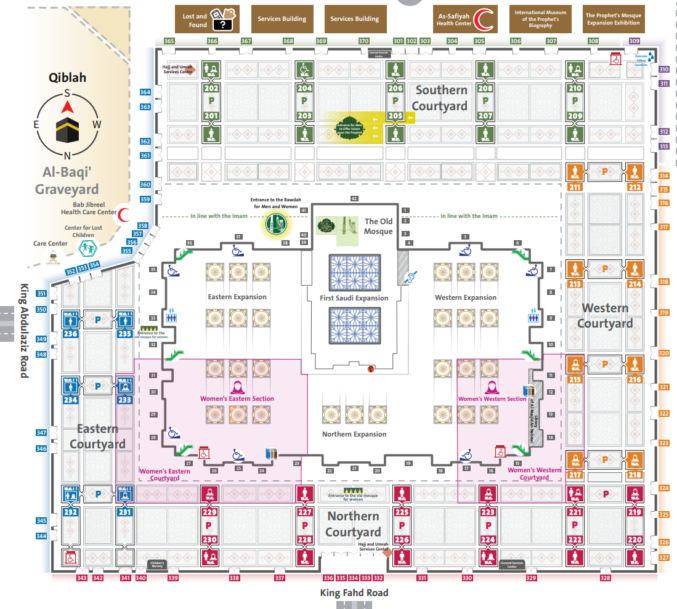
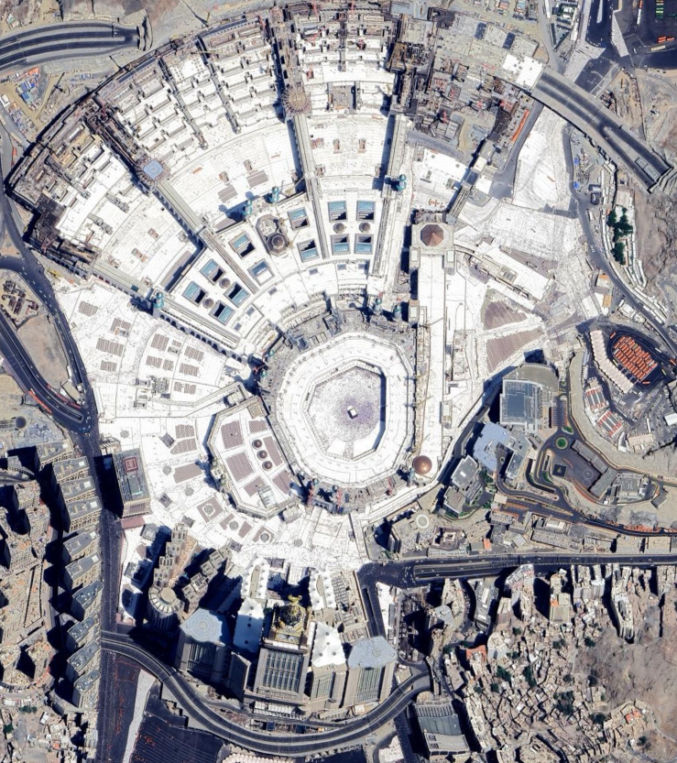
Below is a Google Earth view of the mosque.
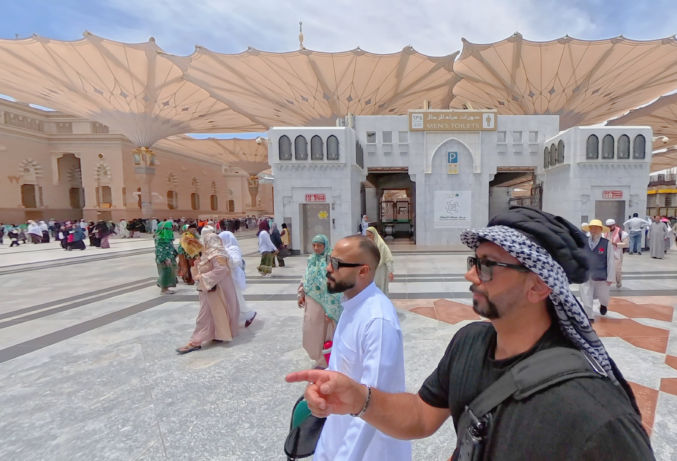
There are many restrooms all around the mosque and huge umbrellas to provide shade during the day.
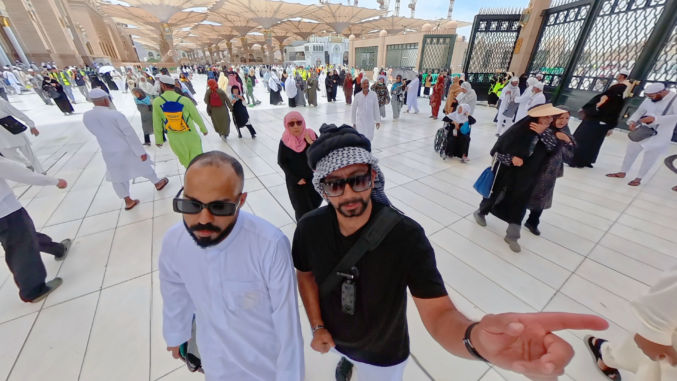
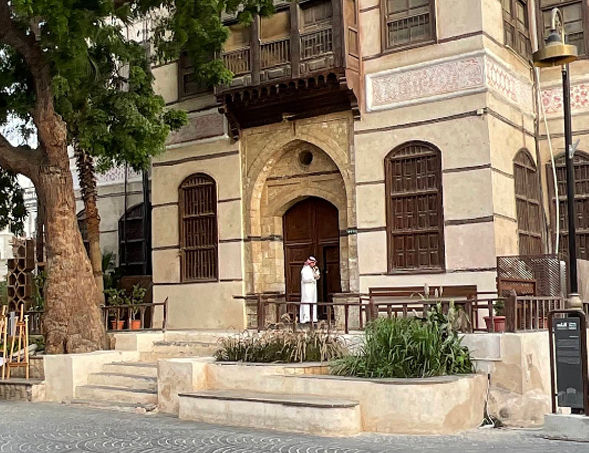
The Prophet’s Mosque is big. Ibrahim, our driver/guide, came with us inside to show us around and help guide us.
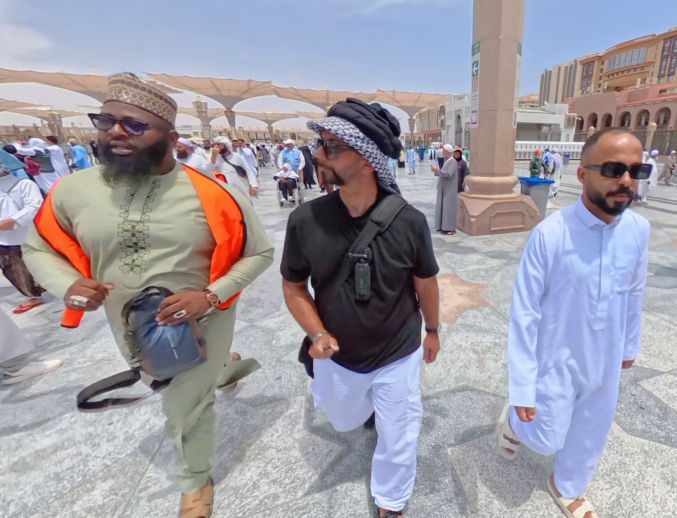
People from all over the world visit Madinah and the Prophet’s Mosque, like the person on the left, who may be from somewhere in Africa.
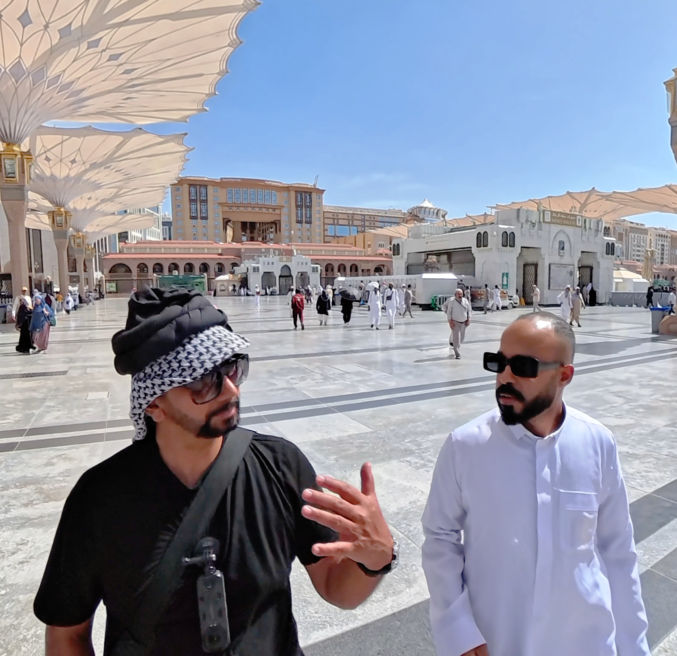
As we explored the mosque, I asked Ibrahim about various aspects of the mosque.
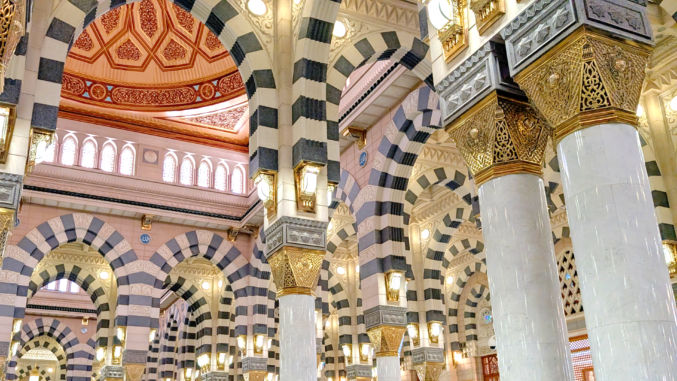
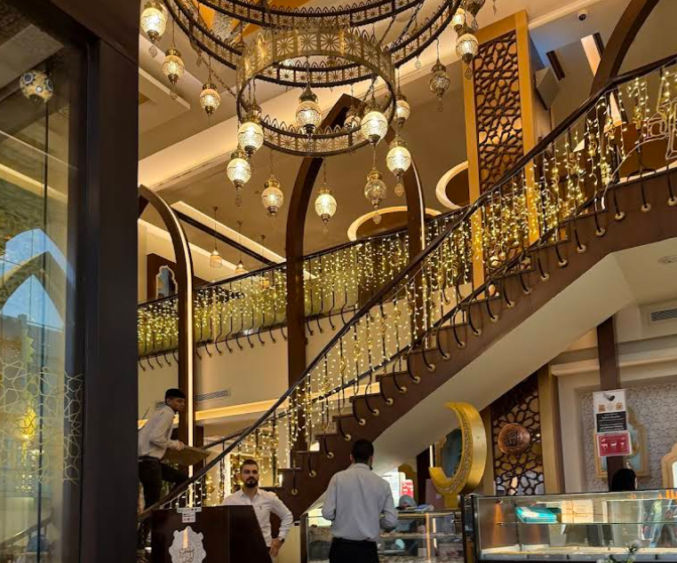
The interior design of the mosque was very elaborate with huge chandeliers.
I especially like the design of the striped arches.
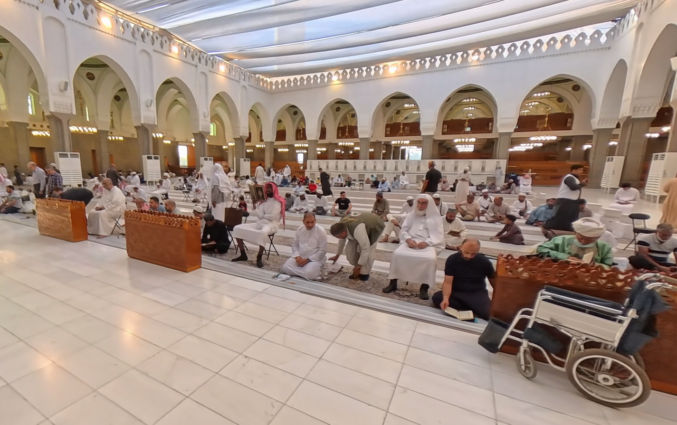
People can be seen praying, relaxing, reading, and chatting in their ethnic attire.
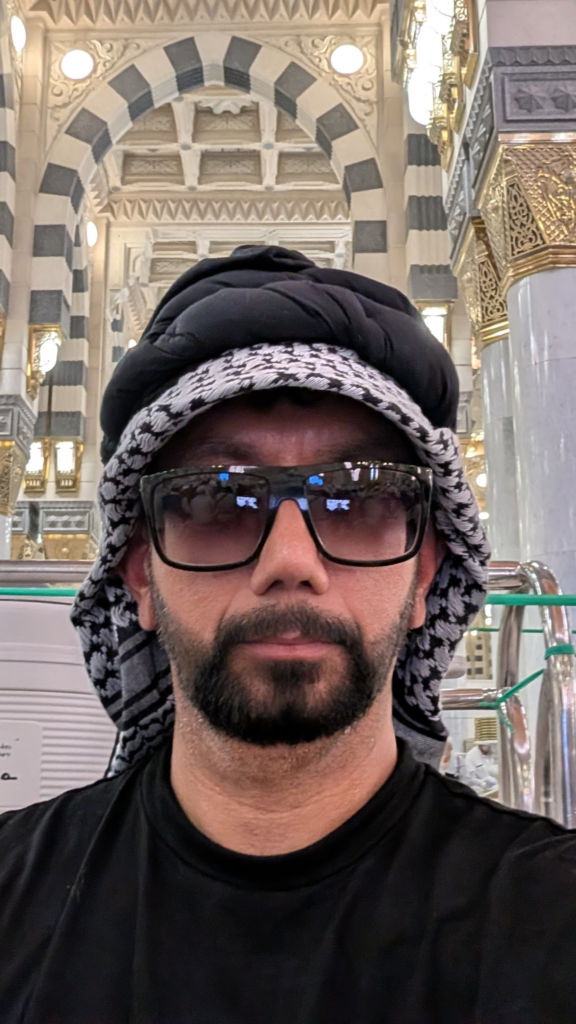
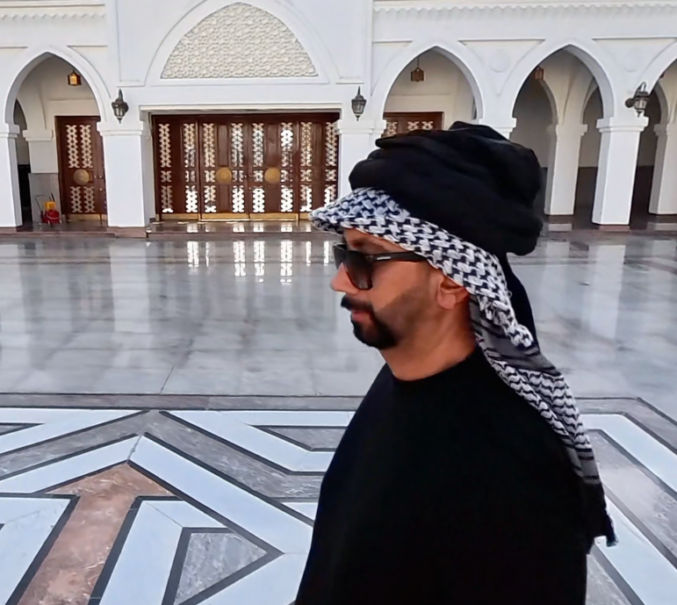
Being from the US, I normally wear a baseball cap and simple Western clothes, but I decided to dress more like a local for this trip. See photo below. The headscarf is commonly worn in Arabia whereas the black turban on top is more north African. I bought both on Amazon. When I tried the headscarf on, it kept moving around and looked messy, so I used safety pins to hold the shape I wanted. I also wanted a visor to provide some shade on my face, so I cut a visor off of an old had, stuck it in between the folded scarf, and secured it using safety pins. For the black turban on top, I didn’t want to mess around with folding and wrapping it on me, so I bought one that came pre-shaped that you wear like a hat. It had 2 straps on the back to tighten it to your head.
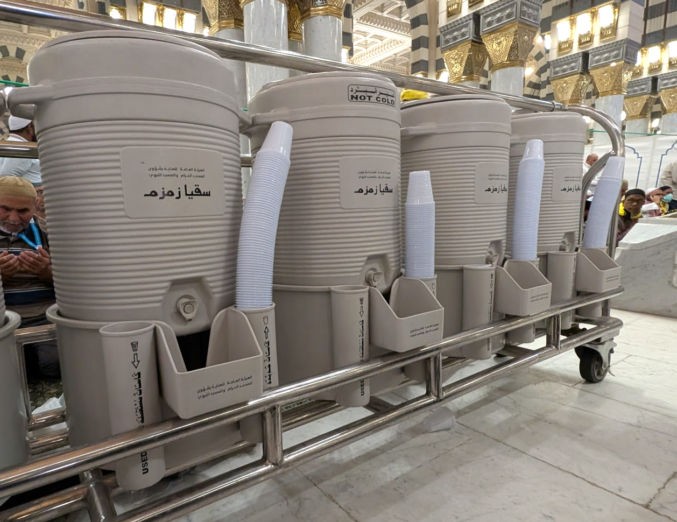
Inside the mosque, there were many water dispensers contain Zamzam water.
All over the mosque, both inside and out, you can find free Zamzam water, which was necessary considering the very hot climate.
I must have drank 10 of these cups of water. Next time, I would bring a water bottle with me.
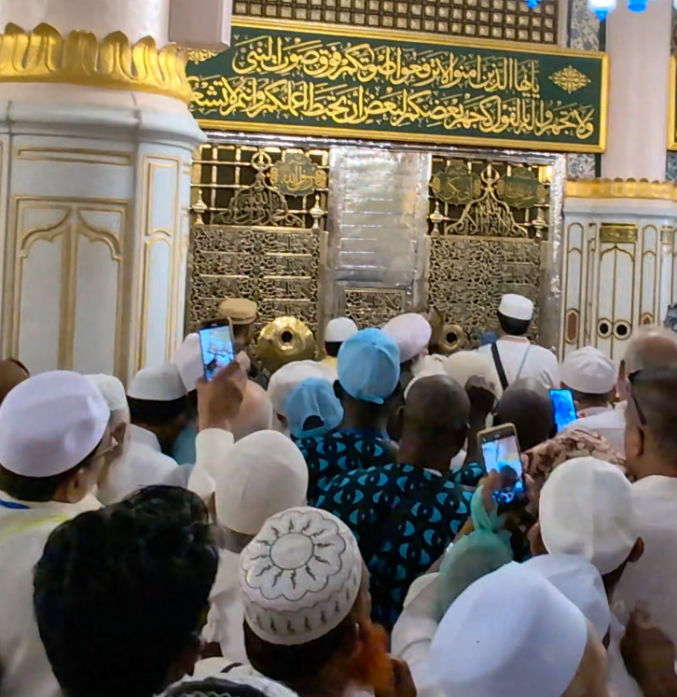
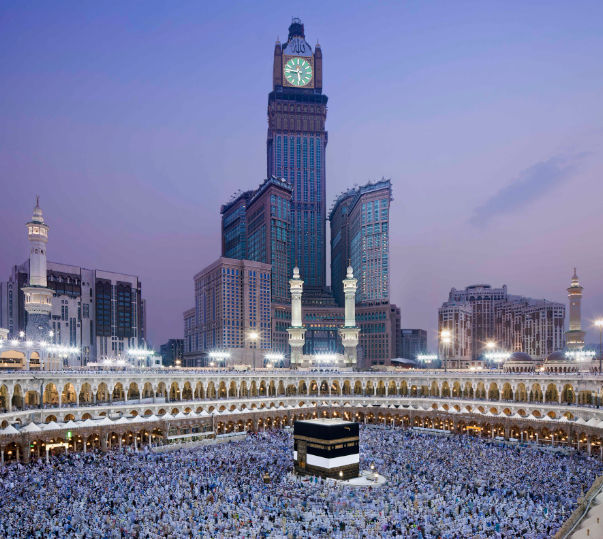
If you visit Prophet Muhammad’s tomb, it will likely be very packed with people as shown in the photo below.
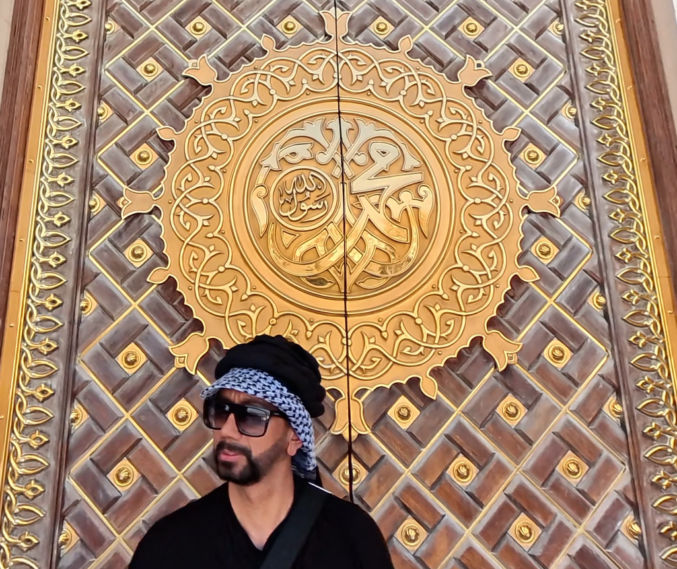
All around the mosque there are numerous golden doors with intricate designs.
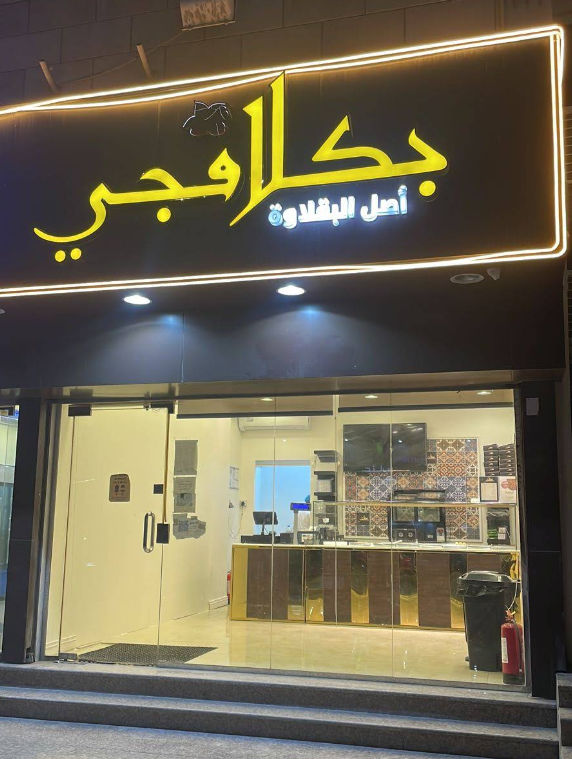
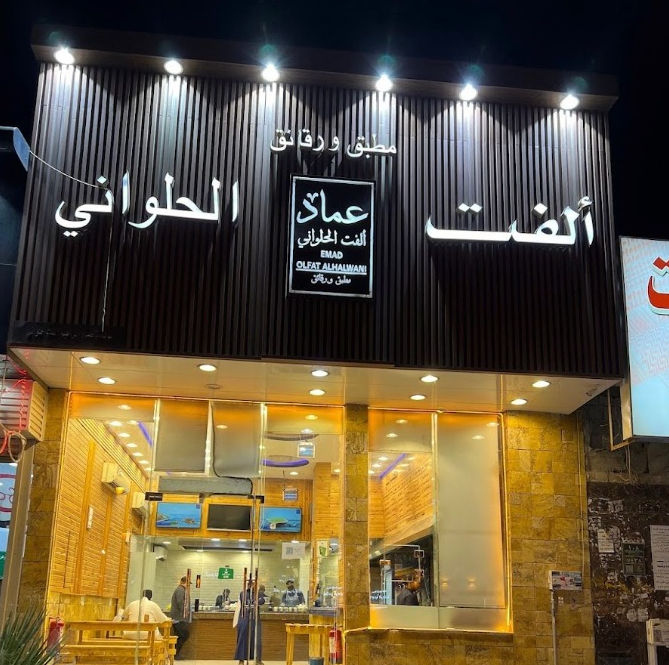
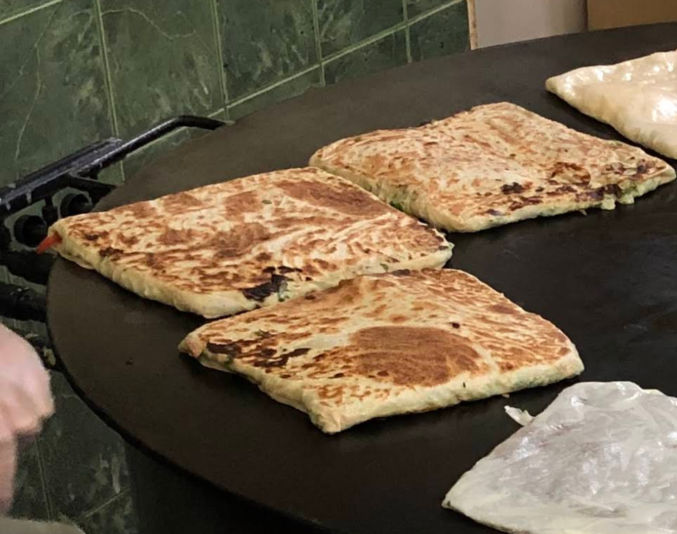
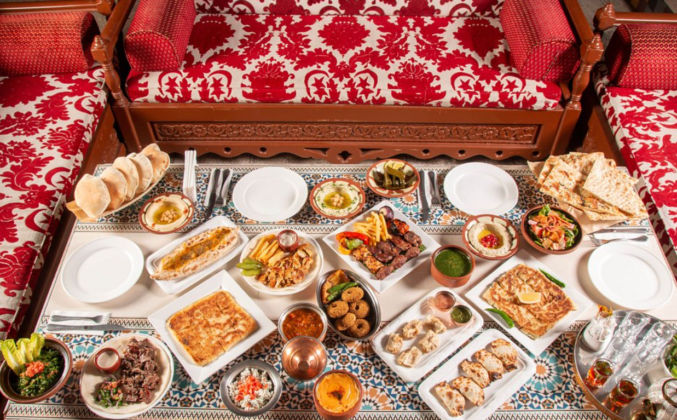
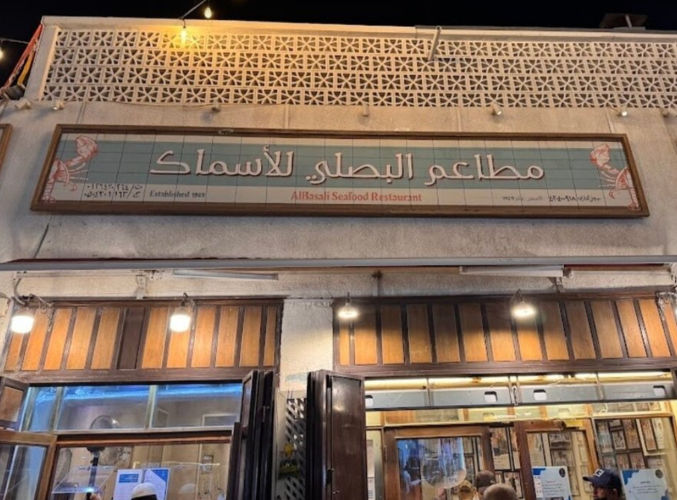
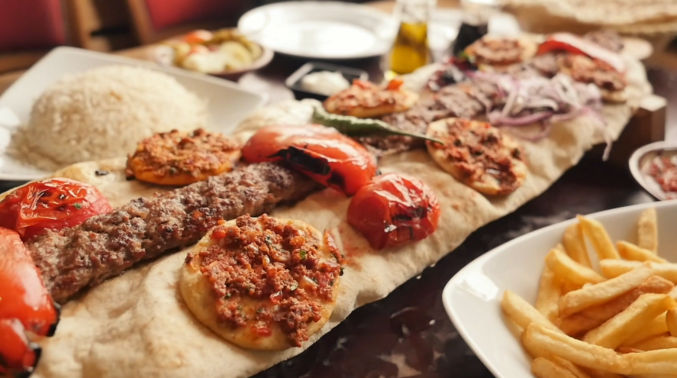
After visiting the Prophet’s mosque, we went for lunch. I wanted Turkish food. Ibrahim took us to a place somewhat distant from the touristy Prophet’s Mosque area where it wasn’t crowded and the prices were more reasonable. Though I was able to read the Arabic menu, I didn’t understand what everything was. Luckily, Ibrahim was able to explain everything to both me and the waiter, who happened to be Egyptian. Apparently, there are many Egyptians working in Saudi Arabia.
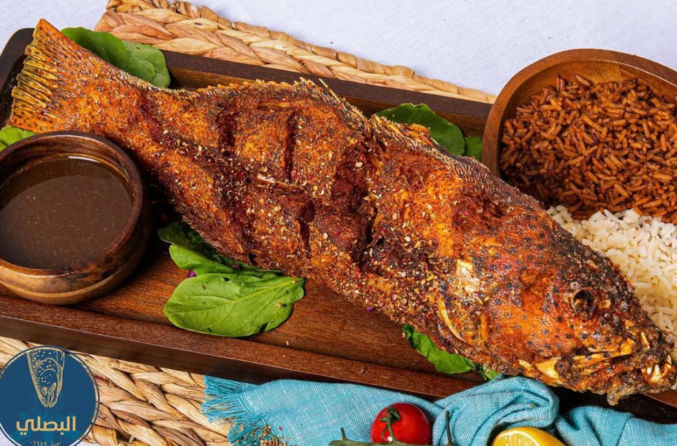
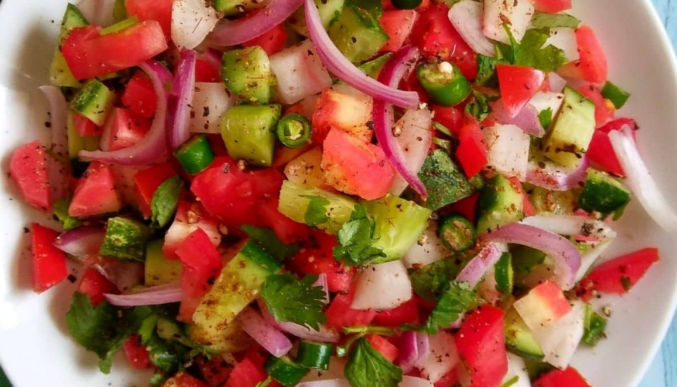
We ordered a mixed plate that was enough for all 3 of us, including the driver, Ibrahim. The food was acceptable and fair for the price.
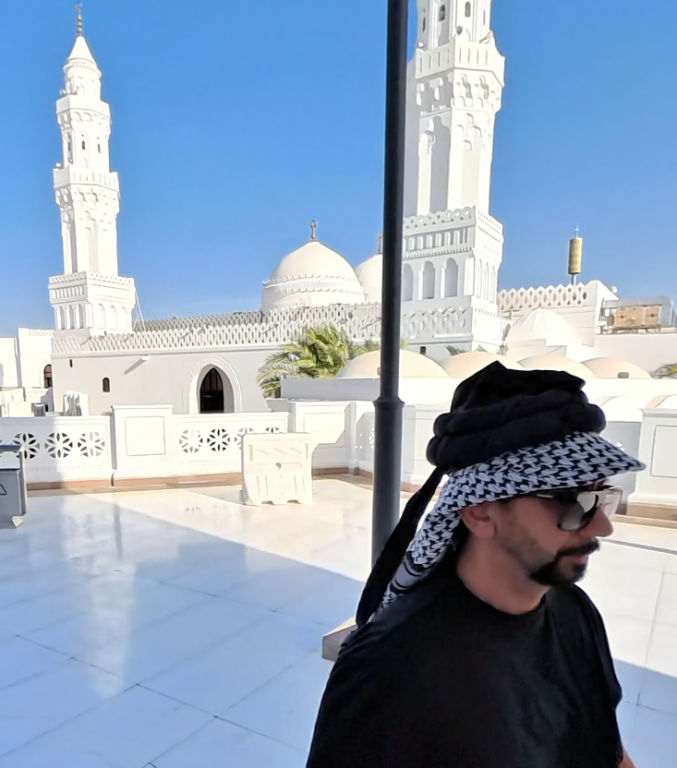
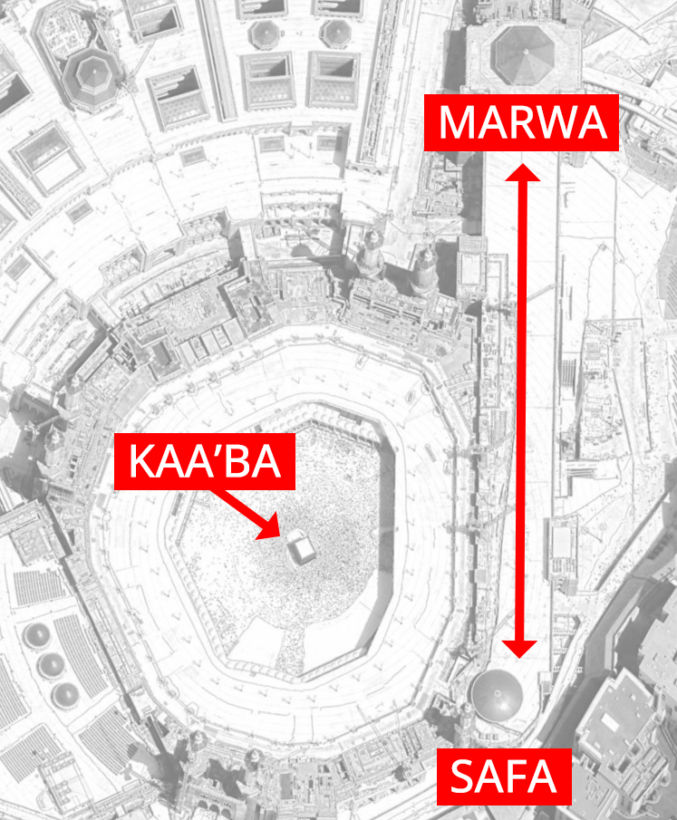
We then went to the Qiblatain (Two Qiblahs) mosque, where prophet Muhammad was commanded to move the qiblah (prayer direction) from the Aqsa mosque in Jerusalem to the Haram mosque in Mecca.
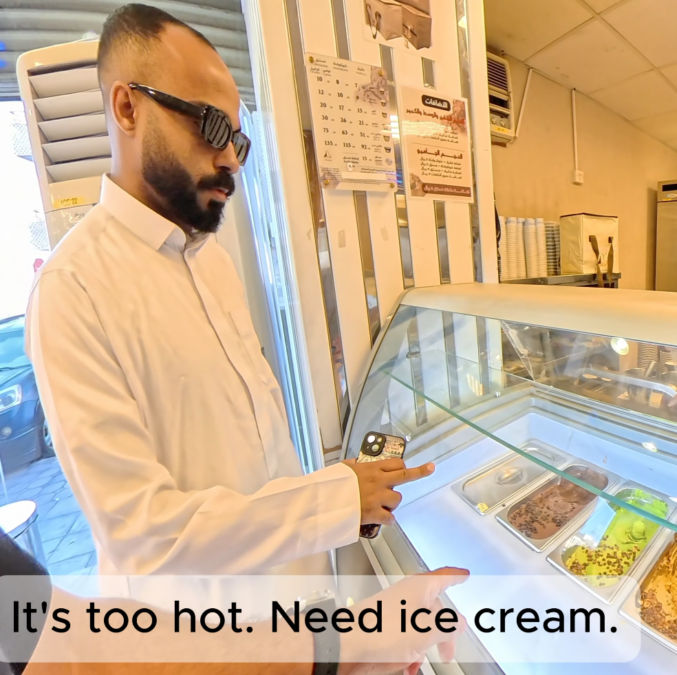
Since it was super hot, I asked our driver, Ibrahim, to take us to get some ice cream.
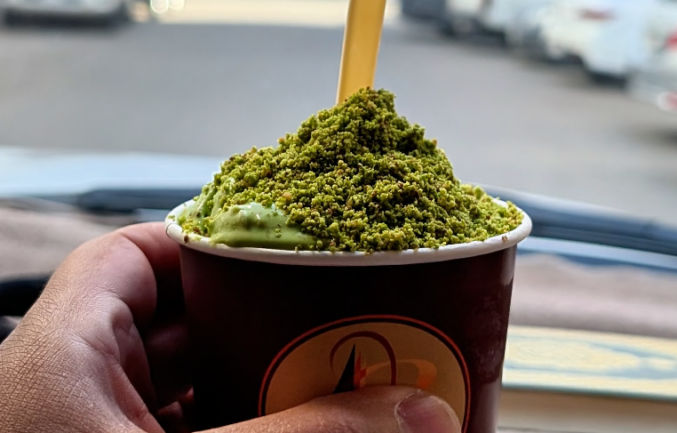
I ordered a mix of pistachio and vanilla ice cream with pistachio shavings on top. Pistachio seems to be very common in the Middle East, like in Turkey.
We then went to the Seven Mosques, a historical collection of small mosques.
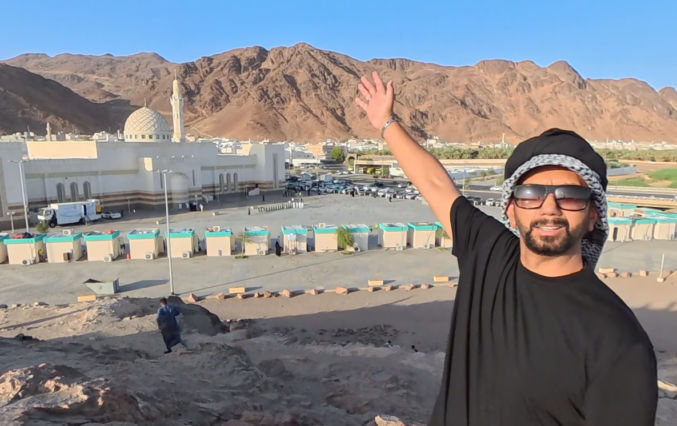
We then went to Mount Uhud, a historical site where the prophet Muhammad had a battle with the polytheists of his Quraysh tribe.
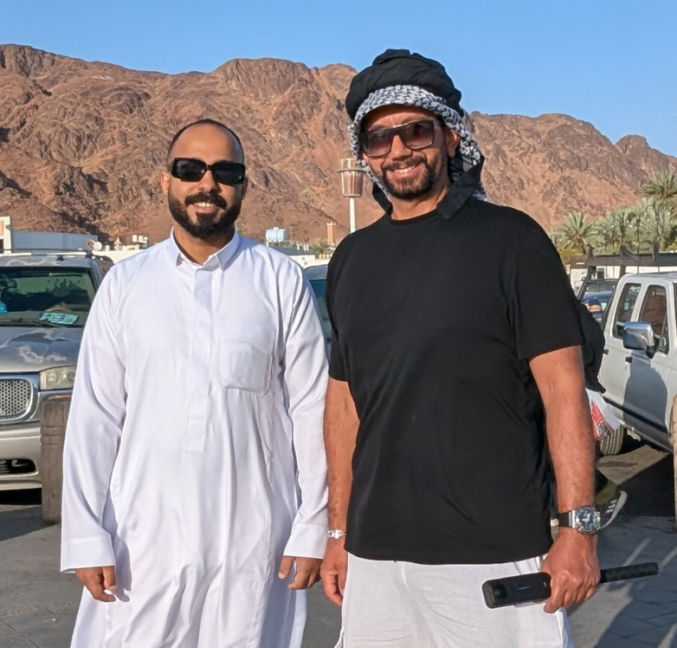
Here’s a photo of me (right) with our driver, Ibrahim (left).
Our last stop on our one-day Medina tour was to the Quba mosque, the first mosque to exist. This was one of the busier mosques we visited. Many people were praying and reading the Quran, and there were groups of kids learning something.
After that, Ibrahim took us back to the train station in time for us to catch our 7:30 PM train ride back to Jeddah.
Video
Watch the full video of my one-day excursion to Madinah.
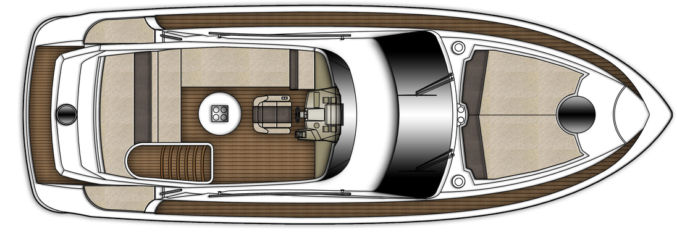
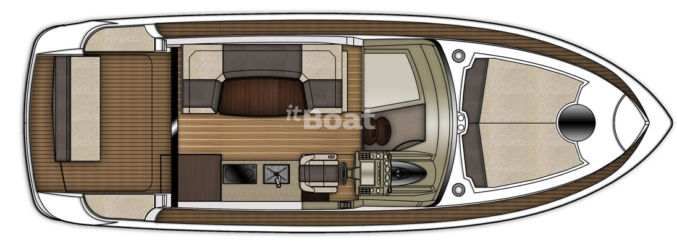
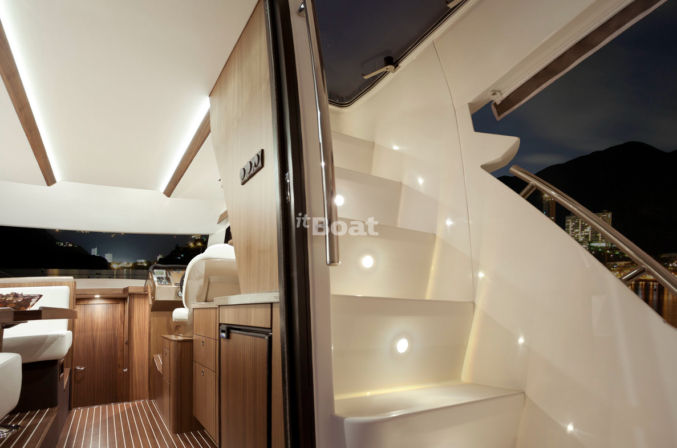
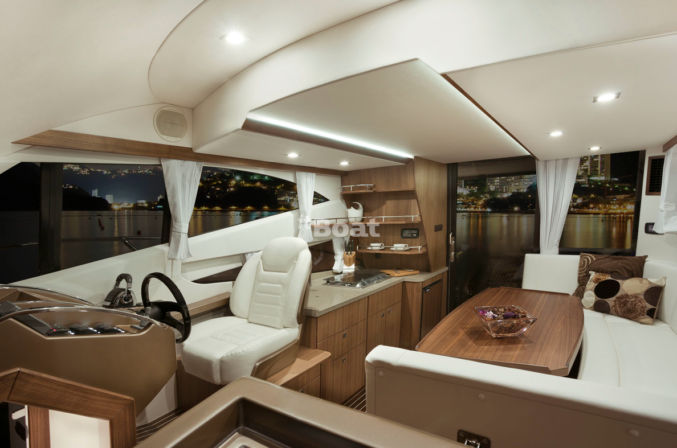
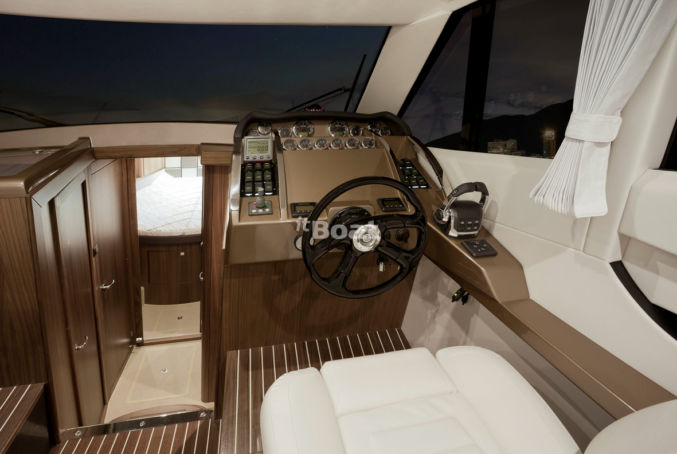
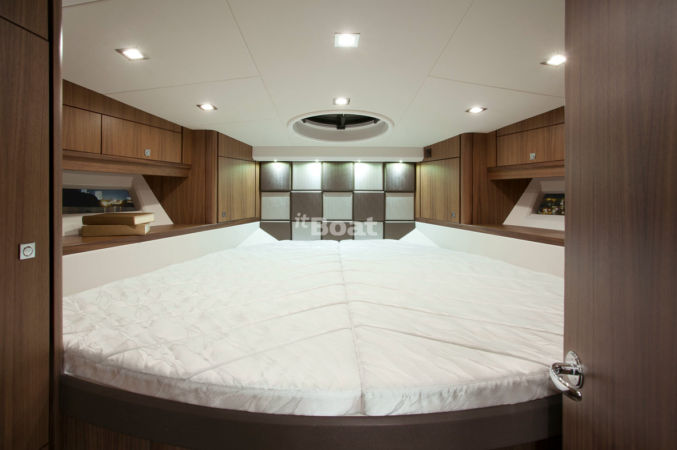
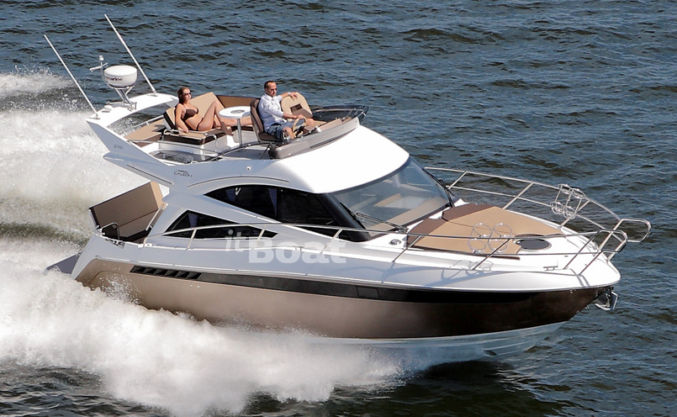
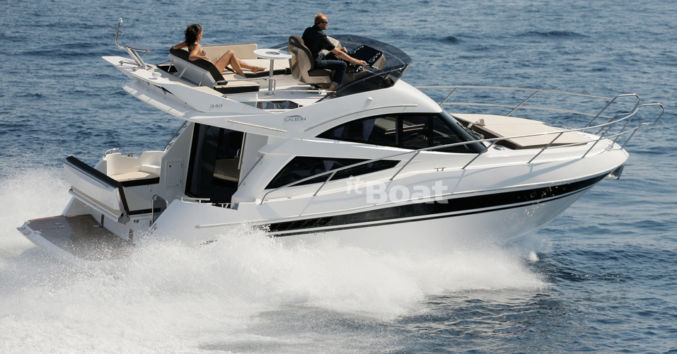
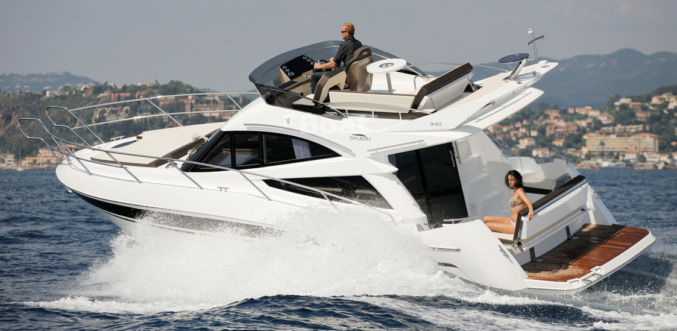
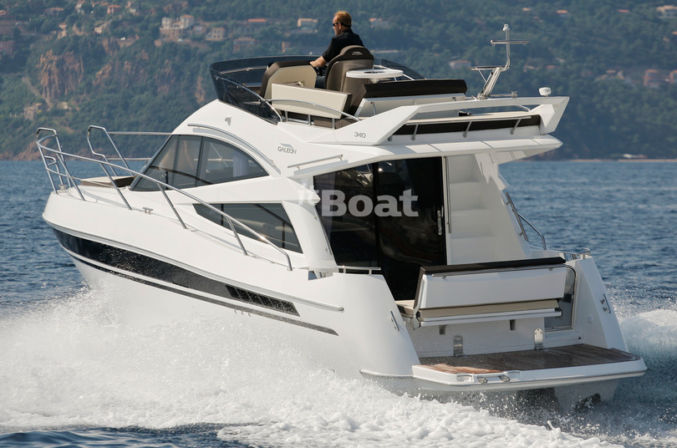
Galeon 340 Fly boatTop deck (seating at top)Middle deck (seating at back, seating in middle, seating on front deck)Bottom deck (3 bedrooms, 1 shower room, 1 toilet room)Middle deck, showing stairs to go to top deckMiddle deckMiddle deck, showing opening to lower deckLower deck, master bedroomLower deck, 2nd bedroomLower deck, 3rd bedroomLower deck, shower roomLower deck, toilet room
Play music using Bose portable speaker
Lip sync Cest La Vie at various scenes
On boat, change into captain outfit and make video tour of the yacht
Take pic looking out using binoculars
Give everyone plastic champagne glasses and pour apple cider
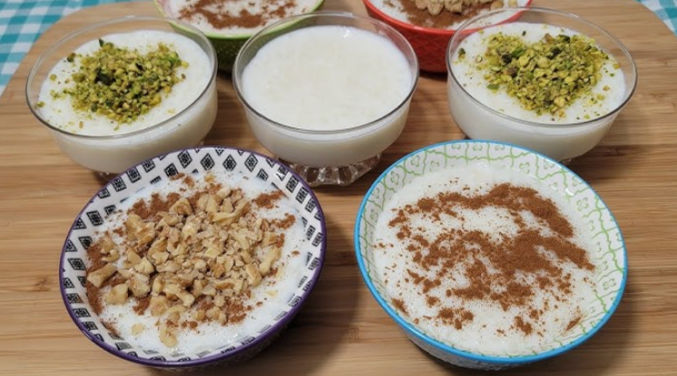
On boat, change into rastafarian hair and make video eating baklava in master bedroom or on front deck of boat
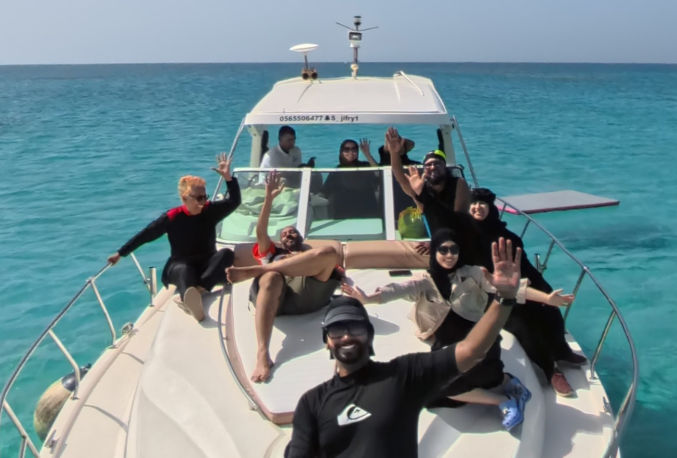
Upon arriving at Bayada, take a group photo using the 10′ selfie stick with everyone standing on the front deck of the boat. Take both a video and interval photos.
Get on inflatable lounger and float around boat while sipping on apple cider
Have Riyadh jump into the water near me to make me fall off the lounge
Use this magnetic chest mount for hands-free FPV (first-person view) filming. The camera should be positioned upside down to lay flat on your chest.
Daytime Video Recording
Choose “Freeframe video” mode.
Ratio: 4:3 (in the Studio app, change it to 16:9)
Active HDR: On
Resolution: 4K (this is the only option)
Frame Rate: 30 fps is good enough (this is the highest frame rate that supports HDR)
Horizon lock: choose 360-degree horizon lock
Slow Motion Video Recording
Choose “slow motion” mode to record a video with a high frame rate. Allows you to shoot in 240 frames per second in 1080P, or up to 120 frames per second in 4K.
Night Shots and Low-Light Scenes
Choose “Pure Video” mode.
FlowState Stabilization
There are 3 stabilization options: Off, Low, Standard, and High. Choose High for very shaky situations. Note that the high setting will result in more cropping.
Field of View (FOV)
Choose Dewarp to experience a wide FOV with minimal distortion. This is ideal for scenarios such as skiing and vlogging.
Quickly cancel a recording
You can quickly cancel a recording if you’ve messed up by long-holding the shutter button while recording.
Pause recording
If you have some downtime during a shot, for example, you’re waiting at an intersection or for something to happen, tap the screen while recording (at the bottom) to pause your recording. You can then tap to resume at any time.
Quick Capture
When the camera is off, press the shutter button to start shooting with QuickCapture. The camera will start shooting using the last-used shooting mode.
Pre-recording
Save 15 or 30 seconds of footage before you start recording. This can be handy if you want to catch something on film that is imminent.
Interval (long period)
Take a series of single photos over a long period of time. The photos can then be combined into a timelapse.
Burst (short period)
Take a series of photos in a short period of time (up to 10s). One use case is if you are alone and want to take a selfie or if you are with someone who is not good at taking photos. You can set the burst setting to 30p/10s, meaning 30 pictures in 10 seconds. Then, you can stand, smile, try different poses, etc, and later pick the best shots.
Timelapse (for static, fixed-position shots)
Create a timelapse video that condenses a long scene into a short video by taking a photo at a set interval. Use a tripod or fix the camera in one spot.
Shoot length: infinite, 3m, 5m, 10m, … 10h
Interval: 0.5s, 1s, 2s, … 120s
For example, let’s say you want to film yourself having dinner on an airplane. You expect you will take 30 minutes to eat, so you choose 30m for “shoot length”. Then, you can adjust the interval to see how long the timelapse video will be. For example,
interval = 0.5s, => timelapse duration = 2m
interval = 10s, => timelapse duration = 6s
The timelapse duration is shown on the screen.
Timeshift (for moving shots)
This is like a moving time-lapse.
Auto-stop Recording
If you want to shoot a video and have the camera auto-stop recording, you can set the duration to one of the preset values. The default is infinity (until the battery dies). Other options include 15s, 30s, … 3h, etc.
Inconspicuous shooting
If you want to film without people knowing that you’re filming, you can do the following to make people think that the camera is turned off.
Turn off the indicator light so there’s no flashing red light on the camera.
Turn off “Front Screen Display”
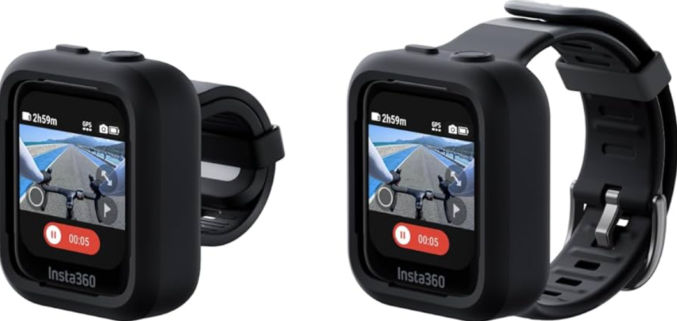
Use the GPS remote to start and stop shooting without touching the camera.
Disclaimer: I have not tested these methods yet, but theoretically they should work.
On Steering Handle
Use a U-bolt mount on the left handle grip. Use a selfie stick so you can see more of the driver in your shots. You can have the camera positioned in front of the driver or to the left or right of the driver.
If you have the selfie stick going over the steering unit, you may need to secure it in place using endless ratchet straps. You may need to loop the ratchet strap around the selfie stick once or twice to keep it from moving around.
If you have a life vest with straps, you can secure your camera with selfie stick between the vest and the straps.
However, if you want to extend the selfie stick to get a bird’s-eye-view shot, then you’ll need to do more. One way is by inserting the long selfie stick between your body next and the vest next to your shoulder. To prevent the bottom of the stick from moving around, wear a belt that has a stick holder. To prevent the stick from moving around near your shoulder, hold it against the vest using a reusable rubber twist tie. If you use the 10′-long Insta360 selfie stick, the bottom of the stick is too large to fit in the stick holder in the belt. As a workaround, you can connect the Insta360 tripod attachment to the selfie stick and then insert that attachment into the belt. Another option is to remove the stick holder in the belt and screw the selfie stick to the belt using a 1/4″ male-to-male camera screw.
On Arm
You can rig together a selfie stick mount on your arm as pictured below. The benefit of this is you can move the camera around hands-free. Learn more.
Other Spots
Depending on the jet ski, you may be able to use endless ratchet straps to secure a selfie stick to other areas like the front, where the rear-view mirrors are, and the rear passenger handle. You can also use a suction mount, as pictured below, but you may want to tether it to the jet ski using a lanyard in case the suction mount fails while riding.
Since I have the following cameras
two Insta360 X3 (360-degree action cameras)
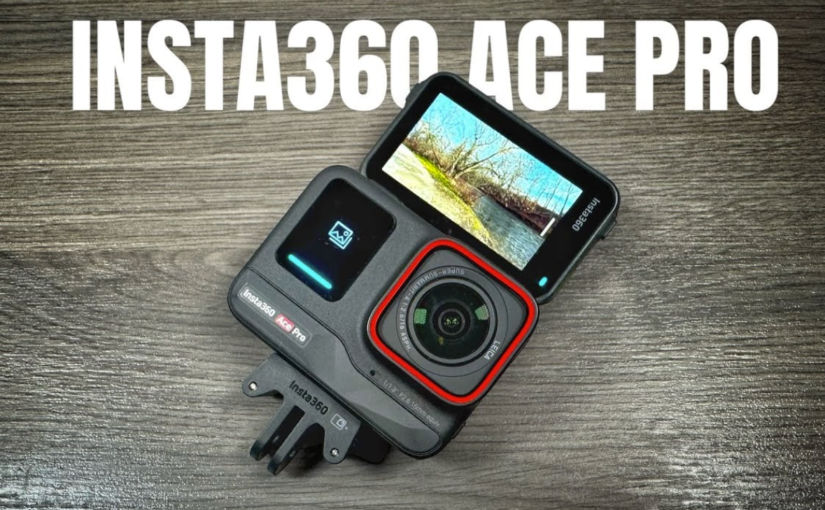
one Insta360 Ace Pro (traditional, single-direction action camera)
I would use the following setup on a rented jet ski:
When speeding, keep the selfie stick retracted to avoid it breaking due to rough motion. You can get an FPV (first-person view) facing the direction of motion.
When not speeding, you can turn the camera on and then extend the stick upwards. This will allow you to get a bird’s eye view of everything around you.
Usage: Screw the U-bolt mount around the left handle. Screw the camera to the 10′-long selfie stick and screw the selfie stick to the U-bolt mount. Position the U-bolt mount so that the selfie stick lays over the right handle. Secure the stick to the steering unit using a ratchet strap. Wear the GPS action remote on your wrist and push the shutter button to start/stop shooting.
Views:
When speeding, don’t extend the stick fully to avoid it breaking due to rough motion. You can get a 3rd-person view of yourself and a partial view of the jet ski.
When not speeding, you can fully extend the stick and get a complete 3rd-person view of yourself and the jet ski.
Usage: Mount the suction mount somewhere on the front of the jet ski such that the camera can face you. Attach a lanyard to the camera and secure the lanyard to the jet ski so that you can retrieve the camera from the water in case it falls in. Wear the GPS action remote on your wrist and push the shutter button to start/stop shooting.
Views: Whether you are speeding or not, you can get a 3rd-person view facing you from the front of the jet ski. Since the Ace Pro is not a 360-degree camera, you can only film in the direction of the single lens.
Note: you can use one GPS Action Remote with both the X3 and the Ace Pro.
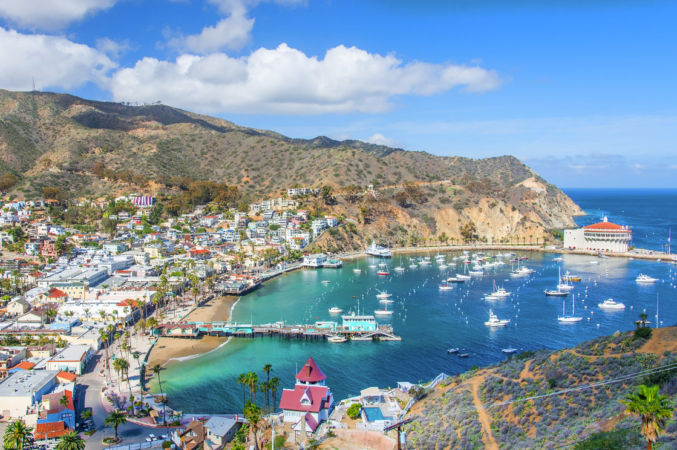
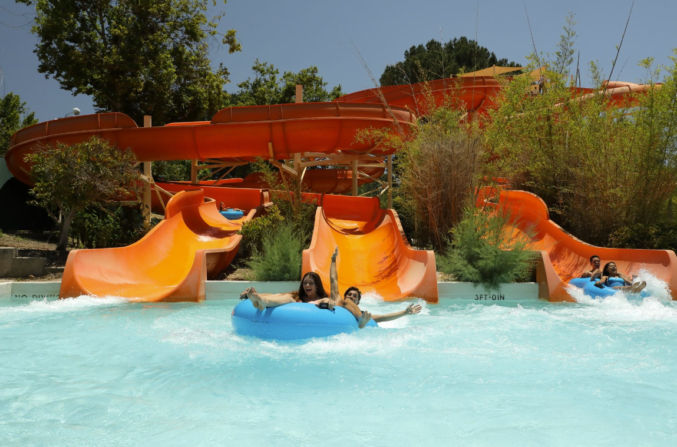
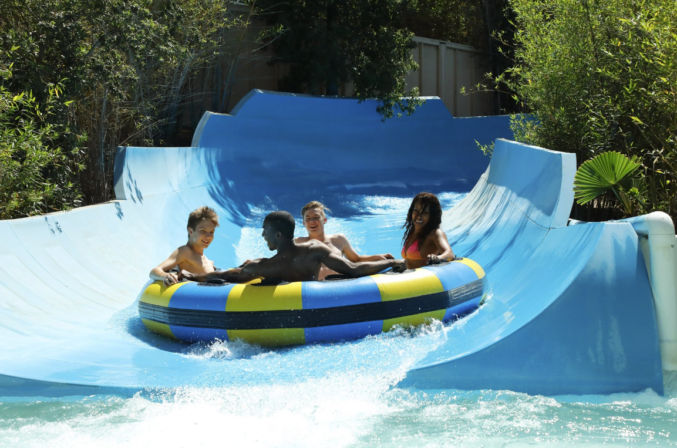
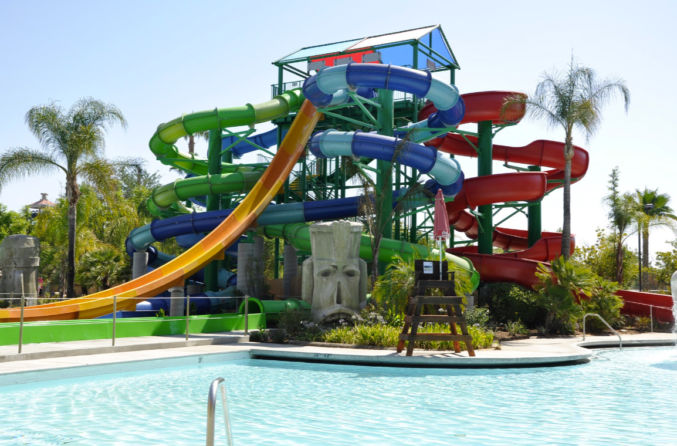
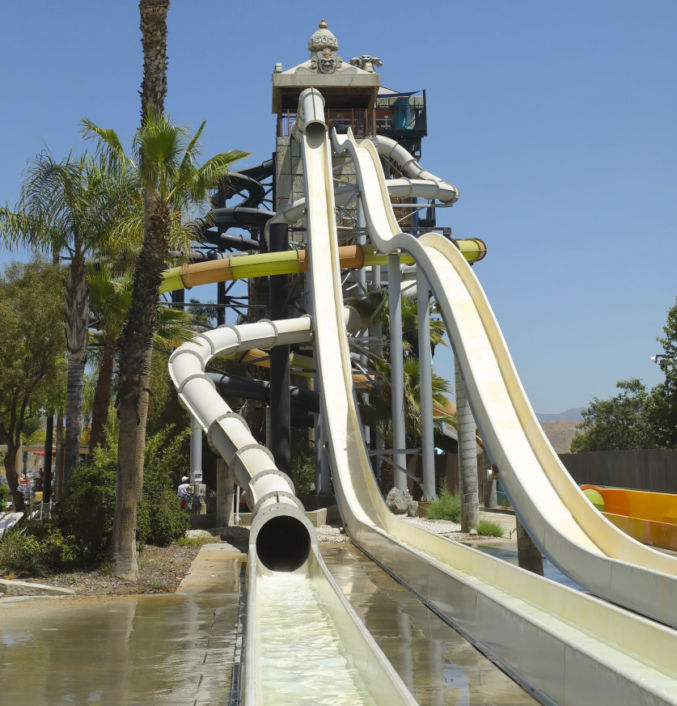
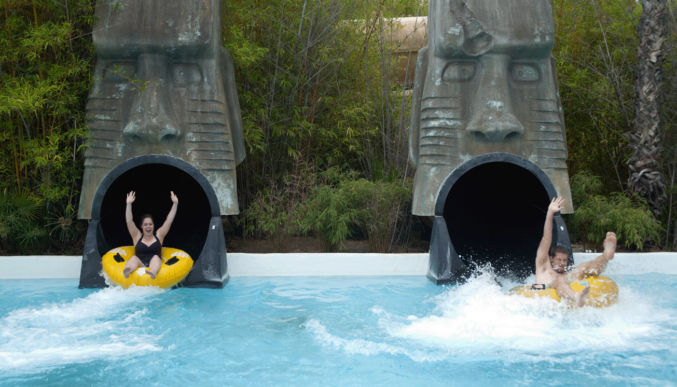
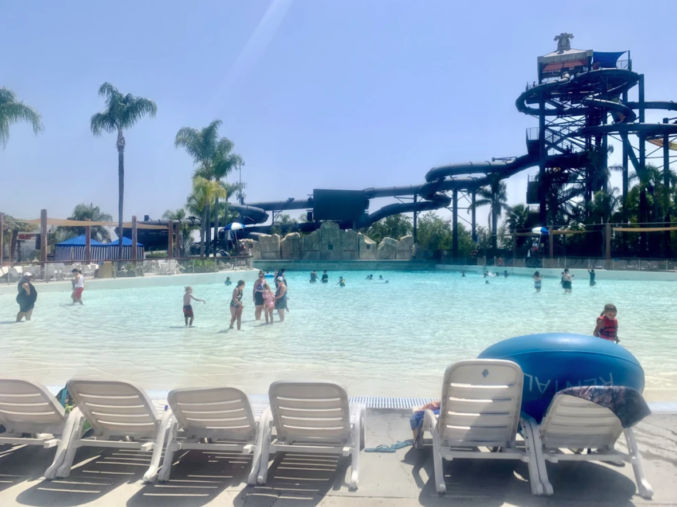
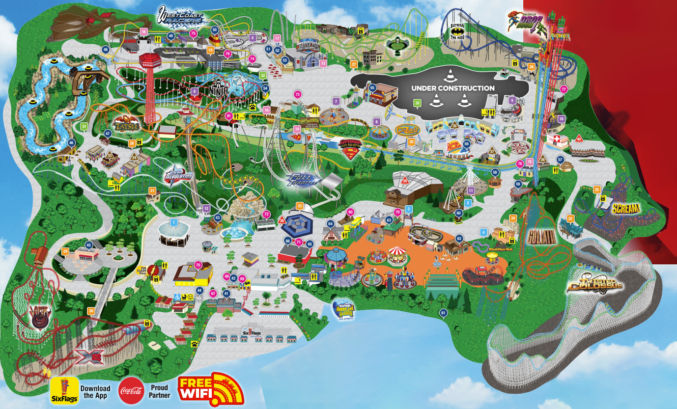
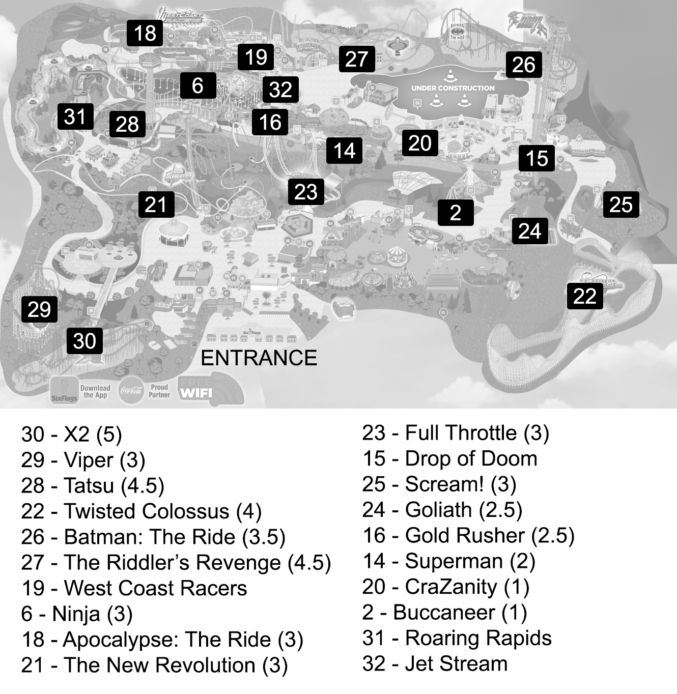
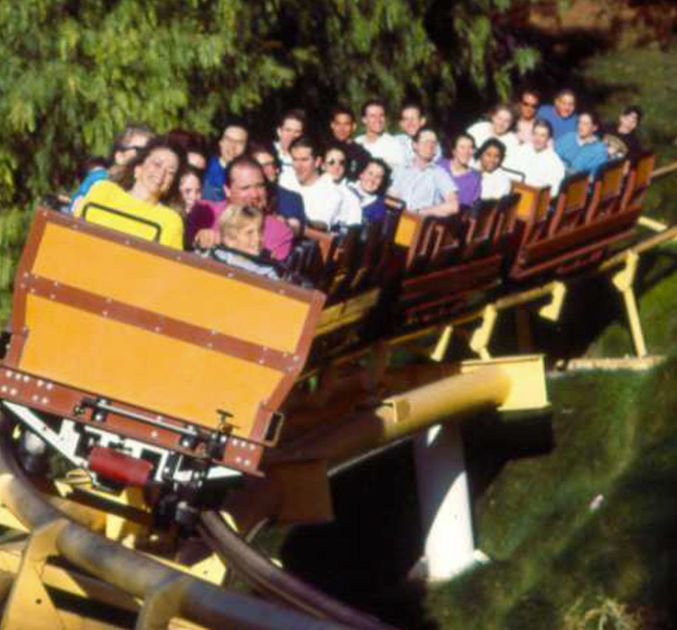
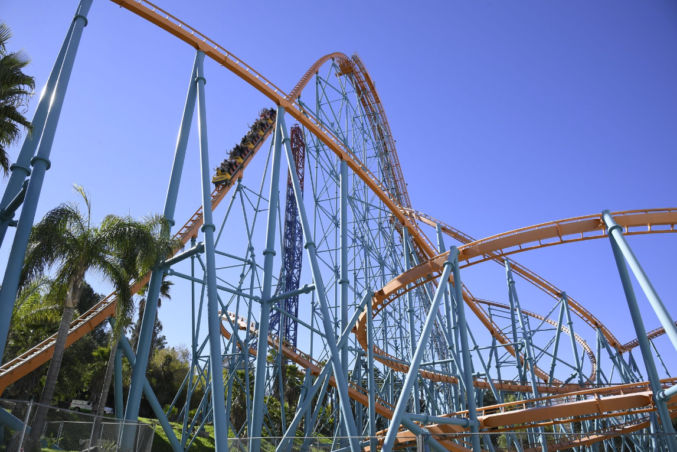
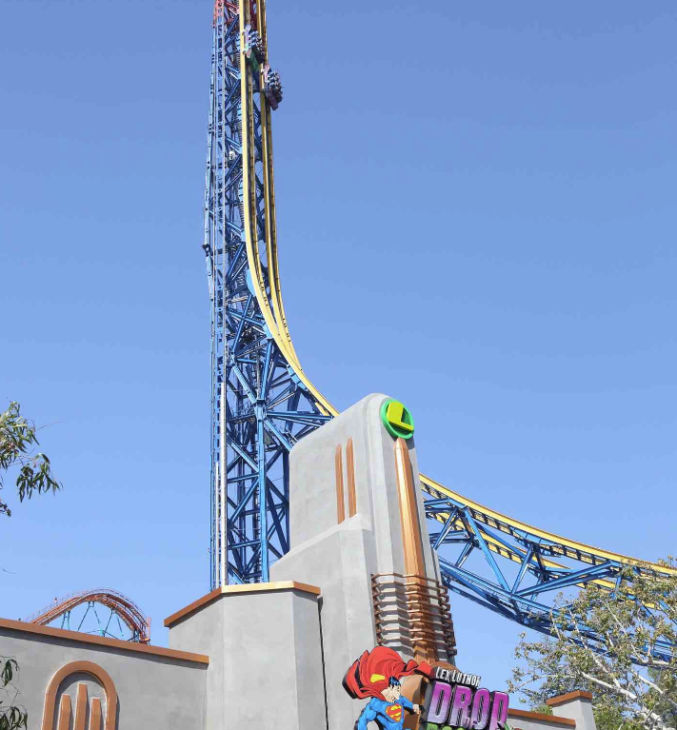
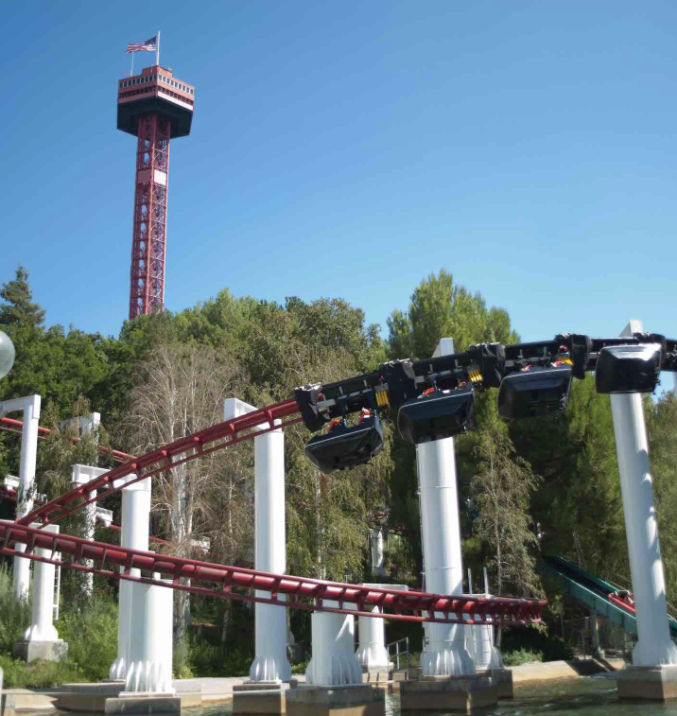
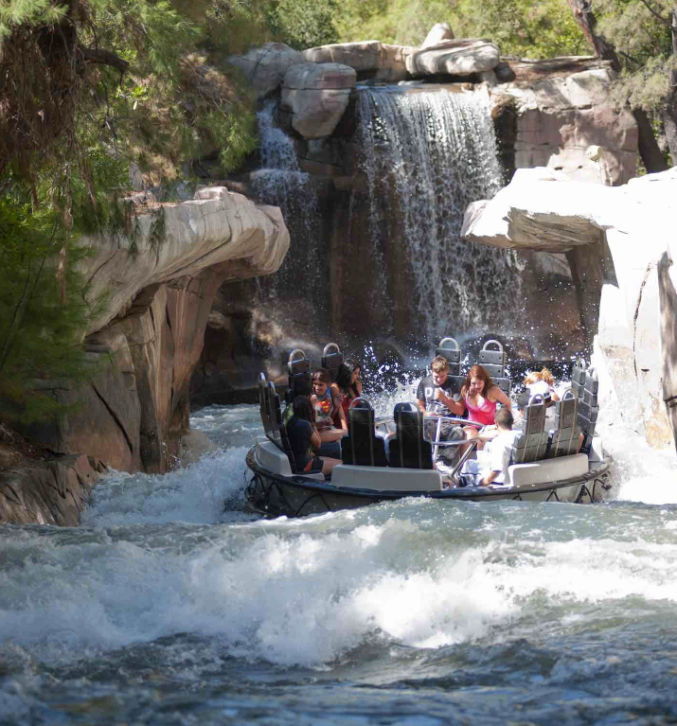
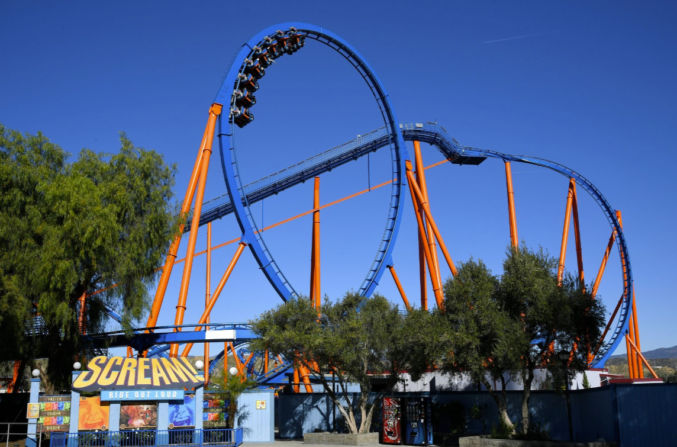
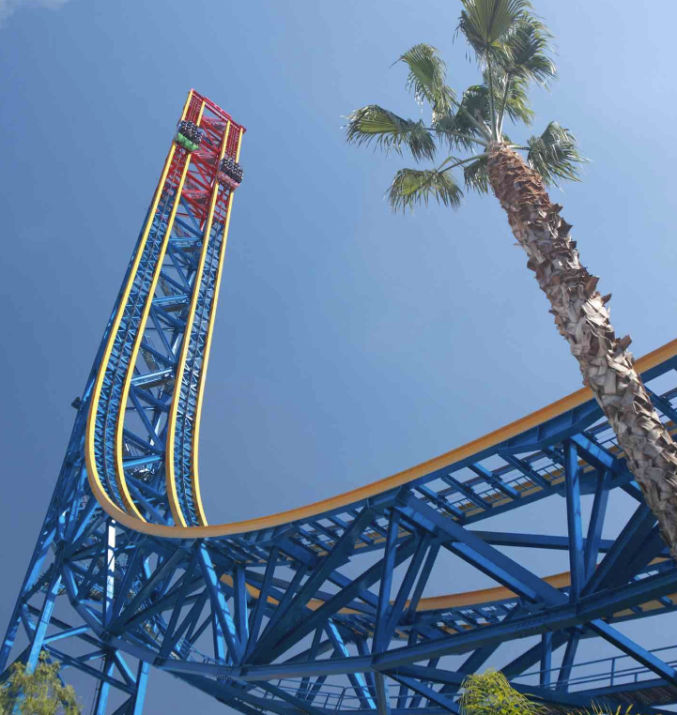
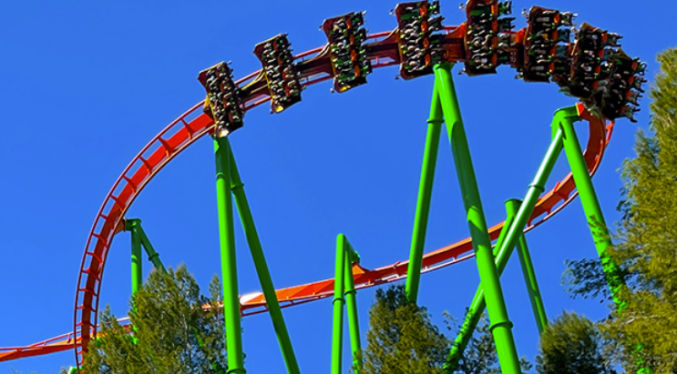
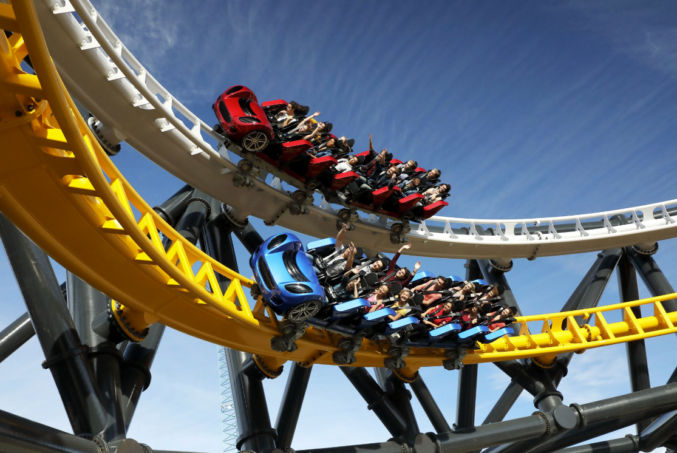
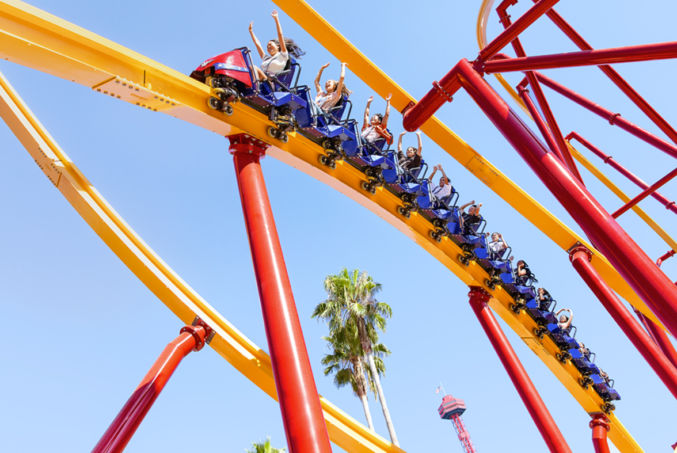
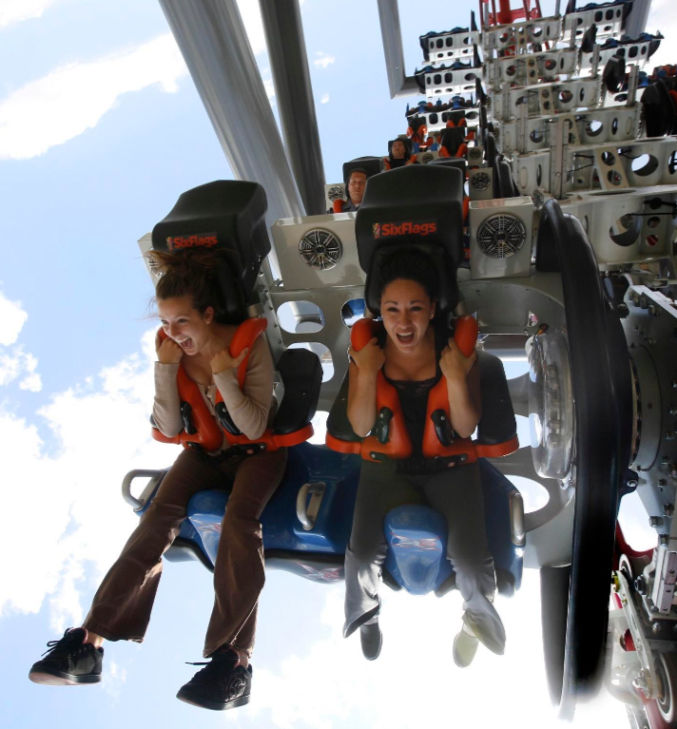
Sunday: Catalina Island – the Amalfi Coast of Orange County Monday: Six Flags Hurricane Harbor (Water Park) Tuesday: Six Flags Magic Mountain (Amusement Park) Wednesday: Six Flags Magic Mountain (Amusement Park)
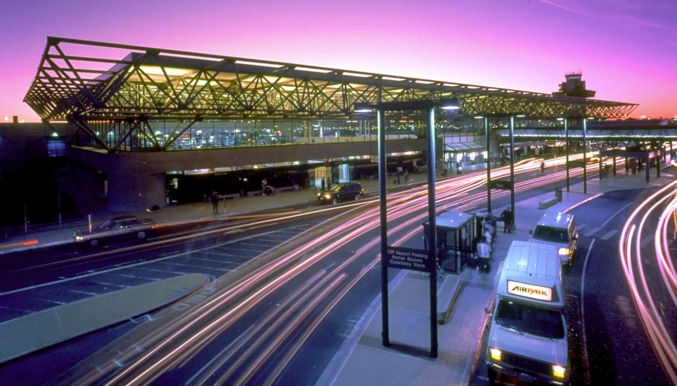
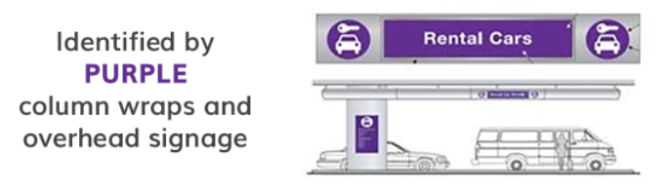
When exiting the airport, follow the signs to “ground transportation”
Stand under the purple sign marked “car rental companies” to await shuttle pick-up
Board the Dollar shuttle bus
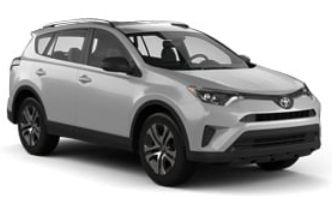
Dollar Rent a Car Booking.com # 789858762 Toyota RAV4 or similar $316.94 for 5 days
3:00 PM
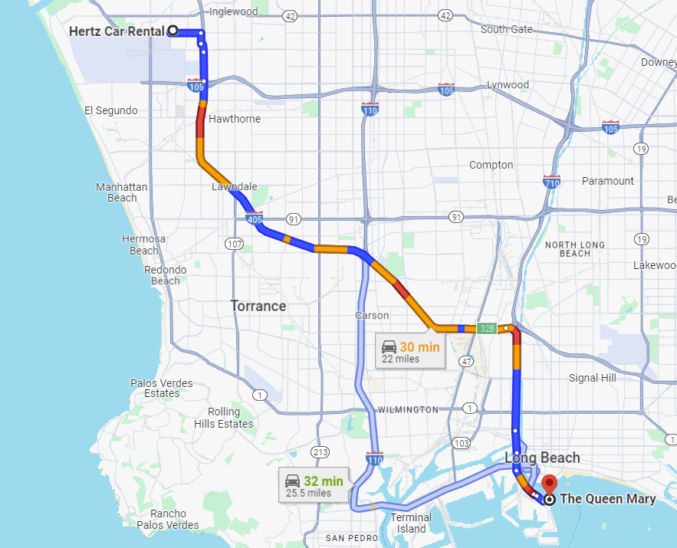
Drive to Hotel
30 minutes
3:45 PM
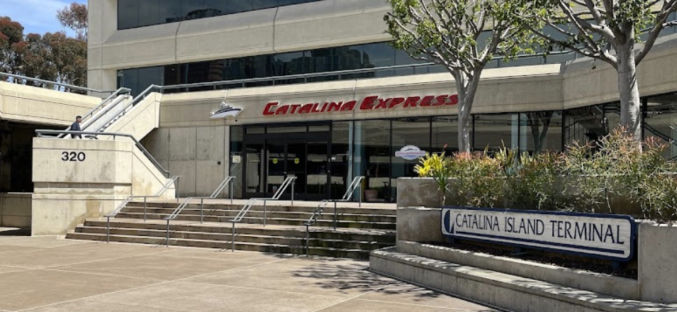
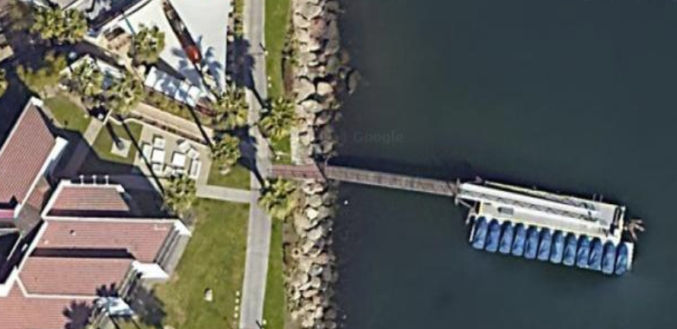
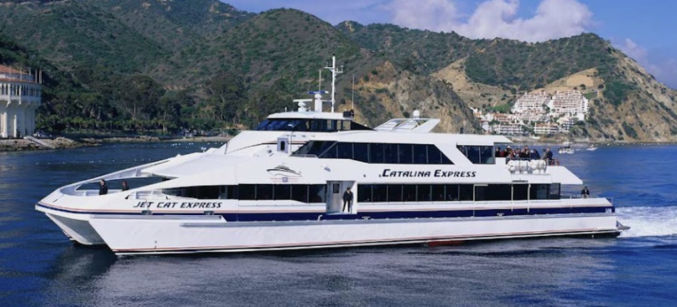
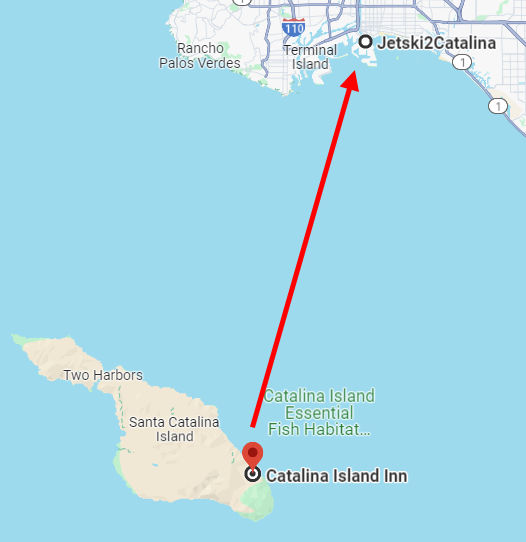
Stop by Catalina Express
320 Golden Shore, Long Beach, CA 90802
3:45 PM
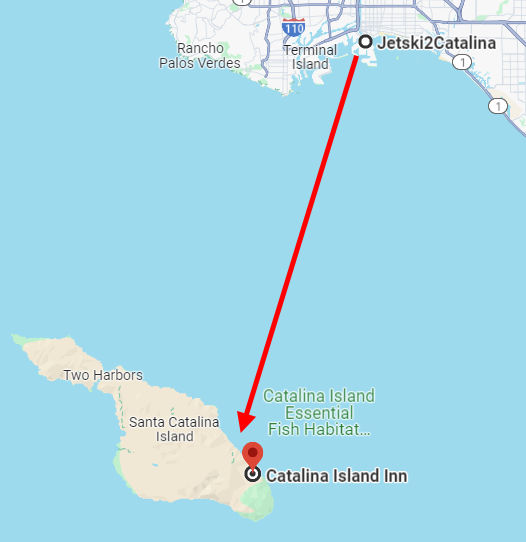
Stop by Jetski2Catalina nearby
Check out the jet skis.
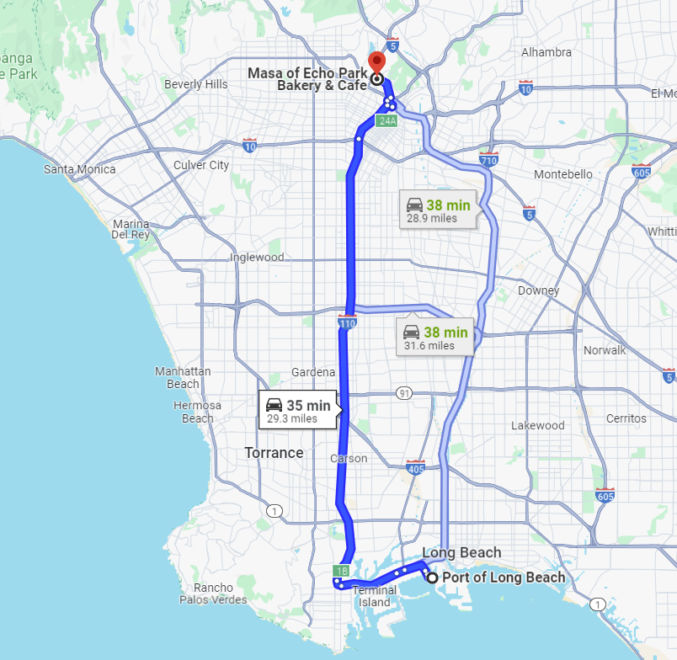
Drive to Hotel Maya 700 Queensway Dr Long Beach, CA 90802
4:00 PM
Check in to Hotel
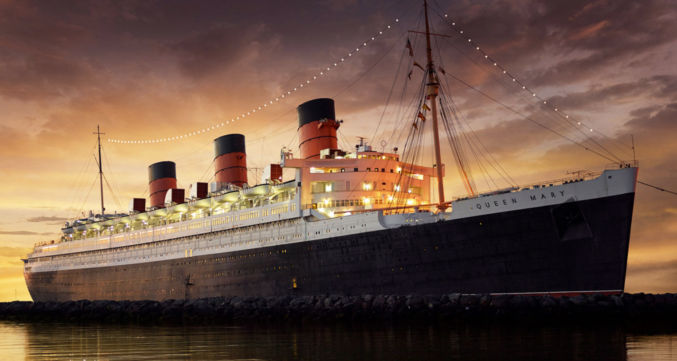
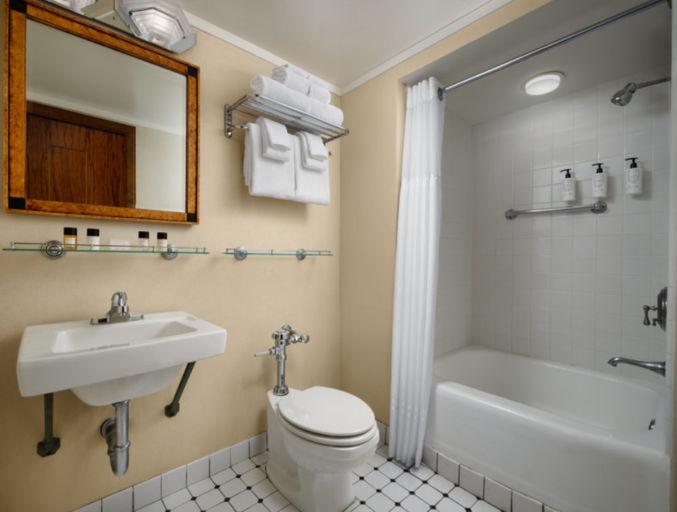
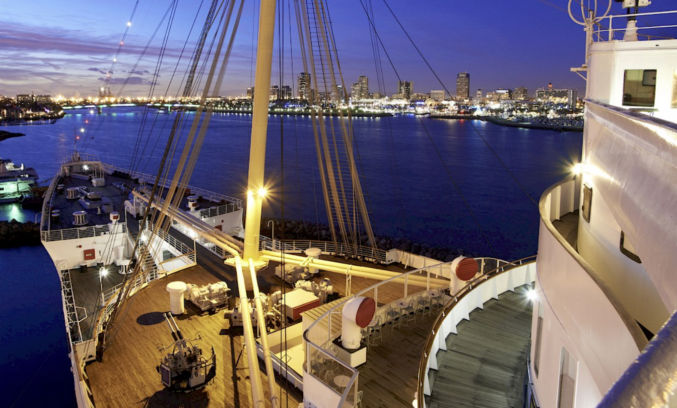
Queen Mary – a cruise ship turned into a hotel 1126 Queens Highway, Long Beach, California 90802, United States $265 / night Check-in is at 4:00 PM and Checkout is at 11:00 AM Hotel guest self-parking is $30/night Built in 1930 Map of the Queen Mary
Park at Hotel Maya by building 3 or 4. Normal parking is $31. We will stamp your parking ticket and the Jetski2Catalina rate is $14.
7:40 AM
Walk to JetSki2Catalina
After parking at the Maya Hotel parking lot by building 3 or 4, walk through the buildings, and you will see the marina on the water. Turn right at the sidewalk and go past the Pool. We are on the water in the marina.
8:00 AM
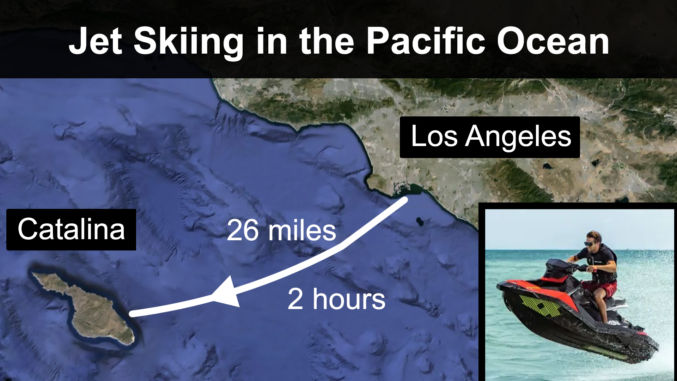
Check in for Jet Ski Ride from Long Beach to Catalina
2 hours
8:15 AM
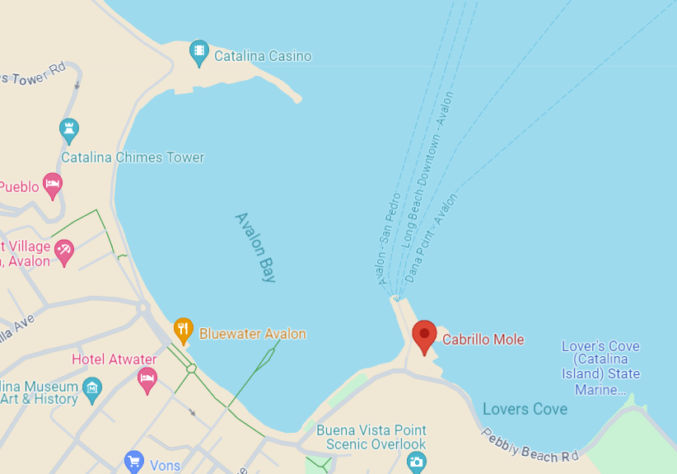
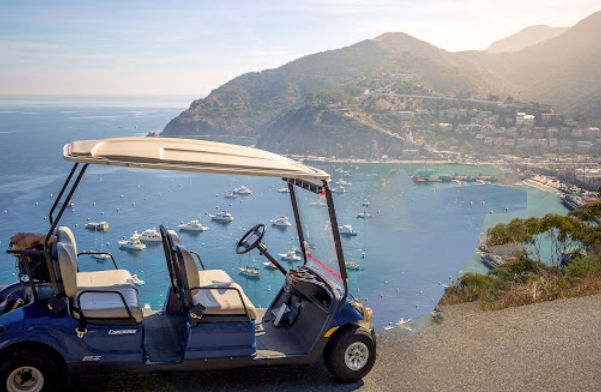
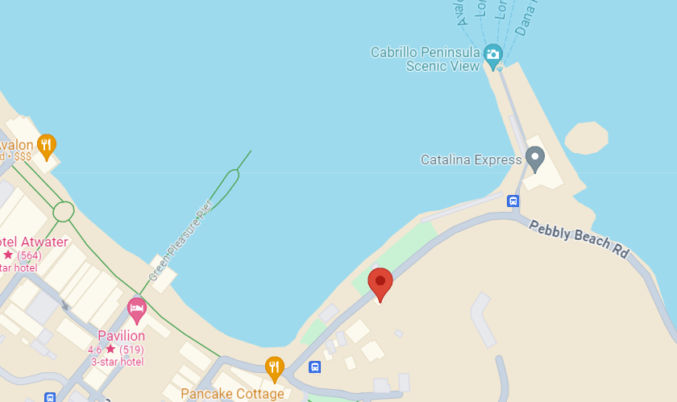
Catalina Express ferry arrives at Avalon, Catalina Island
The Catalina Express ferry drops off at the Cabrillo Mole in Avalon, Catalina Island.
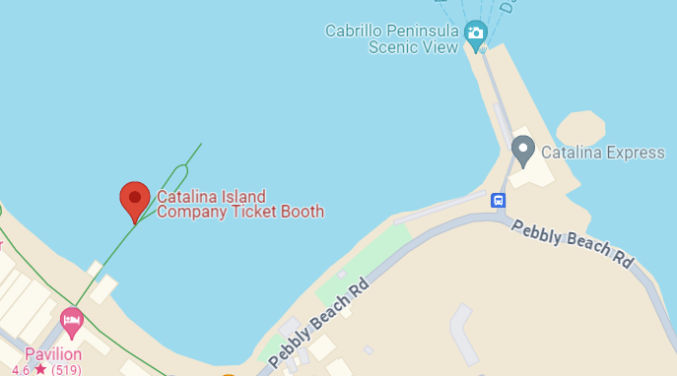
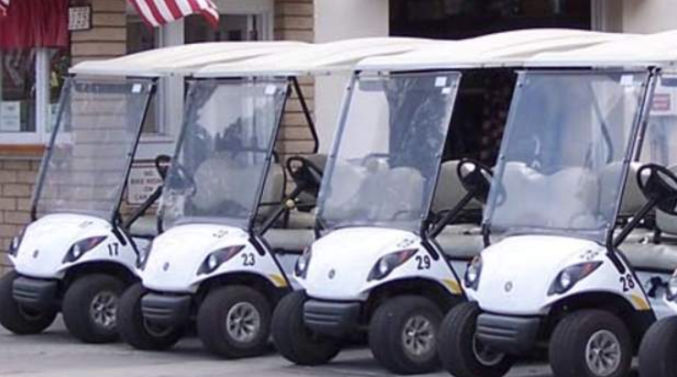
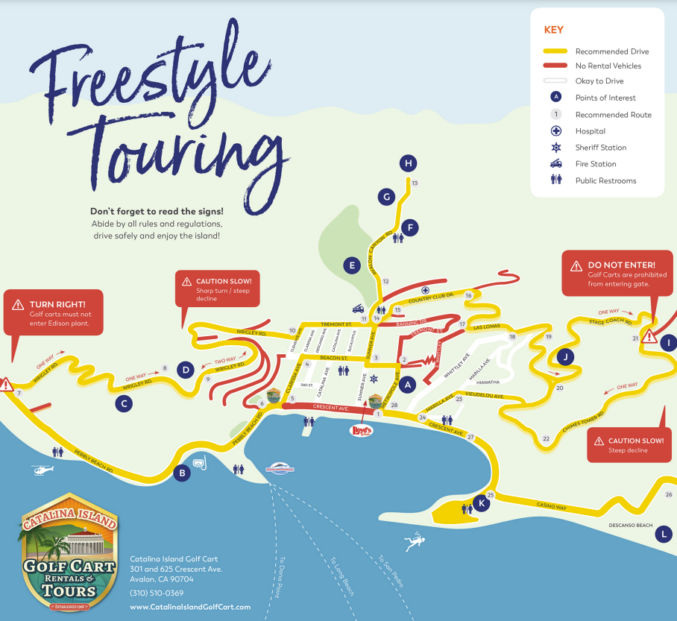
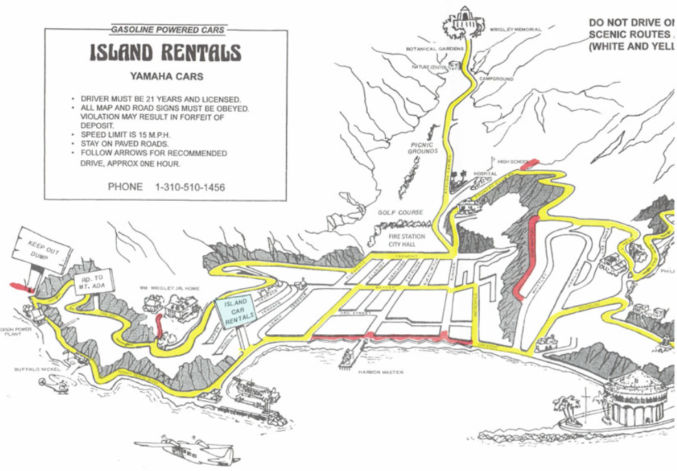
Explore Catalina by golf cart for 1 hour. Scenic tour. Island Rentals 125 Pebbly Beach Road, Avalon, CA 90704, Phone 310.510.1456 NO RESERVATIONS. First come, first serve. $60 / cart / hour We have a one-hour scenic route through the beautiful hills around Avalon and if you want to go longer we will pro-rate the second hour (the time you use is the time you pay for). We have a pre-planned 12-mile scenic route that may be completed in 1 hour without stops.
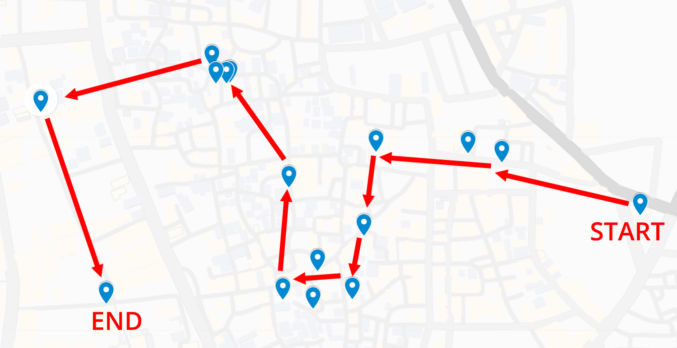
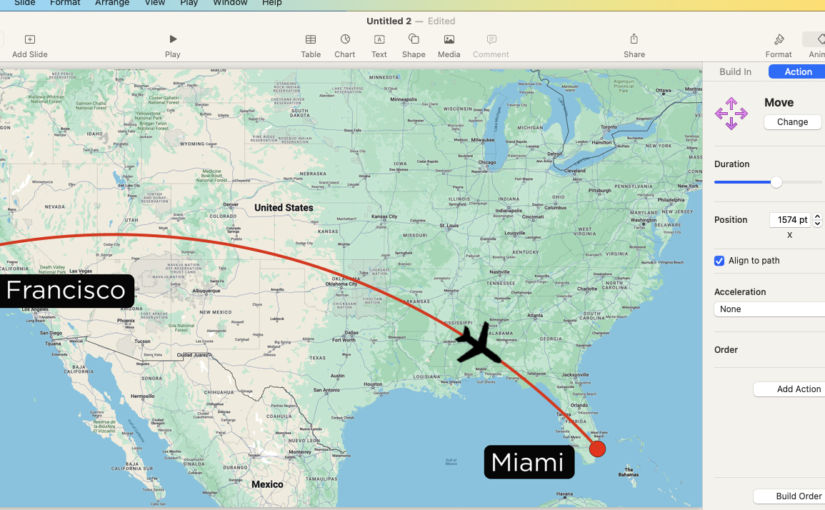
In this post, I’ll show you how to make an animated travel map like the one below using Apple Keynote.
1. Get an image of a map
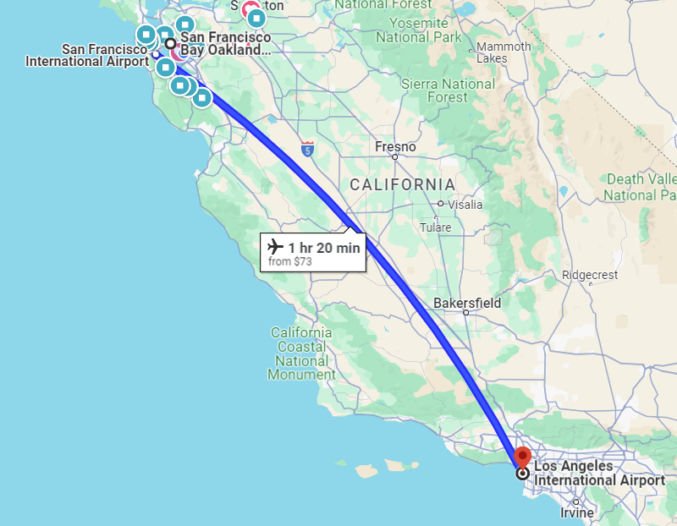
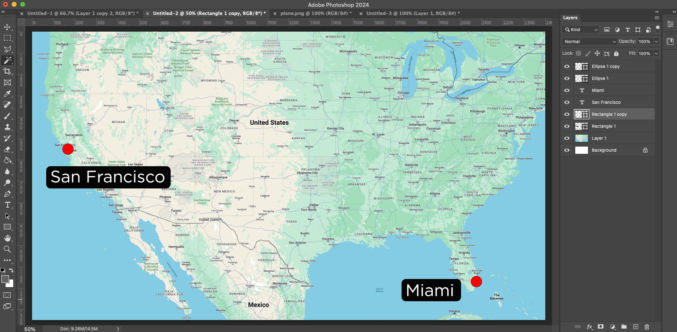
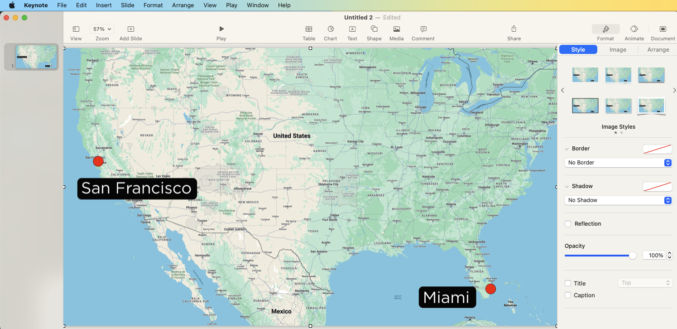
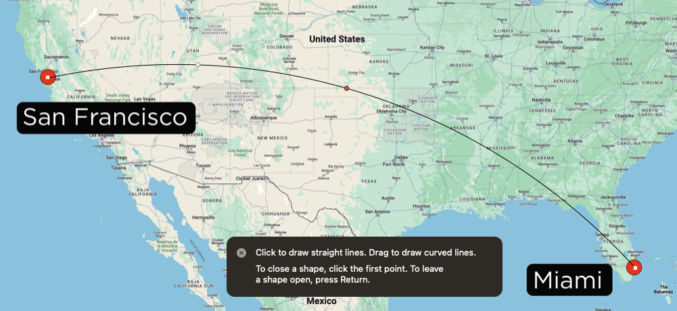
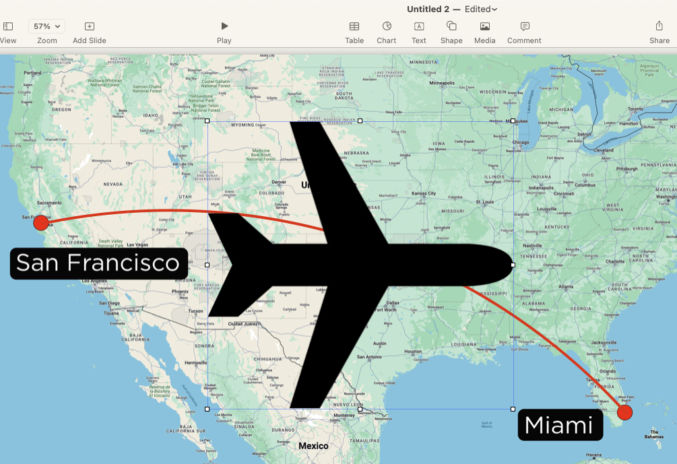
I usually just go to Google Maps, zoom in/out to the area I want to show, then take a screenshot. In this example, I took a screenshot of the USA because I want to show an animated flight path from San Francisco to Miami.
2. Crop map and optionally add labels
Open the screenshot in an image editor (I use Photoshop) and crop to your target video resolution. My target resolution is 1920 x 1080 (standard HD). I also added some red dots where the start and end points will be as well as some city labels.
3. Get a transparent image of a plane, car, train, boat, etc
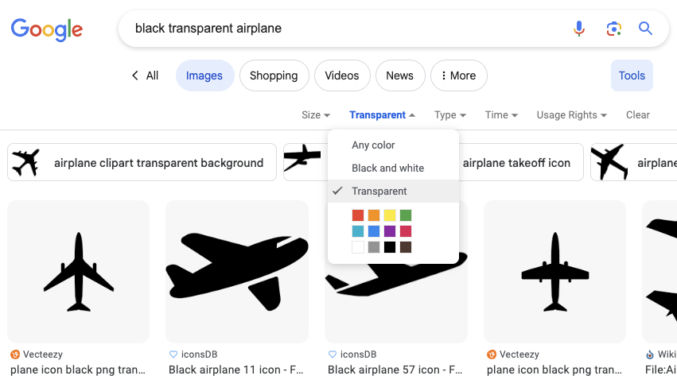
Since I want to show an airplane animate along a path, I looked for an image of one in Google Images. The background should be transparent. In Google Images, you can choose Tools > Color > Transparent to find images on a transparent background.
I chose this image.
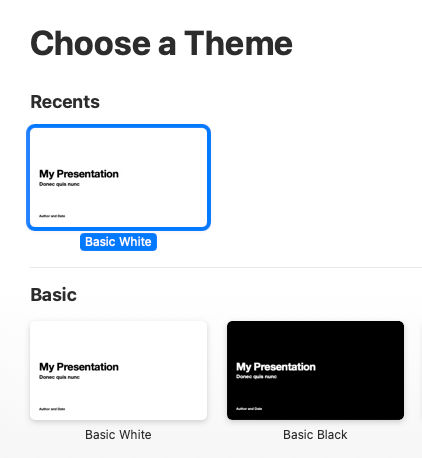
4. Create a blank Keynote presentation
Open Apple Keynote and choose the basic white theme.
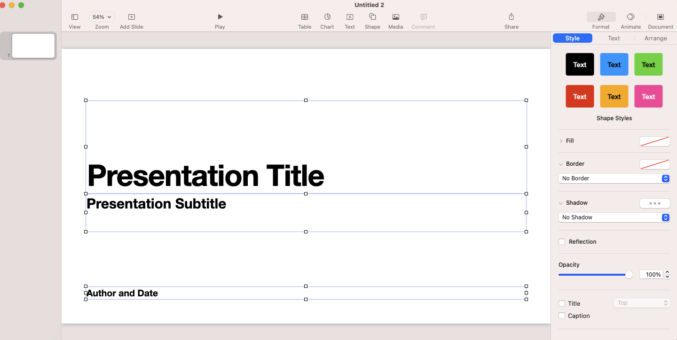
You will get a single slide. Select and delete everything in the slide.
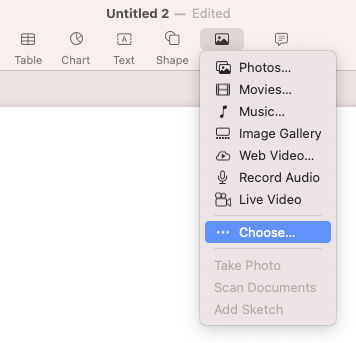
5. Insert background map
Go to Media > Choose and select the background map.
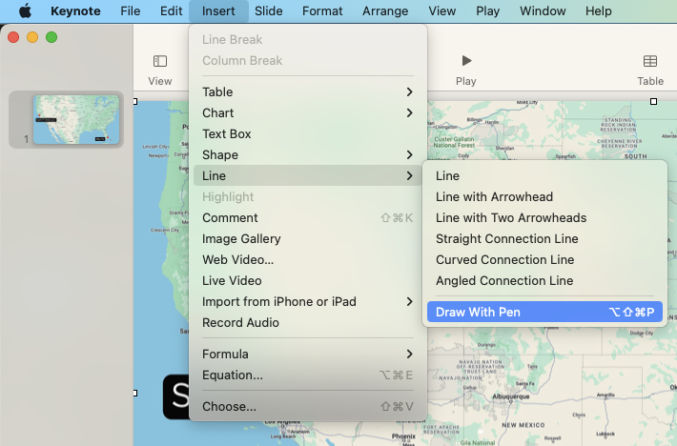
6. Draw a path
Go to Insert > Line > Draw With Pen and draw your travel path.
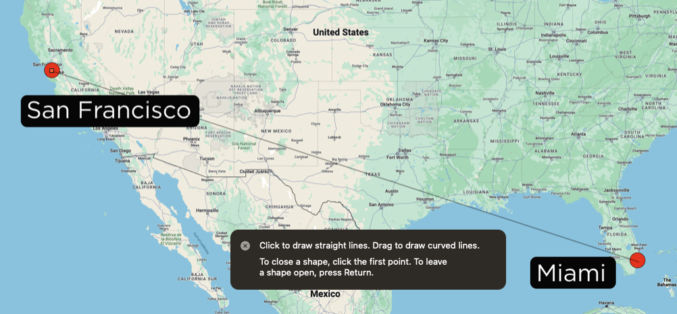
Click on the start point then click on the end point. You will get a straight line.
In the middle of the line, there will be a point. Click and drag it up if you want to create a curve. Repeat with other midpoints as necessary.
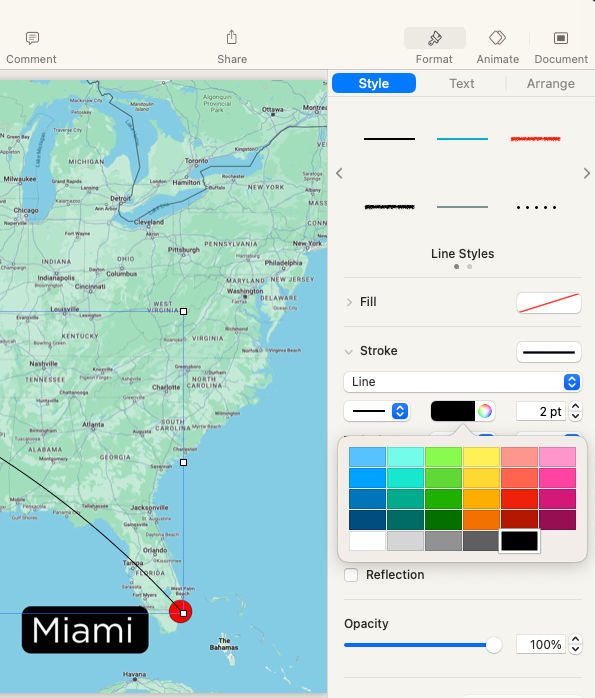
When you’re done, hit the ESC key. We now have our travel path. Let’s change the style of the path. I’m going to make it red and thick. In the right pane, under Format > Style, you can edit the style of the element (curve). I choose a red color that is 7 pt thick.
7. Animate the path
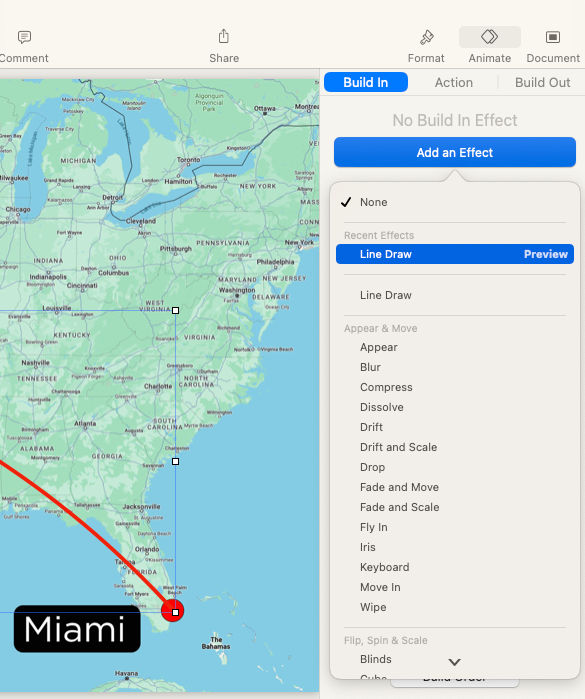
In the top right corner, choose the Animate tab and then “Add an Effect” > “Line Draw”.
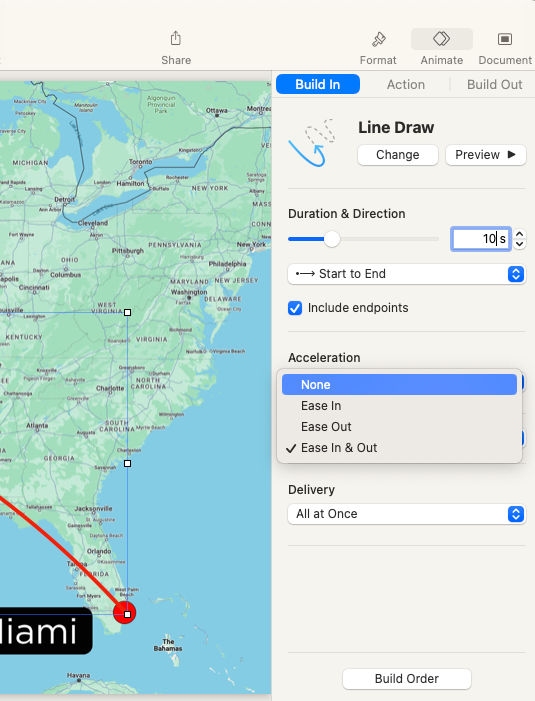
You can then change the default animation from 2 seconds. I changed the duration to 10 seconds so that in my video editor, I can slow it down without it appearing jumpy. I also changed the acceleration to “None”.
Click the “Preview” button to preview the path animation.
8. Add the airplane image
As in step 5, go to Media > Choose and select the airplane image.
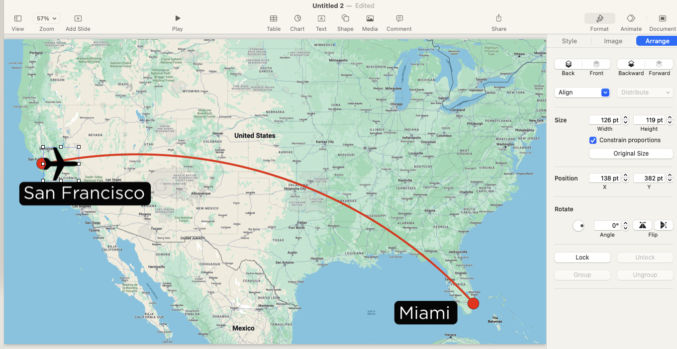
Scale the airplane by dragging one of the corners. Drag the airplane to position it at the start point.
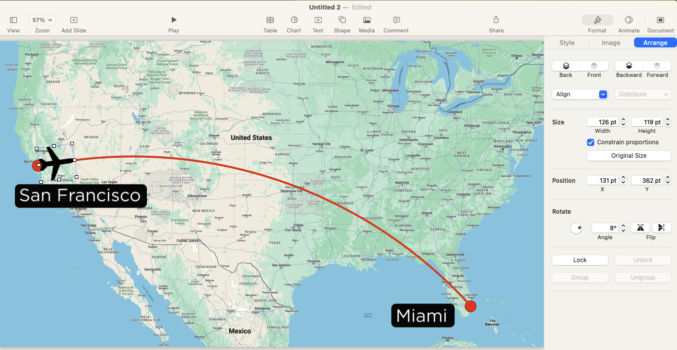
Rotate the airplane. In the top right choose Format > Arrange and adjust the rotation value such that the nose of the plane is aligned with the flight path.
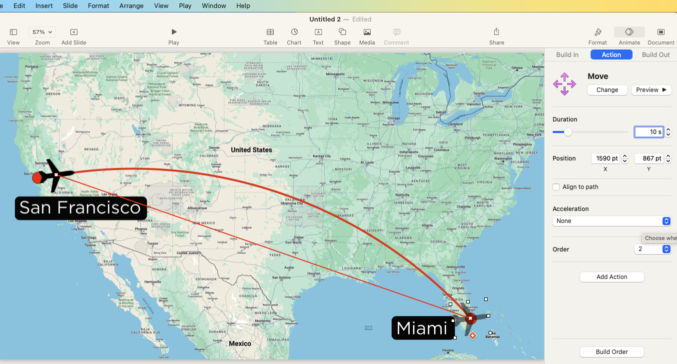
9. Animate the airplane
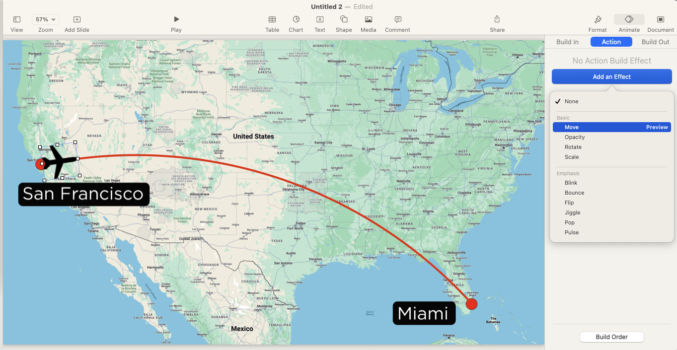
In the top right, click Animate > Action > Add an Effect > Move.
Drag the airplane to the end point. Set the duration and acceleration to match that of the flight path (10 sec, None).
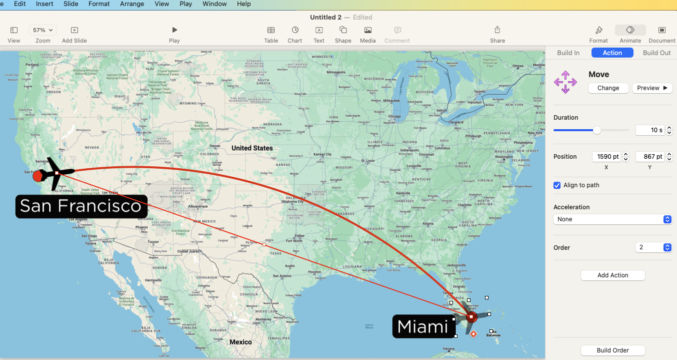
Click Preview to preview the animation. The airplane doesn’t yet follow the flight path. Check the “Align to path” checkbox. A point will appear along the line between the airplane’s start and end points. Drag that middle point to where the flight path is.
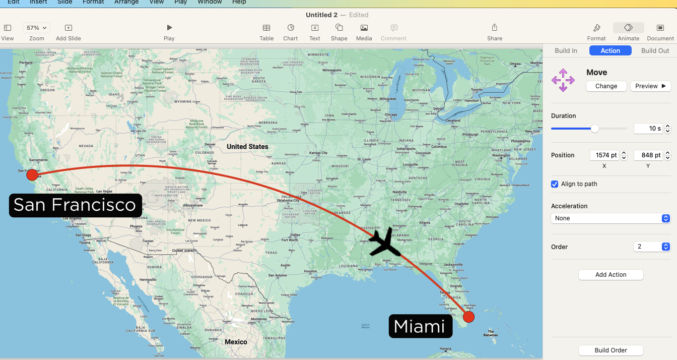
Click Preview again. You will see the airplane animate along the flight path.
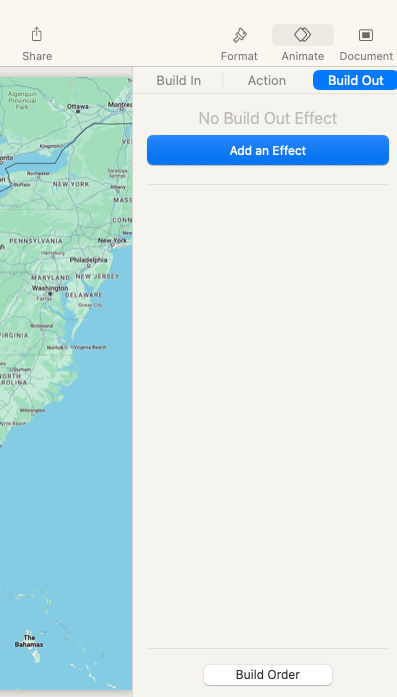
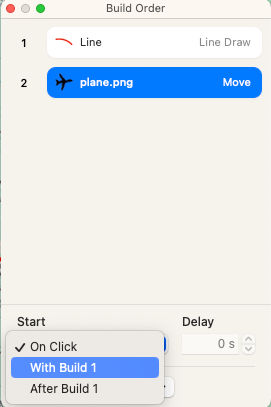
10. Animate the flight path and airplane at the same time
In the top right, click Animate > Build Out > Build Order.
You will see a list of all animation effects. The first animation is the line (flight path). The second is the plane. Choose te second animation and then under “Start”, select “With Build 1”.
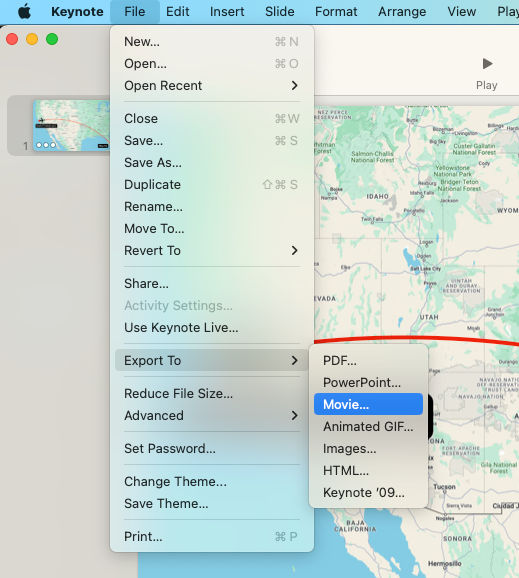
11. Export the animation
Choose File > Export To > Movie.
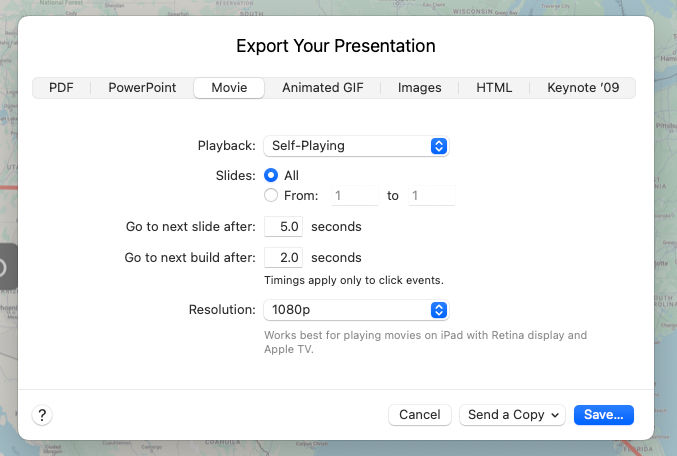
Since there’s only 1 slide, you can leave “Slides” to “All. The resolution should match that of the background image (1080p).
Here are some alternatives for creating an animated travel map:
Here’s a collection of mounts for action cameras like the Insta360 X3 that I’ve found useful. These accessories can mostly be used with other cameras as well.
This clamp is lightweight. Since it’s curved, it’s ideal for clamping to cylindrical objects like bike handlebars. You can connect it to a long selfie stick or a 1/4″ rod that accepts a 1/4″ screw.
Example Use Cases
Clamp to a bike handlebar with or without a short selfie stick or rod
This clamp is designed for fishing poles, but it can be used for selfie sticks because selfie sticks are like fishing poles. You can adjust the angle of the stick.
Example Use Cases
Secure to cruise ship railing and insert 10′ selfie stick to get drone-like footage.
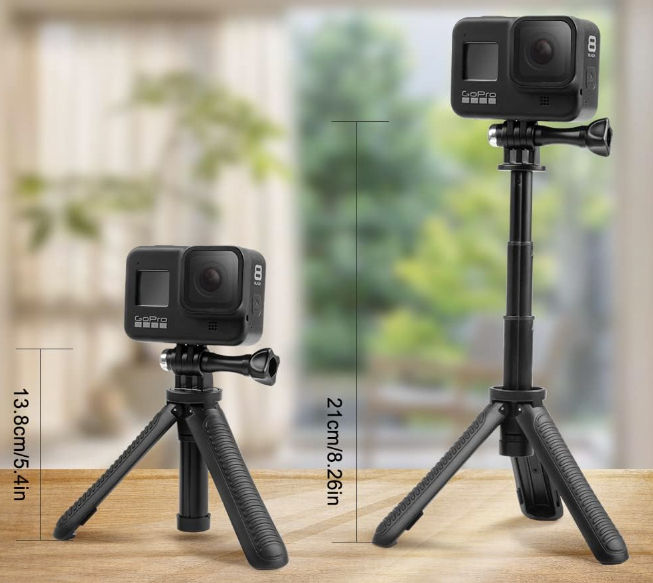
Medium (3.4′) Invisible Selfie Stick With Tripod and Invisible Quick Release Adapter
This selfie stick is invisible when used with the Insta360 X3 camera. To quickly attach and remove an Insta360 X3 camera, use the invisible quick release adapter designed specifically for the Insta360 X3.
Example Use Cases
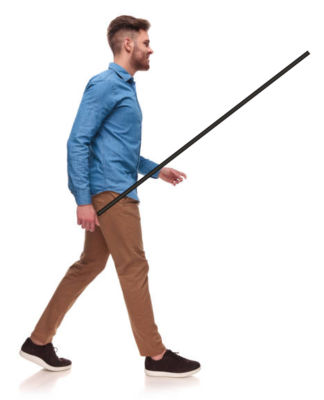
Walking around
Placing it on the floor / ground using the tripod while you perform an activity, e.g. painting a room
When walking, I find it best to keep the camera at face level, unless you want to create some interesting perspectives like positioning the camera near your feet.
If you’re worried about dropping your selfie stick and losing it, you can attach a 1/4″ camera screw to the bottom of it and a wrist lanyard to the screw.
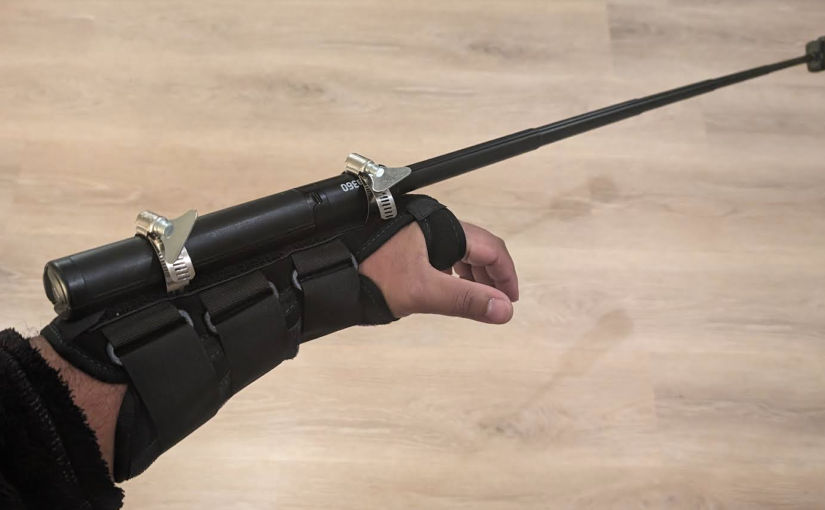
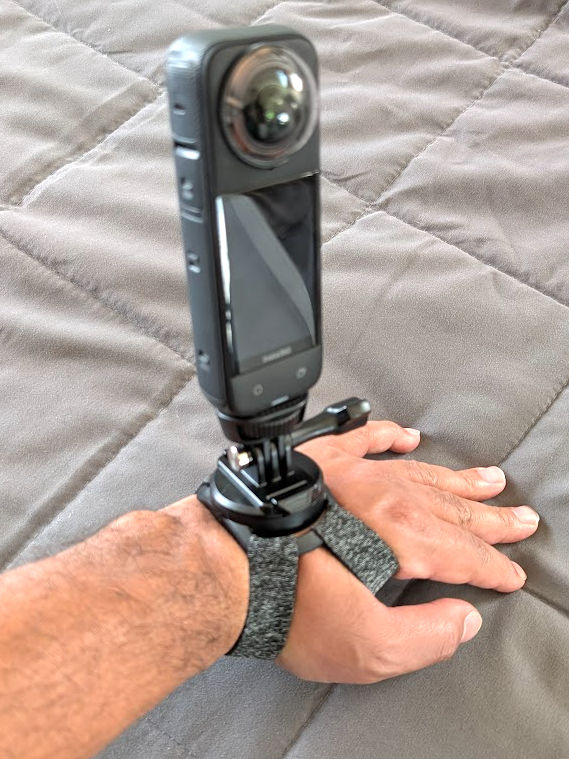
Having a selfie stick extended away from you allows you to get shots that look as if someone is filming you. You can also get more of yourself in the shot. In certain situations, however, you may not be able to hold the stick in your hand. That’s when having a forearm mount comes in handy. Since no one makes these, I had to engineer one myself using a forearm brace and an adjustable clamp.
The brace comes with a thin aluminum bar that is inserted in a pocket at the top of the brace. Using a utility knife, I had to make minor incisions to be able to insert the clamp into and underneath the aluminum bar.
At the front of the brace, I wasn’t able to slide the clamp underneath the bar, so I trimmed the bar to make it a bit narrower.
Like this.
This is the finished product.
The metal bar and clamp can cause discomfort on the top of your hand, especially when the selfie stick is extended and is shaking up and down. To address this, you can simply slide a dishwashing sponge above your hand as shown below to act as a cushion.
Example Use Cases
Any time you want to extend the selfie stick and you can’t mount it on something else and you need your hands free, e.g.
when you are driving a jet ski
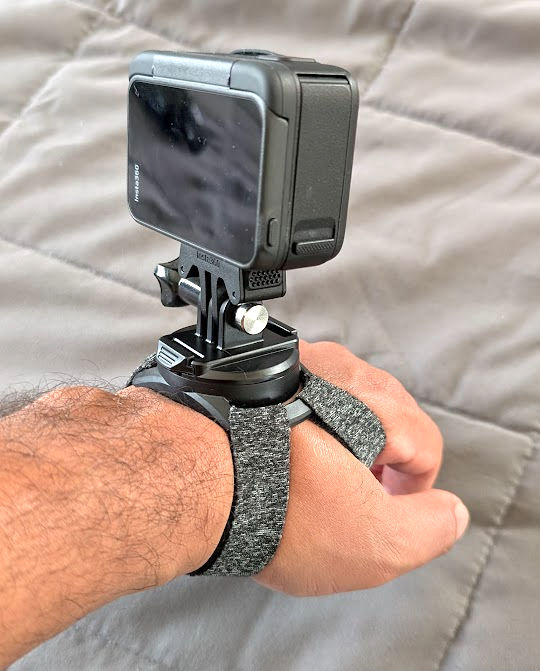
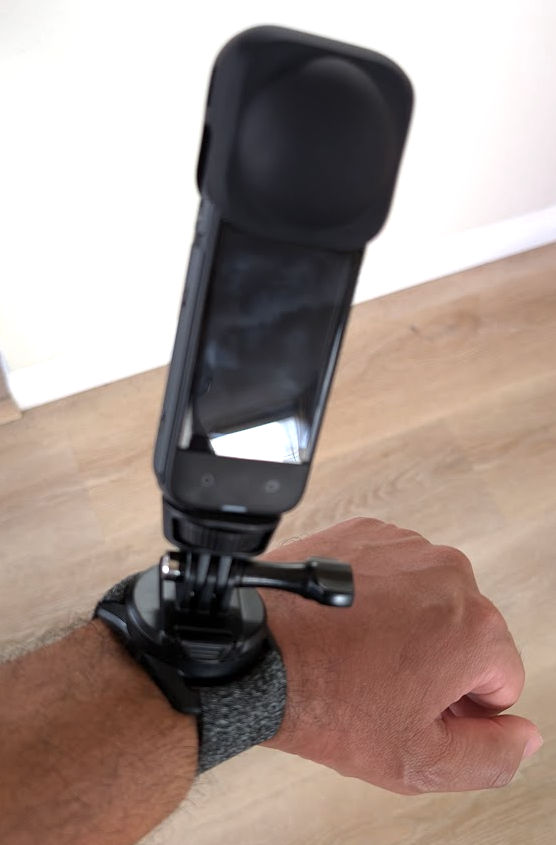
Hand and Wrist Mount
If the forearm mount is unavailable or can’t be used, then you can use a wrist mount. This is not as good as the forearm mount because the distance from the camera to your face is just the length of your arm extended.
This mount is very sturdy, but the handlebar clamp opening may be too big for some handlebars. In that situation, you can wrap some rubber around the handlebar, which will also protect it from damage. This mount includes the selfie stick.
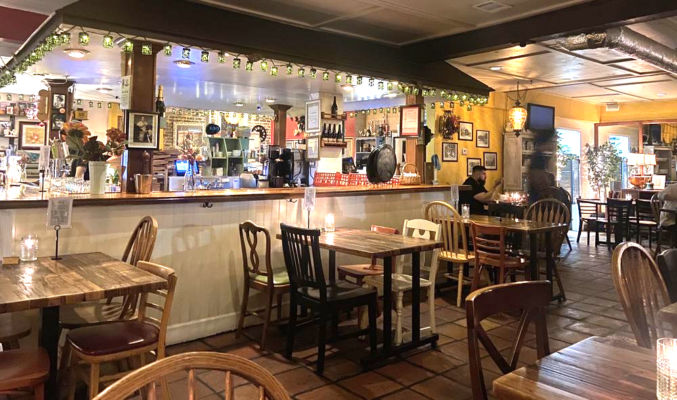
This mount has a small footprint and includes a very strong magnet. You can add one or more 1/4″ rods to it. I find this setup particularly useful when eating at a restaurant. The mount doesn’t take a lot of space and it positions the camera high enough that you can film everyone’s food and their faces.
This mount can also stick to any metal surface like the side of a refrigerator.
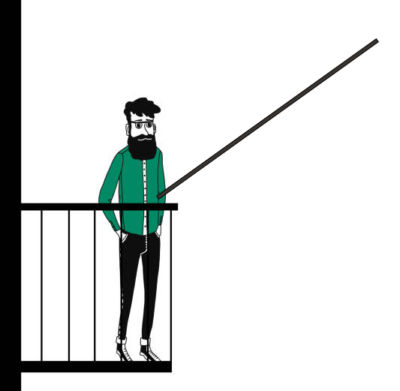
If you’re out and about and want to stand your selfie stick on the ground, you can easily do that with the 3.4′ stick with built-in tripod. But, if you try that with 10′-long selfie stick extended at max length, then there’s the risk of it falling and destroying your camera. In this case, one thing you can do is strap the stick against an object like a rail. You can also try to use a c-clamp to clamp onto something flat and then strap the selfie stick to the clamp.
There are many adjustable and removable straps you can use, including
According to the Insta360 ONE X2 manual, you must use a UHS-I Micro SD card with a V30 or above speed class and exFAT format. UHS-II and UHS-III Micro SD/TF cards are not compatible with ONE X2. You can find V30 cards on Amazon. Note that the U3 symbol in the image below doesn’t mean UHS-III but rather U3. According to Wikipedia, U3 has to do with software rather than speed.
The cards below have been tested to work well with ONE X2 and X3.
SD Card
Model Number
Capacity
Speed Class
Sandisk Extreme V30 A1
SDSQXVF-032G-GN6MA
32G
V30
Sandisk Extreme Pro V30 A1
SDSQXCG-032G-GN6MA
32G
V30
Sandisk Extreme Pro V30 A1
SDSQXCG-064G-GN6MA
64G
V30
Sandisk Extreme V30 A1
SDSQXAF-128G-GN6MA
128G
V30
Sandisk Extreme V30 A2
SDSQXAF-128G-GN6MA
64G
V30
Sandisk Extreme V30 A2
SDSQXA1-256G-ZN6MA
256G
V30
Sandisk Extreme Pro V30 A2
SDSQXCZ-1T00-ZN6MA
1TB
V30
The first character of the 3rd part of the model number may differ, e.g. “G” in GN6MA vs “Z” in ZN6MA. According to this forum, that just identifies a different manufacturer.
The last character of the 3rd part of the model number may differ, e.g. “A” in GN6MA vs “N” in GN6MN. “A” means it comes with an adapter and “N” means it doesn’t.
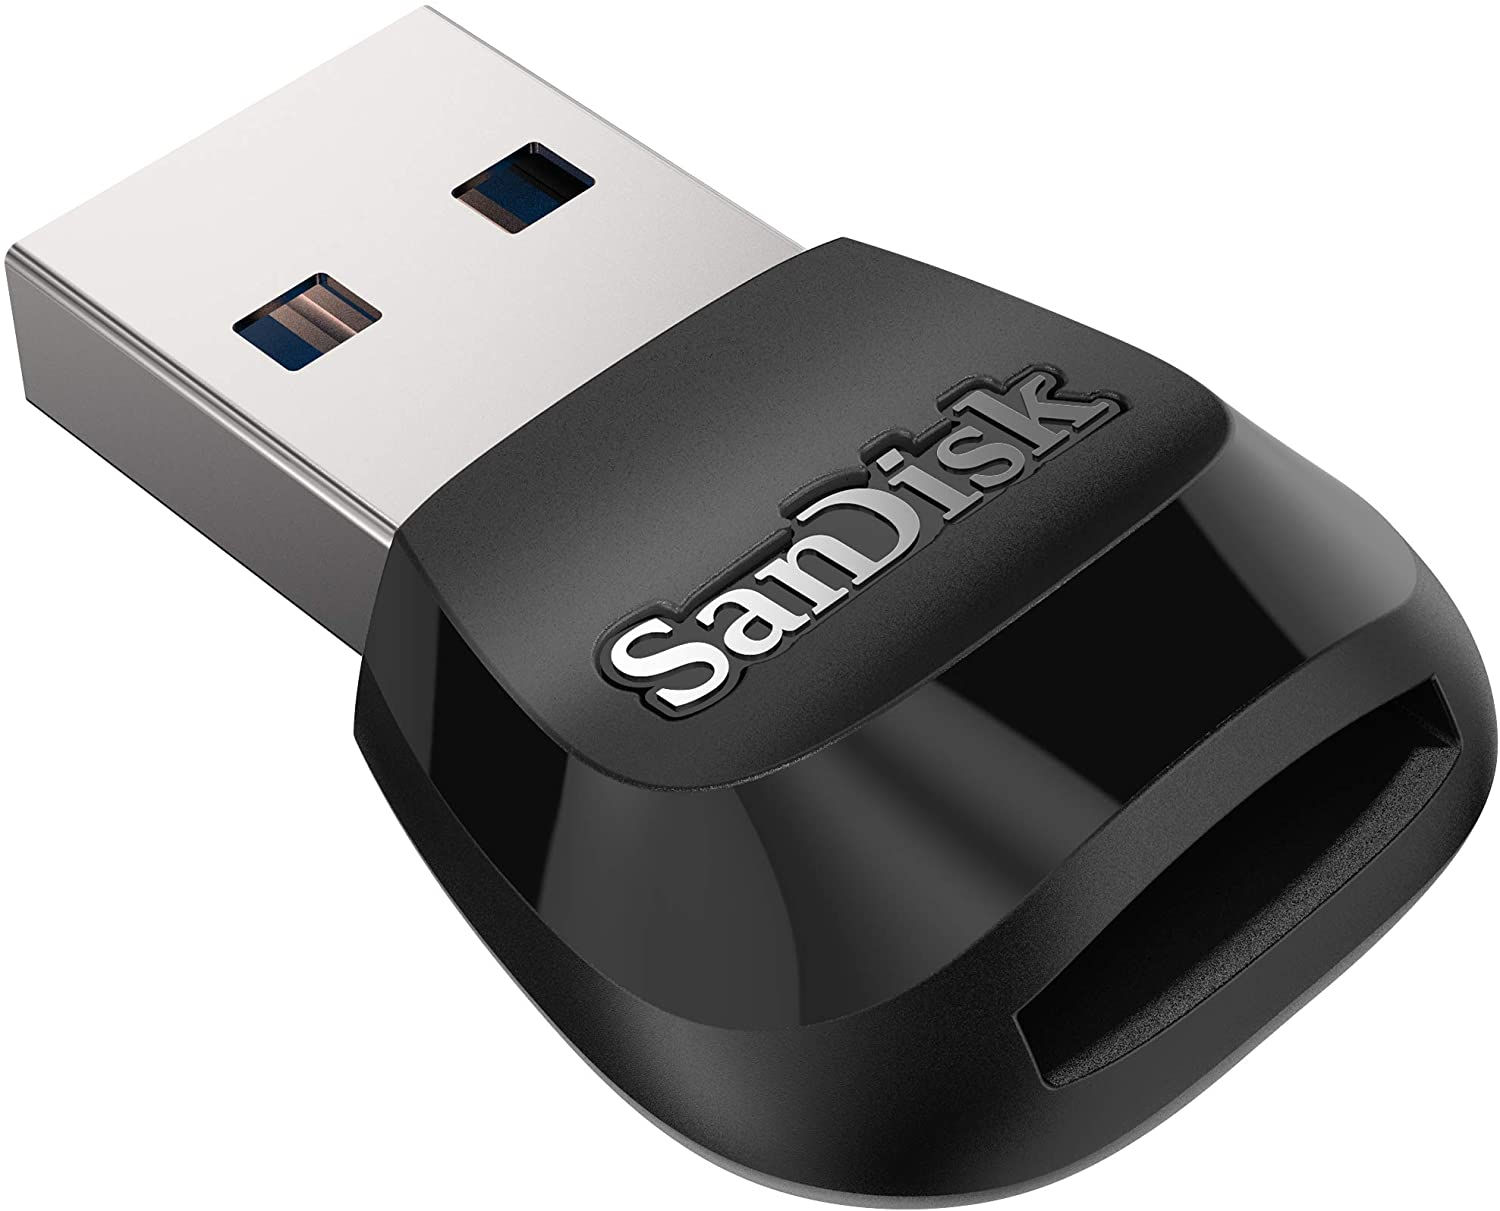
SanDisk MobileMate USB 3.0 microSD Card Reader
Transferring video files from the Insta360 ONE X2 to your computer can be really slow. To speed this up, use a USB 3 card reader. I use this one: SanDisk MobileMate USB 3.0 microSD Card Reader- SDDR-B531-GN6NN. It supports transfer speeds of up to 170 MB/s. With USB 3.0, move content up to 10x faster than USB 2.0 readers.
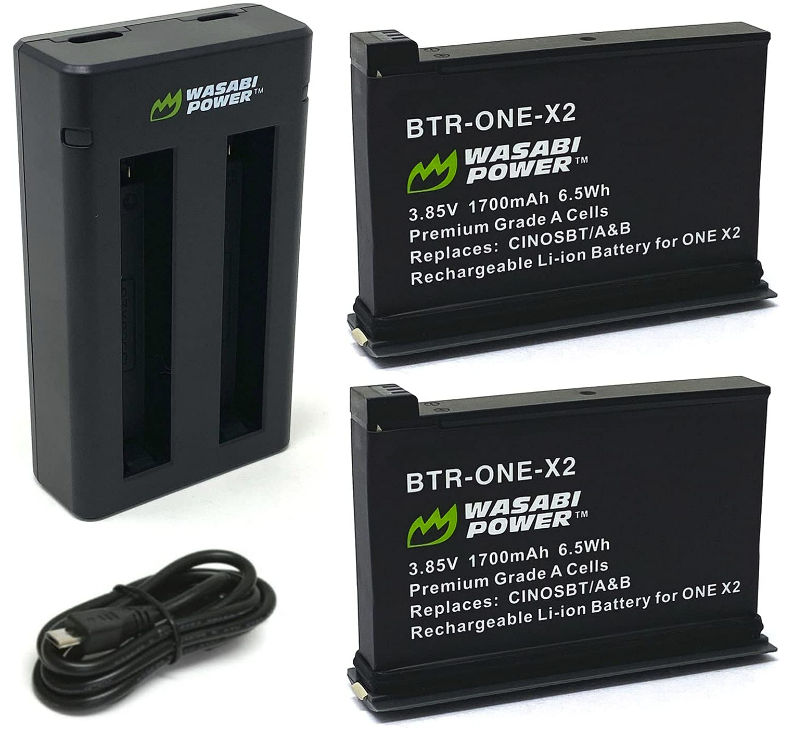
Extra Batteries + External Charger
The battery that comes with the Insta360 ONE X2 is good for 80 minutes. It may be a good idea to buy additional batteries just in case. I bought a pack of 2 batteries on Amazon. It comes with a charger and the batteries work.
Mount Adapter
For the adapters, this one is better because you can tighten it with the camera facing any direction you want.
Waterproof Pouches
When you’re swimming, having a waterproof pouch to keep your camera dry can give you peace of mind. Though the pouches pictured below are for phones, they fit the Insta360 X2/3 cameras as well.