People’s faces vary significantly from one to another and with time as they age. Some men lose hair, some women pluck and lose their eyebrows or change the shape of their eyebrows, some men change their beard or mustache style, and last but not least, some people have or develop some natural or accidental issue with their nose, whether it’s crooked, asymmetric, bumpy, droopy, too large, or so shallow that they can’t comfortably where glasses.
For men, the most common operation is probably a hair transplant. For women, the most common operation is probably rhinoplasty (nose job) although many women should probably just get an eyebrow transplant instead of drawing their eyebrows on their skin which looks obviously fake.
Interesting fact: Iran has the highest rate of nose surgery in the world, and according to a report in the conservative Etemad newspaper, as many as 200,000 Iranians, mostly women, go to cosmetic surgeons each year for a nose job. Source
This article explains one way to edit a 3D version of your face. It can be helpful if you are just curious about what a change may look like or if you are trying to explain your desired outcome to someone.
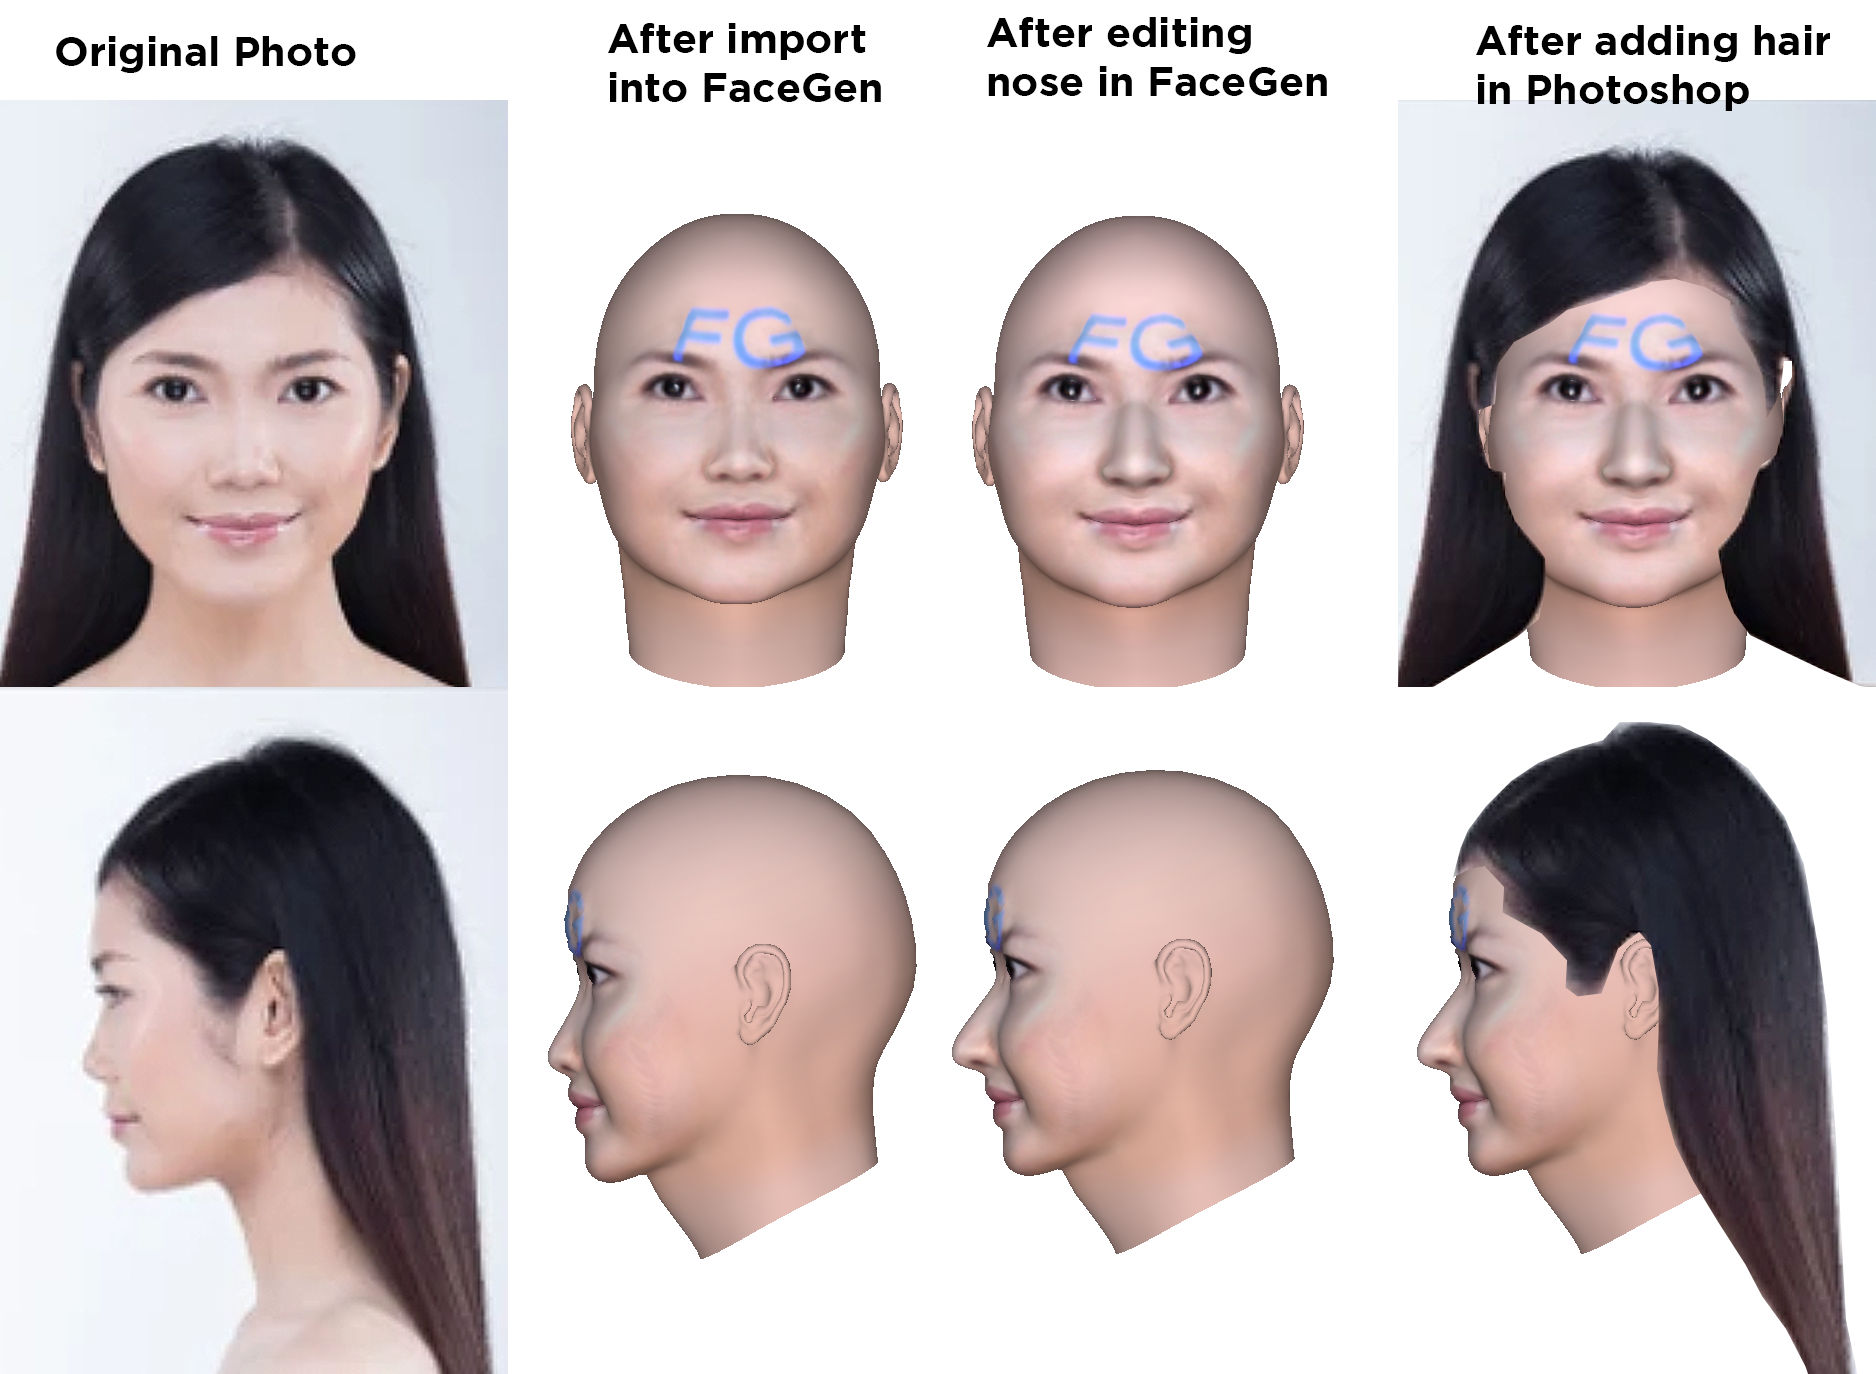
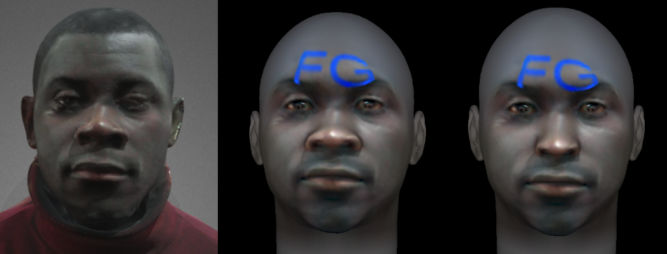
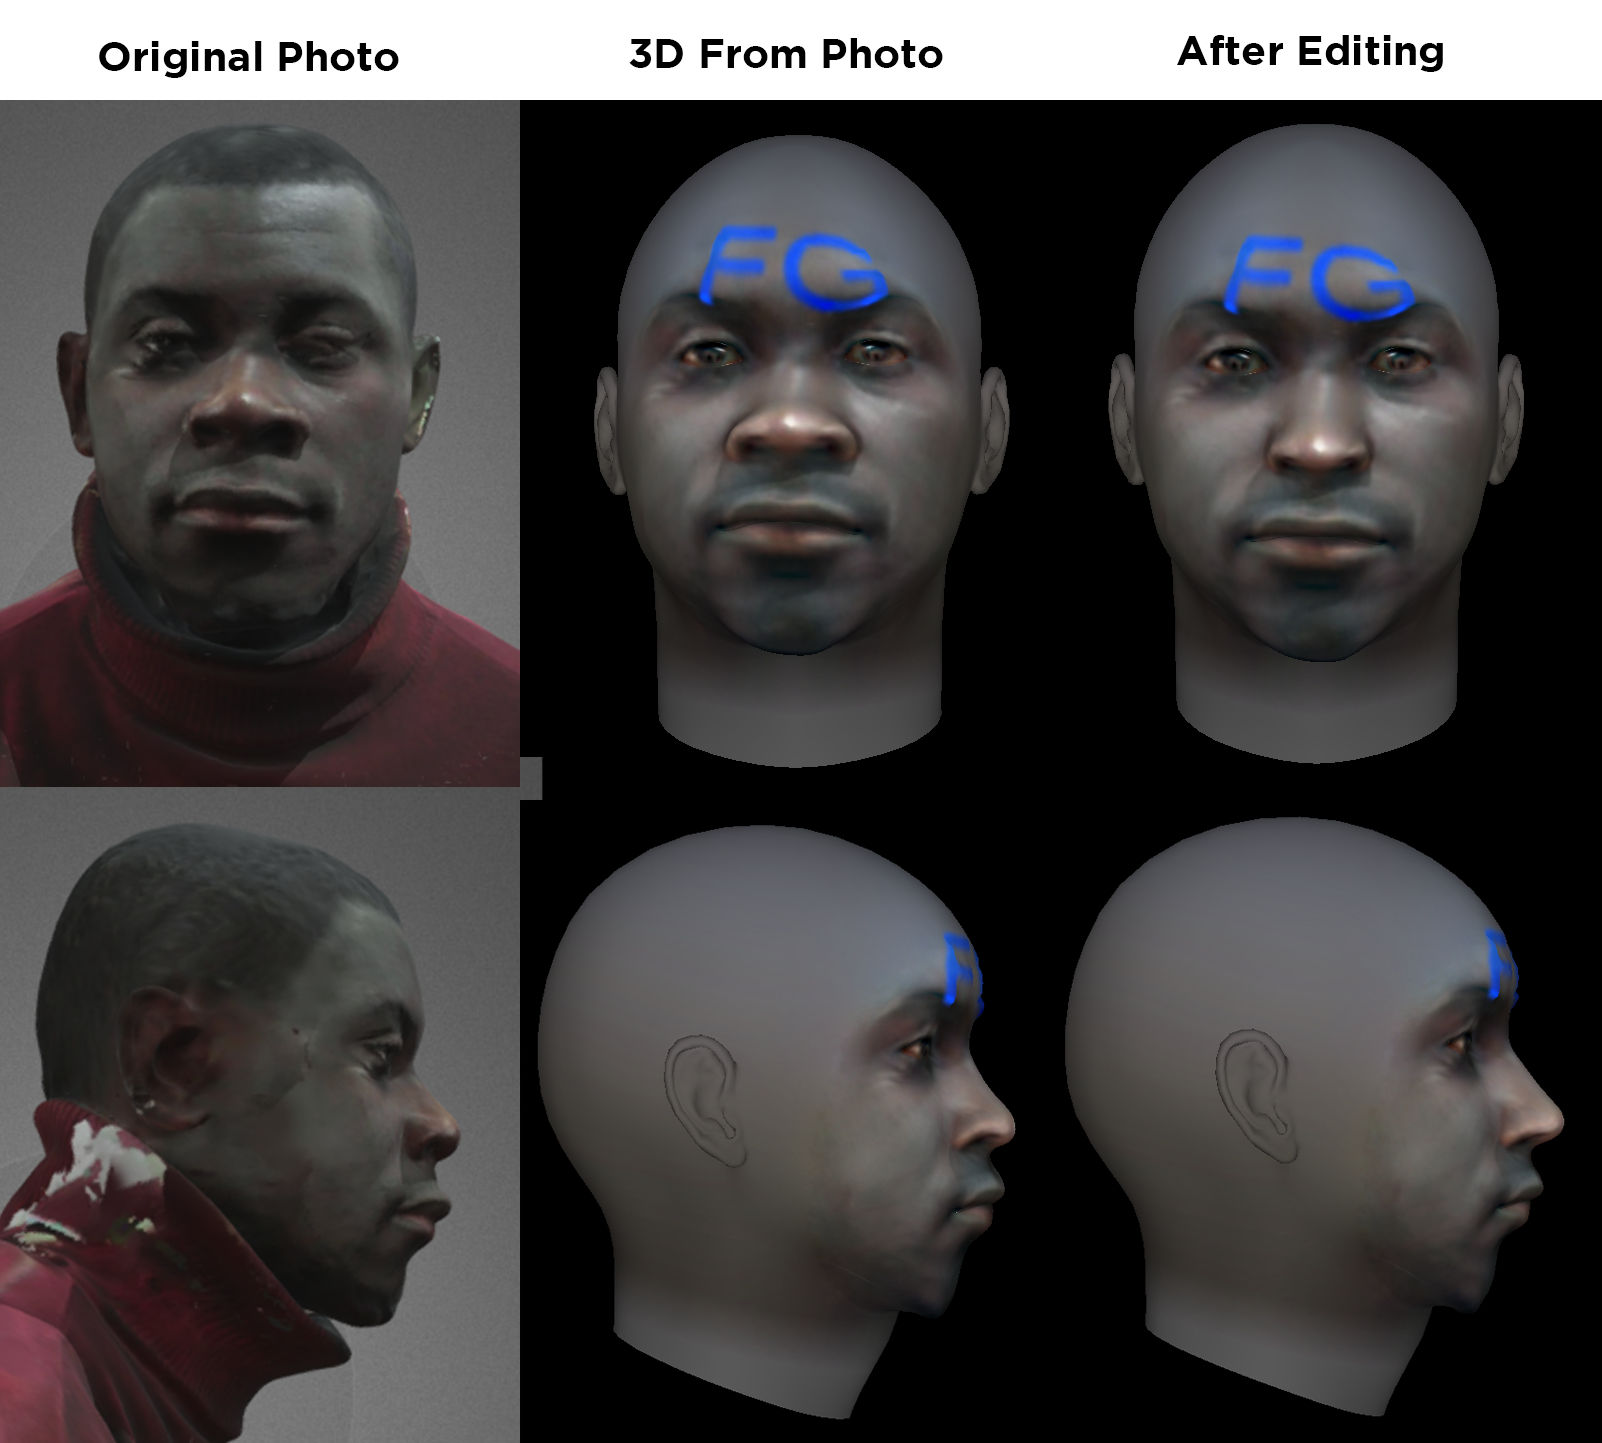
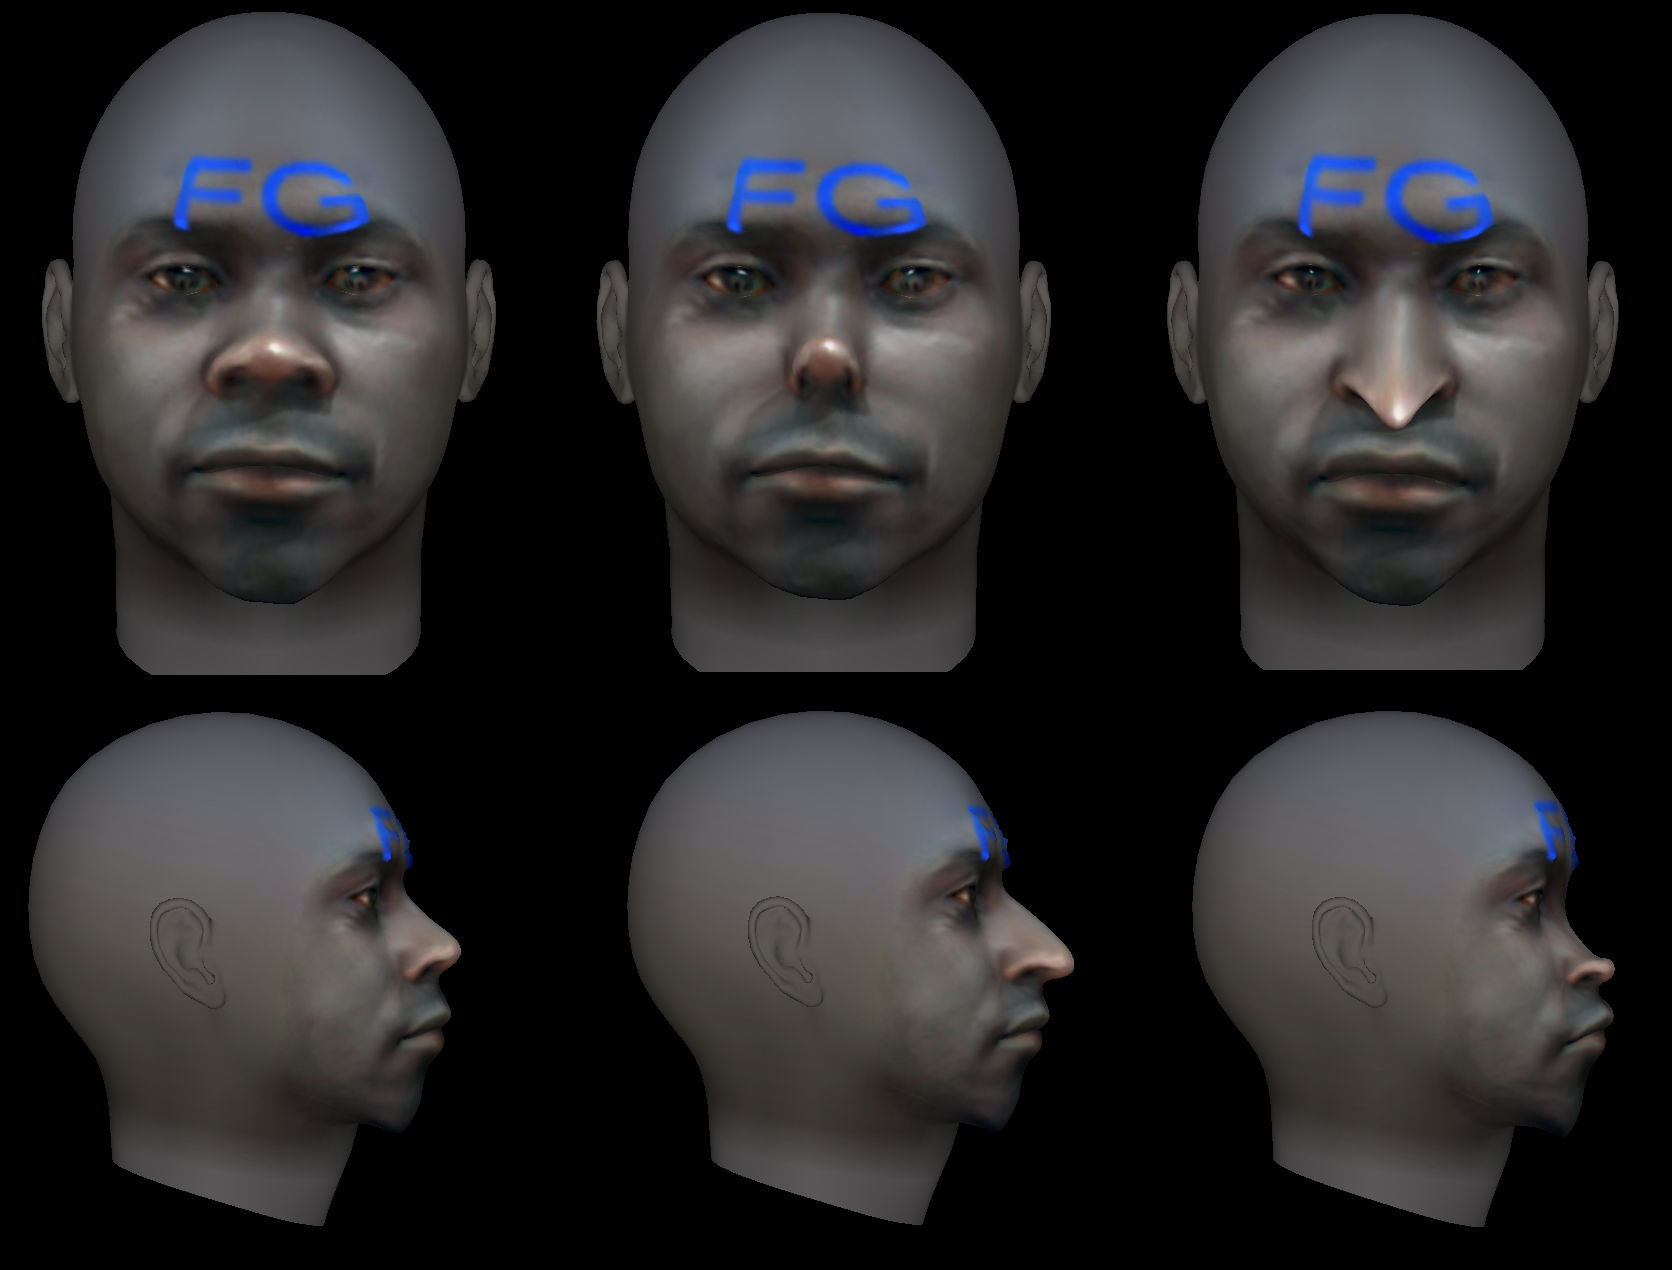
The following image shows the photos I started with (left column), the 3D faces generated from the photos (middle column), and the 3D faces after editing (right column).
1. Take a photo of someone’s face
For demonstration purposes, I took a screenshot of a 3D image of a random person on Sketchfab. You can take just a front photo but it’s better to take pictures of both sides as well.
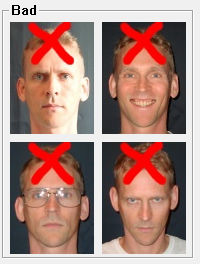
When taking photos, you should look straight and not tilt your head. You should have neutral gestures (no smiling, etc), and you shouldn’t wear glasses.
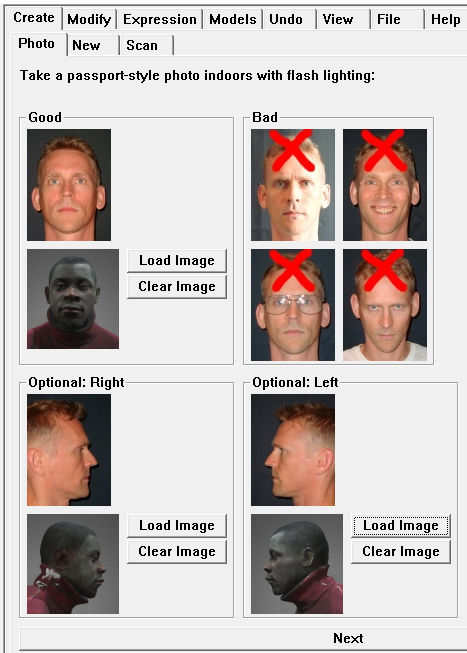
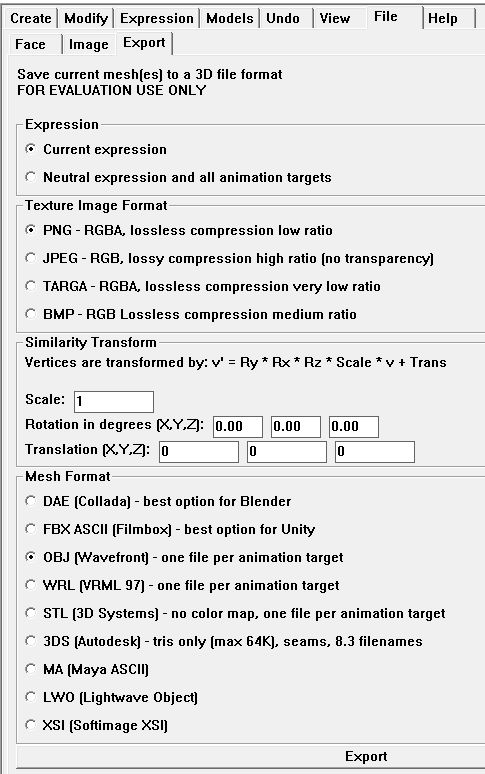
2. Load the photos into FaceGen 3D Print
Download FaceGen 3D Print. You can download the demo version. You won’t get all of the features but you may not need all the features. The cheapest paid version costs $69. Install the program, click Create > Photo > and upload the photos from step 1.
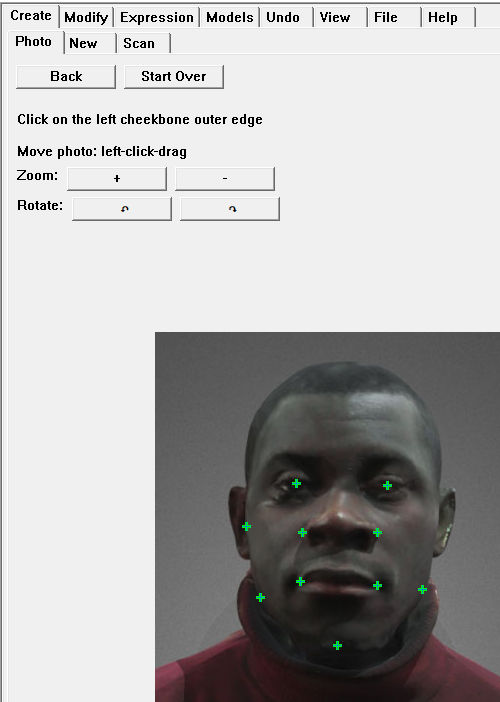
3. Mark specific points
FaceGen will then instruct you to mark specific points on your photos so that it can better generate a 3D image.
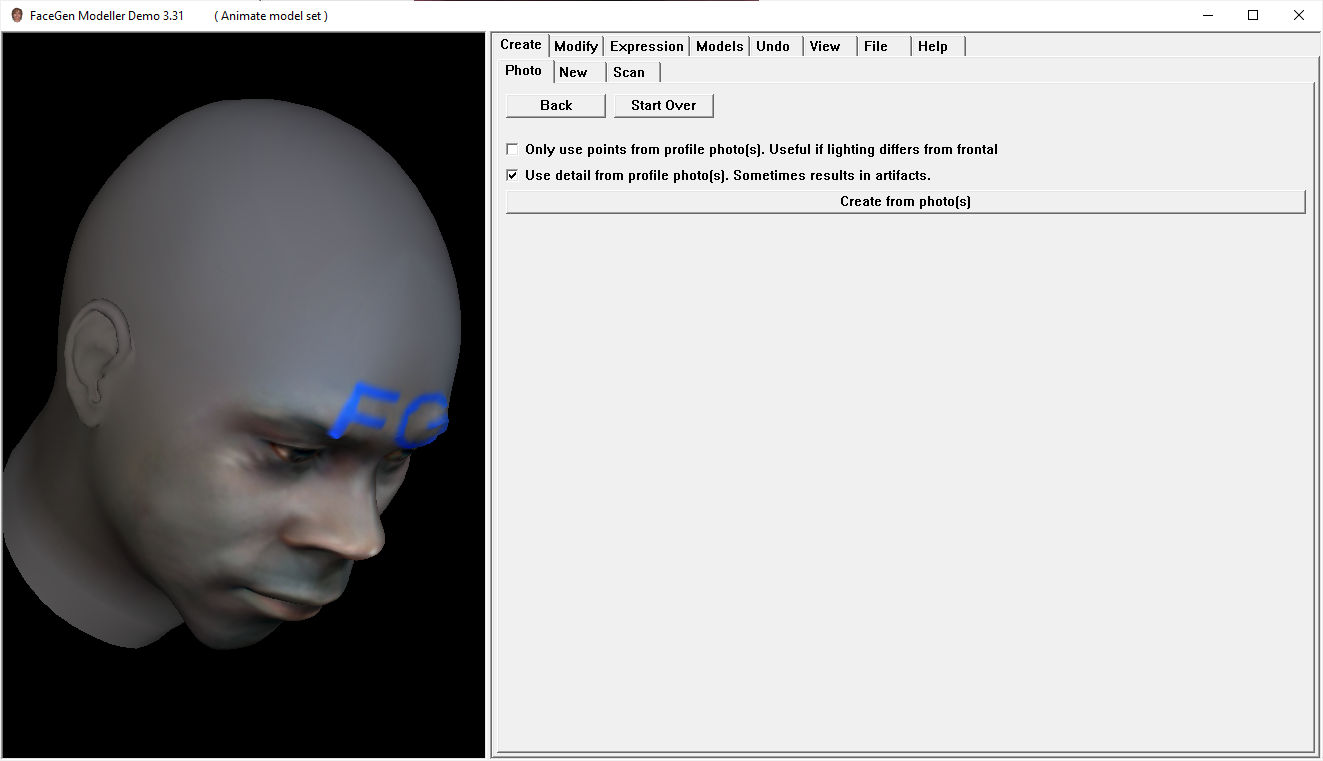
4. Generate 3D image
After you click the “Create from photo(s)” button, FaceGen will take about 30 seconds to analyze the photos and then generate a 3D image. This technique of generating a 3D image from photos is called Photogammetry. If you have a 3D scanner, you can also load a 3D image.
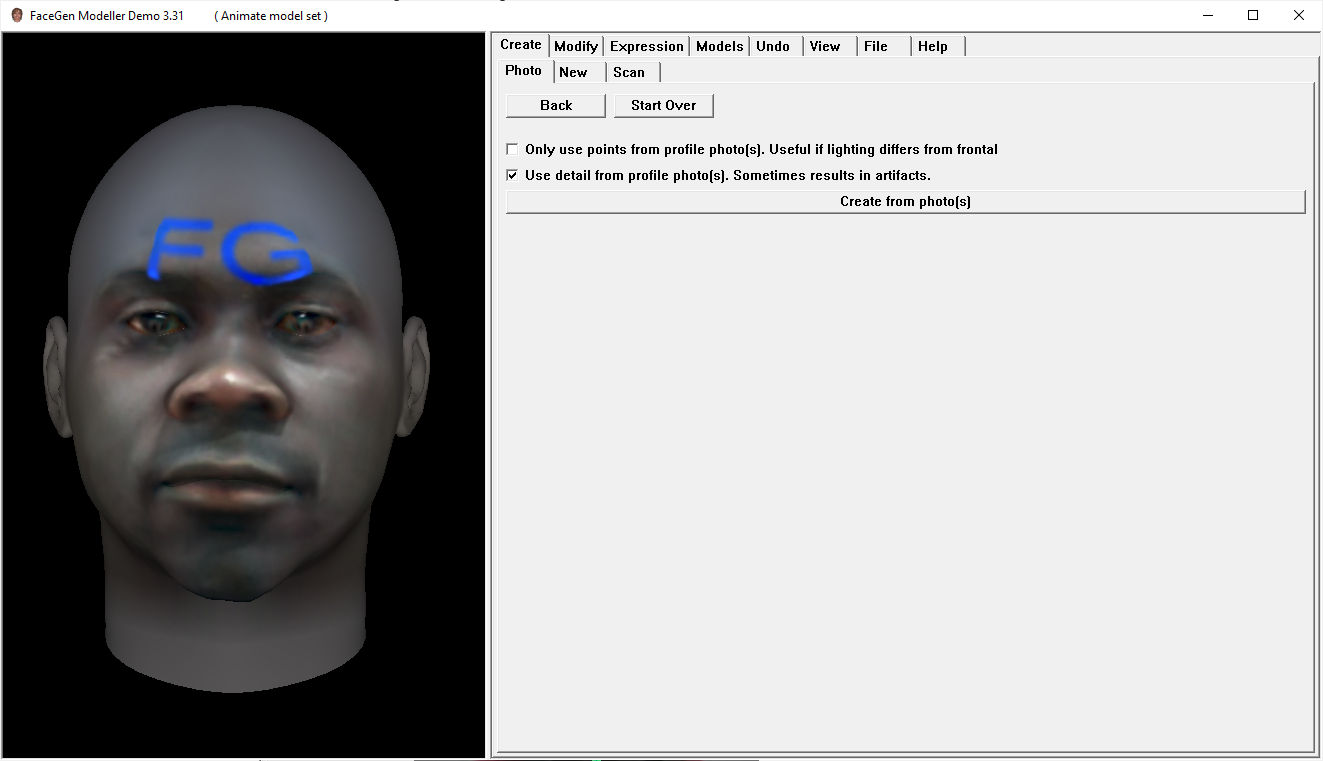
You can drag the 3D image around in any direction. Since I’m using the demo version, there is a blue FG (FaceGen) watermark on the image.
5. Overlay original photo to check accuracy
The generated 3D image may not be perfect. To fix that, we can overlay our still photos on the FaceGen window and tweak the 3D image to match the photos. One overlay utility that works is called Overlay. After installing it, load your still photo, drag the Overlay window over the FaceGen window, scale the overlaid photo so that the face elements of the overlaid photo and the underlying 3D image are almost the same. You can then see whether the generated 3D image is sufficiently accurate or needs tweaking.
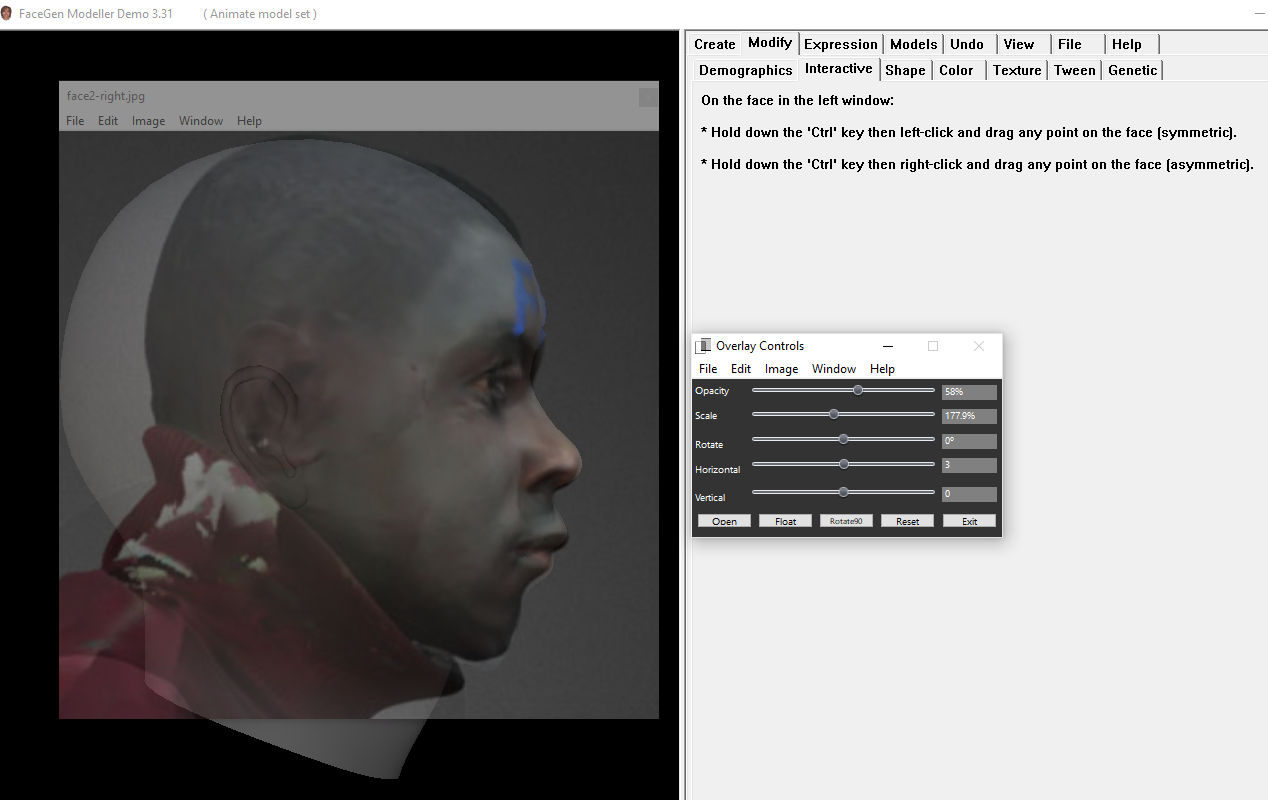
6. Edit the 3D image to match the photos
Click the “Float” button in the Overlay controls. Then, in FaceGen, click Modify > Interactive and edit the 3D image as follows:
- Hold down the ‘Ctrl’ key then left-click and drag any point on the face (symmetric).
- Hold down the ‘Ctrl’ key then right-click and drag any point on the face (asymmetric).
Symmetric will make changes symmetrically, e.g. if you edit the left eyebrow, then the right eyebrow will get the exact same edits. If you only want to edit one side / location, then use the asymmetric option.

In this step, your goal is to just tweak the 3D image to more closely match the photos.
7. Edit the 3D image to your desired result
After tweaking the 3D image to match the still photos, you can start editing the 3D image to your desired transformation using the same technique as in the previous step. Following are some extreme examples for demonstration purposes.
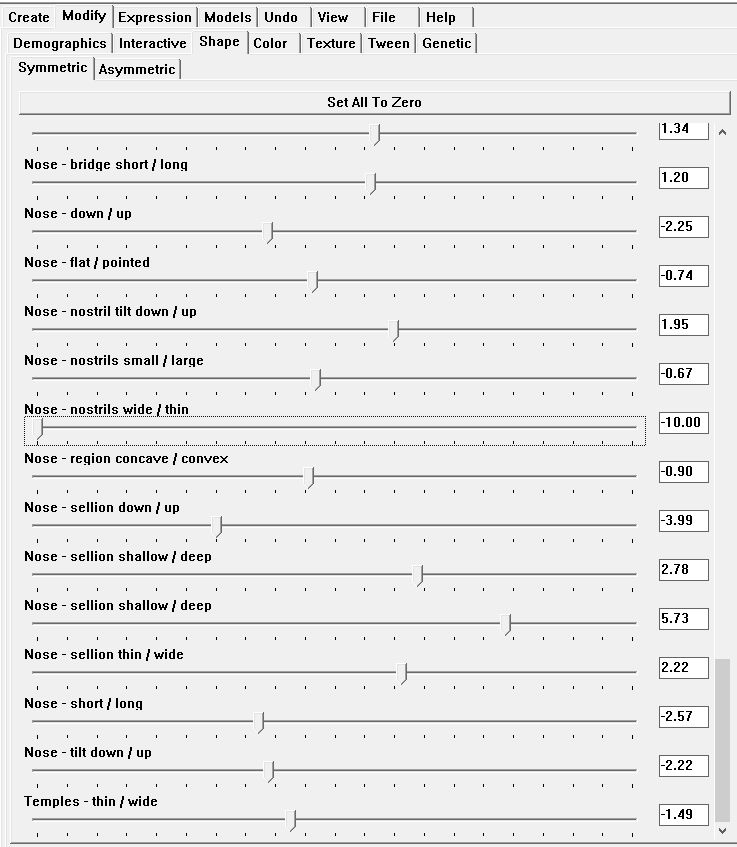
If you click on Modify > Shape, you can modify preset facial elements, e.g. nose nostril size, etc.
8. Further editing
Though FaceGen has many features, it seems to lack the ability to modify 3D images in certain ways. For example, one complaint many people seem to have is of a hump on their nose.
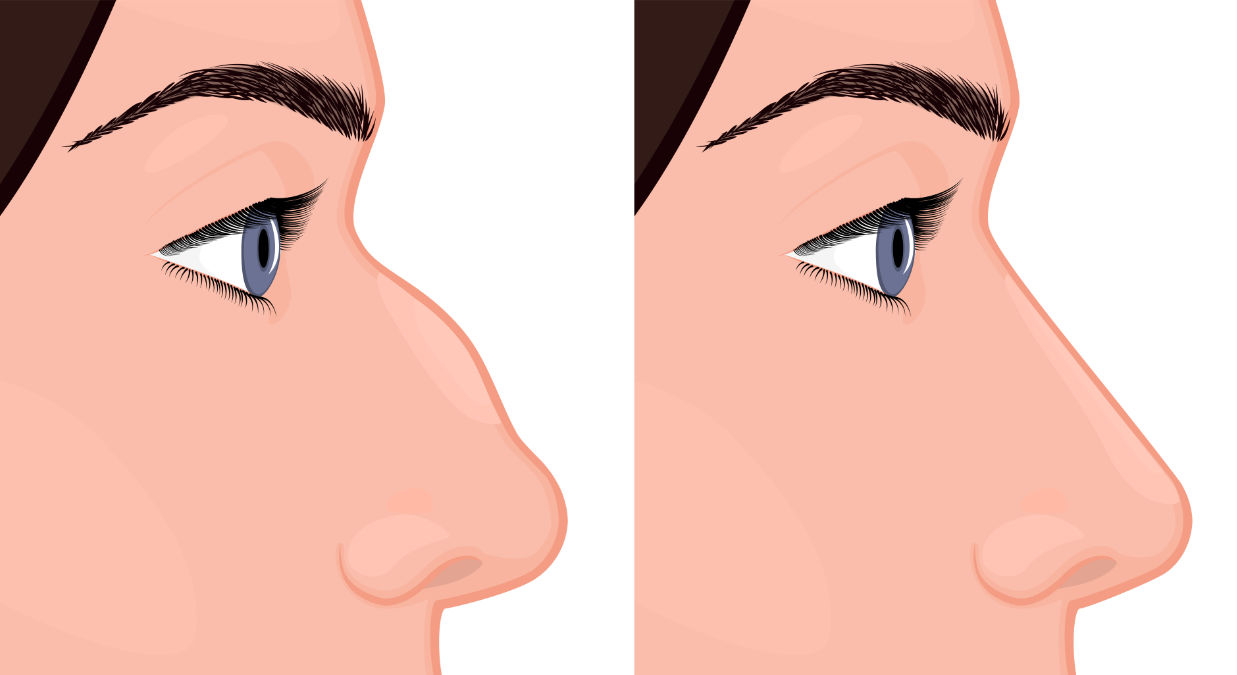
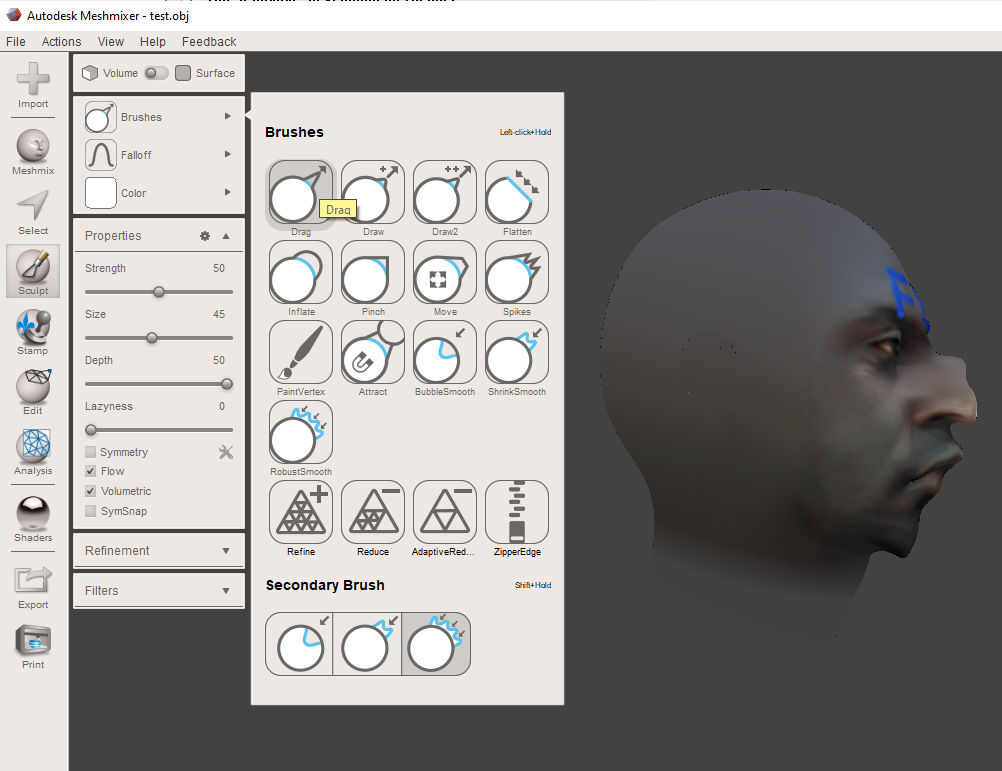
FaceGen doesn’t seem to have a way to reshape a hump like that. To resolve this, export the 3D image out of FaceGen as an OBJ file.
Then, download AutoDesk MeshMixer. It’s free. Install MeshMixer and import the 3D image you exported from FaceGen. With MeshMixer, you can sculpt your 3D image, e.g. click Sculpt > Brushes > Drag, adjust the strength, size, depth, etc of the brush, and then drag on the 3D image. Since my demo model didn’t have a hump on the nose, I created (an exaggerated) one. Note that all of this editing is in 3D so you can rotate the image around.
Another tool you can use is FaceTouchUp. But, it only works with 2D flat images, which, depending on your needs / goals, may be sufficient.
8. Upload 3D image for sharing
After you export your 3D image as an OBJ file, you can upload it to Sketchfab where you can share it with others. For example, below is an embed of the 3D image I took for this demo.
9. Morph the before and after images
If you took a screenshot of the 3D image before and after you made edits, you can use a morphing program to show the transformation from the before state to the after one.
3D Scanner
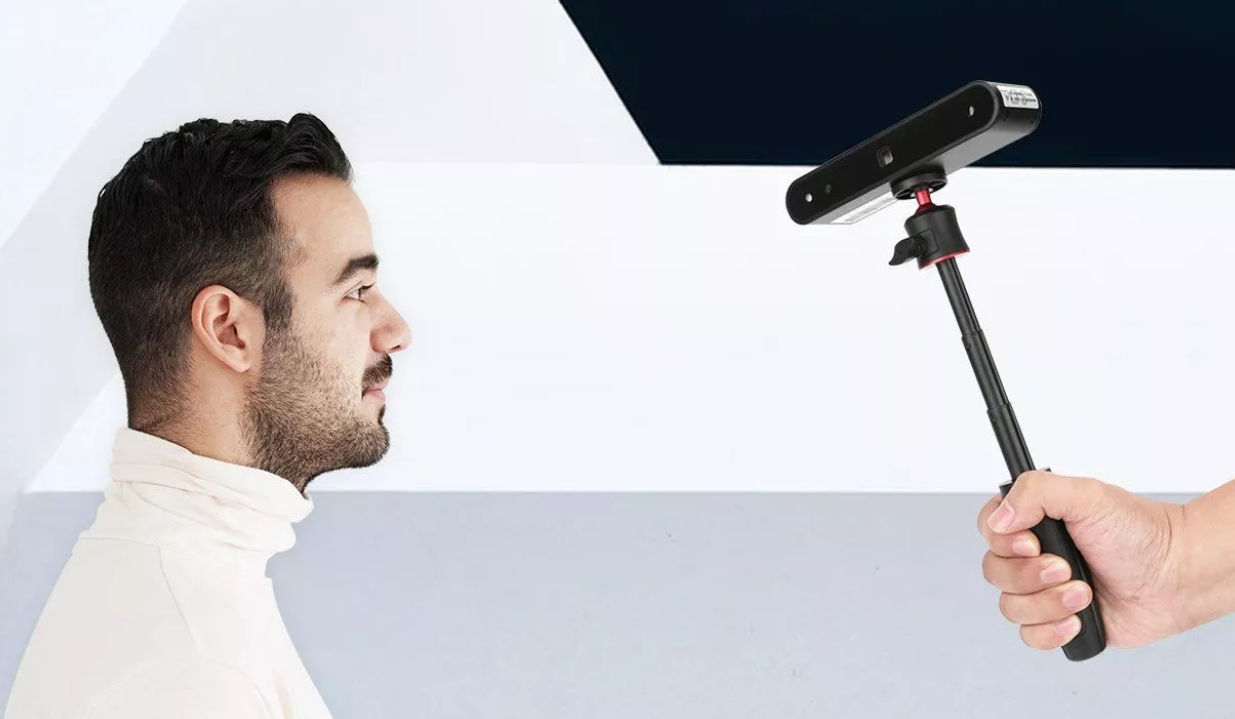
Generating a 3D image from still photos works pretty well. But, you can also create a 3D image of your face (or any object) using a 3D scanner. Revopoint POP 3D Scanner ($500) is one such scanner. It’s supposed to generate a more accurate 3D model by using infrared light to calculate depth. However, it doesn’t capture anything in black so if you have black hair or a black beard, it will not pick those up.
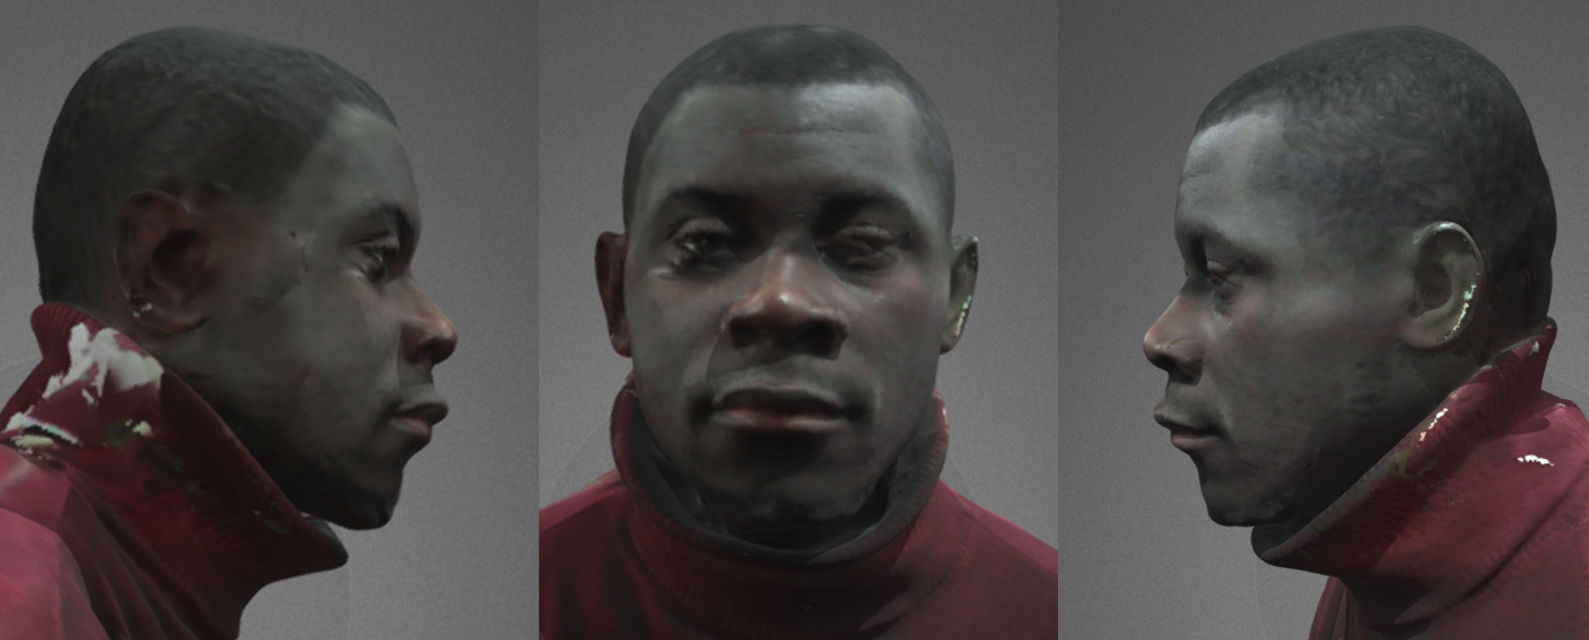
Other Examples
Click to enlarge