


Many, if not most, people aren’t experienced with buying and selling a house. For that reason, they hire a real estate agent. However, once you’ve bought one or two houses, you’ll realize it’s not that hard. 50 years ago, when online MLS sites like Zillow didn’t exist, having an agent find a house for you was useful. However, nowadays, buyers can get notified instantly when a house matching their criteria comes on the market. This reduces the value of having an agent. Furthermore, in California, real estate agents get a 3% commission. Even though this is paid by the seller, in certain situations the buyer pays by having to offer a higher purchase price. By buying a house without an agent, the seller doesn’t have to pay 3% commission to a buyer’s agent which means you can offer a lower purchase price than other buyers who have an agent. For a $500,000 house, this can save you $15,000.
Below are steps to buy a house without an agent.
1. Get a pre-approval letter
Assuming you will be borrowing money to buy the house, as for most people, you need a pre-approval letter. This is for 2 reasons:
- Find out how much of a house you can afford
- Prove to the seller you can actually afford to buy their house
To get a pre-approval letter, you can submit an application to purchase a home on Zillow Home Loans. You can do the same at LoanDepot.com which is reportedly the second-largest non-bank provider of direct-to-consumer loans in the United States. Another option is to compare lenders based on interest rate offered. By filling out some information on Zillow’s Mortgage Rates page, you’ll be presented with multiple lenders and interest rates. You can then pick a lender, get in contact with them, and ask for a pre-approval letter at the rate they advertised. Here’s an example pre-approval letter.

A pre-approval letter is different from a prequalification letter. With a pre-approval, your financial situation is verified and your credit score is checked.
2. Search for a house
The easiest thing to do is search Zillow. You can also search Redfin, Trulia, and official MLS websites.
Appraisal
Note the automated estimates, e.g. Zestimate and Redfin estimate. They will give you a good idea of the value of the property. However, don’t assume they are correct. Sometimes, their algorithms use uncomparable properties to determine value leading to incorrect values, e.g. comparing a multifamily property or condo to a single-family property. You can see the properties each website uses to determine a particular value. If they don’t make sense, you can calculate the price per sq ft of similar properties recently sold and come up with a more accurate estimate. See an example. Based on the pictures, neighborhood and estimate, think of how much you’d pay for the property.
Tips
See my post on house-buying tips to learn more about certain things to watch out for.
3. Draft a purchase offer
Most offers in California are made using standard forms provided by the California Association of Realtors (CAR). You can see sample forms and buy the forms at exorbitant prices at https://store.car.org/collections/c-a-r-standard-forms.
RPA – California Residential Purchase Agreement and Joint Escrow Instructions – 4 Pack
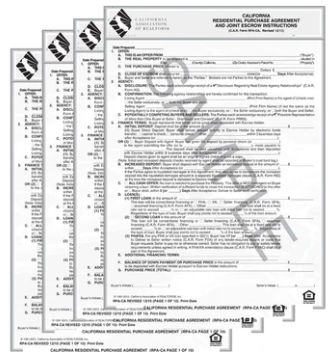
This form is the main form used for making an offer. It includes
- (AD) Disclosure Regarding Real Estate Agency Relationship
- (BIA) Buyer’s Inspection Advisory
- (PRBS) Possible Representation Of More Than One Buyer Or Seller
- (WFA) Wire Fraud Advisory
Price
- $170.98 (CAR Member Price)
- $341.95 (CAR Non-Member Price)
Other useful forms
- TDS – Real Estate Transfer Disclosure Statement
The property disclosure statement is required by law in most residential sales transactions in California. It includes Seller’s mandatory disclosure of specified items and any known adverse material conditions, as well as sections for Seller’s and Buyer’s agents to comply with diligent visual inspection requirements. - BCO – Buyer Counteroffer
Counteroffer form to be used when a buyer initiates a counter offer. - SCO – Seller Counteroffer
Counteroffer form to be used when a seller initiates a counter offer. - WOO – Withdrawal of an Offer
This form is used to revoke an offer or counter offer before the document has been accepted.
Important Terms of Purchase Offer
The standard California residential purchase offer form is written to protect buyers by default. Following are some key clauses.
- Inspection Contingency
- Appraisal Contingency
- Loan Contingency
4. Submit the purchase offer
You will submit the purchase offer to the seller’s agent or, if it’s an FSBO (for sale by owner) listing, then to the seller directly.
Since you are submitting your purchase offer yourself without an agent, you should make it clear that your offer will not require the seller to pay a commission to a buyer’s agent. For a 3% rate, the seller could save $15000 on a $500,000 purchase offer. Below is an example cover letter for this purpose.
Note to Seller:
This offer is from a buyer with no agent. I (the buyer) am representing myself. As such, acceptance of this offer by you (the seller) would save you from having to pay a commission to a buyer’s agent. Since my offer is for $390K, assuming a commission rate of 3%, my offer would save you $390K x 3% = $11,700, and your total commission expense would only be $11,700 to your own agent (seller’s agent). Your net proceeds (excluding other expenses) would be $390K – $11700 = $378300 as shown below.
| My Offer | Commission to Seller’s Agent | Commission to Buyer’s Agent | Seller’s Net Proceeds |
| Purchase Price | 3% | 0% | (excluding other expenses) |
| $390,000 | $11,700 | 0 | $378,300 |
If there is another offer above $390K but below $403K and that offer includes a buyer’s agent, then you’d have to pay 6% commission (3% for each agent). In this case, my offer will net you higher proceeds as you can see from the table below.
| Other Offers | Commission to Seller’s Agent | Commission to Buyer’s Agent | Seller’s Net Proceeds |
| Purchase Price | 3% | 3% | (excluding other expenses) |
| $391,000 | $11,730 | $11,730 | $367,540 |
| $392,000 | $11,760 | $11,760 | $368,480 |
| $393,000 | $11,790 | $11,790 | $369,420 |
| $394,000 | $11,820 | $11,820 | $370,360 |
| $395,000 | $11,850 | $11,850 | $371,300 |
| $396,000 | $11,880 | $11,880 | $372,240 |
| $397,000 | $11,910 | $11,910 | $373,180 |
| $398,000 | $11,940 | $11,940 | $374,120 |
| $399,000 | $11,970 | $11,970 | $375,060 |
| $400,000 | $12,000 | $12,000 | $376,000 |
| $401,000 | $12,030 | $12,030 | $376,940 |
| $402,000 | $12,060 | $12,060 | $377,880 |
| $403,000 | $12,090 | $12,090 | $378,820 |
To conclude, my offer of $390K will net you a higher profit than any other offer up to $402K.
5. Do a home inspection
Inspections aren’t usually required by your mortgage lender, but they can reveal hidden issues that the seller might not know about. A typical home inspection covers surface-level elements of the home, including its plumbing, structure, heating system, and more.
You can search for home inspectors on Zillow’s website or Google.
Expect to pay at least $400 for a home inspection from a reputable company on an average 2,000-square-foot home.
6. Negotiate
If the inspection reveals an issue with the home, there are a few ways you can negotiate with the seller.
- Ask For Repairs
You can ask the seller to repair any problems with the home before closing. - Ask For Reimbursement
You can ask the seller to reimburse you for the cost of repairs. This guarantees that you’ll get work from a quality contractor because you choose the professional. However, you might have trouble getting a seller to agree to pay a bill if they don’t know how much it will be. - Ask For A Discount
You can ask the seller for a reduction of the sale price if there are significant repairs that need to be made. - Cancel The Sale
If you can’t reach a solution with the seller and the issues are a deal-breaker for you, you can always cancel the sale.
7. Finalize financing and close
When you reach an agreement with the seller, it’s time to close on the loan.
Appraisal
Your lender will likely require you to pay for an appraisal. You’ll pay up to $500 and the lender will choose the appraiser. They do this to protect themselves so that if you default on the loan, they can reduce their losses. The appraisal report will also protect you so that you are not overpaying for the property. If the property isn’t worth what you’re offering, you can negotiate to lower the purchase price. Or, you can put a larger down payment if you really want the house.
Your lender will first give you a loan estimate. As soon as the appraisal and underwriting are cleared, your lender will send you a closing disclosure. Your loan estimate and closing disclosure tell you about the terms of your loan, your closing costs, your interest rate, and more. Compare the loan estimate to the final closing disclosure to ensure everything is as expected. If everything looks good, contact your lender and schedule your closing. The examples below are for a refinance but they are similar for a purchase.
Things to look out for
- The loan should have NO prepayment penalty
- The loan should have NO balloon payment
- The loan should have NO demand feature


