Document headings (Heading 1, Heading 2, …) are useful to show a document’s content hierarchy. But, unless styled, it can still be difficult to visually scan a document to quickly find different sections. Some techniques to add styling and improve visual hierarchy include
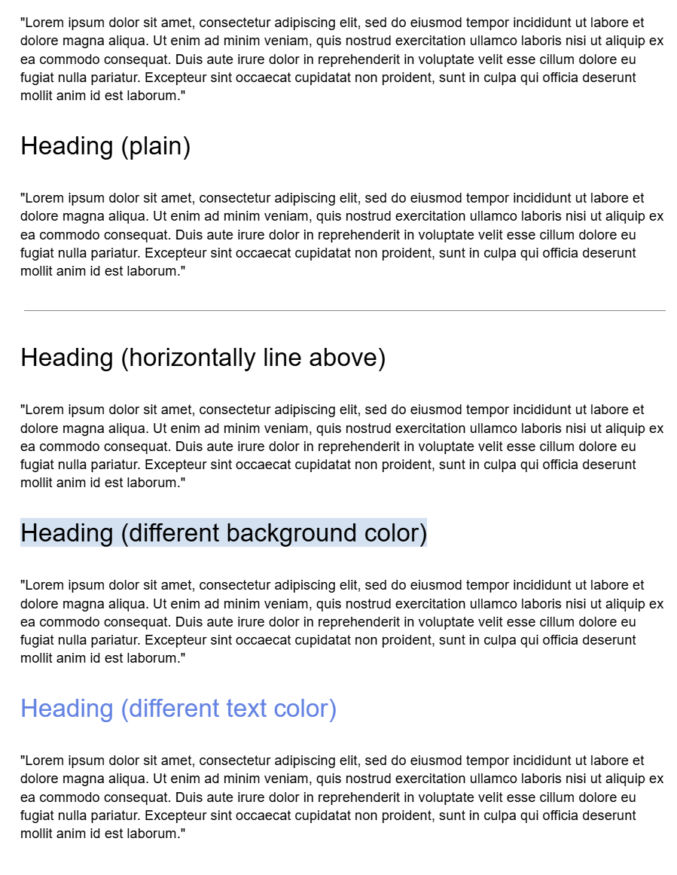
using a horizontal line to separate sections
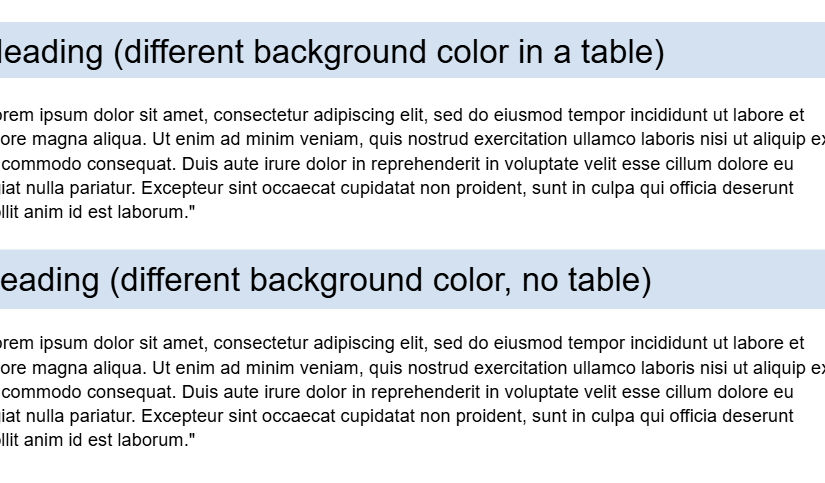
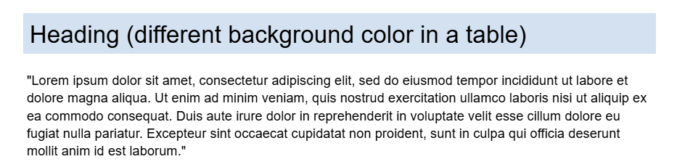
using a background color
changing the heading text color
All of these styles, except the one with the different background color, look fine, but they may not suffice if you want high-contrasting section headings. You can put heading text in a 1×1 table, as shown below, but that’s not ideal, especially if your document may be parsed.
To create a table-less heading with full-width background color, do the following:
Type your heading on its own line
Select the entire heading line (triple-click to include whitespace after the text)
Go to Format → Line & paragraph spacing
Click Single
Click Remove space before paragraph
Click Remove space after paragraph
With the line still selected, go to Format → Paragraph styles → Borders and shading
Background color: e.g. #1F2933
Border width:0 pt (all sides)
Paragraph padding: e.g., 6 pt or 7 pt
You can optionally style the heading text and create a reusable heading style (Format → Paragraph styles → Heading 1 → Update “Heading 1” to match).
Here’s a link to the test document used in this post.
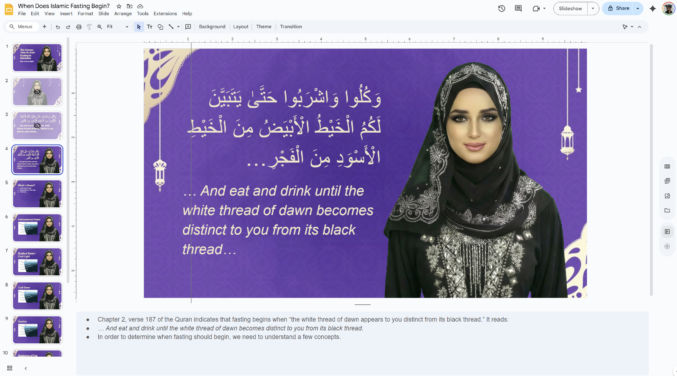
In this post, I’ll show how to easily create explainer videos using Google Slides and Google Vids. Here’s an example explainer video I made using these tools.
Create Your Slides
Go to Google Slides and create a slide for anything you want to show visually in your video. A slide can contain a background, text, images, videos, and more. When creating your slides, write your speaking script in the notes section below each slide preview. In my case, I took the slide design from here.
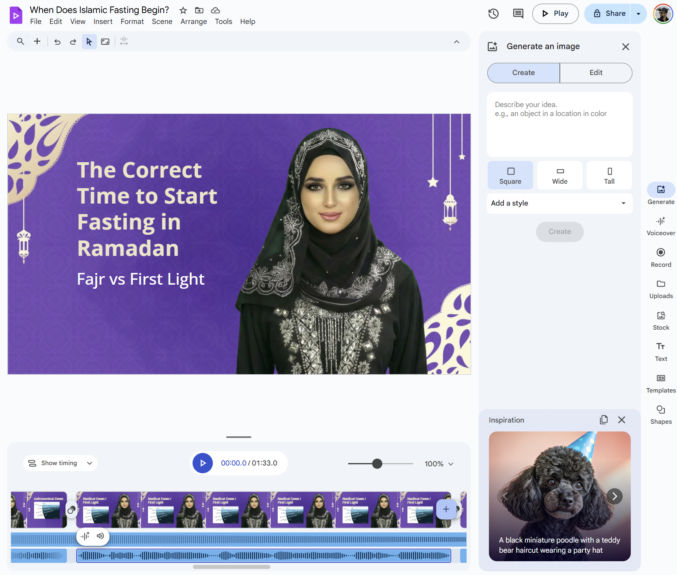
Import Slides into Google Vids
Click the “Convert to Video” button. This will open the presentation in Google Vids.
Choose the slides you want to import. You can also include AI voiceover, script, and background music. If you do that, Google Vids will use AI to create a voiceover script for you. If you want to use the notes you wrote in Google Slides, turn off this toggle.
Google Vids only supports videos that are 10 minutes long. If you have many slides with scripts that, once the voiceovers are generated, will result in a video that exceeds 10 minutes, you will need to delete some slides and voiceovers. If this happens, you will convert slides in batches, e.g., 20 or 30 at a time. When selecting which slides to import, you can click one slide, hold the “shift” key, then click the last slide to select all slides in between.
Edit the Video
Now that you’re in Google Vids, you can edit the video. You will see a video timeline at the bottom.
Move the playhead along the timeline to different sections of the video.
Click the “Play” button to preview the video.
Click “Voiceover” on the right to edit the script for each slide you imported, if needed. Here, you can change the narrator’s voice as well. At this time, Google Vids only supports English, Spanish, Portuguese, Japanese, Korean, French, Italian, and German. If you want a voiceover in a different language, you’ll have to import the audio or record your own voice.
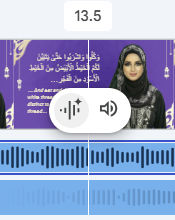
If you want to edit the background music,
click on the background music track,
click the speaker icon to the right of the waveform icon
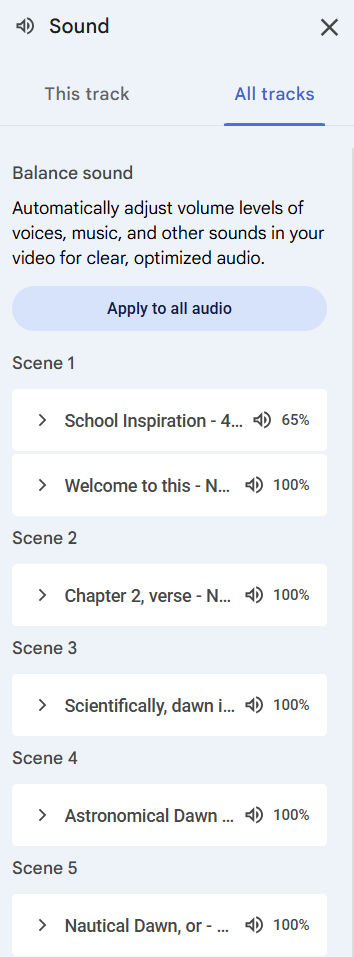
You will see the Sound panel. Click the “All tracks” tab. You will then see the background music and narration audio for each scene. Clicking on each one will allow you to edit the audio for each scene individually. You can also click the “Apply to all audio” button to have your changes apply to all scenes.
Export Video
When you’re done making your changes, click “Share > Download as MP4” to generate and download the video.
Note
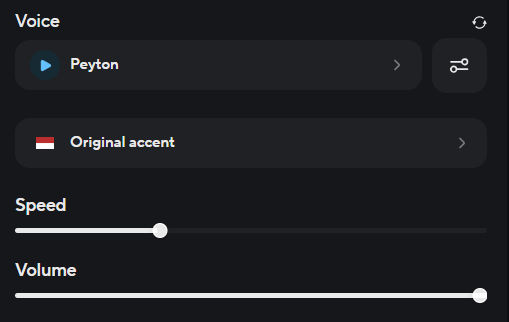
In the example video I created, I used HeyGen to create a lip-sync video of the narrator speaking. Google Vids doesn’t offer this feature, and you don’t need it to create explainer videos. If your video is in a language that is unsupported in Google Vids, e.g., Indonesian, and you want to create a lip-sync video, then you can simply paste the script into Heygen, preview the voiceover, and then generate the lip-sync video. HeyGen only charges for video generation, not text-to-speech previews. For a female voice in Indonesian, for example, I chose “Peyton” (voice ID = 6dd171c356f94a138cdbb5bd11ea8ee8) with “Original accent”.
If you only want to lip-sync some scripts, then it’ll be cheaper to paste those scripts in ElevenLabs. For an Indonesian text-to-speech, I chose Hannah’s voice, using the “Eleven Multilingual V2) model.
You can also clone your own voice in HeyGen and use it to create a lip-sync video.
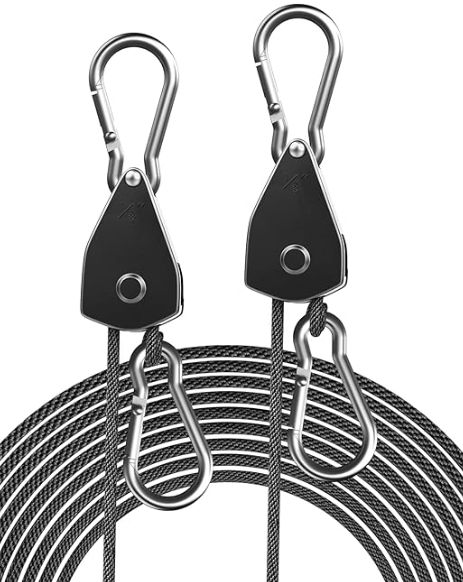
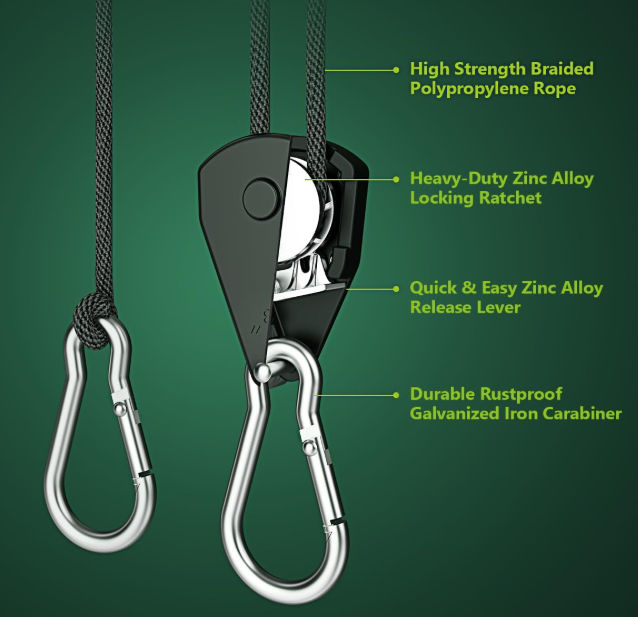
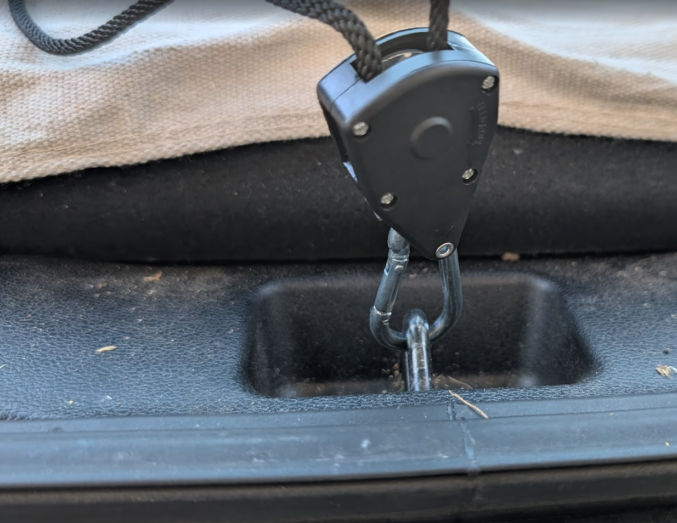
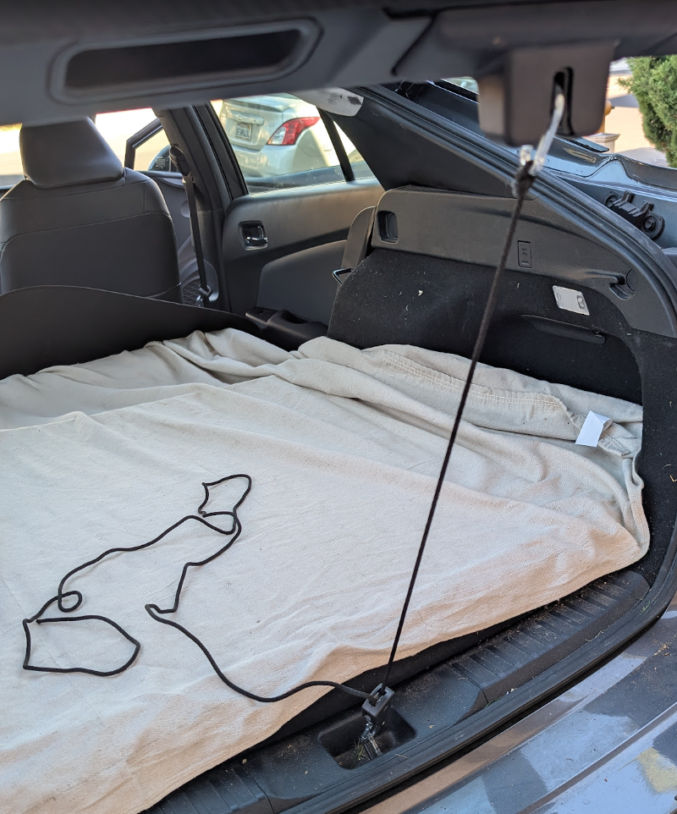
These instructions are for a 2019 Toyota Prius Prime, but they should work for most cars. Some people use a bungee cord, but I prefer this 1/8” Adjustable Rope Hanger I got on Amazon. It has carabiners on both ends rather than hooks, which is more secure. It also has a simple ratcheting mechanism to shorten or lengthen the rope.
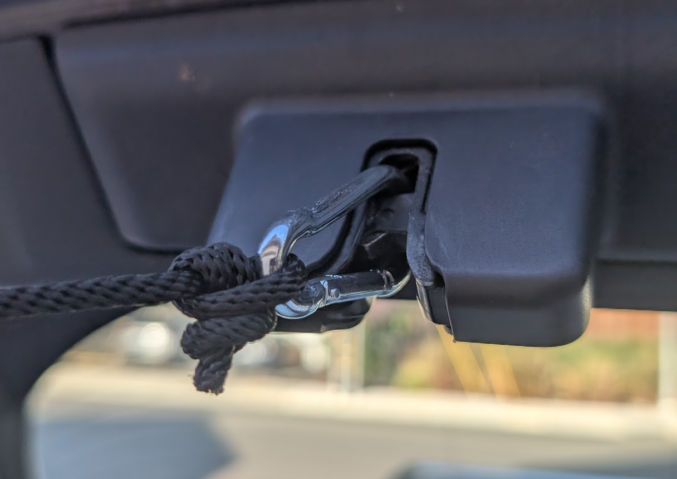
To hold your trunk partially open, take one end of the rope hanger and push it into the locking mechanism on your trunk as shown below.
The lock will close, preventing the carabiner of the rope hanger from disconnecting.
Then, take the carabiner on the other end of the rope hanger and hook it onto the metal lock part that’s at the other end of the car’s trunk locking mechanism.
Lastly, pull on the rope that’s connected to the ratchet to make the rope hanger shorter.
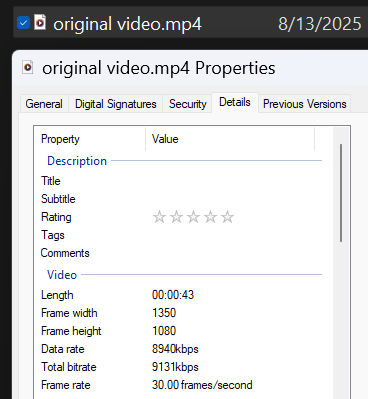
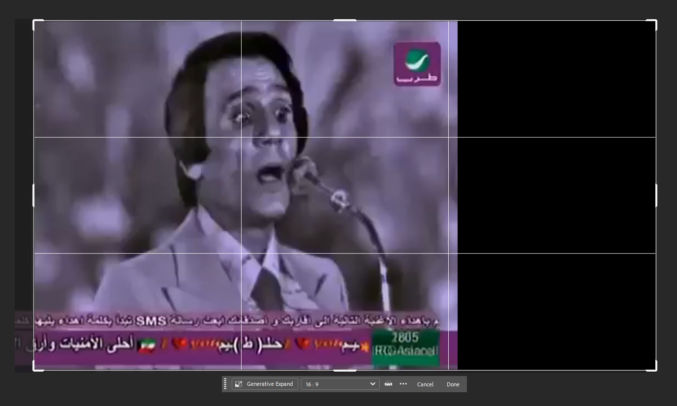
Older videos tend to be in the 4:3 aspect ratio rather than the 16:9 we use today. If you enlarge an old video, you’ll end up cropping parts of it. To keep all of the existing video, but extend it horizontally or vertically, you can use Photoshop’s Generative AI Extend feature. Here’s an example.
I have a video with dimensions 1350 wide by 1080 tall.
You can see this by looking the at file’s properties.
To extend this video horizontally so that it has a 16:9 aspect ratio, we’ll use Photoshop.
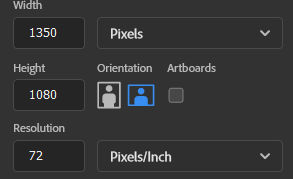
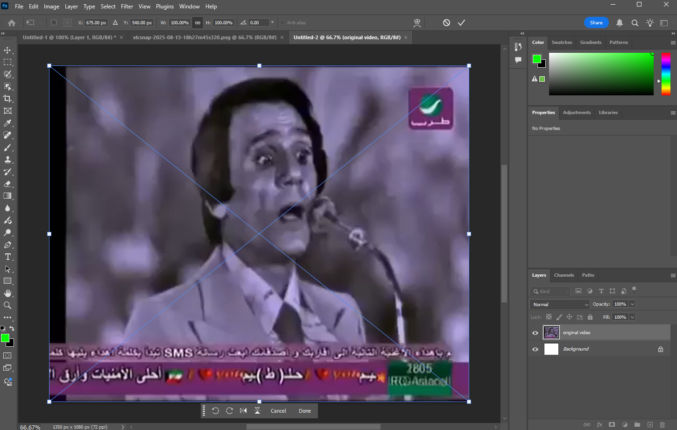
Create a new document with the same dimensions (1350 x 1080 px)
Drag the video to the blank document. The video will be on a layer above the white background layer. Click “Done” or the checkmark at the top to accept importing the video into the document.
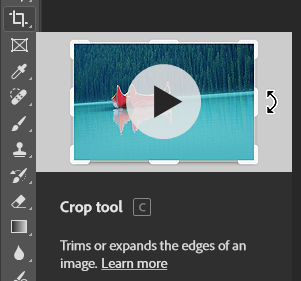
Click the Crop tool
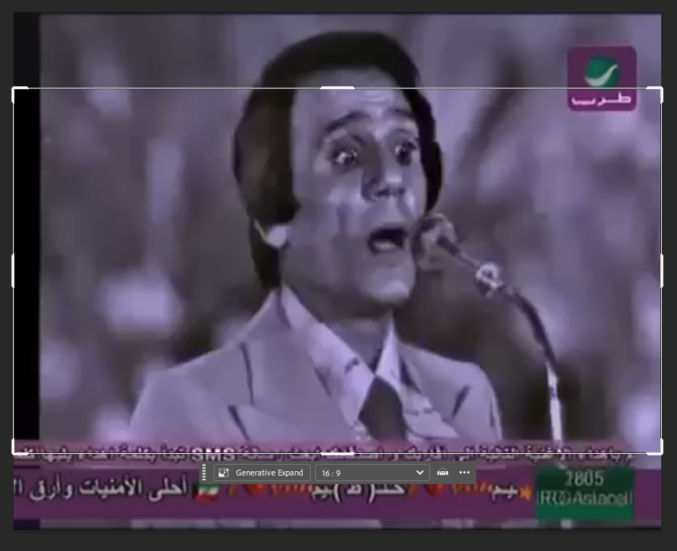
A white border with handles will appear on the video. A floating toolbar that says “Generative Expand” will also appear. Ensure the dimensions are set to 16:9.
Drag the handles so that the crop border covers the video. In this case, I dragged the vertical handle on the right toward the right.
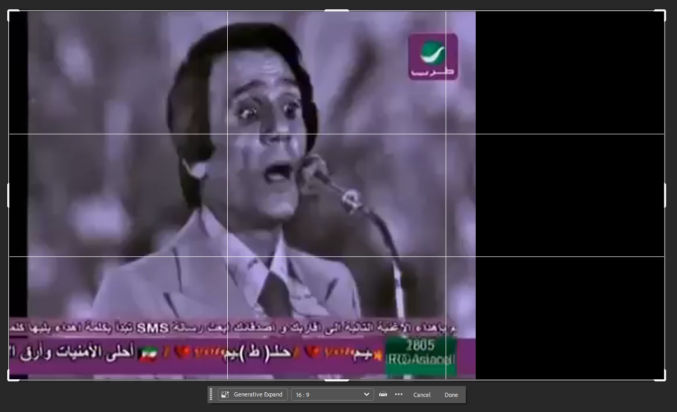
The original video had a black vertical bar on the left. I don’t like that, so I will drag the video to the left so he black bar is outside the crop rectangle.
Click the Generative Expand button in the floating toolbar.
You can then enter a prompt if you want. I will just click “Generate”.
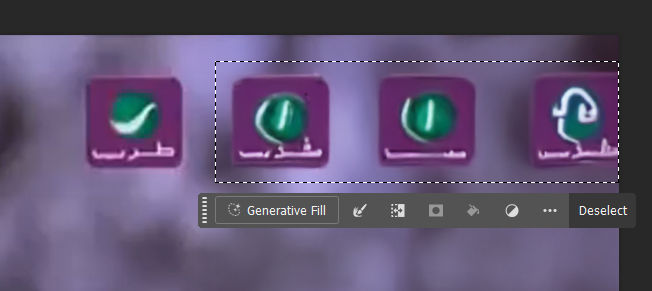
Photoshop will generate 3 variations. Click on each one to see how they look.
I like variation 1, but I don’t like that Photoshop added 3 purple and green boxes on top to the right of the original box.
Select the 3 boxes so we can remove them using Generative Fill.
Click the Generative Fill button followed by ‘Generate”.
Those 3 boxes are now gone.
Click “Window” > “Timeline” to open the timeline. Then, click “Create Video Timeline”.
You will see a track for the original and two tracks above it, one for generative expand and one for generative fill.
Drag each generative track so they are the same duration as the original track.
Click the play button in the timeline to preview the modified video.
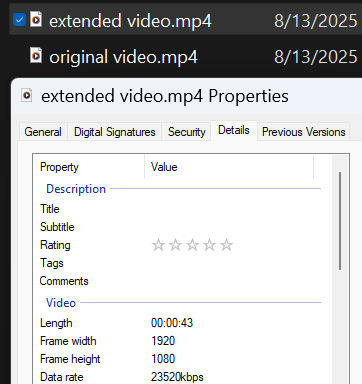
If the results look good, export the video by going to File > Export > Render Video.
If you inspect the video’s properties, you’ll see that they are now 1920 x 1080 px.
In this post, I’ll share my process for how to make a traditional video in Capcut. Specifically, I’ll show how to make a video that:
comprises a collection of video and image clips
has a simple crossfade (mix, fade-in/fade-out) transition between clips
has background music with a crossfade between music clips
improves audio quality
uses AI to stabilize some shaky video footage
improves the color and lighting of some clips
animates some images with a subtle zoom effect
animates some images to create rolling credits
freezes a frame in a video clip
has text overlays
Download and install Capcut
Visit the Capcut website, download Capcut and install it.
Import video and image footage
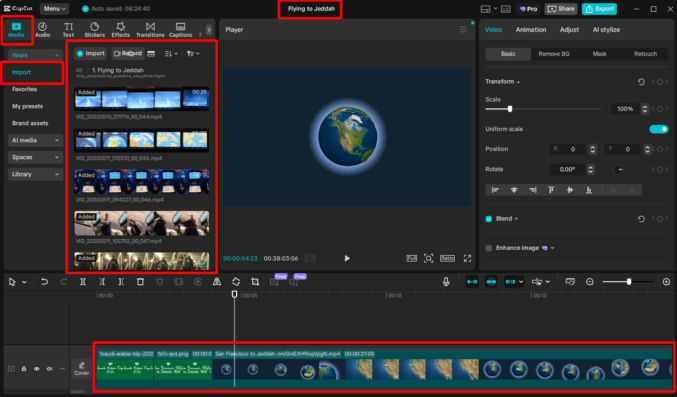
Open Capcut
Create a new project
Click the default project name at the top center and rename it to something descriptive, e.g. My Vacation
Click the “Media” tab at the top left and then click “Import” tab below it.
Click the “Import” button or drag your footage (audio, video, images) to the assets pane.
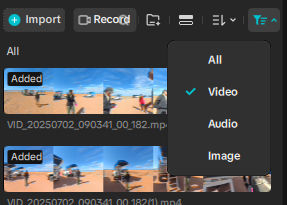
Use the filter dropdown to filter assets by type (video, audio, image, etc).
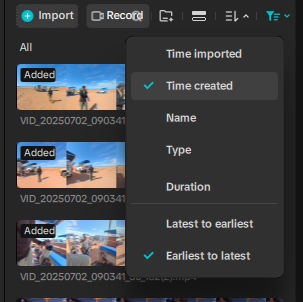
Use the sort dropdown to sort assets, e.g. by date created, etc. I find that sorting by “Time created” and “Earliest to latest” puts my assets in the order I want them in so I can just select all assets and drag them to the timeline.
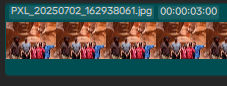
Drag some or all of your footage to the timeline at the bottom
Drag the zoom slider at the top right of the timeline pane to zoom the timeline in and out.
Trim images
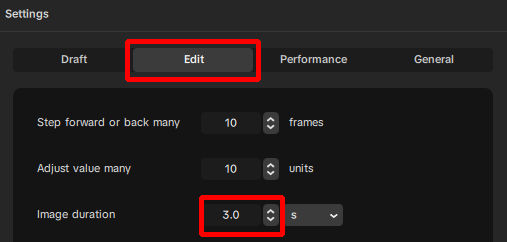
When you drag images to the timeline, the duration will be whatever the setting is under Options, which defaults to 5 seconds. If you want to change the default to, say, 3 seconds, go to Menu > Settings > Edit (tab) > Image Duration and change the value to 3.
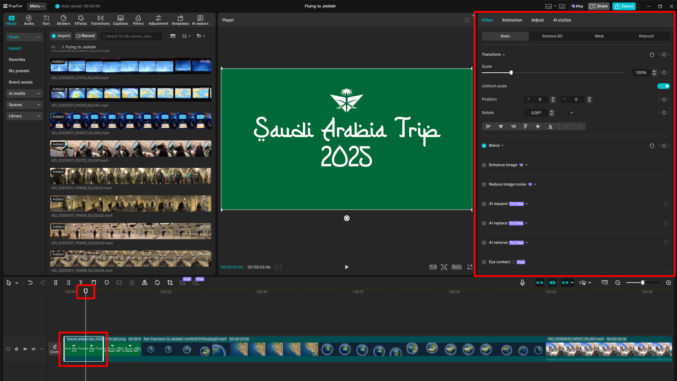
Click on an image in the timeline. In the right pane, you will see various options to edit the image.
The playhead is a visual marker that indicates the current position or frame being viewed in the preview pane. Drag the playhead to anywhere above the image in the timeline. You will see a preview of the image in the center in the preview pane.
Click the play button in the preview pane to preview how the image will appear relative to the rest of the video project.
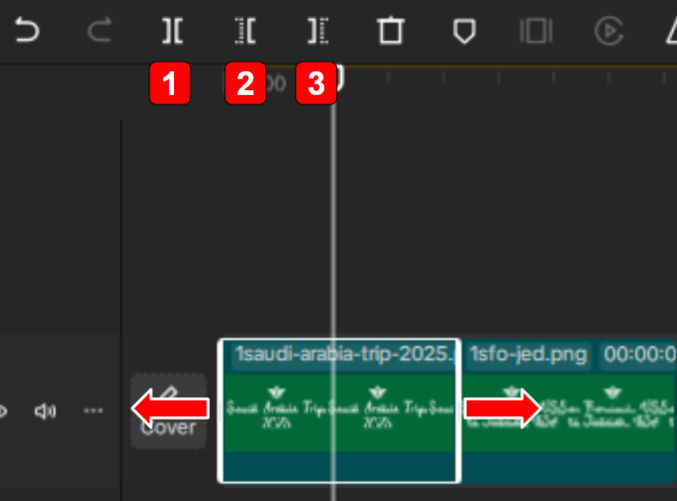
If the image duration is too short or too long, you can extend the duration by dragging the left or right edge of the clip in the timeline to the left or right. You can also position the playhead at a particular time and click one of the following buttons:
SPLIT: to split the image clip into two clips
DELETE LEFT: to delete the portion of the image to the left of the playhead
DELETE RIGHT: to delete the portion of the image to the right of the playhead
To see the duration of an image, zoom out on the timeline and look at the duration label on the clip in the timeline. For example, the image clip below is 3 seconds long.
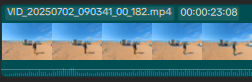
The video clip below is 23 seconds and 8 frames long.
Trim Videos
Trimming video clips on the timeline is similar to trimming images. Click on a video clip in the timeline. You will see a preview of the video in the preview pane. In the right pane, you will see various options to edit the video clip.
In the right pane, click “Speed” to see the video clip’s duration. If you change the duration value here, the video clip’s speed will change accordingly. If you don’t want to speed up or slow down the video, you’ll need to trim the video clip the same way you trim image clips:
drag the left end of the video clip in the timeline to the right
drag the right end of the video clip in the timeline to the left
split, delete left, or delete right the video clip relative to where the playhead is in the timeline
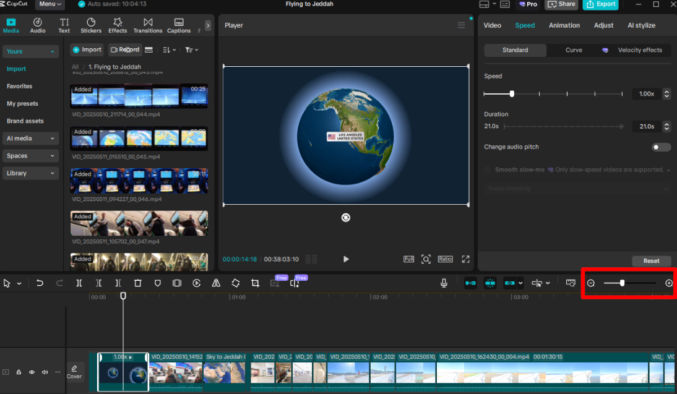
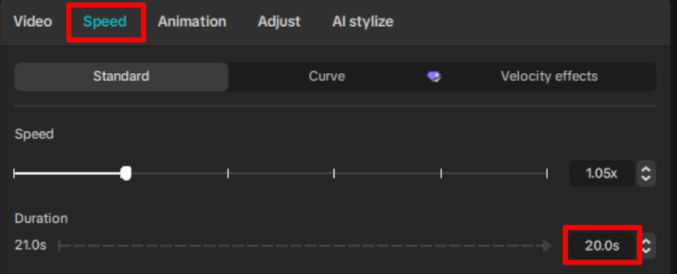
Speed up or slow down video clips
If your video clip is too slow or too fast, you can speed it up or slow it down. As in the previous step, click the video clip in the timeline and then click the “Speed” tab in the right pane.
Speed up
To speed up the video clip, e.g, 2x for twice the speed, just drag the speed marker to the right. The duration of the clip will change accordingly.
Slow down
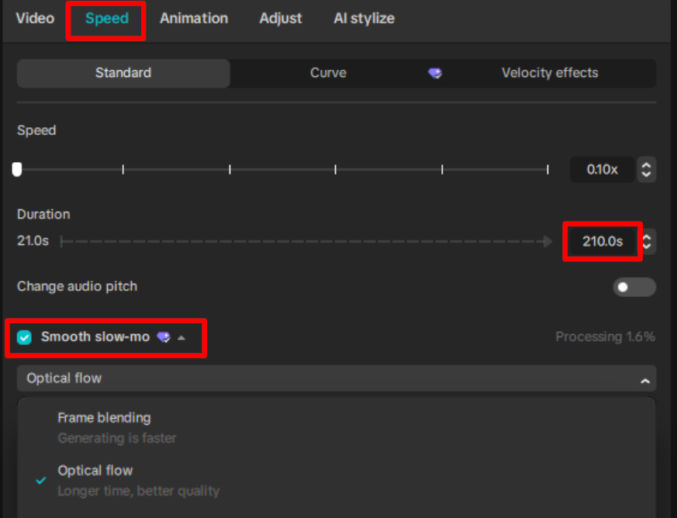
To slow down the video clip, e.g. 0.5x for half the speed, drag the speed marker to the left. The duration of the clip will change accordingly. Note that if your video clip was shot at 30 frames per second (fps) and you slow down the clip by 50% (0.5x), the resulting video will stutter due to an insufficient number of frames. This is why you should shoot video at a high frame rate, e.g. 60 or 120 fps, if you know you want to play it back in slow motion, which is usually done for action scenes.
If you didn’t shoot at a high fps, you can use Capcut to smoothen the slow-mo effect by either
frame blending
optical flow
The results are not as good as a high-fps video, but they’re better than without smoothening, especially using the “optical flow” option.
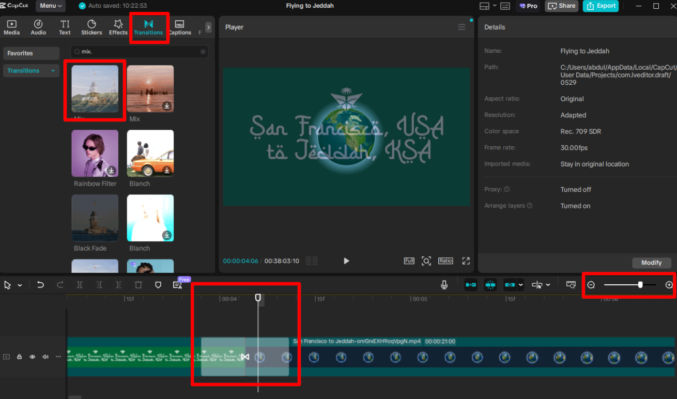
Add transitions between clips
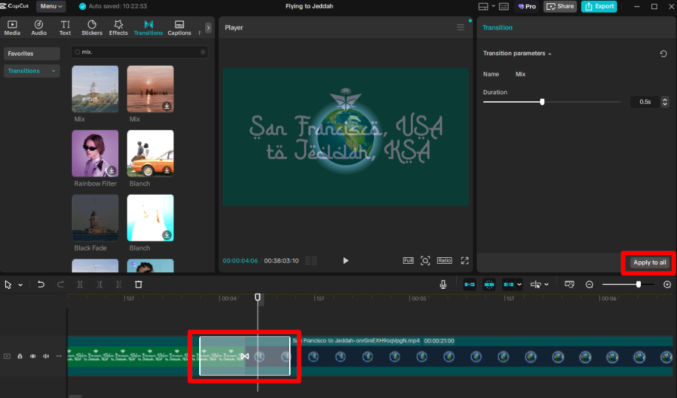
There are many transition effects available. I prefer to use the simple crossfade (mix) transition, which gradually fades out one clip and fades in the next clip. To add this transition between two adjacent clips, click the “Transitions” tab in the left pane, type “mix” in the search field, and drag the mix transition icon down to the timeline between two clips. If necessary, zoom the timeline out. You’ll see a semi-white section between the two clips representing the transition. If you move the playhead to that transition area in the timeline, you can see a preview of the transition in the preview pane, showing a blending of the two clips.
If you want to apply the same transition to all clips, click one transition in the timeline and then, in the right pane, click the “Apply to all” button.
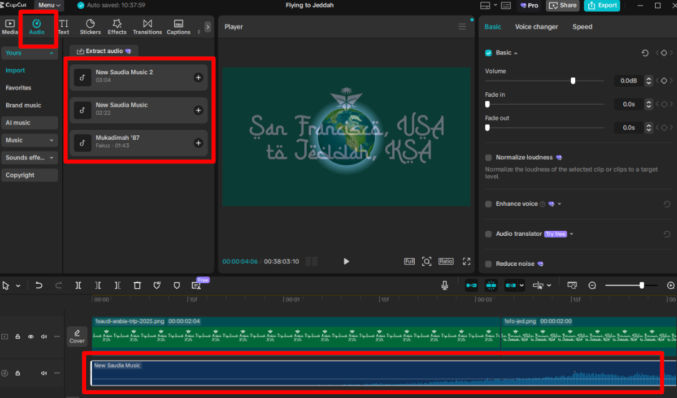
Add background music
Click the “Audio” tab in the left pane.
Click the “Import” button to import songs (MP3) from your computer.
Drag a song from the list of songs down to the timeline below the main video track.
As with still images and video clips, you can trim audio clips in the same manner.
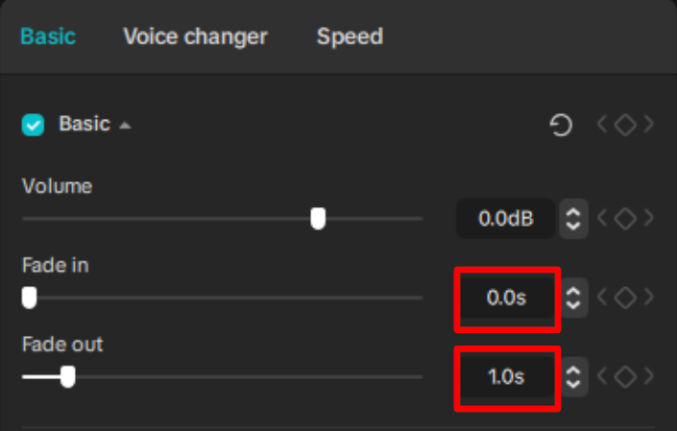
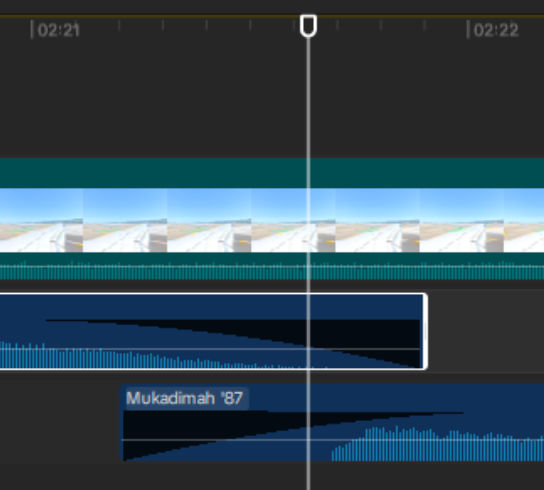
If you want to crossfade two adjacent songs,
put the 2nd song on a separate track below the first song’s track
zoom in on the timeline and scroll to where the two songs meet
click the 1st song and, in the right pane, set a fade out duration of, say, 1 second
click the 2nd song and, in the right pane, set a fade in duration of, say, 1 second
position the playhead just before the end of the first song
preview the audio crossfade in the preview pane
Notice the black curve in the audio tracks showing the fade effect.
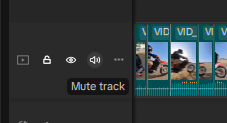
When you add audio or music track, if your video clips contain audio, you’ll hear audio from all tracks containing audio. If you want to mute all audio from all clips in the main track, click the audio icon as shown below.
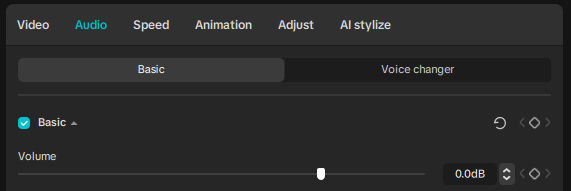
If you want to adjust the volume or mute just a single video clip, click on the clip in the timeline, then in the right pane, click the “Audio” tab and drag the volume slider.
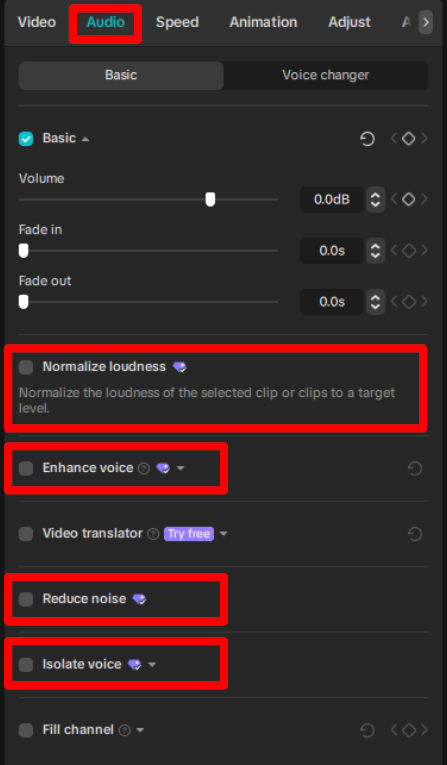
Improve audio quality
The audio in your video clips may contain background noise as well as vocals. To improve the audio quality, select the relevant clips and choose from the following options in the “Audio” panel.
To reduce background noise, e.g. humming or the sound of an engine, check the “Reduce noise” checkbox
To improve vocals, check the “Enhance voice” and/or “Isolate voice” checkboxes. Note that the “Isolate voice” options strips out all audio, leaving only vocals.”
To normalize the loudness of all background music clips, select all clips and check the “Normalize loudness” checkbox.
Slide the volume slider to increase or decrease the volume as needed.
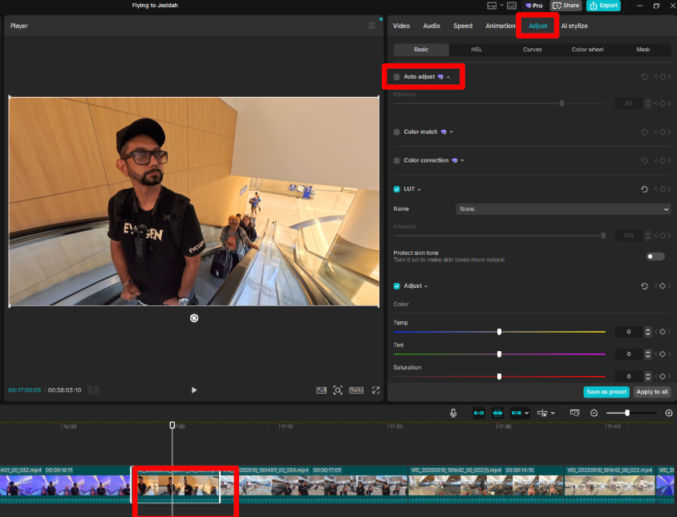
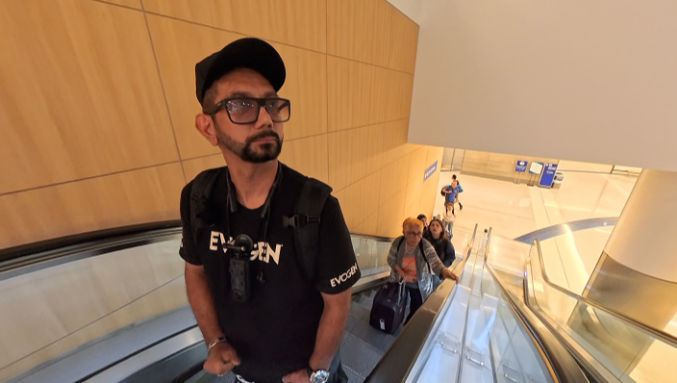
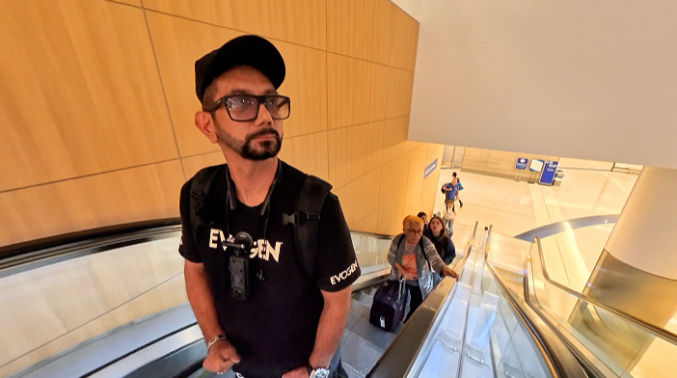
Adjust color and lighting
You can adjust the color and lighting for both image and video clips individually.
Click on a clip in the timeline
Move the playhead to that clip
In the right pane, click “Adjust” > “Basic” > “Auto adjust”
Slide the “Auto adjust” intensity slider until you like how the clip looks in the preview pane.
You can also manually adjust the color by tweaking various color settings in the right pane.
I find adjusting color is especially helpful for brightening a dark image or video. Here’s how one clip looks before and after applying “auto adjust”.
BeforeAfter
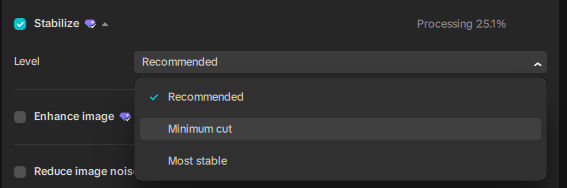
Stabilize a shaky video
If your video footage was taken with a camera that doesn’t include mechanical stabilization (like a gimbal) or software stabilization, then the resulting footage could be annoyingly shaky. Capcut can try to stabilize your footage at the expense of cropping a portion of the video. To stabilize a shaky video,
click on a video clip in the timeline
in the right pane, click the “Video” tab and check the “Stabilize” option.
Animate images
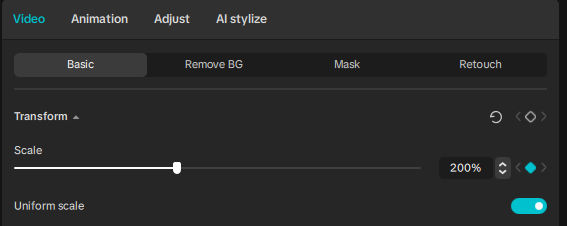
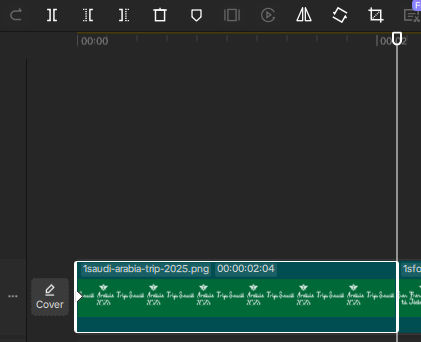
For certain photos, I like to apply a subtle zoom-out animation effect to them. To do this,
click on the image clip in the timeline
move the playhead in the timeline to where the image clip is
click the up arrow key to move the playhead to the beginning of the clip
in the right pane, click “Video” > “Basics”, change the “scale” value to 200% and click the diamond icon to set a keyframe
click the down arrow key to move the playhead to the end of the clip
in the right pane, click “Video” > “Basics” and change the “scale” value to 100%
drag the playhead from the beginning to the end of the clip. You should see the image zoom out. You can also click the play button in the preview pane to preview the animation.
Playhead is at the beginning of the clipScale at 100%Scale at 100%Scale at 200%Scale at 200% with keyframe setPlayhead at end of clip
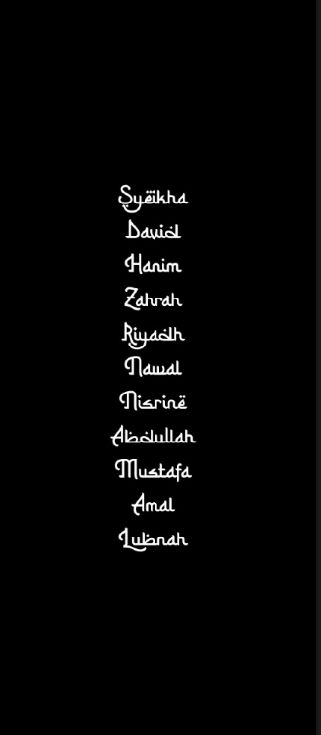
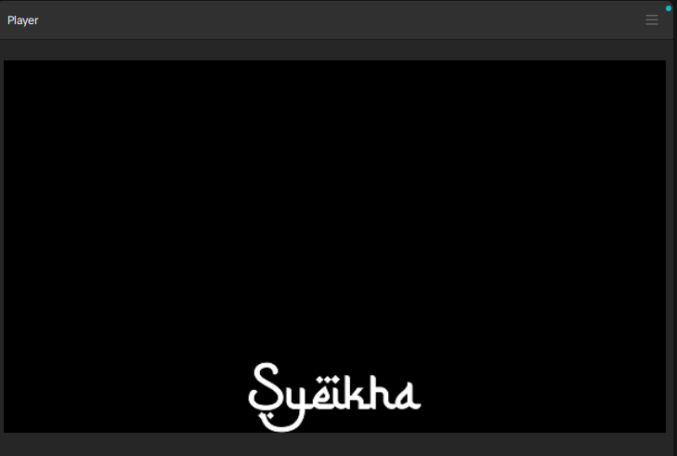
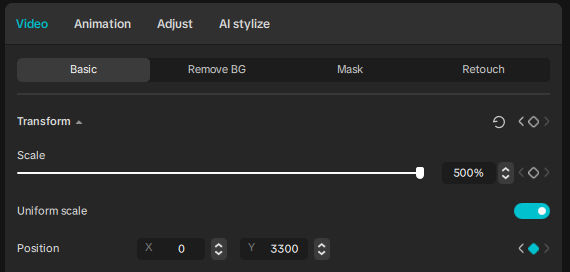
Create rolling credits
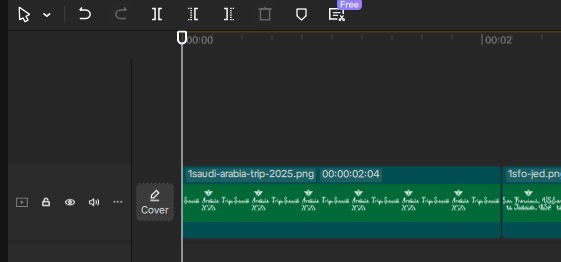
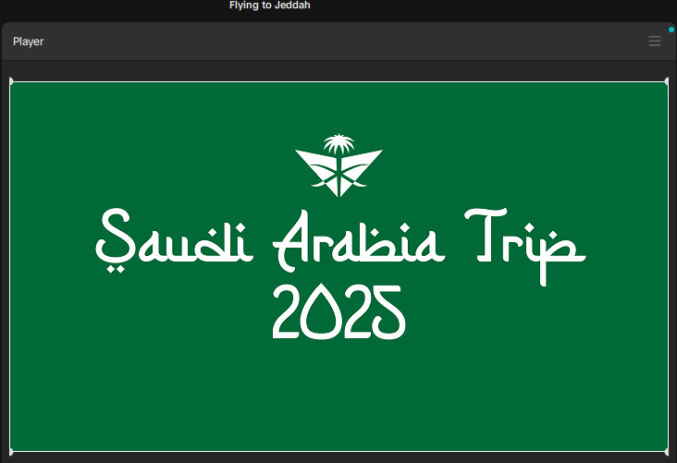
There are different ways to create rolling credits. The way I’m about to show you involves slowly animating an image’s position upwards. Therefore, you’ll need to create a tall image with the content you want in it, like this
Add this image to the timeline
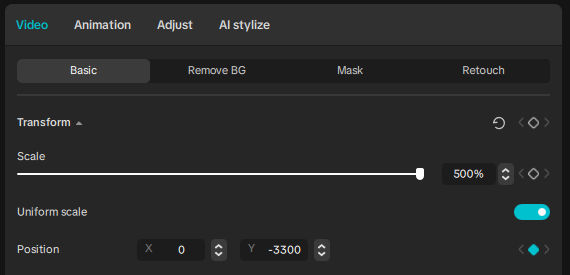
Select the image in the timeline
Position the playhead in the timeline where the image is
Click the up arrow key to move the playhead to the beginning of the clip
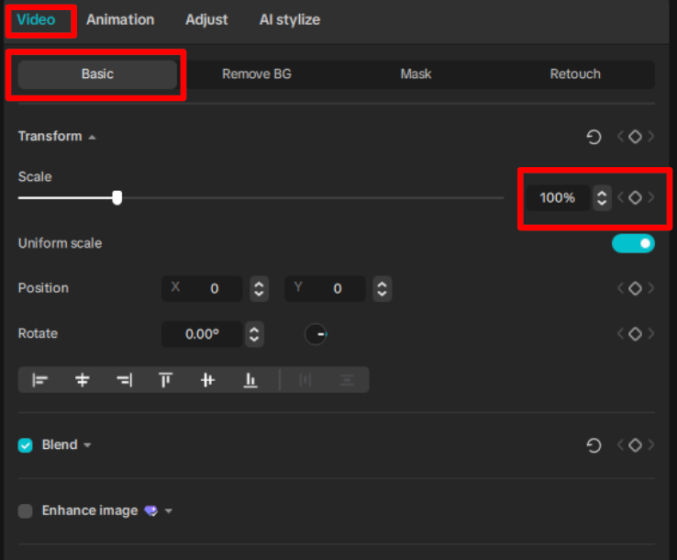
In the right pane, click “Video” > “Basics”
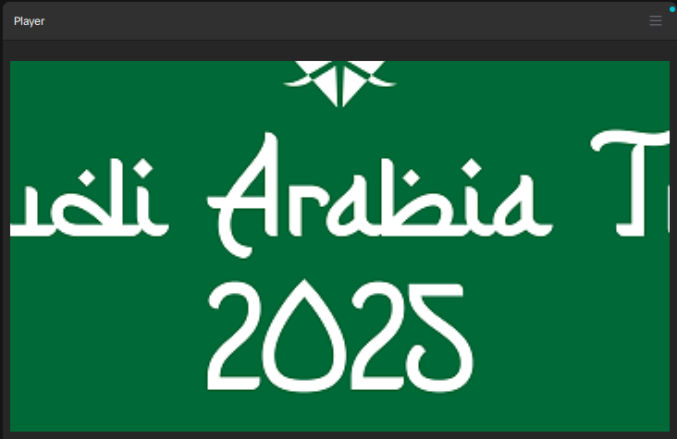
Change the “scale” value until you like how the credits image looks in the preview. In the screenshot below, I set it to 500%.
Change “position” Y value to a value that moves the top of the image near the bottom of the preview pane. In the screenshot below, I set it to -3300.
Click the diamond icon to set a keyframe
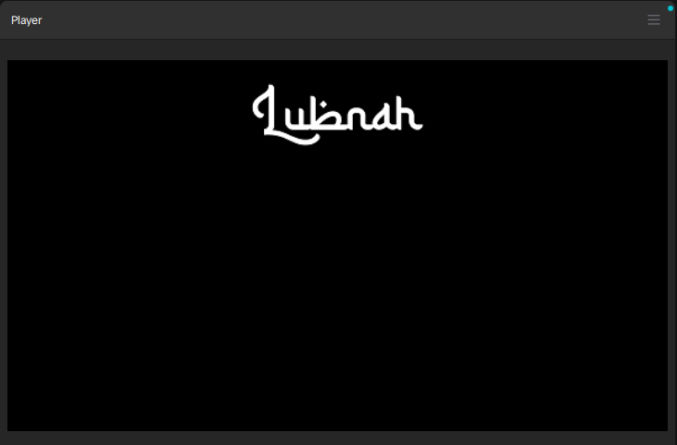
Click the down arrow key to move the playhead to the end of the clip
in the right pane, click “Video” > “Basics” and change the “position” Y so that the bottom of the image is near the top of the preview pane. In the screenshot below, I set the value to 3300.
Drag the playhead from the beginning to the end of the clip. You should see the image roll up. You can also click the play button in the preview pane to preview the animation.
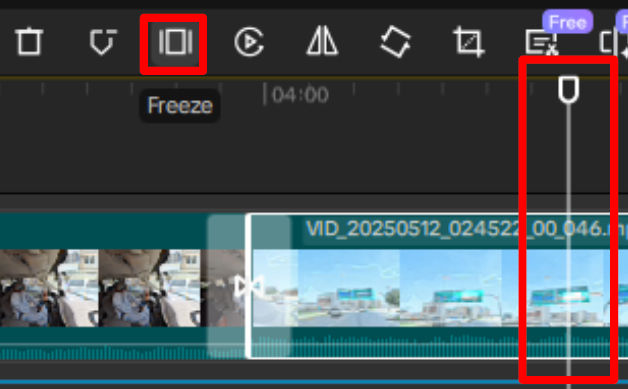
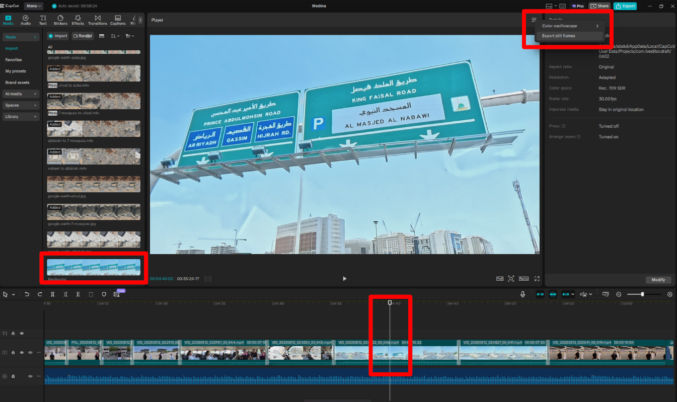
Freeze a frame in a video clip
Sometimes, you may want to freeze a frame in a video clip for a few seconds. For example, in the screenshot below, there’s a video clip of a vehicle moving along a road and a sign showing various destinations. To freeze the frame at the point when the sign is shown,
move the playhead to the timestamp where you want to freeze a frame
click on the video clip in the timeline
click the “freeze” button above the timeline
The video clip will be split at that point and you will see a still image of the frame added to it. You can then adjust the duration of the image. Make sure not to add any transitions between the video clip and the still image. You can group the two clips or create a component to prevent accidentally adding a transition between them.
After freezing the frame, the video clip is split and a still image of the frame is appended
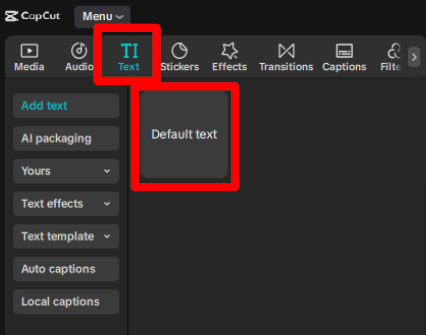
Add a text overlay
There will be times when you’ll want to overlay text on a scene to describe a location or what’s happening as in the following screenshot.
To do this,
click the “Text” tab in the left pane
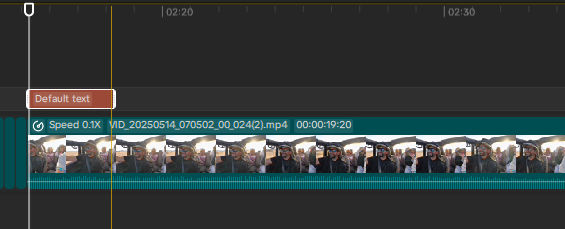
drag the “Default text” item to the timeline on a track above the clip where you want the text to appear
drag the ends of the text clip in the timeline to increase or decrease the duration
click on the text clip in the timeline and, in the right pane, edit the text and various other properties, e.g. background color and background opacity
in the preview pane, drag the text overlay to where you want it. you can also drag the corners to resize it.
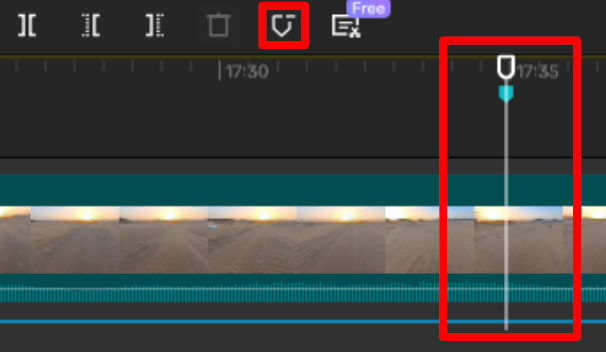
Add a marker on the timeline or a clip
When editing a video, it can be helpful to add markers at certain points to remind you where a specific moment is. For example, you may want to align some a music clip to a specific moment. To do this,
move the playhead to the timestamp where you want to add a marker
click the marker button above the timeline
You will see a light blue marker added on the timeline.
Export your video
Click the light blue “Export” button at the top right to export the video.
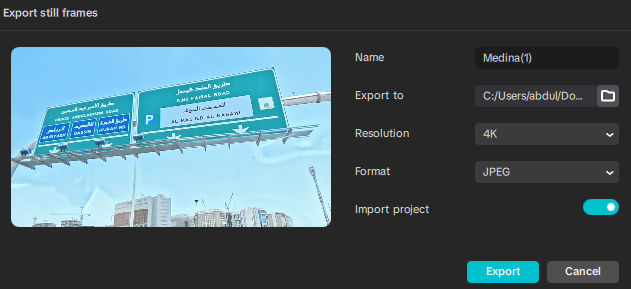
Export a still image of a video clip
move the playhead to the timestamp where you want to freeze a frame.
click the hamburger menu (3 horizontal lines) at the top-right corner of the preview pane
click “Export still frames”
if you don’t want the still image added to your project, uncheck the “Import project” checkbox
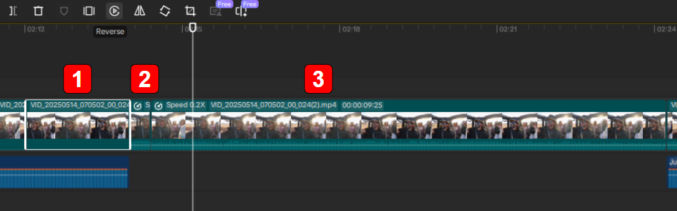
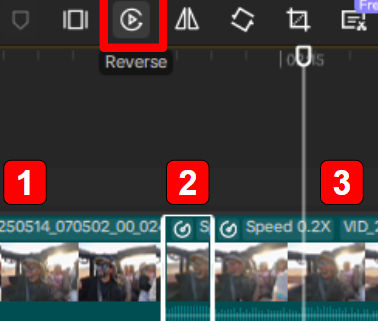
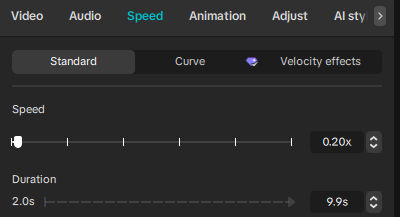
Create a fast-rewind effect followed by a slow-motion effect
For fast-moving scenes, you may want to replace the scene in slow motion. One way to do this is to show the original clip (1) followed by a fast rewind of the clip (2) followed by a slow-motion version of the clip (3) as shown in the screenshot below.
To do this,
copy and paste the original clip twice and place the copies after the original clip on the timeline
click the 2nd clip to select it and then click the “Reverse” button above the timeline
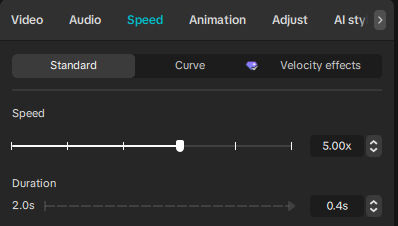
Change the speed of the 2nd clip to something like 5x.
click the 3rd clip to select it and then change the speed to something like 0.2x.
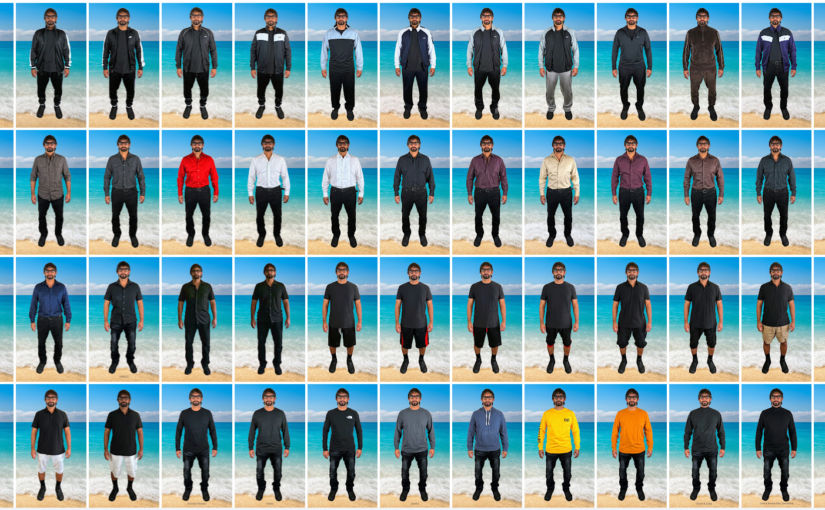
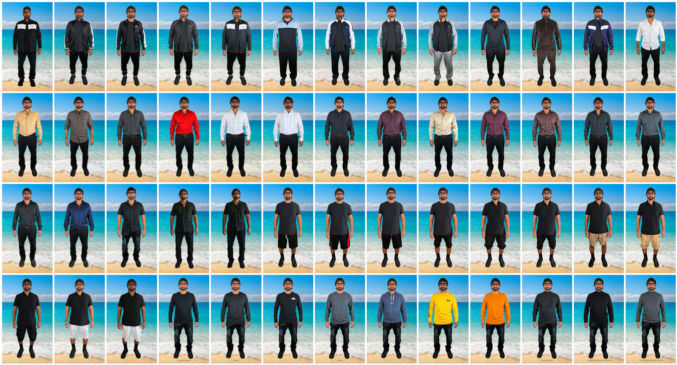
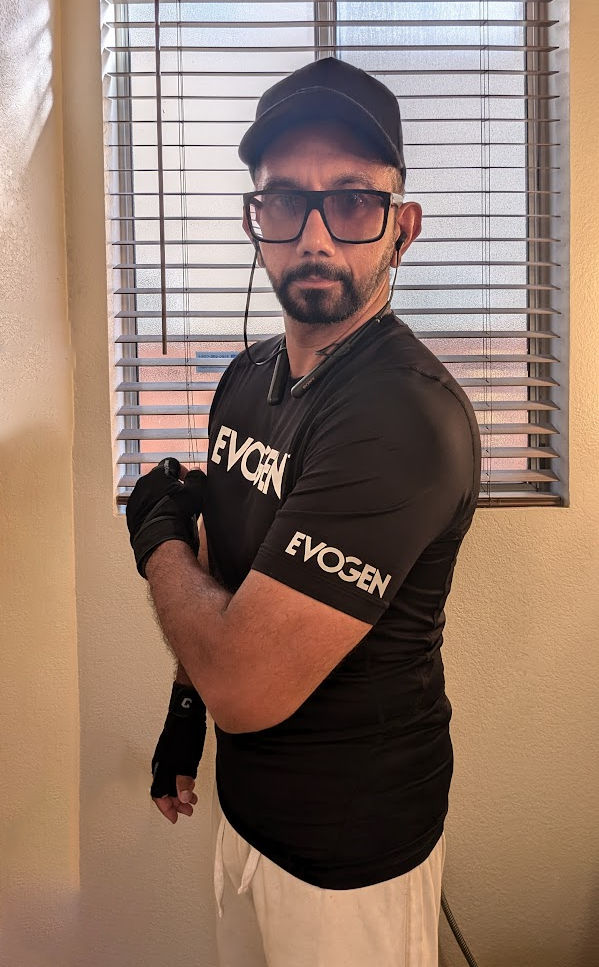
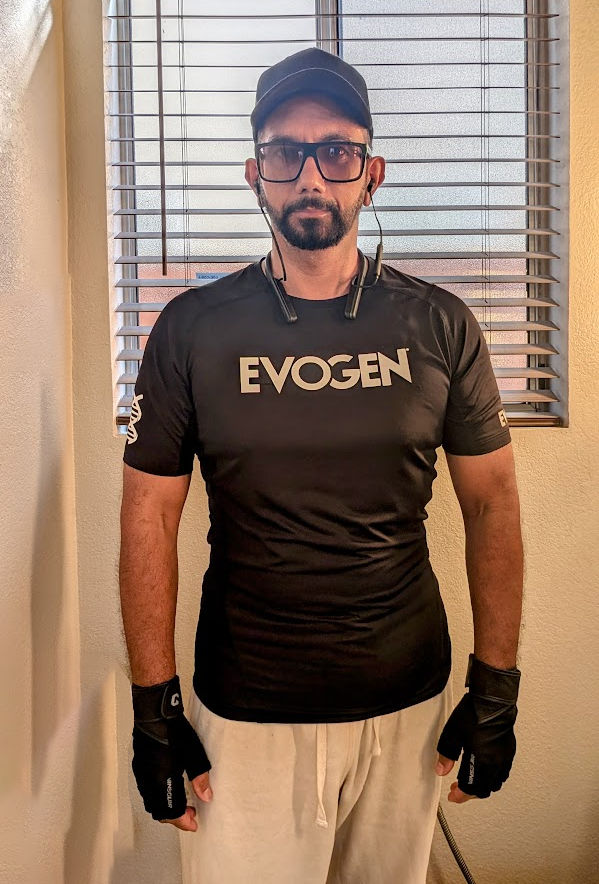
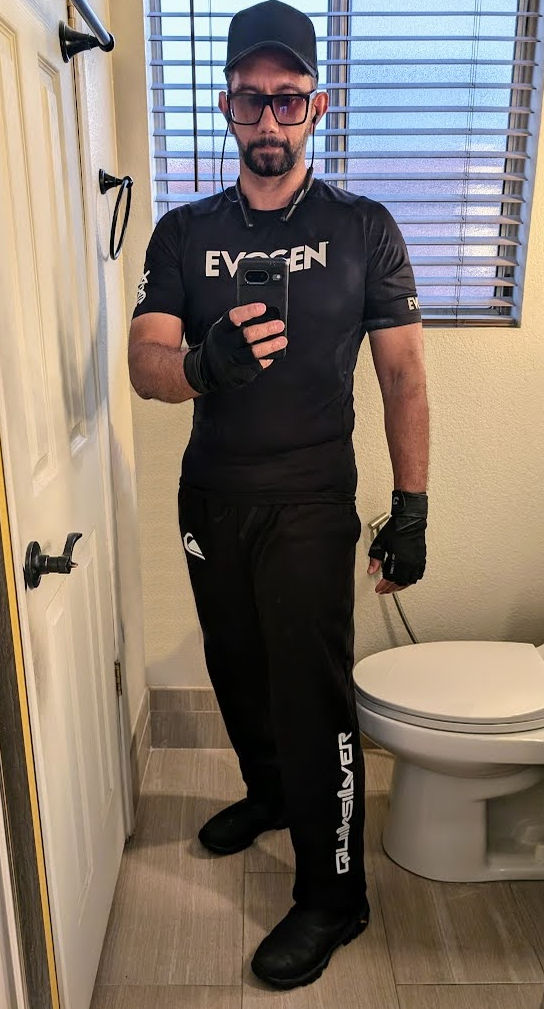
One thing I’ve noticed with a lot of people is they have a lot of clothes but only wear a few. There could be many reasons for this. For example, their “fancy” clothes are only suitable for special occasions but since most days are just not special, they only wear simple but comfortable clothes most of the time. Not only do their clothes consume a lot of space, they may not realize that many of their clothes just don’t fit them anymore or they may no longer like how they look on them. People may also forget just how nice some of their clothes look on them until they try them on again. One way to get organized with your wardrobe and remind yourself of your clothing options and how you look in them is by creating a wardrobe photo inventory.
Here’s how to create a wardrobe photo inventory using Google Photos.
1. Group clothes by type
First, group all your clothes by type, e.g.
Outerwear
Sweaters
Jackets
Tops
Short-sleeve Dress shirts
Long-sleeve Dress shirts
Short-sleeve Polo shirts
Long-sleeve Polo shirts
Short-sleeve T-shirts
Long-sleeve T-shirts
Turtlenecks
Bottoms
Jeans
Cargo Pants
Khaki Pants
Dress Pants
Fitness
Tracksuits
Sweatpants
Vacation
Hawaiian shirt
Beachwear
Swimming clothes
Shoes
Hats
Costumes
Other
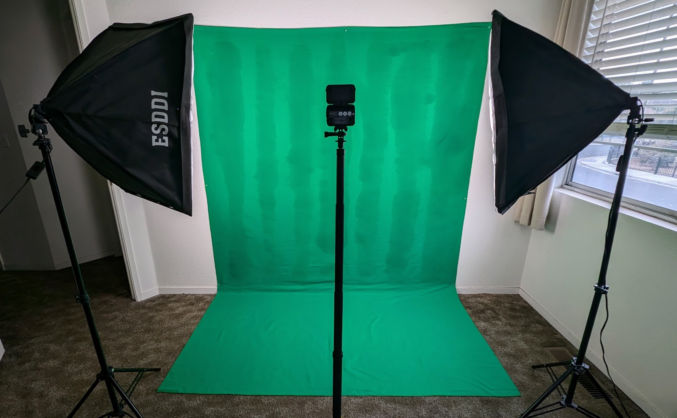
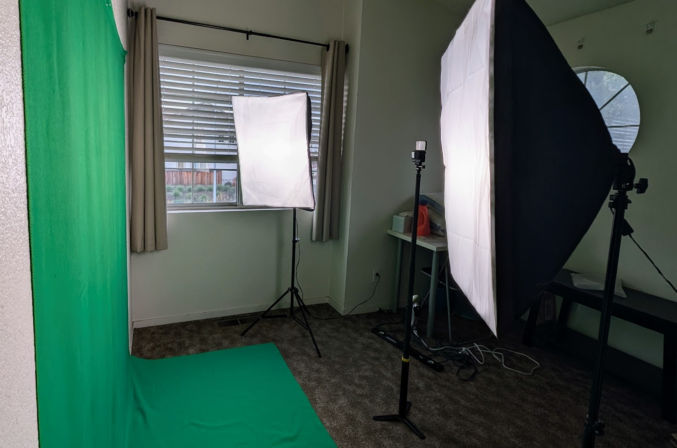
2. Create a photo studio
Find some space, like a spare bedroom, and create a photo studio using
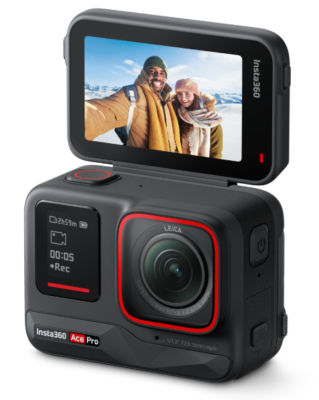
For the camera, you can use your phone. I used my Insta360 Ace Pro action camera with flip screen. By enabling the hand gesture feature, I can just make a peace sign with 2 figures to tell the camera to take a photo in 3 seconds.
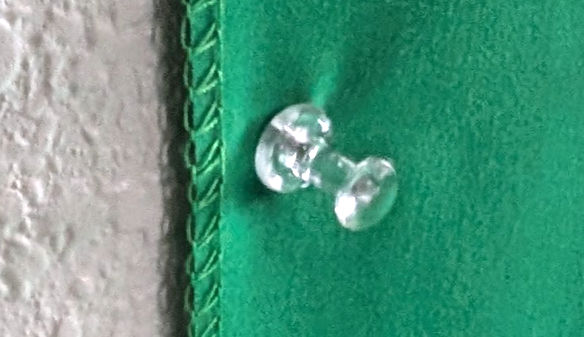
The green screen will make it super easy to remove the background from the subject (you). I just used push pins to stick the fabric to the wall (drywall).
The softboxes will make your face and clothes appear bright and sharp with balanced lighting without any shadows. Here’s a comparison of photos taken with and without softboxes.
3. Take photos
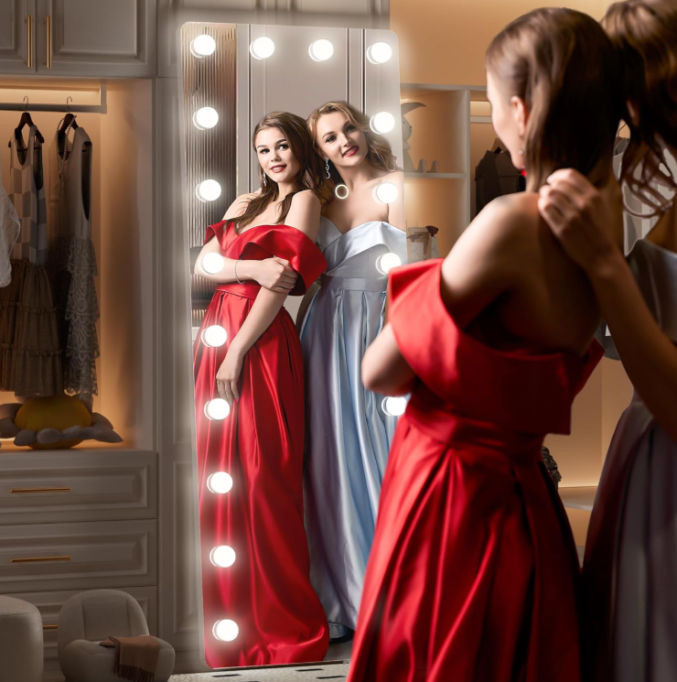
Go through all of your clothes and take photos of yourself wearing them. When deciding what to wear, I find it convenient to have a tall mirror with Hollywood lights around the perimeter near my closet like this one on Amazon.
3. Option A: Edit photos in Photoshop
If you know Photoshop or how to do image editing, you can follow this step.
Open your first photo in Photoshop
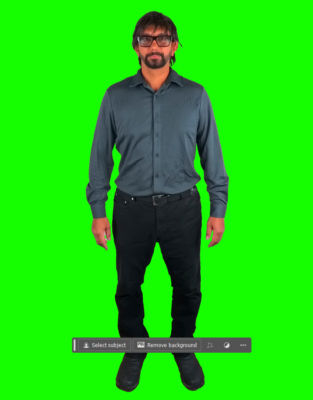
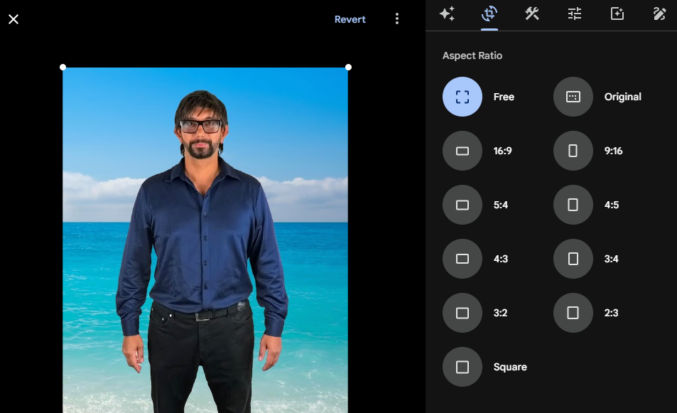
Remove the background. Photoshop will detect the background and show a “Remove background” button. Click it to remove the green background.
3. Crop the image to remove unnecessary whitespace.
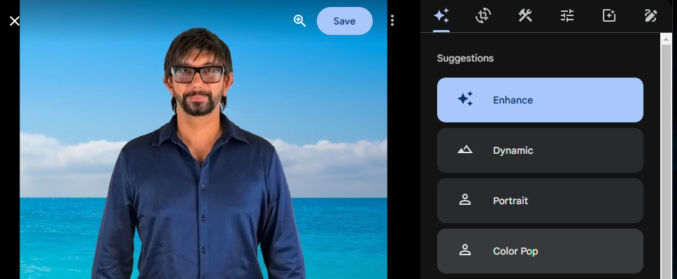
4. Replace the background with any background you like. Here’s what I chose.
5. Repeat that process for all photos.
6. Use horizontal and vertical guides to resize each photo so they are the same width and height.
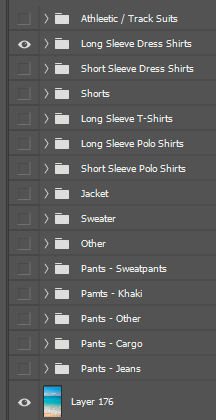
7. Optionally, group the layers by clothes type, e.g.
3. Option B: Edit photos in Google Photos
If you don’t know Photoshop or how to do image editing, you can do basic image editing like cropping directly in Google Photos. Upload all photos to Google Photos and click the Crop button to crop the photos.
4. Upload all photos to Google Photos and enhance them
For each photo, click the Enhance button to improve the levels, brightness, etc.
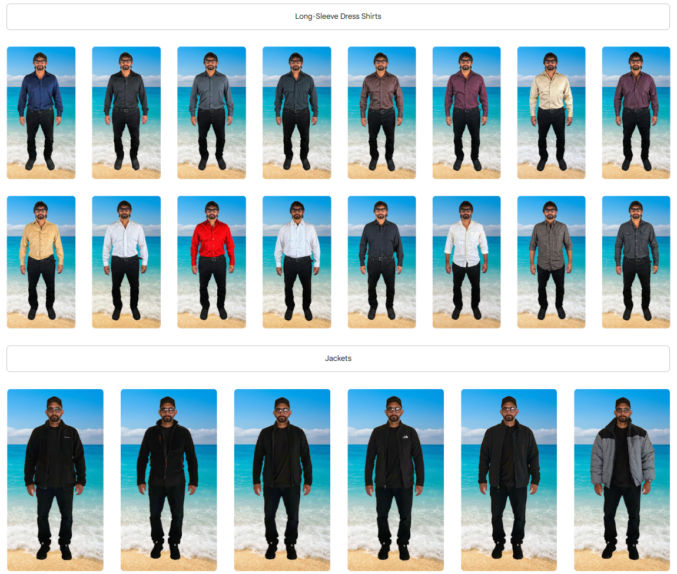
5. Create an album and group photos by type
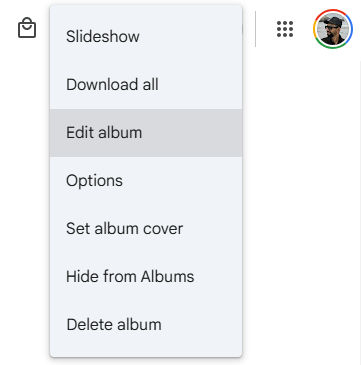
In Google Photos, select all photos and add them to a new album with a name like “Clothes”.
Click the 3 vertical dots in the top right corner to reveal options. Click the “Edit album” option.
Select one or more photos and drag them to rearrange them.
Click the “Add text” icon to add text between groups of photos.
6. You’re done!
Now, you can browse your wardrobe on your phone to visually remind yourself of what clothes you have and how they look on you the next time you’re undecided about what to wear.
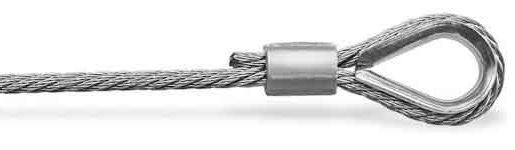
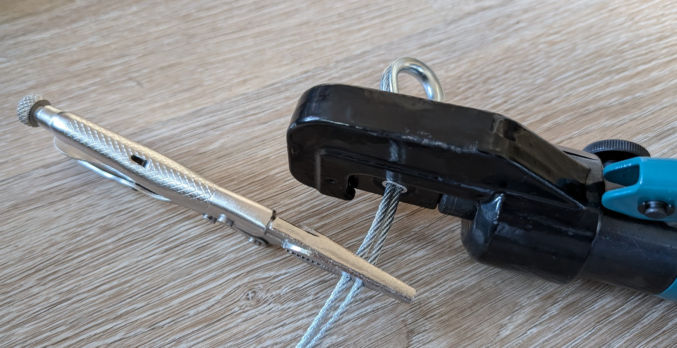
If you need to create a very strong and long-lasting loop at the end of a rope, the best practice is to use a thimble along with a fastener. The faster can be a ferrule or rope clamp.
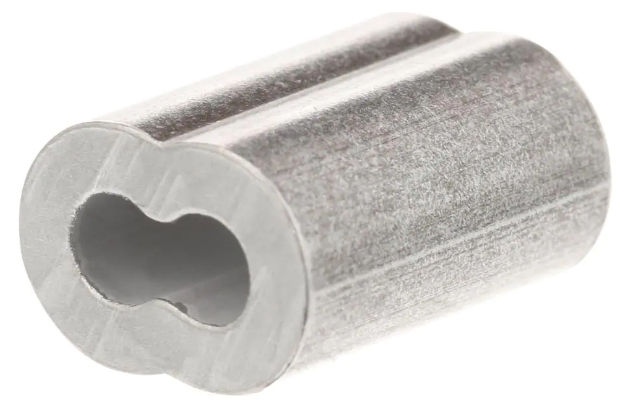
Ferrule
Wire rope is preferred because it is much stronger than non-wire rope like nylon, polypropylene, paracord, etc.
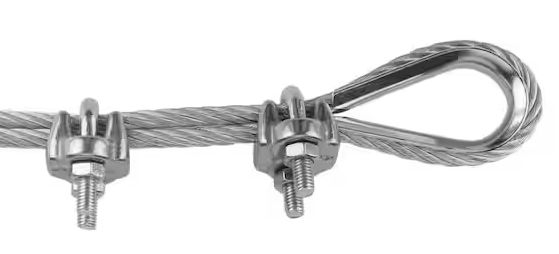
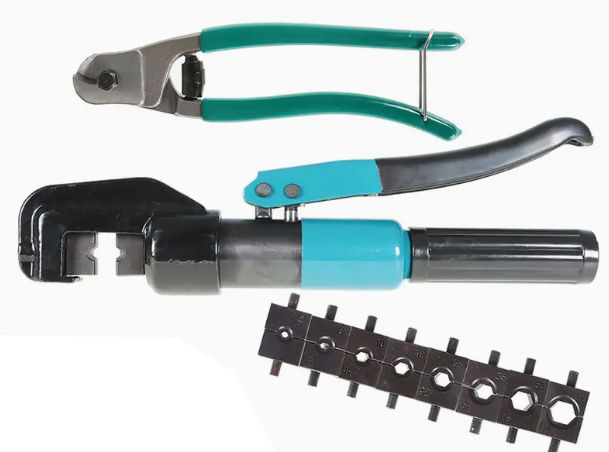
The benefit of a rope clamp is you can unlock the clamp and reuse the rope for something else. Also, you just need pliers to tighten the clamp nuts. The benefit of a ferrule is its small size and permanent nature. However, you would need a special crimping tool. Ideally, you would use a hydraulic crimping tool.
Hydraulic crimping tool
One tricky part when creating such a loop is getting the thimble to be snug and tight. Following is one way to do it, which worked for me.
First, make sure you use a thimble that is the right size for the wire rope you are using. In the example below, the wire rope is 1/8′ thick, so the thimble is for that size rope. If you use a smaller thimble, I found it harder to get the thimble tight and snug.
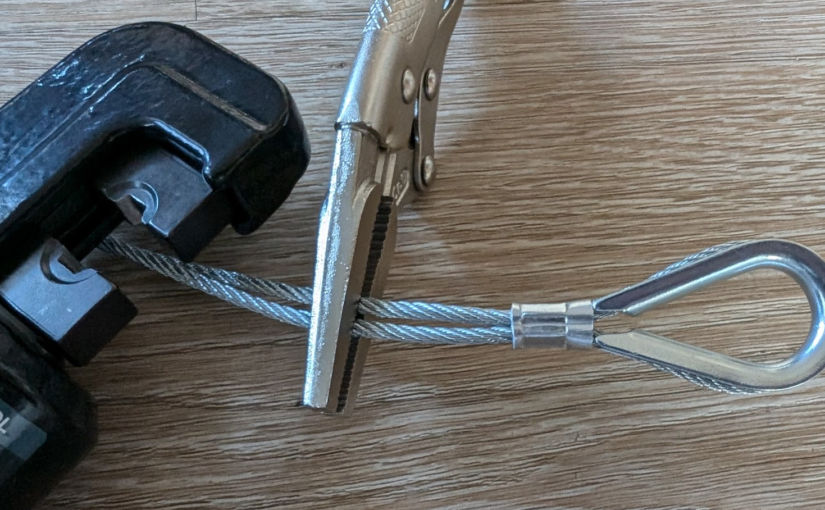
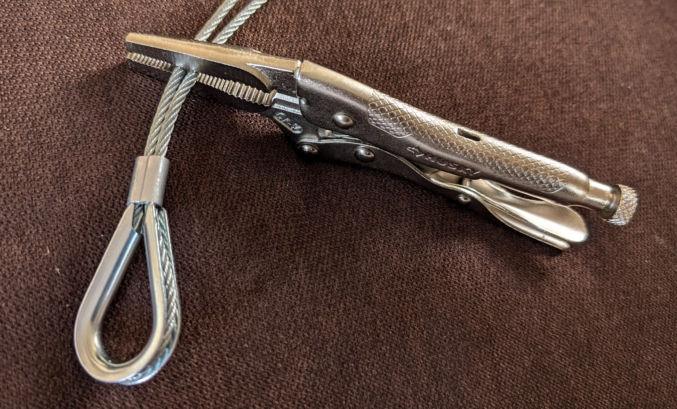
Slide the rope through the ferrule to create a loop. Then, clamp the rope using locking pliers as shown above.
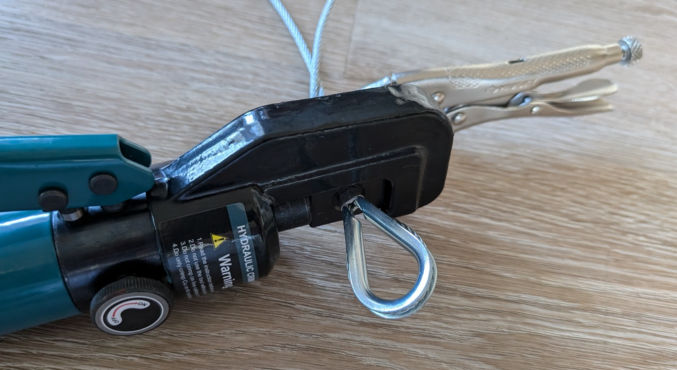
Next, insert the thimble and pull the ferrule toward the thimble until it touches the thimble. If you are having difficulty making the ferrule and thimble stay touching each other, try making the short end of the rope longer.
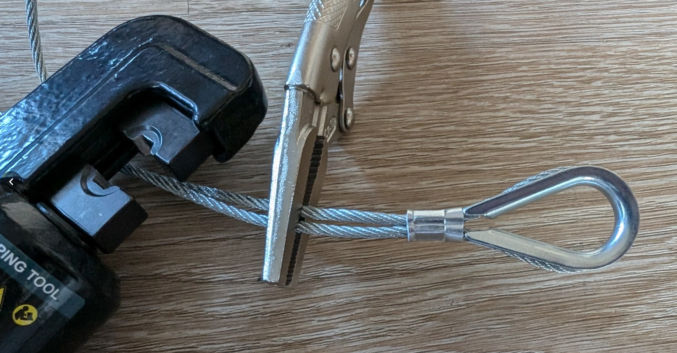
Insert the correct size die for the ferrule in the crimping tool, then insert the ferrule in between the dies within the tool to clamp it. Follow the instructions to clamp the ferrule. Before clamping, ensure the thimble and ferrule are still touching each other for a permanently tight fit.
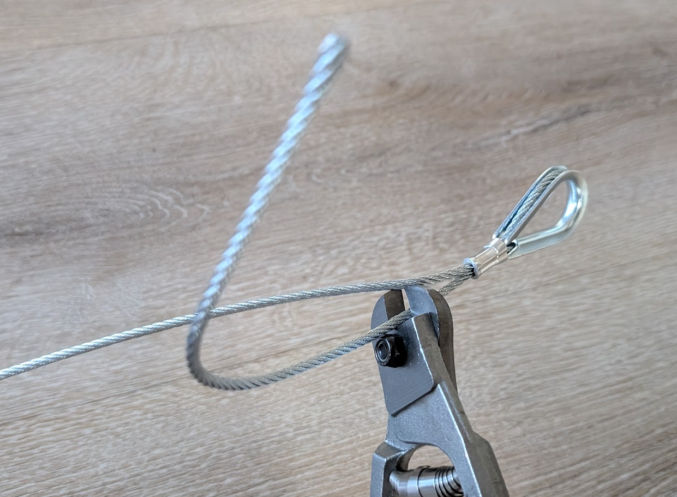
Clamp down multiple times as hard as you can. When do, turn off the hydraulic crimper to release the clamp.
You’ll see that the crimping crimped the ferrule, creating a permanent clamp.
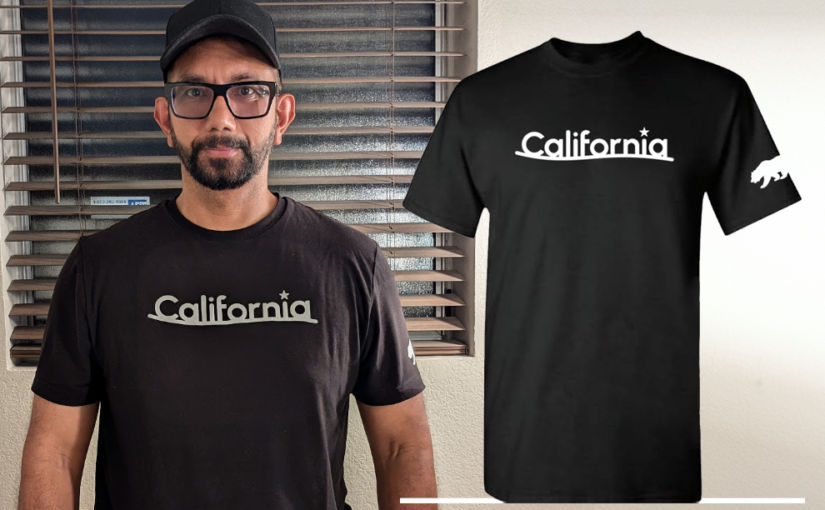
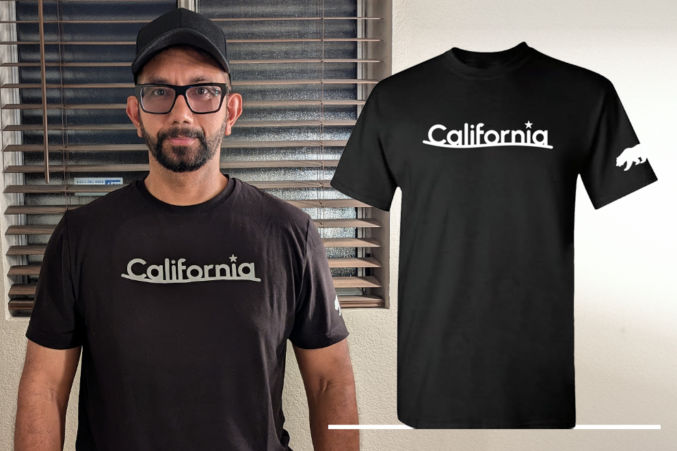
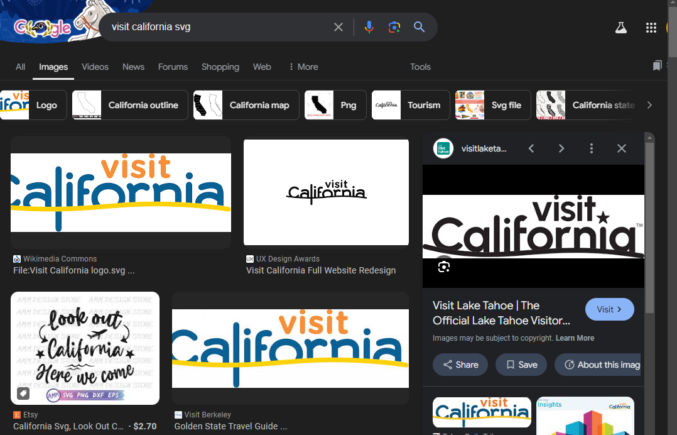
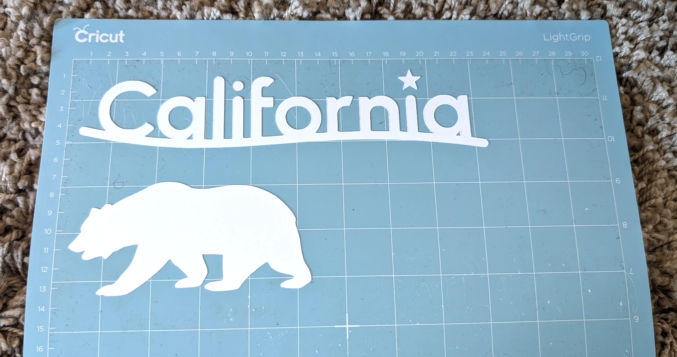
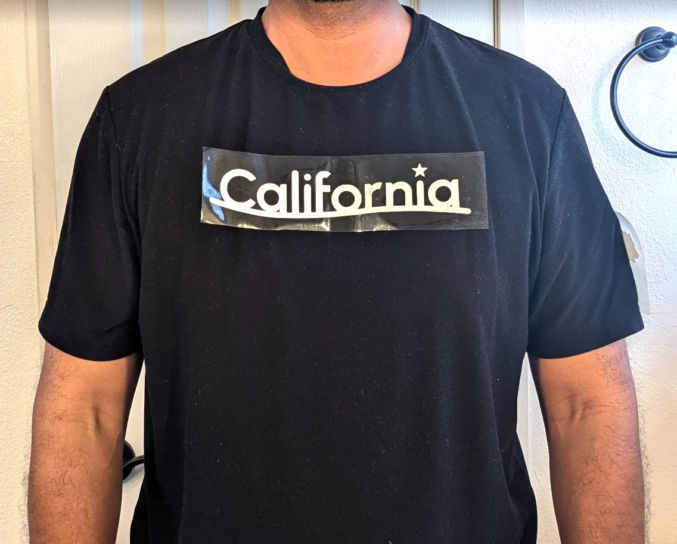
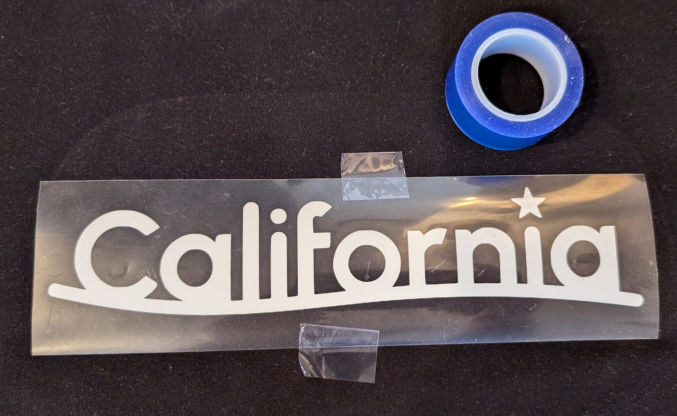
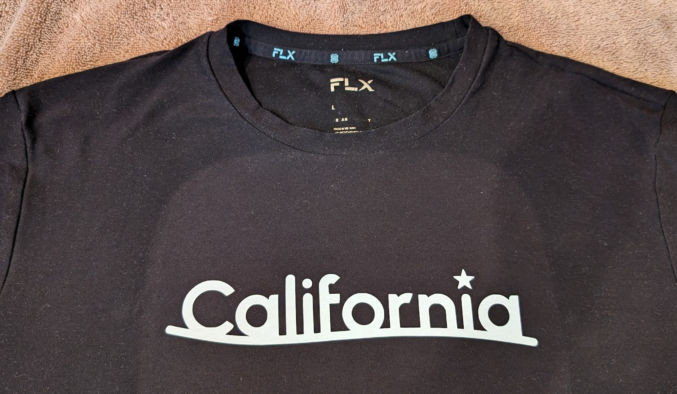
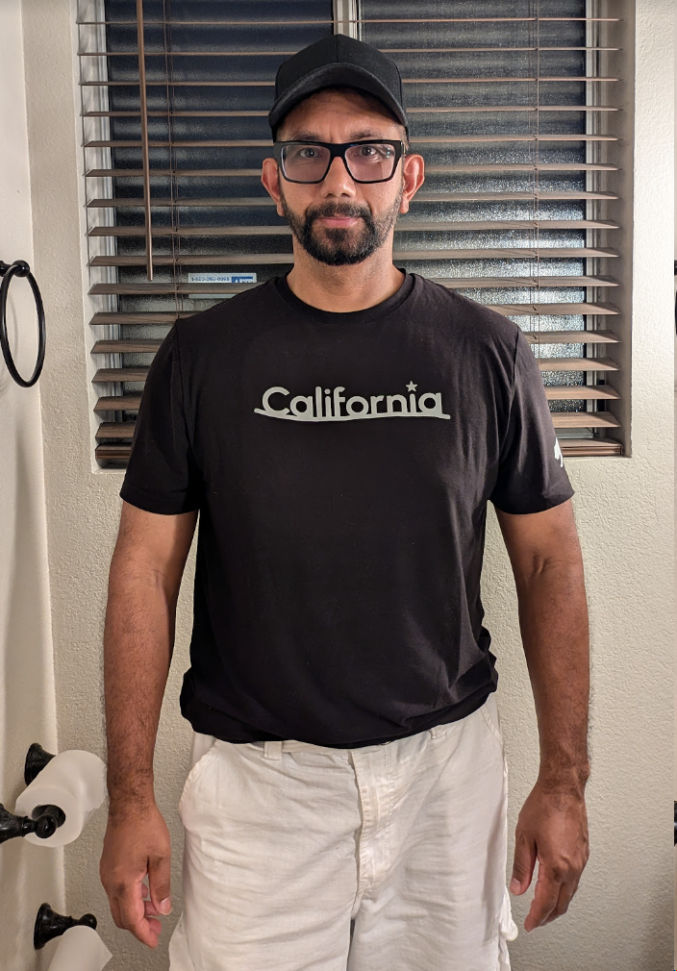
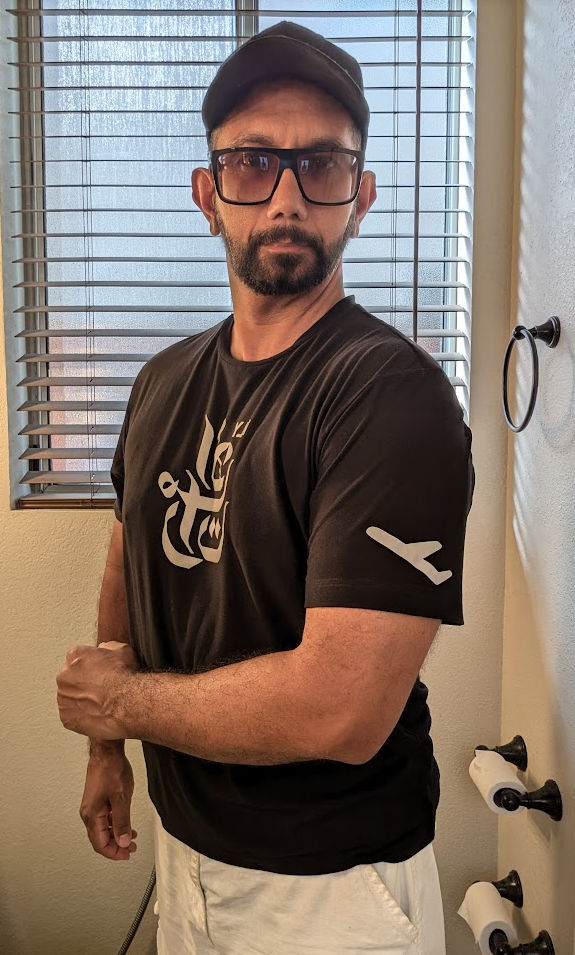
First, you need to design your shirt by finding some images. You want the images to be SVGs so that you can scale the image without losing quality. To make the shirt shown above, I searched Google for “visit California logo svg”.
I found a “California” logo that I like, but I needed to edit it to remove the “visit” part.
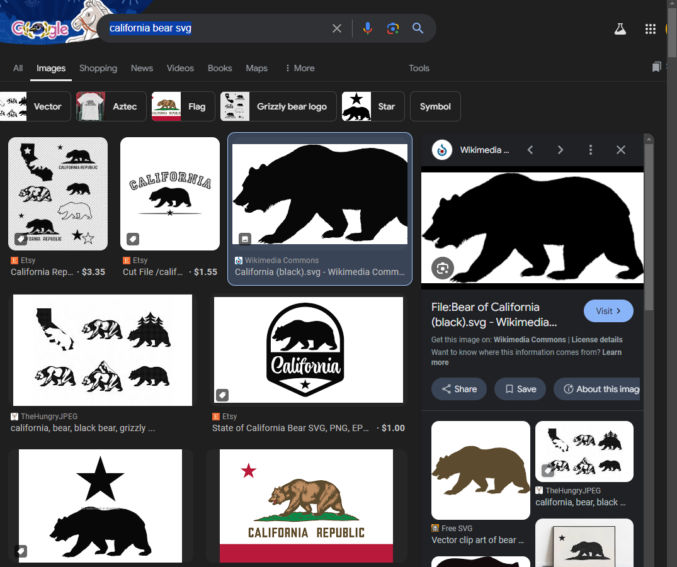
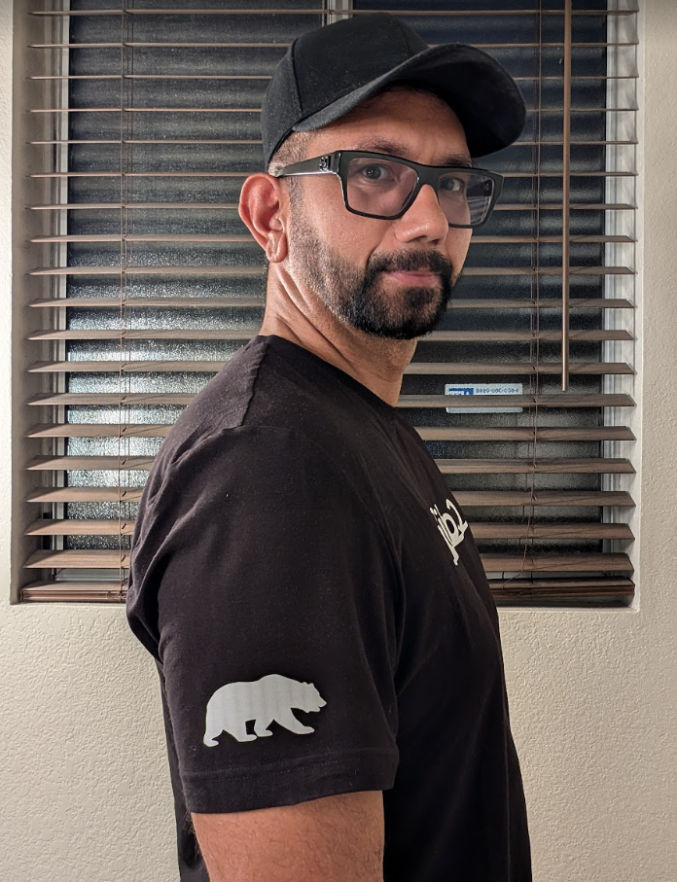
I then searched for “california bear svg” and found a bear image that I liked.
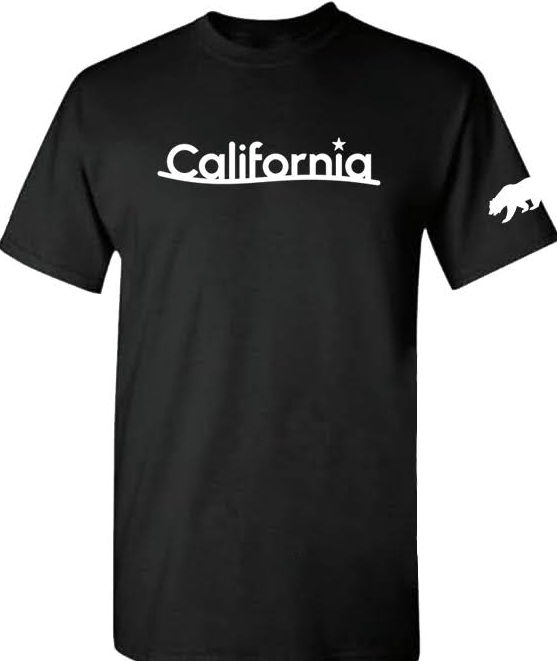
After doing some image editing, I ended up with these 2 images.
Determine printed image dimensions
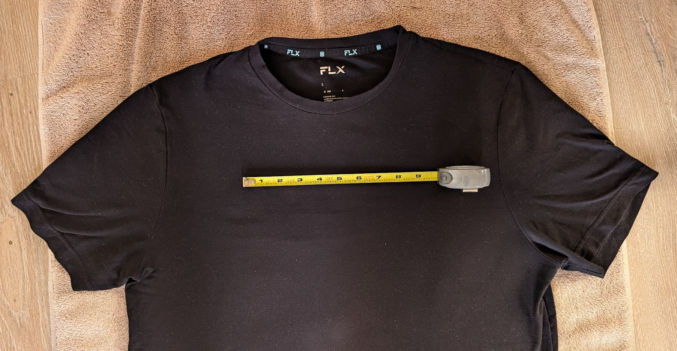
Lay your shirt down and, using a tape measure, decide how wide each image will be. For the “California” logo that would go over the chest, I chose 9 inches.
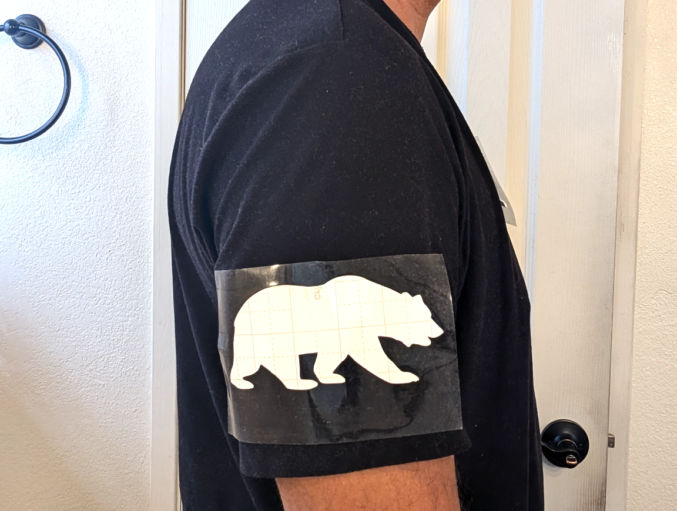
For the bear image that would go on the sleeve, I chose 5 inches.
These dimensions are not final. We will preview the design using cardstock (thick paper) first before using vinyl.
Import the images into Cricut Design Space
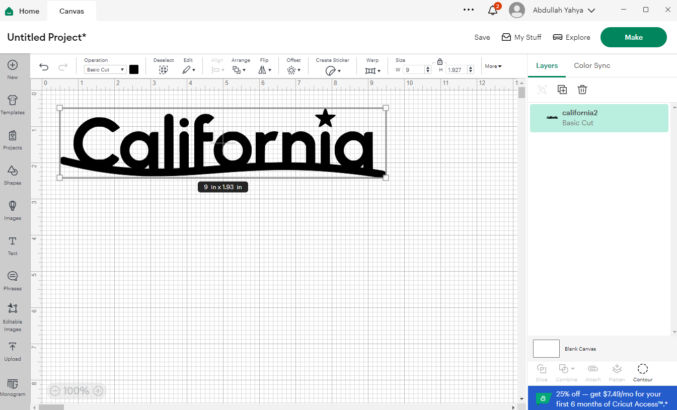
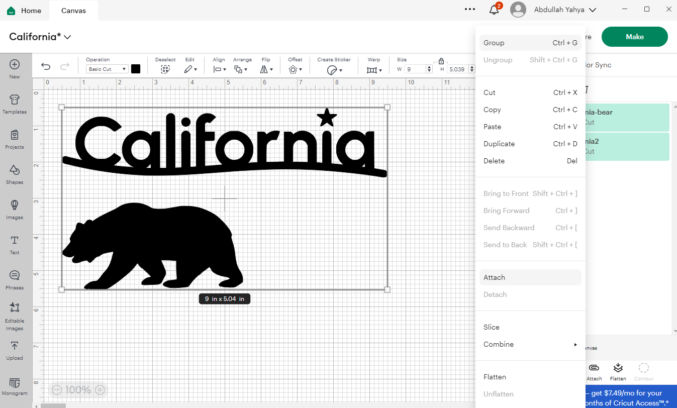
Download, install, and open Cricut Design Space. Follow the guided setup. Then, click the Canvas tab and then the “Upload” icon to upload each image. For the “California” text, I uploaded a large PNG on a transparent background and then set the width to 9 inches.
Do the same for the bear image. Since the Cricut Explore 2 machine can accommodate vinyl up to 12 inches wide and my video is 12 inches wide, I positioned the bear image below the “California” text.
After setting the width of the bear to 5 inches. I selected both image layers in the right column and chose “Attach” so that I could cut both images at the same time.
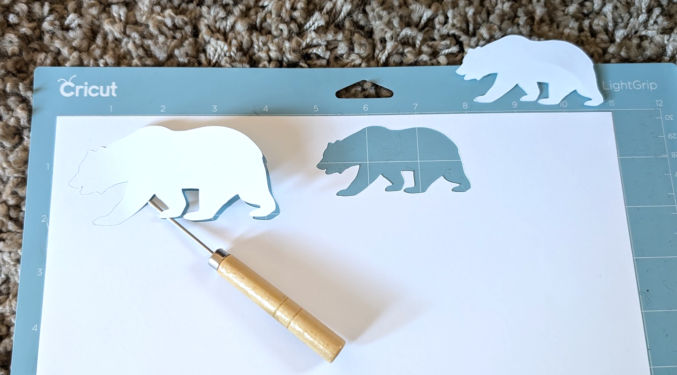
Cut images from the cardstock
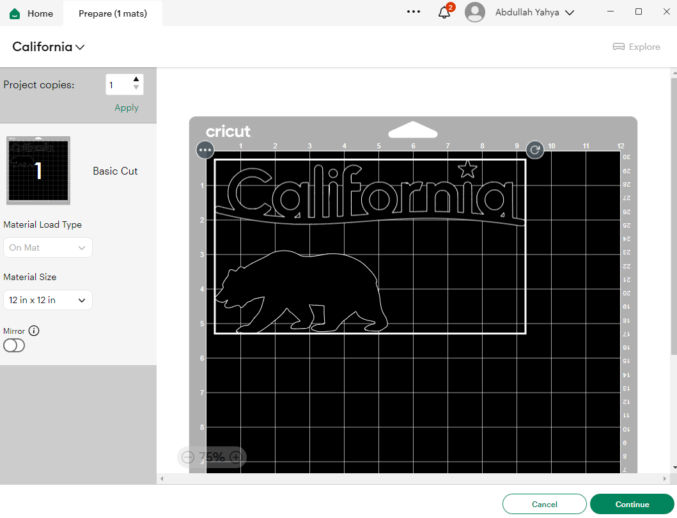
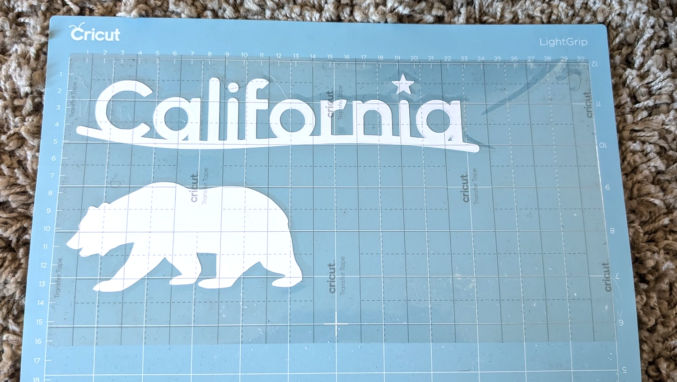
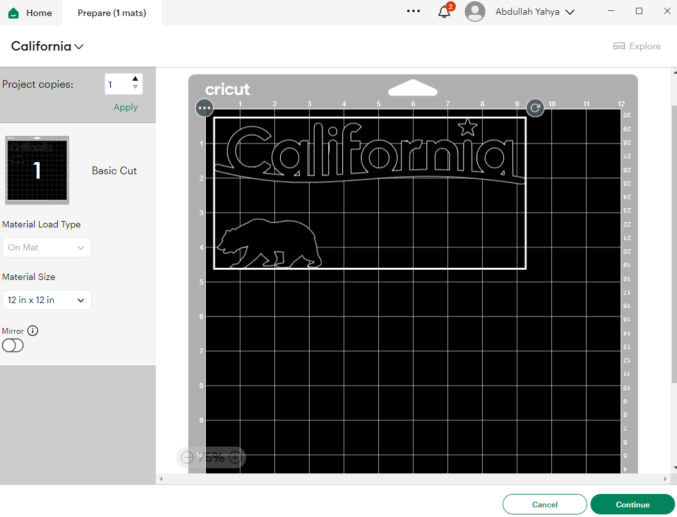
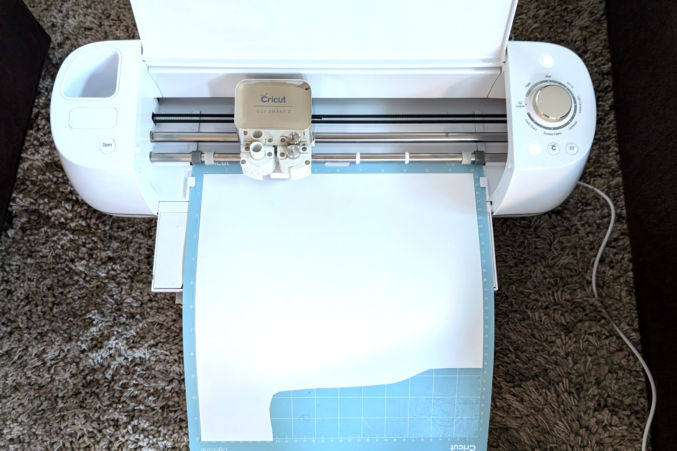
In Cricut Design Space, click the green “Make” button. You will see a preview of the images on the mat.
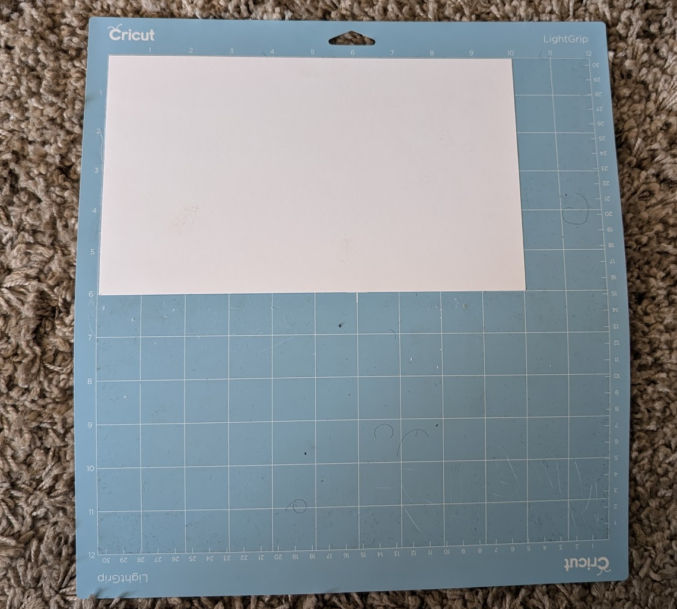
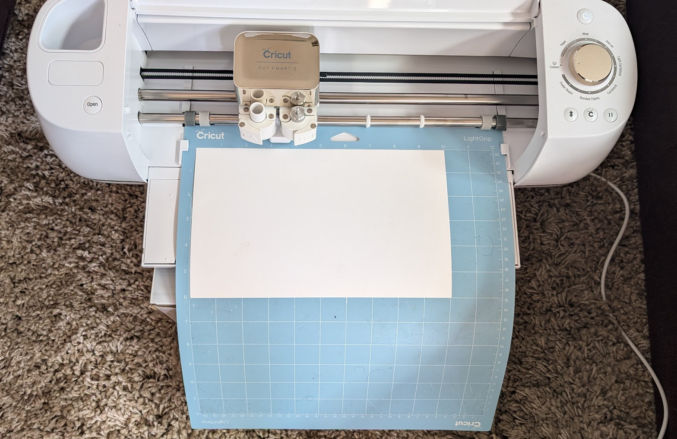
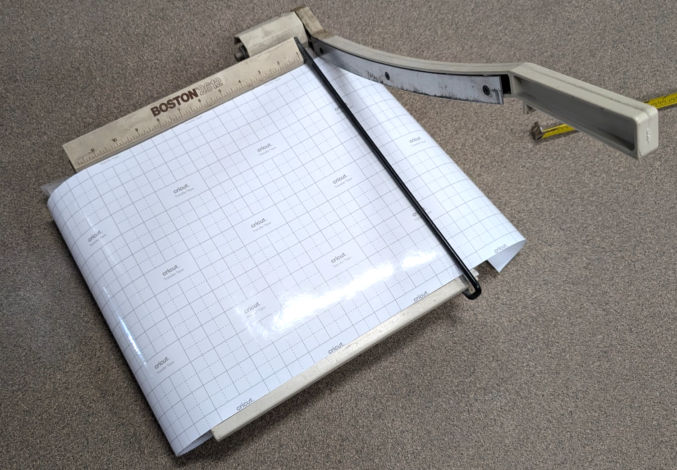
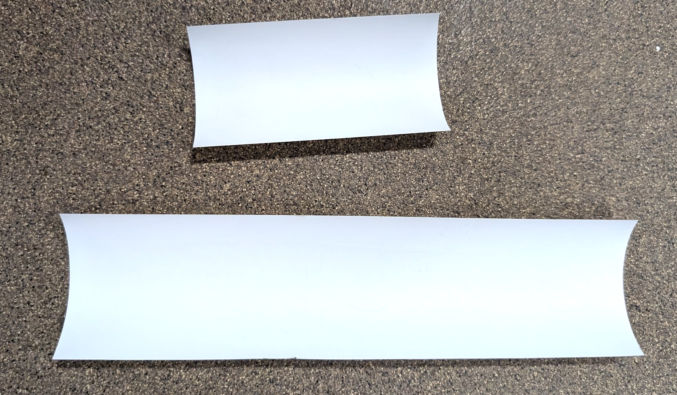
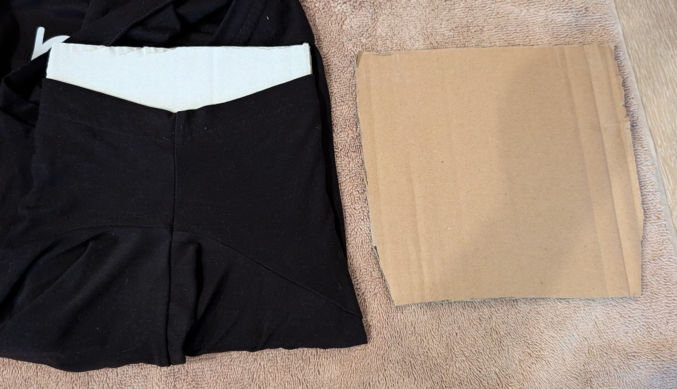
You will see a preview of the design on the board. To make weeding easier, cut a sheet of 65lb cardstock large enough to accommodate the design. In this case, I round up to the nearest inch, so my cardstock will be 10″ x 6″.
Then, place the cardstock on the lightgrip mat as shown in the preview above.
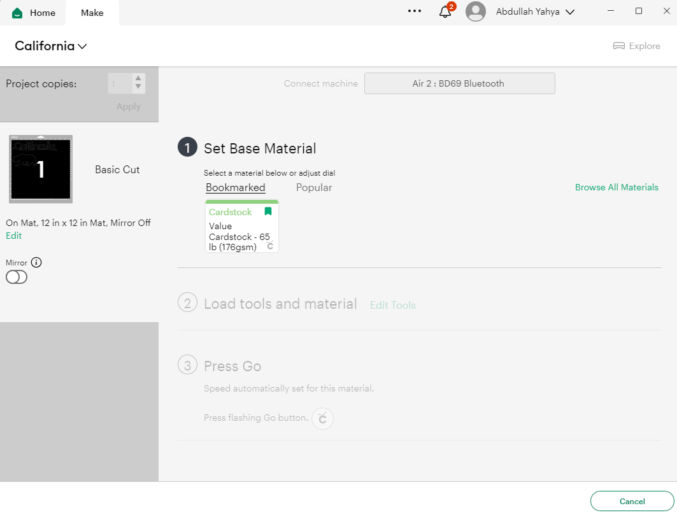
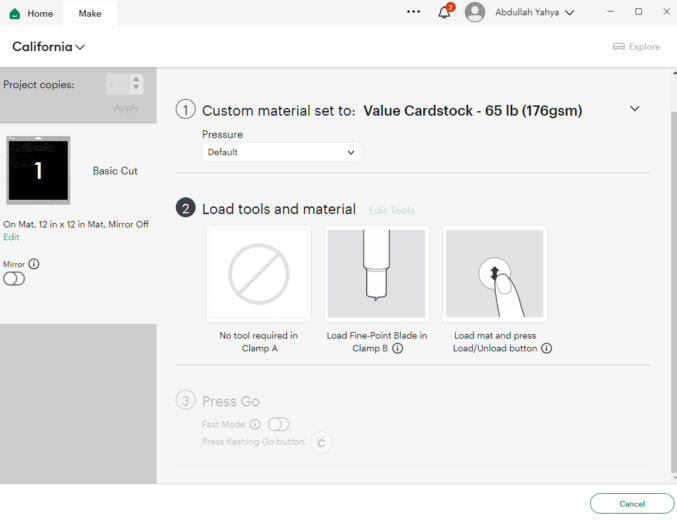
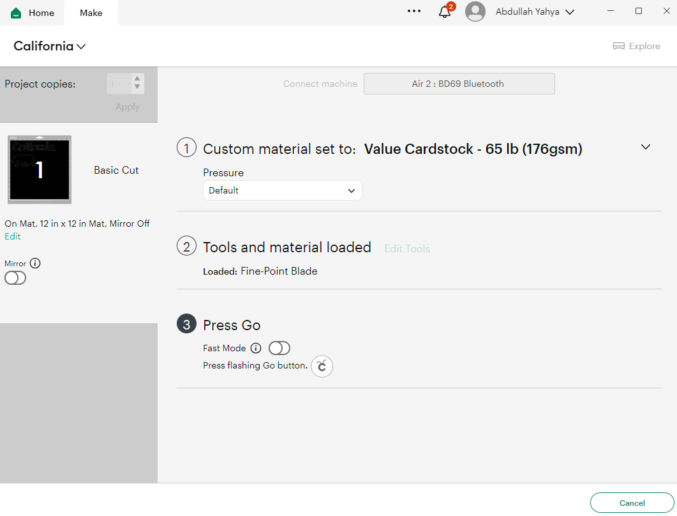
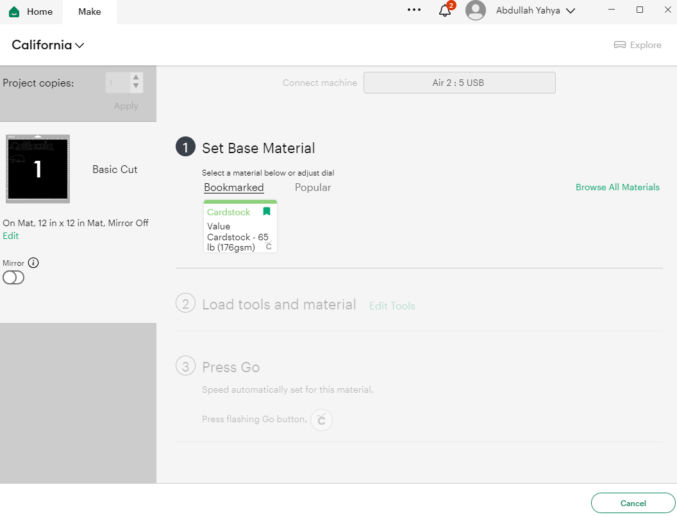
Click “Continue”. Connect the Cricut machine to your computer via bluetooth or USB. Once Cricut Design Space detects your machine, you will follow a 3-step process to cut the images on your chosen material.
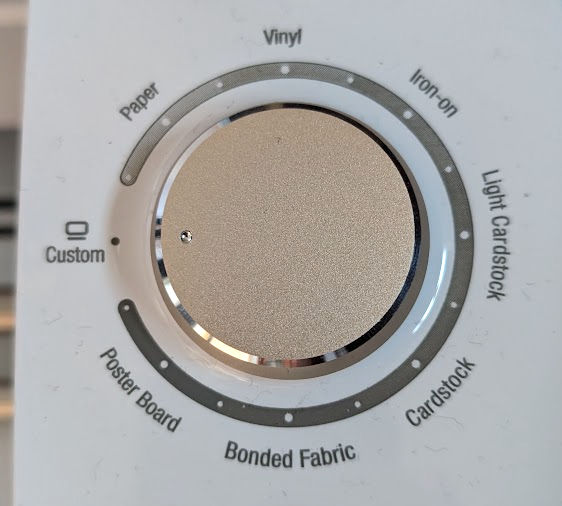
Make sure the dial on the machine is set to “Custom” because we will choose the material type in Cricut Design Space.
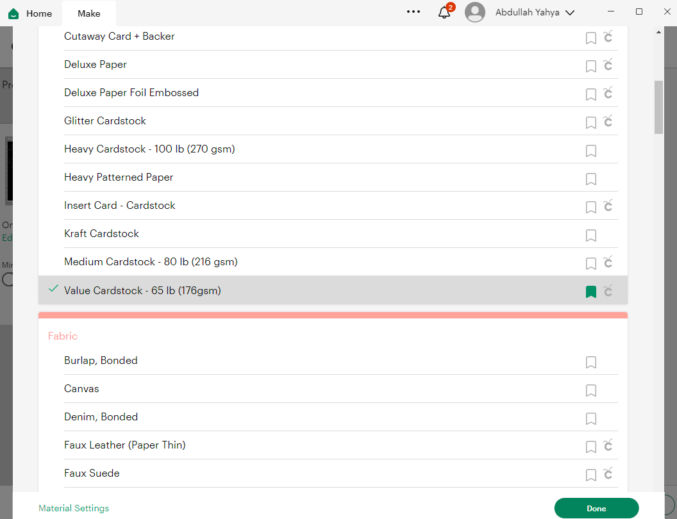
For step 1 (Set Base Material), click “Browse All Materials” and choose “Value Cardstock – 65 lb (176gsm)” since that’s the material we’re going to use first.
For step 2 (Load tools and material), make sure the correct blade is loaded in the correct clamp, load the material into the machine, and then press the flashing Load/Unload button on the machine.
When you press the “Load/Unload” button, the machine will grab and pull the mat a little to prepare it for cutting.
For step 3 (Press Go), just press the flashing “Go” button on the machine. Since we are printing on cardstock, where both sides of the cardstock are the same, we don’t need to toggle the “Mirror” option.
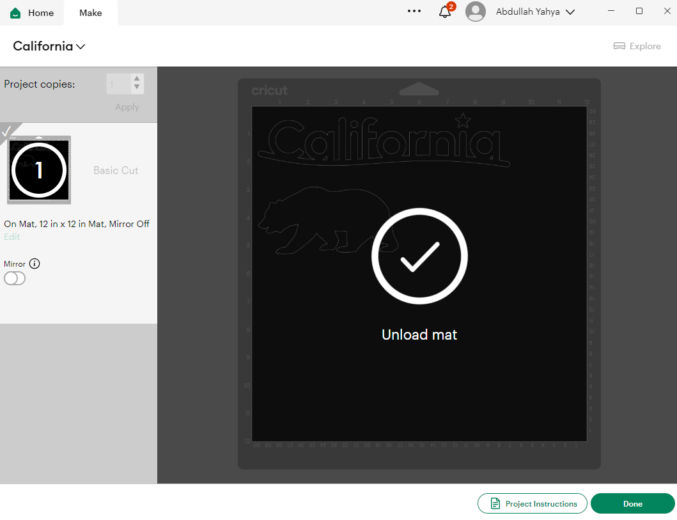
Once cutting is complete, click the “Load/Unload” button to unload the mat.
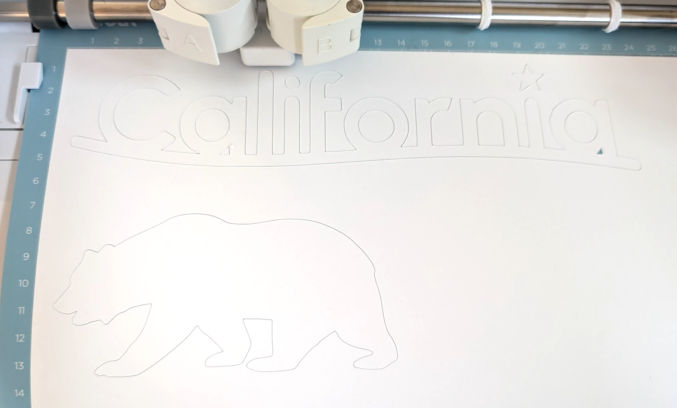
Notice the outline in the cardstock showing where the cardstock was cut.
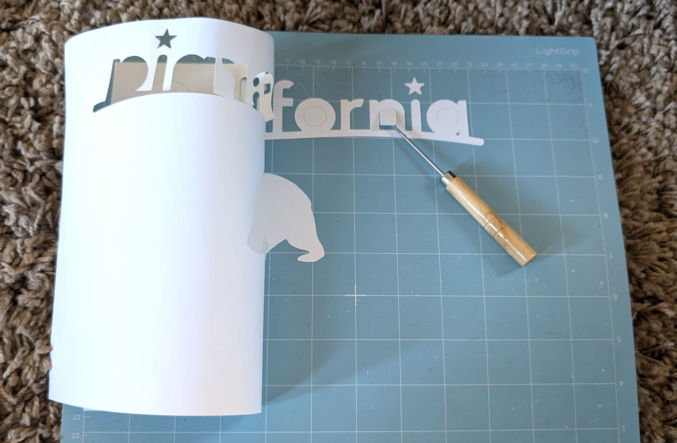
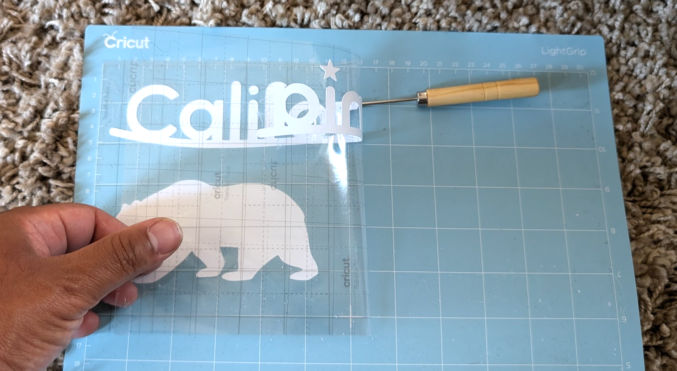
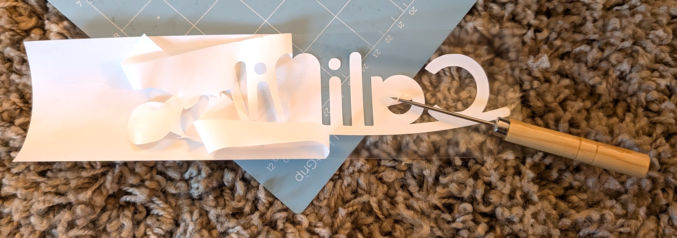
Remove the cut images from the cardstock
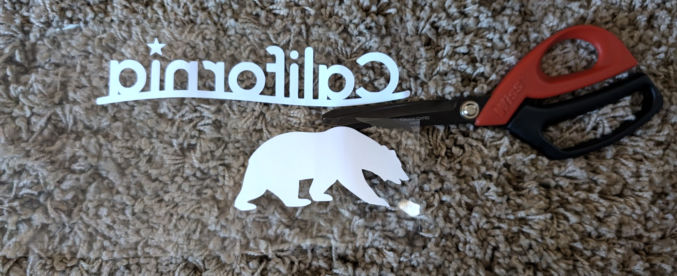
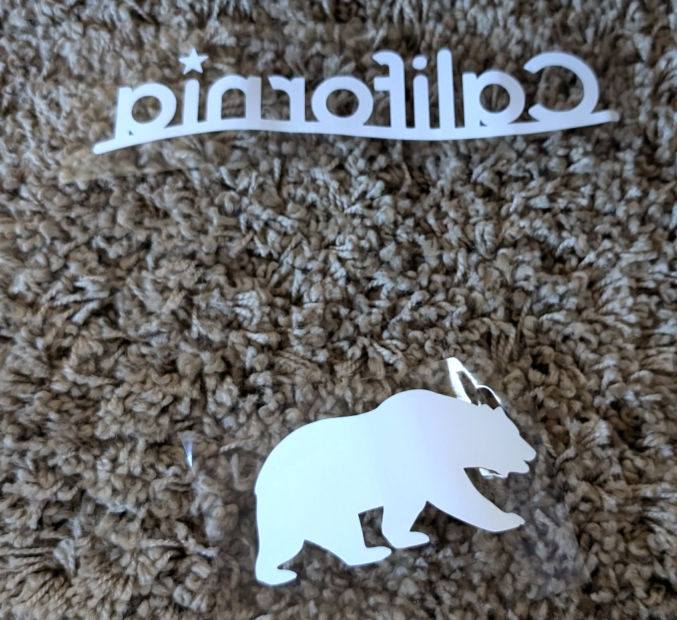
Remove the cardstock from the mat and separate the cut images from the rest of the cardstock. Use a weeding tool, if needed.
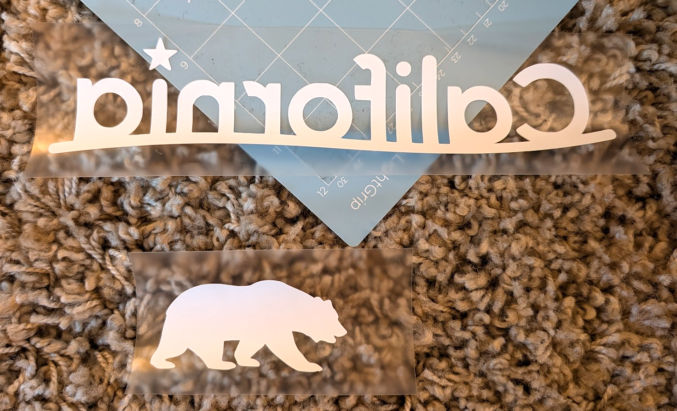
You should be left with this.
Preview cut images on a shirt
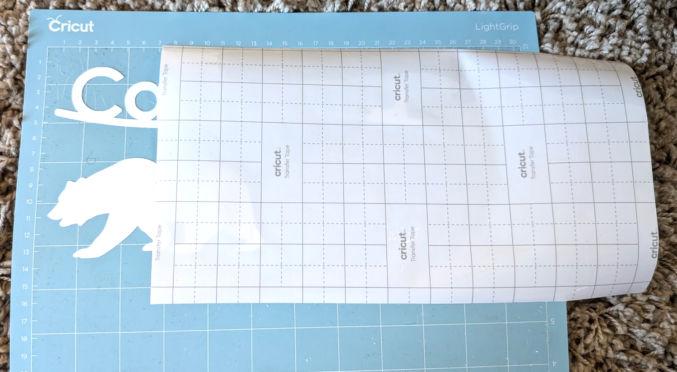
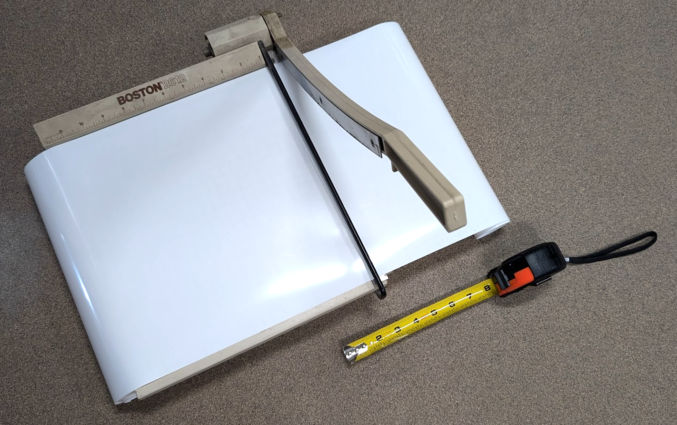
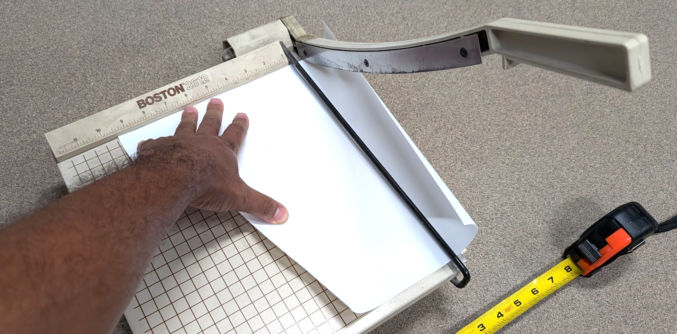
We’ll want to preview how the cut images appear on our shirt. To do this, cut the transfer tape in the size as the cardstock – in this case, 10″ x 6″. Cut straight lines as that will make it easier to center and position the design on the shirt.
Remove the transfer tape from its backing.
Place the transfer tape over the cut images and press it on the cut images.
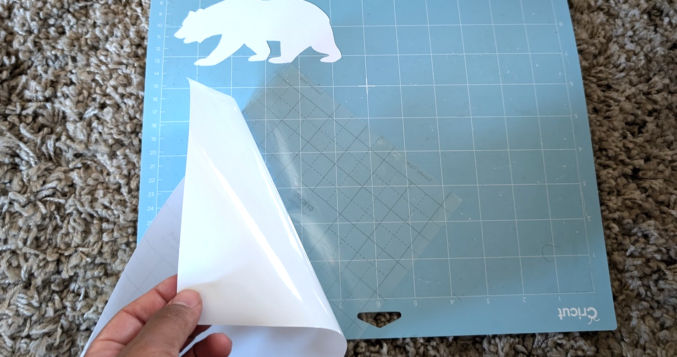
Remove the transfer tape using a weeding tool to keep the cut images stuck to the tape.
Cut the transfer tape around the individual images.
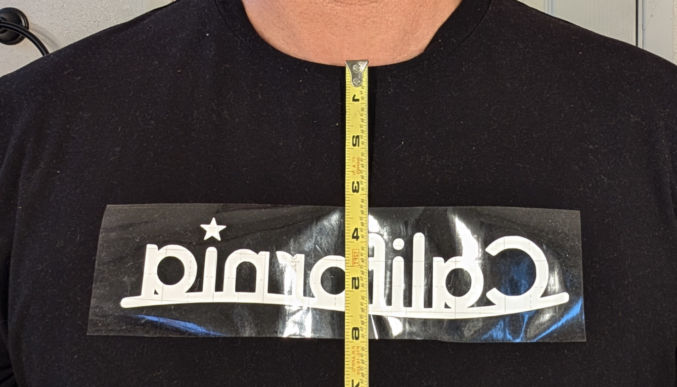
Wear your shirt and place the cut images on the shirt where you want them to go.
The size of the “California” text looks good to me.
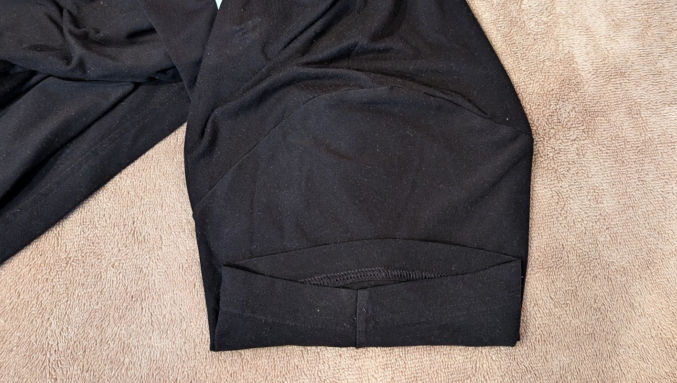
The size of the bear, on the other hand, looks way too big.
Iterate
Since the bear looks too big, I’ll reduce the size from 5″ wide to 4″ and 3″, repeat some of the previous steps, and see how that looks.
This is how the 4″-wide bear looks on the sleeve of the shirt. It still looks too big.
This is how the 3″-wide bear looks. I think that’s a good size.
Now that we have our images and final dimensions, we’re ready to cut the images on heat-transfer vinyl (HTV) and iron them on our shirt.
Prepare images
Follow the same steps as above except instead of a 4″-wide bear, make it 3″ wide.
Trim heat-transfer vinyl
The vinyl I bought is an 8-foot long roll that is 12 inches wide. Since our mat is 12″ x 12″, I cut it to make it easier to work with.
I actually have some leftover vinyl from a previous project, so I’m going to use that.
Cut images from the vinyl
In Cricut Design Space, click “Make” and then “Continue”.
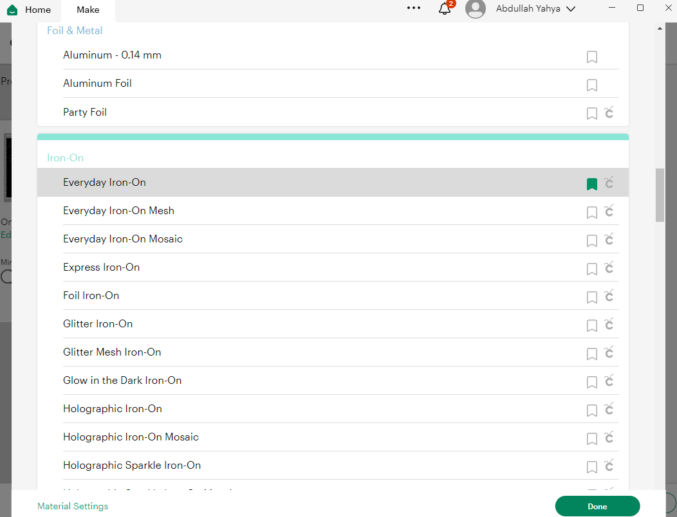
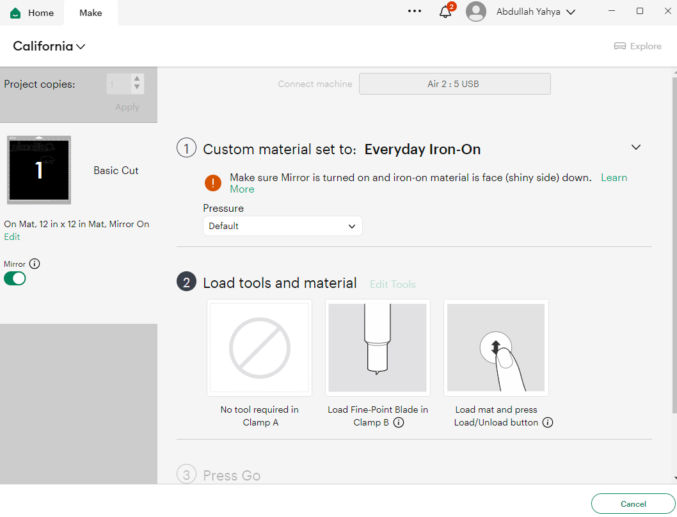
For step 1 (Set Base Material), click “Browse All Materials” and choose “Everyday Iron-on”
For step 2, you’ll notice 2 things:
For iron-ons, the “mirror” must be turned on. This flips the images so that when they are ironed on, they appear correctly. Cricut Design Space automatically toggles this on for you.
You need to place the iron-on material face (shiny side) down on the mat.
For step 3 (Press Go), go ahead and press go to start cutting.
Trim heat-transfer vinyl
Remove the vinyl from the mat and trim away material from the designs. To make it easier to position and align the designs on a shirt, I like to cut straight lines around the designs so I end up with perfect rectangles.
Remove the dull side of the vinyl
Use a weeder tool, if necessary.
You should be left with your designs on a transparent liner.
Determine design placement on shirt
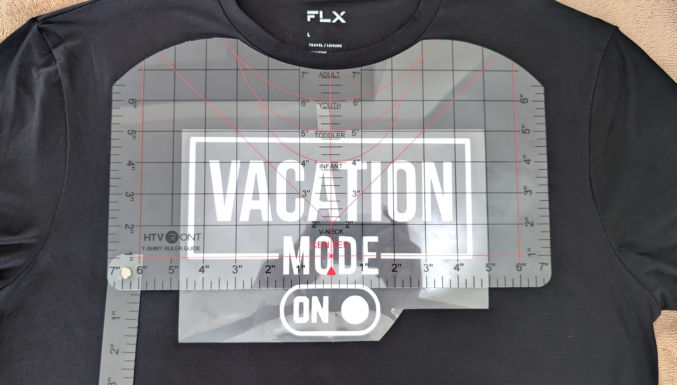
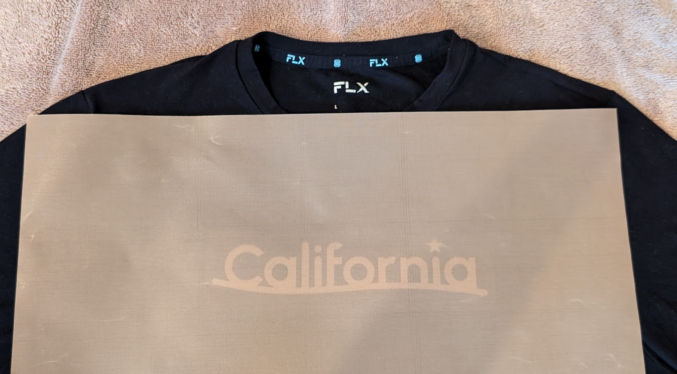
Measure where you want the designs to be on the shirt. I’m going to position the top part of the “California” text to be about 3.75″ from the top as shown below.
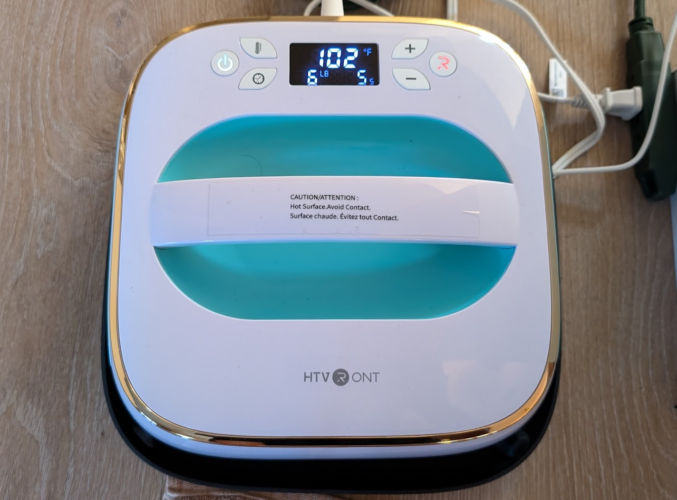
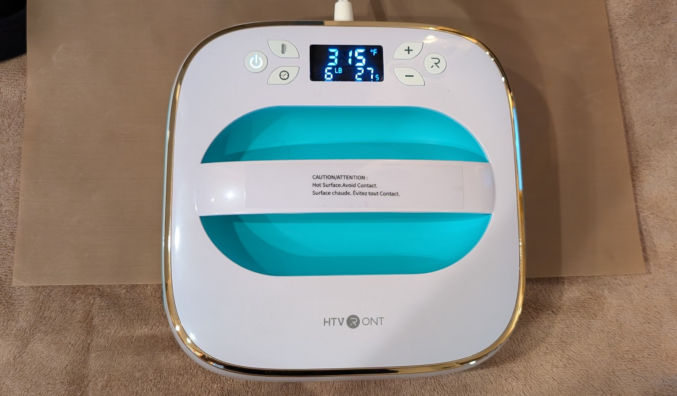
Turn on heat press
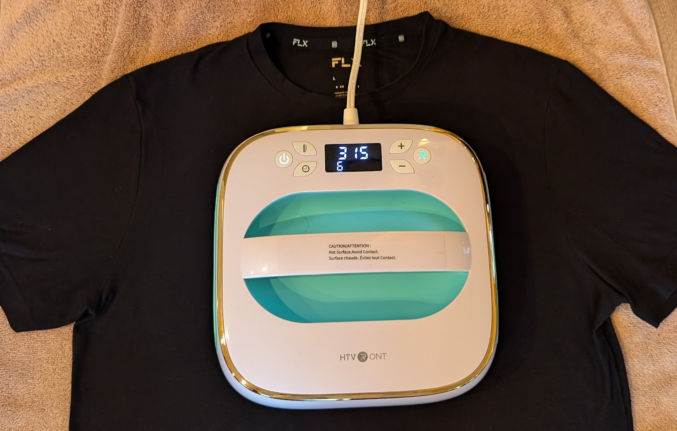
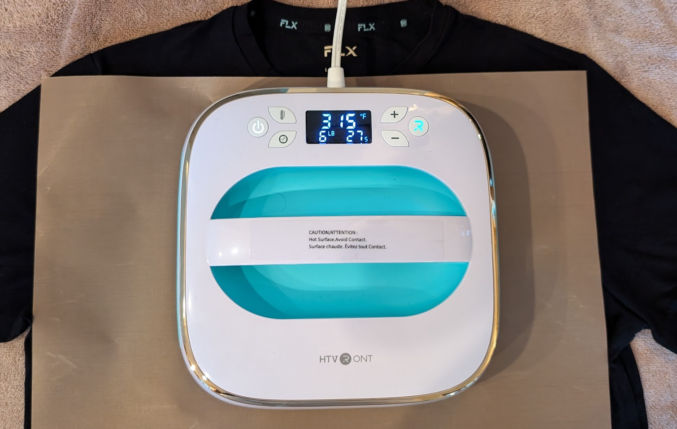
Turn your heat press on and set the target temperature to 315 degrees Fahrenheit. Set the timer to 5 seconds.
Press the designs on the shirt
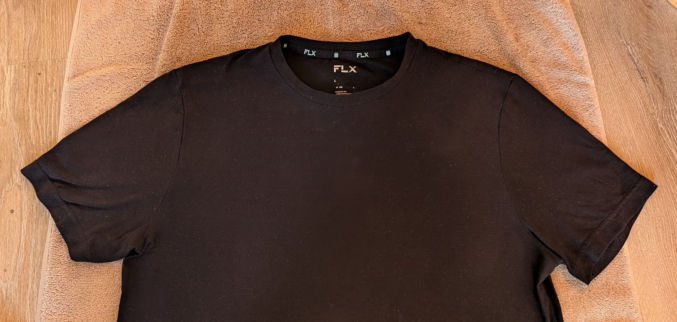
Put the shirt on a bath towel on a hard surface like the floor.
When the heat press is ready, place it on the shirt for 5 seconds where the design will go. This will remove wrinkles from the shirt.
Set the heat press timer to 30 seconds
Place the design on the shirt exactly where you want it to go. Use this measurement guide to make it easy to center designs.
Optionally, secure the design to the shirt using heat transfer tape.
Place a sheet of teflon on the design to protect the shirt and the heat press.
Place the heat press on the design until the 30 second timer is up.
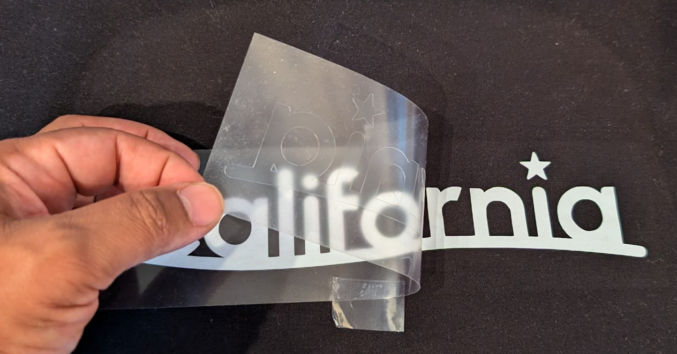
Wait one minute. Then, remove the transparent liner from the design. If the design comes off the shirt, then put the heat press back on and press firmly on it for another 30 seconds.
Once the transparent liner is removed, I like to put the teflon sheet over the design and apply the heat press once again for 30 seconds.
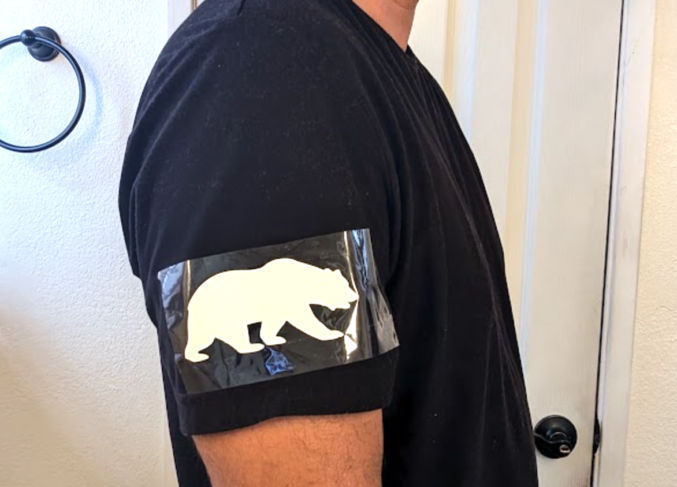
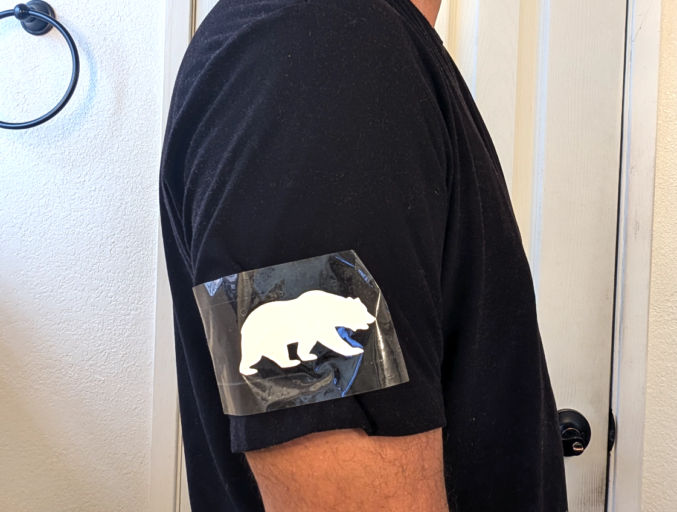
Now, let’s apply the bear to the sleeve. Lay the shirt down such that the seam is at the bottom and in the middle.
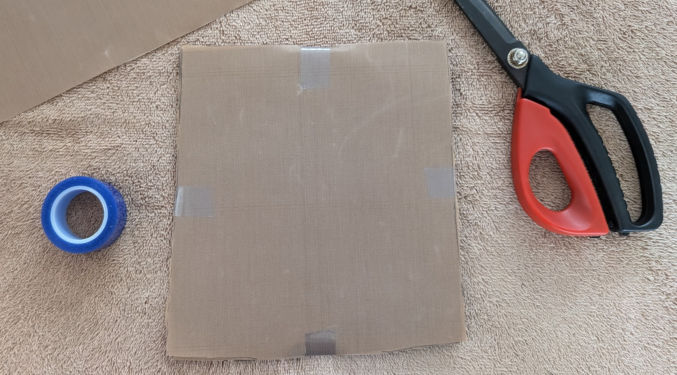
Cut a piece of cardboard and insert it into the sleeve as shown below. We need the surface of the top part of the sleeve to be flat. Otherwise, the design can be ruined due to the bump from the seam.
Remove wrinkles from the shirt by place the heat press on it for 5 seconds.
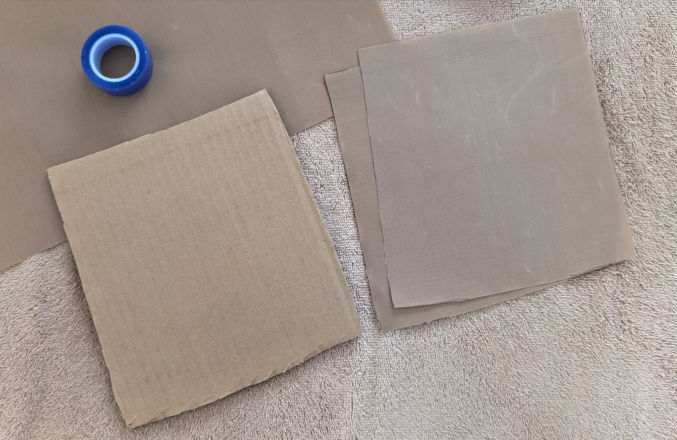
The brown cardboard could cause discoloration in the white design. Cover the cardboard in the sheets of teflon first as shown below.
Secure the teflon to the cardboard using heat-resistant tape.
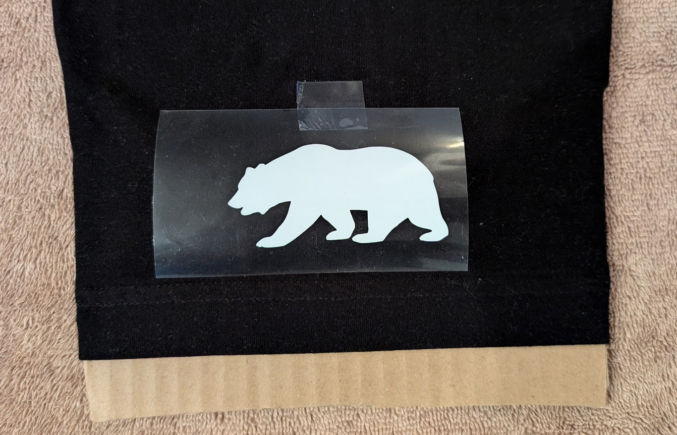
Place the design on the sleeve where you want it.
Put a sheet of teflon on the design.
Press the heat press firmly on the design for 30 seconds.
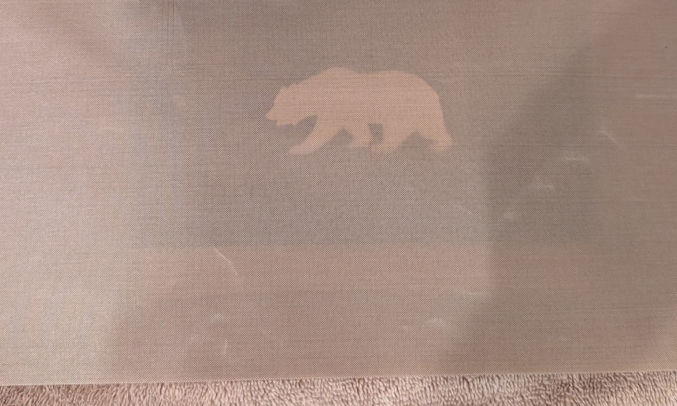
Wait one minute. Remove the transparent liner.
Optionally, place a teflon sheet on the design and apply the heat press again for 30 seconds.
The finished product
Removing vinyl
If you make a mistake, this video will show you how to remove vinyl from your shirt.
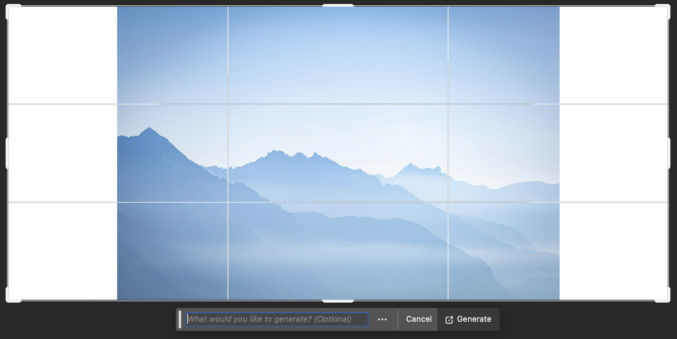
If you have a photo that is too small and you wish it were wider or taller, you can use Photoshop’s Generative Fill feature to fix that. Here’s an example.
Open the image in Photoshop
Enlarge the canvas
Let’s say I want to make the image wider. Using the Crop tool, enlarge the canvas.
When you do this, you’ll see a command prompt below the image.
Click Generate
If you just click Generate, Photoshop will fill in the empty parts to blend in with the original image.
Try custom commands
You can also tell Photoshop how you want to fill in the empty space. For example, if I write, “Fill the empty space with a jungle”
Adjustable-color LED Light Bulbs (This is for the sconces. I set the color to pink.)
Uplights (This one on Amazon lets you change the color of the light) In the picture above, I just have one behind the sofa with a soft white (yellow) light.
LED Light Strip (I got mine from Costco. You can adjust the color.) In the picture above, this is the blue light behind the TV.
1.5 RPM Speed Disco Ball Motor(I chose a speed of 1.5 RPM. Faster speeds make the lights move too quickly, which is distracting and headache-inducing)
Spot Light (This is for the mirror ball. I bought this one because it allows me to adjust the aperture size / spot diameter.) In the picture above, I put it on the ottoman facing up to light up the mirror ball.
Northern Galaxy Light Aurora Projector (In the video above, I set the color to red (R) and blue (B) and disabled the green “star” lights. It’s on the ottoman and illuminates the ceiling).