There are many different ways you can edit home improvement videos. Here are some:
Make a Video From Photos
This is pretty simple to do. You can just add a bunch of photos to the video track of your video editor, animate each photo (many video editors can do this automatically), add some music to the music/audio track, and render the video. The result can be pretty good but it doesn’t really give a sense of the amount of effort or process involved. Here’s an example clip.
Regular 1x Speed Video
If you have a short video, leaving the speed at normal 1x speed might be okay. But, if your video is long, people will get bored very quickly. Since most home improvement projects take longer than 30 seconds, I don’t recommend this option, unless you are maybe adding a voiceover that explains what you are doing in the video.
Fast Speed (Timelapse) Video
Another option is to just timelapse the entire video. Some home improvement projects can take all day. Many people, including myself, will just leave a camera somewhere that will take many still photos at a set interval to create a timelapse video. You can also record an entire day’s worth of video, which I’ve also done using a WyzeCam mounted on a wall. Timelapsing an entire video is as easy as speeding up the video clip. The downside is the audio is also sped up and often doesn’t sound good so you usually mute the audio and optionally add some background music. Here’s an example.
Mixed-Speed Video
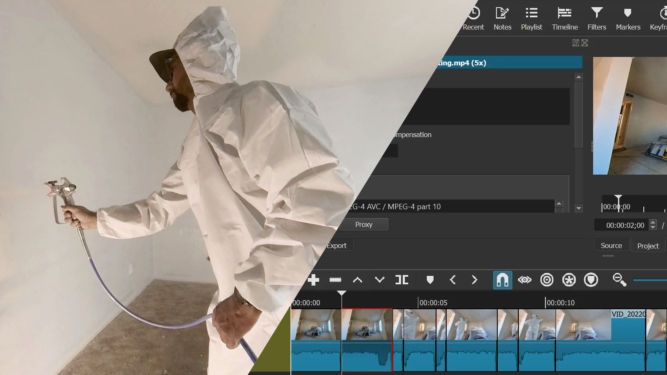
Another option is to timelapse (speed up) certain parts of the video and leave the other parts at regular 1x speed. This is definitely more work but I personally find this better than just speeding up the entire video. However, I find the best effect is when the regular speed segments are ones that have a high volume, e.g. when you’re using a tool that makes a lot of noise (drilling, jackhammering, cutting, etc). Here’s an example.
I normally use Corel VideoStudio to edit videos but for this purpose, I find Shotcut to be easier to use. Shotcut, which is free, shows the waveform very clearly, runs faster and hasn’t crashed on me yet. The UI takes some getting used to but once you get the hang of it, it’s pretty simple to us. Here are the steps I follow in Shotcut to create this type of video:
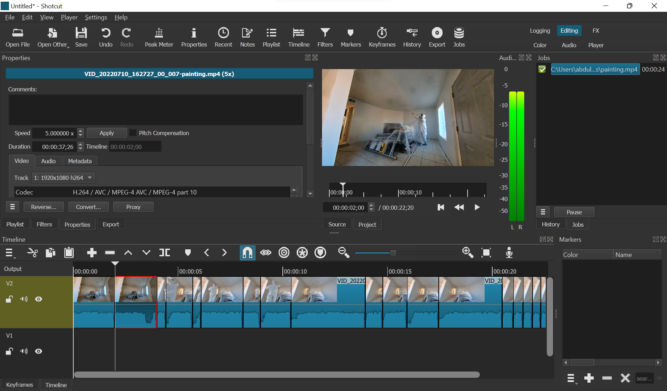
Open the original video in Shotcut
Drag it from the player to the timeline
Zoom in, if necessary, so that you can see the audio waveform
Choose some or all segments where the waveform is high (high volume)
Scrub the playhead until you find a segment where the waveform is high (high volume) and the segment is interesting to show at 1x speed
Split the video at that playhead position.
Move the playhead by where you want to end the segment. For 1x speed segments, I choose a duration of 1 second. You can advance the playhead by 1 second by going to “Player” > “Forward One Second”.
Delete any segments you don’t want to keep (choose Ripple Delete to remove empty space as well)
Click on a segment you want to speed up, click Properties, and change the speed. I choose 5x.
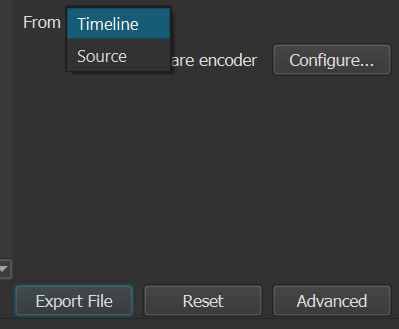
Click the Export button, select “Timeline” in the From field, and click “Export File”.
I changed the speed of this segment to 5x.
Video Showing Only Selection of 1-second Segments
Another option is to create a video from a selection of 1-second segments. Some segments will probably have high volume, e.g. drilling, jackhammering, cutting, etc. , Others may not, e.g. lifting, cleaning, drawing lines, etc. Again, I find this much easier to do in Shotcut than in Corel VideoStudio. Here’s an example.
Here’s how I do it in Shotcut:
Open the original video in Shotcut
Drag it from the player to the timeline
Zoom in, if necessary, so that you can see the audio waveform
Scrub the playhead until you find an interesting segment
Split the video at that position
Move the playhead forward or backward by 1 second (“Player” > “Forward One Second” or “Backward One Second”.)
Split the video again to create a one-second clip
Repeat steps 4-7
Delete all other segments (choose Ripple Delete to remove empty space as well)
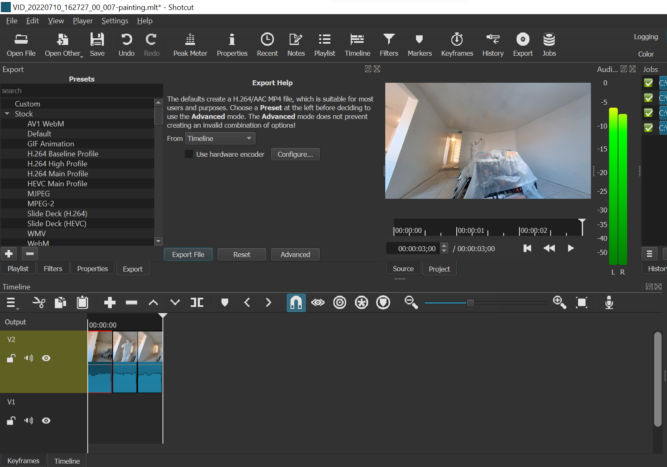
Click the Export button, select “Timeline” in the From field, and click “Export File”
I reduced this 3-minute long video to 3 seconds (each segment is 1-second long) where the volume was high.
Merging Clips
If you end up with a bunch of video clips that you want to merge and you don’t need to apply any transitions or effects, you can merge them almost instantly with LosslessCut.
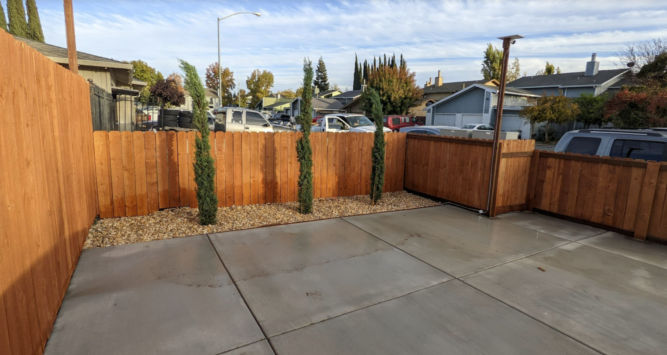
One of my properties is in an HOA. Though many people dislike HOAs and having to pay a monthly HOA fee, one huge benefit of being in an HOA is you never have to deal with unsightly views from the street. If someone violates the CC&Rs, they are fined and forced to stop. This improves everyone’s curb appeal including the neighborhood as a whole. For me, and many others, that’s valuable. But, my other properties are not in an HOA. And, unfortunately, people have very different ideas of what looks good. One neighbor put down pavers himself but was either lazy or didn’t know how to do it right. As a result, the pavers are uneven and weeds are growing everywhere. Another neighbor beheaded their tree leaving a 5′-tall trunk in the middle of their front yard surrounded by probably one of the cheapest rocks you can find – gray gravel. This is bad, but it’s nothing compared to another property of mine where one immediate neighbor is a mechanic who works on cars in his driveway almost 24/7. The neighboring property is a triplex owned by a slumlord who doesn’t appear to care one bit that her ghetto tenants are destroying her property as long as she collects the very low rent that she can get. Their lawn is destroyed because sometimes they park their cars on it. Their garbage bins are always overflowing and are a fly magnet. And if that’s not enough, the other immediate neighbor covered their lawn that meets my property line with concrete and illegally parks a beat-up pickup truck on it. They also leave a grill, used car parts, engine oil, and various other garbage along their side of the property line. As a result, no matter how much I improve my property, being sandwiched between two ugly neighbors significantly ruins my property’s curb appeal. Reporting code violations to the City is useless as they never do anything. Putting up a fence helps but the municipal code limits how tall they can be. Fortunately, there is no height limit on trees as there are 2 and even 3-story-tall trees in nearby front yards. So, one solution I decided on to block the unsightly neighbors is by creating a fence made up of Cypress trees. These trees are super low maintenance, evergreen, the leaves don’t fall and create a mess that you have to clean up all the time, and they grow in a very predictable manner (straight up) so you don’t need to worry about stray branches hitting your eaves or roof.
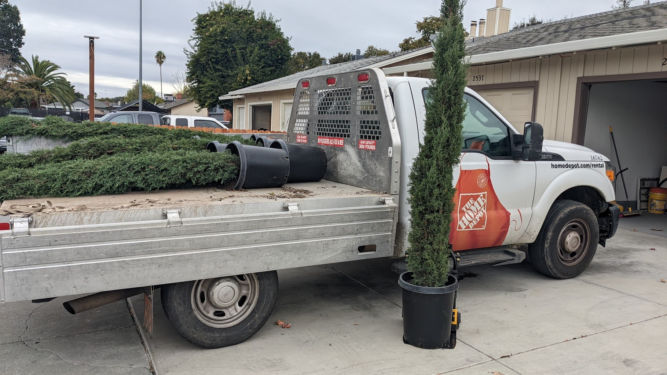
I bought the 5-gallon trees from a nearby nursery for $75 each. In Spring, you can get them at Costco for $40. You can rent a flatbed pickup truck from the Home Depot for $19 for 75 minutes. These trucks are ideal because you can lower the tailgate and the sides as well, making the loading and unloading of trees, or anything for that matter, much easier.
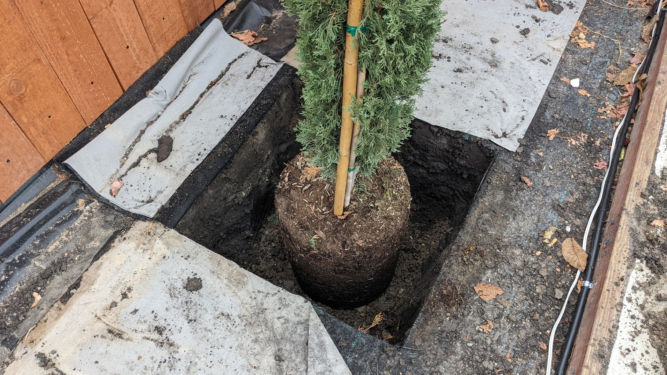
Along the east-facing fence, I had to dig holes in a section where there was no concrete. Digging holes is a PITA for sure. But, using the right tools like a gas-powered auger makes it less of a PITA. In the photo below, I made a square hole by making 4 small holes at each corner using the auger, then another hole in the middle, and then removed the remaining dirt.
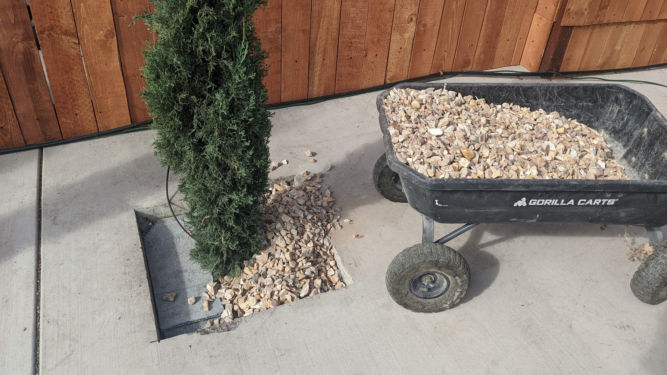
Along the west-facing fence, I had previously poured concrete so I had to cut squares in it for the trees to go in. After backfilling with dirt, I covered the dirt with cement board to be used as weed fabric (regular weed fabric is useless), and then poured a layer of ginger rock.
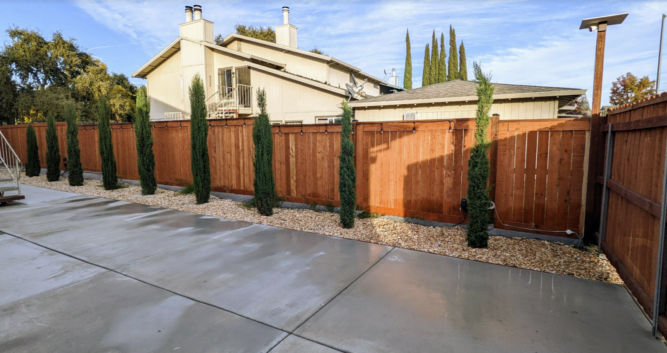
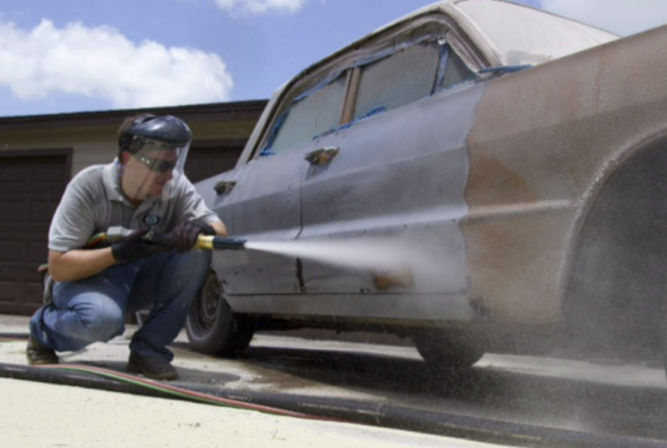
Here’s how the west side looks. The fence boards are red-stained and cost about $3 each from Home Depot. I ran a 1/2″-diameter tube from the back of the building for irrigation. Connected to that tube are smaller tubes for drip irrigation directly at the root of each tree. The photo below is from before the concrete was pressure washed.
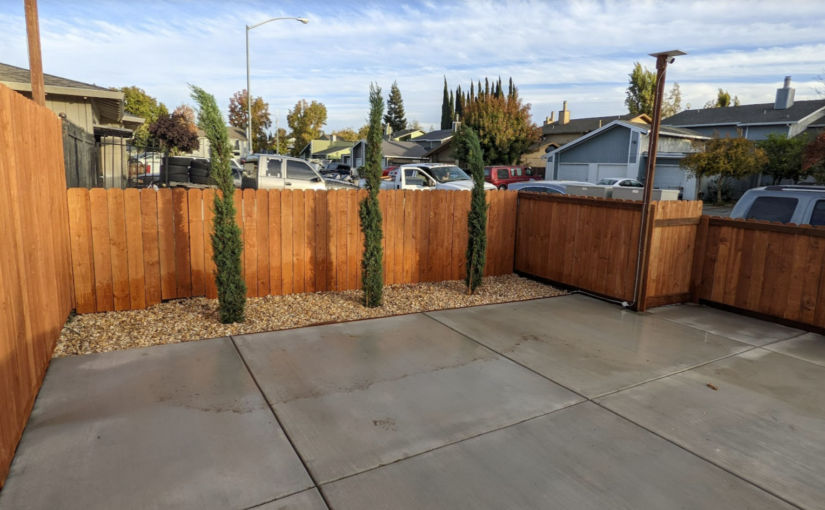
Here’s how the east side looks. You can still see the junk cars next door but after these trees grow tall and thick, my tenants will be shielded from the unsightly views next door and the curb appeal will continue to improve and there will be a clear delineation between my property and the neighboring ugliness.
I continued the fence/tree design alone much of the east side to block as much of the neighbors as possible.
Within 5 years, the trees will be as tall as the 2-story buildings and have a much wider diameter.
So there you have it. One way to block trashy neighbors while not violating most municipal codes.
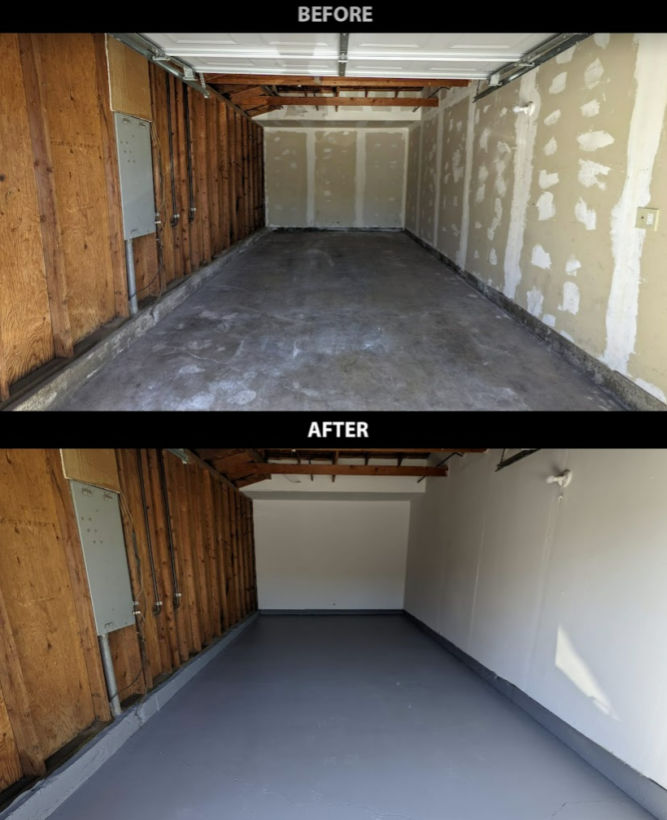
Concrete in your home is everywhere. From your driveway, garage floor, patio, porch, and backyard, everyone has concrete. Unfortunately, concrete is porous and can easily get dirty. Oil, dirt, and stains from all sorts of things can permeate and discolor concrete seemingly permanently. Pressure washing concrete with a high-pressure washer won’t even remove the discoloration. To protect your concrete from stains, you’ll need to seal it. If your concrete is already ugly or if you want to change the way it looks, you’ll need to apply a coating on it, e.g. epoxy. But, in order for any coating to adhere and not peel off, you’ll need to prepare (prep) the surface very well. This is the most important step when renovating concrete. Do it right, and you’ll vastly improve and transform the look of your concrete and your home. Here’s an example before and after picture of a garage floor I renovated.
This is not the step where you want to be lackadaisical. Following are different ways you can prep your concrete surfaces.
Acid
You can pour acid on bare concrete and scrub it around. However, the chemicals are toxic, smelly, and harmful.
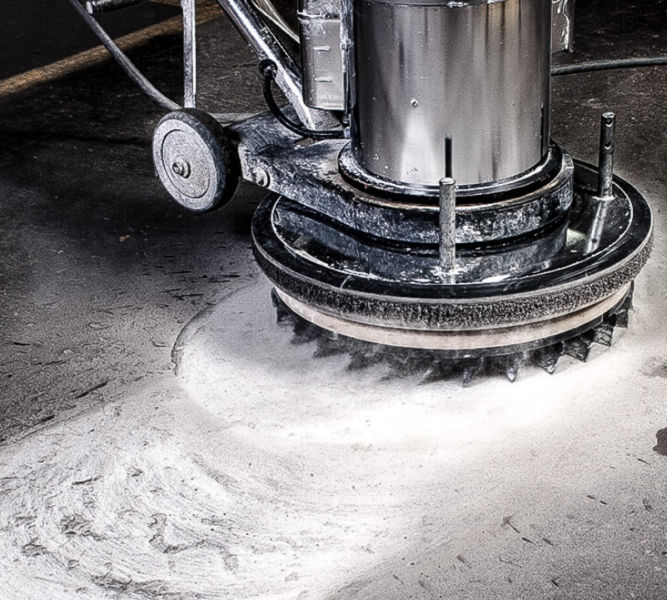
Floor Polisher with Diamabrush Concrete Prep Attachment
The concrete prep attachment is for etching bare concrete floors to prepare for adhesive coatings. This option is much better than using acid, IMHO. But, it’s a bit more expensive. I think I rented it for $140 for 4 hours from the Home Depot. It’s a bit tiring to use because the polisher likes to move in one direction so you need to force it to go in the other direction.
Floor polisherDiamabrush concrete prep attachment
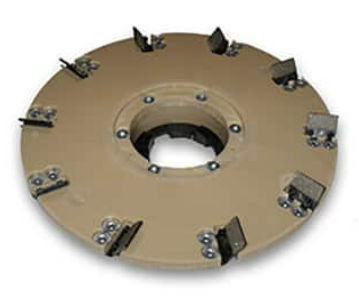
Make sure you choose the concrete prep attachment and not the coating removal attachment picture below. Both look similar but the latter is for removal of mastics, glue, adhesives, thinset epoxies and paint from interior concrete.
Diamabrush coating removal attachment
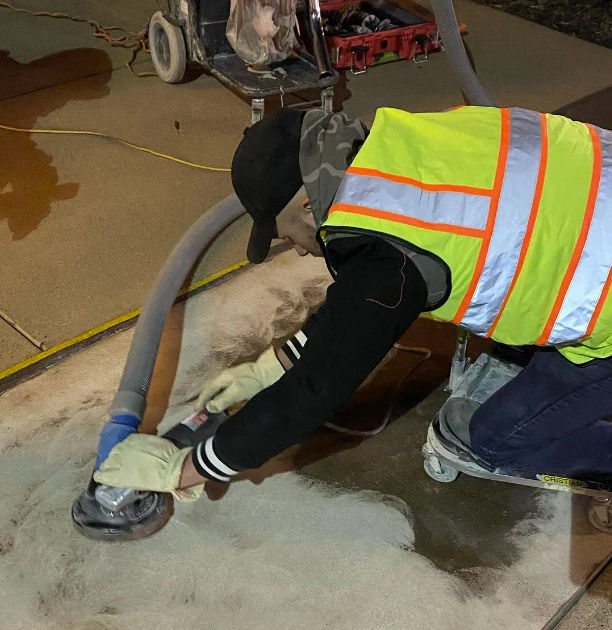
Angle Grinder with Concrete Grinder Attachment and Dush Shroud
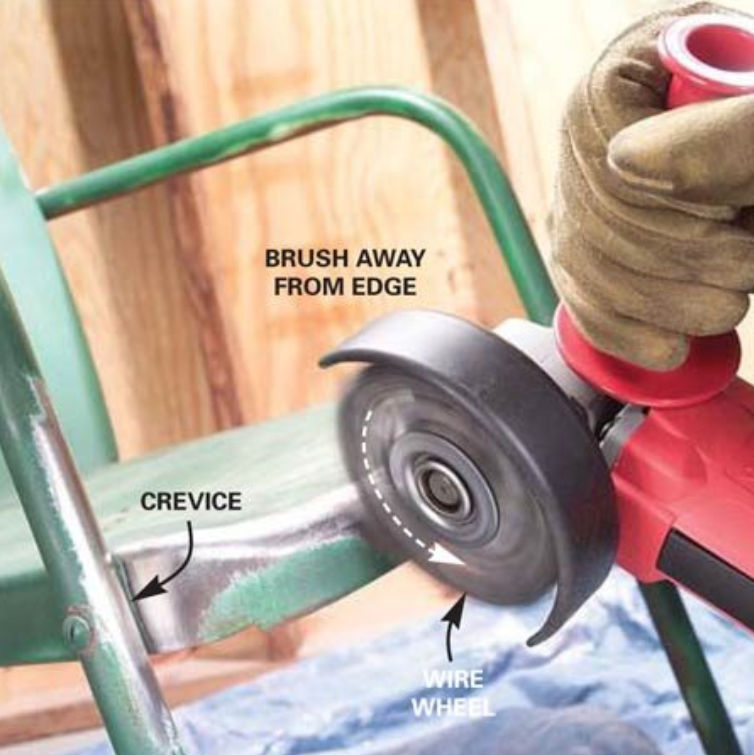
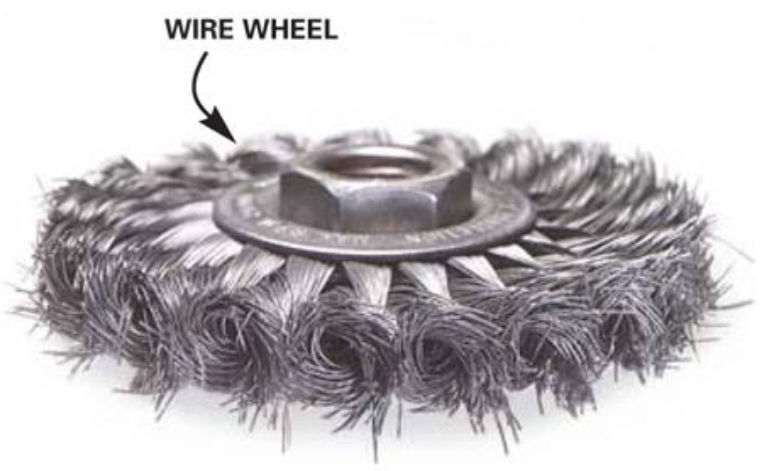
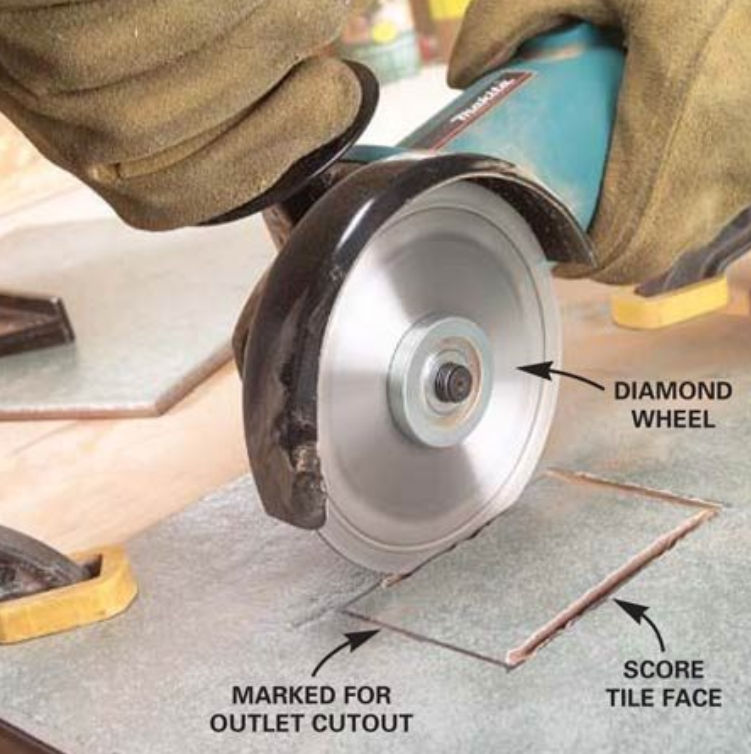
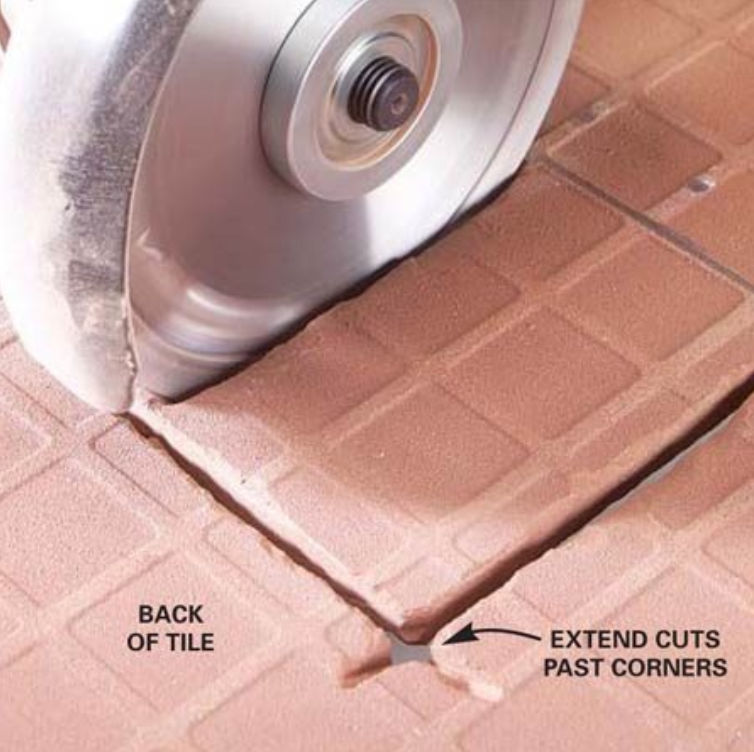
Another option is to grind the concrete down. This, however, requires getting down on the ground and can take a long time. You’ll also need to use a shopvac to suction the dust as this will product a ton of dust. Concrete dust is harmful because it contains silica which can mess with your lungs. If you have a small area to grind or if you need to grind edges, this tool is handy.
Walk-Behind Concrete Grinder
This commercial-grade concrete grinder can be rented at the Home Depot. It grinds down concrete high spots, removes sealers and thin mil paints, removes mastics and preps floors to accept new coatings.
This tool can be rented from Sunbelt Rentals for $270 / day. This tool works by blasting media (shot) at the concrete to scour the surface. This is one of the best ways to prepare concrete. However, what’s annoying about it is you have to periodically pick up the shot media that escapes the tool.
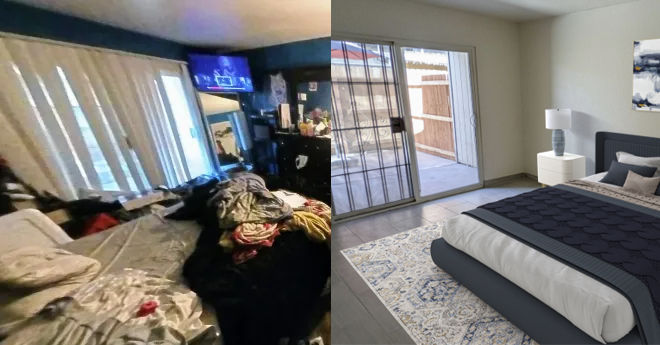
I just finished renovating an entire 2-bedroom, 1-bathroom apartment and totally remodeled the kitchen from a U layout to an L layout with an island. Here are some before and after pics and step-by-step pictures showing how I did it.
Here’s how I renovated the apartment step by step:
Removed all doors
The doors were all beat up so I replaced them with new ones.
Removed fixtures
Replaced all outlets with Decora outlets
For the kitchen and bathroom, use 20 amp outlets, otherwise, use 15 amp outlets.
Removed HVAC registers and grills
All HVAC registers were beat up so I replaced them all.
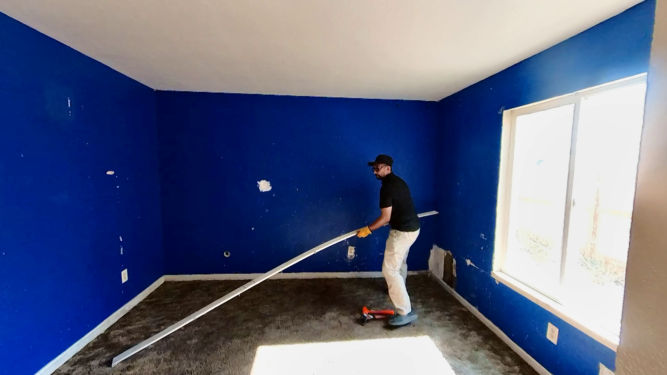
Removed all baseboard
To remove the baseboard, first, cut the caulk using a utility knife. You can also use an oscillating tool.
Then, I like to use a mallet and a special tool that makes it easy to pry the baseboard away from the wall. It has a large surface area to minimize damaging the wall as you pry the baseboard off.
Most of the time, you can reuse the baseboard. But in this case, mine was so beat up that it wasn’t worth it. Plus, for a rental property, it’s better to install a tile baseboard.
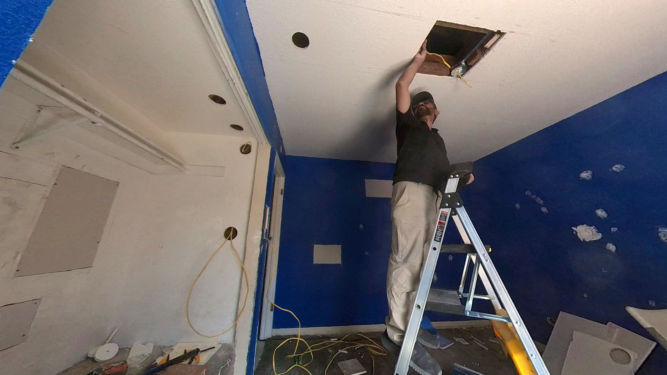
Ran new wiring for a ceiling fan
First, I made holes in the wall and ceiling between studs and joists using a 4″ hole saw. I then inspected the area behind the wall and ceiling to ensure no obstacles were present. It there were obstacles, I could easily patch the holes using the circular cutout pieces.
I then ran yellow romex wiring. Yellow wiring can support 20 amps. I could have used a higher gauge (thinner, lower 15 amp-rated) wire since this is for a ceiling fan in a bedroom.
Where the ceiling fan would go, I cut a rectangular piece of drywall using a small reciprocating saw. I could have used a jigsaw as well. The cut was made in such a way so that I could reuse the piece to patch the ceiling when done.
After installing a ceiling fan bracket between joists, I pulled the wiring to the bracket.
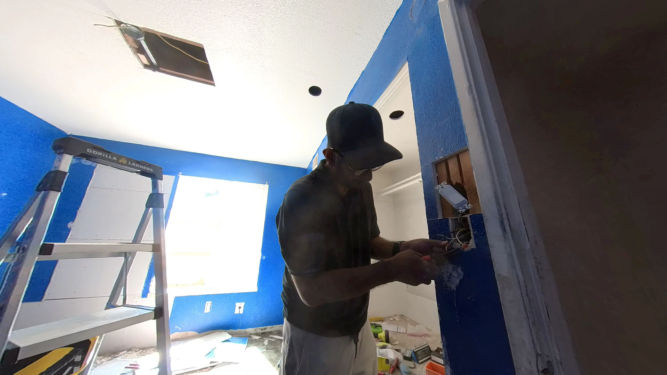
I then wired up the switch…
…and patched the ceiling using the existing drywall.
For the circular holes, I patched them using the circular drywall cuts created when making the holes. I screwed a piece of furring strip behind each hole as pictured.
And then screwed the circular drywall cuts to the furring strip.
Demolished the bathroom vanity
The vanity top was made of cultured marble. I just broke it into small pieces using a sledge hammer.
I then cut up the wood vanity using a reciprocating saw and a demolition blade.
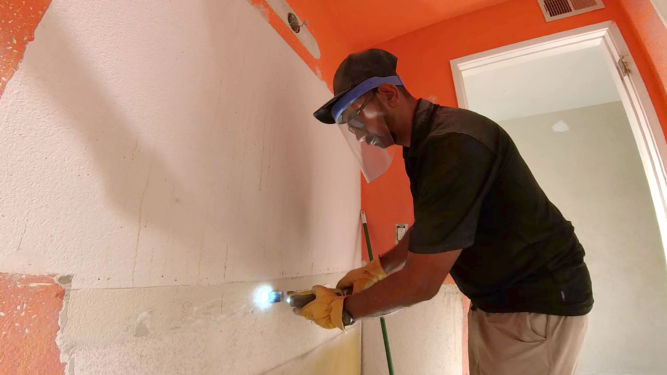
I removed the caulk on the wall using a oscillating tool following by an orbital sander.
Patched holes in the wall and replaced damaged drywall
In the kids’ bedroom, there were many holes in the wall. Some parts of the wall were patched very poorly. I decided to a large section of drywall. I tried using a drywall cutout tool but it was very noisy and it was hard to cut a straight line.
I ended up just using a reciprocating saw and oscillating tool to cut the drywall.
I screwed in the drywall using drywall screws.
I put mesh tape along the edges of each piece of drywall. This helped hold the drywall mud in place where there were large gaps.
For the drywall mud, I used premixed joint compound so I didn’t have to mess with mixing powdered drywall with water.
I then used an orbital sander to smoothen the mud. This produced a lot of dust, but that was okay because I was going to remove the carpet and paint the walls afterward.
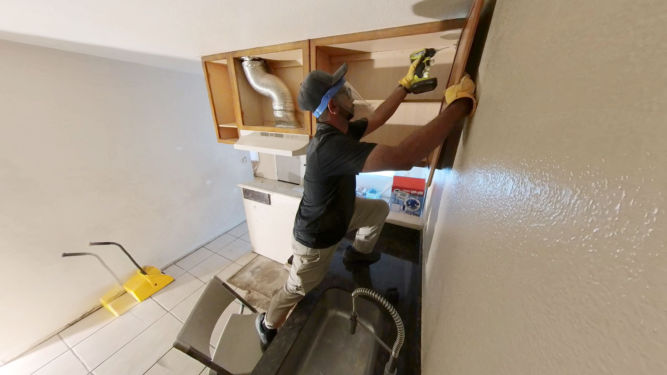
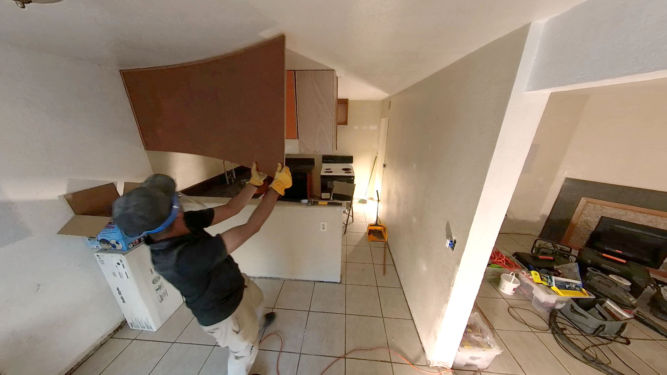
Demolished the kitchen
To demolish the old kitchen cabinets, I first unscrewed and removed each cabinet door.
I hated the old kitchen layout. The half wall and ceiling cabinets made the dining and kitchen areas very small.
The ceiling cabinets can easily be removed by unscrewing them from the ceiling and wall.
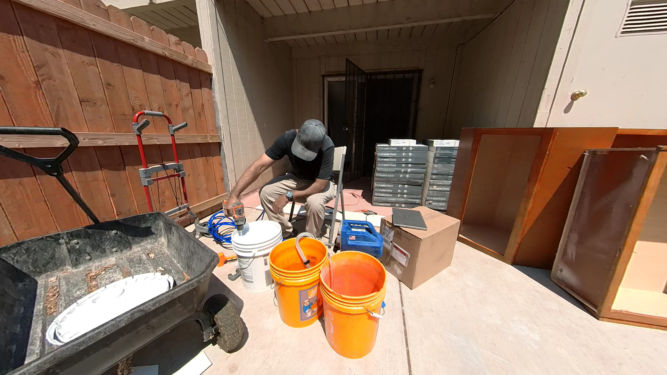
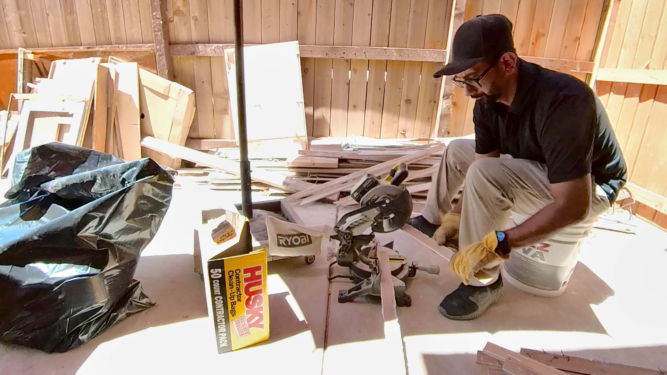
I used the backyard to temporarily store all the construction debris.
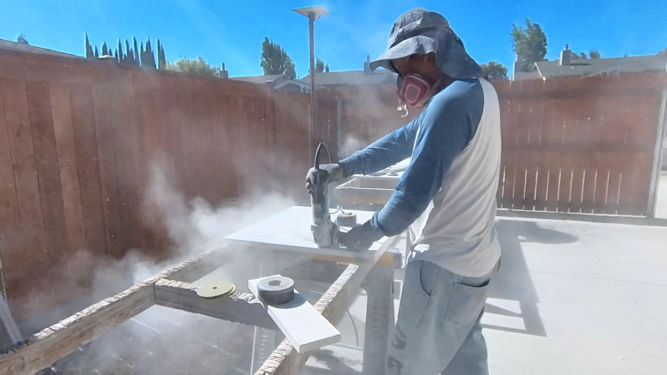
I removed the heavy marble countertop by breaking it up into small pieces using a sledge hammer.
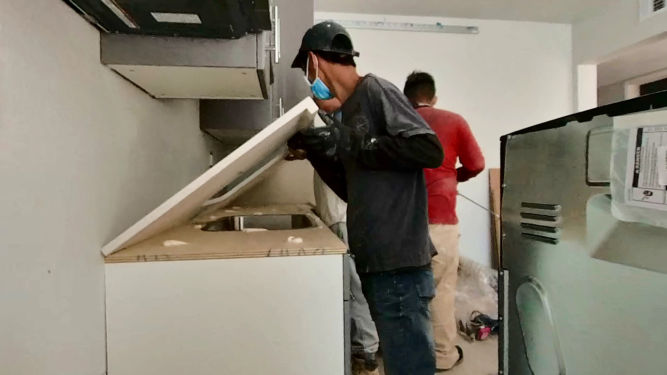
You should definitely wear a full face mask when doing this to prevent small objects hitting your eyes or face.
Just for fun, I used my 24V electric chainsaw to cut up the base cabinets.
After unscrewing some screws that fastened the base cabinets to the wall, I was able to pull out the cabinets.
To remove the pony wall, I drilled a bunch of 4″ holes in it so I could see if there was anything dangerous behind it.
I was then able to demolish it.
The 24V electric chainsaw was handy for quickly cutting some thick pieces of wood.
For safety, I hammered down any nails that were sticking out.
The wall was soggy because there was a small leak that was never detected. I had to cut out the soggy drywall so I could replace it.
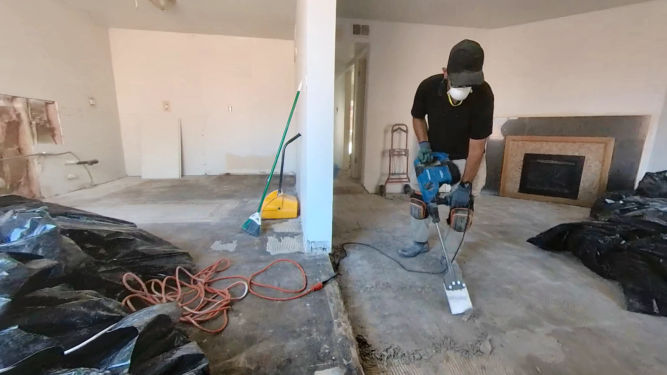
Demolished old tile
To remove the old floor tile, I used a jackhammer with a chisel bit. Since there had been a leak in the kitchen, the tiles were easy to remove.
In the living room, however, it was a little harder to remove the tiles.
In general, separating the tile from the floor was easy.
What was difficult was moving the broken tile outside because it was heavy.
I put the broken tile in bags out front.
I first tried removing the thinset mortar using a scraper attachment on my jackhammer. But, that proved slow and very tiring…
… so I rented a heavy duty jackhammer and cart. This was much easier but still a lot of work. Note to future self: don’t ever do this by yourself. Just pay someone to do it.
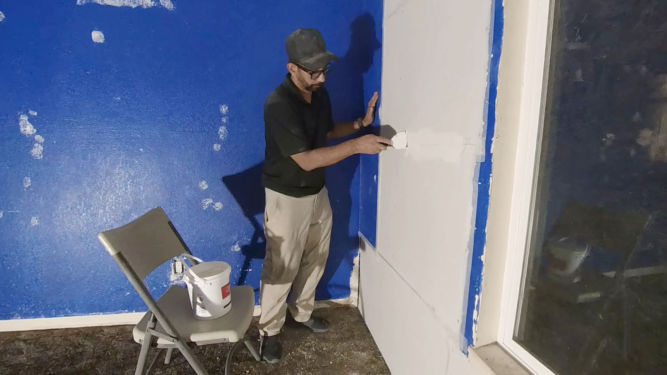
Painted the ceiling and walls
I used painter’s plastic to cover large areas like windows. It’s a very thin plastic.
I sprayed glue around the perimeter of the window.
And stuck the plastic to the wall.
I removed excess plastic by trimming it off with a utility knife. Make sure to use a new blade.
I could then just peel off the excess plastic.
I did the same to cover outlets and switches, although I alter realized it would’ve been easier to cover small areas using blue masking tape.
You can then trim the excess tape with a utility knife so when you’re done painting…
…you can just remove the tape.
To paint the walls and ceiling, I used the Graco Magnum X5 Airless Paint Sprayer. Setting it up and cleaning it up was a hassle, but once it was primed and ready to go, it worked very well and made painting very quick and easy with good, even results.
I first painted primer on the colored walls since the colors were dark. I painted two coats.
Try to move quickly to avoid runny paint.
Painting ceilings is easy with a paint sprayer like this.
Once the primer dried, I painted the whole apartment. A fresh coat of paint really does make a big difference by making the place look new and clean.
But spray paint particles can really get on your face and glasses.
Dirty walls suddenly look new again.
Painting ceilings would have really been hard without a paint sprayer.
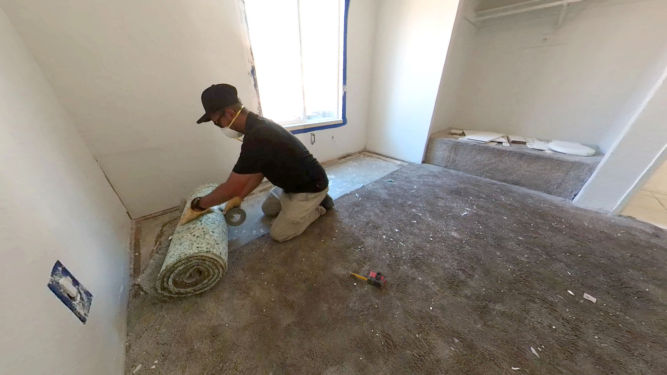
Removed carpet
Using a utility knife, I cut the carpet in 2 or 3′ sections.
I then rolled it and the underlayment padding up and strapped it from unraveling using duct tape.
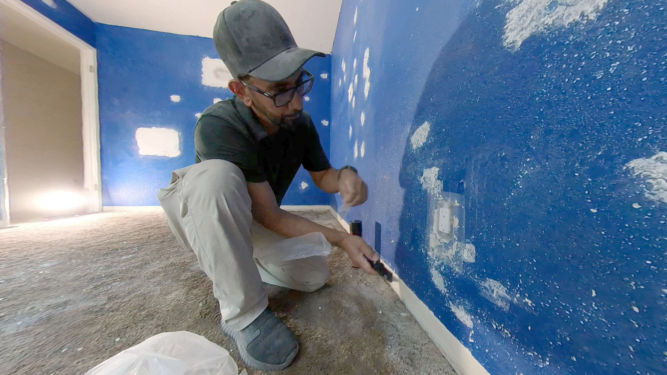
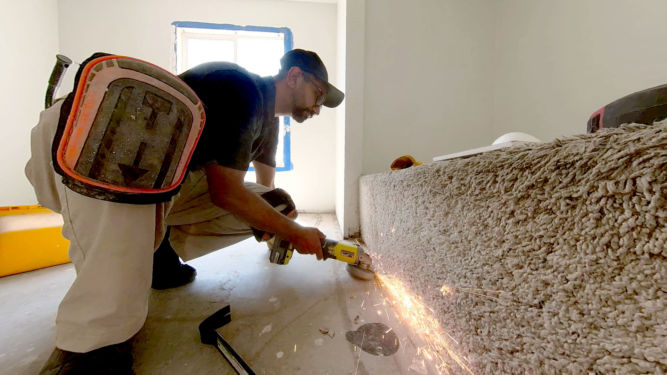
I then removed the tack strip along the perimeter since I was going to install tile over the concrete.
Husky contractor clean-up bags are great for disposing of construction debris.
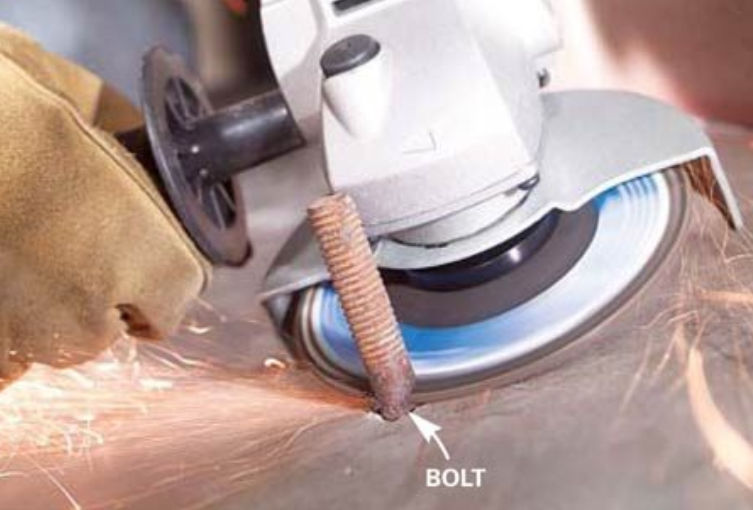
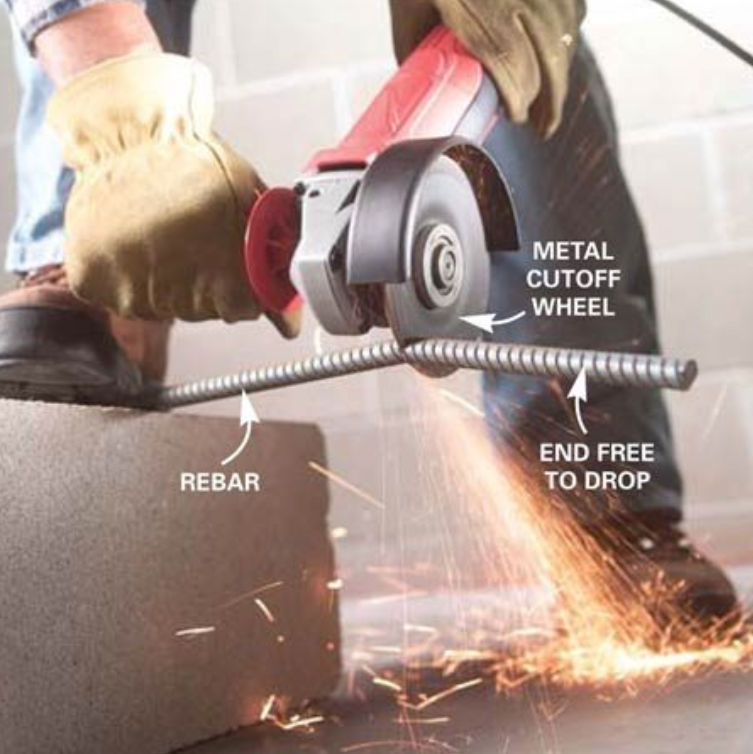
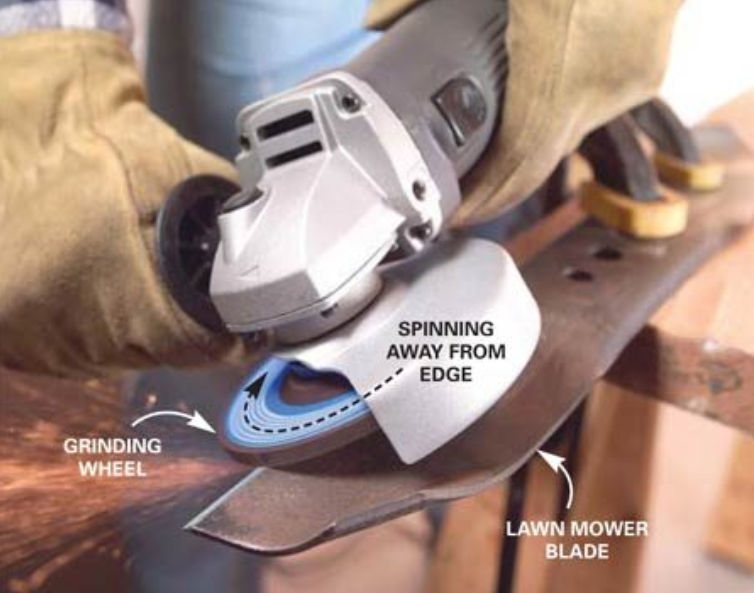
Using an angle grinder, I trimmed any tacks/nails that were stuck in the concrete.
Here’s a close-up.
Replaced all multi-turn water valves with 1/4-turn ones
I hate multi-turn water valves. I paid a plumber to replace them with 1/4-turn valves.
Installed tile
I bought 12″x24″ large tiles.
I paid someone to install the tile. First, they removed the tile around the electric fireplace.
Then they put cement board around the firstplace as backing for the tile.
They scraped the floor to remove any uneven spots from thinset.
They mopped the floor to remove excess dust.
They mixed the thinset and troweled it on the floor before laying down the tile.
I later noticed they were using the wrong type of thinset so I had them use thinset for large format tile (LFT).
For some tile, they’d cut it using a manual tile cutter.
They used little red plastic things to ensure adjacent files were level with each other.
I chose a terracotta color for the fireplace surround tile.
They applied the grout.
Then wiped it off the tile itself.
And mopped off any excess grout.
Patched kitchen wall
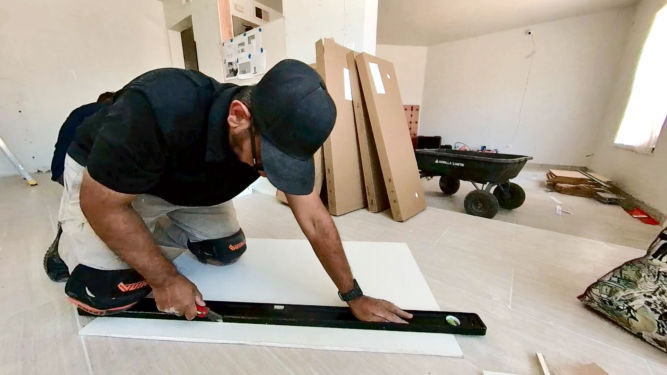
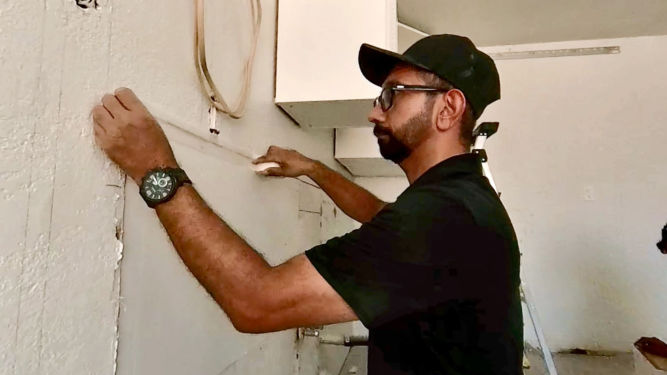
Before installing the cabinets, I had to patch the wall where there had been a water leak. I marked the stud locations using a stud finder.
Using a level, I drew lines where the studs were.
Sometimes, I’d cut drywall using a jigsaw.
Other times, I’d cut it by first scoring it using a utility knife…
…snapping it…
…and scoring the other side.
It’s actually easier and creates a straight cut with no dust.
I had to screw in some 2x4s to existing studs so I’d have a frame to screw the drywall into.
I dry-fitted the cut drywall panels.
And occasionally I’d have to mark edges that didn’t fit…
…so I could trim them using a rasp.
I screwed the drywall into the studs using drywall screws such that the screw heads would be slightly recessed so they wouldn’t be seen after patching with drywall mud.
I added mesh tape along all seams/joints to hold drywall mud (joint compound).
Then I applied joint compound.
Rerouted kitchen exhaust
I had to cut open the ceiling and reroute the exhaust vent.
I removed the old rigid vent.
And installed a flexible vent.
The exhaust went was moved to the wall above where the range would be.
Installed IKEA kitchen cabinets
IKEA delivered the kitchen cabinets.
To install the wall cabinets, we had to fasten metal brackets to the wall, sometimes using drywall anchors. We also had to cut some of the brackets using an angle grinder.
IKEA cabinets come flat-packed and must be assembled.
Fastening wall cabinets to the wall is easy because you can hang them on the bracket and adjust their position before finalizing where they’d go.
The base (floor) cabinets/drawers come with short plastic legs. This is good so that if the floor is wet, the wooden cabinets wouldn’t get wet.
I decided to run additional wiring to a new switch to control a new ceiling fan I planned to put in the kitchen.
We cut a hole in one of the wall cabinets where the exhaust vent would go.
All IKEA cabinet boxes are white. For end cabinets werhe a side will be exposed, we screwed a finished panel to the side.
We installed the over-the-range microwave.
And then attached the cabinet doors.
We screwed in the door handles and attached the kickboard.
Installed quartz kitchen countertop
For IKEA kitchen cabinets, I had to cut 3/4″ thick plywood to put on top of the base cabinets. For non-IKEA cabinets, you can use 1/2″ thick plywood.
I screwed the plywood in through the metal holes at the top of the cabinets.
I decided to buy a new range because the old was in very bad condition.
I bought the quartz countertop from Granite Expo and paid them to install it. In the picture below, they cut the quartz and sanded the edges.
Cutting quartz can produce a lot of dust.
The inside edges were also smoothened.
One guy cut a hole in the plywood for the sink. I decided to go with an undermount sink. The lip of the sink would sit on the plywood but below the countertop. The would ensure the sink would stay in place.
They also made a hole in the countertop for the sink. Like marble, quartz countertops are very heavy.
They put construction adhesive on the plywood before laying down the countertop.
The corner seam between the two adjacent countertop slabs was straight, not diagonal. Getting the two slabs to be perfectly level with each other was tricky. The guy screwed a screw up from under and through the plywood to push up areas of the countertop so it would be level with the adjacent slab. The other guy was applying silicone caulk around the inside edge of the sink.
One of the guys was smoothening and polishing one cut end of the backsplash.
They glued the backsplash to the wall.
They were nice enough to clean up after themselves.
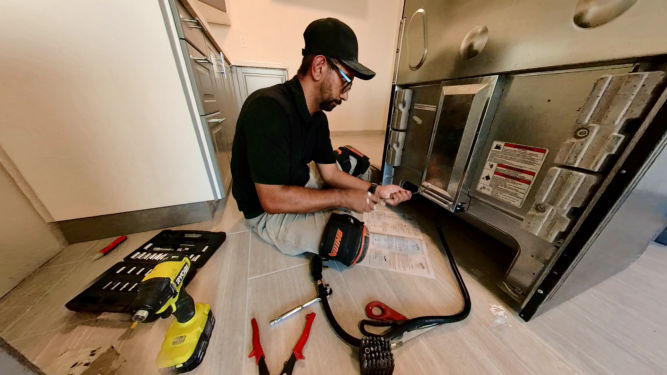
Installed a new range
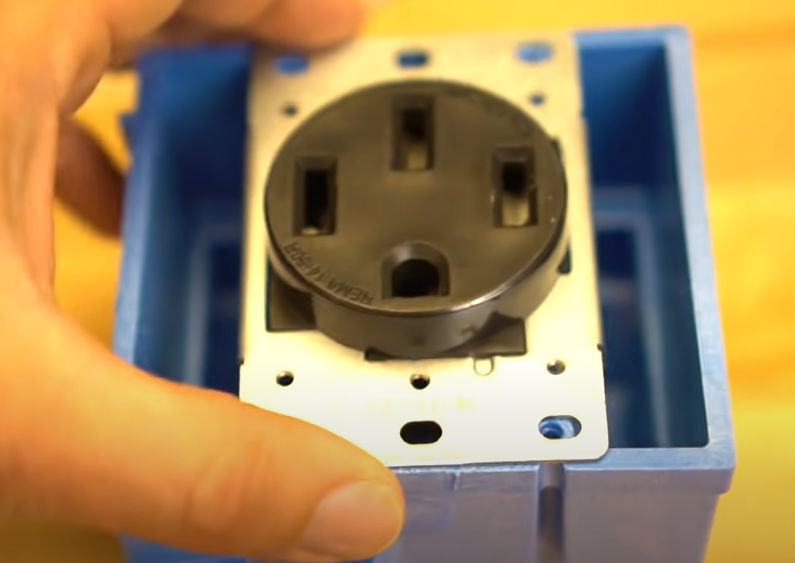
Unlike other appliances, I had to install the range plug by screwing it to specific terminals on the range.
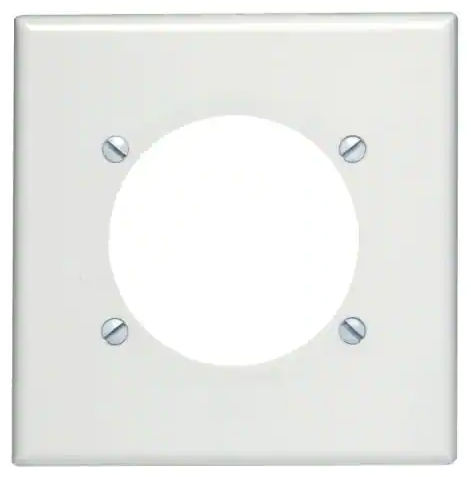
I decided to replace the 220V outlet with a new one. I turned off the circuit breaker first.
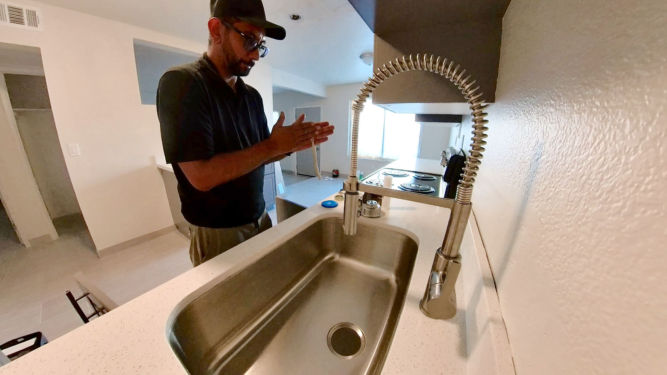
Installed kitchen sink plumbing
I first secured the sink to the countertop by turning a large plastic piece. No special tools were required.
I then screwed the hot (left) and cold (right) water supply lines to the new 1/4-turn valves.
I made a bead of plumber’s putty…
…and put it around the sink hole…
…and then put the sink strainer on it. The plumber’s putty helps prevent leaks.
I then secured the sink strainer by screwing it to a complementary part underneath the sink.
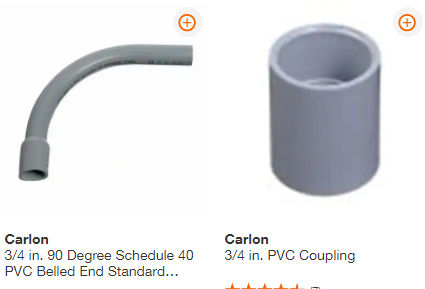
The black PVC drain pipe stuck out too far so I cut it. After installing the garbage disposal, I applied PVC glue around the pipe…
…and inserted a threaded coupling to it.
I then connected the garbage disposal outlet to the drain inlet coming out of the wall. I hate fooling around with PVC so this time, I used flexible p-trap by SimpleDrain. It comes
It’s so much easier to install than PVC p-traps. Instead of screwing on flimsy PVC nuts, SimpleDrain uses an adjustable metal clamp.
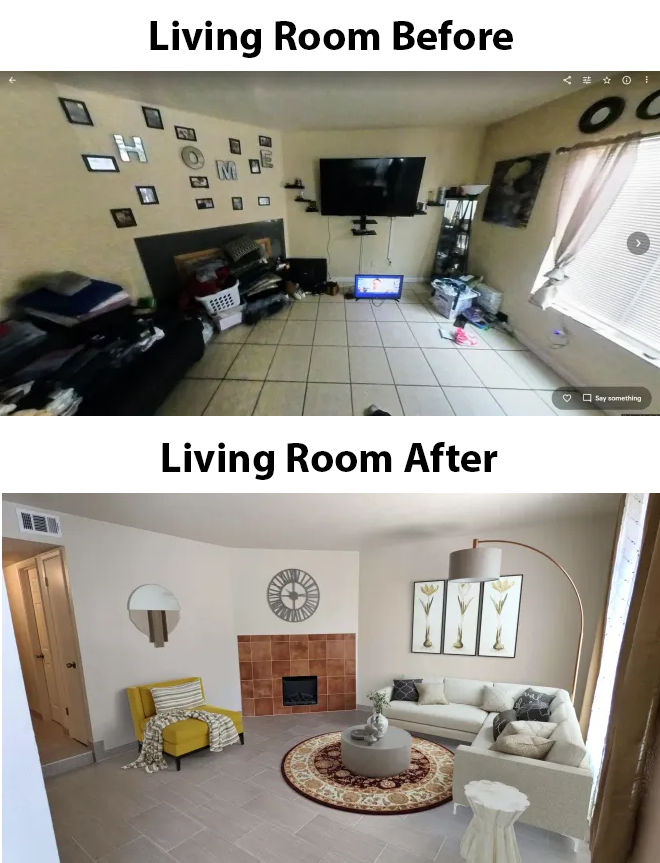
This is what the old kitchen looked like.
And this is the new. One of the cabinets was missing when I took this photo. As you can see, remodeling the kitchen with a new layout really makes the kitchen feel bigger.
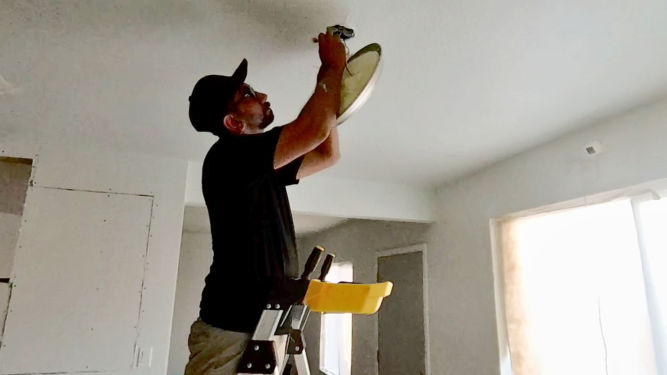
Replaced kitchen lights
I decided to replace the kitchen and dining room ceiling lights.
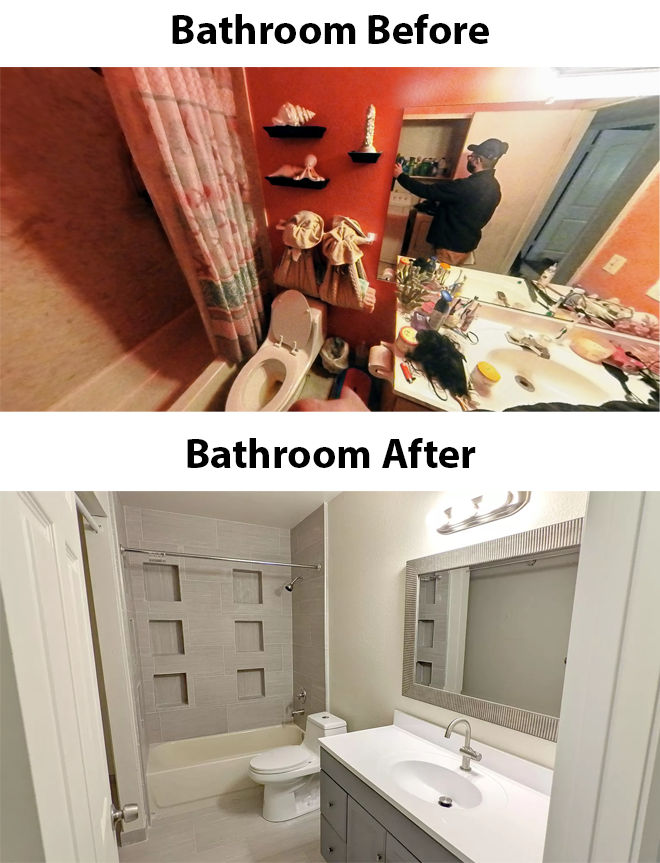
Installed bathroom vanity
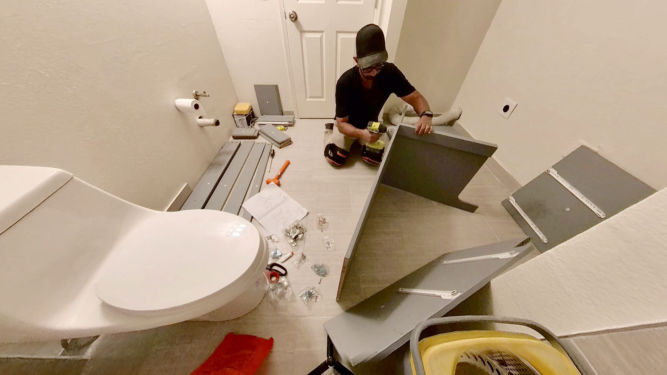
I bought a gray vanity to match the gray kitchen cabinets. I had to assemble the vanity.
Without the countertop, it was lightweight.
It actually took a long time to assemble. After assembling the frame and installed the 2 doors, I had to assemble 4 drawers.
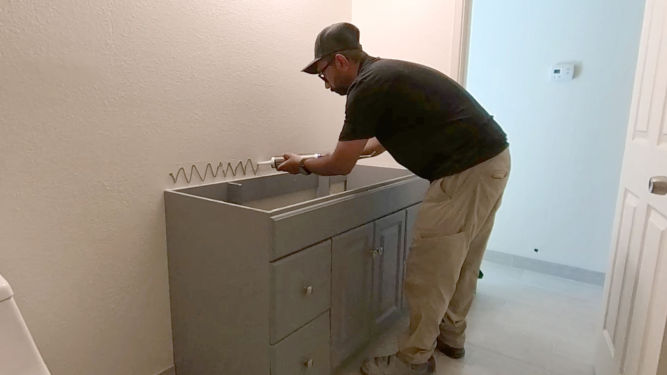
Once that was done, I could install the heavy countertop by first applying a bead of glue to the top perimeter of the vanity frame…
…and to the wall where the backsplash would go.
I like this countertop because the sink and backsplash are integrated making installation easier and minimizing leaks.
Repainted the ceiling and walls
So, I messed up. When I painted the ceiling and walls, I chose a color that looked good in a certain light but not in others. In the evening, and in soft white lighting (slightly yellow), the walls appeared to have a blueish hue to it. It made the rooms psychologically feel a bit cold and that drove me crazy. I decided to repaint the ceiling and walls. But, this time it was hard because I had to be careful not to get paint on the new tile and kitchen cabinets.
The new color I decided on was
Hazelnut Cream 750C-2 (Eggshell) from Behr (Home Depot)
This is equivalent to Lowe’s Valspar “Cream in my Coffee”.
This color is neutral and perfect.
I taped some masking paper to the top of the tile baseboard.
I covered the floor with a large drop cloth and covered the kitchen cabinets with large plastic and cardboard. Notice the difference in the ceiling color.
Preparation takes a long time but spray painting is quick and easy.
It’s hard not getting paint on yourself. My glasses and watch had many paint specks on them.
I then had to go back and paint some missed areas.
It’s always satisfying, though, to remove masking tape to reveal the finished product (as long as the masking tape doesn’t rip and can easily be pulled off).
I was too lazy to texture part of the wall above the backsplash. It’s not that noticeable though.
Installed new ceiling fans
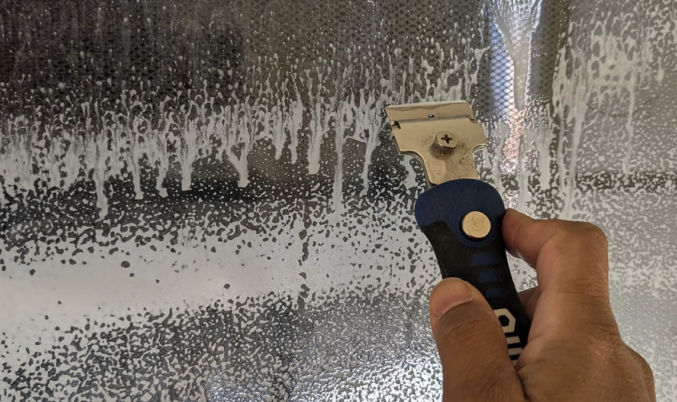
Now that I was really done painting the walls and ceiling, I installed the ceiling fans in each bedroom.
Then, I used a blade to scrape the entire surface to remove any dirt, paint overspray, etc.
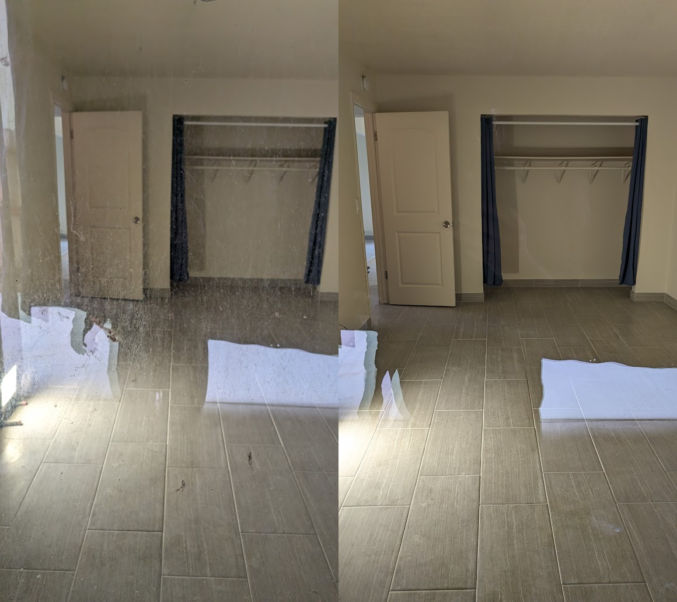
Then, I wiped the windows using a microfiber cloth. Below are before and after pics.
Painted the garage walls
I had unpainted garage walls. The builder would just install drywall and patch holes but that’s it. I ended up painting the walls plain white (the color of primer).
I hate painting ceilings.
Having an extension pole allowed to reach high areas.
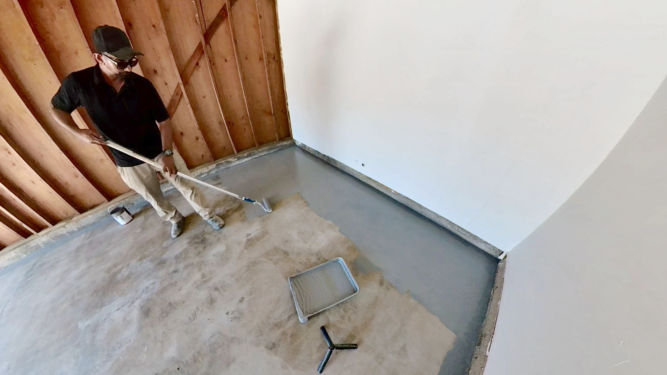
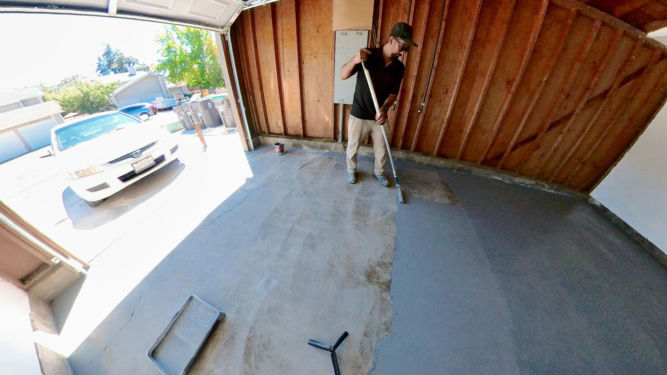
Resurfaced the garage floor
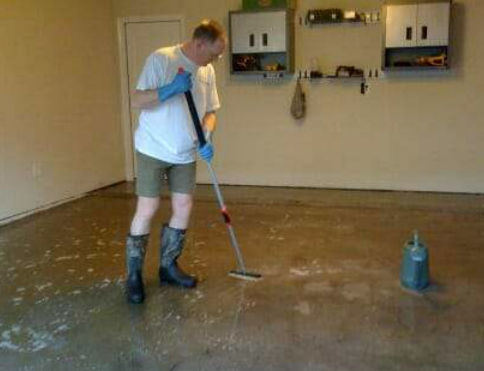
The garage floor was heavily discolored and looked dirty. There were all sorts of stains. To beautify it, I first sprayed water on it.
Then, I used a orbital floor polisher tool with a floor prep attachment. This attachment has a bunch of very coarse tabs like rough sandpaper. It etches the surface and scratches the hell out of it. The tool tends to want to move to the right all the time so you need to force it to stay put or go left. It’s way better than using chemicals like muriatic acid.
When I was done etching the garage floor, I pressure washed it and let it dry overnight.
This epoxy is like a primer. When you roll it on, it easily covers up any discoloratino. Two coats may be needed. It’s very satisfying to easily transform an ugly garage floor into one that looks brand new. Plus, painting a floor is much easier than painting a wall or ceiling. The color of the epoxy looks almost like untinted concrete.
When the epoxy dried, I installed a LED shop light with motion detection.
In one of the other garages (the triplex has 3 garages), I tried applying Behr Granite Grip. Not only is Granite Grip more expensive, I had to use a texture sprayer connected to an air compressor to get good results.
I then had to use a texture roller to even out the material. The results were good but not worth the time, effort and cost for a rental property.
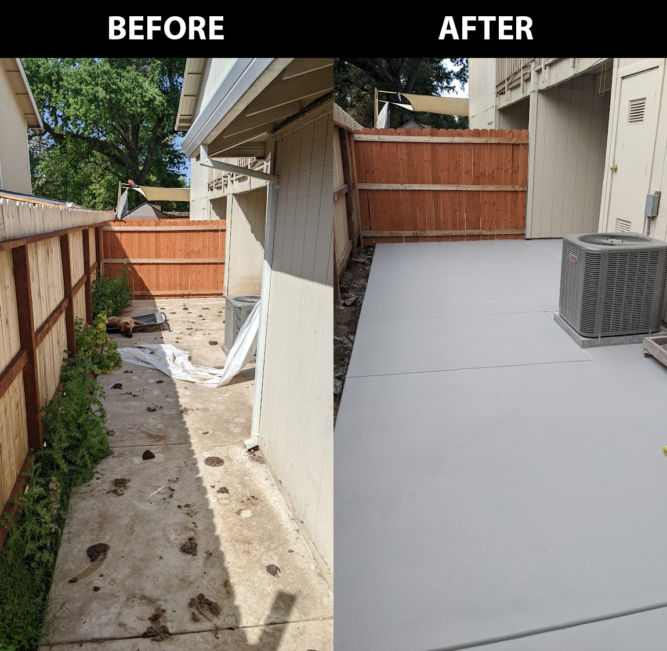
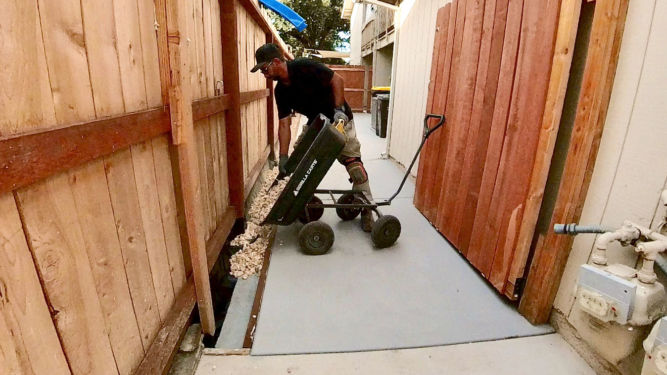
Resurfaced the backyard concrete
The tenants I kicked out had a dog they never cleaned up after. There was dog shit everywhere. When they left, they removed the large pieces but the concrete was still discolored by dog shit that baked in the Stockton, California sun and permeated into the porous concrete. This was brand new concrete that I had put in the year before. Pressure washing with a high-PSI commercial pressure washer was inadequate. I decide to apply the same treatment I applied to the heavily stained garage floor. In this photo, I was etching (scratching) the surface.
I then pressure washed the concrete.
After the concrete dried, I applied epoxy to the joints using a wide paint brush.
And then I rolled on epoxy to the rest of the concrete.
Landscaped the dirt by the fence
When I had the concrete put in, I didn’t want it to go all the way to the fence for drainage purposes. But, if you leave dirt along the fence, you’ll end up with a jungle of weeds, which is exactly what happened. To fix this, I first took used my jack hammer to break up concrete from old fence posts.
I bought a PVC pond liner, which is 14.5-mil thick, and cut it a little longer than some 8-foot-long 2x4s.
I stapled the liner to the 2×4.
I made some holes in the 2×4 and hammered in some long galvanized stakes to hold the wood in place along the edge of the concrete. The pond liner covers some of the dirt. Along the fence, I stapled some pond liner that also covered some of the dirt. In between and overlapping the two pond liner pieces, I put cement board. This will prevent weeds from growing while still allowing water to drain.
Finally, I powered 3/4″ ginger rock to keep everything in place and for aesthetics.
Disposed of all construction debris at the dump
To get rid of all construction debris, I cut up some things into small pieces and put all small garbage in clean-up bags.
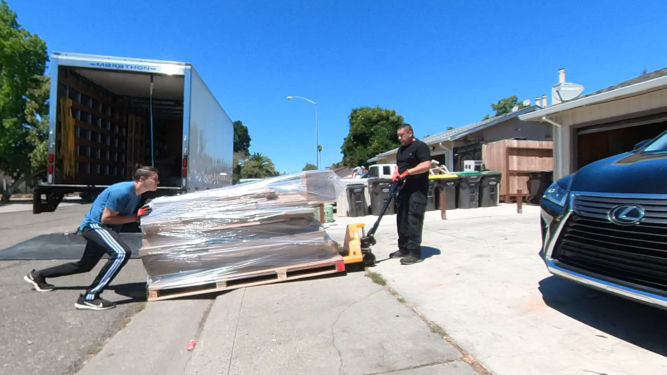
I rented a box truck from Home Depot, loaded garbage into a 4-wheel cart, and used it to move junk to the truck.
The process worked very well. Luckily there was a ramp.
At the dump, I threw everything off the edge of the platform like the toilet…
…and the old doors.
Periodically, a huge bulldozer would come and push all the garbage away.
I had to clean the truck to avoid a cleaning fee.
Dumping the many bags of broke tile was extremely tiring. I’ll make sure to pay someone to do that next time.
I paid about $150 to the dump to dispose of a truck-load full of garbage and around $50 for the truck rental.
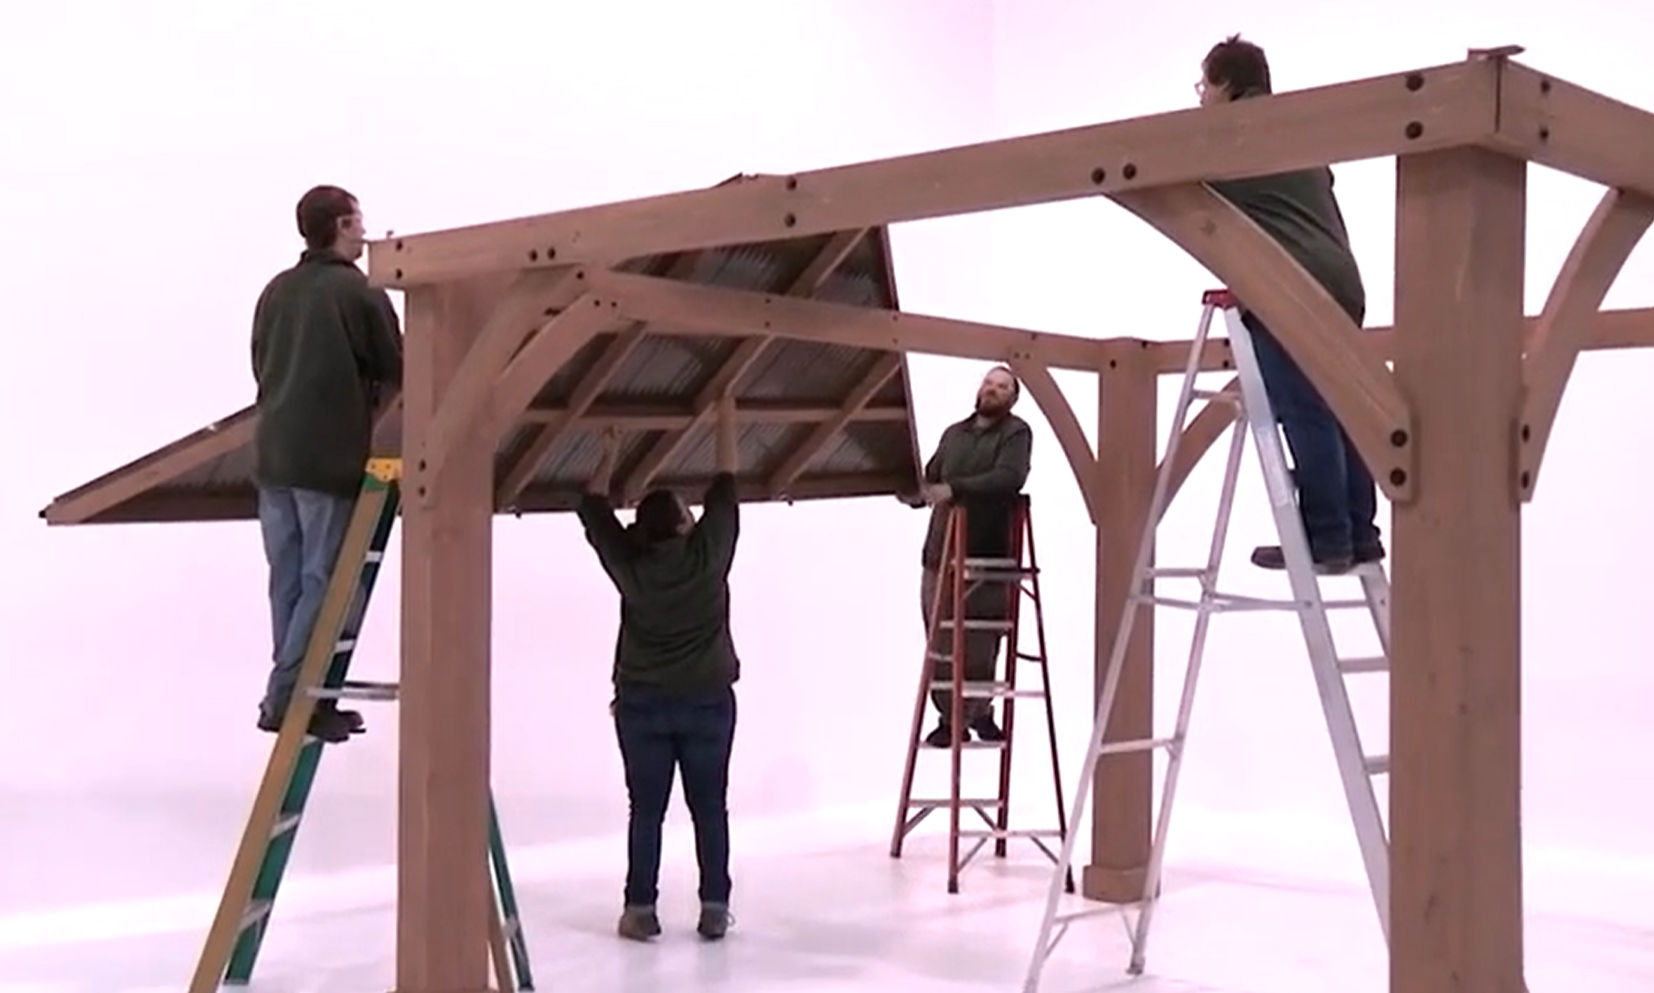
Assembling the posts and beams was easy but time-consuming. It took one day.
The hard part was assembling the roof. Half a day was spent screwing in the aluminum roof panels. Another half was spent raising the roof up and fastening everything together. In the picture below, we used the Jawstand to hold a 2×4 piece of wood which supported the center peak of the roof. The Jawstand made it easy to adjust the height of the 2×4 since the angle of the roof had to constantly be adjusted to get all 4 roof panels to fit right.
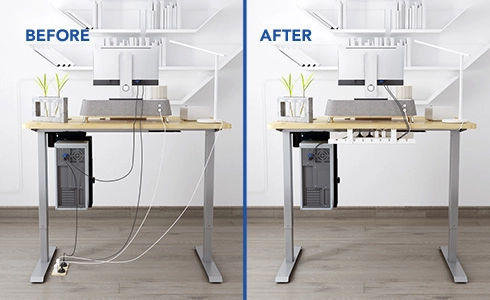
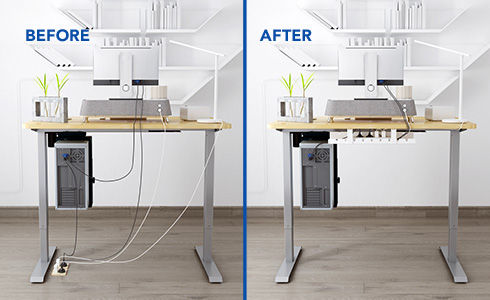
I hate seeing lots of cables everywhere. In this post, I will list various options for managing and hiding cables.
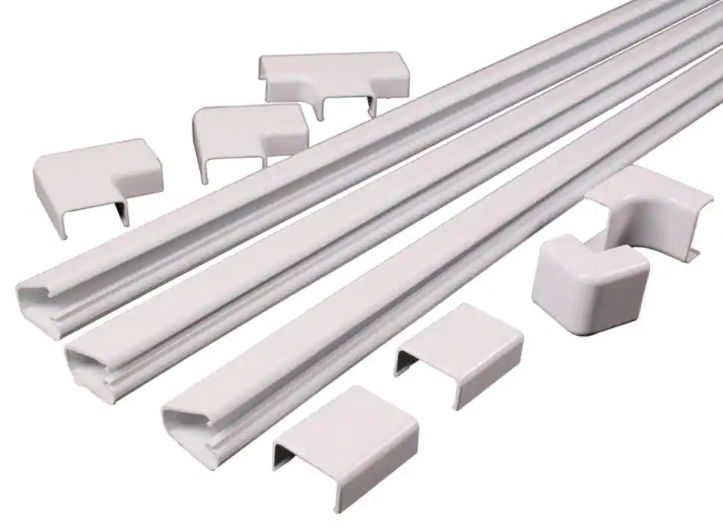
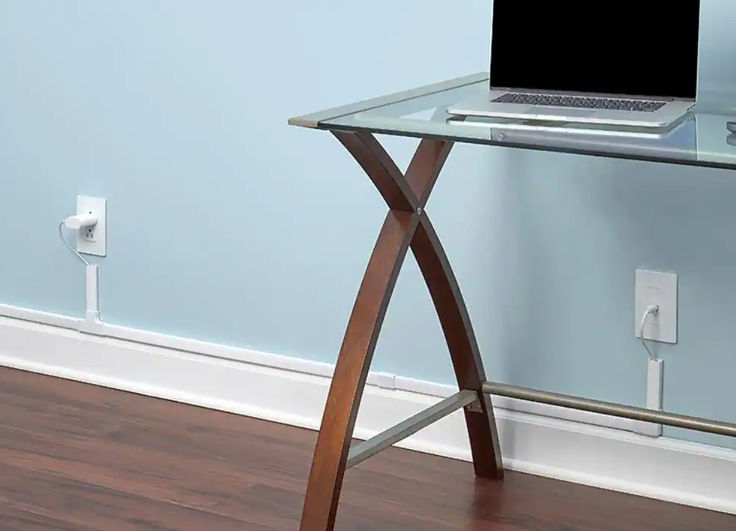
Cord Covers / Cable Raceways
These are useful for hiding cables in a paintable conduit. The cable cover can be made of plastic or metal. Some have an adhesive backing and some you can screw to a wall. They come in various sizes and lengths and include various connectors. These are great for when you can’t hide cables behind or underneath something.
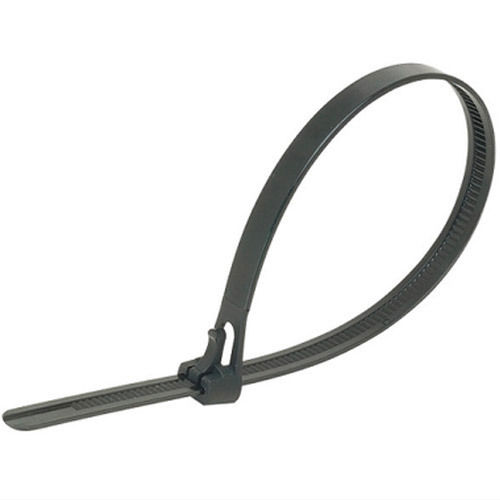
Cable Ties
Cable ties are great for holding multiple cables together. Usually, once you pull to tighten the cable tie, you can’t release it.
If you need to release a cable tie, you can buy the releasable type.
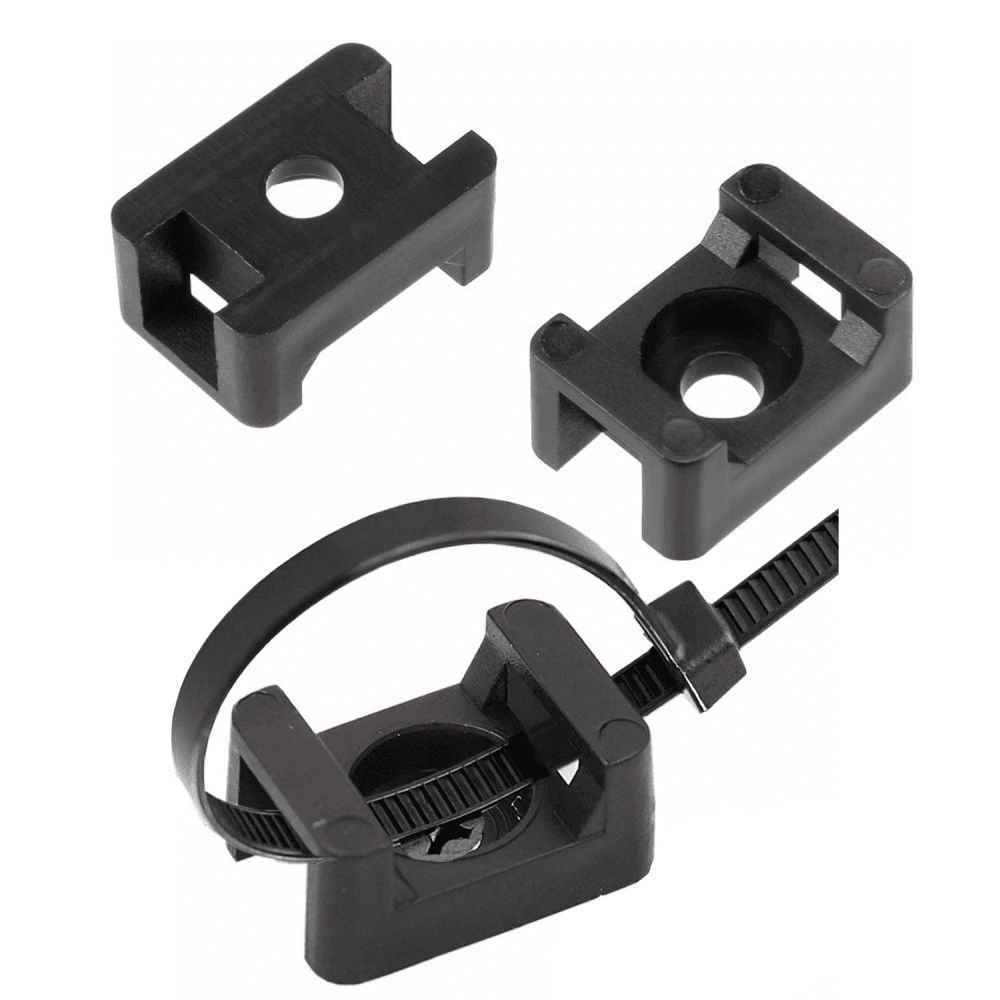
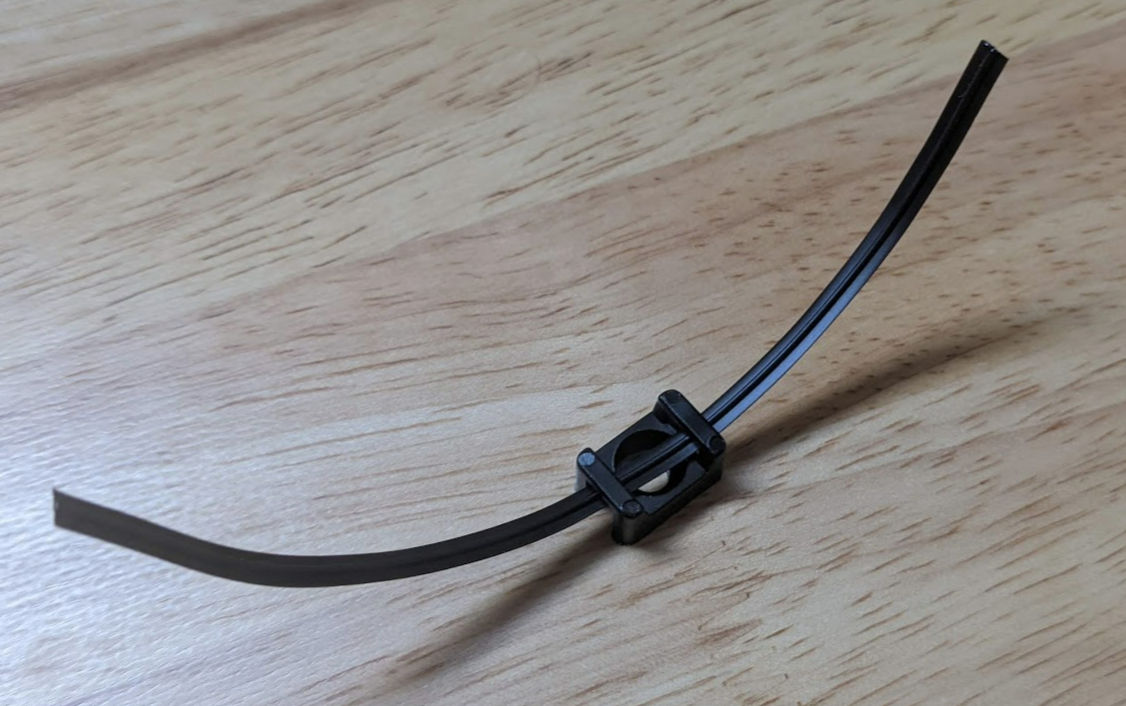
Cable Tie Base Mount
Cable ties will bundle cables together, but oftentimes you’ll need to attach them to a wall or something. You can buy cable ties with a screw hole.
However, you may have a hard time finding these with releasable cable ties. In that case, you can buy the base mounts themselves and insert releasable cable ties in them, or just use a twistie tie.
Cable box
Oftentimes, you’ll have an ugly power strip with a bunch of cables going to it. You can hide this ugliness in a cable box.
Cable Clips
If you need to clip some cables in a removable way, cable clips with adhesive backing can help with that.
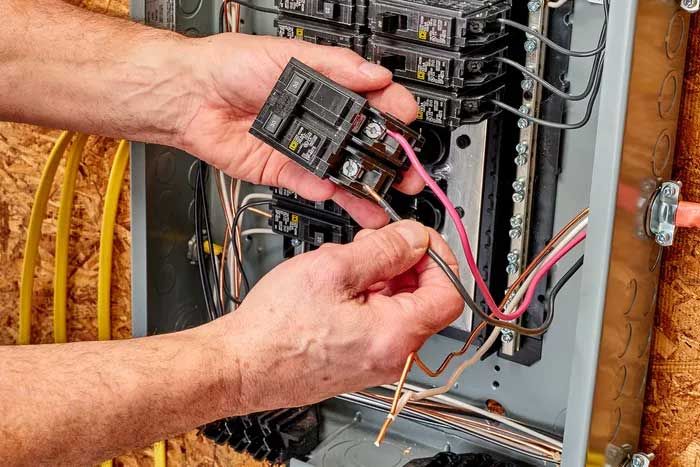
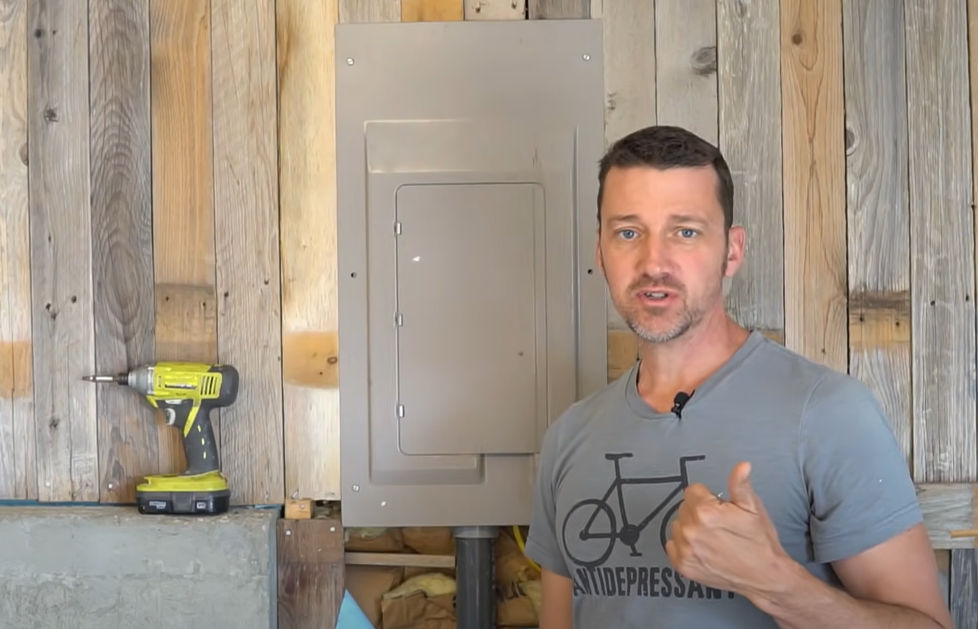
The article is based on this YouTube video. These instructions are similar for adding 120 V circuits as well.
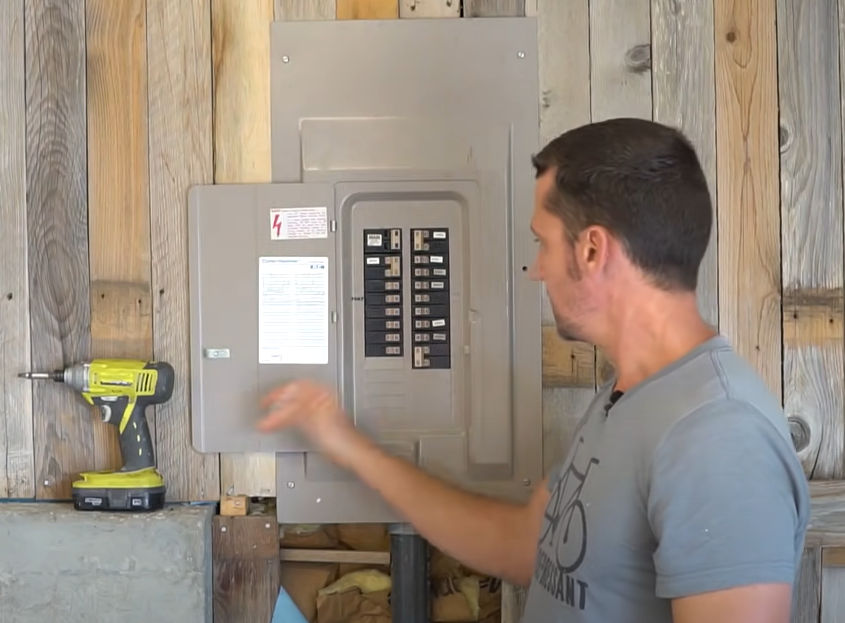
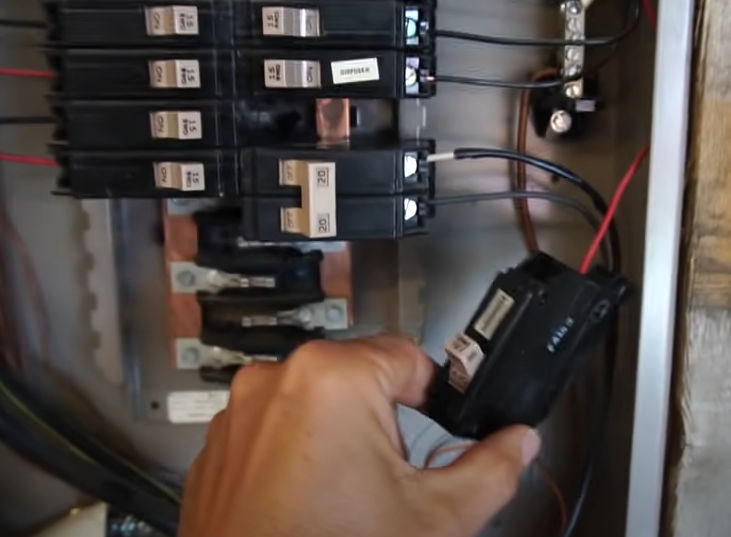
When you open the panel door, verify that you have empty slots to put a one-pole (120 V) or two-pole (240V) circuit breaker. If you don’t, you may need to upgrade your panel to a larger one.
Unscrew the screws and remove the panel cover.
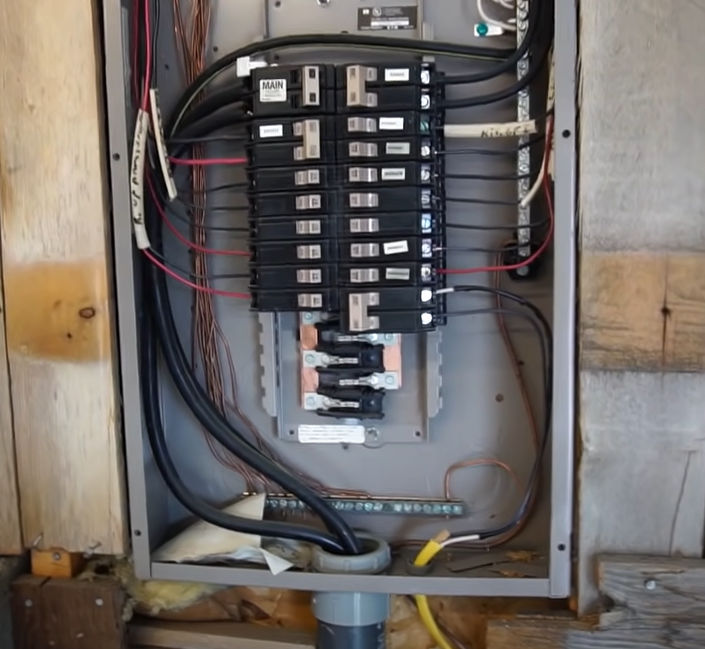
You will usually see two large cables coming into the box.
One black wire = + 120
Other black wire = – 120
Voltage diff between the two = 240
The 2 black wires go into a main breaker.
In this example, the main breaker supports 125 amps, and the main breaker is located in the same panel as the circuit breakers.
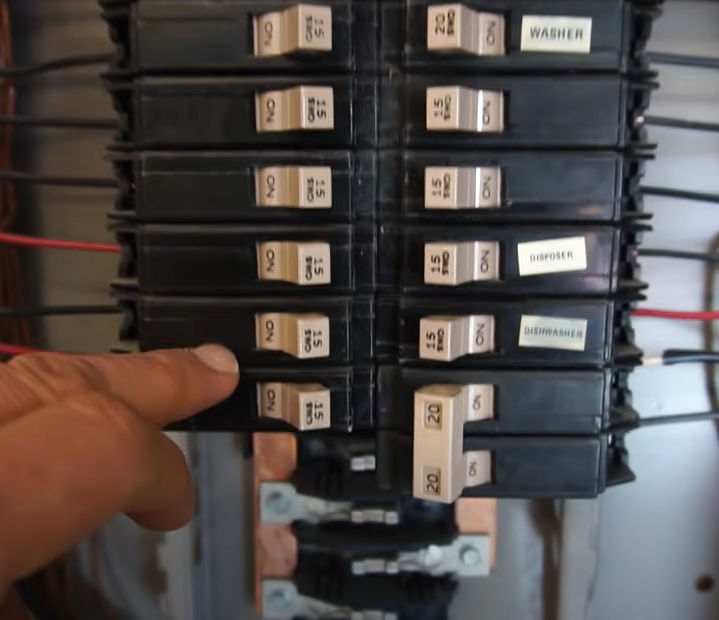
The electricity then goes into the two left and right rails. Usually, you’ll have some 120 V / 15 A circuit breakers for general power, 120 V / 20 A circuit breakers for kitchen and bathroom power, and 240 V / 20 A double circuit breakers for an electric dryer.
Electricity flows from the rail through the circuit breaker through the wires.
Everything in the box is hot until you turn off the main breaker. Once you turn off the main breaker, only the 2 black wires and the terminals they are connected to are still hot.
In my home, the main breaker is located in a separate panel outside whereas my circuit breaker panel is in the garage. This is safer because once you turn off the main breaker outside, there are no hot / live wires in the circuit breaker panel.
The “6/3” identifier means this cable is 6 gauge and has 3 conductor wires and 1 ground wire for a total of 4 wires. The max amperage that this cable supports is 55 amps as indicated in the chart below.
Find the right kind that fits your circuit breaker box. My breaker box brand is Challenger. From the time when Challenger went out of business in the 90s, they were bought by different companies until Eaton/Cutler-Hammer finally got a hold of them. So, in my case, I can buy Eaton BR/C breakers.
The amperage of the circuit breaker must be less than or equal to the max amperage of the cable connected to it to prevent the cable from melting and causing a fire.
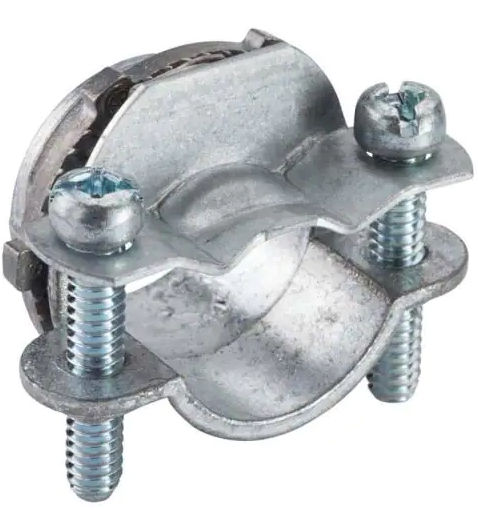
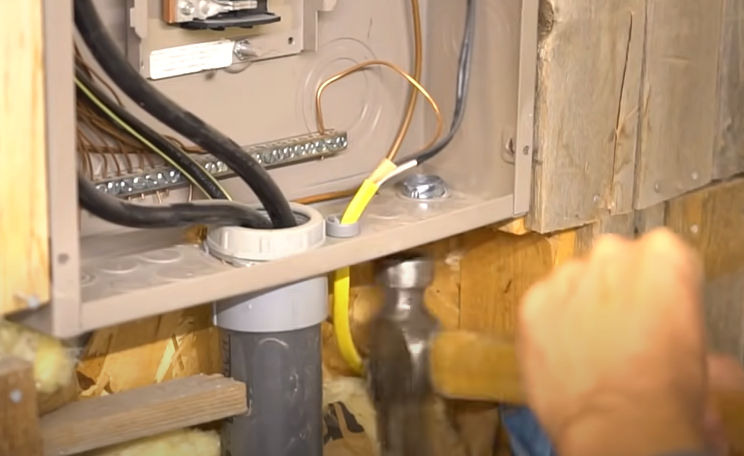
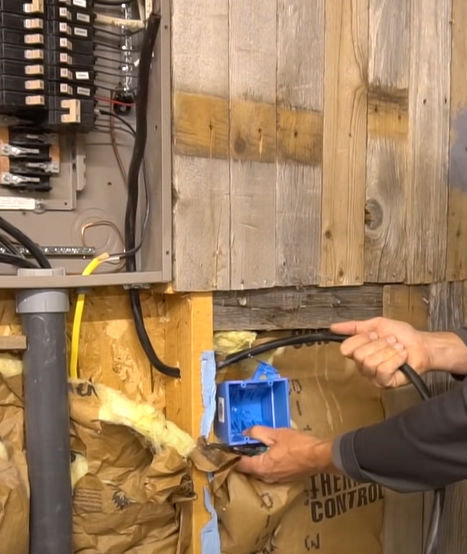
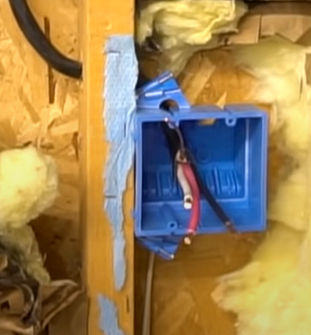
When you knock out a hole, make sure you knock out a 3/4″ center hole in one of the sides, not a smaller 1/2″ hole. If you accidentally knock out a 1/2″ hole, you can seal it with one of these:
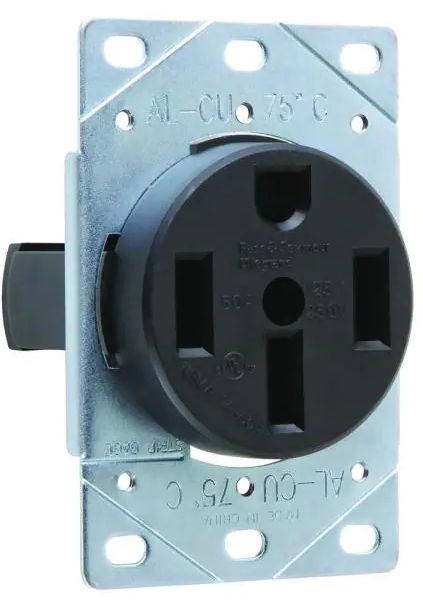
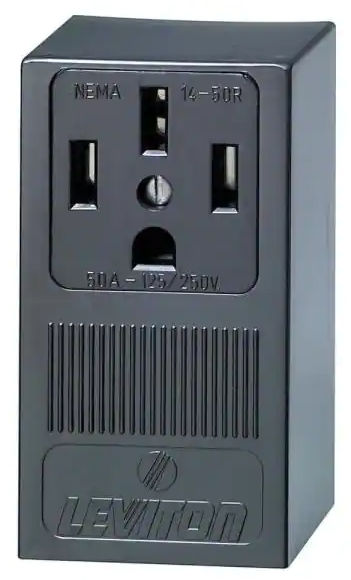
Note: The cable is very thick and difficult to bend. Using the Leviton outlet is MUCH easier than making your own outlet because with the Leviton, you don’t need to bend the cable at all.
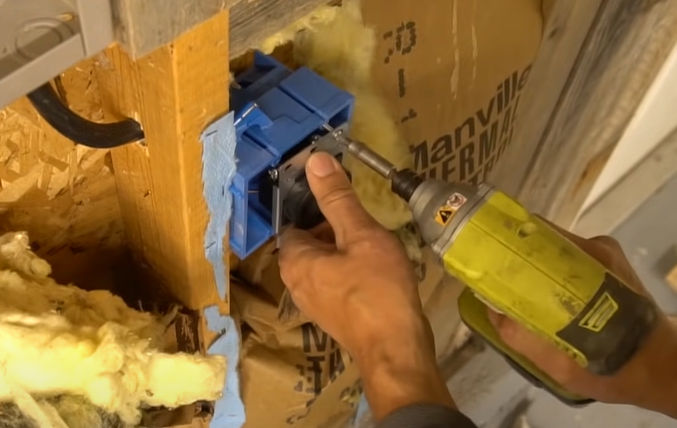
Run the cable through the stud and into the breaker box.
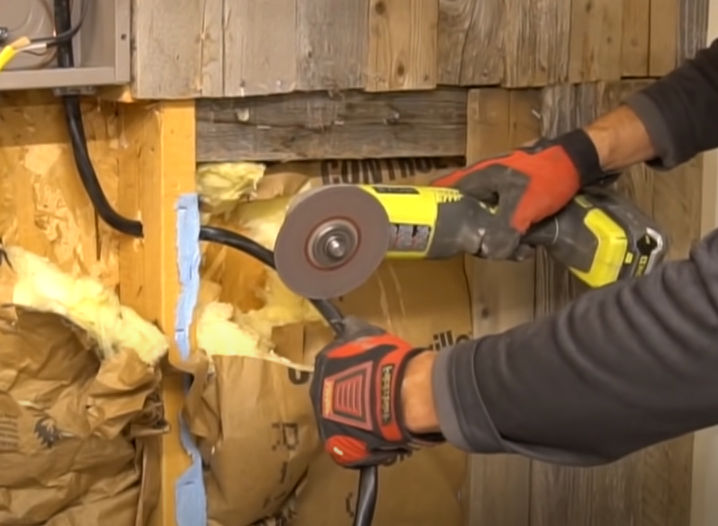
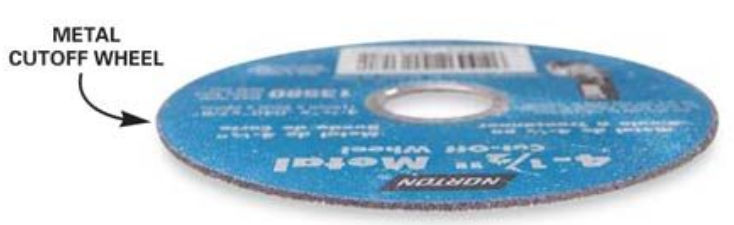
The cable can be hard to cut. If you can’t cut it with scissors or snips, you can use an angle grinder.
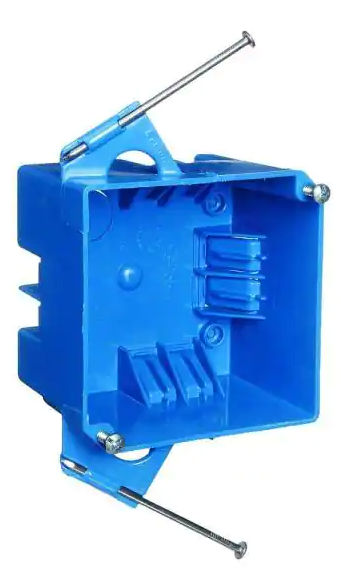
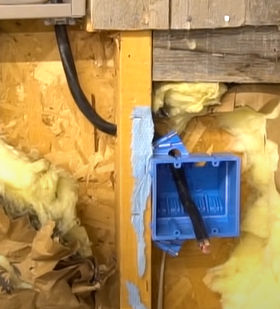
For ease of work, feed the thick wire into the electrical box before attaching box to stud.
Strip the wires in the cable. First, slit the exterior jacket / sheathing lengthwise using a sharp utility knife. Then, use a wire stripper to cut just the sheathing layer using the flat blade part. You can’t use the various round blades because the cable is too thick.
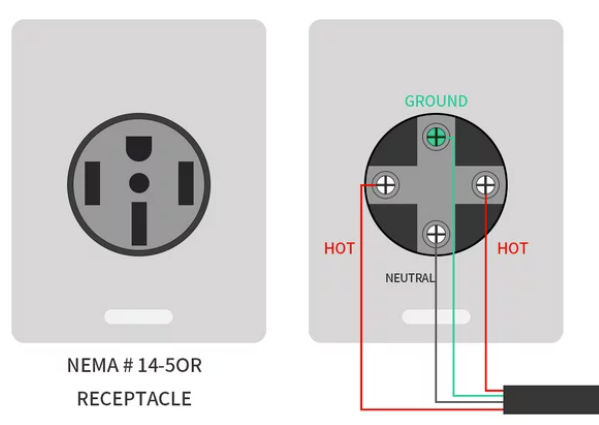
Attach the wires to the outlet.
The red and black (hot) wires are interchangeable and connect to the gold screw terminals.
The white (neutral) wire goes to the silver screw terminal.
The bare copper (ground) wire goes to the white screw terminal.
Screw the outlet to the box.
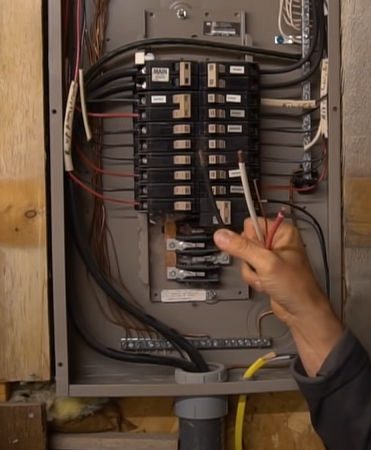
Strip the wires on the other end of the cable. Make sure the main circuit breaker is off.
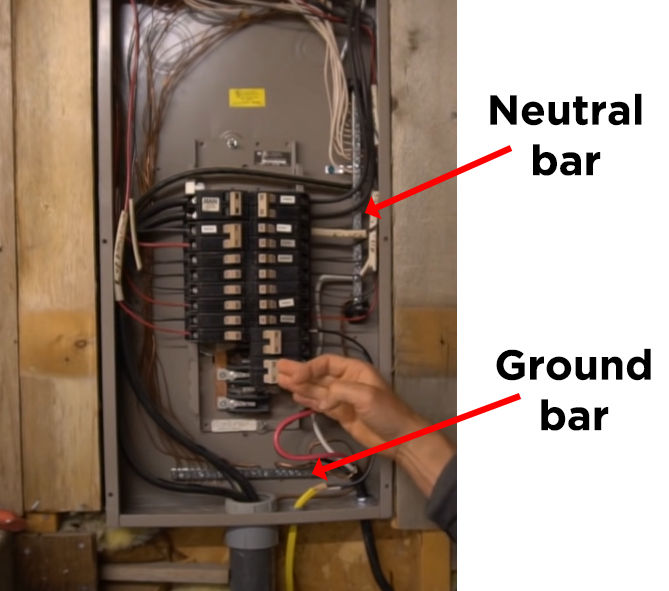
Connect the white (neutral) wire to the neutral bar.
Connect the bare copper (ground) wire to the ground bar.
Connect the two red and black (hot) wires to the 240V circuit breaker.
Insert the circuit breaker.
Turn on the main breaker and then turn on the new 240 V circuit breaker.
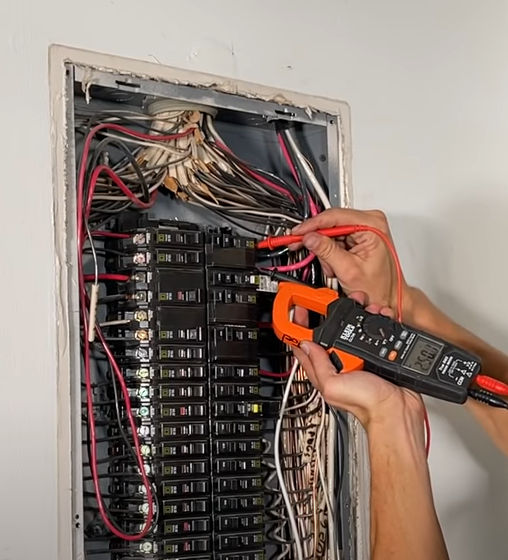
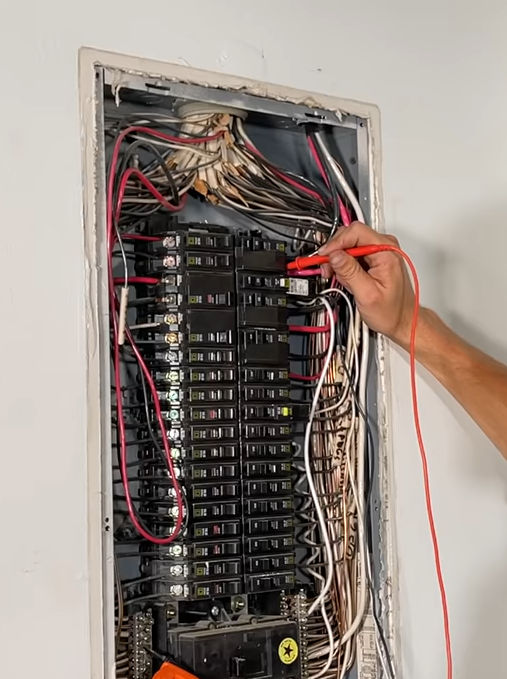
Test voltage
Hot (red) to hot (black) should be about 240 V.
Hot (red) to neutral should be about 120 V.
Hot (black) to neutral should also be about 120 V.
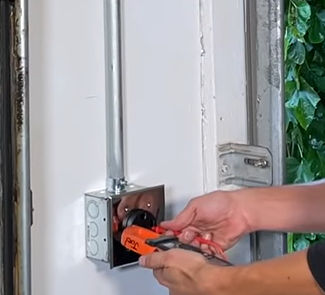
Do the same voltage test at the receptacle.
Here’s how mine came out.
It would have been more expensive and a hassle to put the outlet by the garage door, so I just put it next to the circuit breaker panel. I’ll just use an extension cord to reach the garage door.
You can buy this EV charger cable on Amazon for $330.
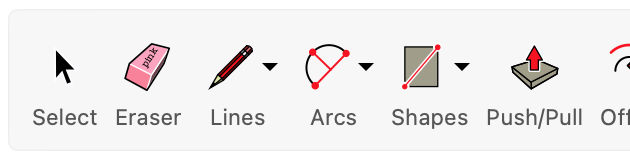
When drawing rectangles, you can specify length & width by separating the measurements with a comma. For example: to draw a two foot by four foot rectangle, you can enter 2', 4' into the measurement box. The order of the measurements matches the order of the axes (R, G, B). For example: Red, then Green; Red, then Blue; or Green, then Blue.
When items are pre-selected, you can click anywhere in the model to begin moving them, and then click anywhere to set them down. This is an effective way to move things precisely and/or align things to other things.
Click the red crosshairs that appear on the bounding box of an object to rotate that object.
After moving a copy, you can type a number followed by the X key and then press Enter to create an array of copies.
Rotate, stretch, distort, or copy items or objects along a rounded path.
Tool Operation
(Optional) Preselect the items or objects you want to rotate.
Click on an item or object to both make a selection and set the center point of rotation.
Move cursor to indicate start point of rotation.
Click to set starting point of rotation.
Move cursor to indicate end point of rotation.
Click to complete rotation, or enter angle in degrees.
Modifier Keys
Ctrl = Toggle rotate a copy.
Before first click, hold Shift to lock protractor inference.
Before first click, use arrow keys to toggle the protractor inference lock direction (→ = Red, ← = Green, ↑ = Blue, ↓ = Parallel).
After first click, use arrow keys to toggle rotation inference lock direction (→ = Red, ← = Green, ↑ = Blue, ↓ = Parallel/Perpendicular).
Tips
Esc = Cancel operation.
During Step #2 of the tool operation steps above, you can click-drag the protractor along an edge or axis to set an axis of rotation.
After rotating a copy, you can type a number followed by the letter X and then press Enter to create a rotated array of copies.
When inputting rotation values into the Measurements box, you can enter either an angle of rotation, in degrees (for example 45 Enter),or a slope expressed as a rise:run architectural slope notation (for example 4:12 Enter).
(Optional) Preselect the items or objects you want to scale.
Click on a face or object.
Click on a Scale grip.
Move cursor to resize or stretch item or object.
Click to finish scaling item or object.
Modifier Keys
Ctrl = Toggle scale about center.
Shift = Toggle uniform scale.
Tips
Esc = Cancel operation.
Click a corner grip for 3-way scale. Default = Uniform. Pressing Shift = Non-uniform.
Click a midline grip for 2-way scale. Default = Non-uniform. Pressing Shift = Uniform.
Click a center grip for 1-way scale. Default = Non-uniform. Pressing Shift = Uniform.
When scaling an item or object you have the option to enter either a scale factor (for example 2.5 Enter will make the things you’re scaling 250%, or two and a half times bigger), or you can simply input the size that you want the thing you’re scaling to be (for example, if scaling up along the blue axis direction, 6' Enter will make the selection six feet tall).
It’s possible to activate multiple section planes at the same time, as long as the section planes are in different contexts. For example, you can activate one section plane through the model, and then activate another section plane through a group or component object and have both planes active at the same time.
Measure angles and create angled guide line entities.
Tool Operation
Place protractor’s center at vertex of angle.
Click to set vertex. (Alternatively: click and drag first point to set rotation plane.)
Move cursor in circle until touching start of angle.
Click to set start of angle.
Move cursor in circle until touching end of angle.
Click to measure angle.
Modifier Keys
Ctrl = Toggle create guide lines.
Before first click, hold Shift to lock protractor inference.
Before first click, use arrow keys to toggle the protractor inference lock direction (→ = Red, ← = Green, ↑ = Blue, ↓ = Parallel).
After first click, use arrow keys to toggle rotation inference lock direction (→ = Red, ← = Green, ↑ = Blue, ↓ = Parallel/Perpendicular).
Tips
Esc = Cancel operation.
When inputting rotation values into the Measurements box, you can enter either an angle of rotation, in degrees (for example 45 Enter ), or a slope expressed as a rise:run architectural slope notation (for example 4:12 Enter).
Click anywhere in the model to place the camera. The camera will be positioned above the point where you click, at the eye height distance specified in the measurements box.
(Optional) Click and drag from one point in the model to another point in the model to create a target camera. The point you drag from will be the exact location where the camera will be positioned, the point you drag to will establish the camera target.
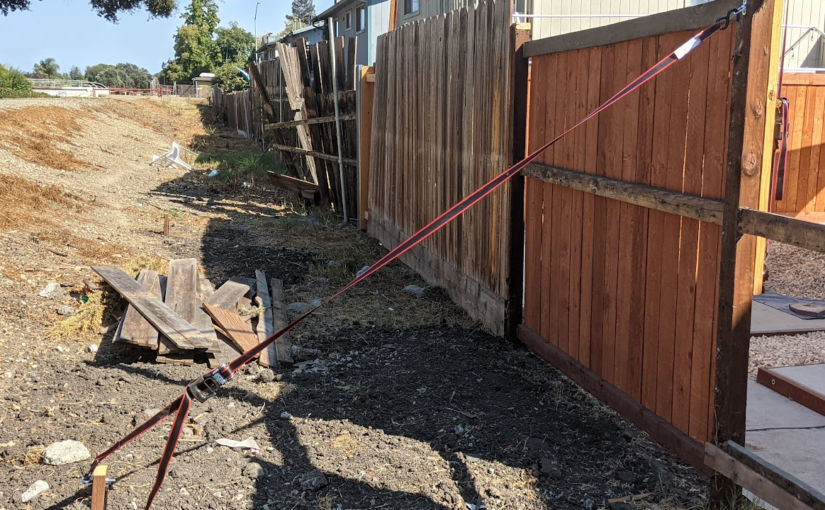
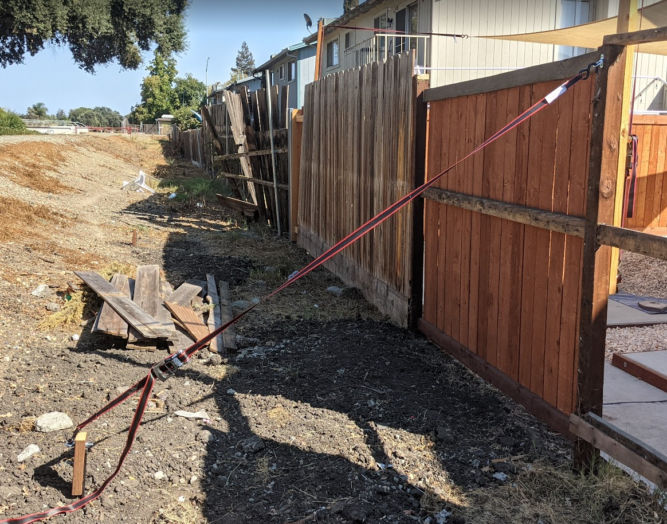
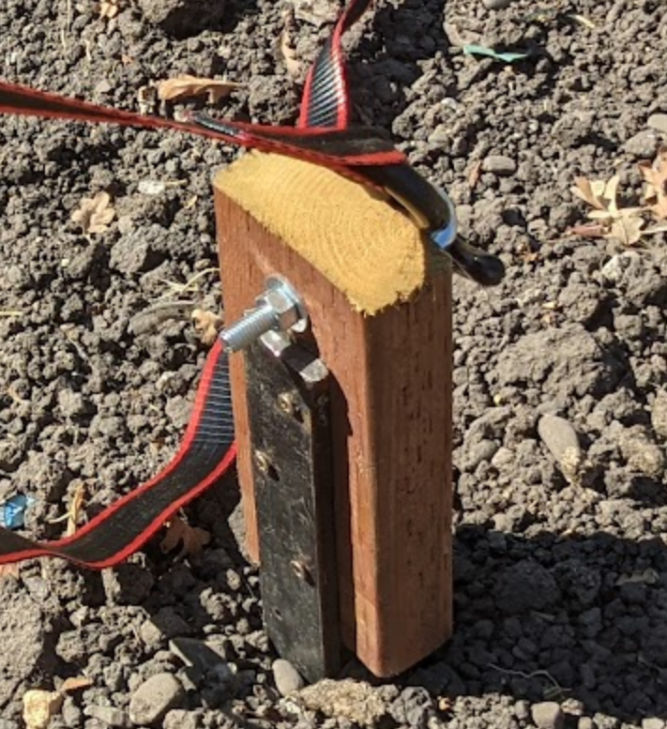
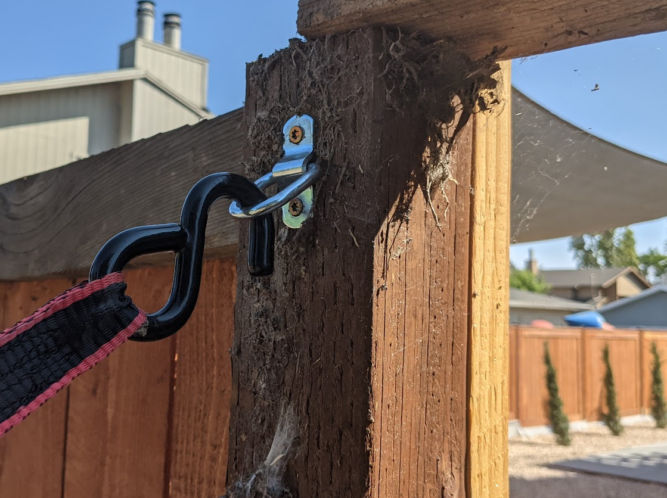
One of my fence posts on a rental property was leaning over due to the previous owner not securing it correctly in the ground. To make matters worse, I use the fence post to secure a ratchet strap attached to one of 4 corners of a sun shade. Since I didn’t feel like redoing the fence post, and since the back of my property is empty, government land beside a slough, I decided to just pull the fence post back into position using a ratchet strap. It was quick and easy and worked perfectly.
If you don’t feel like redoing a leaning fence post or need a temporary fix, here’s what you can do.