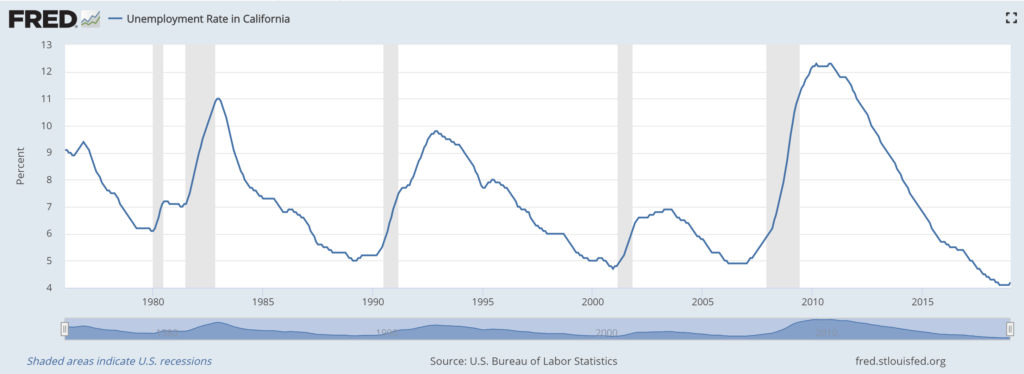
When an economic recession occurs, one thing that happens for sure is the unemployment rate goes up. You can see a graph of the California unemployment rate since 1967 on the St. Louis Federal Reserve Bank’s website. Below is a copy of that graph until 2019-01-01.
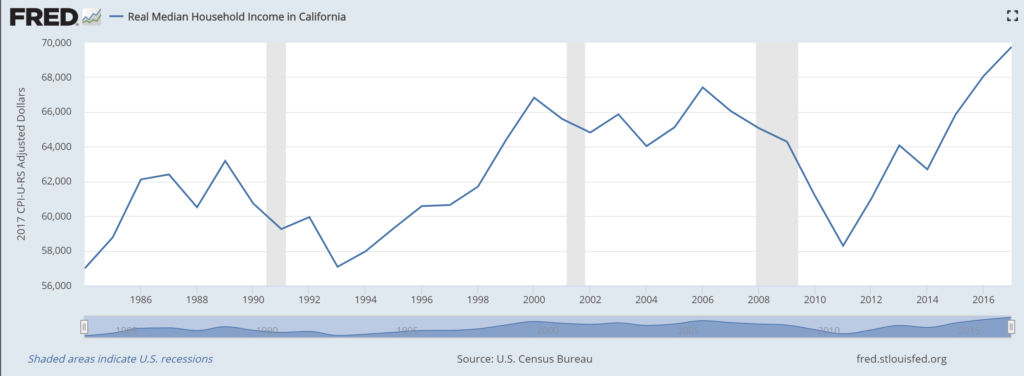
The shaded areas indicate a recession. As you can see, the unemployment rate has jumped up during each recession. Logically, as unemployment goes up, incomes go down since fewer people are working. Following is the graph of real median household income in California over the years.
So how do you know when a recession will occur. It turns out that the best indicator of a recession is when the Treasury Yield Curve inverts.
Buying a house can be stressful, especially in a hot market. If you wait too long to put in an offer, it may be too late as the seller may have already accepted a existing offer in which case the buyer would be “in contract” (pending sale) in which case the seller can’t accept other offers while in contract. Therefore, getting “in contract” quickly blocks other buyers.
Property Appraisal
Of course, the more you offer to buy a house, the more interested the seller would be to accept your bid. However, you don’t want to offer too much as you could be overpaying. Let’s say you find a duplex on sale for $360,000. You then do some research to determine if $360K is the market value.
Redfin Estimate According to Redfin, you find that the house is estimated at $360K. However, Redfin shows you how they came up with that estimate using comparable properties in the area. After looking at the comparables, you find that Redfin’s automated estimation algorithm is using single family homes as comparables instead of duplexes. Obviously, single family homes are not good comparables if the subject property is a duplex.
1 cup full-fat, canned coconut milk like this one (high in calories)
1 cup carton coconut milk like this one (low in calories)
1.5 tbsp monk fruit sweetener
INSTRUCTIONS
Combine all ingredients in a blender
Blend until smooth
Enjoy
Note: Some coconut milks have much higher fat content and, therefore, calories. The results are much creamier pina coladas because they are not diluted with water.
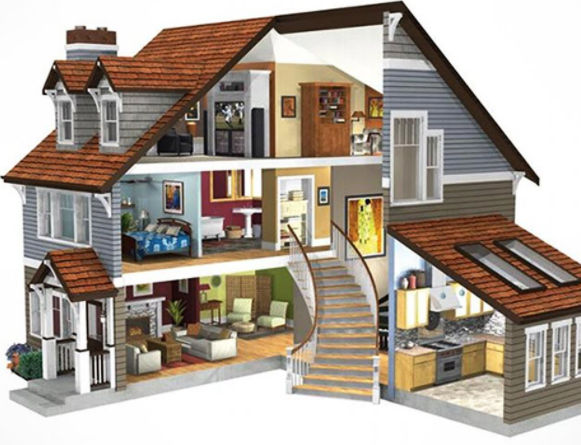
If you need to only create 2d house floor plans, I personally have found Lucidchart to be easy to learn and intuitive to use.
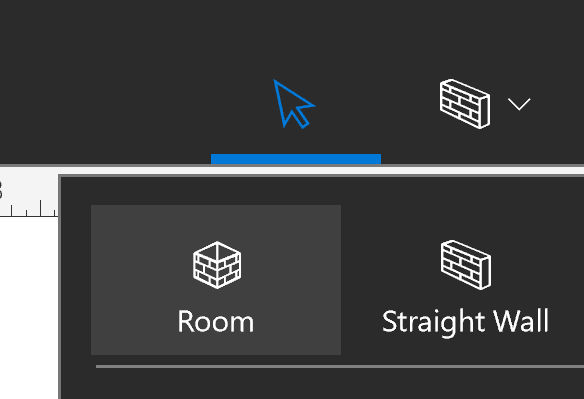
If you need to create 3d house floor plans, I have found Live Home 3D to offer the best features for the price. At $10 (on sale), you can easily create 2d and 3d home plans. You download and install the program which allows for faster 3d rendering. My typical workflow to design a house is as follows:
1. Create a room by clicking the Room button
2. Draw a room (2d) by dragging the shape of a rectangle
I’ve been playing around with taking videos and video editing. My main issues with taking videos are
poor quality in low light conditions (e.g. indoors or night time)
too much shaking / lack of image stabilization
huge video files
missing scenes / cut off subjects
difficult to bring or to use suddenly while traveling
Cameras
Following are some action cameras worth considering.
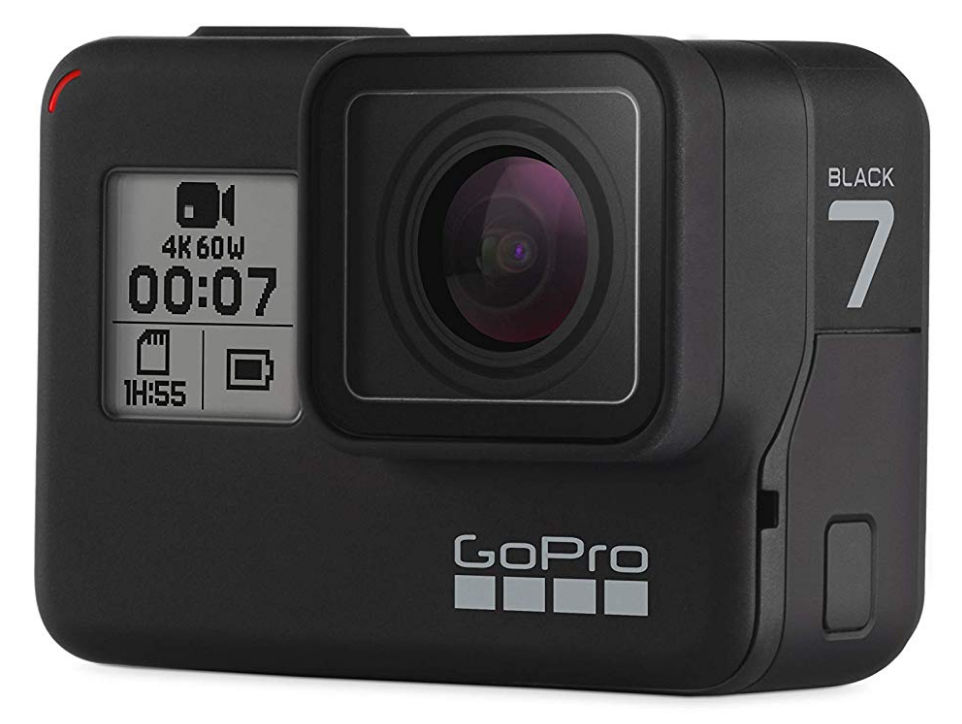
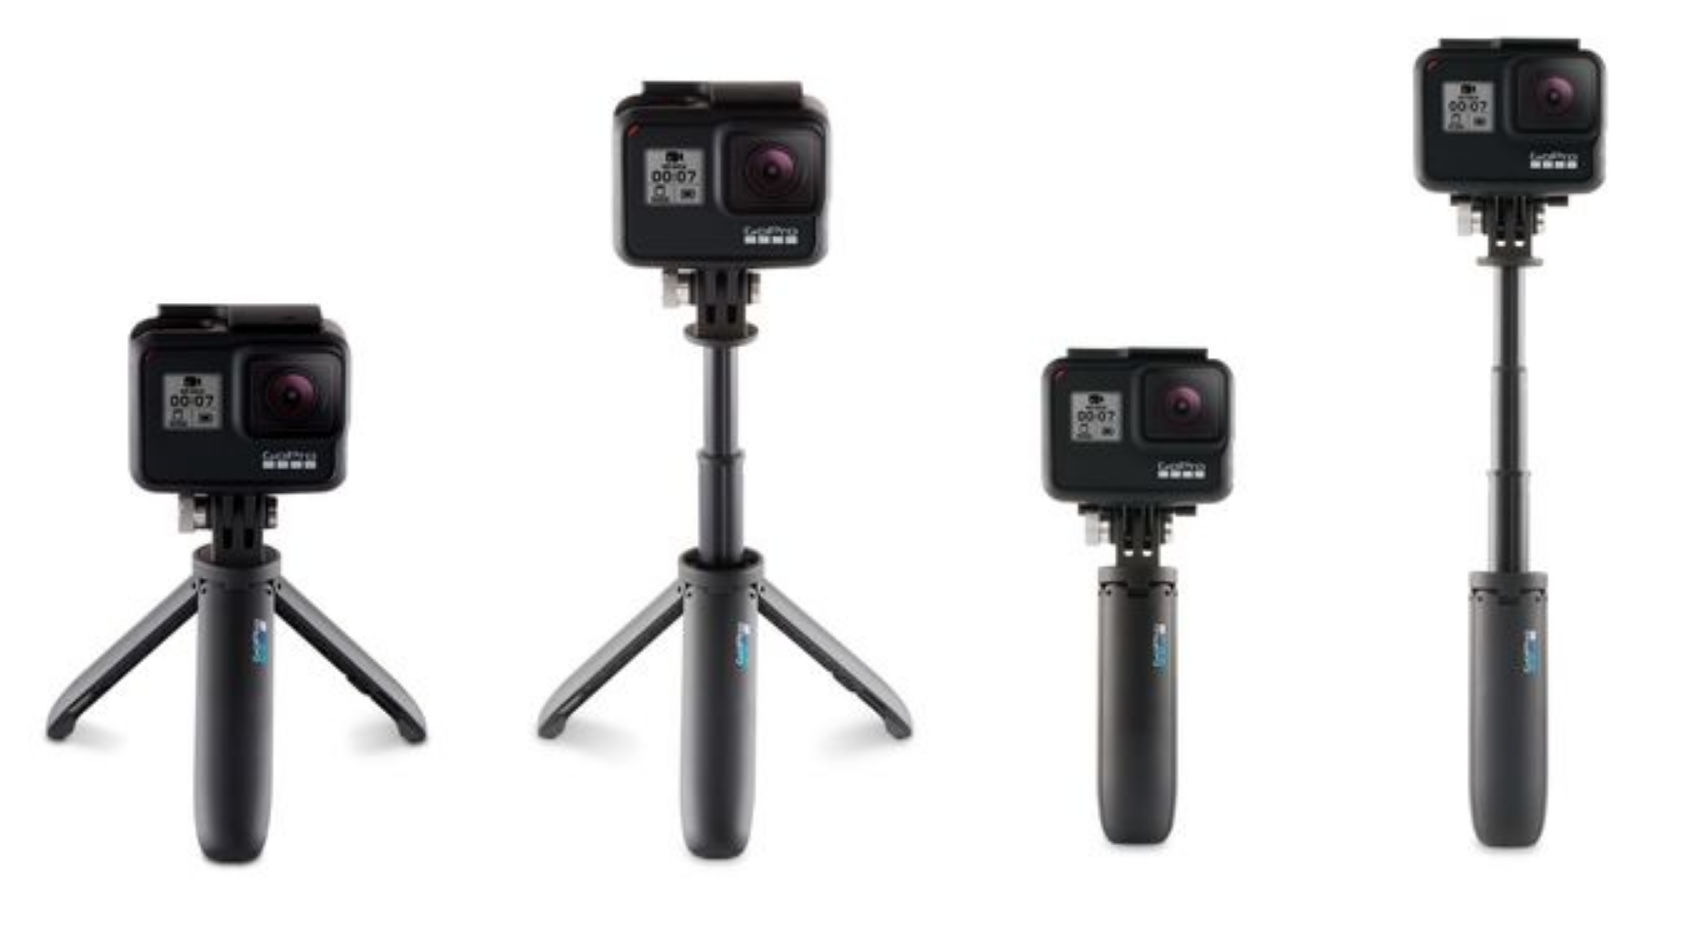
GoPro Hero Black 7 ($400)
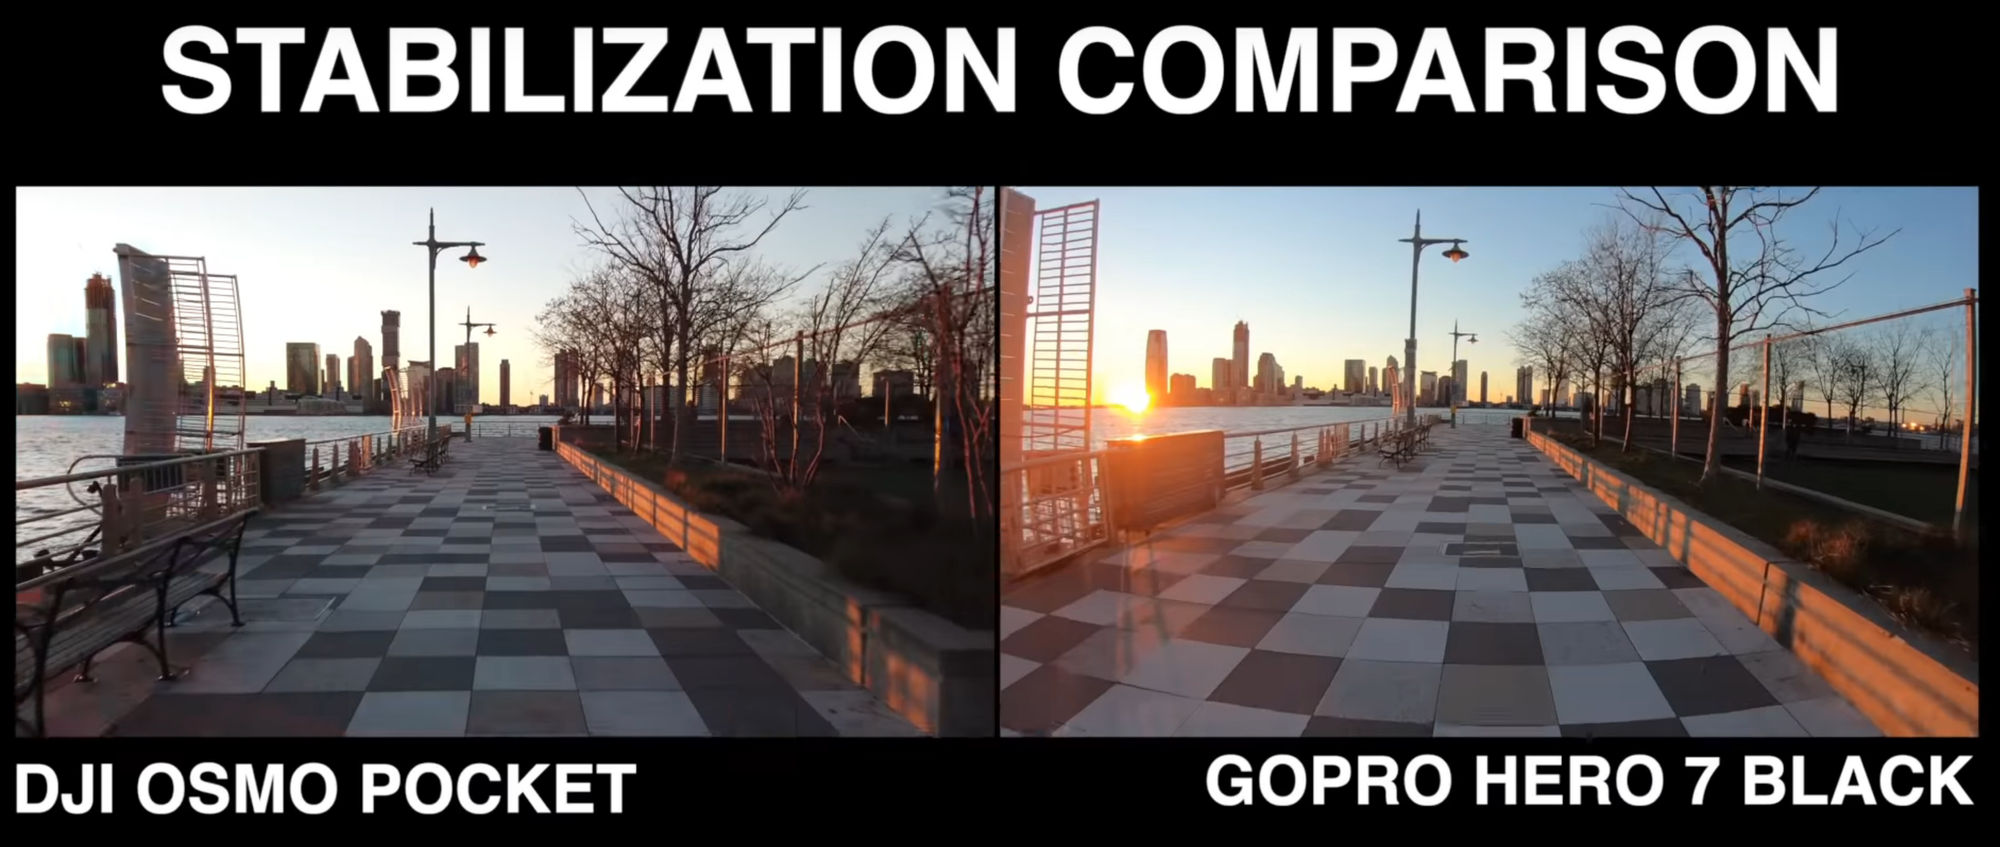
What I primarily like about this camera is the gimbal-like”Hypersmooth” video stabilization. It doesn’t use an actual gimbal but it does an impressive job performing as if using a gimbal. However, it’s not as good as using an actual gimbal. The primary downside is the huge price tag at $400.
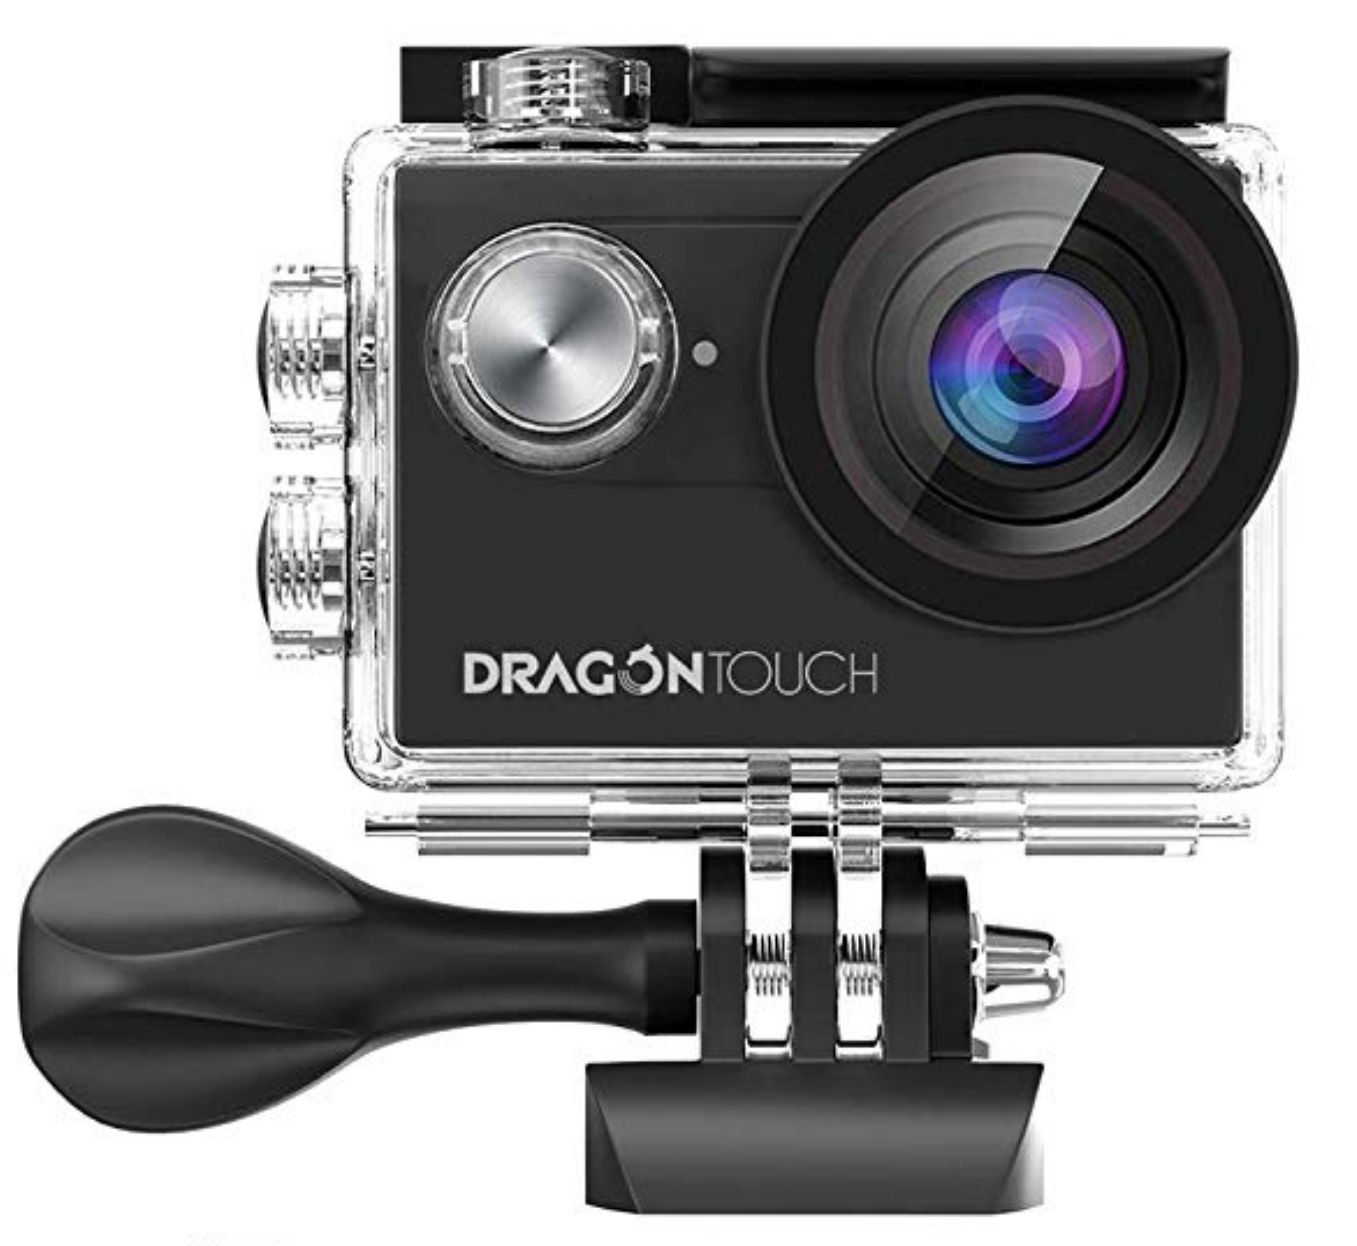
This camera costs only $50 and comes with basic EIS (electronic image stabilization). It’s still not as good as GoPro’s HyperSmooth stabilization but it’s significantly cheaper.
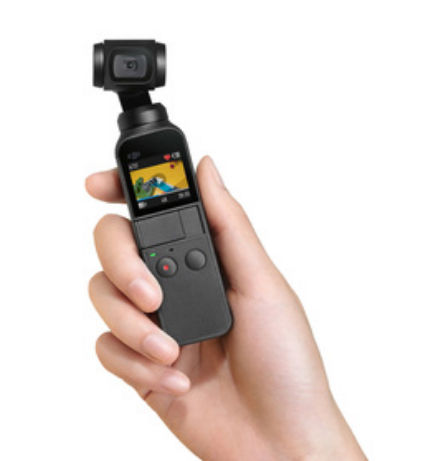
DJI Osmo Pocket ($350)
The DJI Osmo Pocket is a tiny camera with mini holder than offers true gimbal 3-axis stabilization.
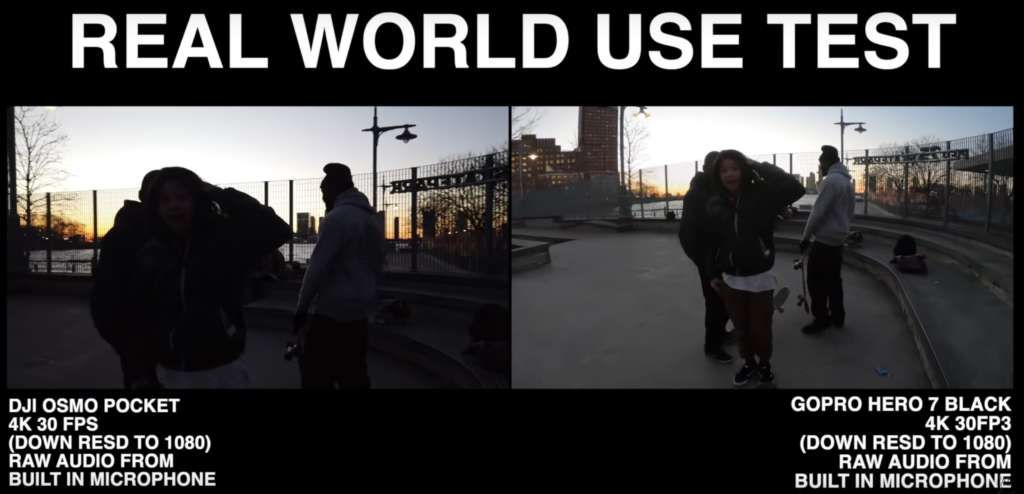
When you compare GoPro 7’s HyperSmooth image stabilization to DJI Osmo Pocket gimbal stabilization, the latter is better, as expected. If you watch this video at time 5:08, you’ll see that the horizon stays level in the Osmo Pocket video but it sways a bit in the GoPro 7 video as if you are on a boat. For the GoPro, you’d have to get a holder with a gimble to achieve the same level of stabilization.
Low Light Performance
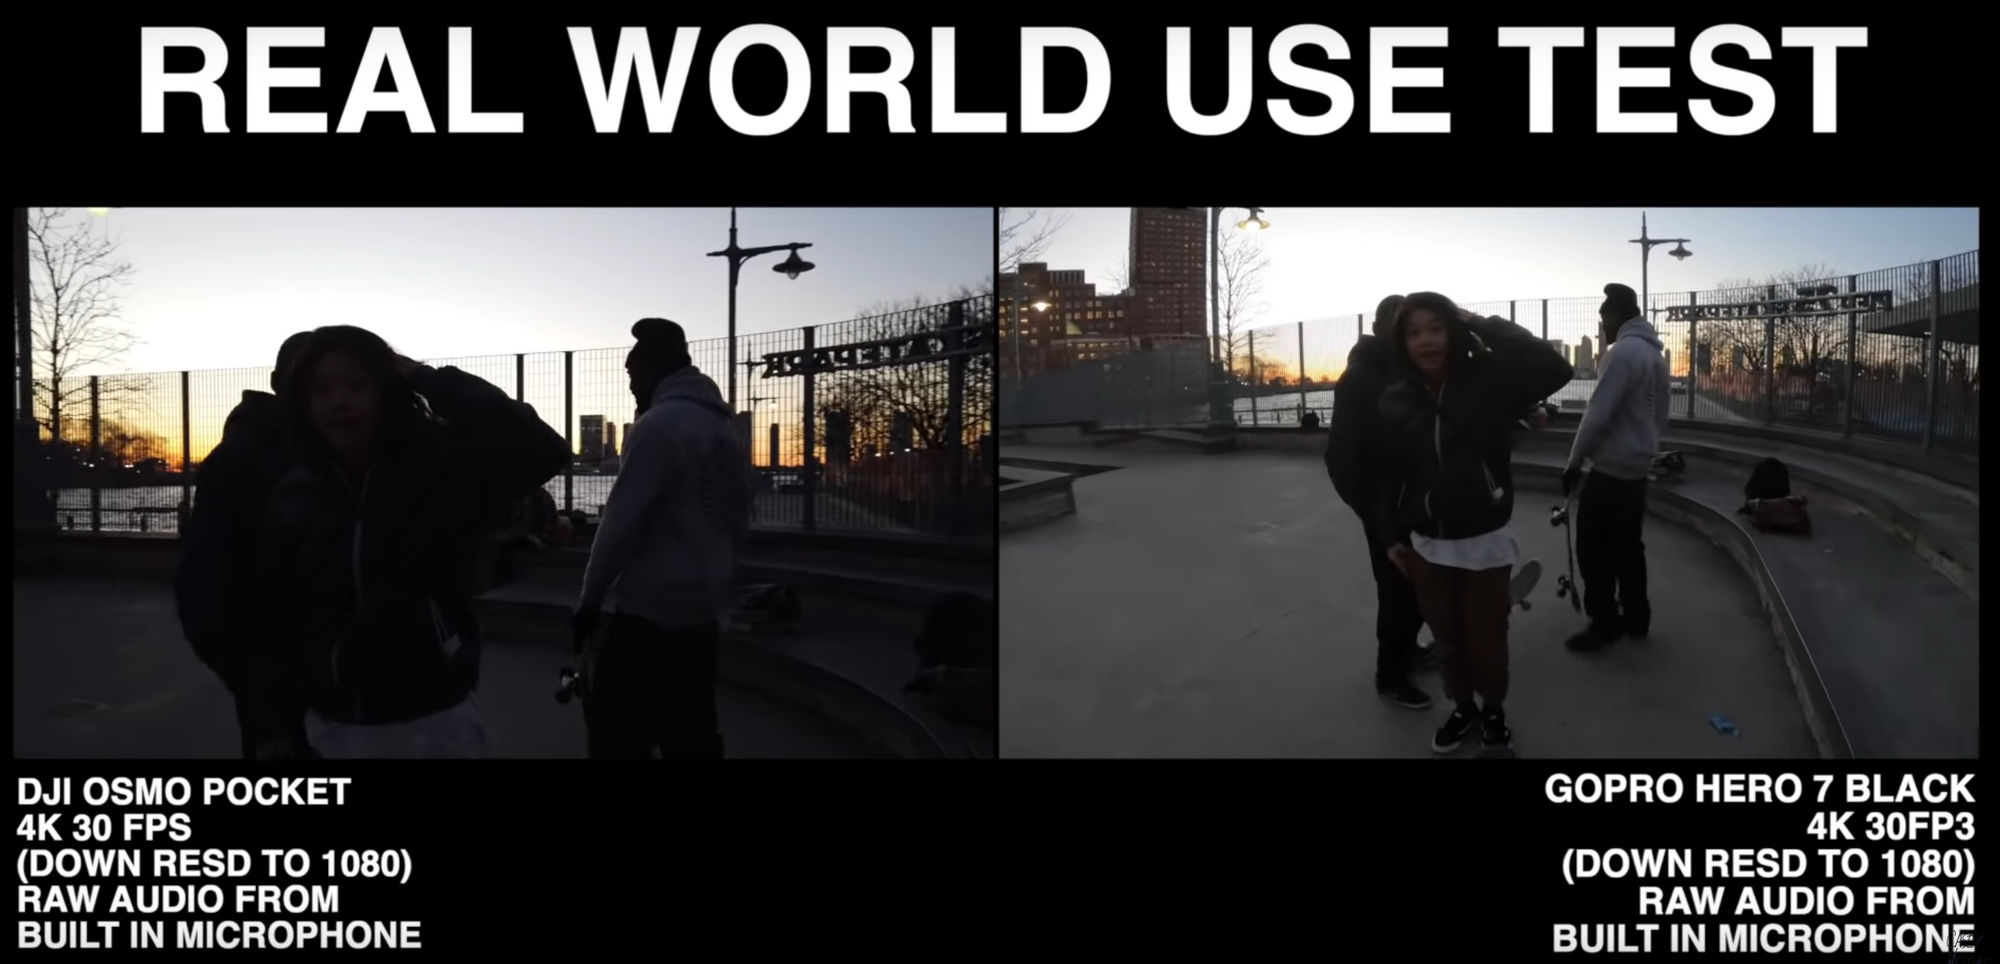
The GoPro Hero 7 seems to have better low-light quality.
Field of View (FOV)
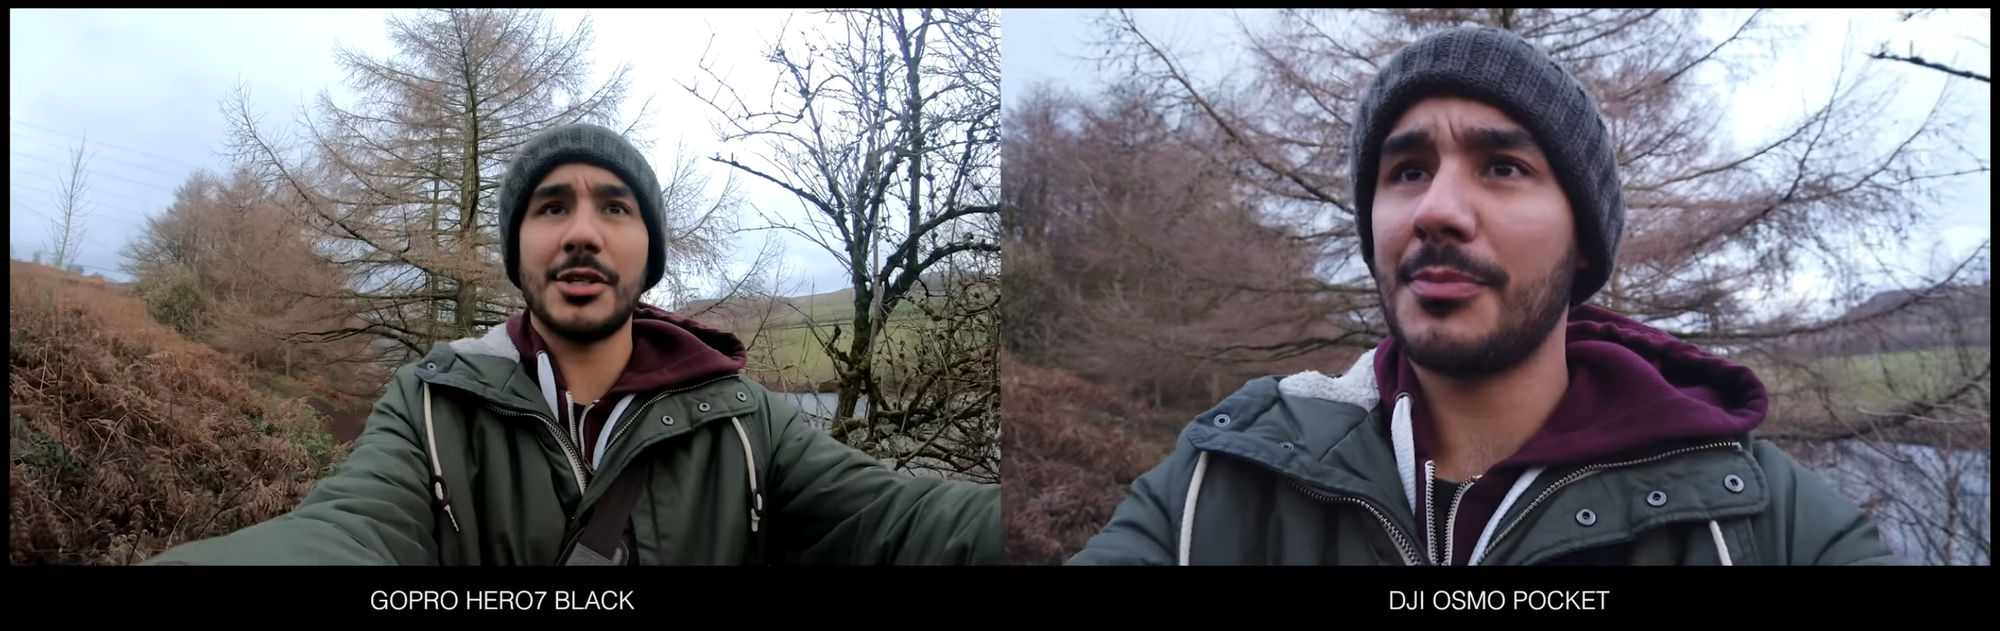
With a wider field of view (FOV), you’ll obviously be able to see more. The GoPro Hero 7 appears to support a wider field of view compared to the Osmo Pocket.
Replaceable Batteries
With the GoPro, you can replace the batteries. With the Osmo Pocket, you have to charge the embedded battery.
Conclusion
Infrequent use
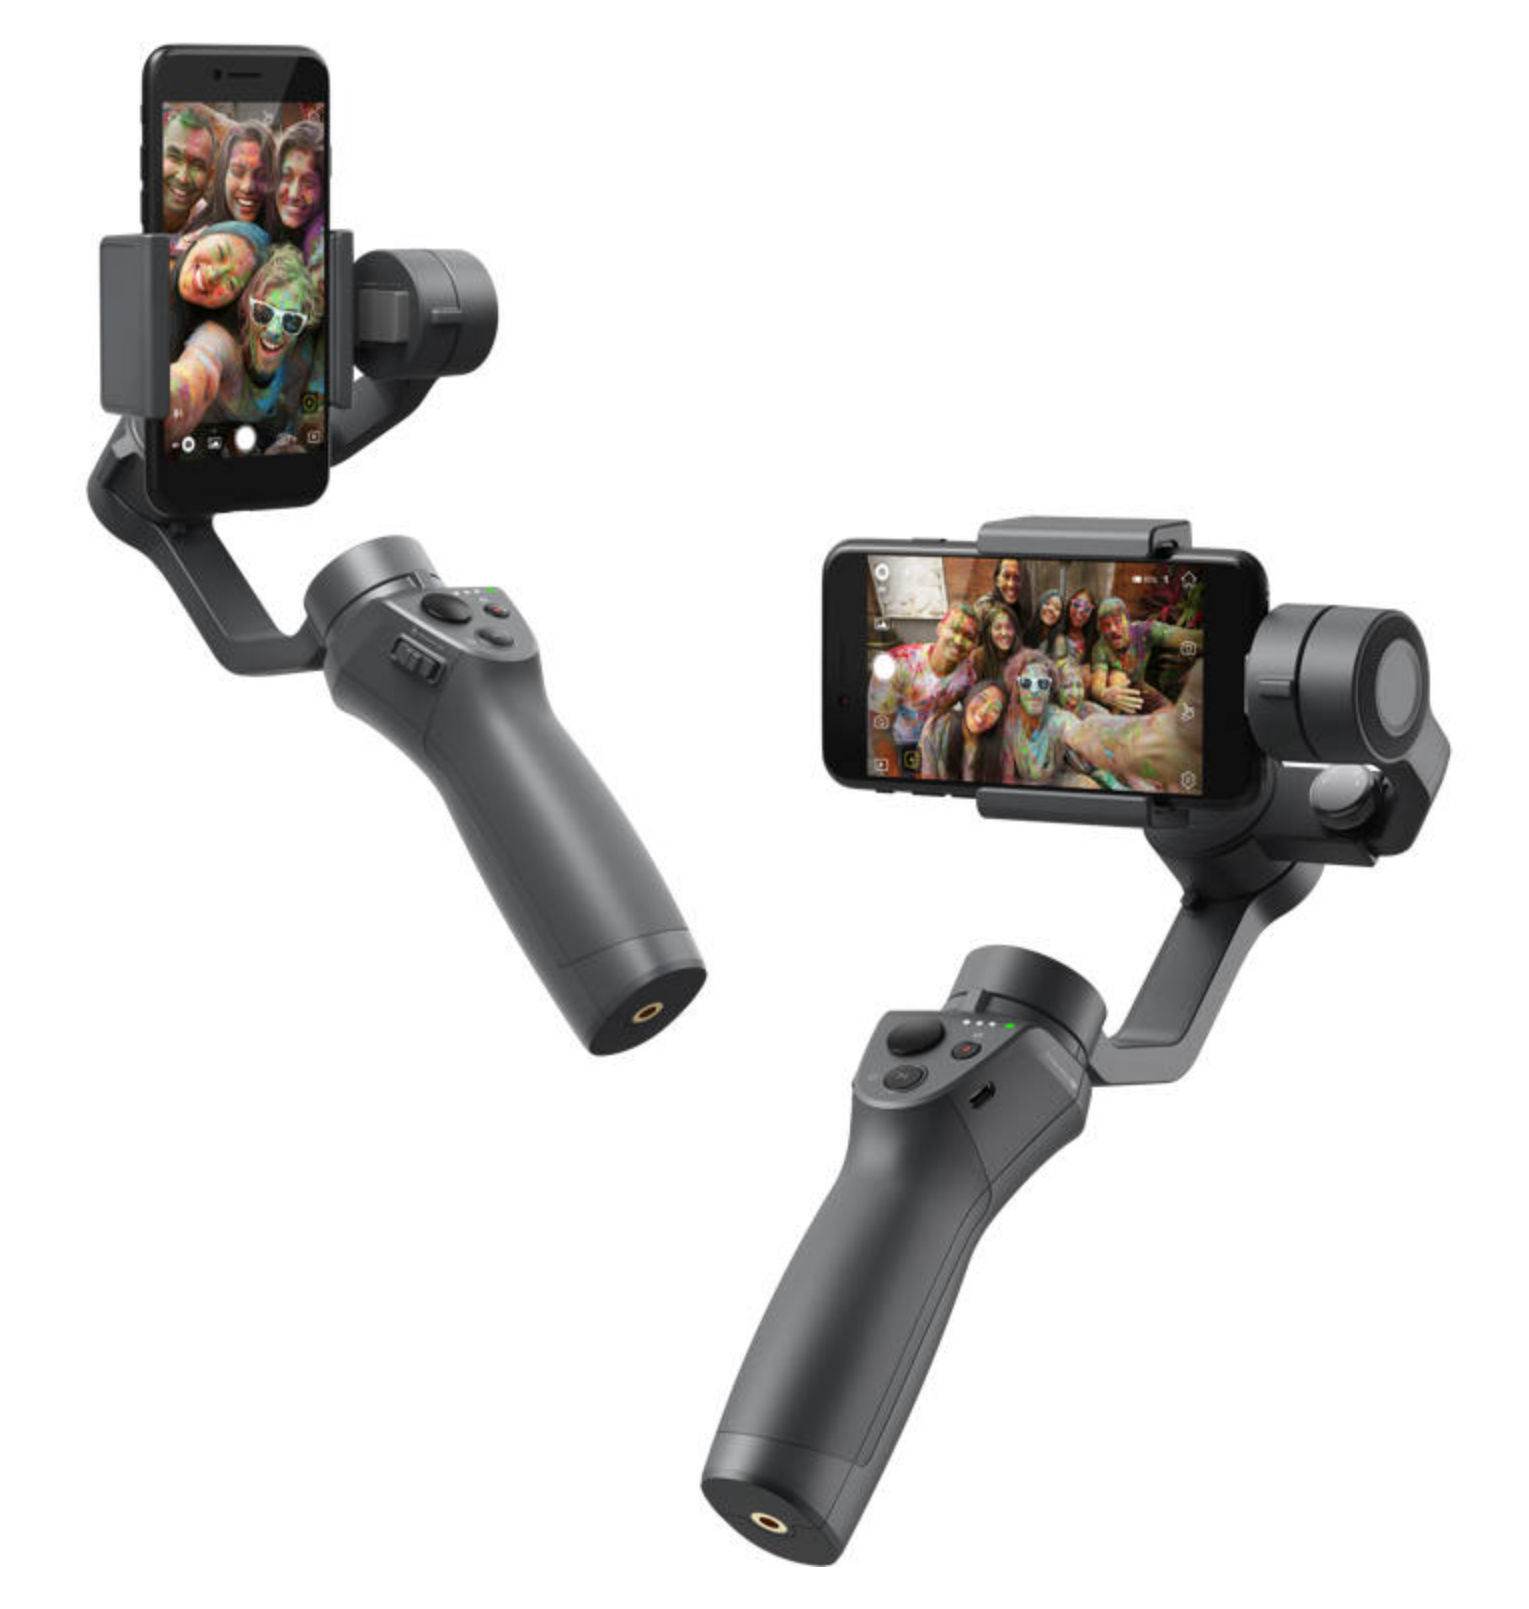
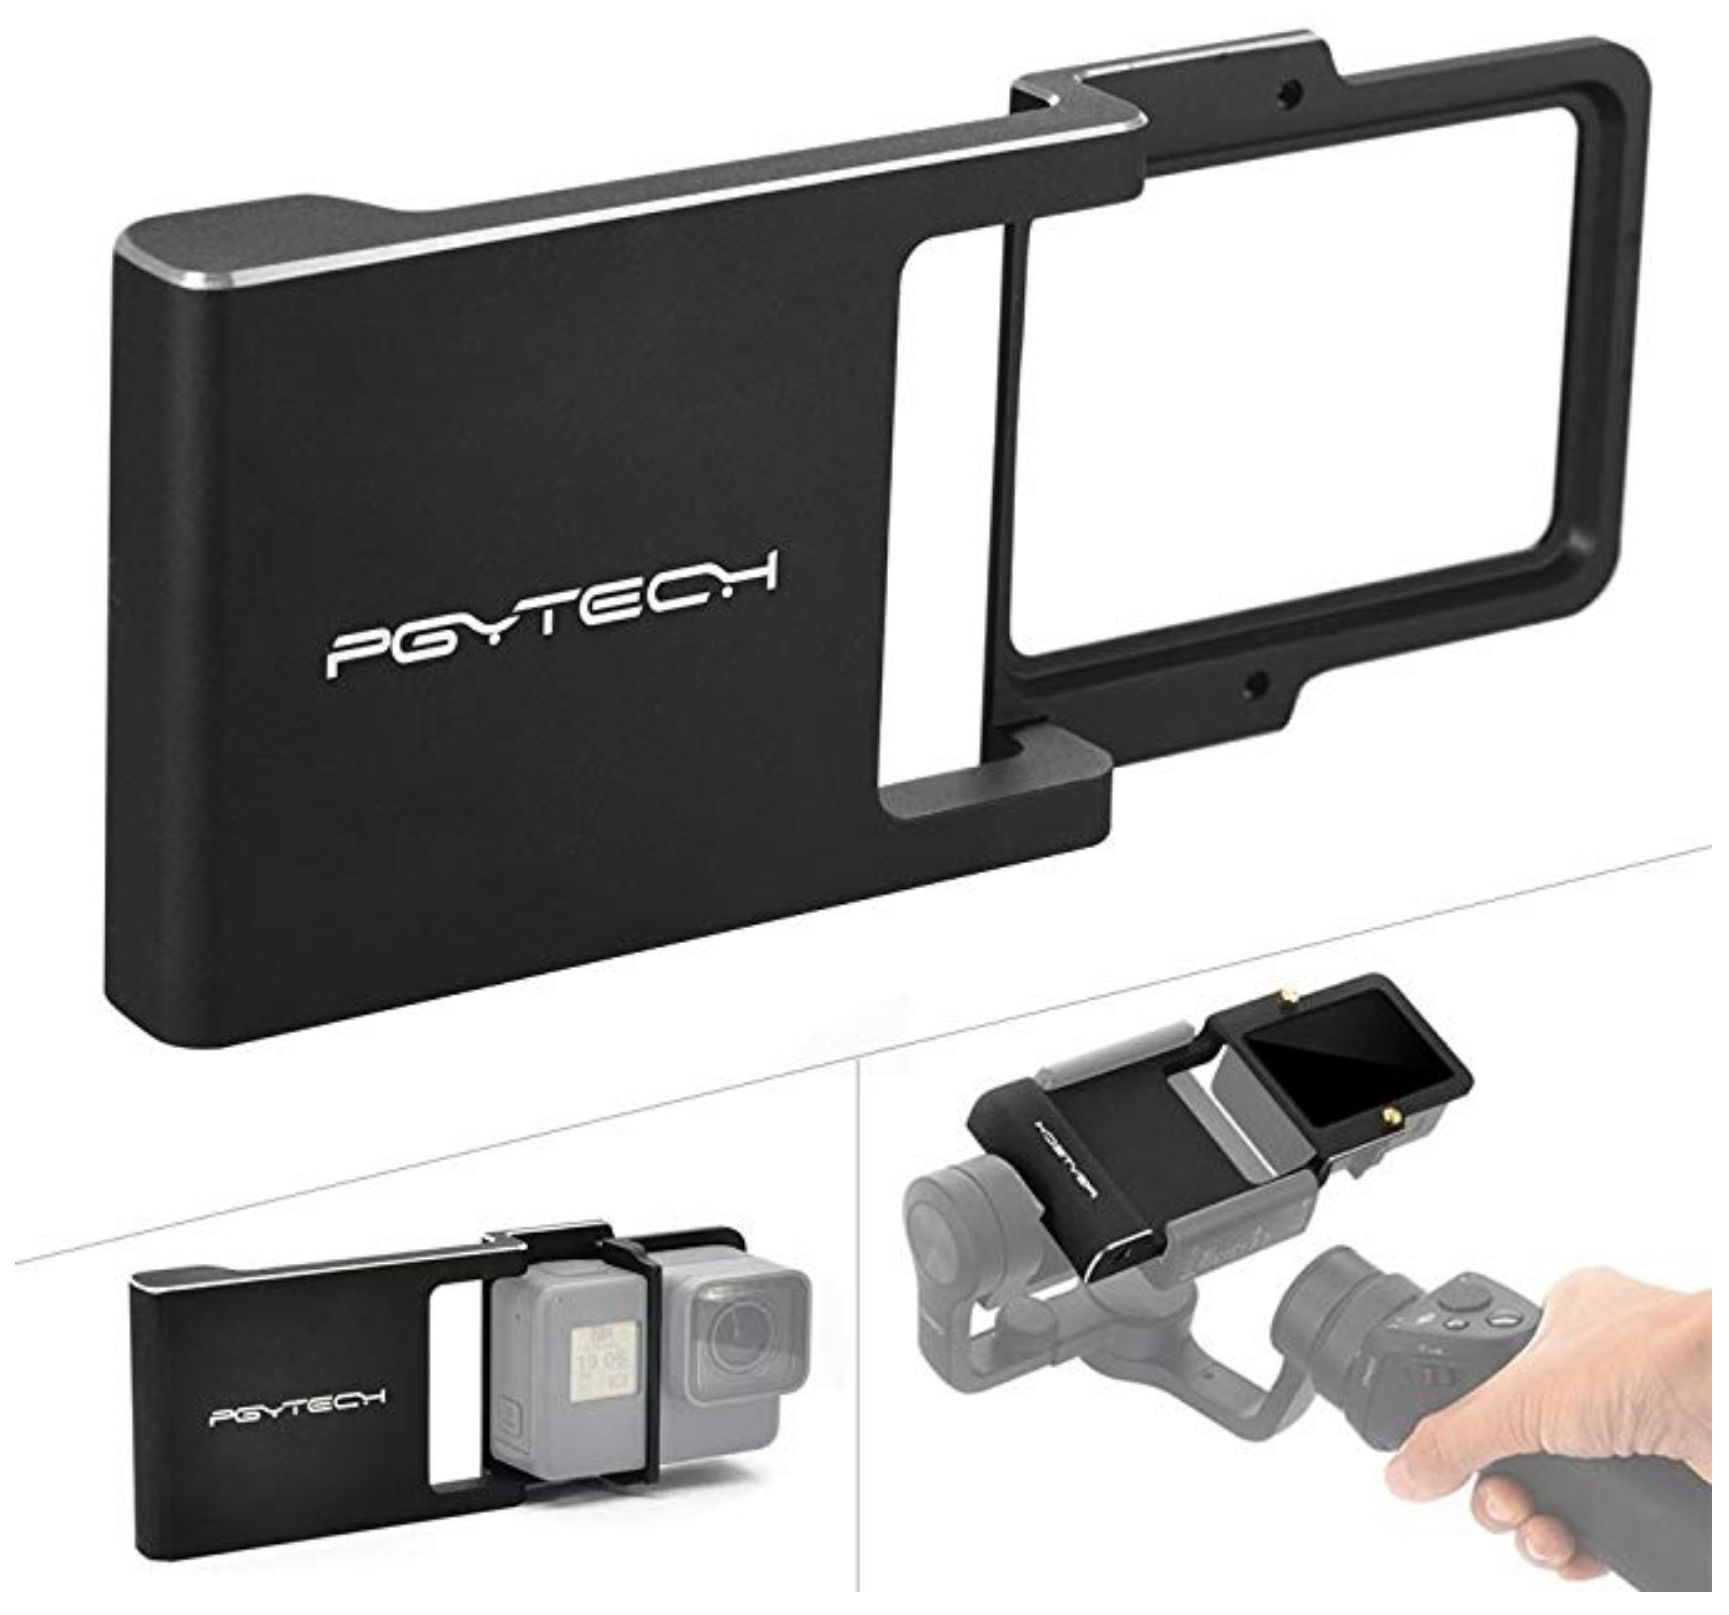
For infrequent use, I’d just get a gimbal for my smartphone that also supports the GoPro Hero in case I ever get a GoPro. After reviewing the Moza Mini-Mi, Zhiyun Smooth 4 and the Osmo Mobile 2. The Osmo Mobile 2 is the best.
Frequent Use
For frequent use, though I like how small the Osmo Pocket, I think I’d get the GoPro Hero 7 since it includes Hypersmooth stabilization, a wide field of view, and supports replacing batteries. To get gimbal-smooth videos, I’d just buy a holder with a gimbal for use with the GoPro.
Scene Capture
When filming with a regular action cam, you have to point the camera at what you want to film. If the person holding the camera doesn’t aim well or is on a moving around a lot, e.g. on a roller coaster, the subject can easily get cut off. To solve this, you could get a 360 degree action camera. They record everything around you regardless of which direction the camera is facing. In post processing, you can choose which direction you want the final video at face at any given time frame. This is called “reframing” the video to convert it to normal a flat video.
When traveling, you don’t always know when you’ll come across a scene you’d like to film. Fortunately, many cameras are small enough to put in your pocket. However, it’s nice to be able to record hands free. There are many mounts and accessories available including
Chest mount
Wrist / hand mount
Neck lanyard
Wrist lanyard
Invisible stick
At the very least, using a lanyard would be wise in certain situations like on a roller coaster so if you drop the camera, you won’t lose it.
Following is some advice regarding major life issues I would offer to the average person (the majority of people) based on my experience and the experience of others. Unfortunately, these are things they don’t teach you in school.
Invest in real estate
People don’t like saving money and generally aren’t good with money. If you choose to rent instead of buy a house for a long period of time, you will for the most part lose money and not end up with much money. Your rent will keep increasing and the money spent on rent will just be gone – given to your landlord. Conversely, if you buy a house, even with just a 20% down payment, while you may feel like you’ve lost a huge amount of money from paying the large down payment, in most cases you haven’t lost any money at all. You’ve just moved that money from one place (a bank account) to equity in the house. When you make your monthly payments, though some of the payment amount will be lost to pay interest to a lender, e.g. a bank, the remainder of the money will be yours, albeit in the form of equity in the house. Furthermore, the house will likely increase in value which increases your equity in the house. In hot markets like the San Francisco Bay Area, one can realize an impressive gain in house value due to appreciation, e.g. $200K over a few years of doing nothing but paying your mortgage.
Most people are not good investors, whether in the stock market or in running a business. While it’s easy to invest in the stock market, it’s extremely volatile and more akin to gambling. Running a business is a lot of work which most people can’t handle. Therefore, most people would be better off just investing in real estate and becoming a landlord. While it does require some work, it’s much less than running a business and more predictable than the stock market. Having a rental property would allow your net worth to grow much faster than if you just owned one home as your primary residence. In other words, if you had to choose between buying one dream home for $1M as your primary residence versus buying two average homes, each costing $500K, where one would be your primary residence and the other a rental property, you’ll end up having a higher net worth faster in the latter case as your tenants in your rental property will be paying that property’s mortgage for you.
Some ways to help get your first house are:
Buy a 3 bedroom house and rent out two of the bedrooms
Buy a duplex or multiplex, live in one unit and rent out the other units
If you know home improvement, buy a cheap fixer-upper and fix it up while living in it
The ways listed above may not get you your dream home but at least it can help you build equity to put towards getting a nicer home.
The Fujitsu ScanSnap iX500 document scanner is one of the best sub $500 scanners. Unfortunately, the documentation isn’t good. I tried scanning a document over wi-fi to my laptop, which normally works fine, but one day the blue light would keep changing to orange. I ended up having to uninstall and reinstall the installation software. Fortunately, my scanner’s wi-fi settings were still saved. Here are some tips (which I’m writing more as a reminder to myself) that may be of help to anyone experiencing the orange light error.
ScanSnap Icon Color
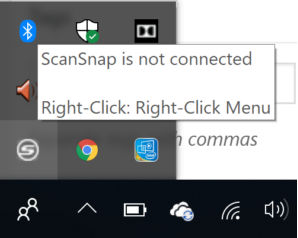
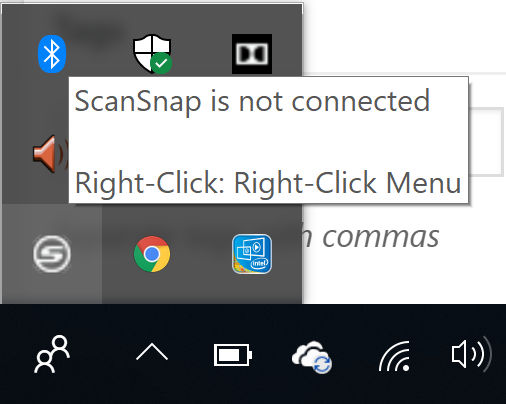
On Windows, in your system tray there should be a ScanSnap icon. When the scanner is off, the icon is grayed out and the tooltip message says “ScanSnap is not connected.”
Scan over wi-fi to laptop
To scan over wi-fi to your laptop, do the following
Turn on both the ScanSnap scanner and your laptop
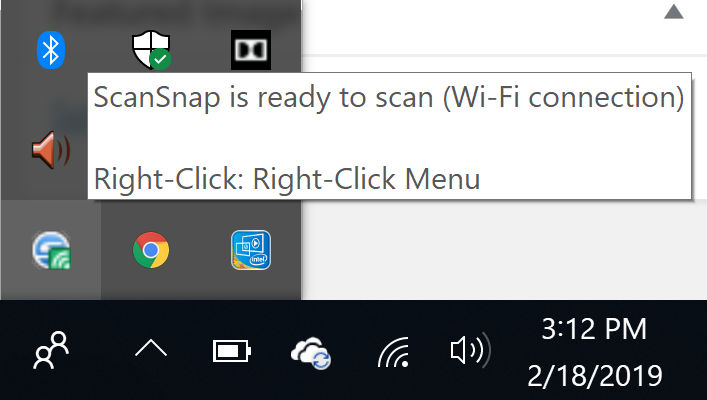
Wait for the ScanSnap icon to change as shown below. The tooltip will also say that ScanSnap is ready to scan over wi-fi.
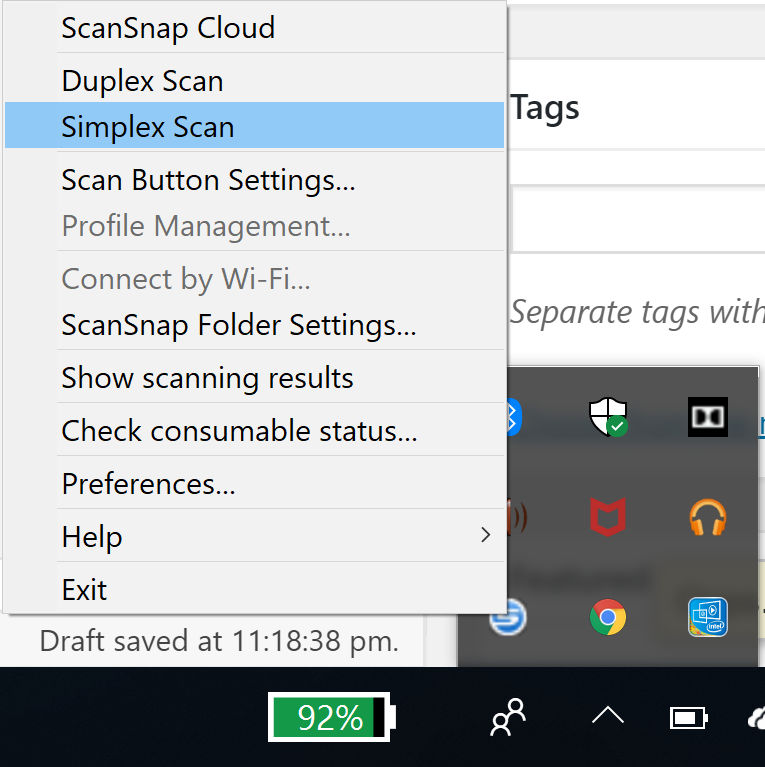
Load a document and push the blue button on the scanner or right-click on the ScanSnap icon and click either Simple Scan (one-sided) or Duplex Scan (double-sided)
The document will pass through the scanner and a window will appear on your desktop asking where you’d like to save the document, e.g. local folder, Google Drive, etc.
Scan over USB to laptop
If you want to scan to a laptop over USB, e.g. if you are having wi-fi problems, do this:
Turn on both the ScanSnap scanner and your laptop
Connect both devices with a USB cable
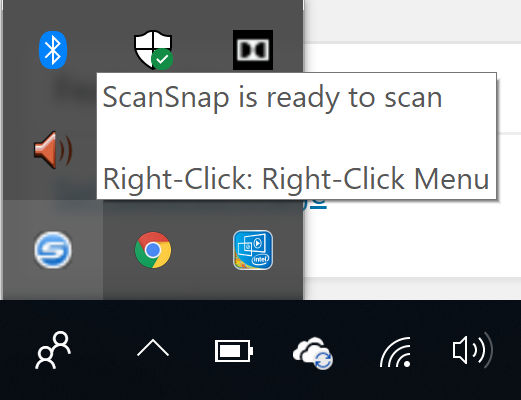
Wait for the ScanSnap icon to change as shown below. The tooltip will also say that ScanSnap is ready to scan.
Load a document and push the blue button on the scanner or right-click on the ScanSnap icon and click either Simple Scan (one-sided) or Duplex Scan (double-sided)
For fancy animations where you still write JavaScript to control the animation, the Greensock JS library is great. Another great one is anime.js.
svgator (free trial)
For even fancier animations that allow you to design the animations using a timeline, svgator is an online tool that can do that.
Adobe After Effects (free trial), BodyMovin and Lottie
For super fancy animation, design your animation in Adobe After Effects. Then, download and install the BodyMovin plugin for After Effects. Then, export the animation from After Effects using the BodyMovin plugin. The exported files will contain the animation data as JSON object. It may also include image files as a PNG which, if possible, you should manually export each one as a SVG and replace the PNGs with the SVGs. Then, load the lottie library in your page, e.g. with
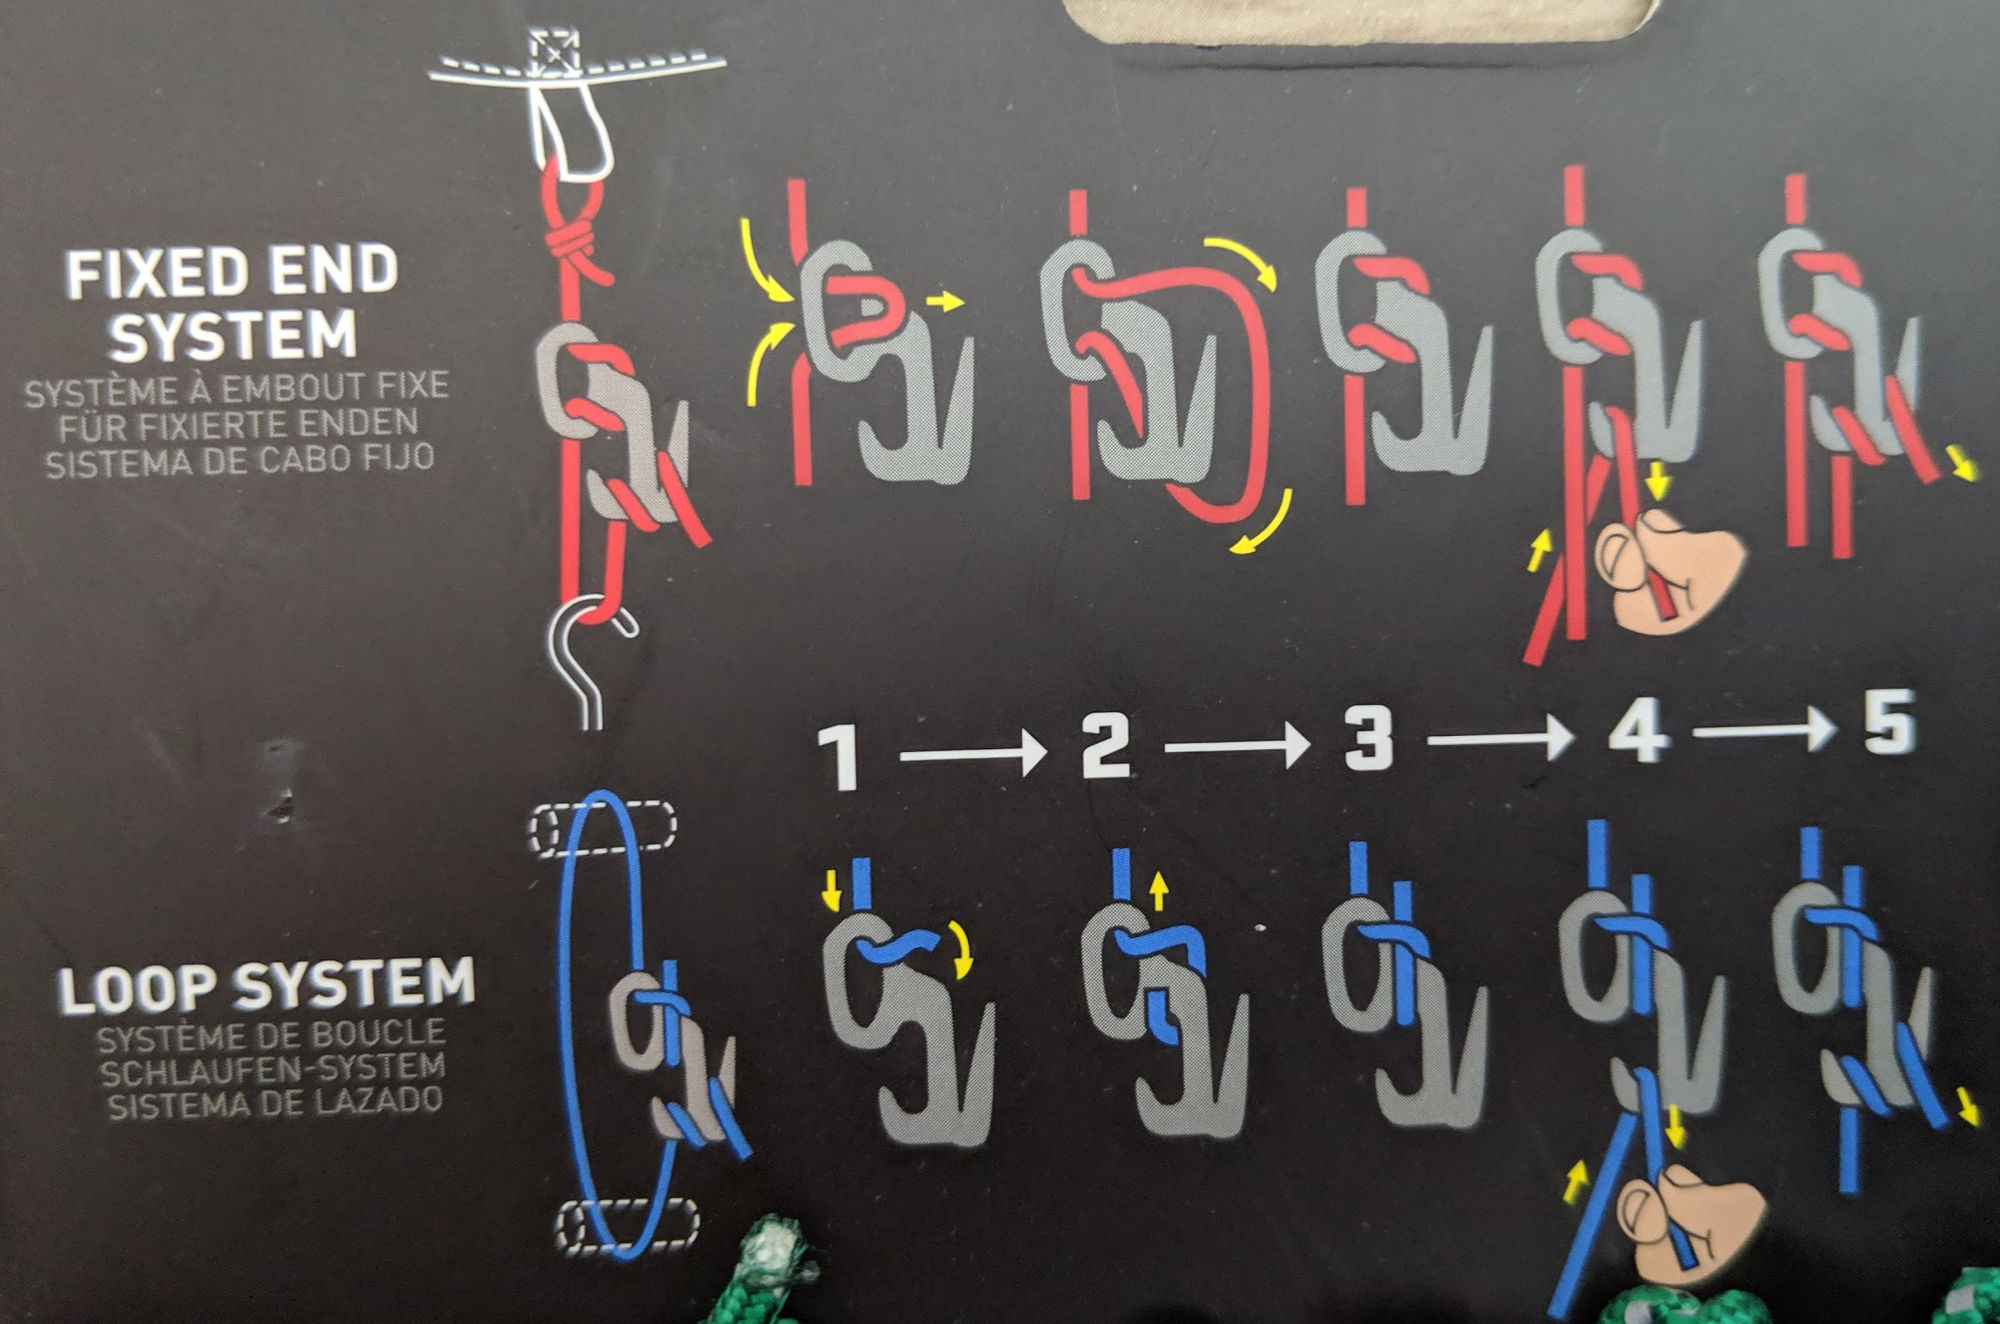
When you need to tighten a rope to hold something in place, e.g. a tent, cargo in a pickup truck, a leaning tree, bed sheets, etc, you might think you’ll need to tie a knot. Not only is it difficult to tie a knot without losing tension in the rope, it’s a hassle and often difficult untying the knot. Ratchet straps are easier to use but are overkill for non-heavy duty situations. A simpler solution is to use a figure 9.
Here, I used a figure 9 to hold a leaning tree in place.
You can purchase Figure 9s at REI. One brand is Nite-ize but there’s also generic ones on Amazon for less.
This are two ways to tighten a rope using a Figure 9.