Artikel ini awalnya ditulis dalam bahasa Inggris. Ini adalah terjemahannya dalam bahasa Indonesia.

Sebagian besar orang Muslim, selain Al-Quran, percaya bahwa hadits adalah sumber hukum Islam yang sah. Argumen di bawah ini dengan mudah membuktikan menggunakan Al-Quran dan logika dasar bahwa kebanyakan Muslim tidak hanya salah, tetapi mereka juga kafir menurut Al-Quran, karena mereka menghakimi menggunakan hadits.
Mari kita mulai.
Hanya menghakimi dengan kitab suci Tuhan (Taurat, Al-Quran)
Sebelum Tuhan menurunkan Al-Quran kepada Muhammad, Ia mengirim Taurat kepada Musa untuk orang Yahudi menghakimi dengannya. Pada saat itu, para nabi, para rabi Yahudi dan para ulama Yahudi hanya menghakimi menggunakan Taurat. Ini dibuktikan dalam ayat 5:44 di mana Tuhan juga memberitahu orang-orang untuk tidak menukar ayat-ayat-Nya dengan yang lain, misalnya hukum buatan manusia, dan siapa pun yang tidak menghakimi dengan apa yang diturunkan Tuhan, misalnya Taurat dan Al-Quran, maka mereka adalah orang yang kafir.
| إِنَّا أَنزَلْنَا التَّوْرَاةَ فِيهَا هُدًى وَنُورٌ ۚ يَحْكُمُ بِهَا النَّبِيُّونَ الَّذِينَ أَسْلَمُوا لِلَّذِينَ هَادُوا وَالرَّبَّانِيُّونَ وَالْأَحْبَارُ بِمَا اسْتُحْفِظُوا مِن كِتَابِ اللَّهِ وَكَانُوا عَلَيْهِ شُهَدَاءَ ۚ فَلَا تَخْشَوُا النَّاسَ وَاخْشَوْنِ وَلَا تَشْتَرُوا بِآيَاتِي ثَمَنًا قَلِيلًا ۚ وَمَن لَّمْ يَحْكُم بِمَا أَنزَلَ اللَّهُ فَأُولَٰئِكَ هُمُ الْكَافِرُونَ |
| Sungguh, Kami yang menurunkan (bahasa Arab: an-zal) Kitab Taurat; di dalamnya (ada) petunjuk dan cahaya. Dengan Kitab itu para nabi yang berserah diri kepada Tuhan menghakimi atas perkara orang Yahudi, demikian juga para rabi dan ulama mereka, sebab mereka diperintahkan memelihara kitab-kitab Tuhan dan mereka menjadi saksi terhadapnya. Karena itu janganlah kamu takut kepada manusia, (tetapi) takutlah kepada-Ku. Dan janganlah kamu jual ayat-ayat-Ku dengan harga murah. Barangsiapa tidak menghakimi dengan apa yang diturunkan (bahasa Arab: an-zal) Tuhan, maka mereka itulah orang-orang kafir. (Al-Quran: 5:44) |
Setelah Musa meninggal, pada abad ke-2 para rabi Yahudi menyusun sebuah buku berjudul Talmud yang berisi
- Mishnah (Taurat Lisan / perkataan yang diduga atau hadits Musa)
Menurut tradisi Yahudi, Taurat Lisan diturunkan secara lisan di rantai tak terputus dari generasi ke generasi sampai akhirnya ditulis. Ini sangat mirip dengan hadits Islam / dugaan perkataan Muhammad). - Gemara
Serangkaian komentar dan debat mengenai Mishnah.
Saat ini, sebagian besar orang Yahudi menghakimi dengan kitab suci (Taurat) dan Talmud yang berisi perkataan yang diduga dari Musa. Ini sangat mirip dengan bagaimana para pengikut Al-Quran pada awalnya hanya menghakimi dengan Al-Quran. Setelah buku-buku hadits (dugaan perkataan Muhammad) ditulis, pengikut Quran mulai menghakimi dengan Al-Quran dan hadits.
Garis waktu kejadian
| Tahun | Kejadian |
|---|---|
| Dahulu kala | Tuhan menurunkan Taurat kepada Musa |
| Dahulu kala | Para nabi, rabi dan ulama Yahudi menghakimi hanya menggunakan Taurat |
| ~200 CE | Para rabi Yahudi menulis Talmud yang berisi dugaan perkataan Musa |
| ~ 200 CE ke depan | Orang-orang Yahudi menghakimi menggunakan Taurat dan Talmud |
| 609 – 632 CE | Tuhan menurunkan Quran kepada Muhammad |
| ~ 800 CE | Bukhari menulis hadits yang berisi dugaan perkataan Muhammad |
| ~ 800 CE ke depan | Orang-orang Muslim menghakimi menggunakan Al-Quran dan hadits |
Hanya hakim menggunakan Al-Quran
Quran ayat 45:6 secara khusus memberitahu orang-orang untuk hanya menghakimi dengan Al-Quran dan bukan hadits. Perhatikan bahwa kata Arab yang digunakan untuk hadits adalah hadits dan bukan kata lain.
| تِلْكَ آيَاتُ اللَّهِ نَتْلُوهَا عَلَيْكَ بِالْحَقِّ ۖ فَبِأَيِّ حَدِيثٍ بَعْدَ اللَّهِ وَآيَاتِهِ يُؤْمِنُونَ |
| Itulah ayat-ayat Tuhan yang Kami bacakan kepadamu dalam kebenaran; maka dengan hadits (bahasa Arab: ha-deeth) mana lagi mereka akan percaya setelah Tuhan dan ayat-ayat-Nya. (Al-Quran: 45:6) |
Ayat-ayat Tuhan adalah Al-Quran. Hadits jelas bukan ayat Tuhan. Tidak ada orang yang waras, termasuk pengikut hadits, yang akan mengatakan bahwa hadits itu ayat-ayat dari Tuhan.
Al-Quran ayat 5:44 dengan jelas mengatakan bahwa siapa pun yang menghakimi dengan apa pun selain Al-Quran adalah orang kafir.
| … وَمَن لَّمْ يَحْكُم بِمَا أَنزَلَ اللَّهُ فَأُولَٰئِكَ هُمُ الْكَافِرُونَ |
| Barangsiapa tidak menghakimi dengan apa yang diturunkan (bahasa Arab: an-zal) Tuhan, maka mereka itulah orang-orang kafir. (Al-Quran: 5:44) |
Apa yang “diturunkan” (bahasa Arab: an-zal) oleh Tuhan adalah Al-Quran, dan sebelum itu, Taurat. Keduanya adalah kitab suci dari Tuhan sendiri. Dugaan perkataan (hadits) Musa dan Muhammad tidak “diturunkan” oleh Tuhan. Perhatikan penggunaan kata “diturunkan” (bahasa Arab: an-zal) dalam ayat-ayat berikut yang menegaskan bahwa apa yang “diturunkan” Tuhan adalah Al-Quran dan bukan hadits.
| إِنَّا أَنزَلْنَاهُ قُرْآنًا عَرَبِيًّا لَّعَلَّكُمْ تَعْقِلُونَ |
| Sesungguhnya Kami menurunkannya (bahasa Arab: an-zal) sebagai Qur’an berbahasa Arab, agar kamu mengerti. (Quran: 12:2) |
| وَكَذَٰلِكَ أَنزَلْنَاهُ قُرْآنًا عَرَبِيًّا وَصَرَّفْنَا فِيهِ مِنَ الْوَعِيدِ لَعَلَّهُمْ يَتَّقُونَ أَوْ يُحْدِثُ لَهُمْ ذِكْرًا |
| Dan demikianlah Kami menurunkan (bahasa Arab: an-zal) Al-Qur’an dalam bahasa Arab, dan Kami telah menjelaskan berulang-ulang di dalamnya ancaman, agar mereka menghindari dari dosa, atau agar (Al-Qur’an) itu memberi peringatan bagi mereka. (Quran: 20:113) |
| لَوْ أَنزَلْنَا هَٰذَا الْقُرْآنَ عَلَىٰ جَبَلٍ لَّرَأَيْتَهُ خَاشِعًا مُّتَصَدِّعًا مِّنْ خَشْيَةِ اللَّهِ ۚ وَتِلْكَ الْأَمْثَالُ نَضْرِبُهَا لِلنَّاسِ لَعَلَّهُمْ يَتَفَكَّرُونَ |
| Sekiranya Kami turunkan (bahasa Arab: an-zal) ini kepada sebuah gunung, pasti kamu akan melihatnya tunduk terpecah belah disebabkan takut kepada Tuhan. Dan perumpamaan-perumpamaan itu Kami buat untuk manusia agar mereka berpikir. (Al-Quran: 59:21) |
Dalam ayat 13:37, kita membaca bahwa Tuhan menurunkan “undang-undang Arab” yang menegaskan bahwa Al-Quran Arab adalah hukum yang harus dipakai untuk menghakimi dan bukan buku lain.
| وَكَذَٰلِكَ أَنزَلْنَاهُ حُكْمًا عَرَبِيًّا ۚ… |
| Dan demikianlah Kami telah menurunkannya (bahasa Arab: an-zal) sebagai peraturan (yang benar) dalam bahasa Arab. … (Al-Quran: 13:37) |
Hadits itu bukan wahyu
Sebagian pengikut hadits akan mengklaim bahwa, selain Al-Qur’an, perkataan sehari-hari Nabi Muhammad juga merupakan wahyu dari Tuhan. Mereka dapat dengan mudah dibuktikan salah sebagai berikut.
Bukti 1:
Quran ayat 66:1 menunjukkan situasi di mana Tuhan mempertanyakan Muhammad setelah Muhammad melarang sesuatu yang Tuhan buat sah. Jika semua yang dikatakan Muhammad adalah wahyu dari Tuhan, lalu mengapa Tuhan mempertanyakan Muhammad tentang sesuatu yang dikatakan Muhammad? Logikanya, karena tidak semua yang dikatakan Muhammad adalah wahyu dari Tuhan.
| يَا أَيُّهَا النَّبِيُّ لِمَ تُحَرِّمُ مَا أَحَلَّ اللَّهُ لَكَ ۖ تَبْتَغِي مَرْضَاتَ أَزْوَاجِكَ ۚ وَاللَّهُ غَفُورٌ رَّحِيمٌ … |
| Wahai Nabi, mengapa kamu mengharamkan apa yang Tuhan telah membuat halal untukmu, mencari persetujuan dari istrimu? … (Quran 66:1) |
Bukti 2:
Dalam ayat 69:44-46, Tuhan mengancam akan membunuh Nabi Muhammad jika Muhammad membuat perkataan palsu tentang Tuhan. Ini membuktikan bahwa tidak semua yang dikatakan Muhammad adalah wahyu dari Tuhan karena jika semua perkataannya adalah wahyu, Tuhan tidak perlu membuat ancaman ini. Jika Tuhan ingin mengatakan bahwa setiap kata yang keluar dari mulut Muhammad adalah wahyu dari Tuhan, Dia bisa saja mengatakan itu tanpa membuat ancaman.
| وَلَوْ تَقَوَّلَ عَلَيْنَا بَعْضَ الْأَقَاوِيلِ لَأَخَذْنَا مِنْهُ بِالْيَمِينِ ثُمَّ لَقَطَعْنَا مِنْهُ الْوَتِينَ |
| Dan jika dia (Muhammad) mengada-adakan perkataan atas (nama) Kami (Tuhan), pasti Kami akan pegang dia pada tangan kanannya; kemudian Kami akan potong pembuluh jantungnya. (Al-Quran 69:44-46) |
Bukti 3:
Hadis Sahih al-Bukhari #1629 menunjukkan bahwa Muhammad melarang sholat saat matahari terbit (fajar) dan matahari terbenam (maghrib). Ini jelas adalah kontradiksi besar dengan Quran yang bahkan pasti disetujui oleh pengikut hadits.
| Dikisahkan `Abdullah: Saya mendengar Nabi (ﷺ) melarang sholat pada saat matahari terbit dan terbenam. Sahih al-Bukhari 1629 https://sunnah.com/bukhari/25/113 |
Semua Muslim, bahkan mereka yang menggunakan hadits sebagai hukum Islam, akan terus sholat fajar dan maghrib meskipun hadits sahih ini melarangnya. Dalam hal ini, mereka dapat mengatakan bahwa meskipun hadits ini sahih, mereka memilih untuk mengabaikannya karena bertentangan dengan Al-Quran, tetapi mereka akan mengatakan bahwa hadits lain masih valid. Dengan kata lain, mereka akhirnya memilih untuk mengikuti beberapa hadits dan mengabaikan yang lain. Maka dari itu, tidak mengherankan bahwa Quran ayat 68:36-38 mempertanyakan orang-orang yang menghakimi dengan buku selain Quran (misalnya buku hadits) di mana mereka memilih semaunya hukum mana yang mereka ingin ikuti.
| مَا لَكُمْ كَيْفَ تَحْكُمُونَ أَمْ لَكُمْ كِتَابٌ فِيهِ تَدْرُسُونَ إِنَّ لَكُمْ فِيهِ لَمَا تَخَيَّرُونَ |
| Mengapa kamu (berbuat demikian)? Bagaimana kamu menghakimi? Atau apakah kamu mempunyai buku yang kamu pelajari yang memang untuk kamu di dalamnya adalah apapun yang kamu pilih? (68:36-38) |
Fakta bahwa pengikut hadits mengakui bahwa beberapa hadits sahih tidak dapat diterima seharusnya membuat mereka curiga dan mempertanyakan keaslian semua hadits lainnya, bahkan jika hadits lain kedengarannya benar.
Nabi Muhammad hanya memperingatkan menggunakan Al-Qur’an
Sebagian pengikut hadits, dengan berpikir bahwa mereka meniru Muhammad, akan menggunakan hadits untuk memperingatkan orang lain tentang hukum Islam. Ironisnya, Quran ayat 50:45 dan 6:19 membuktikan bahwa Muhammad sendiri hanya memperingatkan menggunakan Quran.
| … فَذَكِّرْ بِالْقُرْآنِ مَن يَخَافُ وَعِيدِ |
| … Maka berilah (ya Muhammad) peringatan dengan Al-Qur’an kepada siapa pun yang takut kepada ancaman-Ku. (50:45) |
| … وَأُوحِيَ إِلَيَّ هَٰذَا الْقُرْآنُ لِأُنذِرَكُم بِهِ وَمَن بَلَغَ … |
| Al-Qur’an ini diwahyukan kepadaku agar dengannya aku memberi peringatan kepadamu dan kepada siapa pun yang mendapatnya… (6:19) |
Nabi Muhammad hanya mengikuti Quran
Pengikut hadits berpikir bahwa mereka mengikuti jalan Muhammad dengan mengikuti hadits tentang dia. Ironisnya, Muhammad mengatakan dalam Quran ayat 50:45 bahwa dia sendiri hanya mengikuti Quran.
| وَإِذَا تُتْلَىٰ عَلَيْهِمْ آيَاتُنَا بَيِّنَاتٍ ۙ قَالَ الَّذِينَ لَا يَرْجُونَ لِقَاءَنَا ائْتِ بِقُرْآنٍ غَيْرِ هَٰذَا أَوْ بَدِّلْهُ ۚ قُلْ مَا يَكُونُ لِي أَنْ أُبَدِّلَهُ مِن تِلْقَاءِ نَفْسِي ۖ إِنْ أَتَّبِعُ إِلَّا مَا يُوحَىٰ إِلَيَّ |
| Dan apabila dibacakan kepada mereka ayat-ayat Kami dengan jelas, orang-orang yang tidak mengharapkan pertemuan dengan Kami berkata, “Datangkanlah kitab selain Al-Qur’an ini atau gantikan (isinya Al-Quran).” Katakanlah (Muhammad), “Tidaklah pantas bagiku menggantinya atas kemauanku sendiri. Aku hanya mengikuti apa yang diwahyukan kepadaku. …” (10:15) |
Argumen “Bagaimana cara sholat”
Sebagian pengikut hadits pasti akan memberitahu Anda bahwa hadits diperlukan untuk hukum Islam karena hadits menjelaskan bagaimana cara sholat. Yang tidak disadari oleh orang-orang ini adalah bahwa
- Tidak seorang pun belajar sholat dengan membaca hadits. Sebenarnya, mereka belajar dari orang lain seperti orang tua mereka.
- Hadits tidak menjelaskan dengan jelas bagaimana cara sholat. Sholat adalah ritual sehari-hari. Fakta bahwa hadits tidak banyak bicara tentang bagaimana sholat seharusnya membuat Anda curiga tentang keaslian hadits.
- Walaupun jika hadits benar-benar menjelaskan cara sholat, maka karena buku-buku hadits tidak ditulis sampai sekitar 200 tahun setelah kematian Muhammad, maka selama 2 abad setelah Muhammad wafat, tidak ada yang bisa sholat karena buku-buku hadits belum ditulis. Tidak masuk akal bahwa orang tidak bisa sholat selama 200 tahun karena mereka sedang menunggu Bukhari untuk menulis buku haditsnya.
Masuk akal bahwa Tuhan tidak memberikan petunjuk langkah demi langkah tentang cara sholat dalam Al-Quran karena Tuhan tahu bahwa orang pada awalnya akan belajar dengan mengikuti Muhammad dan kemudian setelah Muhammad meninggal, orang akan belajar dari masyarakat mereka, misalnya ketika mereka sholat di masjid pada hari Jumat. Kenyataannya, pengetahuan tentang cara sholat diturunkan dari satu generasi ke generasi lain, bukan dari membaca ribuan hadits mencoba mencari tahu seperti teka-teki yang besar.
Argumen “tafsir” (interpretasi)
Sebagian pengikut hadits akan berpendapat bahwa tafsir saya terhadap ayat-ayat di atas, atau ayat lain dalam hal ini, tidak benar. Mereka berpikir bahwa hanya tafsir mereka adalah tafsir yang benar. Al-Quran membahas masalah tafsir dalam ayat 3:7 di mana Tuhan mengatakan bahwa ada dua jenis ayat.
1. Ayat spesifik (jelas)
Ayat ini adalah dasar dari Al-Quran dan karena ayat-ayat ini sudah jelas, penafsiran tidak diperlukan.
2. Ayat tidak spesifik (tidak jelas)
Ayat ini adalah ayat yang tidak jelas dan hanya Tuhan yang tahu arti yang sebenarnya. Ayat-ayat yang tidak jelas ini adalah ujian bagi orang-orang yang ingin menafsirkannya dengan cara tertentu untuk mendukung pendapat dan minat pribadi mereka.
| هُوَ الَّذِي أَنزَلَ عَلَيْكَ الْكِتَابَ مِنْهُ آيَاتٌ مُّحْكَمَاتٌ هُنَّ أُمُّ الْكِتَابِ وَأُخَرُ مُتَشَابِهَاتٌ ۖ فَأَمَّا الَّذِينَ فِي قُلُوبِهِمْ زَيْغٌ فَيَتَّبِعُونَ مَا تَشَابَهَ مِنْهُ ابْتِغَاءَ الْفِتْنَةِ وَابْتِغَاءَ تَأْوِيلِهِ ۗ وَمَا يَعْلَمُ تَأْوِيلَهُ إِلَّا اللَّهُ ۗ وَالرَّاسِخُونَ فِي الْعِلْمِ يَقُولُونَ آمَنَّا بِهِ كُلٌّ مِّنْ عِندِ رَبِّنَا ۗ وَمَا يَذَّكَّرُ إِلَّا أُولُو الْأَلْبَابِ |
| Dialah yang menurunkan (bahasa Arab: an-zal) Kitab (Al-Qur’an) kepadamu (Muhammad). Di antaranya ada ayat-ayat yang spesifik dan jelas, itulah dasar Kitab (Al-Qur’an), dan yang lain tidak spesifik. Orang-orang yang dalam hatinya ada penyimpangan [dari kebenaran], mereka mengikuti yang tidak spesifik untuk mencari-cari perselisihan dan untuk mencari-cari interpretasi yang sesuai dengan keinginannya, padahal tidak ada yang mengetahui arti yang sebenarnya kecuali Tuhan. Dan orang-orang yang berpengetahuan berkata, “Kami percaya kepadanya (Al-Qur’an), Seluruhnnya (Al-Quran) adalah dari Tuhan kita.” Tidak ada yang dapat mengambil pelajaran kecuali orang yang berakal. (3:7) |
Karena ayat-ayat yang digunakan dalam argumen saya di atas jelas, maka argumen pengikut hadits bahwa interpretasi saya itu salah tidak valid.
Argumen “Tradisi”
Sebagian pengikut hadits berpendapat bahwa tradisi Islam harus dihormati dan dipertimbangkan dalam semua urusan Islam. Mereka juga berpendapat bahwa karena secara tradisional orang Muslim telah mengikuti hadits, maka umat Islam harus terus mengikuti hadits. Argumen ini tidak valid karena tidak semua tradisi benar dan tradisi bukanlah dasar agama. Tidak ada dalam Al-Qur’an yang mengatakan bahwa pengikutnya harus mengikuti tradisi dan praktik nenek moyang mereka. Sebaliknya, Al-Quran sebenarnya memberikan contoh yang dengan jelas menunjukkan bahwa tradisi tidak ada tempatnya dalam agama dan jelas bukan pengganti perintah Al-Quran yang jelas.
Dalam ayat 21:52-53 nabi Ibrahim bertanya kepada ayahnya dan kaumnya mengapa mereka menyembah patung. Jawaban mereka adalah bahwa mereka hanya mengikuti tradisi nenek moyang mereka. Jelas tradisi nenek moyang mereka salah.
| إِذْ قَالَ لِأَبِيهِ وَقَوْمِهِ مَا هَٰذِهِ التَّمَاثِيلُ الَّتِي أَنتُمْ لَهَا عَاكِفُونَ قَالُوا وَجَدْنَا آبَاءَنَا لَهَا عَابِدِينَ |
| Ketika dia (Ibrahim) berkata kepada ayahnya dan kaumnya, “Patung-patung apa ini yang kamu tekun menyembahnya?” Mereka menjawab, “Kami lihat nenek moyang kami menyembahnya.” |
Dalam ayat 2:170, ayah dan kaum Ibrahim diperintahkan untuk mengikuti apa yang Tuhan turunkan tetapi mereka malah bersikeras mengikuti tradisi nenek moyang mereka. Tuhan kemudian berkata bahwa nenek moyang mereka tidak tahu apa-apa dan mereka tidak mendapat petunjuk (hidayah).
| وَإِذَا قِيلَ لَهُمُ اتَّبِعُوا مَا أَنزَلَ اللَّهُ قَالُوا بَلْ نَتَّبِعُ مَا أَلْفَيْنَا عَلَيْهِ آبَاءَنَا ۗ أَوَلَوْ كَانَ آبَاؤُهُمْ لَا يَعْقِلُونَ شَيْئًا وَلَا يَهْتَدُونَ |
| Dan apabila dikatakan kepada mereka, “Ikutilah apa yang telah diturunkan (bahasa Arab: an-zal) Tuhan.” Mereka menjawab, “Daripada itu, kami akan mengikuti apa yang dilakukan nenek moyang kami.” Padahal, nenek moyang mereka itu tidak mengetahui apa pun, dan tidak mendapat petunjuk (hidayah). (2:170) |
Argumen “2,5% zakat”
Sebagian pengikut hadits berpendapat bahwa tanpa hadits, umat Islam tidak akan tahu bahwa mereka harus membayar 2,5% dari pendapatan mereka untuk memenuhi persyaratan zakat yang mereka yakini benar-benar hanya untuk orang miskin atau yang membutuhkan uang. Ada beberapa masalah dengan argumen ini.
1. Setiap orang harus membayar zakat, bukan hanya Muslim
Pengikut hadits secara keliru percaya bahwa hanya orang Muslim yang harus membayar zakat. Quran ayat 41:7 membuktikan bahwa bahkan orang yang bukan Muslim termasuk musyrik harus membayar zakat.
| وَوَيْلٌ لِّلْمُشْرِكِينَ الَّذِينَ لَا يُؤْتُونَ الزَّكَاةَ وَهُم بِالْآخِرَةِ هُمْ كَافِرُونَ |
| “… Dan celakalah kaum musyrik (41:6) yang tidak memberikan ‘Zakat’ dan di akhirat mereka adalah orang-orang kafir. (41:7)” |
2. Orang sudah membayar zakat jauh sebelum Muhammad lahir
Dalam ayat 19:31, 19:55, 2:83, 7: 156, 5:12, 21:73, 4: 162, dan 98: 5 kita melihat bukti bahwa banyak sekali orang sudah membayar zakat jauh sebelum nabi Muhammad, misalnya nabi Ibrahim membayar zakat. Karena itu, berapa persentase pendapatan untuk membayar zakat tidak tergantung pada sesuatu yang diduga adalah perkataan oleh Muhammad (hadits).
Apa sebenarnya zakat itu?
Karena setiap orang harus membayar zakat dan uang zakat sering digunakan untuk membantu orang miskin, maka masuk akal jika zakat adalah pajak pemerintah karena pajak pendapatan digunakan untuk kepentingan masyarakat termasuk orang miskin. Di AS, lebih dari 15% pajak pendapatan federal digunakan untuk program sosial untuk membantu orang yang membutuhkan bantuan finansial. Ini adalah jumlah yang jauh lebih besar daripada 2,5% yang tertulis di hadits untuk memenuhi persyaratan zakat. Ironisnya, sebagian negara-negara Islam di mana orang-orang hanya membayar 2,5% untuk zakat adalah negara-negara termiskin di dunia. Sebaliknya, di AS tempat semua orang membayar zakat (pajak pendapatan), orang yang membutuhkan bantuan finansial bisa mendapatkannya dan keluar dari kemiskinan.
Hadis Terbaik
Tidak mengherankan bahwa hadits terbaik adalah hadits Tuhan, yaitu Al-Quran. Oleh karena itu, Tuhan mengatakan kepada semua orang untuk hanya menghakimi dengan Al-Quran dan bukan dengan sumber yang lain.
| اللَّهُ نَزَّلَ أَحْسَنَ الْحَدِيثِ كِتَابًا مُّتَشَابِهًا مَّثَانِيَ تَقْشَعِرُّ مِنْهُ |
| Tuhan telah menurunkan (bahasa Arab: an-zal) hadits (perkataan) yang paling baik – buku (Al-Qur’an) yang serupa (ayat-ayatnya) lagi berulang-ulang. (Al-Quran: 39:23) |
Contoh-contoh
Berikut ini adalah beberapa contoh di mana hadits bertentangan dengan Alquran dan umat Islam menghakimi dengan hadits daripada Alquran.
Sholat Jum’at
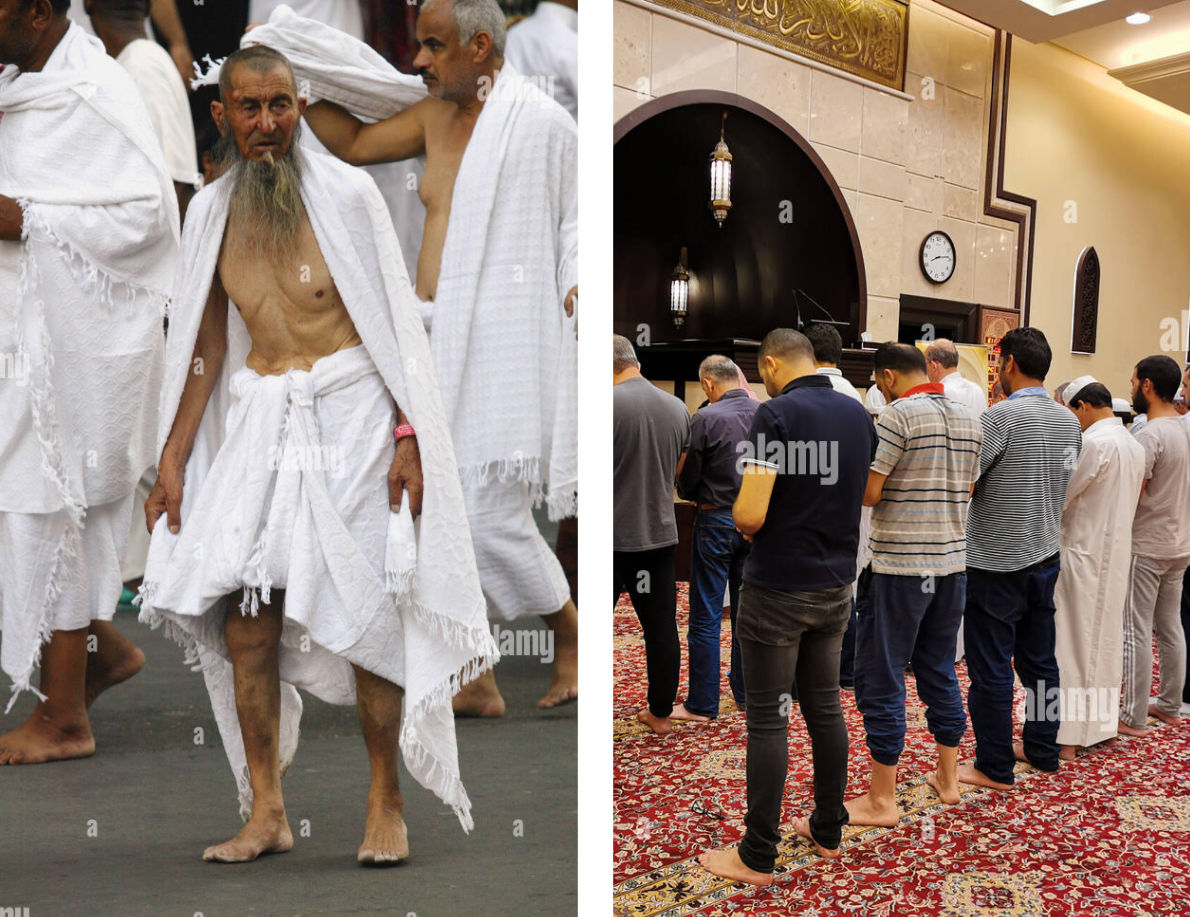
Banyak orang Muslim percaya bahwa wanita tidak diharuskan sholat berjamaah pada hari Jumat. Kepercayaan ini berasal dari hadits. Namun, itu bertentangan langsung dengan Quran ayat 62:9 yang menginstruksikan semua orang yang beriman (pria dan wanita) untuk sholat bersama pada hari Jumat.
2,5% zakat
Sebagian besar orang Muslim percaya bahwa mereka hanya diharuskan membayar 2,5% dari pendapatan mereka untuk memenuhi persyaratan zakat. Batas ini ditemukan dalam hadits tetapi tidak ada dalam Al-Quran.
Emas dan sutra
Larangan bagi pria Muslim untuk memakai emas dan sutra berasal dari hadits. Tidak ada dalam Qur’an bahwa Tuhan melarang pemakaian emas dan sutra.
Musik dan bernyanyi
Larangan bagi umat Islam untuk mendengarkan musik dan bernyanyi berasal dari hadits. Tidak ada dalam Qur’an bahwa Tuhan melarang ini.
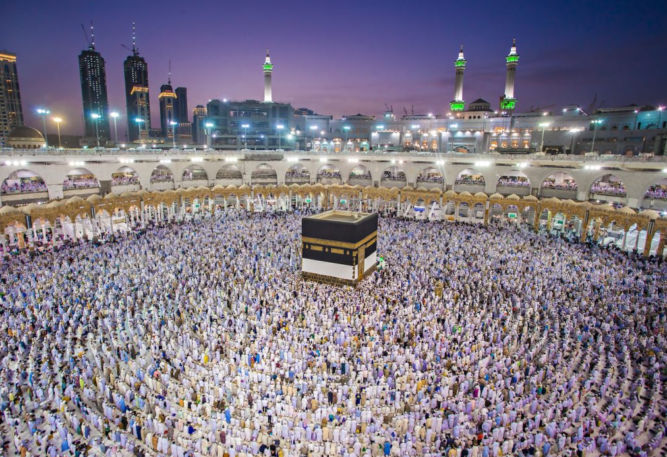
Haji tanpa “muhrim”
Seorang “muhrim” dipahami sebagai laki-laki yang tidak sah untuk menikahi wanita yang bersangkutan, misalnya ayah, saudara laki-laki, anak laki-laki, kakek, dll. Dengan demikian, wanita Muslim percaya bahwa mereka tidak boleh melakukan ibadah haji kecuali kalau salah satu dari “muhrim” mereka menemani mereka. Kepercayaan ini berasal dari hadits yang mengatakan bahwa tidak boleh ada laki-laki yang akan ditemani seorang wanita sendirian dan di tempat sunyi. Dengan jutaan peziarah haji mengunjungi Mekah setiap tahun, berada dalam keadaan “bersunyi-sunyian” adalah kebalikan dari apa yang sebenarnya terjadi. Kepercayaan ini biasa terjadi dalam budaya yang didominasi pria seperti di Arab Saudi di mana aturannya jelas tidak adil karena pembatasan ini tidak berlaku untuk pria. Tidak ada hukum seperti itu dalam Quran yang melarang wanita melakukan haji tanpa “muhrim”.
33% alokasi aset maksimum dalam wasiat
Sebagian orang Muslim berpendapat bahwa maksimum yang dapat Anda alokasikan dalam surat wasiat adalah 1/3 (33%) dari total aset Anda. Nilai ini tidak ditemukan di dalam Al-Quran. Itu berasal dari hadits.
Hadits sebagai tafsir (penjelasan) dari Quran
Banyak orang Muslim percaya bahwa hadits diperlukan untuk menjelaskan Quran. Namun, ini bertentangan langsung dengan Al-Quran yang mengatakan bahwa
- Al-Quran adalah hadits terbaik (39:23)
- Al-Quran lengkap (6:115)
- Al-Quran tidak kehilangan apa-apa (6:38)
- Al-Qur’an mengandung penjelasan yang rinci (6:114, 12:111, 41:3, 11:1)
- Al-Qur’an adalah klarifikasi untuk semua hal (16:89)
- Al-Qur’an adalah tafsir terbaik (penjelasan) dari dirinya sendiri (25:33)
Kesimpulan
Bukti-bukti di atas sangat dan cukup jelas bahwa hadits bukan hanya merupakan sumber hukum Islam yang tidak benar, tetapi mengikuti dan menghakimi dengan hadits, menurut Quran ayat 5:44, menjadikan Anda seorang kafir!

| … وَمَن لَّمْ يَحْكُم بِمَا أَنزَلَ اللَّهُ فَأُولَٰئِكَ هُمُ الْكَافِرُونَ |
| Barangsiapa tidak menghakimi dengan apa yang diturunkan (bahasa Arab: an-zal) Tuhan, maka mereka itulah orang-orang kafir. (Al-Quran: 5:44) |
Related articles
- Proof Muslim Women Don’t Have to Cover Their Hair
- Proof the Hadith is Not Valid Islamic Law
- Muslims Are Performing the Hajj Wrong
- Muslims Are Wrong About Zakat
- Lailat Al-Qadr Is Not What You Think It Is
- Most Muslims Start & End Fasting At the Wrong Time
- Islamic Misconceptions About the Call to Prayer (Adhaan)
- Most Muslims Are Wrong About Various Aspects of Prayer
- Islamic Ablution (Wudhu) Is Simpler Than Many Muslims Think
- Muslims Don’t Need to Perform Ablution (Wudhu) Before Touching the Quran
- Deferring Matters of Islamic Law to Religious Scholars Is Not Permissible. Studying and Understanding the Quran is Required.
- Proof That the Quran Is Complete and That the Hadith Books Are Not Needed
- Prayer Among Jews, Christians, and Muslims – A Quranic Analysis
- The Testimony (Shahadah) to Convert to Islam is Inaccurate
- Categories of People According to the Quran
- Jews and Christians Are Actually Muslims
- Abraham, Not Muhammad, Was the Founder of Islam
- Jewish, Christian and Islamic Scriptures
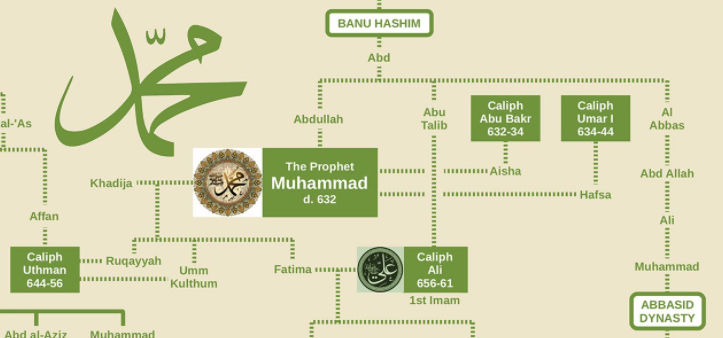
- The Fallacy That Descendants of Prophet Muhammad Are Superior to Everyone Else
- Islamic Prophets, Messengers & Scriptures
- What is God’s Name – A Quranic Analysis
- Aliens Do Exist – A Quranic Analysis
- Most Muslims Are Asian, Not Arab
- Proof That Relatives (Wives, Children, Descendants, etc) of Islamic Prophets, Including Muhammad, Are Not Automatically Righteous
- There Is No Punishment for Blasphemy in Islam
- Proof That Arabic is Not a Holy or Superior Language
- Proof That Prophet Muhammad Is Not Exclusive or Superior to Other Prophets
- Muslims (Submitters) and Mu’mins (Believers) Are Not the Same Thing
- Most Jews, Christians, and Polytheists Are Not Infidels (Kafir)
- There Is No Quranic Proof That Zamzam Water Is Blessed Holy Water
- Muslims Are Not Allowed To Force Others To Practice Islam. So Why Do Muslims & Islamic Governments Keep Doing It?
- If You Are a Sunni or Shia Muslim, Then You’ve Violated Islamic Law
- Contrary to Extremist Belief, Muslims Are Allowed To Sing and Listen to Music
- Muslims Are Allowed To Have Statues and Photos of People in Their Homes
- Dogs Aren’t Impure. Muslims Are Allowed to Have Pet Dogs.
- Muslims Are Allowed to Pay Interest, e.g. on a Car or Home Loan
- Prophet Muhammad Was Not Illiterate. He Could Read and Write.
- Jesus is Dead & He Ain’t Comin’ Back – A Quranic Analysis
- Many Muslims Are Wrong About Getting Help From Others on the Day of Judgment
- Wills and Inheritance Law According to the Quran
- Most Muslims Are Wrong About Halal Food
- Circumcision Is Not Required Among Muslim Boys / Men
- Muslim Women Are Not Exempt From Congregational Friday Prayers
- Muslim Women Are Not Exempt From Fasting, Praying, etc During Menstruation
- The Quran Doesn’t Support a Strictly Vegetarian Diet
- Summary of the Quran
- Summary of the Quran 2
- إثبات أن الحديث ليس شرعاً إسلامياً صالحاً
- إثبات أن النساء المسلمات لسن بحاجة لتغطية شعرهم
- Bukti Hadits Tidak Valid Hukum Islam
- Kekeliruan Bahwa Keturunan Nabi Muhammad Lebih Unggul Dari Semua Orang Lain
- Bukti Wanita Muslim Tidak Harus Menutup Rambutnya Dengan Hijab