Zillow provides housing and rental market data on the Research page. Using this data, I created the table below that shows the top 100 most populated cities in America along with their typical house value and monthly rent cost. GRM stands for Gross Rent Multiplier. GRM = Property Purchase Price / Annual Rental Income. It gives you an idea of how many years it will take for your rental income to pay for the cost of the property. It’s often used to compare investment properties. For example, if you buy a triplex for $490,000 and your monthly rental income from the 3 units is $3400, then
GRM = $490,000 / ($3400 x 12 months) = 11.3 years.
Note:
Houses in Texas are cheap but property taxes are some of the highest in the country. But then again, Texas has no state income tax.
Houses in Florida are cheap but the weather is humid and there are often hurricanes.
Chicago is cheap but it gets very cold during the winter there.
The weather is California is GREAT but houses are expensive.
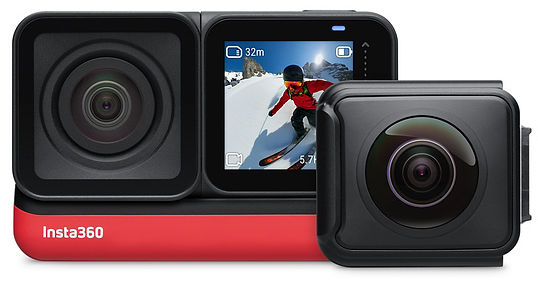
Modular and therefore can add modules that offer different / better features
HDR (high dynamic range) for better image quality
More advanced desktop editing software
Cons:
Modular and therefore can be a hassle to have to switch modules, especially quickly in order to capture a moving target
GoPro Max
Pros:
Easy to use without having to assemble modular parts
Cons:
No HDR (high dynamic range)
Desktop editing software not as powerful as the Insta360 Studio
Insta360 One X2
Pros:
Small
HDR (high dynamic range) for better image quality
Ricoh Theta SC2
After testing the GoPro Max, Insta360 One X2, and the Ricoh Theta SC2, it clear that the Insta360 One X2 is the better camera.
Virtual Reality / 3D Panorama Software
Marzipano
Marzipano is free and open source. You can use the Marzipano tool to quickly upload 360 photos and then download a complete website with all code to host yourself. However, you can only zoom out so much as shown in the screenshot below.
Kuula
Kuula lets you upload 360 photos and embed a 360 viewer of your photos on your website. You can also zoom out much more than with Marzipano as shown in the screenshot below.
You can then take a screenshot of the zoomed out 360 photo which doesn’t show very warped and curved lines.
Metareal
Metareal is a great alternative to MatterPort. You can create floorplans as well and pay a nominal fee to have Metareal convert your 360 photos into virtual tours for you.
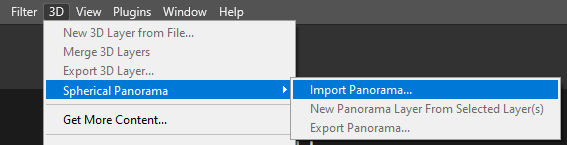
Photoshop
In Adobe Photoshop, you can import a 3D panorama photo
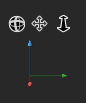
In the lower left corner, when you have the white grid enabled, you will see orbit, pan and dolly buttons to move the image around.
Under Properties, you can adjust the Vertical FOV (Field of View) to zoom in and out.
GoPro Player Desktop App
The GoPro Player desktop app will also open 360 photos and let you rotate and zoom in and out. But, unlike Photoshop and Kuula, you’ll get a fisheye view as shown below.
Google Photos Mobile App
The Google Photos mobile app has a Panorama feature but you have to move your camera horizontally or vertically to capture create the panorama. It’s not a full 360 degree panorama but it does support scrolling in Google Photos.
Insta360 Studio
The Insta360 Studio desktop app is definitely better than the GoPro Player desktop app. It’s got more features and is intuitive to use.
It is January 2, 2021 and the previous year has surprised everyone. Analysts predicted home prices to fall due to the global Coronavirus pandemic but in the US, home prices surged despite millions of Americans losing their jobs.
At this time, the cost to rent an apartment in Hayward, California is
~$1600 / month for a 1 bedroom apartment
~$1800 / month for a 2 bedroom apartment
Now, let’s see how much it costs to buy a house with the following assumptions:
Buyer credit score is 680
Buyer has never purchased a home before
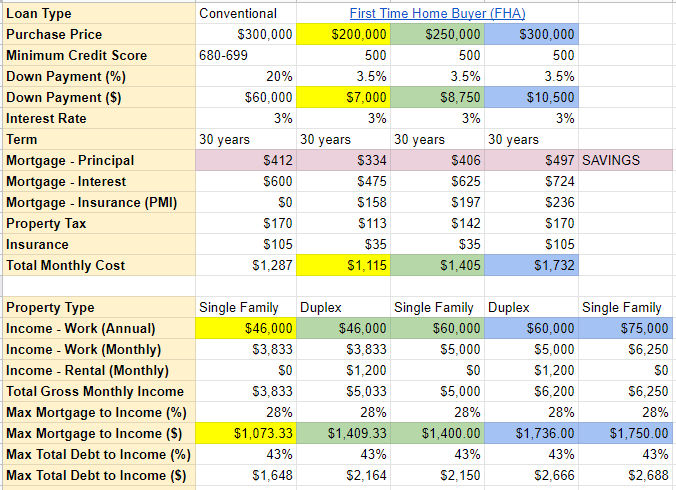
The top half of the table below shows 4 different loan scenarios.
Conventional loan requiring a 20% down payment and a purchase price of $300K
FHA (first time home buyer) loan requiring a 3.5% down payment and mortgage insurance for a purchase price of $200K, $250K, and $300K
At this time, Zillow indicates that one with a credit score between 680 and 699 can get a 30 fixed rate mortgage for 3%.
For a conventional loan of house costing $300K, if one has $60K for the 20% down payment, their monthly mortgage including principal, interest, taxes, and insurance (PITI) would be $1287. This is far below the the cost to rent a 1 bedroom apartment in Hayward, CA.
For the FHA loan, one would only need a 3.5% down payment but they’d have to pay mortgage insurance. The total monthly mortgage-related expenses (PITI) are
$1155 for a $200K purchase price
$1405 for a $250K purchase price
$1732 for a $300K purchase price
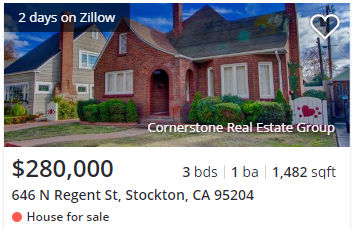
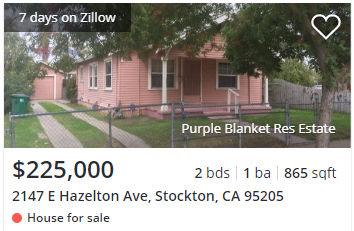
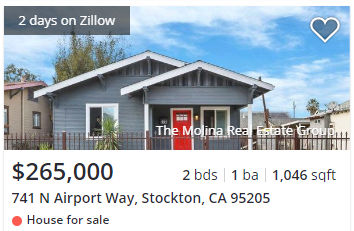
These costs are all lower or equal to the cost to rent in Hayward, CA. The problem, however, is house prices in Hayward are very high. The closest large city with house prices between $200 and $300K is in Stockton, CA, e.g.
Now, just because the monthly mortgage expenses are lower than the cost to rent, that doesn’t mean one would qualify for a loan. Lenders require
mortgage expenses (PITI) to be no more than 28% of one’s gross monthly income before taxes
total debt (including mortgage expenses) to be no more than 43% of one’s gross monthly income before taxes
The bottom half of the table below shows different income scenarios as follows:
Having a gross annual income of $46K and buying a single family home
Having a gross annual income of $46K, buying a duplex and renting one unit out for $1200 per month
Having a gross annual income of $60K and buying a single family home
Having a gross annual income of $60K, buying a duplex and renting one unit out for $1200 per month
Having a gross annual income of $75K and buying a single family home
In these scenarios, we find that:
If you have a gross annual income of $46K and
you buy a single family home, then your maximum mortgage expenses can be $1073.33. In this case, you can buy a house for $200K (yellow cells)
you buy a duplex and rent out one unit for $1200 per month, then your maximum mortgage expenses can be $1409.33. In this case, you can buy a duplex for $250K (green cells)
If you have a gross annual income of $60K and
you buy a single family home, then your maximum mortgage expenses can be $1400. In this case, you can buy a house for $250K (green cells)
you buy a duplex and rent out one unit for $1200 per month, then your maximum mortgage expenses can be $1736. In this case, you can buy a duplex for $300K (blue cells)
If you have a gross annual income of $75K and
you buy a single family home, then your maximum mortgage expenses can be $1750. In this case, you can buy a house for $300K (blue cells)
But Stockton is too far from Hayward!
Assuming you currently live and work in or around Hayward, then it’s true that Stockton is a bit far. According to Google Maps, it’s about a 1 hour drive in no traffic between the two. However, according to this article, many people who work in the Bay Area can no longer afford local housing and have moved to Stockton and commute.
What if I save money and buy a house later?
If you make $46K a year and rent an apartment for $1800 per month, you probably won’t have much left over to save. And, even if you could save $100 per month, house value appreciation could outpace your savings. When you buy a house, some of your monthly payments go towards paying down the principal on your home loan. That, in effect, is a form of savings (pink cells in table) but in the form of equity in the house rather than cash in the bank. After a few years, your wealth could grow in 2 ways:
Appreciation of house value
Equity in paying down the principal on your home loan
You could then potentially sell the house and use the proceeds to put 20% down on another house thereby reducing your monthly mortgage payments even further.
What if the house value drops?
According to this article, recessions typically occur around every 10 years but they don’t necessarily cause house prices to flatten or drop. Housing busts typically occur every 18 years. The last housing crisis was in 2008 so the next one may occur in 2026 (5 years from now).
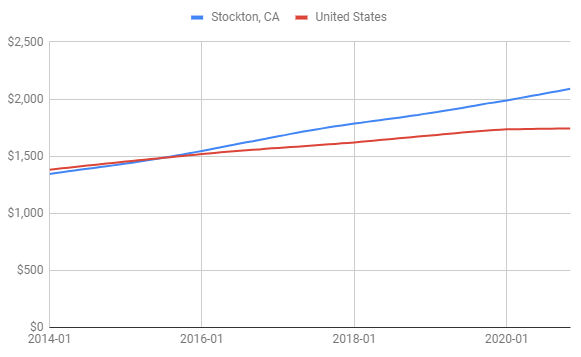
House Value Trends
Using data from Zillow Research Data, we can create a custom graph showing house value trends like the one below.
Similarly, we can chart the rent cost over time. Below is an example using US and Stockton, CA rents.
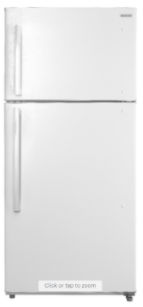
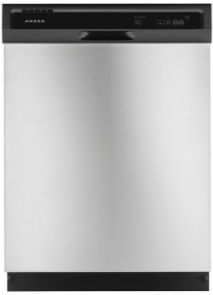
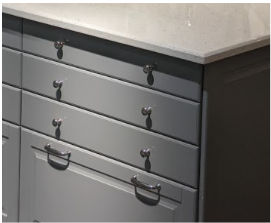
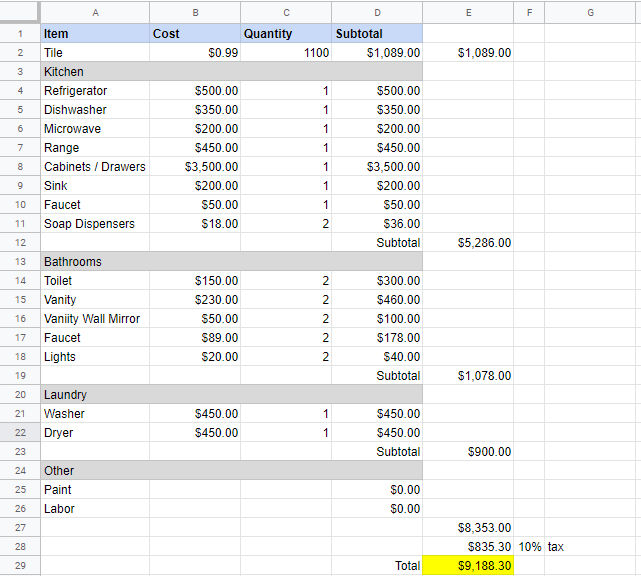
Assuming you have 3 bedroom, 2 bathroom 1100 square foot investment property, following is a breakdown of costs to remodel it relatively cheaply and quickly using neutral colors.
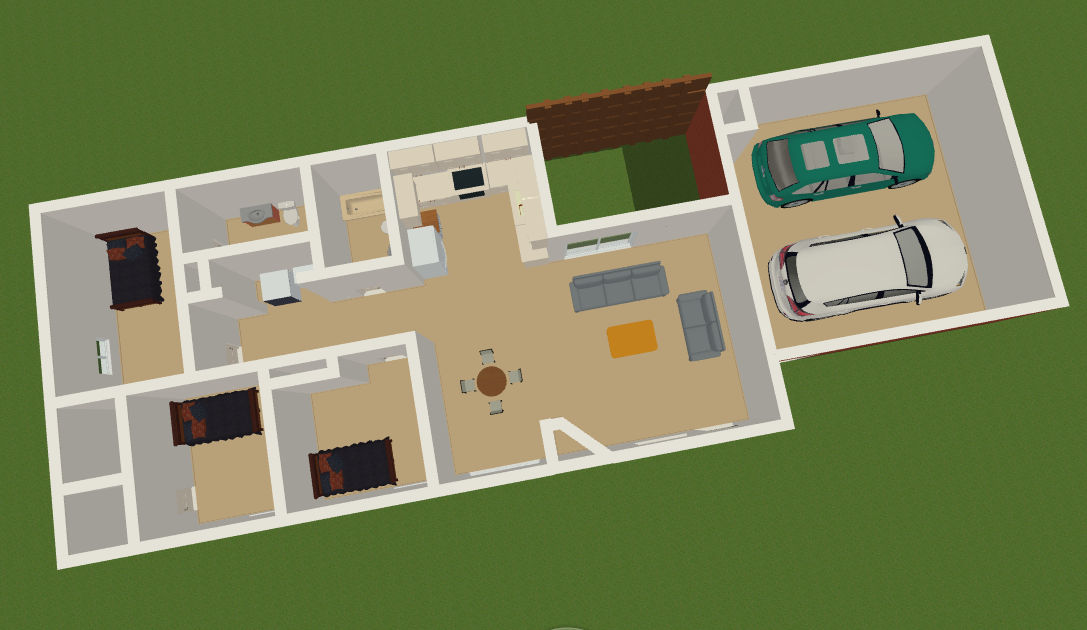
Floor Plan
Using Live Home 3D, this is an example of a 3 bed, 2 bath, 2 car garage house. The kitchen is U-shaped. The bedrooms are almost all the same size. Two of the three bedrooms have walk-in closets. The laundry is central to the house. There is a small patio next to the kitchen and living room.
If you go to Google Translate, you can not only translate text from one language to another, but you can also listen to the translation. For example, this English to Chinese translation allows you to listen to the pronunciation of the Chinese text.
Google’s Cloud Text-to-Speech API allows you to programmatically generate mp3s of any text. Below are steps to do it on Windows using PHP.
When you follow the steps above, you will download a JSON file containing your credentials. You need to set an environment variable by opening a command prompt and entering
set GOOGLE_APPLICATION_CREDENTIALS=path-to-json-file
You can then verify it is set by typing “set”.
That environment variable is temporary and will persist for the duration of the terminal session. To set the environment variable permanently, follow these steps.
Composer will need a php.ini file. If one doesn’t exist, it will create one.
4. Update php.ini
To ensure your SSL certificates are up-to-date, download the latest cacert.pem from https://curl.haxx.se/ca/cacert.pem. Then, edit php.ini as follows:
curl.cainfo=”/path/to/downloaded/cacert.pem”
5. Create PHP Script
Copy and paste the example code from the instructions in step 1. This is a PHP script so wrap the code in <?php … ?>. Save it as test-text-to-speech.php somewhere.
6. Run PHP Script
At the command prompt, verify the Google environment variable is set and then run the PHP script. If PHP is in your path, you can run, for example,
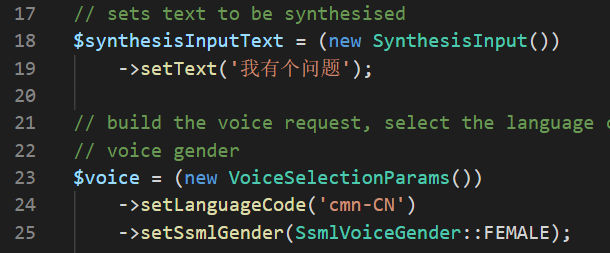
This will output an audio file (output.mp3) in the same folder. By default, the text is “Hello, world!” and the language code is en-US. You can change the text to Chinese, for example: 这是一个测试 and change the language code accordingly to cmn-CN. Then, you’ll get the same speech as what you hear in Google Translate.
Fence gate locks are usually simple locks that can only be opened from one side. There are times, however, when you wish you could just open the gate from outside instead of opening the main door to your house and then walking all the way to open the gate from the inside. One popular two-sided gate lock is YardLock. It’s a keyless gate lock that costs $55 on Amazon.
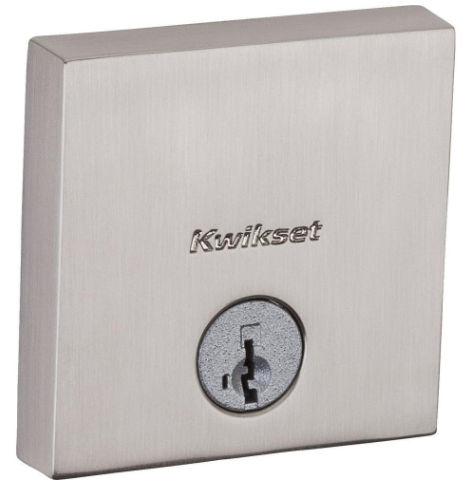
Another option is to install a traditional keyed deadbolt lock. You can also get one that allows rekeying the lock so that you can use the same key as you have for your main door like this one from Kwikset which costs $35.
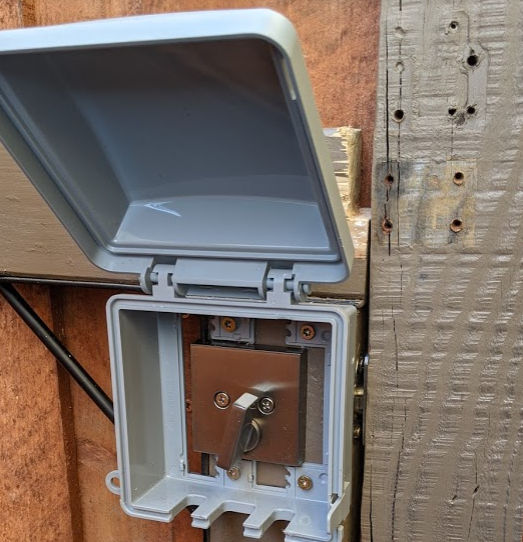
Of course, you’d also need to drill 3 holes for the lock and the bolt like you would for a traditional door. Here’s an example of an attempt at this approach. The photos below show how the lock looks from the outside. For weather protection, I just cover the lock a piece of fence wood attached to a door hinge. Instead of a fancy knob, I just screwed a metal clamp into it.
Outside view
The photos below show how the lock looks from the inside.
Outside view
It’s not as elegant of a solution as the Yardlock although it can be made to look elegant. It does have the advantage of being more secure than the Yardlock.
Not everyone has specialized skills or the ability to get a 4 year degree or higher due to their unique circumstances. Though having a college education normally results in higher pay, you don’t always get paid more for having a higher education. One must wonder, then, what is the highest paying job for the lowest level of education. Fortunately, the US government collects labor data and provides a ton of information to help people compare careers, salaries, education requirements, and more. This information is updated regularly and available at the US Bureau of Labor Statistics Occupational Outlook Handbook website.
Here, we can search for careers starting from the lowest level of education up to having a 2-year associate’s degree. With each search, we can filter by average annual salary. Here are the results. Occupations with salaries below $40,000 a year are excluded.
The occupations in the results above are mostly manual labor jobs like carpentry, landscaping, cooking, construction, driving, farming, machine operating, etc.
Education Level: High school diploma or equivalent
For this education level, the fastest growing occupation is “Computer Support Specialist” with a 2019 Median Pay of $26.33 per hour or $54,760 per year.
For this education level, there is only one occupation in the $80,000 more category. It is “Electrical and Electronics Installers and Repairers” with a 2019 Median Pay of $28.40 per hour or $59,080 per year. However, this occupation is in decline and not growing.
On the summary page for “Electrical and Electronics Installers and Repairers” we find a link for how to become a Electrical or Electronics Installer and Repairer. It looks like one would go to a vocational or apprenticeship school and take specific courses to become an electrician. A Google search reveals that in California, you must be licensed and there are 5 types of licenses. You would need to enroll in a State-approved electrician trainee school. For example, one school located in San Leandro, California is called Alameda County Electrical JATC. This is a 5 year program includes 8000 hours of paid on-the-job training during the day and 900 hours of classroom instruction during day and evenings.
Costs:
$620 for books (first year)
$500 for tools
An electrician
Education Level: 2 Year Associate’s Degree
For this education level, the fastest growing occupation is “Radiation Therapist” with a 2019 Median Pay of $41.14 per hour or $85,560 per year.