If you want to create a video of an animated character that moves its head and lips as you move your head and speak, you can do so easily using Adobe Character Animator. Here’s how.
In Adobe Character Animator, click File > Import and select the puppet file.
2. Import a green screen
Since we’ll want to overlay the exported character animation on other elements in a video editing program, we’ll want to add a green screen so we can key it out. Create a solid green image (RGB = 0,255,0) the size of the scene, e.g. 1920 x 1080. Then, import it and drag the imported item to the lowest layer it the Timeline panel.
3. Enable Puppet Track Behaviors
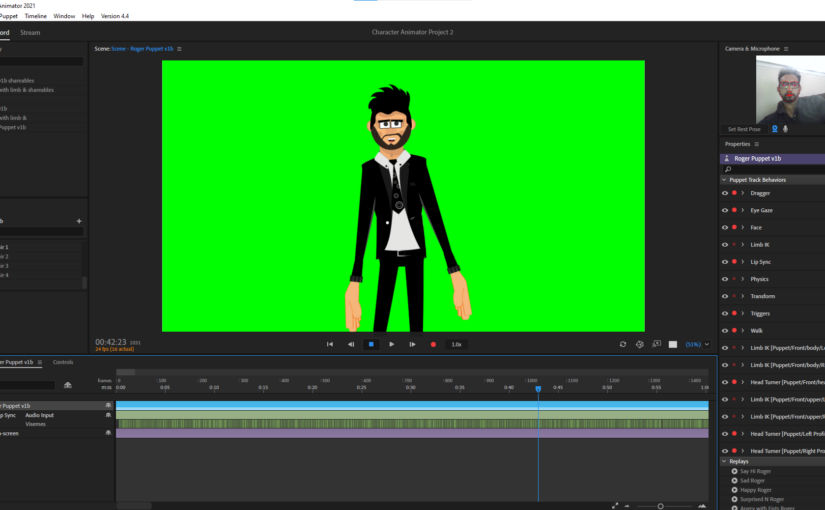
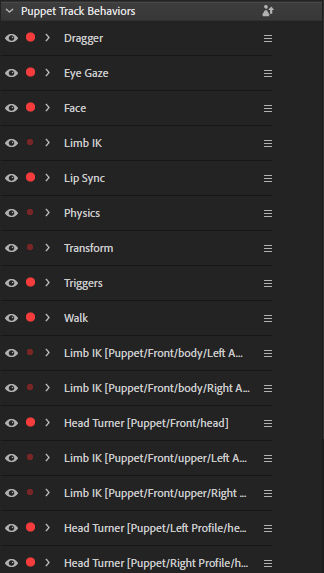
We can tell Adobe Character Animator which parts of our face and body to track as we move and talk in the camera. Click on the puppet layer to reveal the Puppet Track Behaviors panel.
The red button indicates that the particular item will be tracked when you move in front of the camera. For example, the Face item, when expanded, will show a red dot by “Camera Input” meaning if move your face in front of the camera, your facial gestures will be tracked and the puppet’s face will move accordingly.
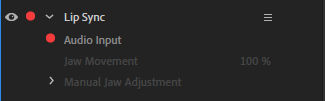
For the lip sync item, the red dot is by “Audio Input” so if you speak, the microphone will capture your voice and convert it into lip movements on your puppet.
For Adobe Character Animator to track your head and lip movements, you need to enable your camera and microphone. You’ll see a circle where your face should be centered in your resting position. Once centered, click the “Set Rest Pose”. You’ll then see a bunch of red dots on your face indicating points where Adobe Character Animator will track your facial gestures.
5. Start recording
Click the red record button. A 3 second countdown timer will begin. Start talking naturally and when you are done, click the red button again to stop recording.
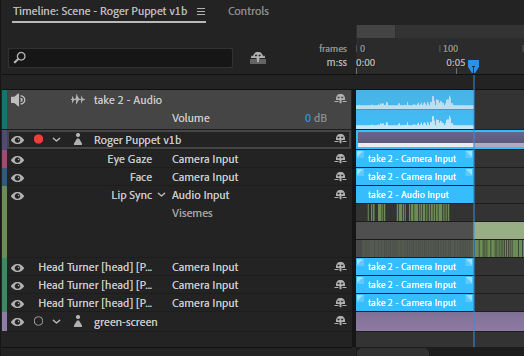
You’ll then see some layers added to the timeline including your voice audio layer.
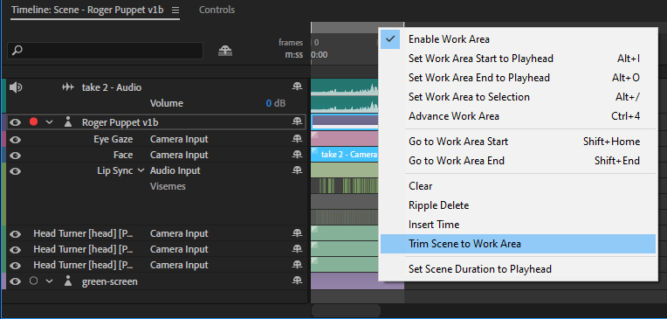
If some of the layers are longer than the audio layer, e.g. the puppet, Visemes and green screen layers in the screenshot above, trim the scene so the duration of the scene is the duration of the audio. Drag the right end of the gray Work Area bar to the right end of the audio track. Then, right click on that bar and click on “Trim Scene to Work Area”.
Now, your scene duration will just be the duration of the Work Area, in this case 5:20.
6. Preview and export the result
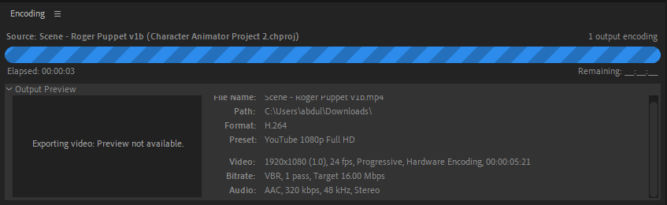
Click the play button to preview the recording. If you are happy with it. you can export it by clicking File > Export > Video via Adobe Media Encoder. This will open Adobe Media Encoder. In the Queue panel, choose a format (h.264) and preset (Match Source – High bitrate or YouTube 1080p Full HD). Then, click the green play button to start encoding.
You will see the encoding progress in the Encoding panel. You’ll also see the video duration as 5:21 seconds as that is the length of the scene in this example.
I recently had to rebuild a bunch of fences on a new rental property. As you may already know, the hardest part is digging the holes and building the frame. This article explains step by step how to quickly and correctly build a fence frame.
1. Run string from one end of new fence to the other end near the ground
In order for the fence to be straight, we need to make a straight line from both ends. Since we haven’t dug holes yet, we put the string near the ground so we can mark where we want the holes for the fence posts to go.
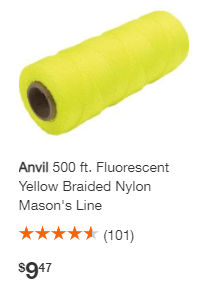
Nylon Mason’s line is thin and can easily break. Instead, you can use paracord.
2. Mark post hole locations
Depending on the existence of neighboring fences, we may or may not need posts at the ends. Mark where the post holes will go. Each fence panel between posts will be 8′ long. For marking the locations, you can use a wood stake, metal stake, flag stake, or spray paint. I prefer using flag stakes.
3. Dig fence post holes
Post type
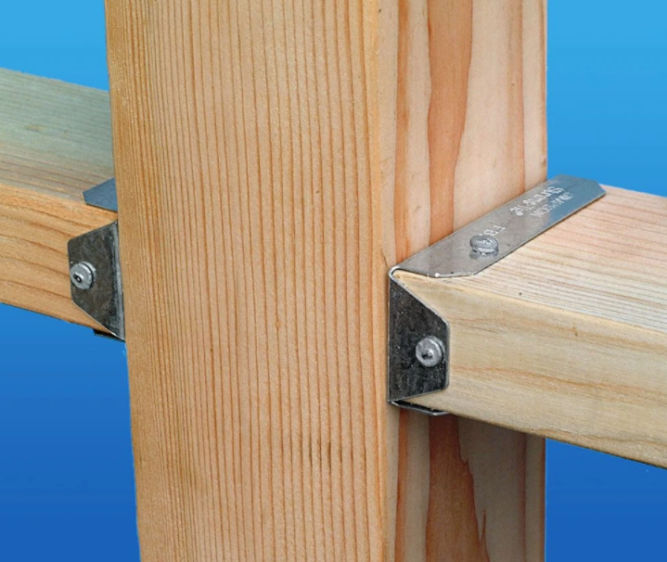
Normally, people use 8′ long 4×4 pressure-treated wood for fence posts. If you do that, then the horizontal 2x4s (rails) will have to be toenailed into it or secured using metal brackets.
Toenailing 2×4 rail to fence postFence rail bracket
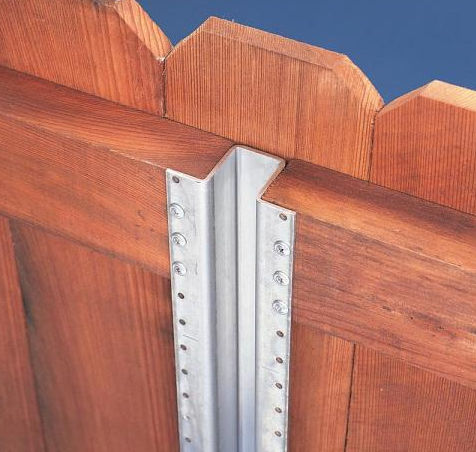
Either way, that’s a lot of work, especially if you later decide to make adjustments. Also, the wood can rot,weaken, and become warped over time. For these reasons, I just spend the extra money and buy steel fence posts.
The post hole diameter should be about 3 times the width of the post. Since the steel posts are 3.5″ wide, then the hole should be about 10.5″ in diameter.
Post hole depth
The post hole depth should be 1/3 to 1/2 the post height above the ground. Since we want our fence to be the standard 6′ tall, and the steel posts are 7.5′ long, we’ll make our holes 2.5′ deep.
Top of fence
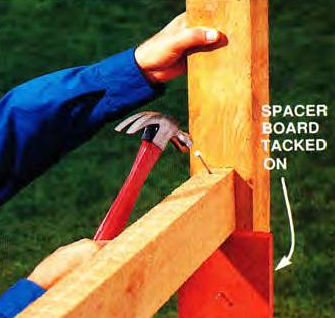
The height of the fence post and the top rail above ground will be 5′. Therefore, the top one foot of the 6′ tall vertical fence boards will be above the top rail. The problem with this is the top one-foot portion of the fence boards can warp.
To fix this, you can screw a horizontal piece of wood (2×3 or 2×4) at or near the top of the fence boards on the side where the fence rails are.
Soak the ground
Before digging holes, you’ll want to soak the ground, preferably overnight. This will make it much easier come time to dig. The deeper you dig, the harder the soil. You can dig a small hole first using a hand digger.
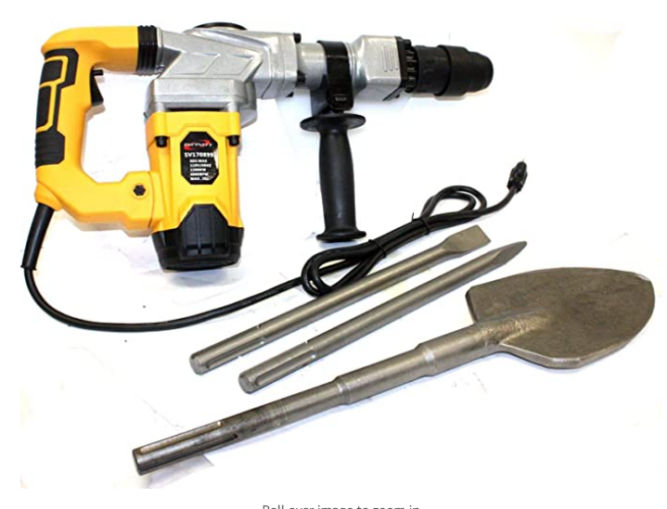
Or, preferably, you can just use a jackhammer with a spade bit.
Digging tool
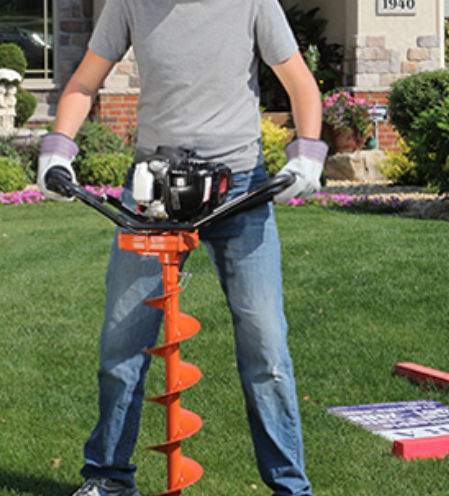
To dig holes, the easiest and cleanest way is to use a gas-powered earth auger. You can rent one from the Home Depot ($55 for 4 hours). You can choose from a variety of auger bit diameters. Choose a 10″ or 12″ diameter auger bit.
When you are digging, if you can’t dig any deeper, then stop and pour water into the hole and let the water drain. You can then dig again.
You may run into roots and rocks while digging with the auger. In this case, you’ll need to cut the roots using a reciprocating saw or break up the rocks using a jack hammer.
4. Tie a string to both end posts
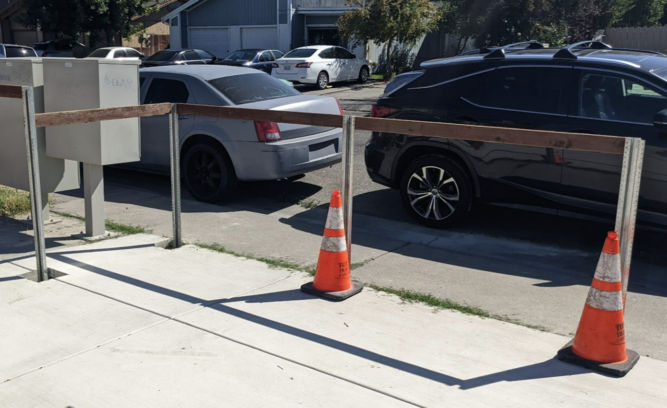
Now that you have 2.5′-deep holes, you can insert the steel posts at each end. Tie string or paracord from one end post to the other both near the bottom and top of each post. The purpose is to adjust the middle posts to be aligned with the end posts. Later on, when concrete is poured into the middle post holes, the middle posts should touch the string.
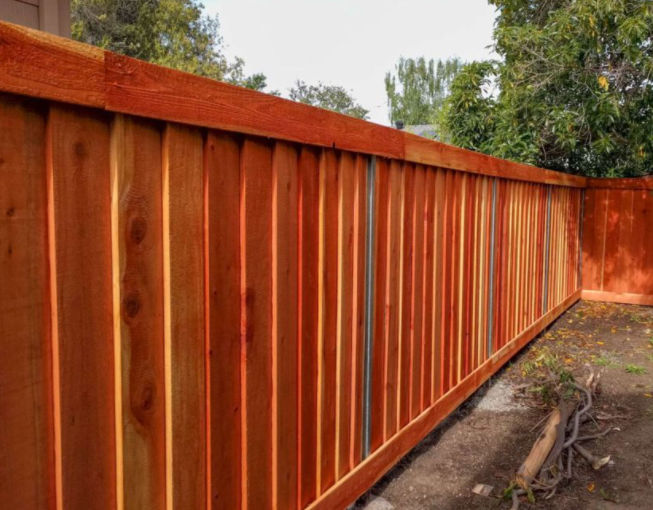
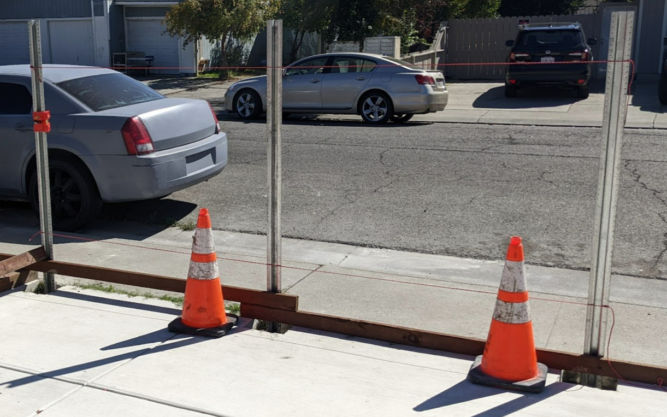
In the photo below, there are a total of 3 posts and 2 string lines connected to each end post.
5. Plumb and brace the posts
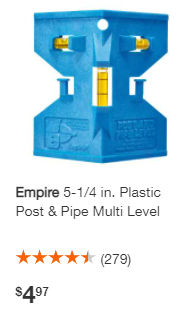
Adjust the position of each post using a fence post level and check for plumb.
To hold the posts in place, if the surrounding ground is dirt, brace them using stakes. I prefer hitting a 2′ long steel stake straight into the ground and then screwing a piece of wood horizontally between the steel stake and the post. The steel stakes are pre-drilled. There should be two braces perpendicular to each other to hold the post plumb.
6. Mix and pour concrete
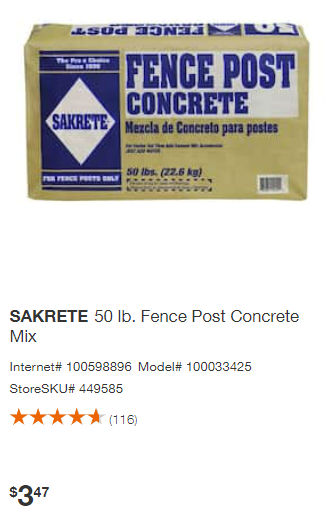
Buy fence post concrete.
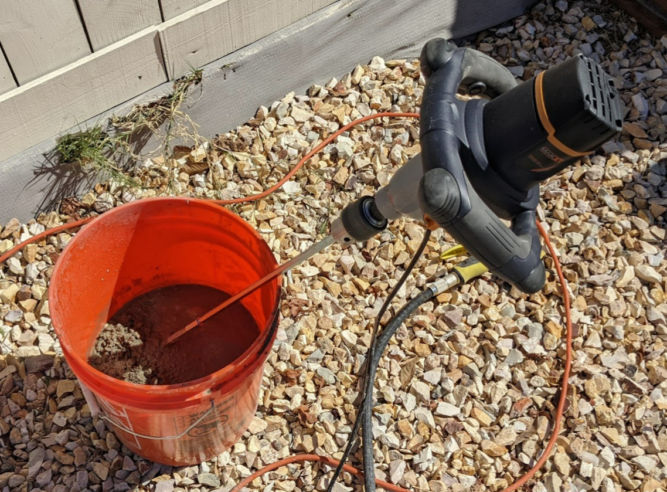
Pour half the bag of concrete in a 5-gallon bucket, add water, and mix using a special mixer for concrete.
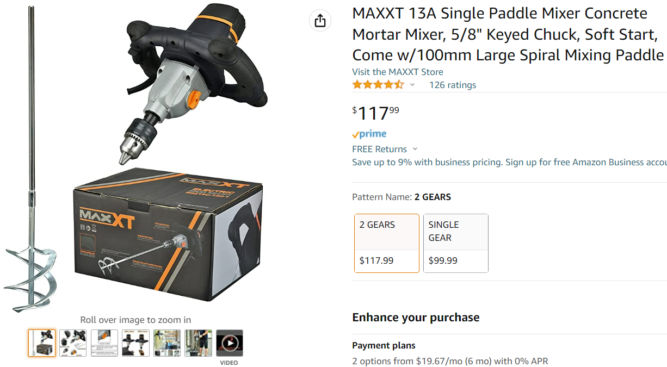
The mixer I use is a 2-gear mixer shown below. The first / low gear is for mixing concrete. It has high torque and low speed which is what you want. If you use a high-speed mixer, the concrete mix gets everywhere, creates a mess, and can crack the bucket. I find this particular mixer to be perfect for mixing concrete.
The consistency of the mix should be watery but not too watery. You should be able to pour the concrete mix straight out of the bucket. If you can’t pour the concrete mix, then you need to add water.
7. Add concrete to the middle posts
Now that the 2 end posts are done, add concrete to the middle posts. If you haven’t braced the middle posts, that’s fine. Once you add some concrete, you can position the posts while the concrete is still wet. Make sure the middle posts touch the top and bottom string lines to ensure a straight fence.
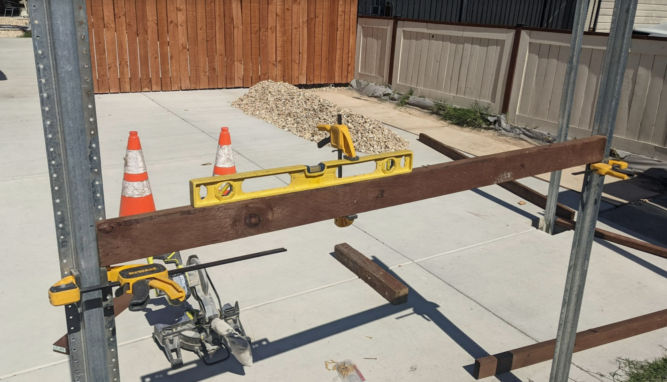
8. Add horizontal fence rails between posts
Once the posts are secure and the concrete is dry, measure how high you want the horizontal rails to be. Then, add clamps to the posts. The clamps will hold the rails in place before you’ve had a chance to screw them to the posts. Secure a level to the top fence rail
9. Cut posts
Cut the top portion of each post using a reciprocating saw with metal blade.
You can just accept the default values (unless the defaults are asking you to pay for an upgrade).
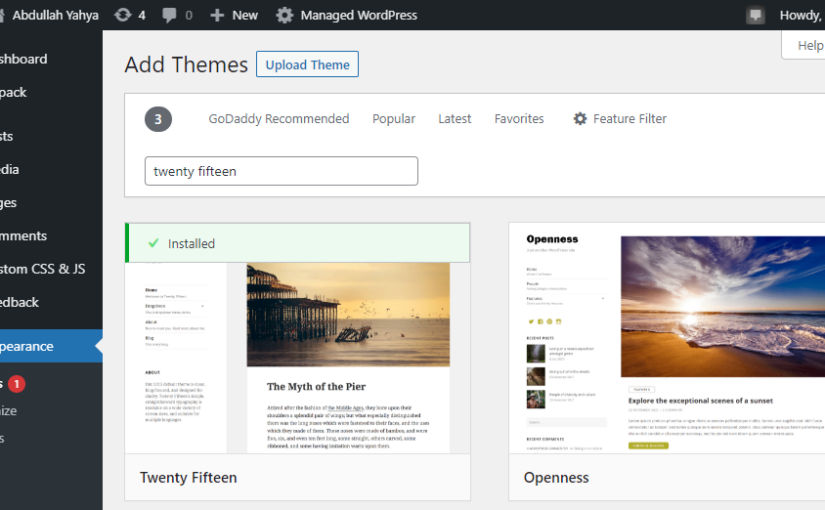
Change the theme to the Twenty Fifteen
In the WordPress dashboard, go to Appearance > Themes > Add Themes and search for “Twenty Fifteen”.
Create a child theme of the Twenty Fifteen theme
style.css
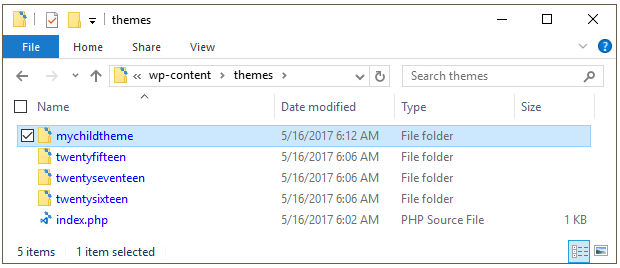
Create a folder called mychildtheme or whatever you want to call it.
In the mychildtheme folder, create a style.css file with the following content:
The style.css file tells WordPress to load the Parent Theme’s files after the Child. It will override any styles in the Parent Theme’s style.css file that have the same selectors.
Template:Very Important! This is the folder name of the parent theme. If this variable is not correct the Child Theme will not work.
functions.php
In the mychildtheme folder, create a functions.php file with the following content:
This code tells your theme to call the style.css file and the parent CSS file.
screenshot.png
In the mychildtheme folder, create a screenshot.png file. A theme’s screenshot is the thumbnail image that shows up under Appearance > Themes in the WordPress Dashboard. The recommended image size is 880×660. The screenshot will only be shown as 387×290, but the larger image allows for high-resolution viewing on HiDPI displays.
Upload your child theme
Upload the mychildtheme folder to wp-content/themes.
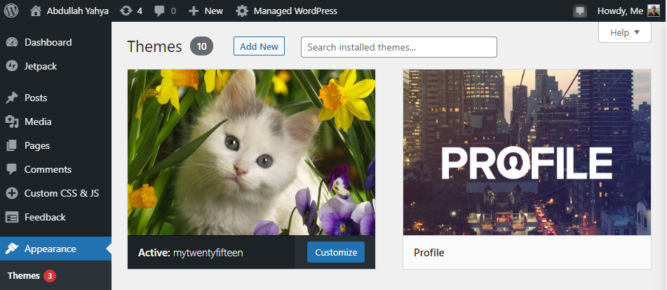
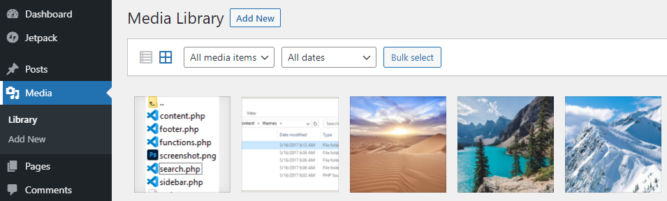
In the WordPress admin, go to Appearance > Themes in the Dashboard. You should see your theme listed. Click to activate it. In the screenshot below, my theme’s screenshot thumbnail is a picture of a cat.
Edit templates
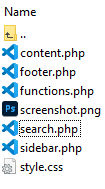
Any PHP file in your mychildtheme folder will override the same file in the parent theme. For this site, I created some PHP templates so my child theme folder looks like this.
Download all files as a compressed zip file, unzip it, and upload each file to your mychildtheme folder.
Add background images
Search Google Images for large background images. Upload them to your WordPress Admin via the Media page. Make a list of URLs based on what you see for each uploaded image in WordPress.
Add JavaScript to randomly pick a background image
To add custom JavaScript, I just installed the “Simple Custom CSS and JS plugin” . Copy the code below , update the URLs to be the backyard images you uploaded to WP-Admin, then paste the code.
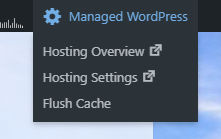
Whenever you update CSS or JS, make sure to flush the cache to see your changes.
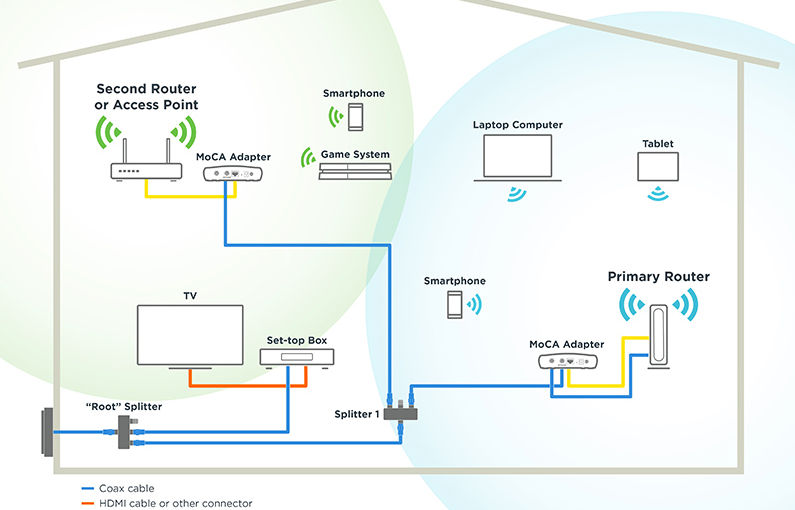
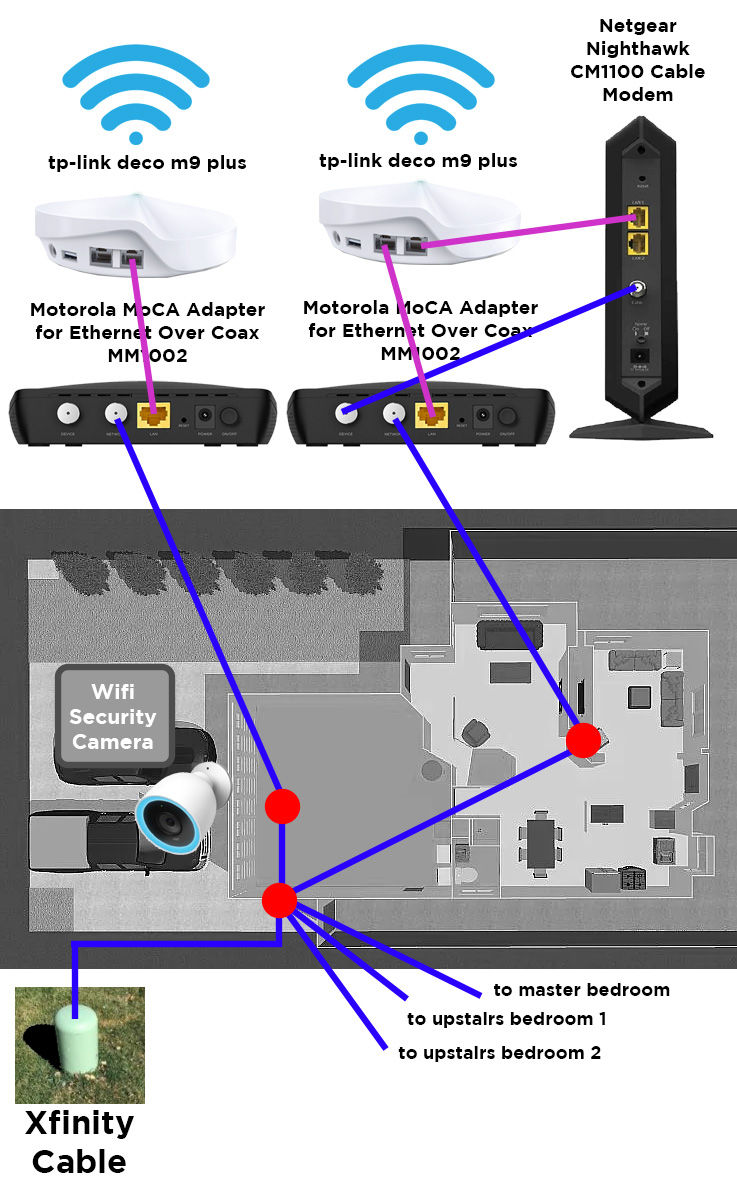
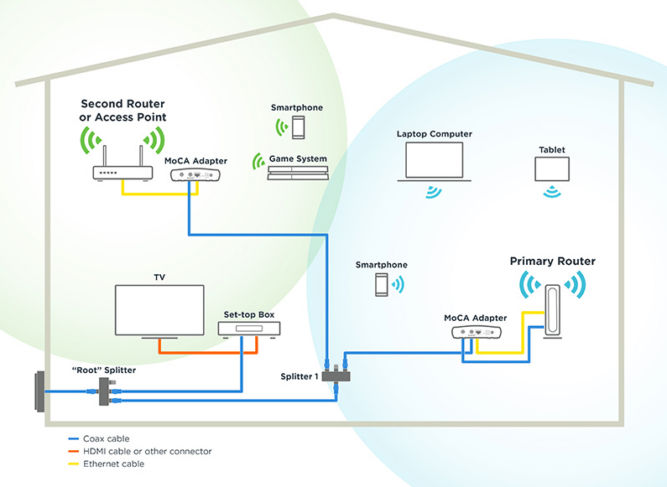
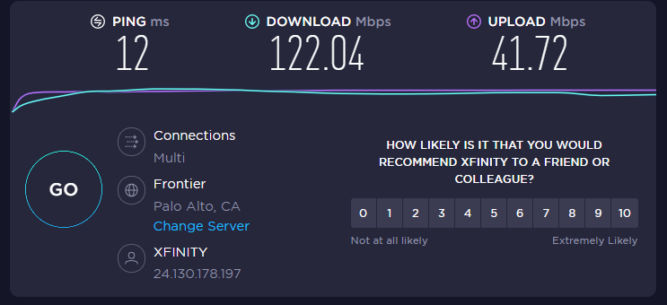
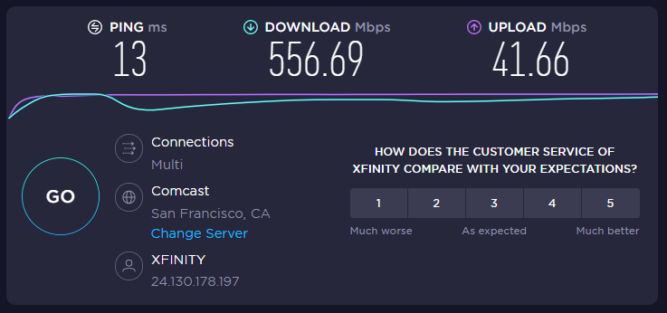
So, in my 2 story house my internet modem is in the family room in the back of the house. The internet comes over coaxial cable by Comcast xFinity 1Gbps. There is a security camera at the front of the house facing the driveway. Every now and then, the security camera would go offline. To spread wifi all over the house, I have the tp-link deco M9 plus AC2200 mesh wifi router (3 wifi access points). The backhaul between access points is wifi, unfortunately. I can’t have a wired ethernet backhaul between access points because running ethernet cable would require opening up walls which is a lot of work. Fortunately, however, there is existing coaxial cabling throughout the house. So, I can use MoCA (Multimedia over Coax Alliance) adapters to bridge ethernet over coax so I can have a wired coax backhaul between access points. This allows the wifi signal at each access point to be much stronger than with a wifi backhaul. There are many diagrams and tutorials online but none that I found were clear enough hence this blog post. Below is my setup with a diagram which should make it clear what goes where.
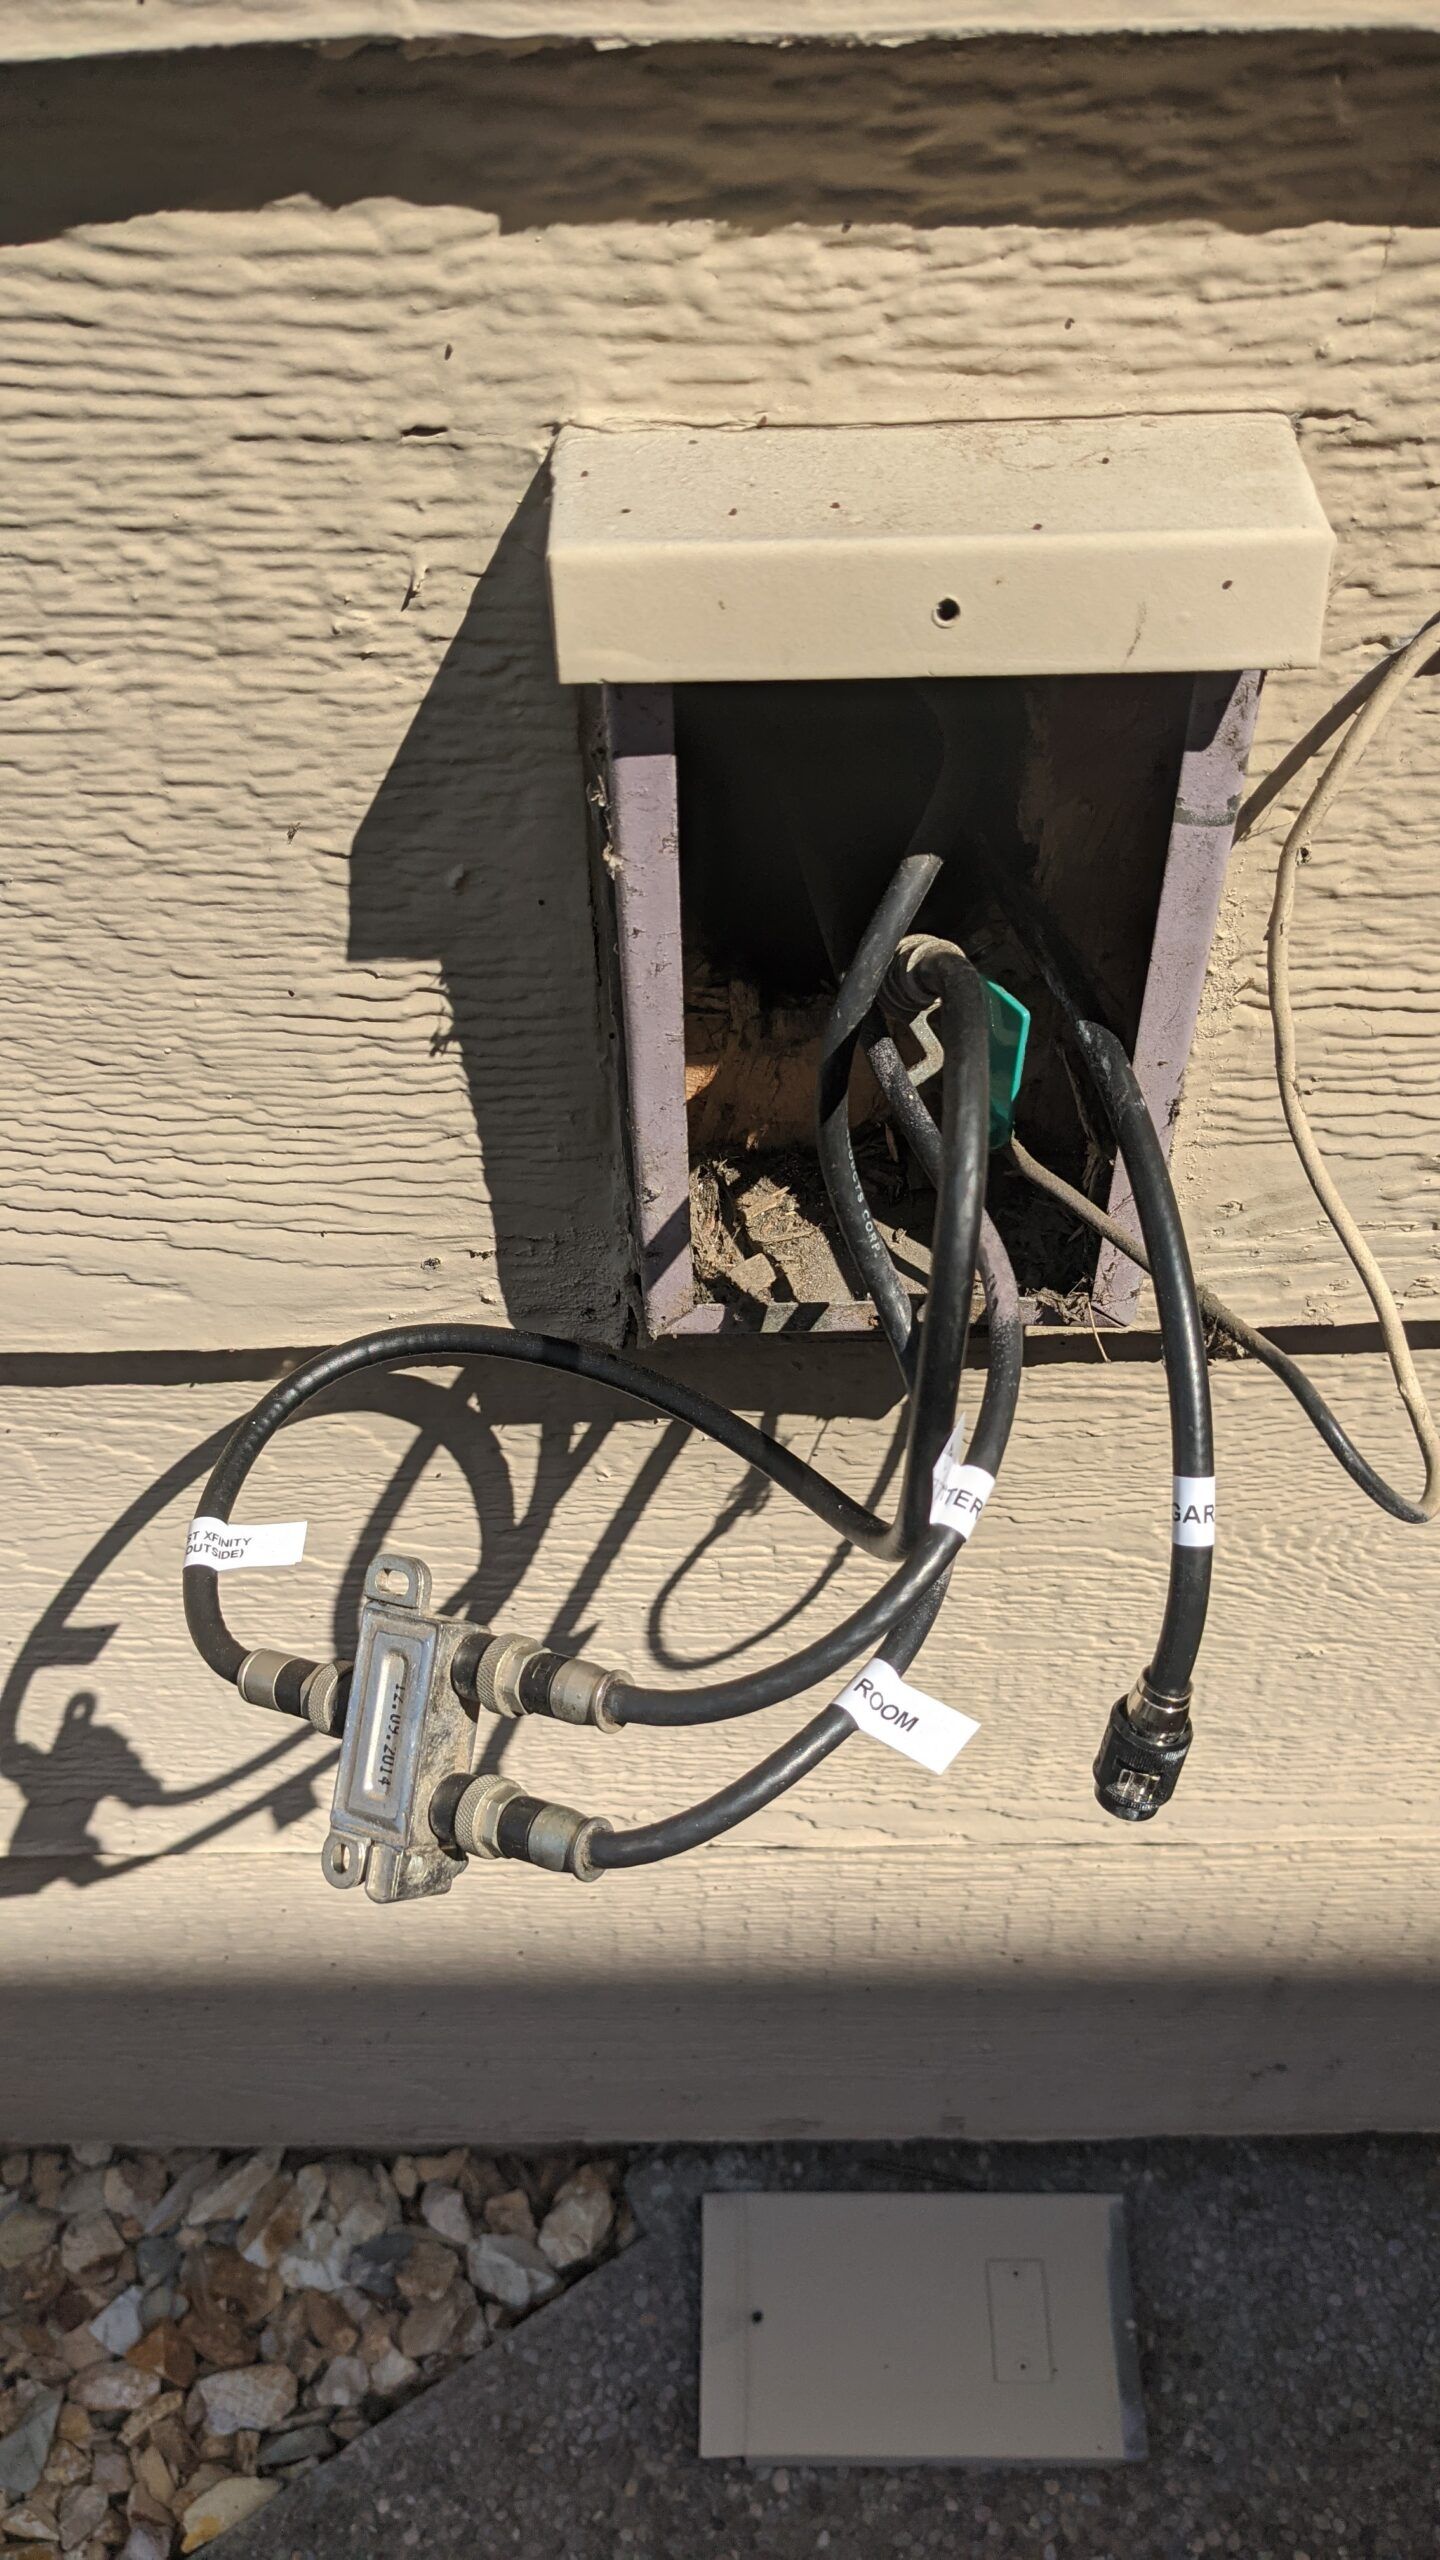
The continuity tester doesn’t work through splitters. Once you’ve tested all cables, you can label them in your junction box like I did below. As you can see, there is a 1 – 2 splitter where the one input is the coax cable from xfinity. The two outputs each go to the master bedroom and family room.
I added a new coax cable to go to the garage but it’s not connected in the picture because I need to add another splitter or replace the existing splitter with a 1-3 (or more) splitter. For MoCA to work, you need a splitter that
is not amplified
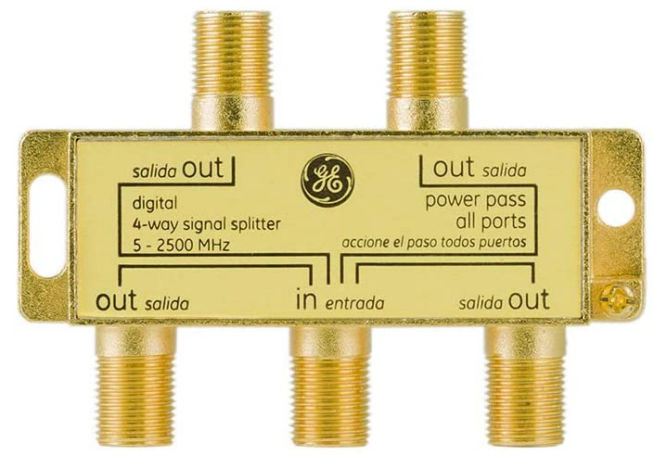
goes up to at least 1.5 Ghz (1500 Mhz)
GE Digital 4-Way Coaxial Cable Splitter, 2.5 GHz 5-2500 MHz
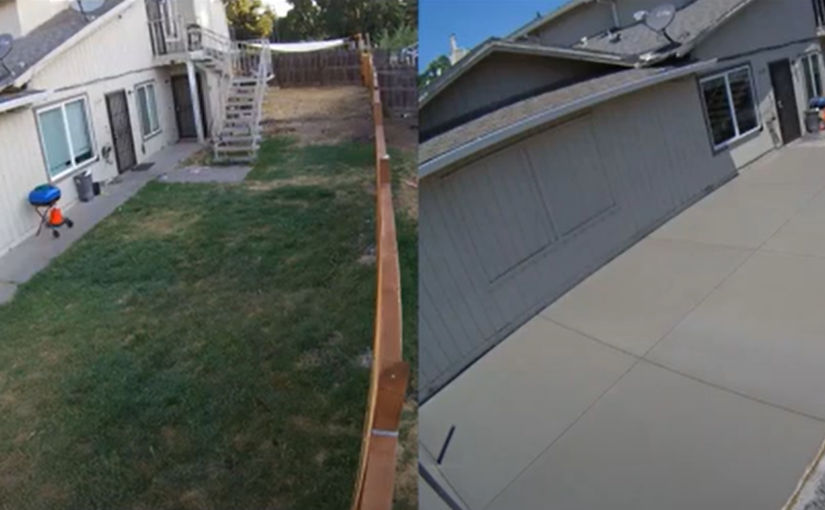
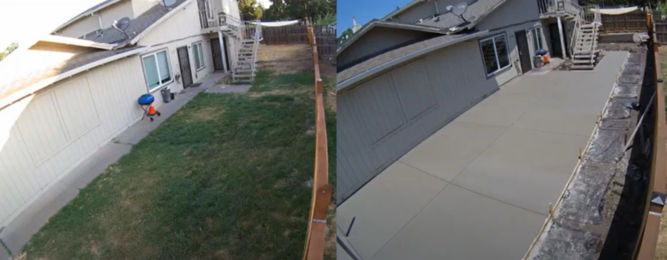
Before and After
BeforeAfter
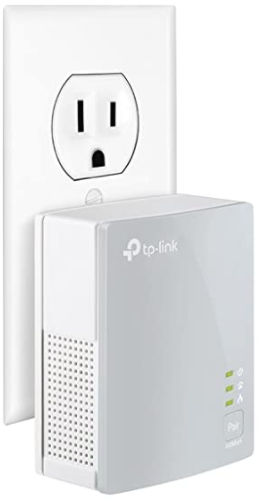
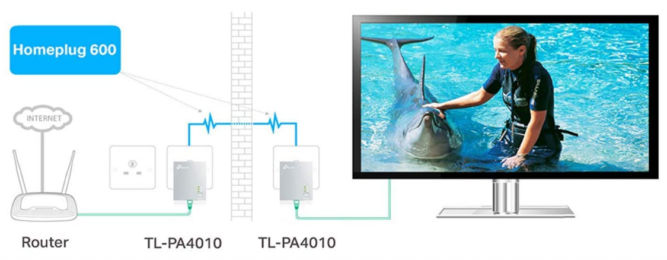
Powerline Adapters
You can also bridge ethernet over your home’s existing electrical wiring using Powerline adapters, e.g.
However, these adapters don’t work if there’s a surge suppressor. Also, there’s a lot more activity in your home electrical wiring that could interfere with the signal, e.g. from the refrigerator, hair dryers, air conditioners, washing machines, and other appliances.
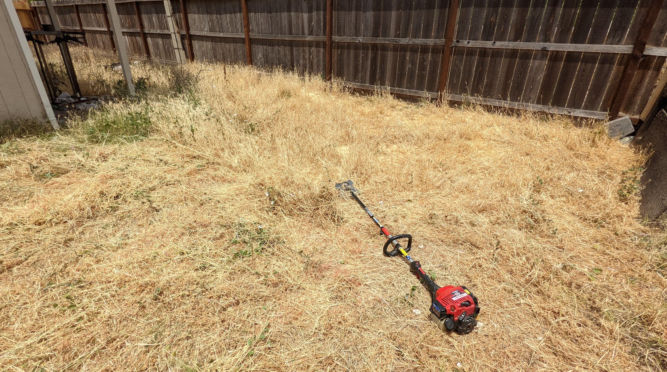
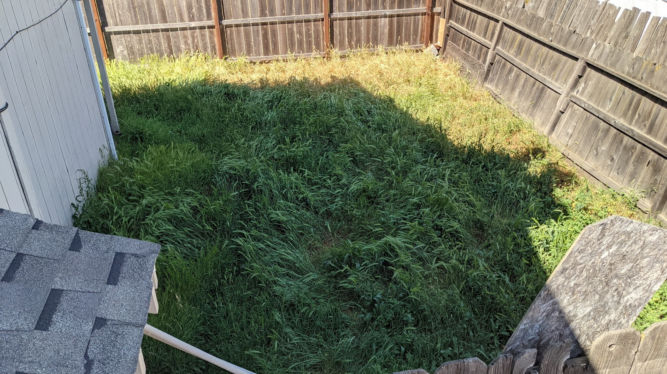
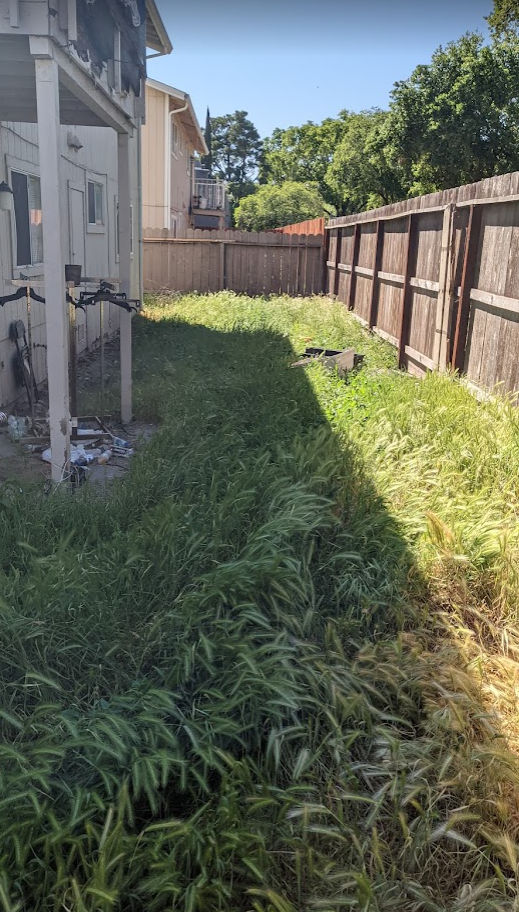
At one of my rental properties, I had some really ugly grass on the on both sides of the property and a jungle of weeds in the back. The space was wasted because not could or wanted to use it.
The previous owners (investors) didn’t want to / know how to maintain the property so I was able to buy it from them at a discount.
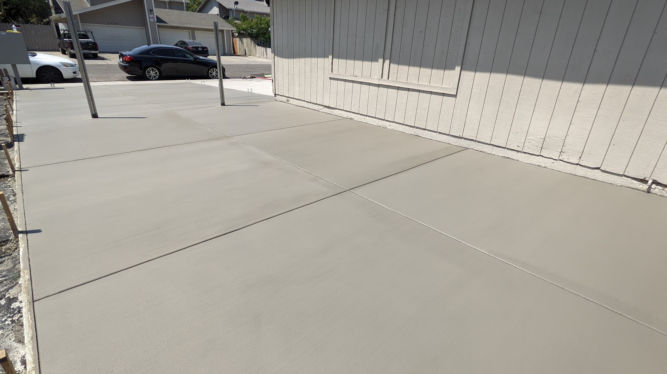
I decided to replace most of the grass (weeds) with concrete indicated in neon green below. I wanted the grass at the remaining areas indicated in dark green to be removed at a depth of 3 inches to place 3/4″ Ginger rock / Sonoma Gold rock. I also wanted to plant ten 15 gallon Italian Cypress trees along the eastern fence.
Here’s how the project went from start to finish.
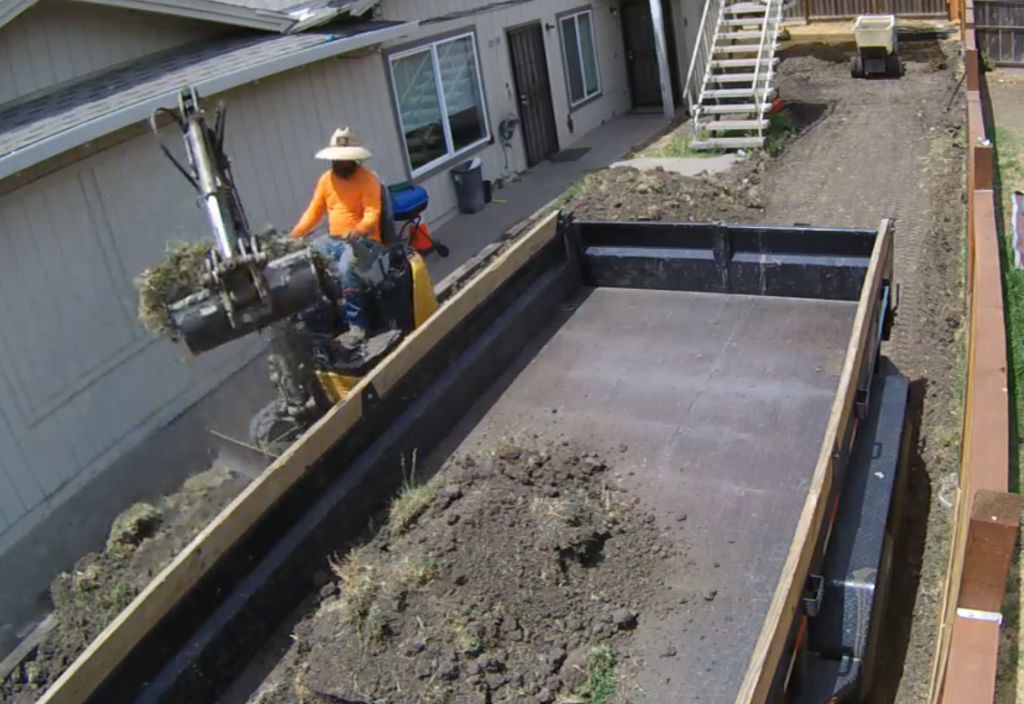
Day 1: Hauling and Dumping Garbage
Loading debris into trailer using a wheelbarrowCutting old fence with a chainsawPreparing to cover the trailer before going to the dumpOn the way to the dumpAt the Lovelace dump in Manteca
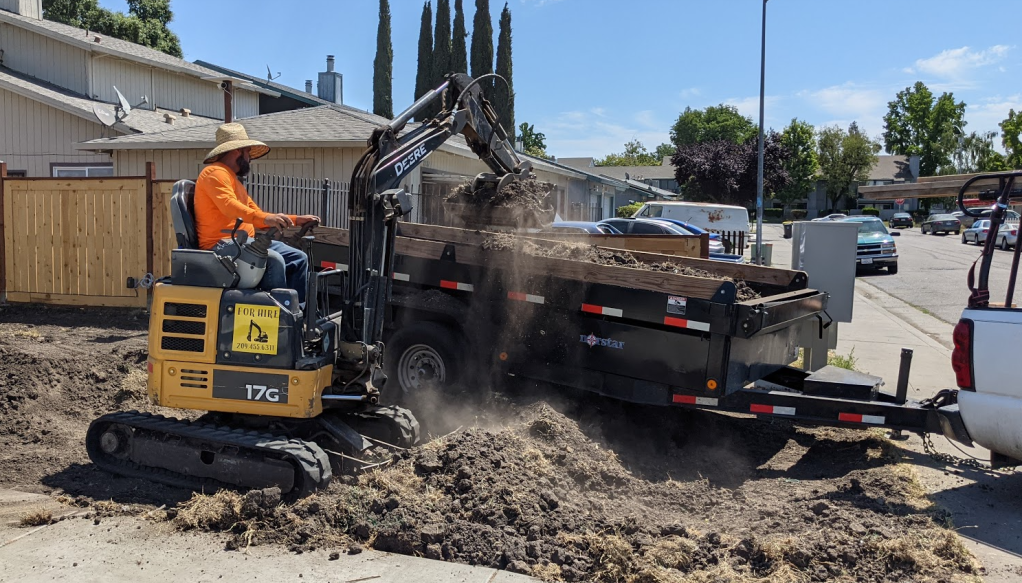
Day 2: Removing Grass and Dirt
Before removing grass and dirt Removing grass and dirt Removing grass and dirt Moving grass and dirt to trailer After removing grass and dirt Loading dirt in the back of the house into a power wheelbarrow Moving dirt from the back to the front Moving dirt from the back to the front Loading dirt into trailer Loading dirt into trailer Loading dirt into trailer
Day 3: Removing Grass, Dirt, and Old Concrete Slabs
Removing old concrete walkway Loading trailer with pieces of old concrete
Day 6: Compacting Gravel and Installing Rebar and Weed Fabric
Compacting the gravel The wood form in which the concrete will be poured Laying down rebar (not done yet) Added weed fabric under wood borders so that weeds won’t grow along perimeter of concrete slab
Day 7: Finishing Rebar Installation & Watering Yard
Installing rebar in the front yardInstalling rebar in the side yardWatering the yard
The instructions below are for migrating a WordPress site on GoDaddy’s Managed WordPress service to a GoDaddy Linux Shared Web Hosting server that uses cPanel. Nevertheless, the instructions still work elsewhere.
Step 1: Back Up (Download) Your Site’s Files
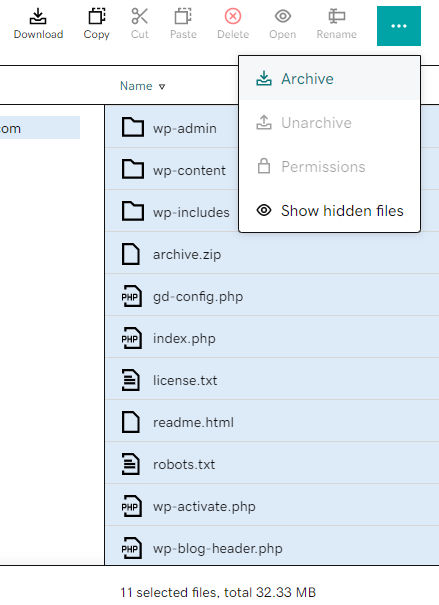
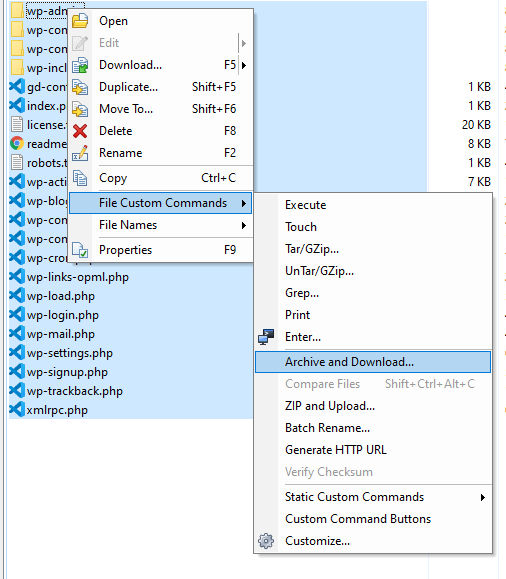
To easiest way to download all your site’s files is to archive (zip / tar) all files into one large file and then download it. You can use a free FTP / SFTP tool like WinSCP to do this or Godaddy’s File Manager or cPanel’s File Manager. Just connect to the server, select all files, right click and choose “Archive and Download”. A file named archive.tar.gz will be downloaded.
GoDaddy’s File Manager
WinSCP SFTP Client
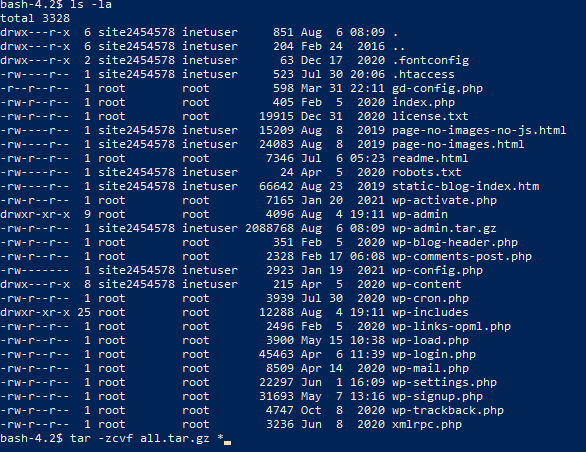
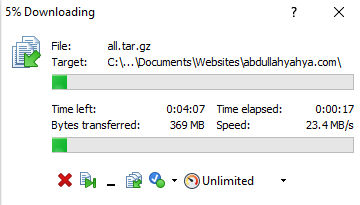
If you are unable to archive all files due to the connection timing out, you can SSH into the server and archive the files from the command line. On Windows 10, you can open Windows Powershell, SSH into the server, and run the command tar -zcvf all.tar.gz *.
When downloading the archive, you may want to connect over ethernet instead of wifi to increase speeds. When I did this, I was downloading at around 23 MB/s.
You can also download files from the command line using the following SCP command if you are on Linux or MacOS.
The easiest way to do this is by connecting to your MySQL database using PHPMyAdmin. Then, click the Export tab, ensure SQL is selected, check the “Save as file” checkbox, and then click the Go button. The database will then be downloaded.
Step 3: Upload Your Site’s Files
On this step, you can use the same tool as in step 1, e.g. WinSCP. If you are going to host the migrated site on GoDaddy’s Shared Linux server, you can just create a new folder on the destination server, e.g. at /home/javanigus/public_html/mysite.com/ where mysite.com is the name of your site.
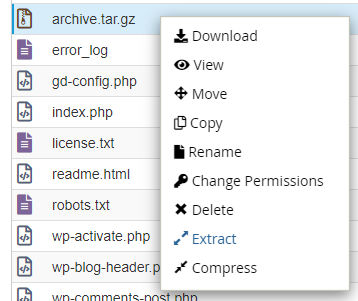
Make sure to upload the archive (one large file) archive.tar.gz. Don’t unarchive it locally and then upload a million separate files. After you upload the file, you can unarchive it. If you’re using GoDaddy, you can use cPanel’s File Manager to select the archive.tar.gz and extract it.
When you’re done extracting the archive, you can delete the archive.tar.gz file.
Step 4: Import (Upload) Your Site’s Database
For this step, you’ll need to create a new database and a database user who has full permissions. If you use cPanel, you can easily to this step from the control panel.
1. Create a database (e.g. mysite_db)
2. Create a database user (mysite_db_user)
3. Add user to the database
4. Assign permissions to the user
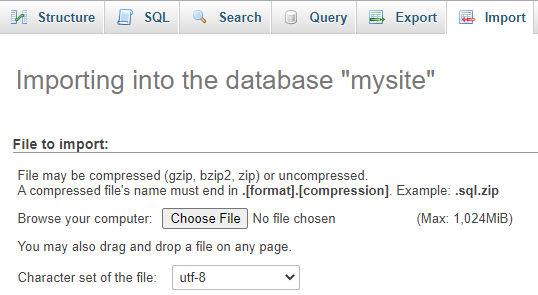
Now that you have a database, you can connect to it using PHPMyAdmin, select the database, click the Import tab, choose your database SQL file from step 2, leave all other defaults, and click the Go button. Your database tables and records will all be created.
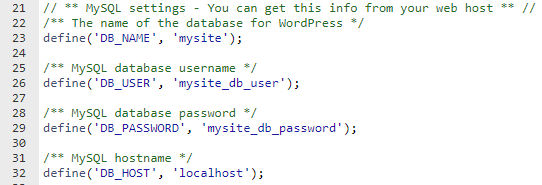
Step 5: Edit Your Site’s wp-config.php File
In the step, you can use an FTP client to download, edit, and upload your site’s wp-config.php file. If you can cPanel, you can also use its File Manager to edit the file in the browser. You’ll need to edit the values for 4 variables:
In many cases, like for GoDaddy’s Linux Shared Hosting service, the value for DB_HOST is “localhost”.
Step 6: Add Domain and/or Change Your DNS
You can update the DNS records for the domain to use values pointing to the new host. After DNS has propagated, you should see the same site but being served from the new host instead of the old one. At this point, you can delete the old site.
If your new host is GoDaddy’s Shared Linux hosting using cPanel, you can use cPanel to create a new domain with a root folder path that matches where you uploaded the site’s files in step 3 above. When you do that, if your domain is also hosted with GoDaddy, then GoDaddy will auto-update the DNS for that domain automatically. You could then delete your old site.
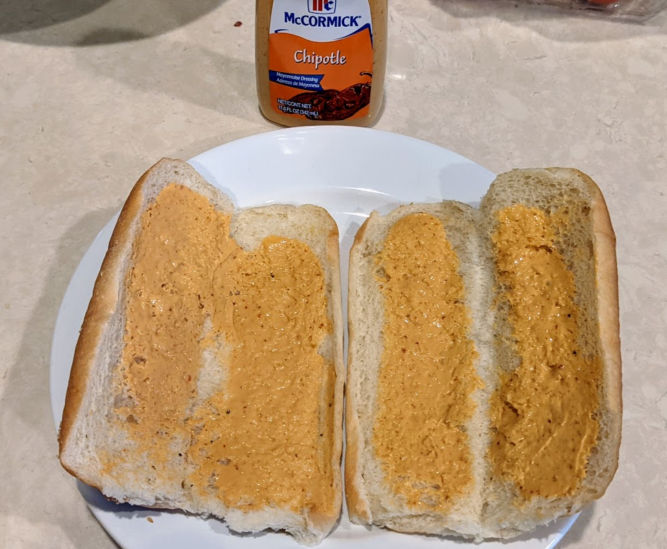
So, the other day I went to Quizno’s and had this Chipotle Steak and Cheddar sandwich. It was mighty delicious so I had to try to recreate it.
Here’s how it came out.
It was actually really good so here’s the recipe. Note: I substituted steak with pastrami. You can also use roast beef.
Ingredients
Pastrami (from Costco) – may substitute with roast beef
sliced green bell pepper
sliced onion
cheddar cheese
Chipotle mayonnaise (substitute with hummus for healthier alternative)
Francisco Gourmet Sesame Seed Rolls
Instructions
Slice the bell pepper and onions into slivers.
Heat up some pastrami in a microwave at 50% power for 2 minutes. If the bell pepper and onion are cold from being in the fridge, heat them up along with the pastrami.
Spread some Chipotle mayo on both sides of the bread
Spread pepper and onion evenly on bread, add pastrami, add cheddar cheese and toast in over until cheese has melted
Let’s face it. Garages have been storage spaces rather than places to park your car. Here’s one approach to organizing your garage so that you can still fit your car in it.
1. Build a shelf
You can buy shelving, including heavy duty restaurant-grade ones with wheels which are expensive, or you can just follow the instructions at this YouTube video on how to make a simple set of shelves out of 2x4s.
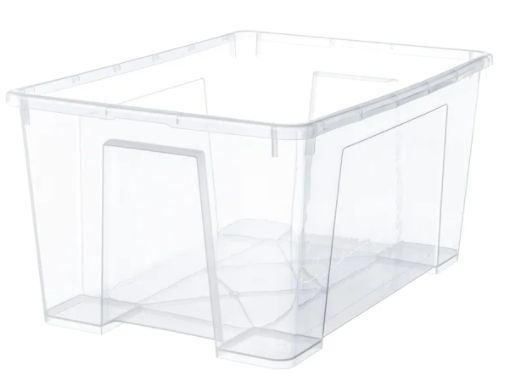
2. Buy transparent plastic containers
These clear boxes from IKEA are great. They’re also cheap. You don’t need to buy the lid.
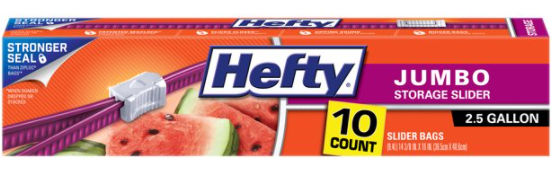
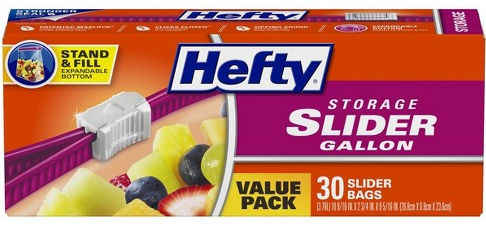
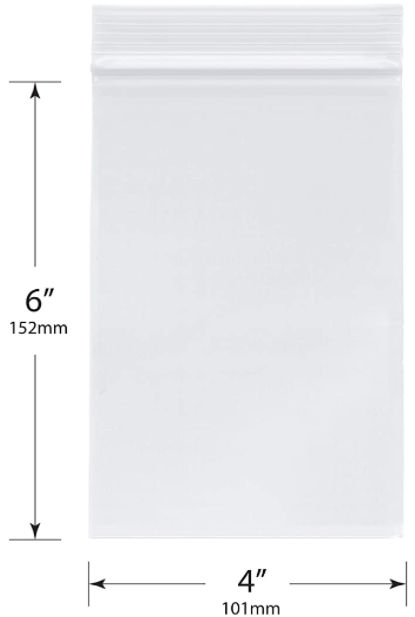
3. Buy zip loc slider bags
Slider bags are better because they are more secure. I use a few different sizes.
2.5 gallon1 gallon1 quart12″ x 12″ bag – 6 mil thickness
Twist ties are very useful for tying up cables. Available on Amazon.
5. Place related items together
For example, the picture below is of a bin labeled “Fasteners” which includes nails, screws, bolts, etc. Loose items are placed in appropriately-sized bags. Others are just placed directly in the bin unless their box or plastic container is mostly empty in which case I’d transfer the contents to a bag to not waste space.
In the photo below, the bin is label “Plumbing”. Not everything needs to be in a bag, like the PVC glue. Loose items or small parts that go together with larger parts are bagged so they don’t get lost.
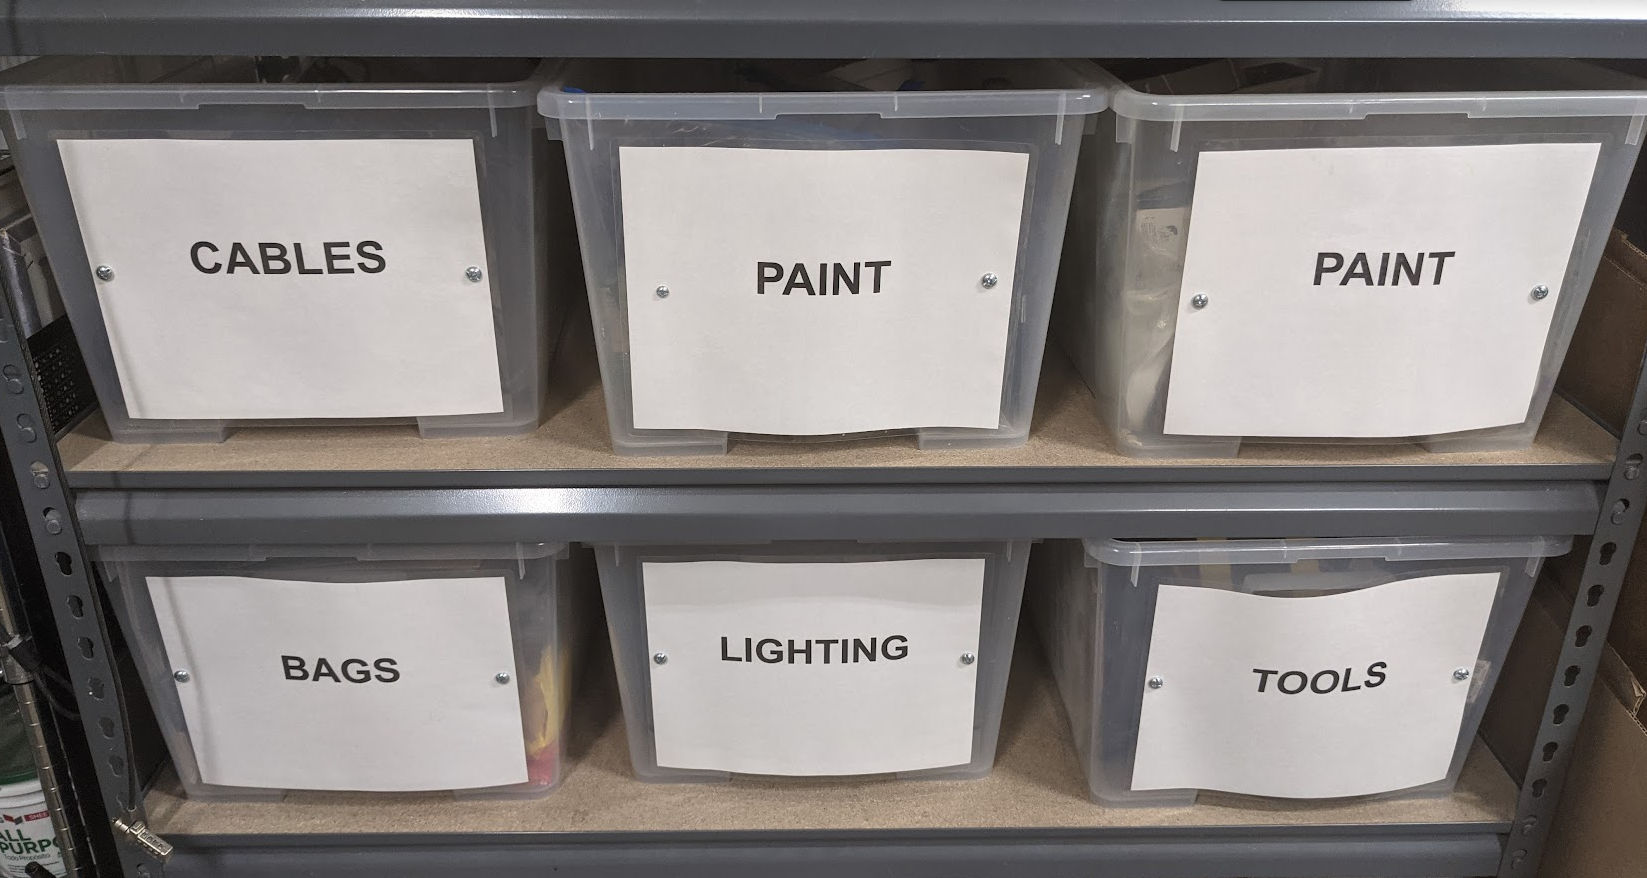
6. Label bins
You can label bins using a label maker. I wanted larger labels so I printed category names on white paper, laminated it, and bolted it to the bins.
By now, your garage should feel a lot bigger and you won’t keep buying things you already have and you won’t spend forever looking for things.
UPDATE: July 29, 2021
Instead of laminating printed sheets of paper, I found a simpler, more flexible solution. Just buy clear sheet protectors for 3 ring binders. $5.00 on Amazon for thin ones. $20 on Amazon for thick, 5.5 mil vinyl ones (preferred). Just drill two holes in the plastic bins where the 2 outer sleeve holes are and fasten using a small bolt with a washer. Then, print your labels and insert them from the side.
Increase your credit score as quickly and as high as possible (minimum 680)
Eliminate as much debt (credit cards, loans) as possible, e.g. monthly payments for a fancy car, etc.
Save as much money as possible (minimum $20,000)
Buy a used duplex (2-unit property) preferably with existing tenants where at least one tenant is paying the market rate for rent
Kick out the lower paying tenant and live in that unit
Slowly fix up the property as money becomes available and time permits to increase its value
After a few years, the home’s value will have appreciated and you will have more equity in the house. You can remain in that living situation or you can sell the duplex, take the profit, buy a single family residence or a better duplex or triplex.
Introductory Facts
Homeownership is the number one way for people to move from the lower class to the middle class and to build wealth.
People who own homes are almost always better off financially than people who always rent.
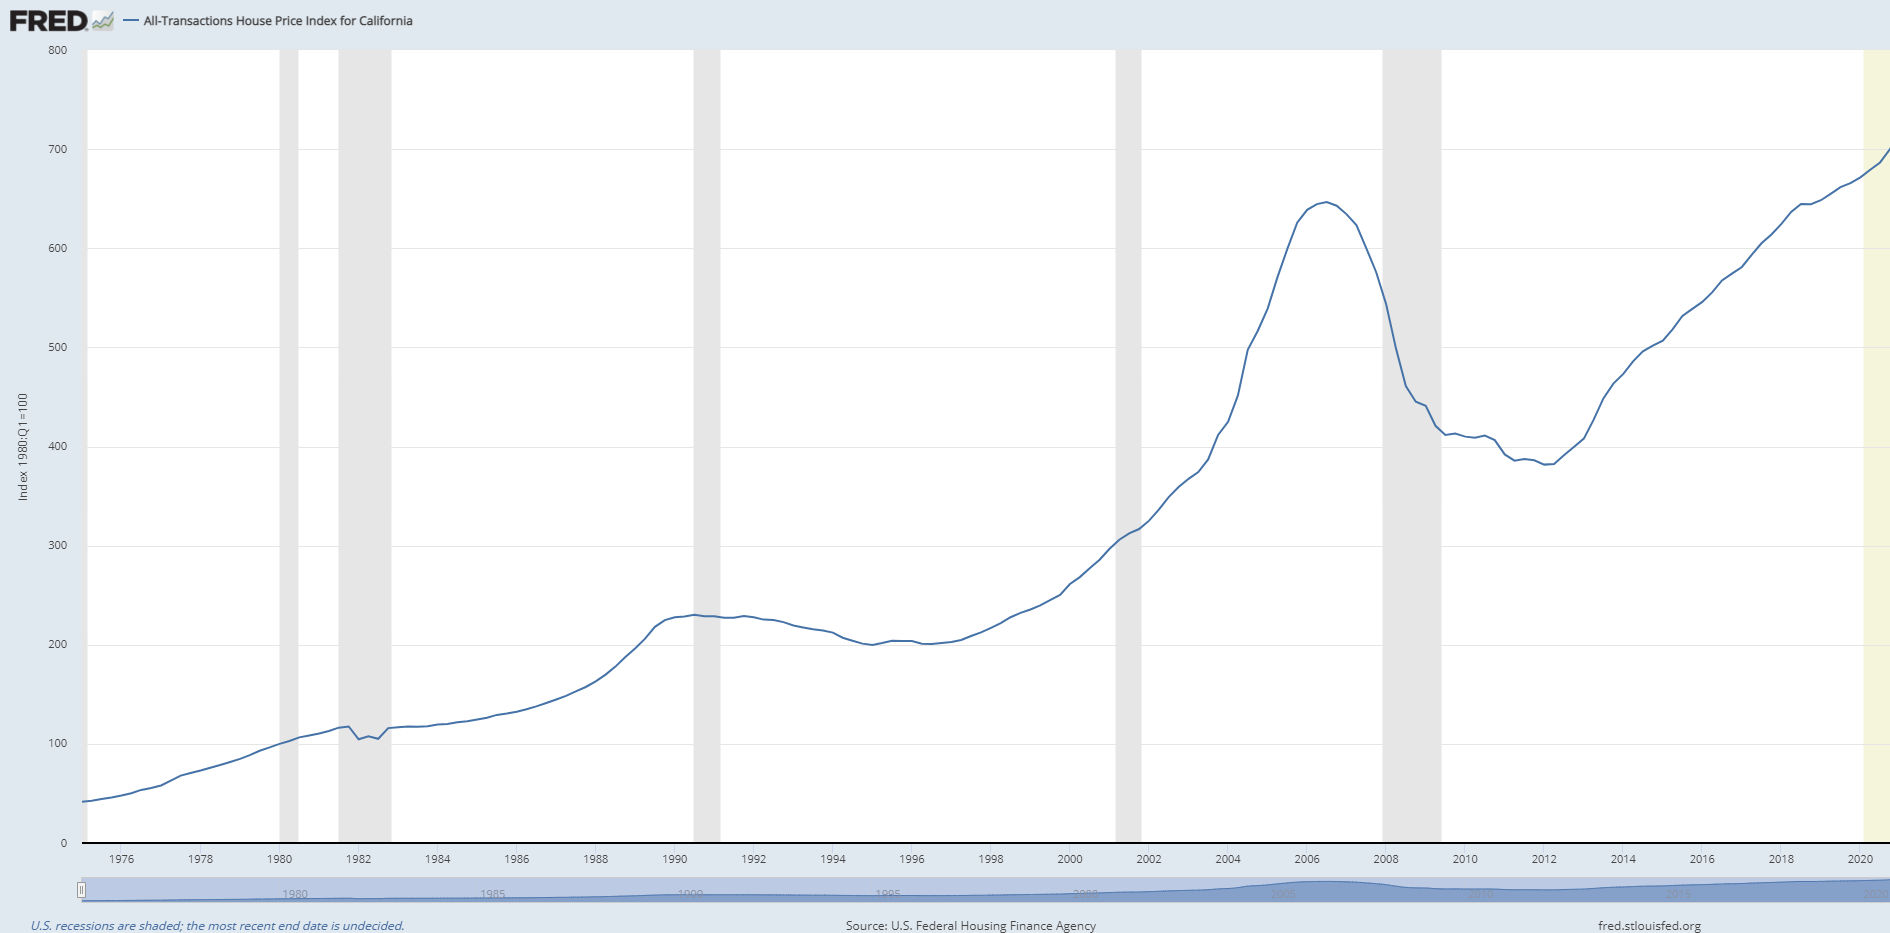
Real estate (e.g. houses) always increases in value over the long term (see graph below). The only exception was between 2008 – 2012 which was due to mortgage fraud and greedy banks which led to a global recession. It is now illegal to commit mortgage fraud which should prevent significant depreciation from occuring again.
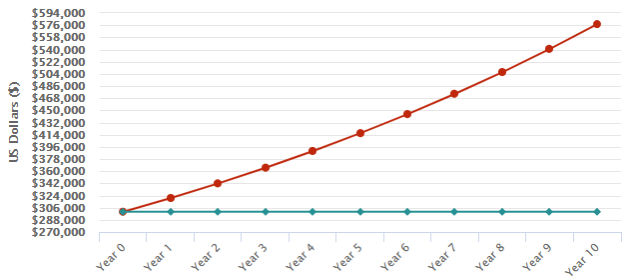
The average rate of appreciation of real estate in California is about 6.77% annually. That means if you buy a house for $300,000, then in one year, the value will have gone up by $300,000 x 6.77% = $20,310. You will have made $20,310 in one year for doing nothing but living in your own home. In 10 years, due to compounding appreciation, your home’s value will have increased by $277,582.
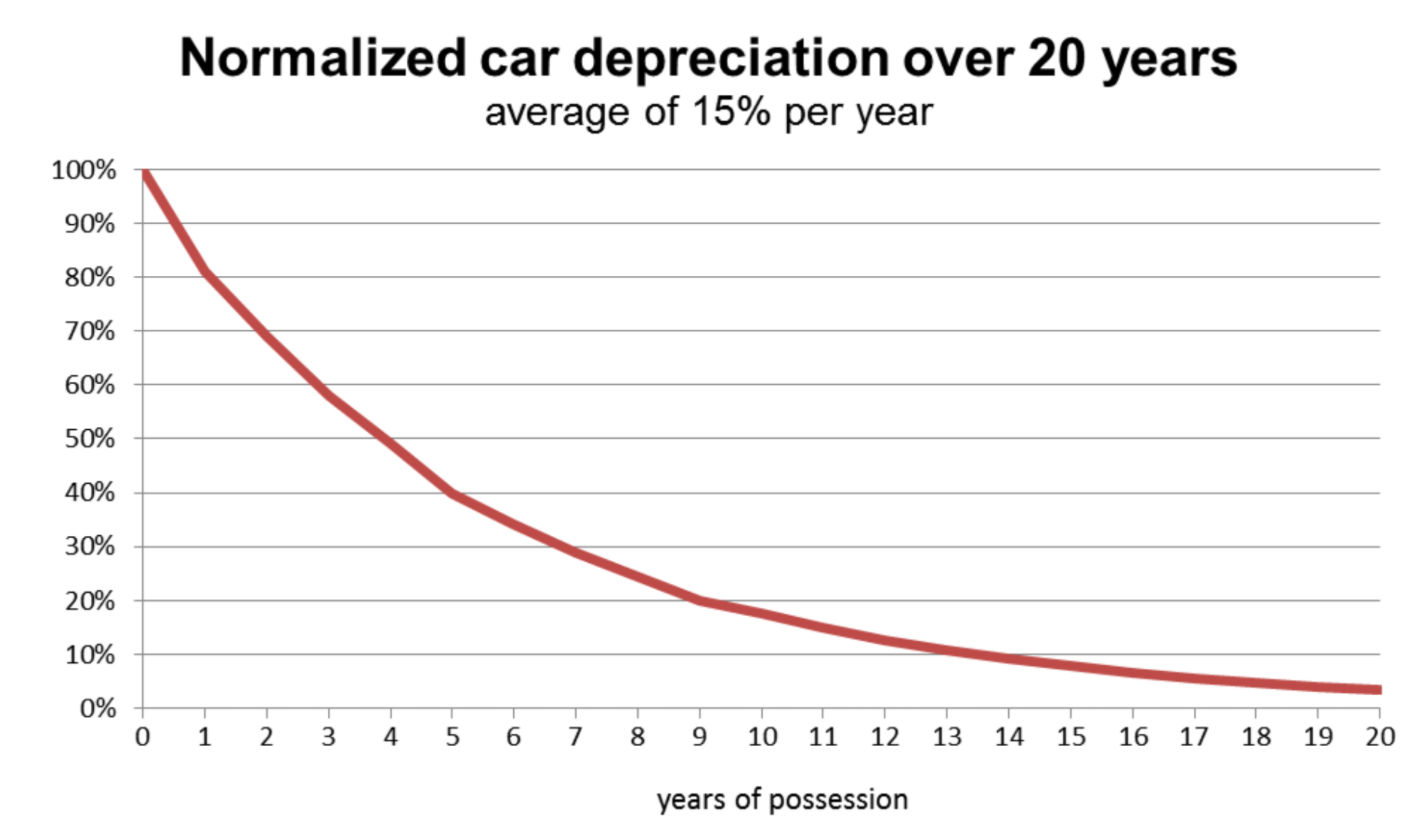
On the other hand, cars always lose value as time goes on. As a matter of fact, they lose an average of 15% per year.
When you rent, your entire monthly rent payment is spent and you get none of it back. However, when you buy a house and pay a mortgage, you get some of your mortgage payment back in the form of equity in the home. For example, if you borrow money from a bank for $300,000 at 3% interest fixed for 30 years (360 months) with a 3.5% down payment ($10,500), your monthly payments during the beginning and ending years will look like this:
Month
Principal & Interest
Principal
Interest
Principal Remaining
1
$1,221
$497
$724
$289,003
2
$1,221
$498
$723
$288,505
3
$1,221
$499
$721
$288,006
….
358
$1,211
$1,211
$9
$2,434
359
$1,211
$1,214
$6
$1,220
360
$1,211
$1,220
$3
$0 (loan paid off)
As you can see in the table above, in the beginning years, even though you pay $1221 per month for your mortgage, you are getting almost $500 back in the form of equity which is like a savings account but in the form of home value instead of at a bank. Your interest payments in the beginning are around $720 but it’s not money completely lost because mortgage interest is tax deductible which can lower your tax bill.
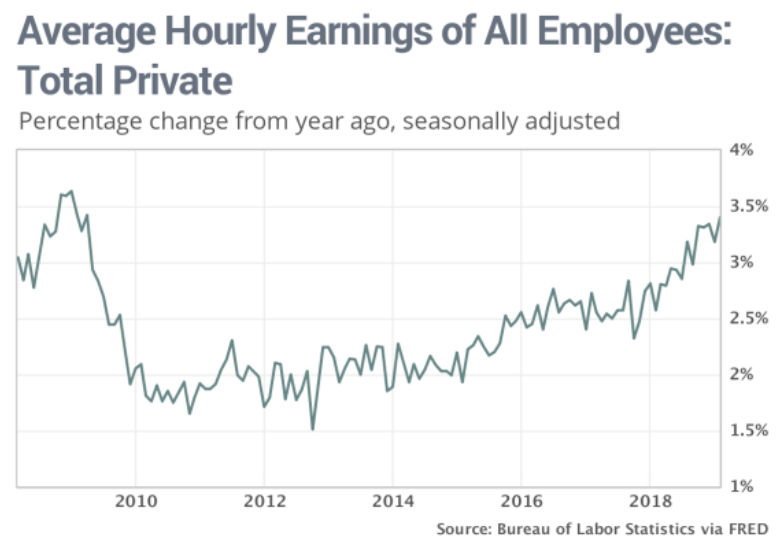
Rent always increases whereas mortgage payments never increase (on a fixed loan). As a matter of fact, nationally rent prices have increased an average of 8.86% per year since 1980, consistently outpacing wage inflation by a significant margin.
Between 2008 and 2020, annual wage increases for hourly employees maxed out at just above 3.5% which is less than both
the annual rate of rent increase (8.86%) since 1980
the annual rate of California home value appreciation (6.77%)
This means that your income growth is less than your housing expense growth. This also means that if you live month to month, as time goes on you will have less and less money as rent increases faster than your income.
Never buy a manufactured / mobile home. Though they are cheap, you will have to rent the land and if the landowner increases the rent on the land, you will most likely have no choice but to pay the increase since it would be difficult and very expensive to move your mobile home somewhere else. Even if you own land and buy a manufactured home to put on it, you will not be able to get a low-interest home loan to purchase a mobile home.
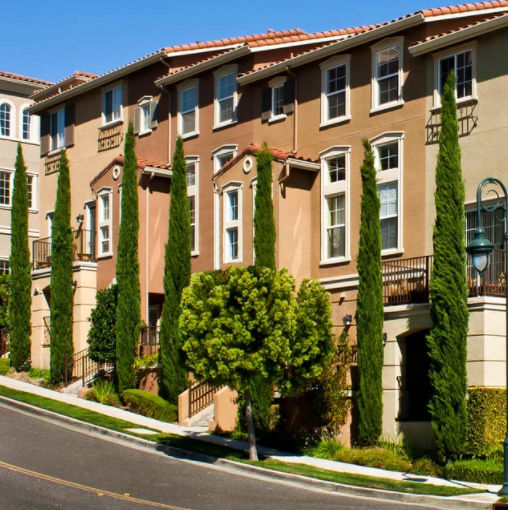
Condos and Townhouses
Condos and townhouses are cheaper than single family residences but you will have to pay an HOA (homeowner’s association) fee which can be very expensive, especially if there is a swimming pool. Also, you are limited in what you can do to your own home, e.g. you can’t paint the exterior, you can’t move walls, build additions, etc. You are better off not buying a condo or townhouse.
Single Family Residence
This type of home is ideal for a single family. However, unless your financial situation is good, it would be difficult to afford one.
This type of property is usually purchased by investors. However, anyone can buy one and live in one of the units and rent out the other units. Of course, the more units, the more expensive. Therefore, for first time homebuyers with a limited income, it is recommended to buy a duplex. The strategy recommended in this article is to live in one unit and rent out the other unit and let the rental income pay for some, most, or all of your mortgage.
Commercial (5 units or more)
This type of property is usually purchased by big investors or companies who have a lot of money. Most people cannot afford this type of property.
Number of Bedrooms and Bathrooms
Most houses come with either
2 bedrooms and 1 bathroom, a.k.a. 2/1
3 bedrooms and 2 bathrooms, a.k.a. 3/2
To keep costs low, focus on duplexes where each unit has 2 bedrooms and 1 bathroom.
Potential Rental Income
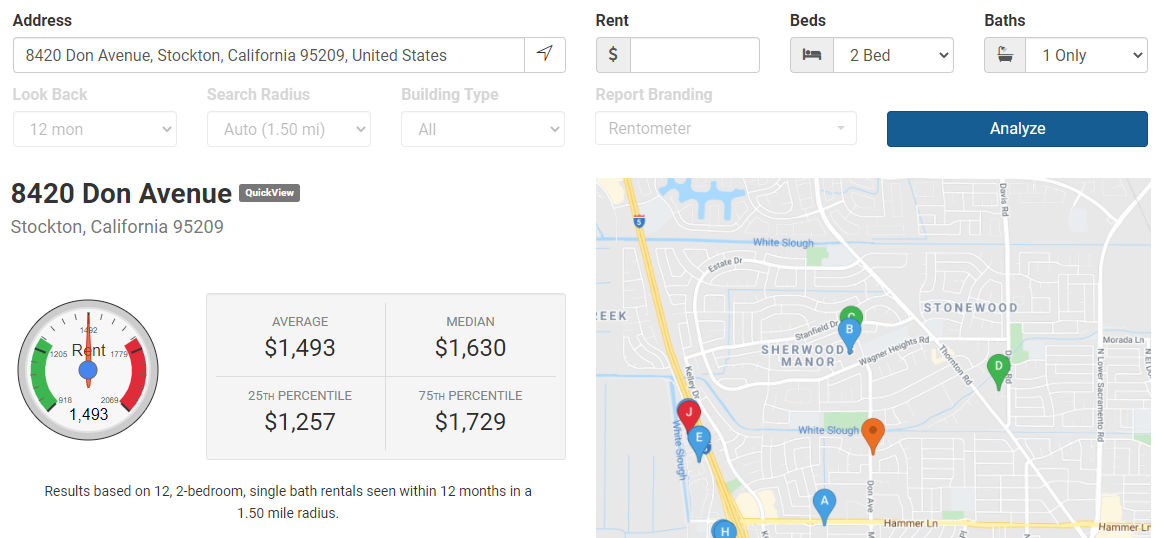
Since the recommended strategy is to buy a duplex and live in one unit and rent out the other, you need to know the potential rental income you will get to offset your mortgage expenses. To determine this, you can go to Rent-o-meter.
For example, the 2/1 duplex at 8420 Don Ave, Stockton, CA 95209 has an average rental income of $1493 for each unit. Therefore, if you buy this duplex, you could potentially get $1493 per month from your renter to help pay for some or all of your mortgage.
Determine Costs
As a first-time home buyer, you are entitled to the FHA First-Time Home Buyer program. This program allows you to borrow money to buy a house and only put a down payment of 3.5% as opposed to 20% for non-first-time home buyers and 25% for investors. However, if your down payment is less than 20%, you will have to pay private mortgage insurance (PMI).
For example, for a loan with the following numbers:
Purchase Price:
$300,000
Down Payment:
3.5% (10,500)
Loan Type:
30-year fixed (always choose this type)
Interest Rate:
3%
your total monthly mortgage-related expenses would be $1734.
However, since your rental income will be on average $1493, then your net monthly mortgage-related expenses will be
$1734 – $1493 = $241 per month
In other words, your monthly housing costs become ONLY $241 per month! But, that depends on
whether you can find a 2/1 duplex for $300,000
whether your credit score is good enough that you can get a loan with a 3% interest rate
whether you can actually rent out the other unit for $1493 per month
Interest Rates
Interest rates on your loan make a very big difference in your monthly mortgage expense and your lifetime loan cost. Due to the Covid-19 pandemic, the federal government lowered interest rates to almost zero to stimulate the economy and avoid a recession. In doing so, interest rates on home loans have been very low. As a matter of fact, interest rates have never been lower than now as indicated in the graph below.
Therefore, now is THE BEST TIME to get a home loan because the interest rates are at the LOWEST they have ever been. If you wait 2, 4 or 6 years from now, interest rates may go back up to 4 or 5% which means your monthly mortgage payments will be much higher.
Credit Score
Your credit score has a VERY BIG impact on the interest rate of your home loan. The higher your credit score, the lower the interest rate, and the cheaper your monthly mortgage expenses. Therefore, you want your credit score to be as high as possible.
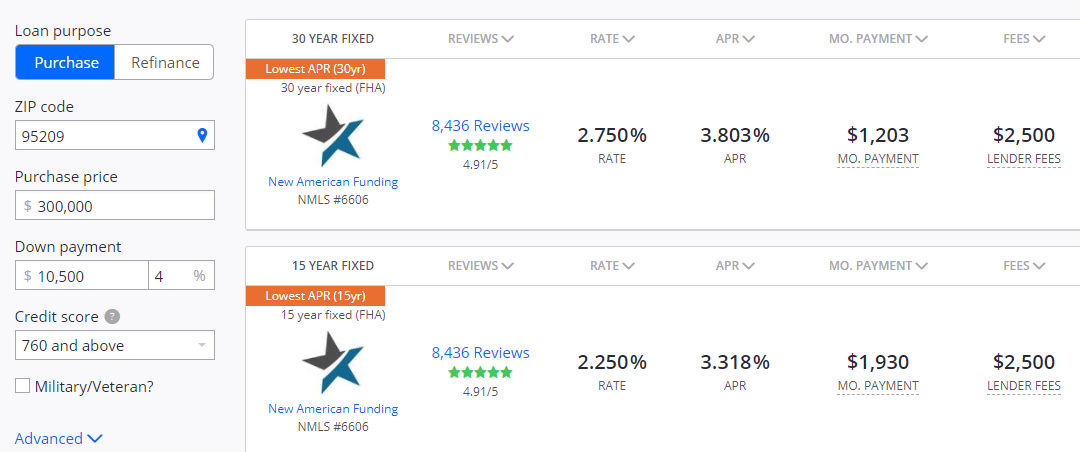
To determine the interest rate you can get for different credit scores, you can go to Zillow > Home Loans > Mortgage Rates https://www.zillow.com/mortgage-rates/
For example, for a loan with the following numbers:
Purchase Price:
$300,000
Down Payment:
3.5% (10,500)
you will find the following interest rates for different credit scores.
Credit Score
Interest Rate
560 – 599
No loans available
600 – 619
No loans available
620 – 639
No loans available
640 – 659
3.5%
660 – 679
3.25%
680 – 699
2.75%
700 – 719
2.75%
720 – 739
2.75%
740 – 759
2.75%
760 and above
2.75%
The rates above were valid on July 4, 2021. Interest rates change daily and throughout the day.
As you can see above, if your credit score is below 620, you can’t even get a loan. Also, the higher your credit score, the lower the interest rate.
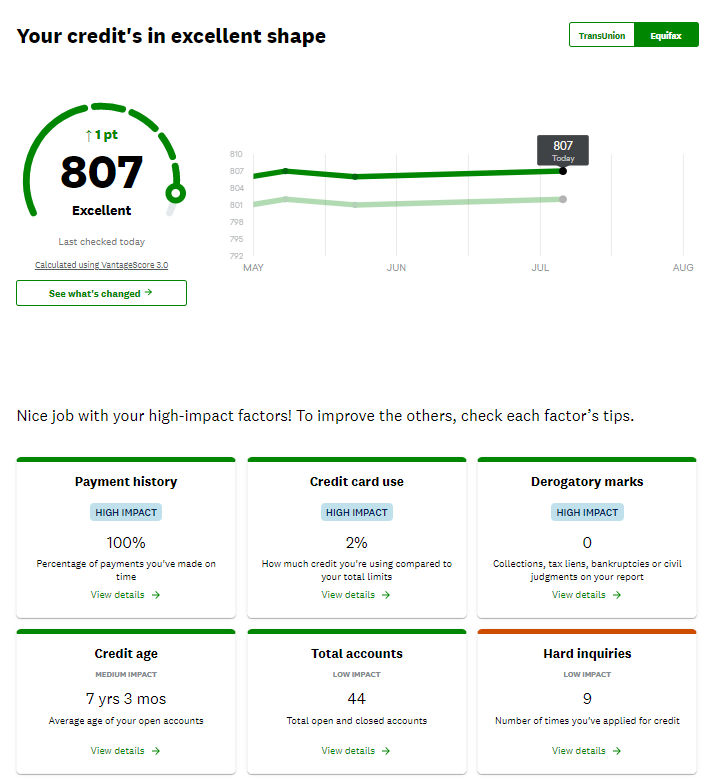
In order to improve your credit score, sign up for a free Credit Karma (https://www.creditkarma.com/) account, enter your information, and under “Credit Scores”, you will see your score for Transunion and Equifax followed by ways to improve each score.
Notice that there are 6 factors that affect your credit score, 3 of which are high impact.
Factor
Impact
Description
Payment History
High
Percent of payments you’ve made on time
Credit Card Use
High
How much credit you’re using compared to your total limits
Derogatory Marks
High
Collections, tax liens, bankruptcies or civil judgments on your report
Credit Age
Medium
Average age of your open account
Total Accounts
Low
Total open and closed accounts
Hard Inquiries
Low
Number of times you’ve applied for credit
From here on, we will assume you have increased your credit score to 680 and since interest rates change all the time, we’ll assume you can get a rate of 3%.
Interest Rate VS Loan Cost
Interest rates affect the cost of a loan and your monthly payments. Following are monthly mortgage costs and total loan costs for a $300,000 home loan at 30-year fixed at various interest rates.
Interest Rate
Monthly Mortgage Payment
Total Loan Cost Over 30 Years
2.5%
$1,190
$123,000
3%
$1,227
$151,000
3.5%
$1,307
$180,000
4%
$1,389
$209,000
4.5%
$1,474
$240,000
5%
$1,562
$271,000
5.5%
$1,652
$304,000
6%
$1,745
$337,000
As you can see, the interest rate makes a big difference in your monthly payment and loan costs. For example, for a 5% interest loan, you’ll be paying an extra $335 per month and an extra $120,000 over 30 years compared to a 3% interest loan for $300,000.
Mortgage-to-Income Ratio
Lenders require that in order to give you a home loan, your mortgage expenses (PITI) must not be more than 28% of your gross monthly income before taxes. PITI stands for
P = Principal
I = Interest
T = Taxes
I = Insurance
Let’s say that your total monthly income is $3000 per month before taxes. That means your PITI may be no more than 28% x $3000 = $840 per month. However, if you buy a duplex, then your total monthly income will increase by the rental income of, say, $1400 per month, which would bring your total monthly income to $4400. Therefore, your PITI for a duplex can be no more than $4400 x 28% = $1232 per month.
Debt-to-Income Ratio
Lenders also require that your total debt (including mortgage expenses) be no more than 43% of your gross monthly income before taxes. For example, if your monthly income is $3000 per month and your fancy car’s monthly payments are $350 per month and you are looking at buying a house with an estimated PITI expenses of $1000 per month, then your debt-to-income ratio is
Debt-to-Income Ratio = Debt / Income = ($350 + $1000) / $3000 = 0.45 or 45%
Since 45% is greater than 43%, you would not qualify for a loan.
Calculations
To help see all important numbers in one place, you can create a spreadsheet similar to the one below.
Loan Type
FHA – First-Time Home Buyer
Purchase Price
$300,000
Minimum Credit Score
680
Down Payment (%)
3.5%
Down Payment ($)
$10,500
Interest Rate
3%
Term
30 years fixed
Mortgage – Principal
$497
Mortgage – Interest
$724
Mortgage – Insurance (PMI)
$236
Property Tax
$170
Insurance
$105
Total Monthly Cost (PITI)
$1,732
Property Type
Duplex
Income – Work (Annual)
$60,000
Income – Work (Monthly)
$5,000
Income – Rental (Monthly)
$1,300
Total Gross Monthly Income
$6,300
Max Monthly Mortgage to Income (%)
28%
Max MonthlyMortgage Allowed ($)
$1,764
Max MonthlyTotal Debt to Income (%)
43%
Max MonthlyTotal Debt Allowed ($)
$2,709
Finding a House for Sale
As mentioned above, the strategy is to buy a “used duplex”. To find these, go to Zillow and do a search.
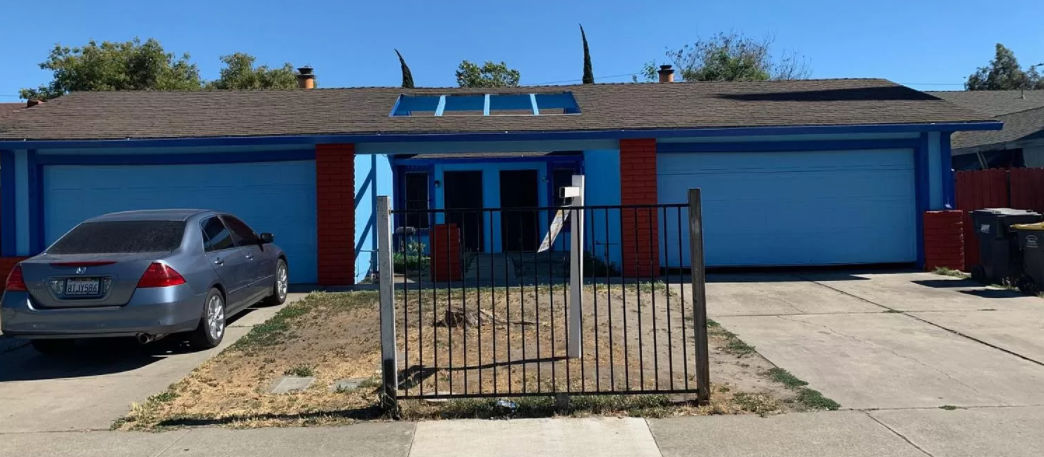
The color is ugly but maybe that’s why no one has bought it. You can always paint it.
Rental Income:
This duplex may already have renters in both units. If you buy it, you can kick out the renter who is paying the lower amount and then live in that unit yourself.
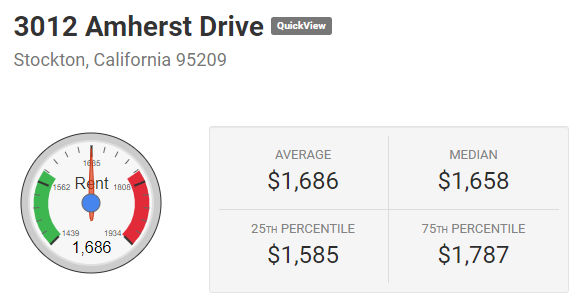
If the duplex isn’t rented, you can check Rent-o-meter to determine average rent. After entering the address in www.rentometer.com, we see that the average rent is $1686.
Mortgage Expenses:
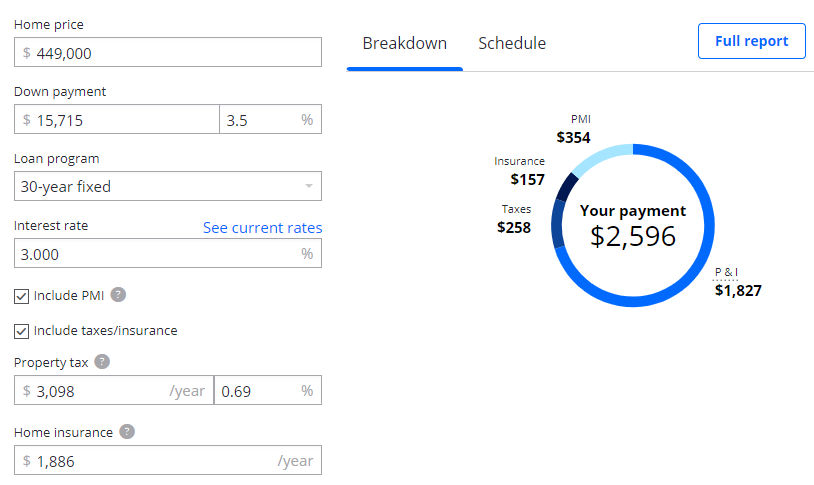
Now, we need to calculate our mortgage expenses by going to Zillow’s mortgage calculator. For a loan with the following numbers:
Purchase Price:
$449,000
Down Payment:
3.5% ($15,715)
Loan Type:
30-year fixed (always choose this type)
Interest Rate:
3%
we get the following
This means that your total monthly housing expense will be $2596.
You net monthly housing expense becomes
$2596 – $1686 = $910 per month
$910 / month is very cheap for 2 bed 1 bath housing in Stockton and is much cheaper than renting. Also, as time goes on, the value of the property will go up on average 6.77% per year.
To reiterate, for the example above,
your net monthly housing expense would be
$910 per month
you need a down payment of
$15,715
you need a credit score of at least
680
you will need to pay for loan closing costs in the average amount of
$5000
Get Pre-Approved
Before making a move to buy a house, you increase your chances of success by first getting pre-approved. Don’t simply get pre-qualified because that doesn’t carry as much weight as a pre-approval. A pre-approval will verify your financial situation so you can feel confident you will be able to afford a house at a particular price. When the time comes, you can and should include your pre-approval letter with your house purchase offer so the sellers know you are serious and can afford to buy their house. When getting pre-approved, mention that you are interested in buying a duplex and renting out one of the two units so that the rental income is accounted for.
Since you are new to buying a house, you’ll want a real estate agent to guide and help you. You can easily find a real estate agent by searching Google for “Stockton real estate agent”.
Once you agree to work with an agent, you can tell them the type of property you want to buy (used duplex) and give them your pre-approval letter. You can then tell them which active listings on Zillow (or Redfin – www.redfin.com) you are interested in. The agent may also have pocket listings / off-market listings that meet your criteria.
Make an Offer
Once you decide to put an offer on a house, you need to decide how much you are willing to pay for it. In a hot market, there could be competition driving up prices. If Zillow estimates the house to be worth $360,000 and the seller is asking for $360,000, then you may want to offer $370,000 to beat the competition. Note, however, that in a hot market, values can go up quickly. I offered $30,000 above the asking price and I still got outbid by someone who bought the property for $40,000 above asking.
Your agent can help you determine the value of the house and draft up a purchase offer. You will review the offer letter for accuracy and then sign it. Your agent will then submit the offer to the seller’s agent and wait for a response. If the seller accepts your offer, then you’re locked in and the seller cannot change their mind and sell to someone else.
NOTE:
For tips on buying a house, read my article titled House-Buying Tips.
For strategies on competing with other buyers in a hot market, read my article titled House-Buying Strategies.
Get a Loan and Fire Insurance
Home Loan
I have not purchased a home using the FHA First-Time Home Buyer program. However, I have found LoFi Direct to offer very competitive rates for home loans.
For fire insurance, I recommend using a broker to shop around and find a deal for you. They usually can offer lower rates than if you go directly to the large insurance companies. Just search Google for “home insurance broker”.
Close Escrow
Once everything is in order, you will “close escrow” which means you finalize the deal. It takes about one month from when your offer is accepted to when you close escrow. Once you close escrow, you become the legal owner of the property and you can move in. Just make sure you pay your mortgage payments and property tax so the lender and government don’t take your house from you.
I’m bad with plants, and you probably are too. Whatever I plant just seems to die. And even with Home Depot’s 1 year return return policy, who’s gonna wanna dig up and return a plant with its roots and all and dirty up their car to take it to the Home Depot for $50.
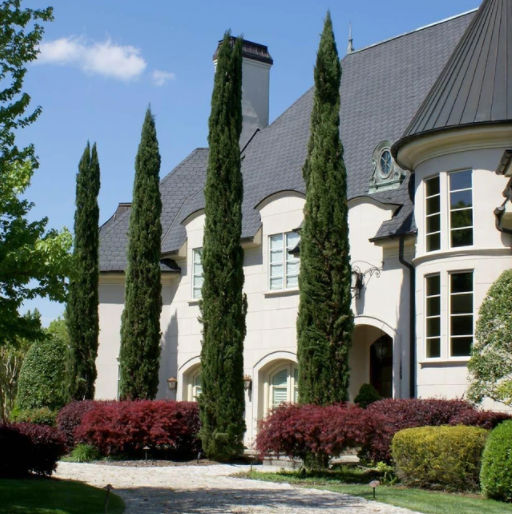
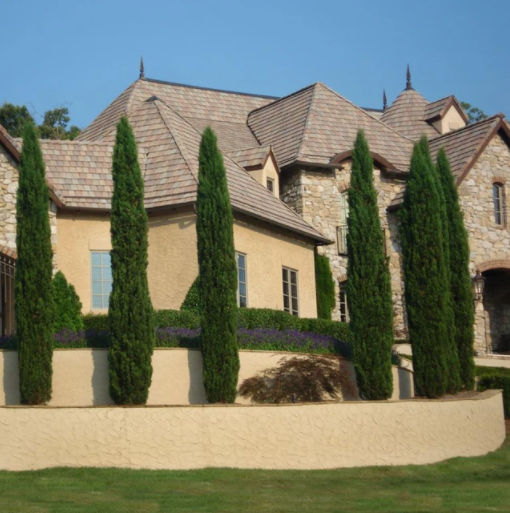
There is one plant (or tree, actually) that anyone (in California) can plant without worry of it dying. This set-it-and-forget-it tree is the Italian Cypress. There are so many great things about this tree, it’s no wonder it adds value to your property.
Fast Growing Tall trees are expensive. You can buy this tree short and the regular Italian Cypress tree will grow up to 3 feet per year.
Very Hardy The Italian Cypress tree is hardy (will survive) down to 10° F. Obviously not a problem in California where it seems to just get hotter and hotter every year.
Drought Tolerant With increasing temperatures and less rain in California by the year, water is becoming less available and more expensive. Some locations may even prohibit watering your lawn or garden during certain periods. This is not a problem with the Italian Cypress tree. I stopped watering mine and they still look alive and green.
Evergreen, Non-deciduous The Italian Cypress tree is an evergreen tree meaning that it’s green forever (all year long). It is non-deciduous meaning that it doesn’t lose its leaves for part of the year. This is great because it’s low maintenance. My neighbor’s trees are deciduous and every winter, their leaves dirty up my front yard and I have to clean it up. With the Italian Cypress tree, there’s nothing to clean up and it looks alive all year long – no temporary death!
Fertilizer The Italian Cypress tree doesn’t even need fertilizer. Just dig a hole, put the tree ball in, back fill, give it some water, and you’re done.
Readily Available The Italian Cypress tree is readily available at the Home Depot all year long. It’s also available at Costco for about half the price but Costco only has it in early Spring 🙁
Most places sell the regular Italian Cypress tree but there’s also a dwarf version. Here are the specs for each.
Dwarf Italian Cypress
Italian Cypress
Botanical Name
Cupressus sempervirens Compacta
Cupressus sempervirens
Deer Resistant
Yes
Yes
Drought Tolerant
Yes
Yes
Mature Height
7-9 ft. in 10 years 25-30 ft. at maturity
35-40 ft. in 10 years or Trim to Desired Height
Mature Width
2 ft.
5 ft.
Sunlight
Full Sun
Full Sun
Growth Rate:
Slow
Fast
Grows Well In Zones:
7-10 outdoors
7-11 outdoors
Hardy
Down to 10° F
Down to 10° F
Planting and Care for Dwarf Italian Cypress Trees
1. Planting: First, select a location with well-drained soil and full sun – any area with 6 to 8 hours of sunlight is ideal.
When you’re ready to plant, dig a hole that’s about one and a half to two times the size of your plant’s root ball, place the Dwarf Italian Cypress in the hole, back fill the soil and water to settle the roots.
2. Watering: Once established, your Dwarf Italian Cypress is moderately drought tolerant, but it’s important to have a regular watering schedule for the first couple of growing seasons. Water about once weekly or check the surrounding soil near your Cypress – if the surrounding soil is dry about 2 or 3 inches down, it’s time to water.
3. Fertilizing: Apply a well-balanced, general purpose fertilizer to your Dwarf Italian Cypress in early spring, before new growth begins.
Planting and Care for Regular Italian Cypress Trees
1. Planting: Italian Cypress Trees are drought tolerant and like to be on the dry side, so choose a location with full to partial sun (4 to 8 hours of sunlight daily) in well-drained soil.
Then, dig a hole that is just as deep but twice as wide as the root ball of the plant. Place the plant in the hole to check the depth. If the soil of the root ball is below the level of the soil of the surrounding ground, pick up the tree and add more soil to the hole. Fill in the hole with the same native soil you removed then water the tree by counting to 20 or by giving it five full watering cans full of water.
2. Watering: Irrigate your newly-planted tree twice a week for the first month, once a week for the next two months and every two weeks after the first three months. Water your Italian Cypress if you have warm, dry, and windy weather during the winter in your area.
3. Fertilizing: This tree isn’t fussy about soil. It grows equally well in clay, loam, or sandy soils. It also does not need routine fertilizing.