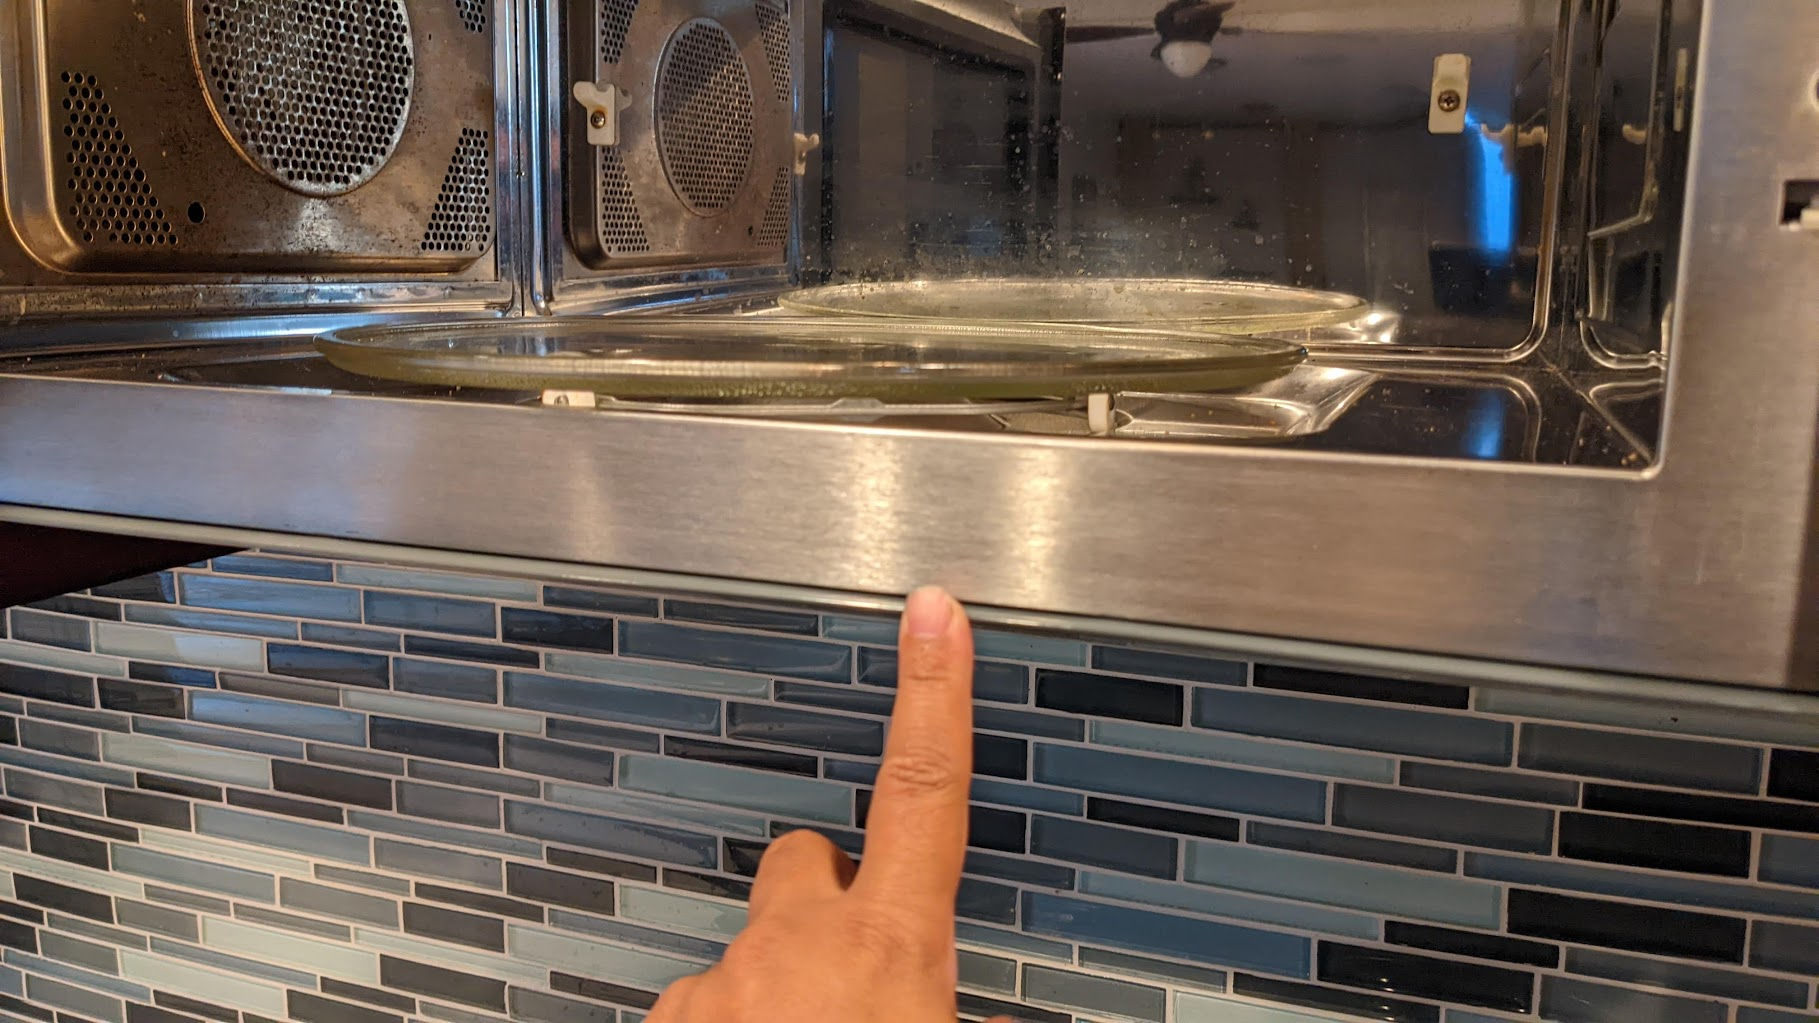
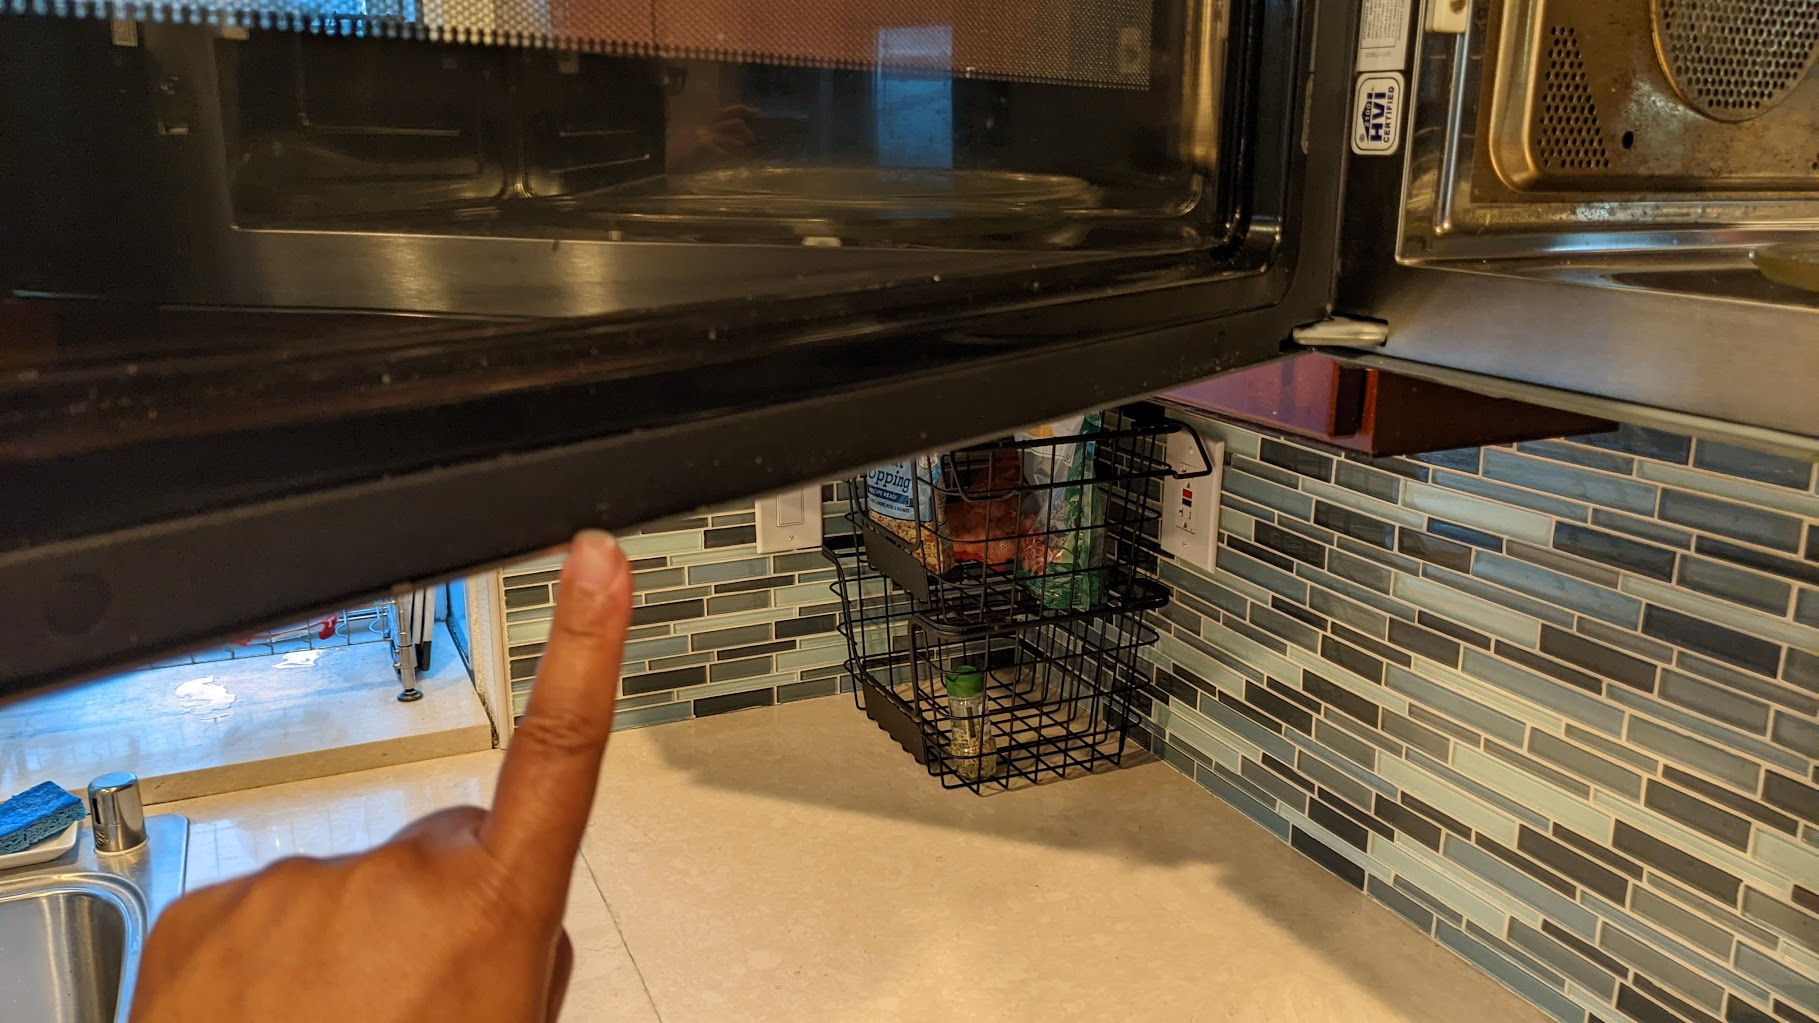
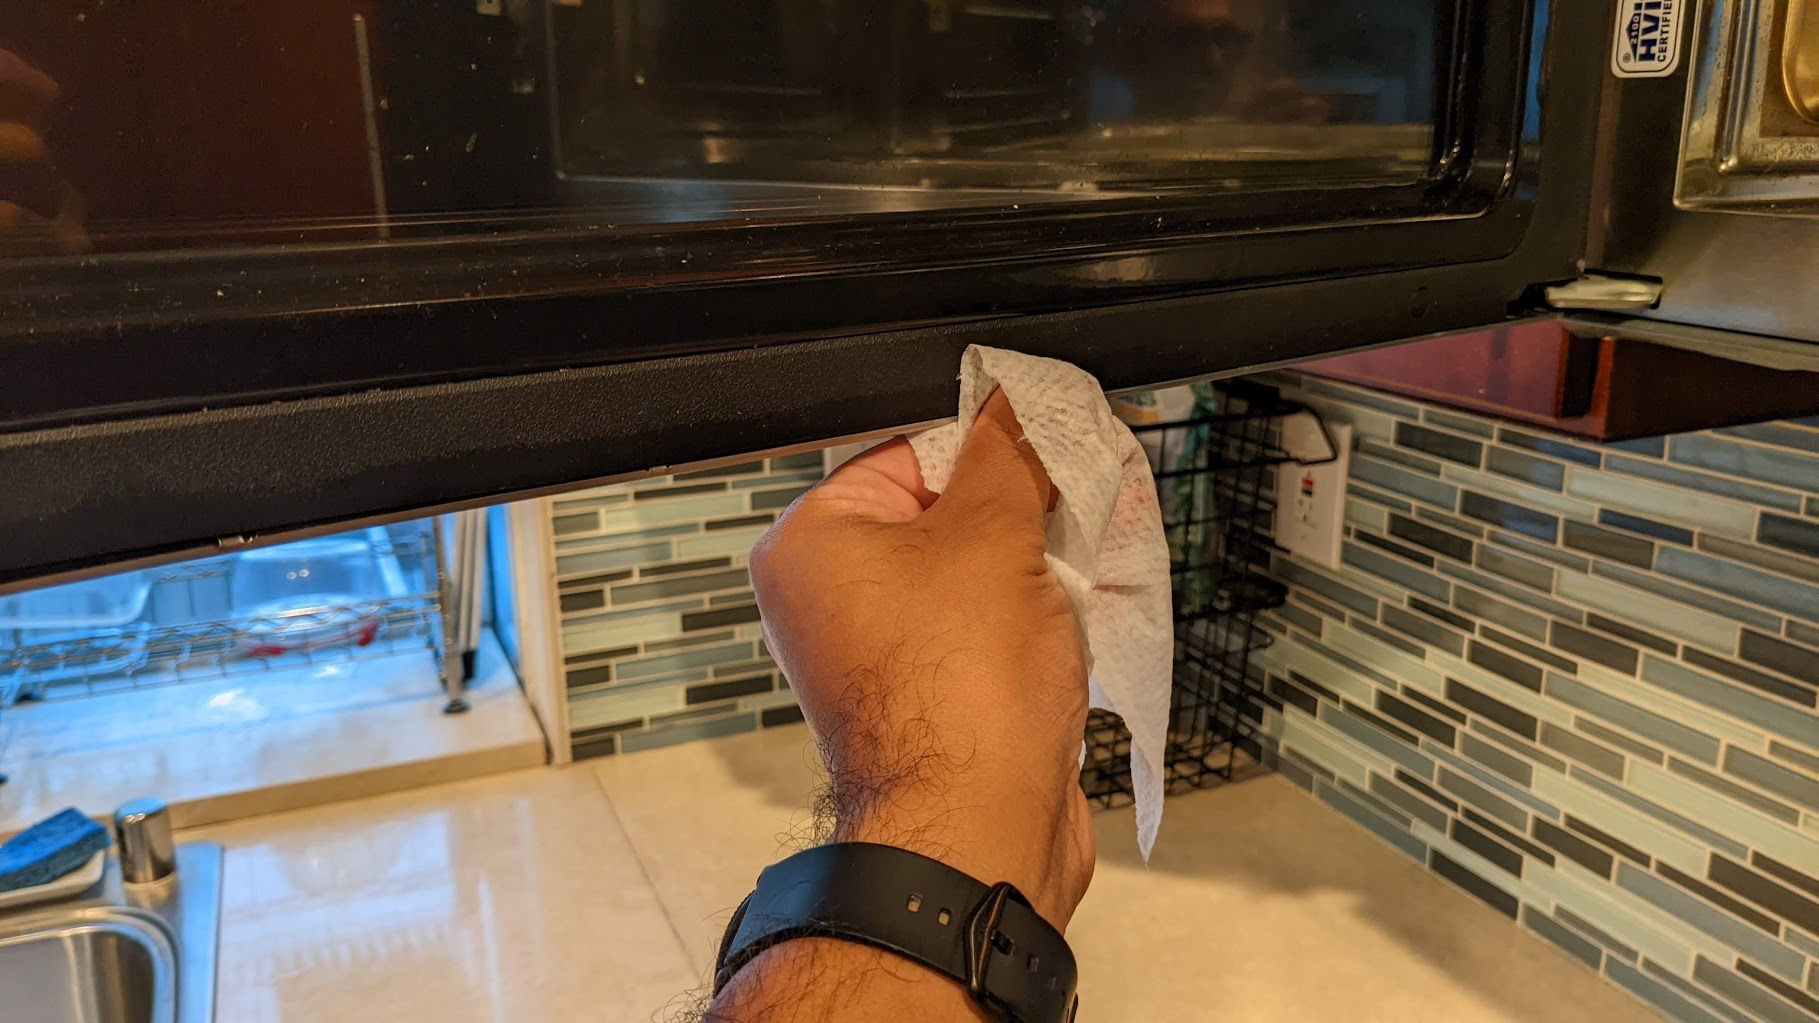
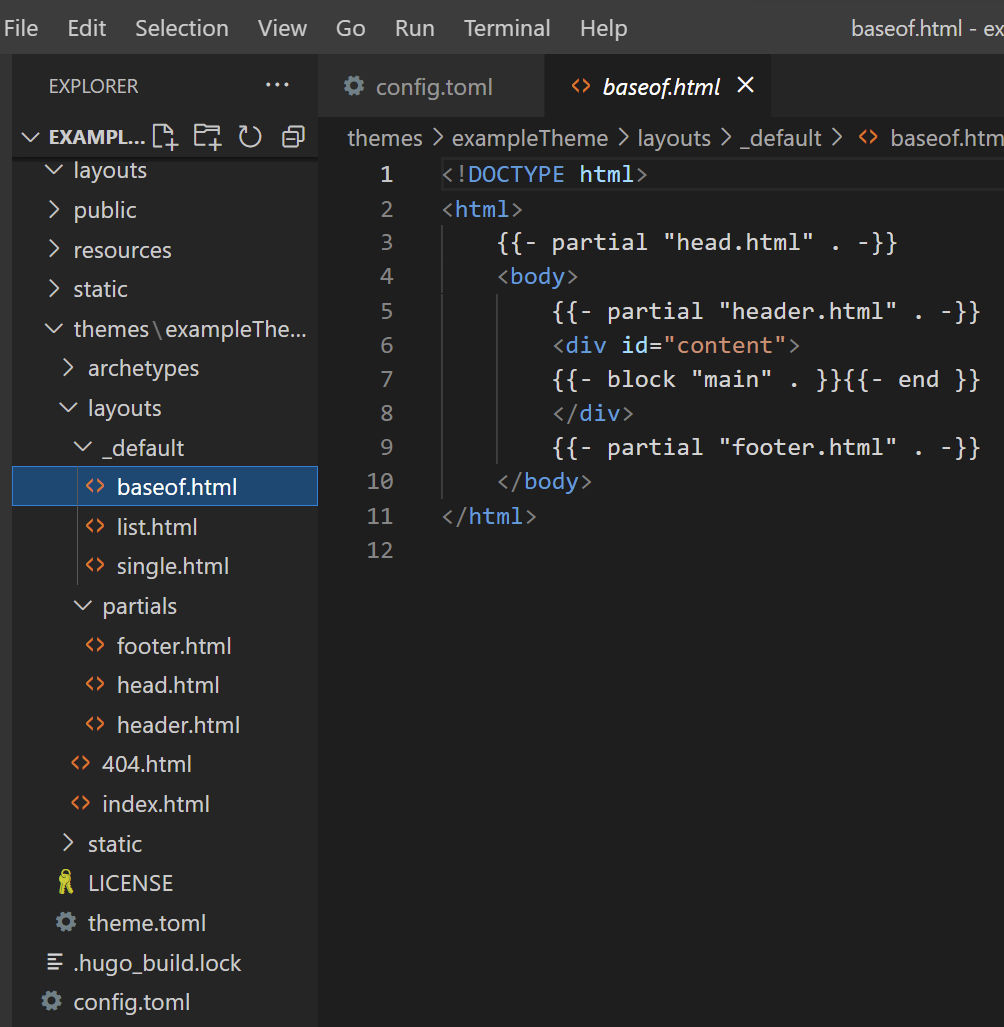
Recently, the microwave would keep giving an error saying I needed to “open / close door” no matter how many times I open and close the door. This prevented me from microwaving anything. Since this was an expensive microwave, I didn’t really want to buy a new one. Fortunately, fixing this error was easy. It turns out that there is a sensor along the inside front bottom edge that detects whether the door is closed or not. I prefer to clean using wet Clorox disinfectant wipes. I find that they lift dirt up easily. I’d then wipe again using a dry paper towel. After doing that, the open/close door error goes away and the microwave can start.
Door sensor along inside bottom edge of microwaveDoor sensor along inside bottom edge of microwave doorCleaning the door sensorCleaning the door sensor
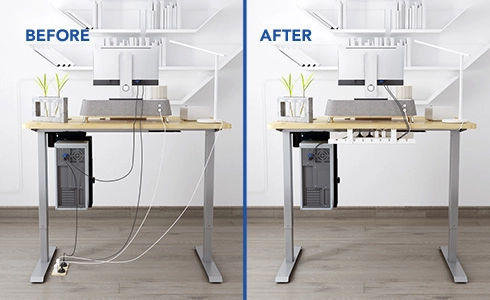
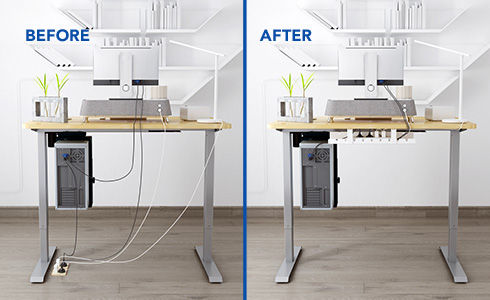
I hate seeing lots of cables everywhere. In this post, I will list various options for managing and hiding cables.
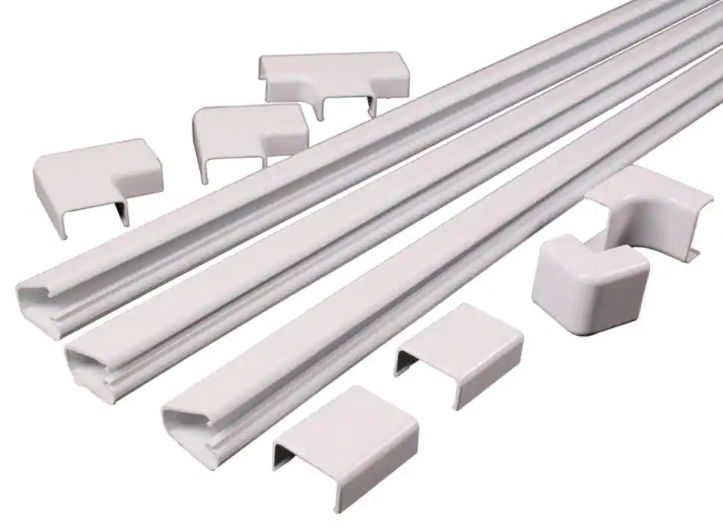
Cord Covers / Cable Raceways
These are useful for hiding cables in a paintable conduit. The cable cover can be made of plastic or metal. Some have an adhesive backing and some you can screw to a wall. They come in various sizes and lengths and include various connectors. These are great for when you can’t hide cables behind or underneath something.
Cable Ties
Cable ties are great for holding multiple cables together. Usually, once you pull to tighten the cable tie, you can’t release it.
If you need to release a cable tie, you can buy the releasable type.
Cable Tie Base Mount
Cable ties will bundle cables together, but oftentimes you’ll need to attach them to a wall or something. You can buy cable ties with a screw hole.
However, you may have a hard time finding these with releasable cable ties. In that case, you can buy the base mounts themselves and insert releasable cable ties in them, or just use a twistie tie.
Cable box
Oftentimes, you’ll have an ugly power strip with a bunch of cables going to it. You can hide this ugliness in a cable box.
Cable Clips
If you need to clip some cables in a removable way, cable clips with adhesive backing can help with that.
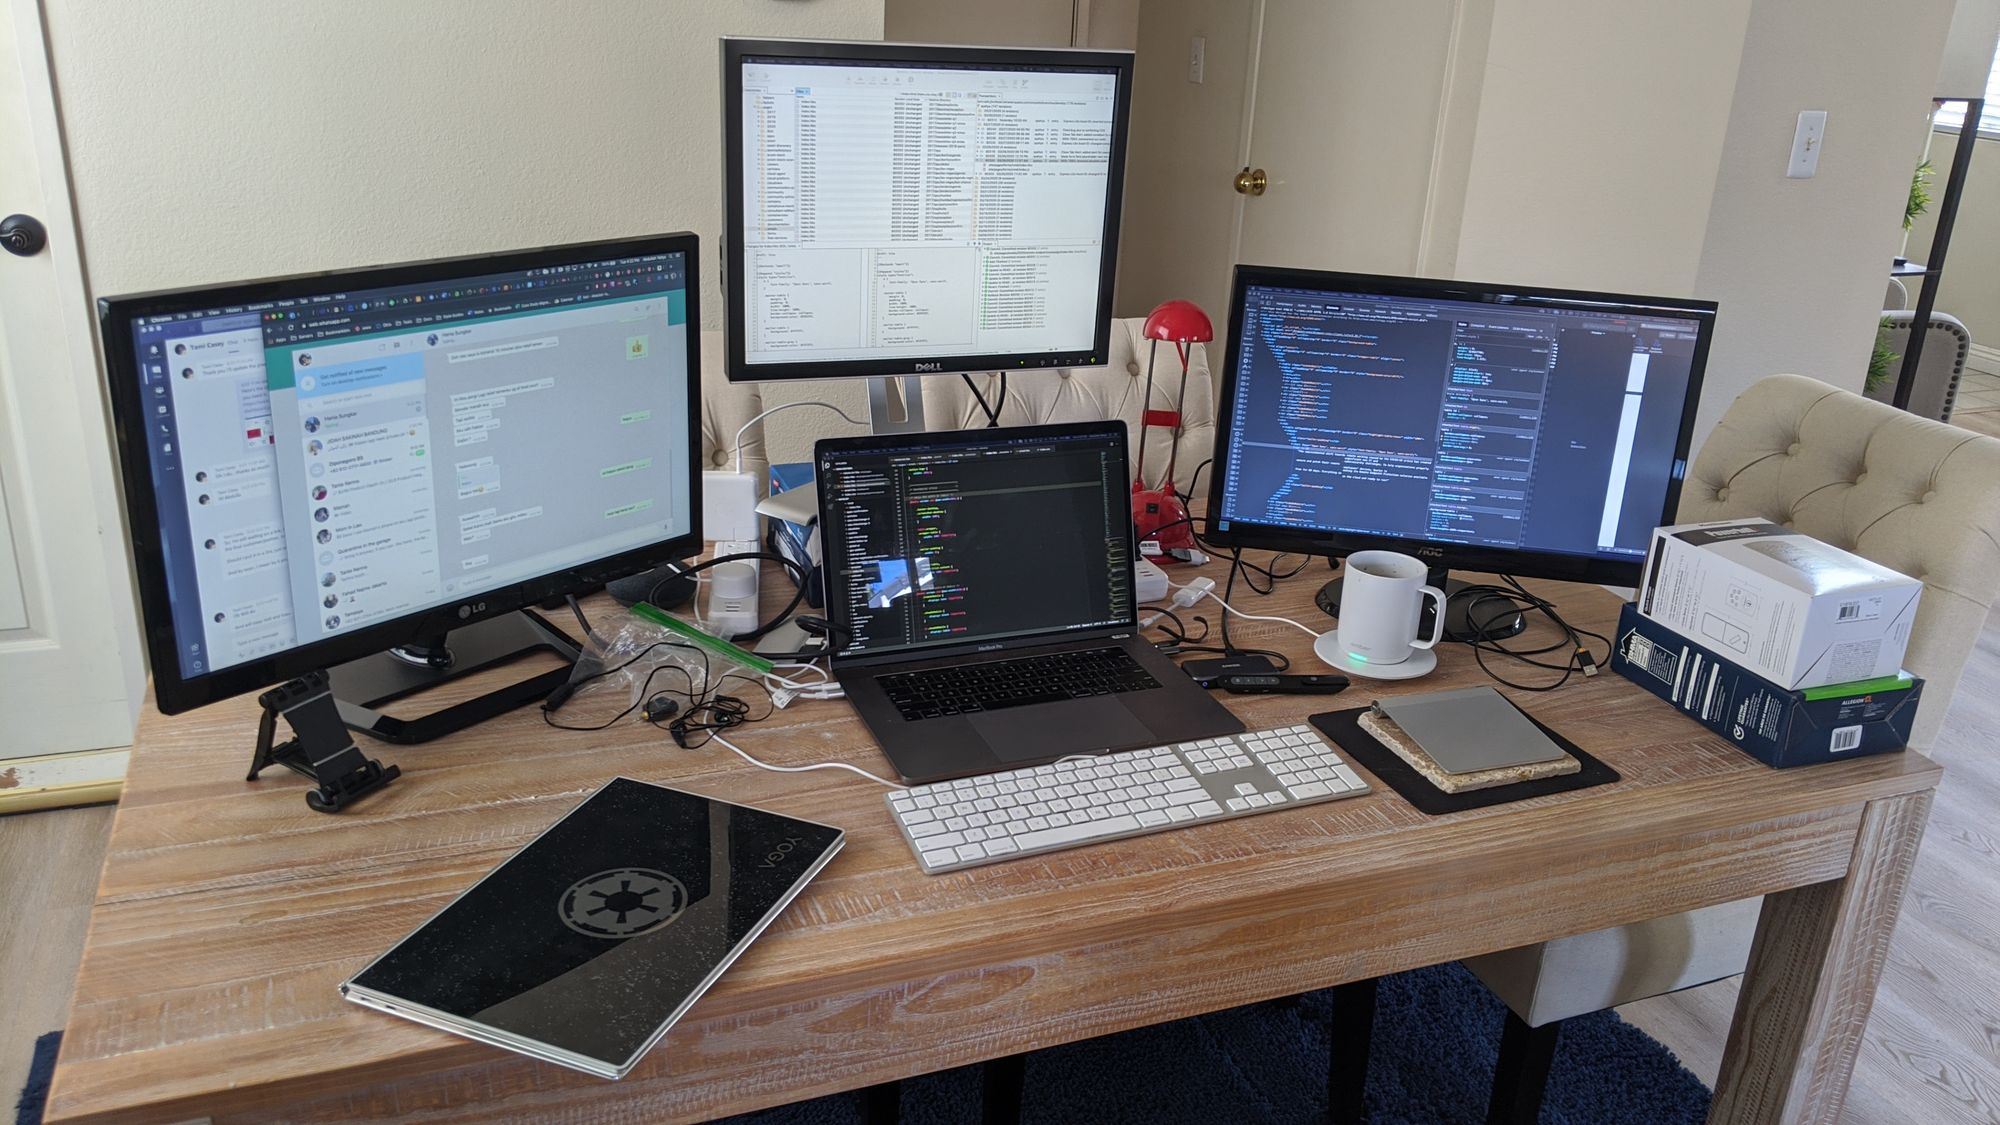
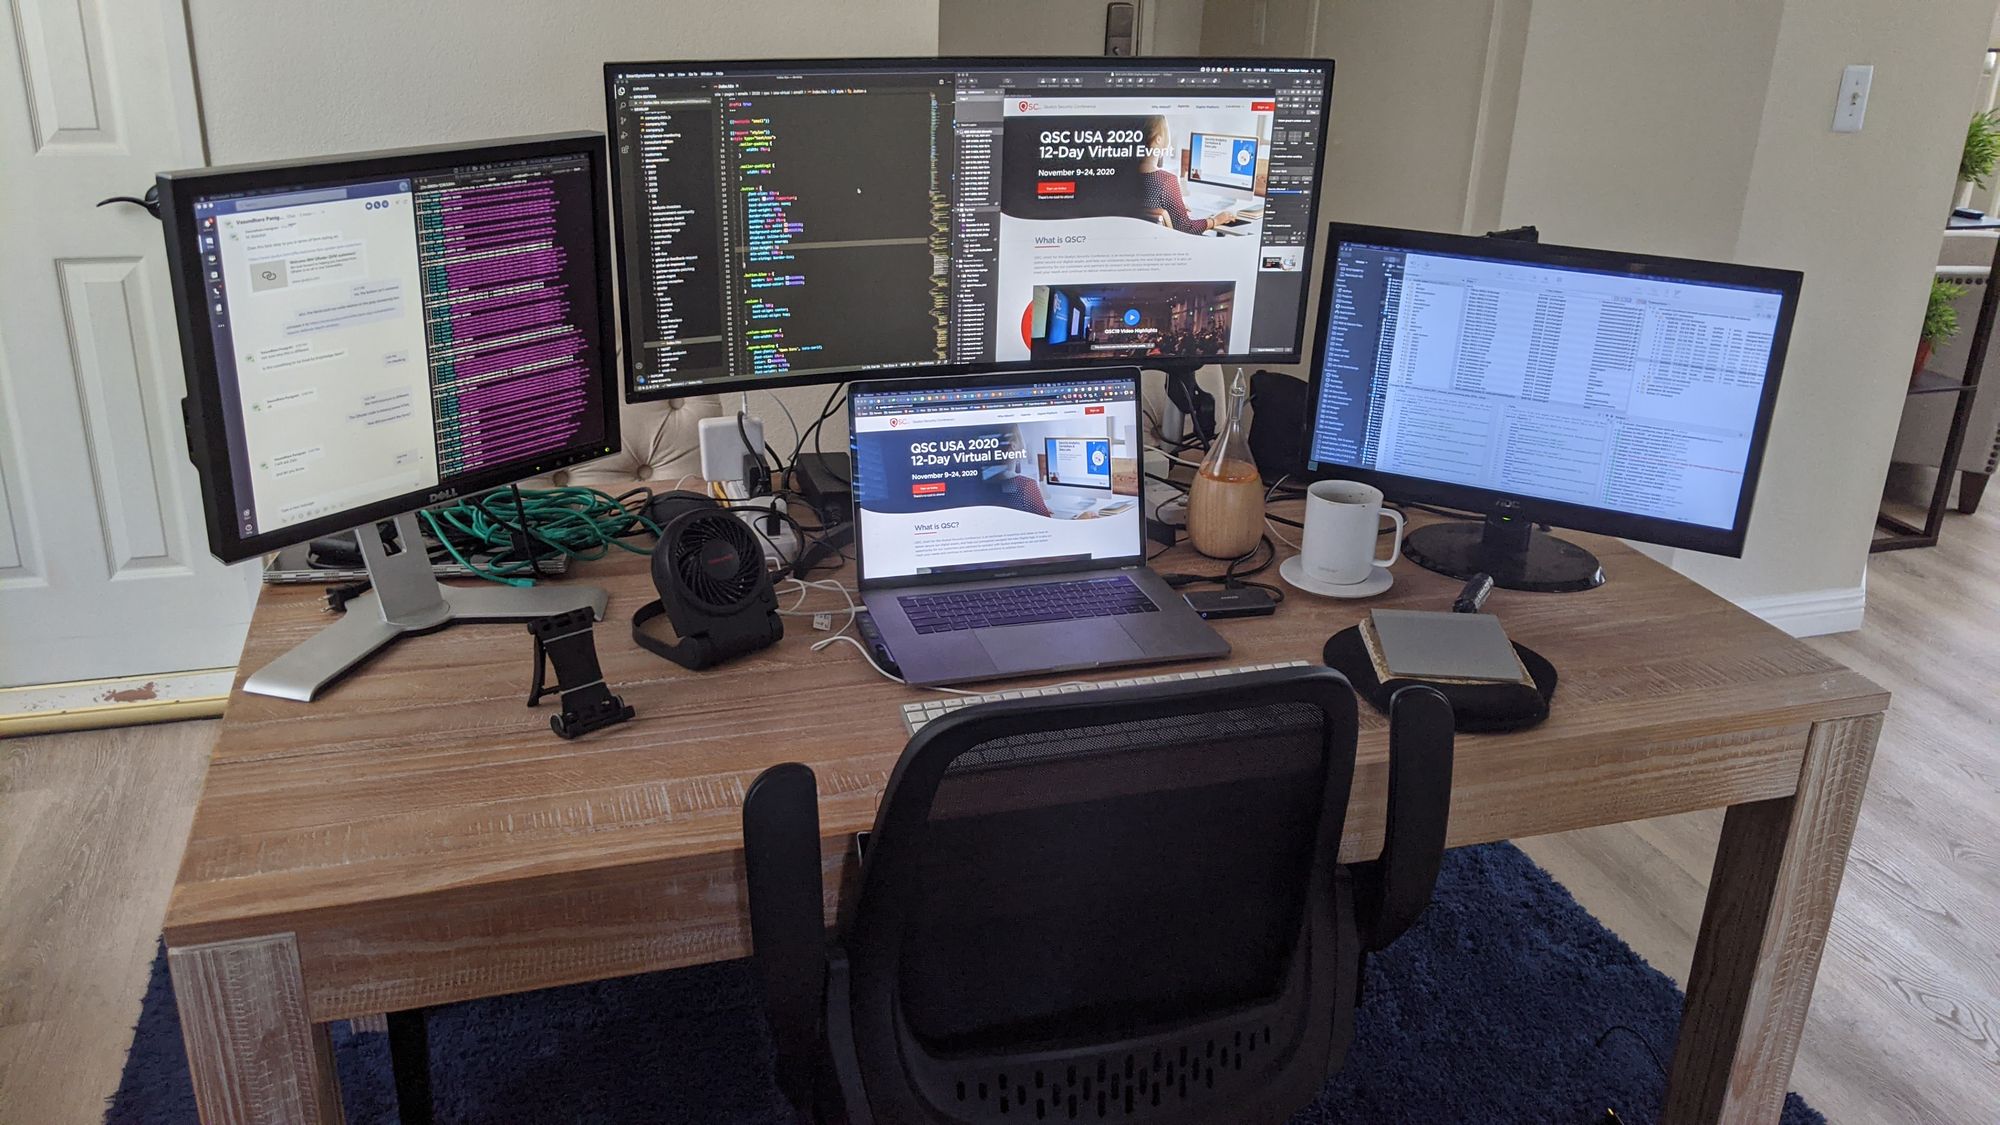
As a web developer, I absolutely need multiple windows open – maybe more than for people in other professions. Due to the pandemic, like many people, I had to create a home office. I could have used the unused loft upstairs but I didn’t know I’d still be working from home after 2 years and I like being close to the kitchen so I converted the dining table into my work desk. Since I had some old monitors lying around, I used them to have multiple windows open. I thought we’d all just work from home for a month or two max so it didn’t seem worth it to spend money on fancy monitors.
April 2020
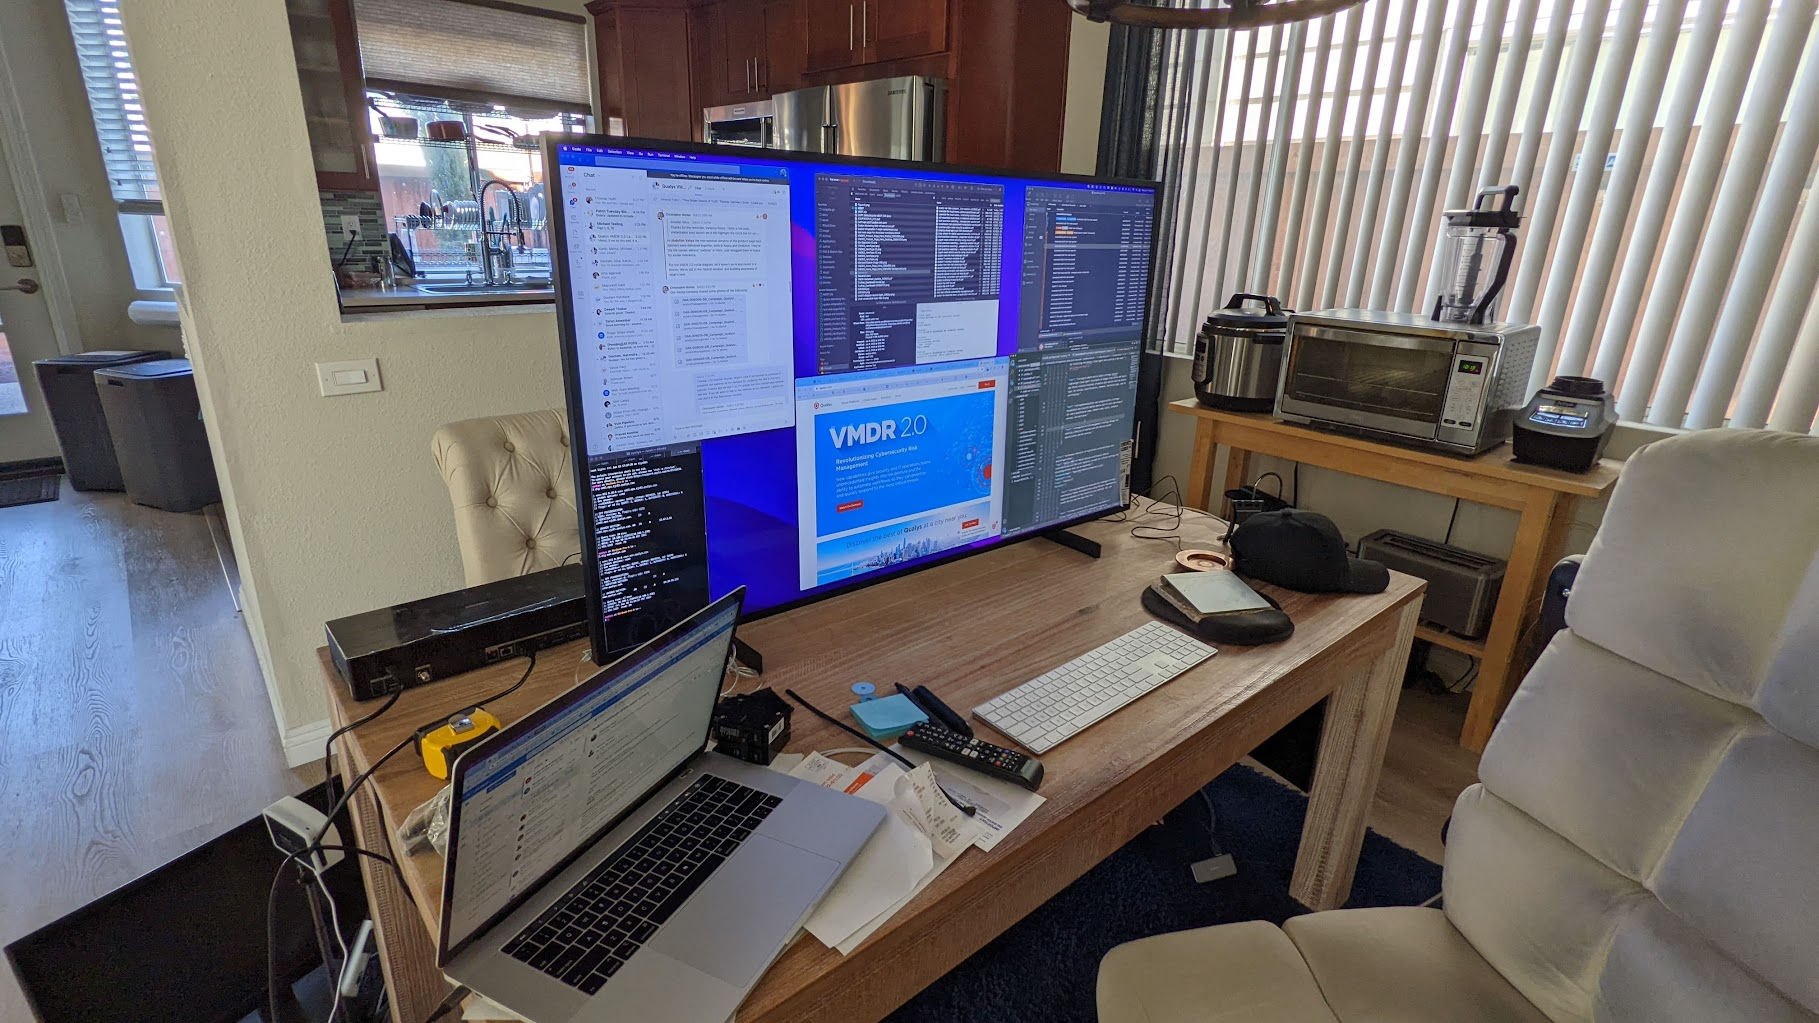
As the pandemic progressed, I got a work allowance to buy office equipment for work from home (WFH). I badly needed an ergonomic and comfy work chair. I also got an ultrawide monitor to have even more screen real estate.
This photo does not show the upgraded chair.
I thought about using my 65″ inch LG OLED TV as a monitor but the screen was WAY TOO BIG!
I then read an article about people using 43″ and 50″ TVs with a low input delay as their work monitor and how happy they’ve been. I got the Samsung 50″ ‘The Frame” TV at a 50% open-box discount at BestBuy. As much as it was nice reading code on it, anything on the left and right was uncomfortable to read.
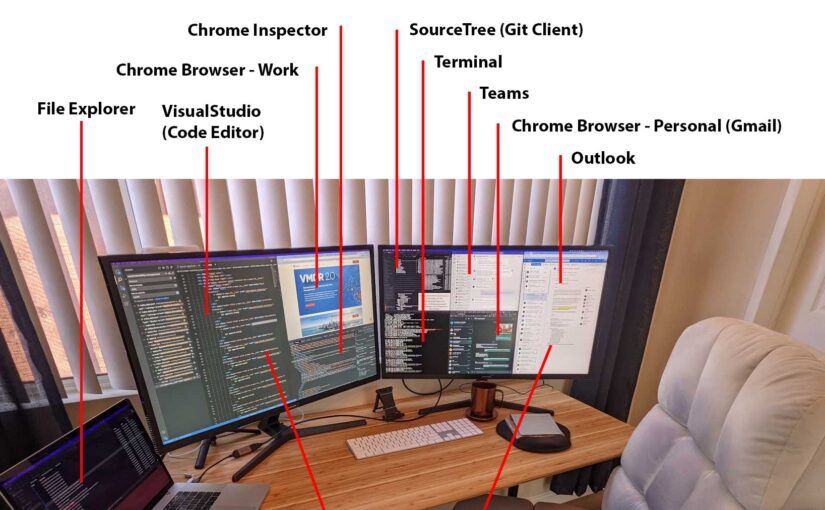
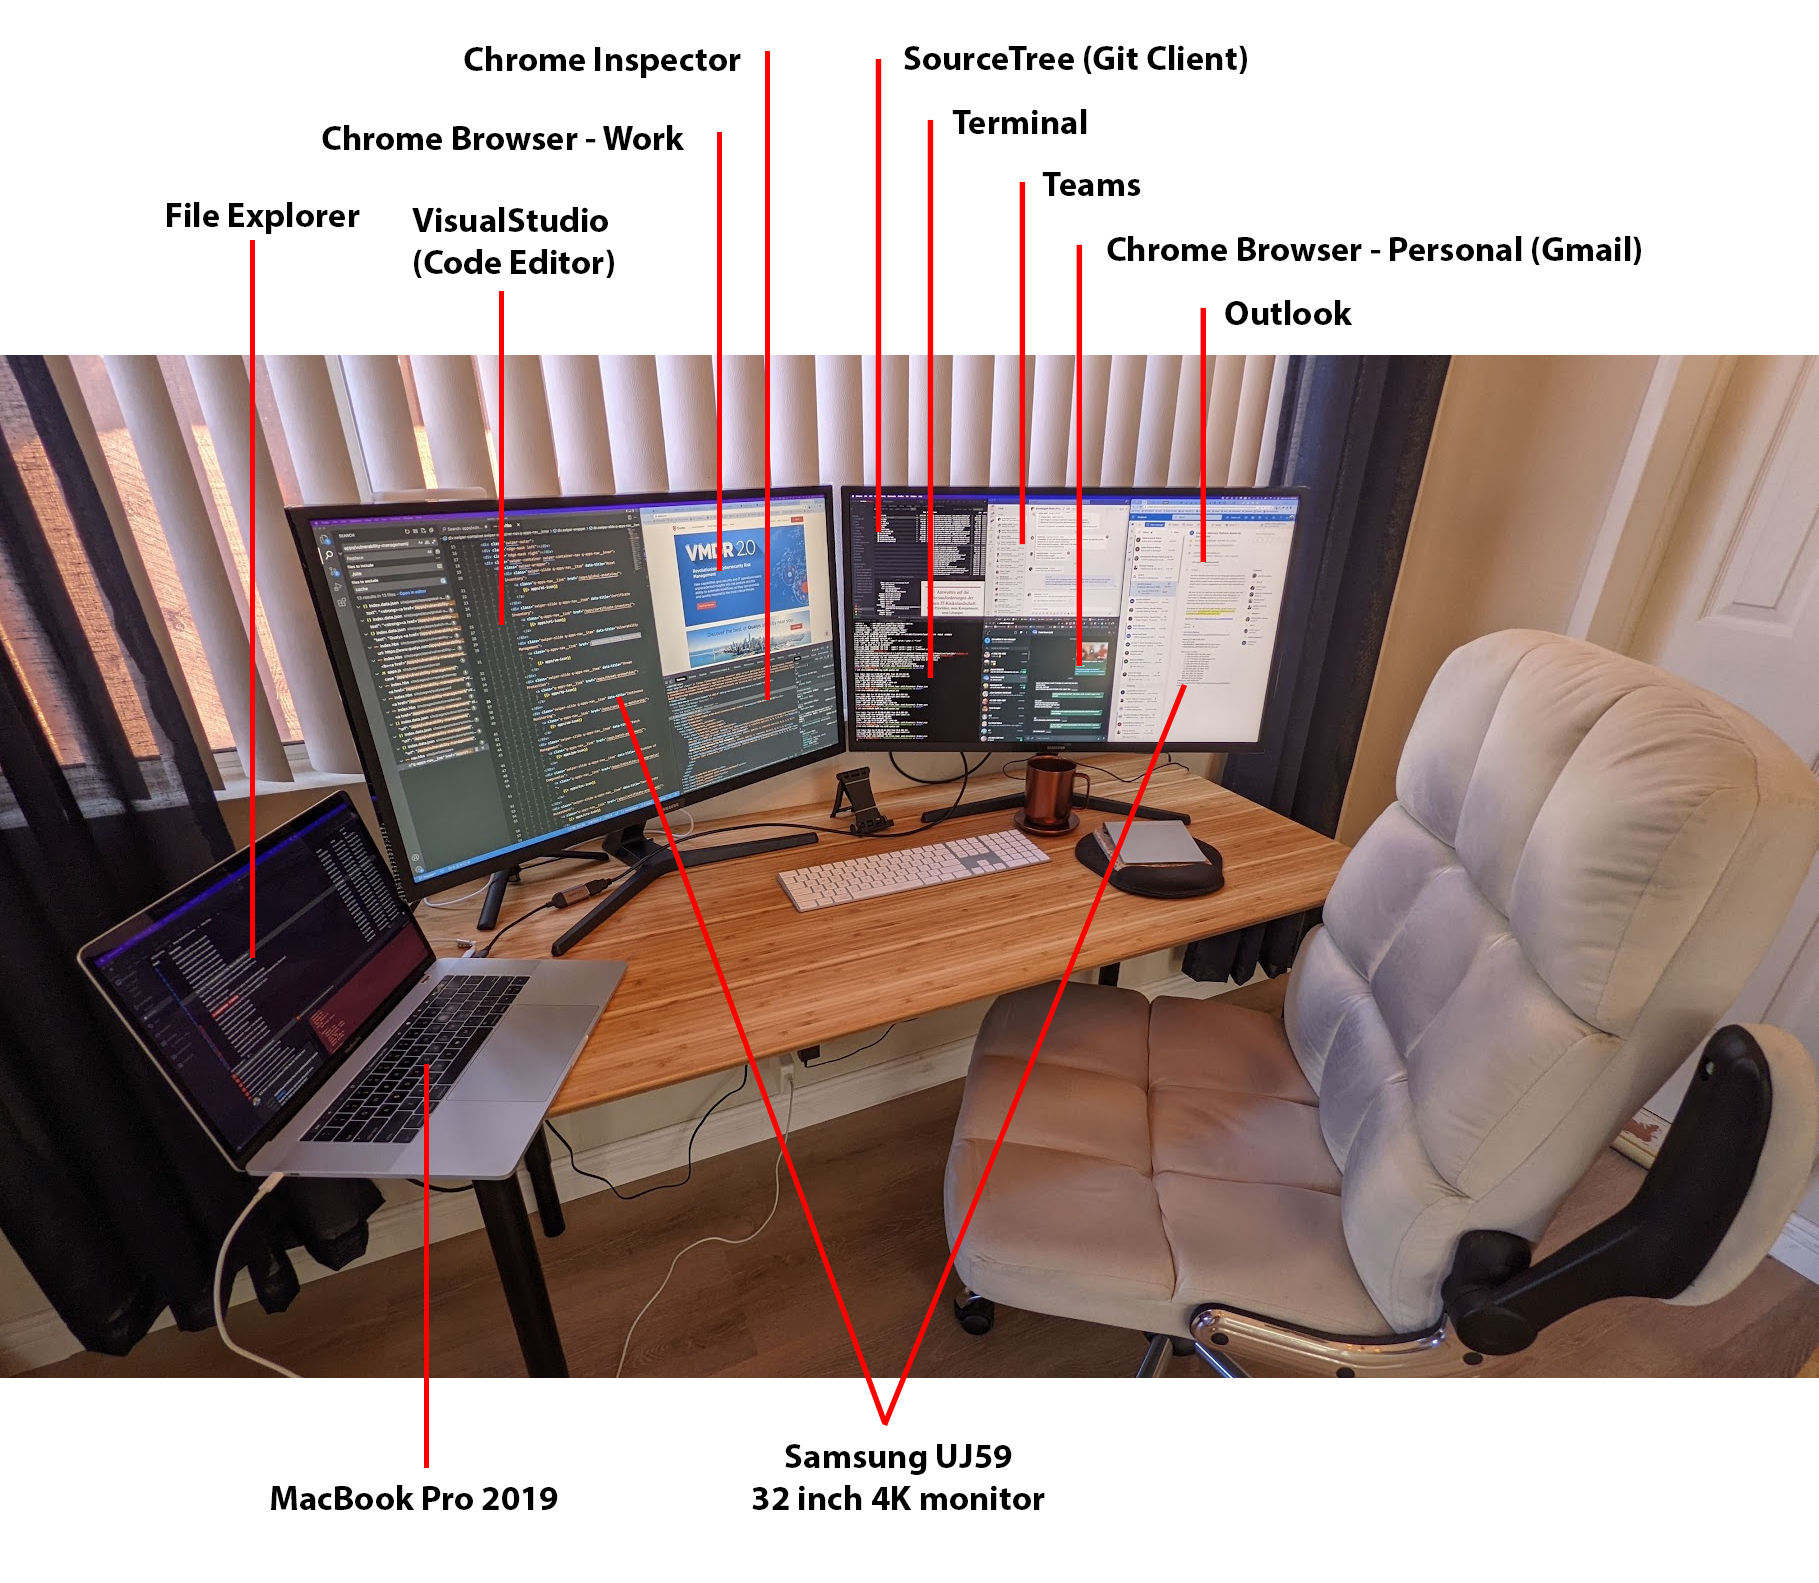
I could have tried the 43″ model of the same TV but it cost more than I wanted to spend. Plus, I wanted more windows open at the same time. Fortunately, BestBuy had some open-box 32″ Samsung UJ59 4K monitors. Regular price: $340. Sale Price: $300. Open box price: $250 and $195 (both looked brand new even though they were open box items). After being tired of a messy dining room / office where I could see the back of my monitors, I decided to rearrange the dining room and get a more suitable desk.
I know what you’re thinking. Why is the laptop halfway off the desk. Since with two 4K monitors, I didn’t think I needed the laptop screen but, how can I resist an extra screen? I’ll get a drawer unit the same height as the desk, put it on the left side of the desk, and put the laptop on it. More importantly: why in the world didn’t I buy two 4K monitors before? This setup makes working so much better I regret not doing this sooner. Now, this setup works for me but you may need to adjust some settings to better suit yours.
Setting up the monitors
Before you go out and buy a bunch of 4K monitors, make sure you laptop / computer supports them. I have a MacBook Pro (2019) and according to Apple, I can run multiple 4K monitors.
My particular Samsung UJ59 monitors don’t have USB-C input – only HDMI – so I have to use a USB-C to HDMI adapter.
Monitor Layout
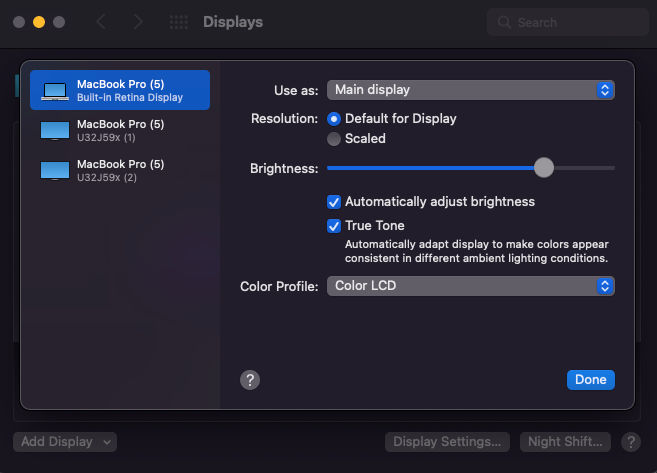
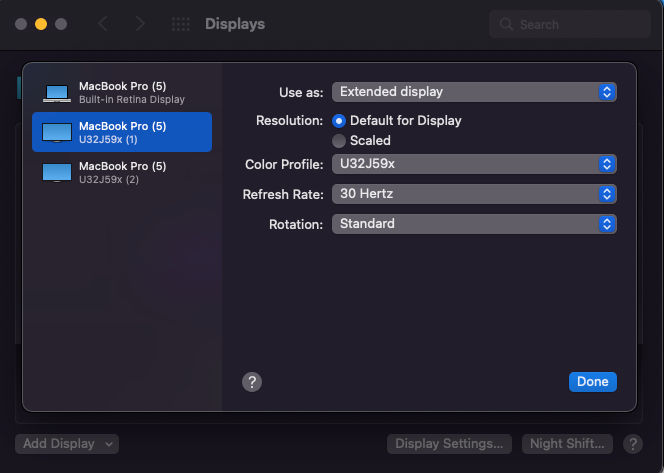
On MacOS, I chose to have my laptop screen be my main display and my 32″ monitors both be extended displays. You can then drag the squares representing screens to match your physical layout so that when you drag your mouse (I use a trackpad) off the edge of a screen/monitor, the pointer seamlessly appears on the adjacent screen, as you’d expect.
Monitor Resolution
4K screens/TV support a native resolution of 3840 x 2160 pixels. But, you may find that reading code or blog posts difficult when the font is too small. There are two things you can do to address this:
Scale down the resolution
You can have your monitor show a picture at a lower than 4K resolution such that everything appears bigger.
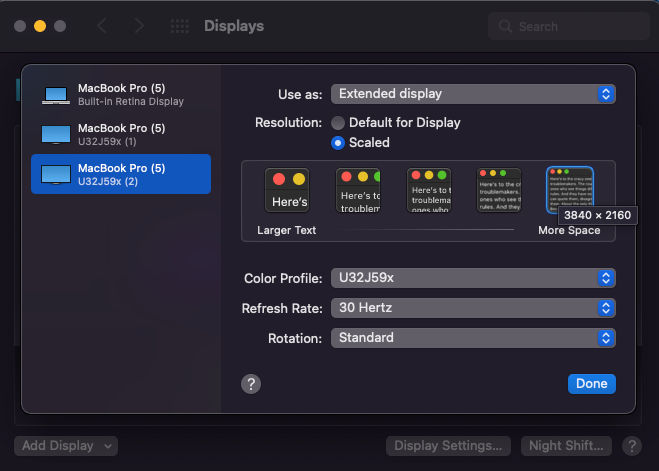
I set my laptop as the main display with a default resolutionThe first 4K monitor is set as “Extended display” with a default (4K) resolutionThe 2nd 4K monitor is also set as “Extended display” with a default resolution. When I click the “Scaled” option, you can see the default resolution is 3840 x 2160, which is 4K.
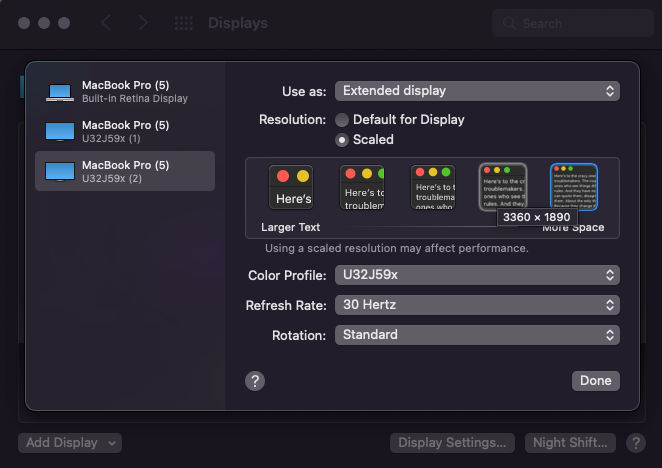
Below are lower scaling options.
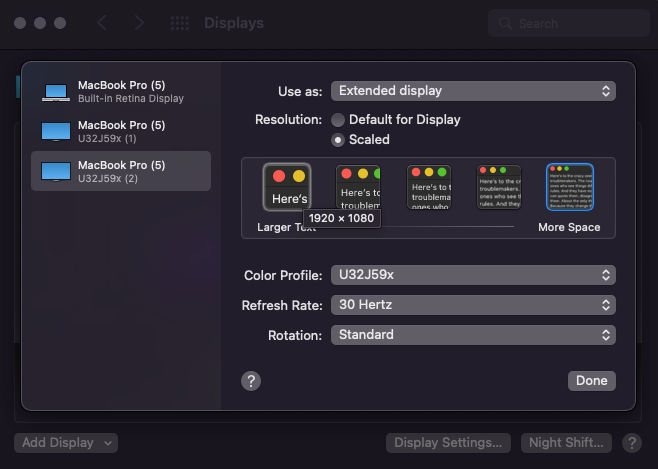
The scaling option right below 4K is 3360 x 1890 px.The lowest scaling option is 1920 x 1080 px.
Increase the font size of some or all browser tabs / apps
If you’re in 4K mode and you feel the font is a bit too small to read, you can increase the font size of just that window or browser tab. I use VisualStudio Code as my code editor and I find that increasing the font size makes for a much more pleasant coding experience. Plus, since I have laid out my screen such that VS Code takes up the full height of the screen, I can still see a ton of code without having to scroll a lot.
Conclusion
One survey indicated that slightly more people preferred a single 4K TV as their monitor than people who prefer multiple 4K monitors. This all boils down to your use case. If you don’t need a million windows open like I do, then a single 43″ 4K TV may be better for you (don’t get a 50″ TV – it’s too big if you are sitting 2-3′ from the screen). Otherwise, multiple 4K monitors is definitely the way to go (with some custom setting adjustments to suit your viewing comfort).
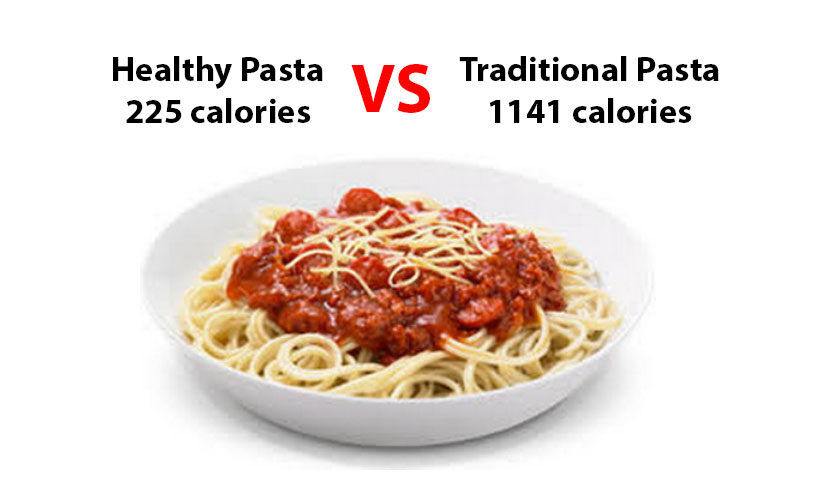
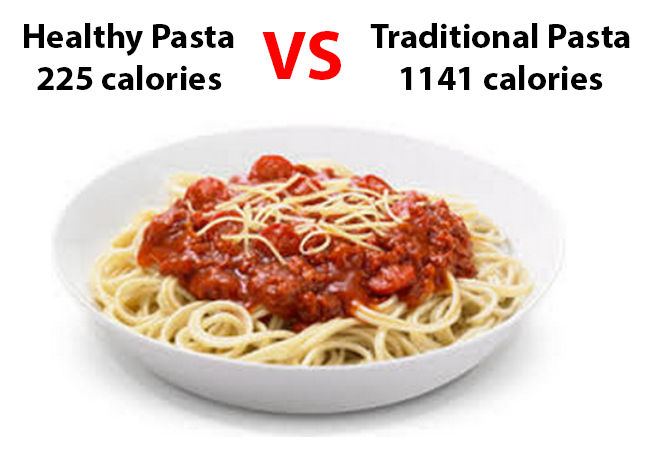
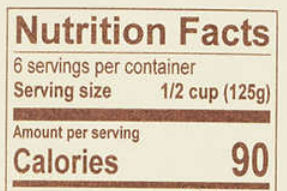
People may not realize this but traditional pasta like spaghetti contains an enormous amount of calories, both from the pasta itself and the sauce. Fortunately, there is a healthy, low-calorie alternative, albeit a bit more expensive. Below is a comparison of traditional to healthy pasta. First, we’ll start with healthy pasta which uses HealthyNoodles available at Costco.
tldr;
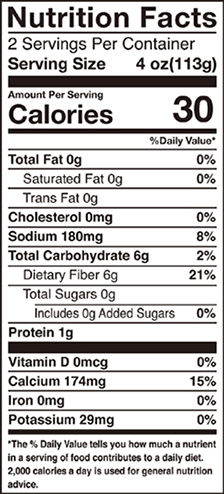
HealthyNoodles-based Pasta
This pasta comes precooked. Since one serving is a ridiculously small amount, let’s say we make 4 servings (452 grams, 120 calories).
For the sauce, we’ll make our own using tomato sauce from Target.
I find that one 18oz can is a good amount for the amount of pasta above. The sauce comes with some spices but we can add more like Italian seasoning, oregano, etc. There are many recipes online for making pasta sauces from tomato sauce. One can (427 grams) of this sauce has 105 calories.
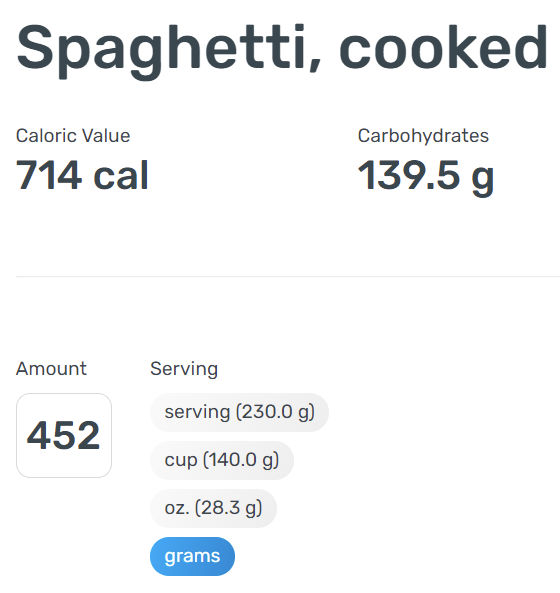
Traditional Pasta
The calories listed on this package is for dry spaghetti. To compare with HealthyNoodles above, we want the calories for cooked spaghetti having a weight of 452 grams. According to Yazio, that amount is 714 calories.
Now, for the sauce, let’s go with Raos marinara, which is a very popular sauce available at Costco.
125 grams of this sauce has 90 calories. Therefore, 427 grams contains 307 calories.
Comparison
Now that we have our values, let’s compare the total calories from each type of pasta.
Traditional Pasta
Healthy Pasta
Noodles
714
120
Sauce
427
105
Total Calories
1141
225
Conclusion
For the amount specified above, Healthy pasta is 916 calories LESS than the calories in traditional pasta. That’s 80% less calories!
This post will describe how to create a simple website with 11ty (Eleventy), a NodeJS-based static site generator (SSG). Accoxrding to this article, 11ty is the 3rd-fastest SSG.
I’ve tried Hugo. It’s definitely fast and easy to install. But, I found that it wasn’t flexible in how it could be used and not as intuitive as Jekyll and 11ty. I’ve also tried Jekyll. It was a bit tricky to install on Windows. It would sometimes get stuck or not detect file changes and therefore not build and reload them in the browser. LiveReload didn’t work, for me at least. 11ty was super easy to install, as you’ll see below. It’s super flexible, customizable, and intuitive to use. And, it supports a bunch of templating engines like HandlebarsJS, Liquid, Nunjucks, EJS, and even plain JavaScript.
Here’s a step-by-step guide to getting started with 11ty to build a simple website from scratch. This tutorial was done on Windows.
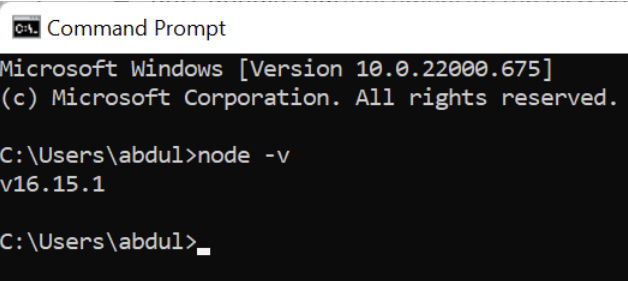
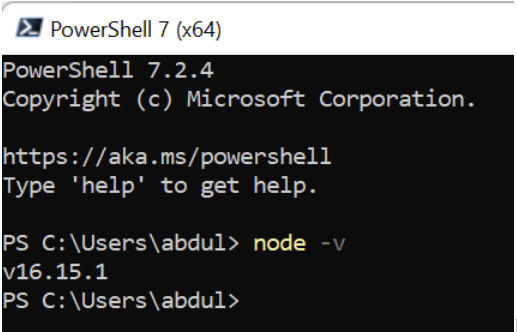
If you’re on Windows, open the Command Prompt and run node -v to check the version of Node installed.
Optionally, install the latest version of PowerShell
If you’re on Windows, you can use the default command prompt. Or, you can use PowerShell. If you don’t have the latest version of PowerShell, you can download it from here. You can also install Windows Terminal.
Instead of the default command prompt (cmd.exe), I’m going to use PowerShell. Open PowerShell and run node -v to check your version of Node installed. If PowerShell doesn’t find Node, then check that Node is in your path.
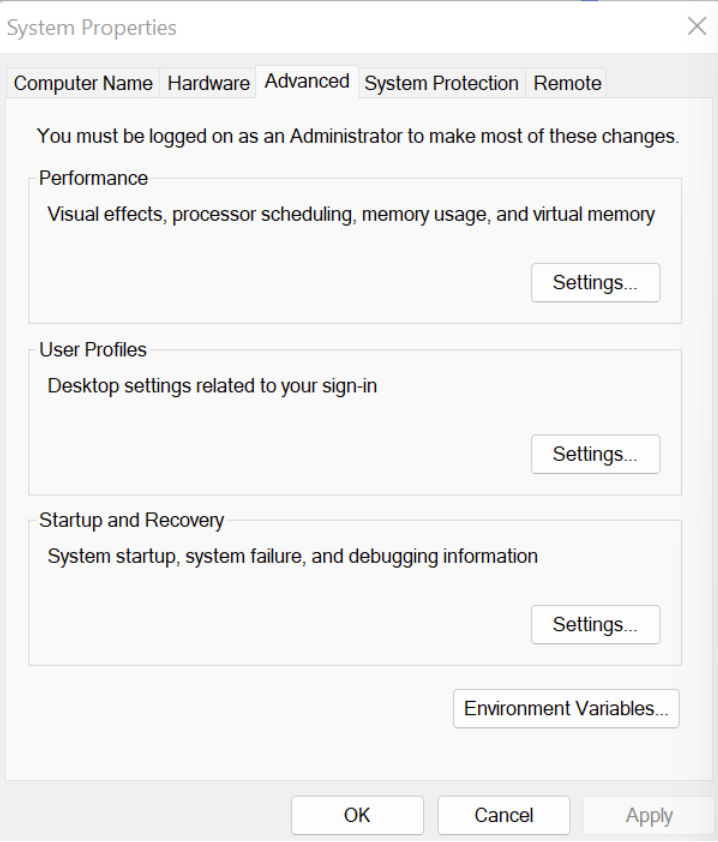
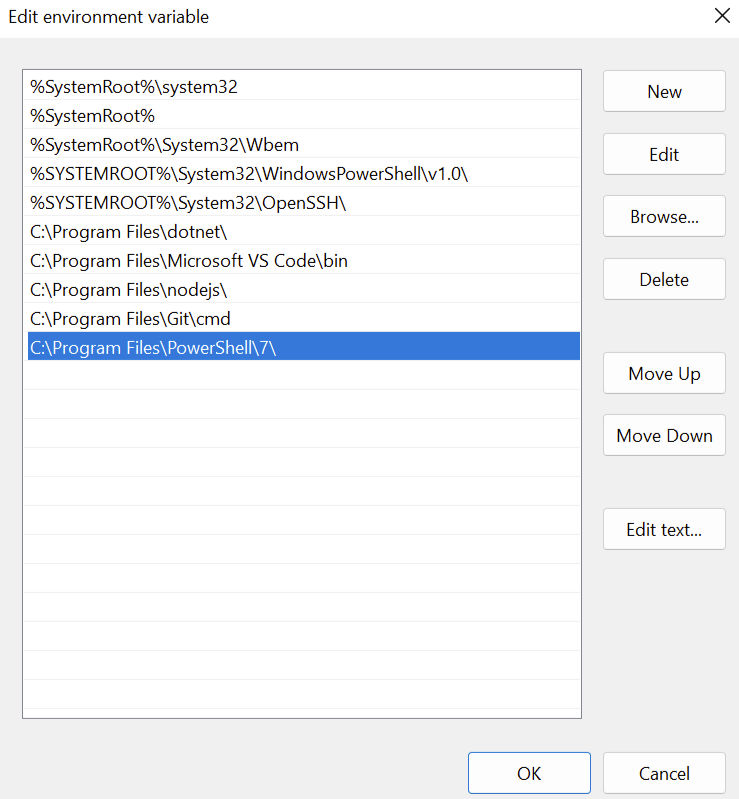
Open System Properties
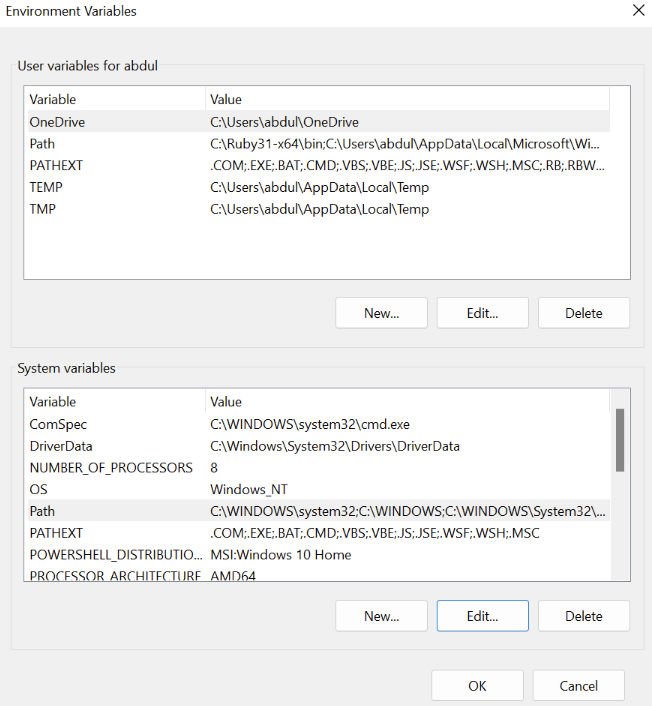
Click Environment Variables
Under System variables, click Path.
If there is no path to the nodejs folder, add it as the last item.
If it exists but comes before the PowerShell path, then move it down below the PowerShell path.
Close and reopen PowerShell and rerun node -v.
Create a website folder
mkdir eleventy-poc
cd eleventy-poc
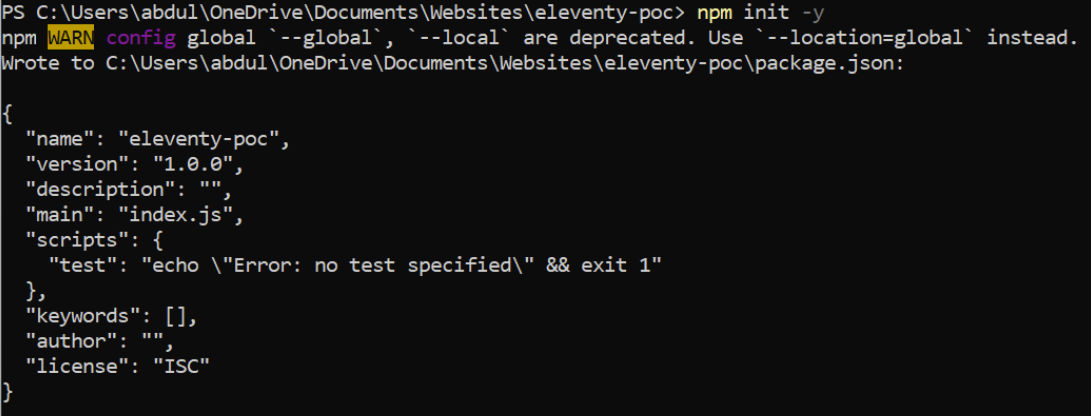
Create a package.json file
npm init -y
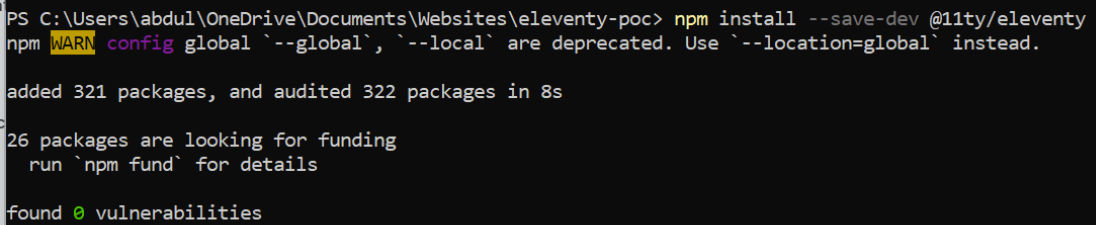
Install eleventy and save it in package.json
At the time of this writing, the latest release version is 1.0.2. However, I will install version 2.0.0 canary because it has new features that I like.
npm install --save-dev @11ty/eleventy@canary
Run eleventy (verify it runs)
npx @11ty/eleventy
Install HTML 5 boilerplate
We’ll use HTML5 Boilerplate as a basis for our website. Go to https://html5boilerplate.com/ and download the latest version.
Extract and copy all files to the project folder (eleventy-poc) EXCEPT for package.json and package-lock.json. You don’t want to overwrite the 11ty dependencies that were already saved there.
Create an “src” folder
To keep our source files separate from root-level environment files (package.json, .env, .gitignore, etc), let’s create an src folder to store our website source files and move the following files and folders into it.
css
img
js
404.html
browserconfig.xml
favicon.ico
icon.png
index.html
humans.txt
robots.txt
site.webmanifest
tile.png
tile-wide.png
The docs folder just explains how to use HTML5 boilerplate. You can delete it if you want. I’m going to delete mine.
Create .eleventy.js config file
Create a new file in the root folder called .eleventy.js. Add to it the following code.
const inspect = require("util").inspect;

module.exports = function(eleventyConfig) {
	eleventyConfig.addPassthroughCopy("src", {
		//debug: true,
		filter: [
			"404.html",
			"**/*.css",
			"**/*.js",
			"**/*.json",
			"!**/*.11ty.js",
			"!**/*.11tydata.js",
		]
	});

	// Copy img folder
	eleventyConfig.addPassthroughCopy("src/img");

	eleventyConfig.setServerPassthroughCopyBehavior("copy");

	// tell 11ty which files to process and which files to copy while maintaining directory structure
	// eleventyConfig.setTemplateFormats(["md","html","njk"]);

	// Run me after the build ends
	eleventyConfig.on('eleventy.after', async () => {

	});

	eleventyConfig.ignores.add("src/404.html");

	// Values can be static:
	eleventyConfig.addGlobalData("myStatic", "static");
	// functions:
	eleventyConfig.addGlobalData("myFunction", () => new Date());

	eleventyConfig.addFilter("debug", (content) => `<pre>${inspect(content)}</pre>`);

	// add support for blocks
    eleventyConfig.addShortcode('renderlayoutblock', function(name) {
        var blockContent = '';
        if (this.page.layoutblock && this.page.layoutblock[name]) {
            blockContent = this.page.layoutblock[name];
        }
        return blockContent;
    });

    eleventyConfig.addPairedShortcode('layoutblock', function(content, name) {
        if (!this.page.layoutblock) {
            this.page.layoutblock = {};
        }
        this.page.layoutblock[name] = content;
        return '';
    });

	return {
		dir: {
			input: "src",
			output: "www",
			// ⚠️ These values are both relative to your input directory.
			includes: "_includes",
			layouts: "_layouts",
		}
	}
};
From top to bottom, the code above does the following
includes the util package to help with debugging
recursively looks for 404.html, *.css, *.json and *.js files (except for *.11ty.js and *.11tydata.js files) and copies them to the output (build) folder while maintaining folder structure. This allows you to have global JS and CSS files in root web folder, e.g. /js/main.js and /css/main.css, in addition to local, page-specific JS and CSS files, e.g. /company/index.html, /company/index.js, /company/index.css.
copies all files from /src/img to the output (build) folder
Using setServerPassthroughCopyBehavior, tells 11ty to pass-through copy files both when running a single build (npx @11ty/eleventy) and when building files during development using the --serve flag (npx @11ty/eleventy --serve)
tells 11ty to ignore the 404.html file. That file does not need to be built. If it gets built, it will be at /404/index.html, which is not what we want.
adds code to show debug information nicely in a web page
adds support for template blocks that works with 11ty’s template inheritance system (see note below)
specifies the input (source) folder as src, output (build) folder as www, the layouts folder as _layouts and the includes folder as _includes.
Include files are reusable code snippets like components, e.g. header, footer, etc.
Layout files are files that determine a page’s layout. Layout files can wrap other layout files.
Note: Both Nunjucks and 11ty have their own template inheritance mechanism. With Nunjucks, you inherit a parent template using {% extends "parent.njk" %}. With 11ty, you inherit a parent template in the front matter, e.g. --- layout: parent.njk --- Nunjucks actually supports template “block”s natively, but it doesn’t support front matter. Since there are benefits to having front-matter support, this post will use 11ty’s template inheritance mechanism. In doing so, Nunjuck’s native “block” support doesn’t work as expected. As a workaround, I have added shortcodes in the .eleventy.js config code above to produce the same effect of Nunjuck’s native “block”s. As you’ll see later, we’ll use the shortcodes {% renderlayoutblock %} and {% layoutblock %} instead of the Nunjucks {% block %}.
Re-run Eleventy when you save
To build the pages in the src folder, we can run the following command.
npx @11ty/eleventy
However, during development, it’s handy to have 11ty build any source file changes automatically. We do that using the following command.
npx @11ty/eleventy --serve
This runs a local web server that auto-reloads the browser when you save modified file.
An output (build) folder (in this case, www) will be created containing the built and copied files.
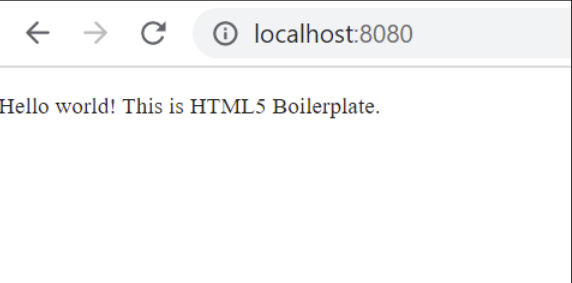
We can browse to http://localhost:8080/ and see the home page.
Create a default layout
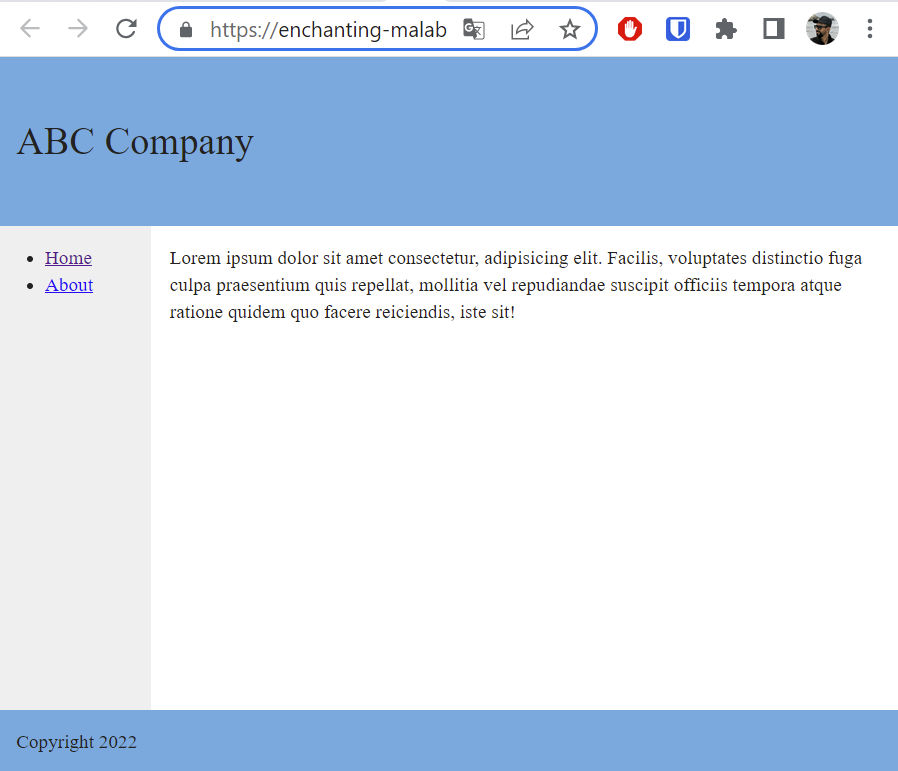
At this point, we have our boilerplate home page (index.html) file.
Let’s create a header, footer, and sidebar containing nav links, and a main content area, like most websites have.
<header>
    <p class="logo">ABC Company</p>
</header>
  <div class="content-wrapper">
    <nav>
        <ul>
          <li><a href="/">Home</a></li>
          <li><a href="/about/">About</a></li>
        </ul>
    </nav>
    <main>
        <p>Lorem ipsum dolor sit amet consectetur adipisicing elit. Tempore, velit provident sed cum repellendus repudiandae ut mollitia animi. Voluptates expedita corporis pariatur sed quam. Ducimus fugiat quos eum aut eaque?</p>
    </main>
</div>
<footer>
    Copyright 2022
</footer>
I’ll also add some basic CSS to main.css to style the page.
Let’s create a layout from this index.html page and create “include” files containing code snippets that will be included on all pages.
Copy index.html to src/_layouts/default.njk (this will be a Nunjucks template)
In src/_layouts/default.njk
Prefix all relative paths with “/”, e.g.
css/normalize.css becomes /css/normalize.css
js/main.js becomes /js/main.js
Copy the <head> code block to src/_includes/head.html
Copy the <header> code block to src/_includes/header.html
Copy the <nav> code block to src/_includes/nav.html
Copy the <footer> code block to src/_includes/footer.html
Copy all of the <script> tags to src/_includes/scripts.html
Replace the <head> code block with {% include "head.html" %} to include the head code
Replace the <header> code block with {% include "header.html" %} to include the header code
Replace the <nav> code block with {% include "nav.html" %} to include the nav code
Replace the <footer> code block with {% include "footer.html" %} to include the footer code
Replace the <script> code with {% include "script.html" %} to include the scripts
Replace the lorem ipsum text with {{ content | safe }}. This content variable will be replaced with content from pages that use this template, like the home page.
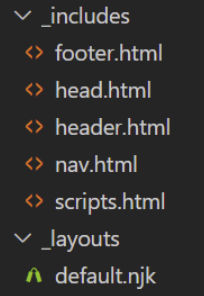
This is how the files should look.
The contents of default.njk should look like this.
<!doctype html>
<html class="no-js" lang="">

{% include "head.html" %}

<body>
  {% include "header.html" %}
  <div class="content-wrapper">
    {% include "nav.html" %}
    <main>
        {{ content | safe }}
    </main>
  </div>
  {% include "footer.html" %}
  {% include "scripts.html" %}
</body>

</html>
Replace the contents of index.html with the following.
---
layout: default.njk
---
<p>Lorem ipsum dolor sit amet consectetur, adipisicing elit. Facilis, voluptates distinctio fuga culpa praesentium quis repellat, mollitia vel repudiandae suscipit officiis tempora atque ratione quidem quo facere reiciendis, iste sit!</p>
The first section between the triple dashes is the front matter in YAML format. Here, we tell 11ty to use the default.njk layout for this page.
The content after the front matter will go where the content variable {{ content | safe }} is in the layout.
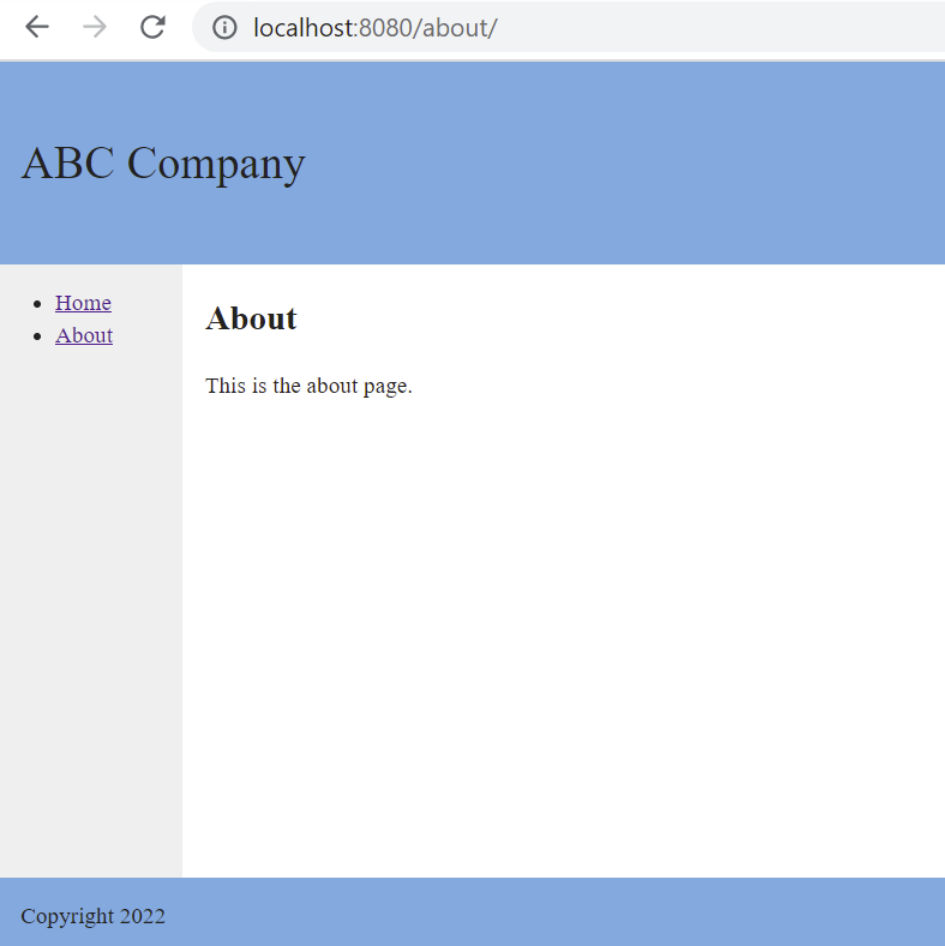
If we look at the home page in a browser, we’ll see that it looks exactly the same as before, except we’ve templatized the home page using a layout and many “include” files.
Add template blocks
Template blocks are handy because they let you add content to a parent template from a child template. For example, our base template (default.njk) may contain global content that applies to all pages, e.g. loading main.css, main.js, etc. A child template for a specific page, e.g. /index.njk or /about/index.njk, can use blocks to add local resources like local CSS and JS files specific to those pages.
First, let’s update our default.njk layout to use blocks using custom shortcodes explained above as follows:
Previously, we had a single head section (head.html) in the _includes folder. It’s better to split this up so that individual pages can have page-specific meta tags, styles, and scripts that need to go in the head. Replace head.html with meta.html and styles.html.
Note in the code above how there is a prependStyles and appendStyles block. This allows a child template to add stylesheets before and after the global styles that are included in styles.html. The same applies to the meta and scripts blocks.
Now, update index.html as follows and change the extension from .html to .njk so 11ty can process the blocks.
---
title: Home
layout: default.njk
---

{# add any meta tags that you want to come BEFORE other meta tags #}
{% layoutblock 'prependMeta' %}
    {# <meta name="a" content="b"> #}
{% endlayoutblock %}

{# add any meta tags that you want to come AFTER other meta tags #}
{% layoutblock 'appendMeta' %}
    {# <meta name="c" content="d"> #}
{% endlayoutblock %}

{# add any stylesheets that need to come BEFORE other stylesheets #}
{% layoutblock 'prependStyles' %}
    {# <link rel="stylesheet" href="/index.css"> #}
{% endlayoutblock %}

{# add any stylesheets that need to come AFTER other stylesheets #}
{% layoutblock 'appendStyles' %}
    {# <link rel="stylesheet" href="/index.css"> #}
{% endlayoutblock %}

{# add any scripts that need to go in the head #}
{% layoutblock 'scriptsInHead' %}
    {# <script src="/js/x.js"></script> #}
{% endlayoutblock %}

<p>Lorem ipsum dolor sit amet consectetur, adipisicing elit. Facilis, voluptates distinctio fuga culpa praesentium quis repellat, mollitia vel repudiandae suscipit officiis tempora atque ratione quidem quo facere reiciendis, iste sit!</p>

{# add any scripts that need to go BEFORE other scripts before the closing </body> tag #}
{% layoutblock 'prependScripts' %}
    {# <script src="/js/x.js"></script> #}
{% endlayoutblock %}

{# add any scripts that need to go AFTER other scripts before the closing </body> tag #}
{% layoutblock 'appendScripts' %}
    {# <script src="/js/x.js"></script> #}
{% endlayoutblock %}
In the code above, I added some meta, link, and script tags. They’re commented out using {% ... %} since they are just to demonstrate usage.
Create another page
Let’s create an About page. Create a file at /about/index.html. The content of the file can be
---
layout: default.njk
Title: About
---
<h1>{{ title }} </h1>
<p>This is the about page.</p>
In this case, we added a front matter variable called title and output it using curly bracket notation. 11ty is processing these files as Liquid files using the Liquid templating engine.
You can also rename about.html to about.njk to use the Nunjucks templating engine. 11ty will process the file accordingly.
11ty supports many templating languages including HTML, Markdown, JavaScript, Nunjucks, Liquid, Handlebars, Moustache, EJS (Embedded JavaScript), HAML, Pug, and custom. I prefer Nunjucks.
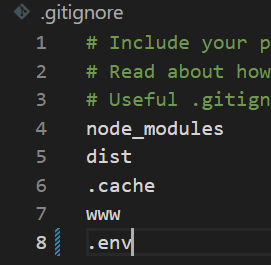
Add files for git to ignore
There are some files/folders we don’t want git to track. The HTML5 boilerplate already includes a .gitignore file. Edit it and add “www” to the list. We don’t want to commit the built files to git. Files will be built during deployment. In the .eleventy.js config file, you can also make your build folder “dist” instead of “www”, if you prefer. “dist” stands for “distributable”. Some other common folder names are “public” and “build”,
# Include your project-specific ignores in this file
# Read about how to use .gitignore: https://help.github.com/articles/ignoring-files
# Useful .gitignore templates: https://github.com/github/gitignore
node_modules
dist
.cache
www
Draft mode
If you are working on a page that is not ready for production, you can tell 11ty not to build it. Simply add permalink: false in the front matter.
11ty supports template inheritance so that children templates or layouts can inherit their parent templates or layouts. For example, we can create a new layout called sublayout.njk. We indicate that it inherits from another layout (in this case, default.njk) by adding layout: default.njk to the front matter.
---
layout: default.njk
variable14: value14
---

<div class="foo">
  <p>This content is wrapped in "div" tag with class="foo".</p>
  {{ content | safe }}
</div>
We can then create a new page template that uses this child layout by adding layout: sublayout.njk in the front matter.
---
layout: sublayout.njk
title: Test nested layout
---

<h2>{{ title }}</h2>
<p>lorem ipsum...</p>
Data
A template in 11ty has access to data from multiple sources. 11ty merges all data sources. Data with the same keys are overwritten based on priority.
.eleventy.js                      lowest prio (7):  data via addGlobalData method
_data/
  site.json                        lower prio (6):  global data file
_layouts/layouts/
  default.njk                       high prio (3):  data in layout front matter
blog/
  blog.json                          low prio (5b): data in parent dir data file
  posts/
    posts.json                       low prio (5a): data in directory data file
    article.njk                   higher prio (2):  data in template front matter
    article.json                  medium prio (4):  data in template data file
    article.11tydata.js          highest prio (1):  eleventyComputed in template js
Global data files
Global data is accessible to all templates. You can have global data in /src/_data. The _data folder is a special 11ty global data folder. This folder may contain files like data.json and data.js. Here’s an example data.json file.
In your base/default layout, e.g. default.njk, you can add data to the front matter. This data can then be used by all page templates that inherit from that layout. Here’s an example.
You can have data that is accessible to only specific pages. For example, if you have a page template at /foo/bar/index.njk, then you can have sibling data files at /foo/bar/colors.json or /foo/bar/bar.11tydata.js or /foo/bar/bar.11ty.js. The json data returned from those data files would then only be accessible to /foo/bar/bar.njk.
IMPORTANT: To access local json and data.js data, the files must have the name of their folder, e.g.
/foo/bar/bar.json
/foo/bar/bar11tydata.js
/foo/bar/bar.njk
If your template file is index.njk, it won’t be able to access the data.
Local data in front matter of page template
If you have a page template at /foo/bar/index.njk, you can add data to its front matter. This data would only be accessible to that page template and no other.
Dump and view all global and local data
Inevitably, you will be working on a page that doesn’t output the data you expect. You can enable debug mode, but the debug information may be lost or truncated in your console output. Earlier in this post, we added a filter to .eleventy.js that uses the util node package for debugging. Now, we can use that filter to dump all global and local data to a page in the browser for easy viewing. To do that, add the following code to any page template.
Note: the front matter format has to be JS, not YAML. Also, you must specify the layout in the front matter. Some people use Nunjucks’ {% extends %} but that won’t work for dumping variables.
---js
{
  layout: "default.njk",
  variable1: "value1",
  eleventyComputed: {
    datum(data) {
      return data;
    }
  }
}
---

<h2>Dump of all data</h2>
<pre><code>{{ datum | debug }}</code></pre>
When you view the page in a browser, you’ll see a nice JSON dump of all data like this.
Inevitably, you will come across a situation where you want to have a slightly different version of an HTML snippet. For example, you can have a snippet of HTML for a hero section and you want to have the option of showing different hero images. Instead of creating a bunch of include/partial files containing almost identical code, you can create components that accept parameters. These components behave like functions. In Nunjucks, they are called macros.
1. Create a component loader
First, we’ll create a Nunjucks’ macro that will simplify how we load other macros. I’ll put it at /includes/component.njk.
{%- macro component(name, params) -%}
  {%- include name + ".njk" ignore missing -%}
{%- endmacro -%}
2. Create some components
For demonstration purposes, I’ll create two simple components. The first one will show a button with a customizable label. I put it at /includes/button.njk.
The second one just shows a message in a box. If a certain parameter is present, then an additional second message will be shown. I put this at /includes/note.njk.
<div style="background-color: #efefef;">
    <p>This is a message</p>
    {% if params.show2ndMsg %}
        <p>This second message only shows if the show2ndMsg variable is true</p>
    {% endif %}
</div>
3. Call the components
Now, in a page template where we want to show the component, we just need to call the component loader (component.njk) and the components themselves, optionally passing in some parameters.
Now, let’s save our website code (source only) to GitHub and automatically deploy it to Netlify all for free.
UPDATE: Apparently, Nunjucks macros (components) don’t receive the context of the calling template, so they have a local scope. This means that global data is not accessible within components. This can be problematic. Plus, the component code requirements above are inelegant, as extra code is needed. If you need to pass custom data to reusable components, just use regular “include” statements and pass the data beforehand using {% set %} declaration, like in the following example below.
{% set color = "red" %}
{% set square = true %}
{% include "quote-box.njk" %}
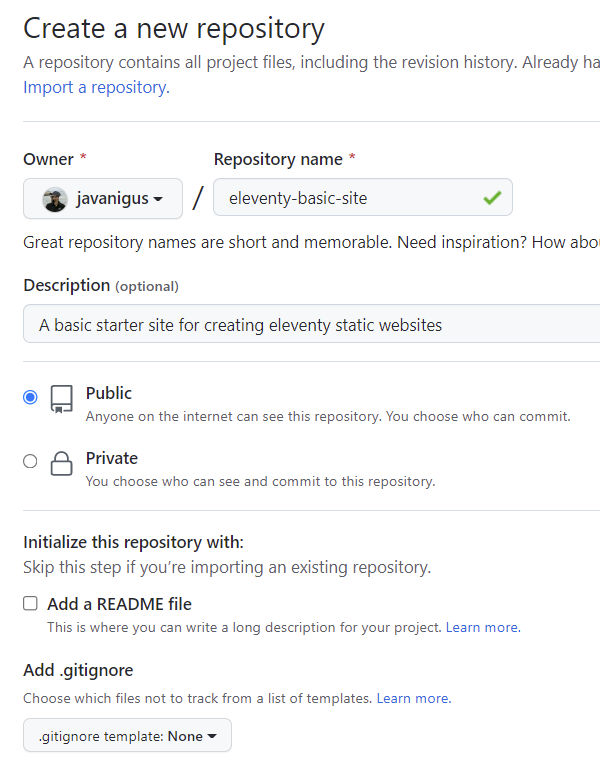
To avoid errors, do not initialize the new repository with README, license, or gitignore files. You can add these files after your project has been pushed to GitHub.
Initialize the local directory as a git repo. Run git init -b main in our project folder. This will create a hidden .git folder.
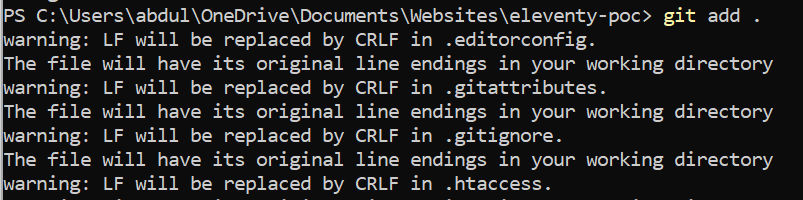
Add the files in your new local repository. This stages them for the first commit.
git add .
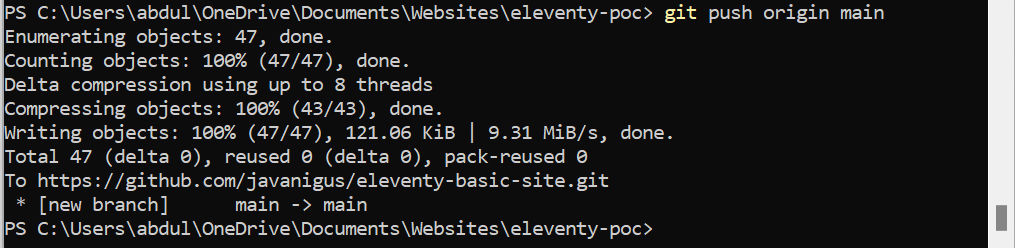
Commit the files that you’ve staged in your local repository.
git commit -m "First commit"
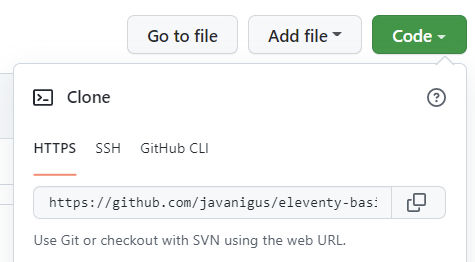
At the top of your repository on GitHub.com’s Quick Setup page, click to copy the remote repository URL.
UPDATE: An alternative to Netlify is Render. Unlike Netlify, which is limited to static sites, Render supports web apps (Node.js, PHP, etc) like Heroku. Render is like Netlify + Heroku.
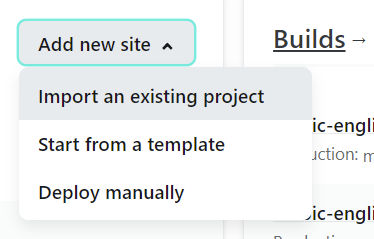
Now, let’s host our site for free on Netlify. Create a Netlify account and add a new site by importing an existing project.
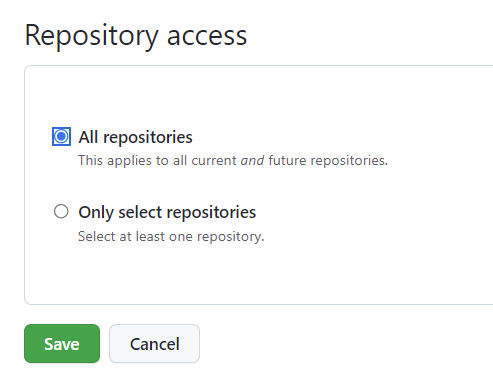
Connect Netlify to GitHub and choose a repo. If you don’t see your repo, configure Netlify to be able to access some or all repos in your GitHub account.
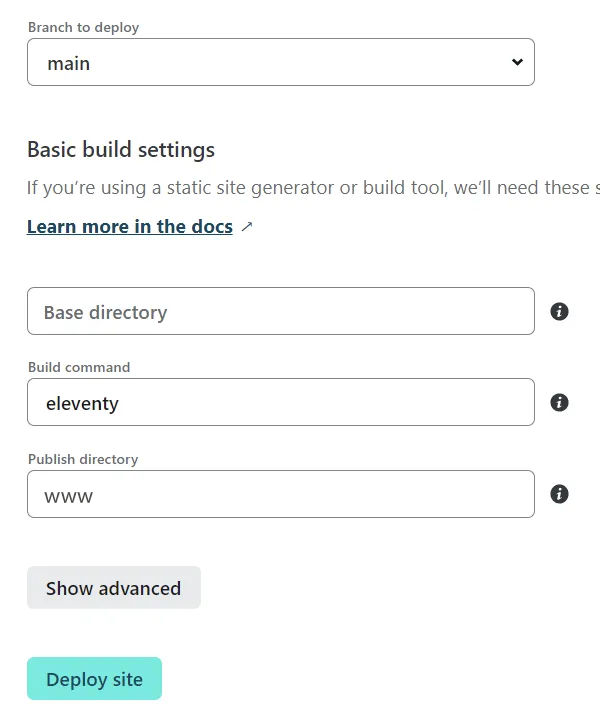
Netlify will analyze your site and suggest default build settings. As you can see below, Netlify correctly detected that my site was built using 11ty so it populated the “Build command” and “Publish directory” using the default Eleventy values.
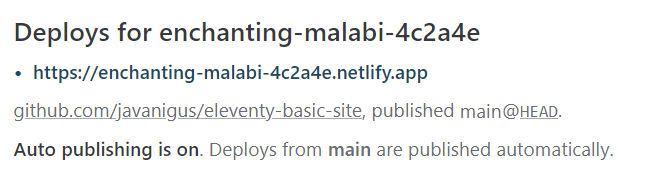
Click “Deploy site’ and wait a minute or two for your site to be deployed. Netlify will clone the repo, install any dependencies as listed in the package-lock.json file, run the Eleventy build command, and host the built files. You will then see how long it took to build the entire site and be provided a free Netlify URL where you can view the live site. In this case, the entire build took 37s.
The free Netlify URL generated is https://enchanting-malabi-4c2a4e.netlify.app/
Going to that URL, we see the same site as we saw on our local dev machine.
Let’s change that subdomain to someone simpler and more relevant. In Netlify, go to Settings > General > Site Details and change it. I’ll change mine to “my11tywebsite”. Now, I can visit my website at https://my11tywebsite.netlify.app/.
Add a Custom Domain
To add a custom domain that you’ve registered at a domain registrar other than Netlify, e.g. GoDaddy, you’ll need to go into your DNS manager and
for your www subdomain, e.g. www.babuun.com, add a CNAME record that points to the Netlify domain for your site, e.g. enchanting-malabi-4c2a4e.netlify.app
for your root / apex domain, e.g. babuun.com, add an ALIAS, ANAME or flattened CNAME record to point to apex-loadbalancer.netlify.com
You can now add SSL/TLS to your site so you can access it at the HTTPS protocol. Go to Site Settings > Domain Management > Domains and click HTTPS. Then click Provision certificate.
Environment Variables
Environment variables are useful for storing settings and secret keys for different environments, e.g. development, staging, and production. First, install the dotenv node package.
npm install dotenv
Then, create a .env file in the root of your project (as a sibling of package.json and .gitignore) and add some variables to it.
# DO NOT COMMIT THIS FILE
# ADD .env TO .gitignore

ENVIRONMENT=development
DB_HOST=localhost
DB_USER=admin
DB_PASSWORD=password
Since I’m on my development machine, I set the ENVIRONMENT variable to “development”.
Since the .env file contains passwords and secret keys, and it only applies to a specific environment, don’t commit it. Add it to your .gitignore file, e.g.
In order to access the environment variables in 11ty page templates, we need to load them as a global variable in our global JS file. Edit _data/site.js as follows. Here
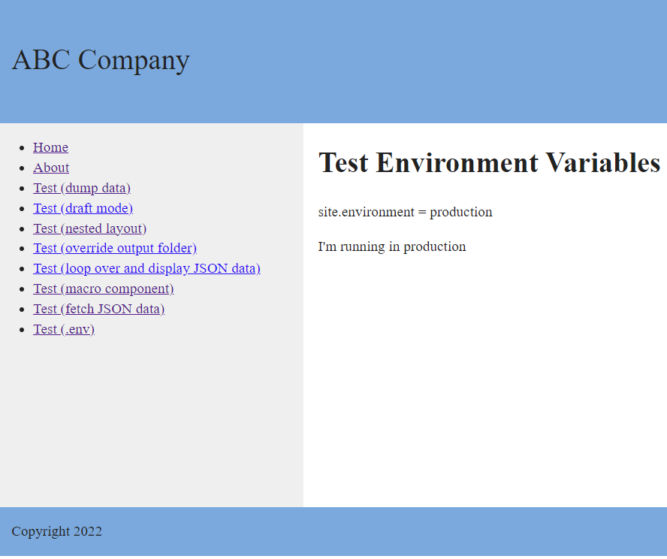
Since the file is called site.js, the global variables will be accessible under the “site” object, e.g. site.environment, site.db_host, etc. If you dump all data to a page, as explained above using the eleventyComputed front matter, you should see these environment variables. Here’s an example page template demonstrating how to use environment variables in a page template.
On your local development machine, you’ll see this.
Since our production website is running on Netlify, we can add production environment variables in Netlify. Under Site settings > Environment variables, we can add environment variables.
And as expected, the page in production shows different (production) values.
Staging Site
At this point, we have two environments:
development (localhost:8080)
production (Netlify domain: https://my11tywebsite.netlify.app)
When working with a larger team, you’ll often need to show people a preview of some changes for their review. Not only that, you may have different projects to show different people a preview of. One common way to handle this is by creating feature branches for each project. This article explains the workflow with relevant commands very clearly. Let’s say you manage projects in Jira and you have 2 separate projects to work on, e.g.
WEB-123 (update home page banner)
WEB-456 (create new landing page)
In the git feature branch workflow, you would basically do the following:
Create a new branch, e.g. git checkout -b web-123
Edit code, commit and push to origin (GitHub). You’ll see a new branch (WEB-123) appear in GitHub.
Create a new branch, e.g. git checkout -b web-456
Edit code, commit and push to origin (GitHub). You’ll see a new branch (WEB-456) appear in GitHub.
In Netlify, the default setting for branch deploys is to deploy all branches, like this
Netlify will detect commits to the branches in GitHub and trigger a branch deploy at a URL prefixed by the branch name, e.g.
WEB-123–my11tywebsite.netlify.app
WEB-456–my11tywebsite.netlify.app
You can then share those URLs with colleagues for review. If the changes are approved, you can then merge those branches into the main branch and delete those feature branches both locally and in GitHub.
git checkout main
git merge web-123
git branch -d web-123
git checkout main
git merge web-456
git branch -d web-456
Example workflow
You’ve decided to work on a new issue (issue #53). You do the following:
git checkout main
Switch to the main branch
git fetch origin
Pull the latest commits from the central repository (origin) to local
git reset --hard origin/main
Reset the repo’s local copy of main to match the latest version
git checkout -b iss53
Create a new branch and switch to it at the same time
git commit -a -m '[iss53] Create new footer'
Make changes and stage and commit them to the iss53 branch. The “a” flag stages “all” files that have been modified or deleted.
git push -u origin iss53
Push the local changes to the central repository (origin). The -u flag adds it as a remote tracking branch.
git commit -a -m '[iss53] Fixed typo'
Make more changes and stage and commit them.
git push
Push the local changes to the central repository (origin).
You’ve decided to work on a new issue (issue #76). You do the following:
git checkout main
git fetch origin
git reset --hard origin/main
git checkout -b iss76
git commit -a -m '[iss76] Updated text'
git push -u origin iss76
You’ve decided to publish all changes in issue #53.
git checkout main
git fetch origin
git reset --hard origin/main
git merge iss53
Merge iss53 branch to main branch
git push origin --delete iss53
Push merged commits on main branch to the central repository (origin) and delete the remote iss53 branch
git branch -d iss53
Delete the local iss53 branch
Reverting the website to a previous version
Netlify uses atomic deploys to deploy versions of a website to its many nodes in its CDN. Unlike deploying files one by one, atomic deploys ensure a globally consistent version of the website is deployed. You can think of it as zipping up the whole site, uploading the zip file, then unzipping the file to deploy the site. If the unzip process fails, then entire deployment fails. Users will not see a partially-deployed (and broken) website. One of the benefits of this is the ability to instantly roll back a mistake directly in Netlify because Netlify keeps a history of deployments. Rather than reverting a change in git and committing it to fix the mistake, you can simply click on a previous deployment and then click the “Publish Deploy” button. You can then take your time to fix your code in git. Learn more.
Preview past deployments
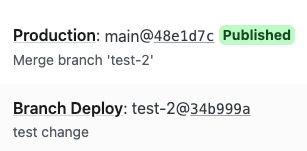
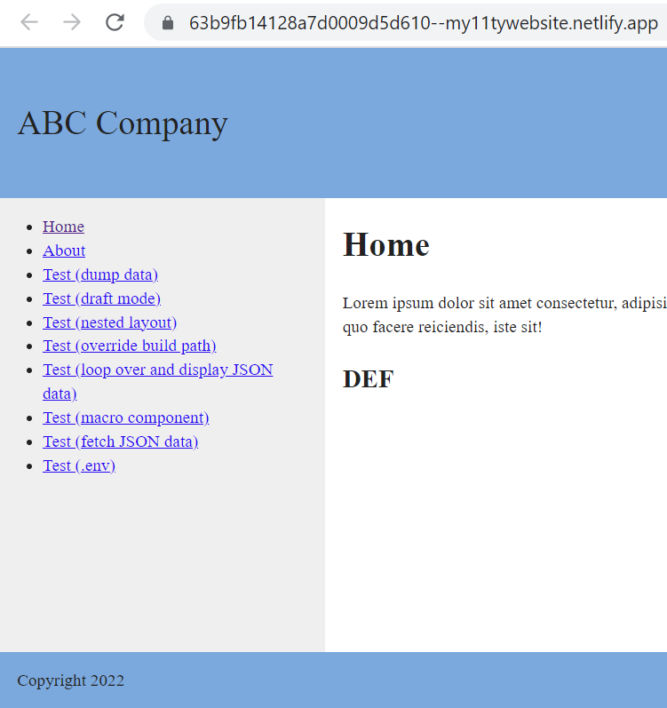
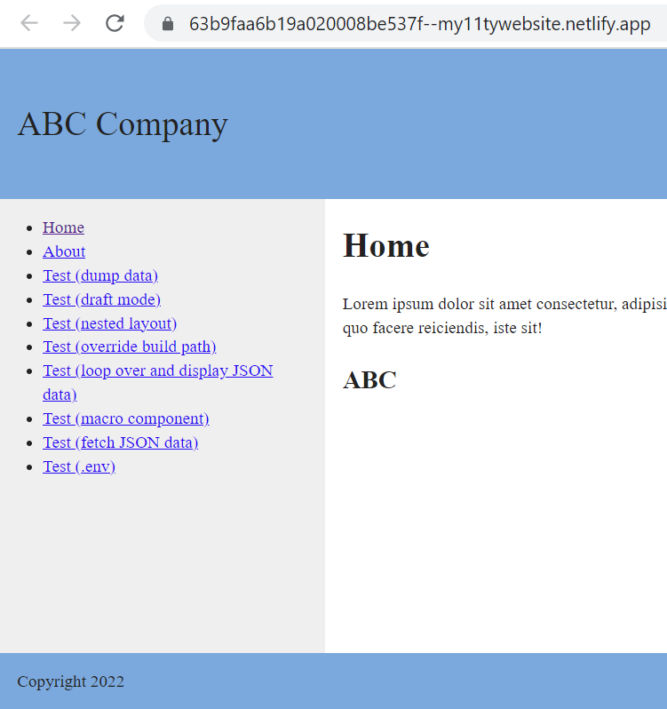
If you’d like to see how a previous version of your website looked, you can preview them rather than roll back to them. Each deployment is atomic and Netlify provides a publicly accessible live version of each deployment by prefixing a unique hash to the website domain. For example, I made two simple changes to the home page and committed and deployed each change separately.
The most recent deployment, which is labeled “Published” and has commit message “Commit DEF”, is accessible at the production URL: https://my11tywebsite.netlify.app/.
You’ll often find yourself in need of pulling data from an API endpoint that returns JSON data and displaying that data in a page. This can easily be done using the eleventy-fetch plugin. Let’s test this out. First, install the eleventy-fetch plugin.
npm install @11ty/eleventy-fetch
We’ll need a URL where the JSON data is located. For testing purposes, I created a JSON file at the root of my project in GitHub so I can access it at
Now, let’s add an 11tydata.js file to fetch this data with the following code.
const EleventyFetch = require("@11ty/eleventy-fetch");

module.exports = async function() {
	try {
        let url = 'https://raw.githubusercontent.com/javanigus/eleventy-basic-site/main/colors.json';

		/* This returns a promise */
		return EleventyFetch(url, {
			duration: "1m",
			type: "json"
		});
	} catch(e) {
		return {
			// my failure fallback data
		}
	}
};
I set a cache duration of 1 minute.To display the data, I created a simple .njk template with the following content:
---
title: "Test Fetching JSON From Remote URL with Caching",
layout: "default.njk",
---
<h1>{{title}}</h1>

<ul>
{% for color in colors %}
    <li>ID: {{color.id}} - Color: {{color.color}}</li>
{% endfor %}
</ul>
If you build the site locally, you will see a .cache folder created with two files.
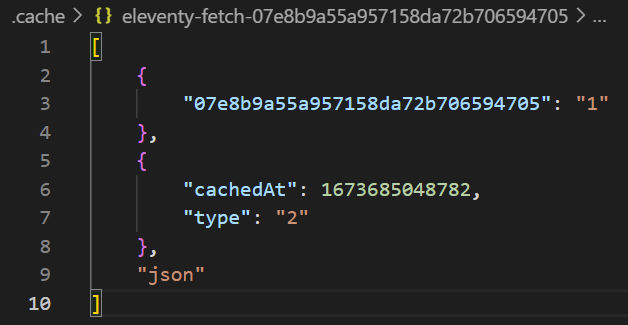
The eleventy-fetch-07e8b9a55a957158da72b706594705.json file contains the JSON data as shown below.
The eleventy-fetch-07e8b9a55a957158da72b706594705 file contains information about the filename of the data file and when it was cached.
Since the cache duration was set to one minute, if you rebuild the site within one minute, the eleventy-fetch plugin will not fetch the remote data but rather use the cached data. However, if you rebuild the site after one minute, the eleventy-cache plugin will fetch the remote data and update the cache and the web page.
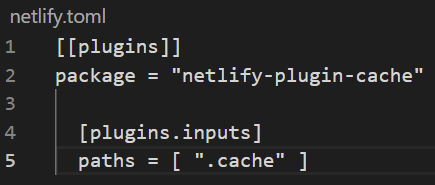
The above works fine locally. However, remotely, Netlify doesn’t cache data by default. As a result, Netlify will always fetch the remote data. In order to get the same behavior as on Netlify, we need to persist the .cache folder. This can be done by installing the netlify-plugin-cache plugin and creating some directives in a .toml configuration file. First, install the plugin:
npm install netlify-plugin-cache
Also, verify that .cache is listed in your .gitignoore file like this.
Do not ever commit the .cache folder to version control. Make sure .cache is listed in your .gitignore file.
Commit these files to GitHub so they can trigger a Netlify build. Once Netlify is done building the page, it will save the cached files remotely. This way, you can cut down on API requests and build pages faster. You can adjust the cache duration time in the 11data.js file. Learn more about 11ty fetch.
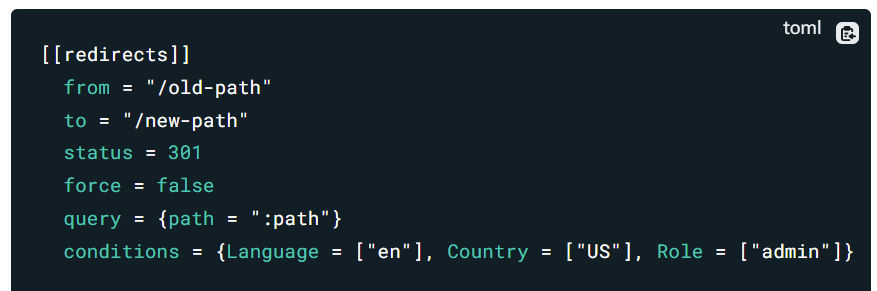
Redirects
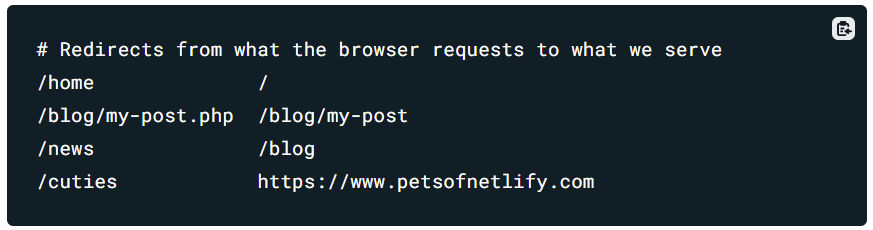
You can add redirects in two ways: in a _redirects file and in a .toml file. We’ll add redirects to a _redirects file. First, create a file called _redirects in the src folder with the following contents
# Redirects from what the browser requests to what we serve
# 301: page has permanently moved to a new location
# 302: page has temporarily moved to a new location
/home               /               301
/foo                /about          302
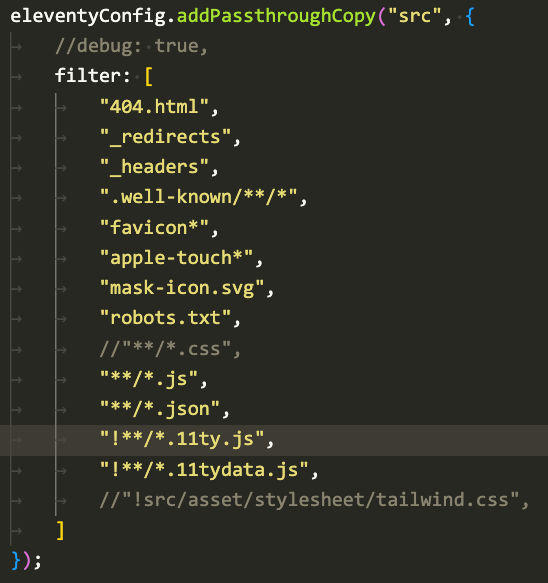
This file has to be in the src folder because it needs to end up in the build output (www) folder. To have 11ty copy the _redirects file to the output folder, add it to the eleventy.js config file.
You can’t test redirects locally during development. They only work in Netlify.
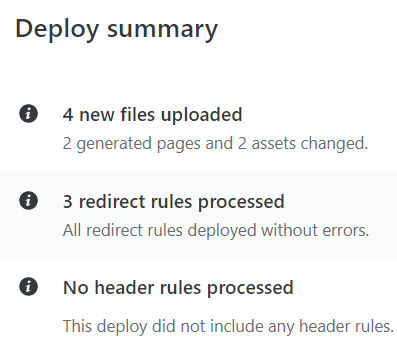
Commit your _redirects and eleventy.js files and push them to Github. Netlify will trigger a build and in the deploy summary, you’ll see how many redirects were processed, e.g.
You can test the redirects on Netlify. They work.
By default, if a source URL includes query parameters, Netlify will pass them to the destination URL.
By default, git handles binary files (images, PDFs, etc) differently than text files. With text files, only the text changes are saved with each commit. With binary files, the entire file is saved with each commit. As a result, your git repo can quickly become huge. Since Netlify clones your Github repo with every build, this not only causes build times to take longer, it also will increase your Netlify bill. You can use Git LFS and Netlify Large Media, but why bother. You might as well store binary files on Amazon S3/CloudFront which is dirt cheap and also supports versioning by default. If you don’t like the cryptic AWS CloudFront-provided domain, you can add your own domain, e.g. resources.yourwebsite.com. In your website code, you can reference images, for example, using the CloudFront-hosted URL.
If you need to create redirects for PDFs in AWS S3/CloudFront, you can do so via the S3 console. Learn more.
Optimizing Images
As mentioned above, hosting binary files that don’t need to be versioned can be done in AWS S3/CloudFront. But, AWS can’t optimize images automatically. Therefore, you should using a dedication image optimization service like ImageKit or Cloudinary. These services can clone your images from your origin, e.g. CloudFront, and host them on their servers while also optimizing them.
CSS
When it comes to CSS, it’s common to use PostCSS, a tool for transforming CSS with JavaScript. For example, with PostCSS you can use the following plugins
autoprefixer, to parse CSS and add vendor prefixes to CSS rules using values from Can I Use.
tailwindCSS, a utility-first CSS framework packed with classes like flex, pt-4, text-center and rotate-90 that can be composed to build any design, directly in your markup.
Then, update your eleventy config file to NOT copy CSS files from the “src” folder to the output folder. Otherwise, your postCSS changes will be overwritten by the straight copies.
Bundling CSS and JS
When building a website, you will likely reference many CSS and JS files. This helps modularize these dependencies, but it can result in a slower-loading website, as the number of network requests increases. One solution is to use a bundler like WebPack, rollup, Parcel, Vite, etc. Parcel is probably the easiest to set up, but integrating Parcel into 11ty isn’t simple.
11ty has released an official bundler plugin that simplifies bundling CSS. Integration and usage is super simple.
Notice how the file names are hashes of their content. The added benefit of this is you get cache-busting as well because any time a CSS or JS file changes, the hashed file name will change.
Eleventy’s bundler plugin can also be used to bundle content (CSS, JS) to a content-hashed file location, but why bother if Netlify will do it for you.
Cache-Busting CSS and JS
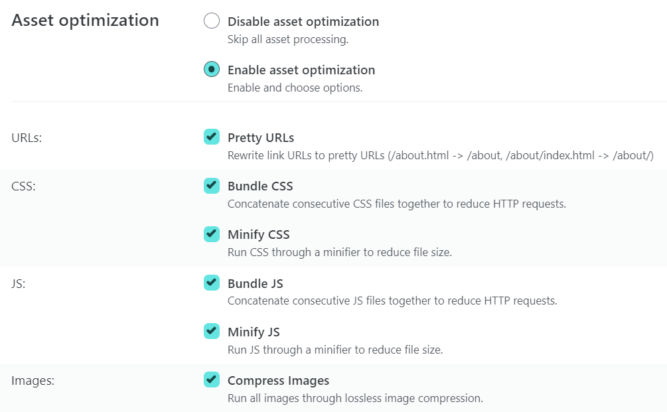
When you update a CSS or JS file and then reload a page, you often won’t see the updates because your browser has cached the CSS or JS files. This is annoying, and you often have to hard reload or open in incognito mode. To fix this, a common practice is to add a URL parameter to CSS and JS URLs that changes depending on whether the file was modified, e.g. last modified timestamp or md5 content hash. As stated above, Netlify’s asset optimization post-processing includes bundling assets to a hashed file name.
JavaScript Interactivity with Svelte
Making a page interactive is usually done using JavaScript. You can write vanilla JS, use jQuery, React, etc. There are many JavaScript frameworks available. But, Svelte is a relatively new framework that is better in many ways, including being easy to learn. For example, many websites include a page with lots of content and some controls to filter such content. Svelte makes it very easy to add this type of functionality.
Integrating a Svelte app into an Eleventy site can be done using Eleventy Plugin Embed Svelte. However, at the time of this writing, the plugin did not work on Windows. As a workaround, you can build the Svelte app separately, copy the compiled output and paste it into your template in Eleventy. Learn more.
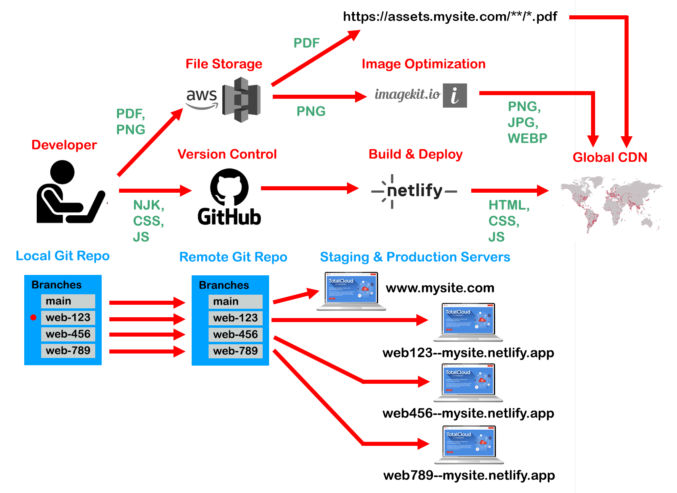
Workflow
With the setup above, your workflow could be like this:
Upload binary files (images, pdfs, etc), if any, to AWS S3/CloudFront. S3 supports uploading multiple files and maintains folder structure. It also supports versioning.
Create a new branch for the issue you are working on, e.g. iss123.
Edit HTML, CSS, JS locally
If there are images, reference the ImageKit image CDN URL
If there are links to other binary files, e.g. pdfs, link to the AWS CloudFront URL. For PDFs, optimize them for web in Adobe Acrobat (Tools > Optimize).
Test at http://localhost:8080
Commit to iss123 branch and push to GitHub
Preview changes at iss123.mywebsite.com on Netlify
Share staging URL with others for review and approval
When ready to publish, merge changes from iss123 branch to main branch, commit, and push to Github
Hotel Skypark Myeongdong 2 호텔 스카이파크 명동 2호점 22, Myeongdong 9-gil, Jung-gu, Jung-Gu, Seoul, 04538, South Korea 중구 명동9길 22, 중구 (서울특별시, 04538)
8:30 PM
Walk around Myeongdong
9:30 PM
Dinner at Myeongdong fried chicken street
Korean fried chicken
Saturday, May 13
9:00 AM
Go to Myeongdong Tourist Information Center
Buy 3-day mPASS and local SIM card
There is a $4.11 deposit. Get deposit refund (minus $0.41 for the cost of the card) at the Tourist Information Center at the airport before leaving Korea.
MPass can be used on subway lines, airport railroad all-stop train, Seoul city buses (mainline buses, branch buses, circulation buses, village buses, night buses)
The pass offers 20 rides a day for the duration of the pass.
A traditional street market in Jongno-gu, Seoul, South Korea. The market is one of the oldest and largest traditional markets in South Korea, with more than 5000 shops and 20,000 employees in an area of 42,000 square meters.
HONG BAR Myeongdong is an all-you-can-eat buffet-style restaurant located in the center of Myeongdong, a popular tourist destination. Samgyeopsal (three slices of pork), yangnyeom daegalbi (seasoned pork), yangnyeom dakgalbi (seasoned chicken), and other 7 types of meat that you cannot miss on your trip to Korea, along with side dishes such as tteokbokki and salad, will fill you up for 90 minutes.
Eat 찐빵 (Jjinppang: Fluffy steamed buns filled with sweet red beans)
12:30 PM
Take subway to Jamsil station, visit Seoul Sky Observatory
The Seoul Sky Observatory is located at the top of the Lotte World Tower, the world’s fifth tallest building standing 123 stories and 555 meters high. As the tallest building in South Korea, it is the only place where you can take in a gorgeous 360-degree view of Seoul, the capital city of South Korea roaring with brilliant history and dynamic modern culture.
Hottoek is a Korean-styled pancake. One of the most popular Korean street snacks, it is made from a simple flour batter and filled with sweet syrup made from cinnamon, brown sugar, and peanuts. It’s a great snack when you’re between meals.
*
화전 (Hwajeon: Pan-fried Sweet Rice Cakes with Flower Petals)
Red beans are mixed with eggs and wheat dough by hand, then this artisan bread is shaped and baked without any artificial sweeteners or preservatives, keeping only the sweetness of its original natural ingredients.
Hodu means walnut in Korean and they are cookies filled with red bean paste and walnuts.
허니 브래드 (Honey Bread)
Thick bread is divided into nine parts filled with whipped cream and then topped with honey, caramel syrup, and cinnamon powder. Its original name was Honey Butter Bread.
계란빵 (Gyeran-ppang: Egg Bread)
has a shape of rounded rectangle and contains whole egg inside of a bread. They are often sold by street vendors.
꽈배기 (Kkwabaegi: Twisted Korean Doughnuts)
It is made with glutinous rice flour and melted butter. The dough is deep-fried in oil and tossed in sugar and cinnamon powder. Like most fried breads, it tastes better when it’s hot. You can enjoy the original taste of twisted bread by eating when it just comes out of the oil, or by heating them up.
뚱카롱 (Ddungcaron: Fat Macaron)
Rice Punch 식혜 (Korean Sweet Rice Drink)
Songpyeon half-moon rice cake (송편)
The fillings for these rice cakes vary, but the most common are sweetened sesame seeds and mung beans.
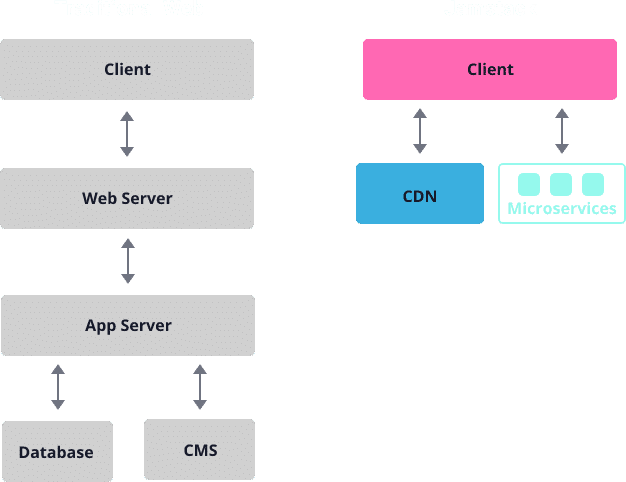
Jamstack is the new standard architecture for the web. Using Git workflows and modern build tools, pre-rendered content is served to a CDN and made dynamic through APIs and serverless functions. Technologies in the stack include JavaScript frameworks, Static Site Generators, Headless CMSs, and CDNs.
Traditional Web (left) vs Jamstack (right)
Jamstack benefits
Jamstack offers many benefits over traditional web stack.
Security Published text files are HTML, CSS and JavaScript only. No server-side scripts like PHP
Scalability As website traffic grows, scaling is much easier when your website amounts to a bunch of static HTML files that can be served from a CDN.
Performance Static HTML files don’t require server-side processing. Files can be served from a CDN.
Maintainability It’s much easier to maintain a simple server that hosts static files rather than application and database servers. The heavy lifting of building the static files is done before deployment resulting in stable production files.
Portability Since Jamstack sites are pre-generated, the production files are simple static files which can be hosted anywhere on any simple host.
Developer experience Jamstack sites are built on widely available tools and conventions making it easier for developers to learn and develop.
Jamstack is a term that was coined by two developers who pioneered the architecture while working at Netlify. This post will explain how to set up a web development, build and release system using the following components
Hugo (static site generator)
GitHub (version control)
Netlify (CI/CD + serverless web hosting)
Netlify CMS (content management system)
imageKit.io (image optimization and CDN)
UPDATE: An alternative to Netlify is Render. Unlike Netlify, which is limited to static sites, Render supports web apps (Node.js, PHP, etc) like Heroku. Render is like Netlify + Heroku.
Web development workflow
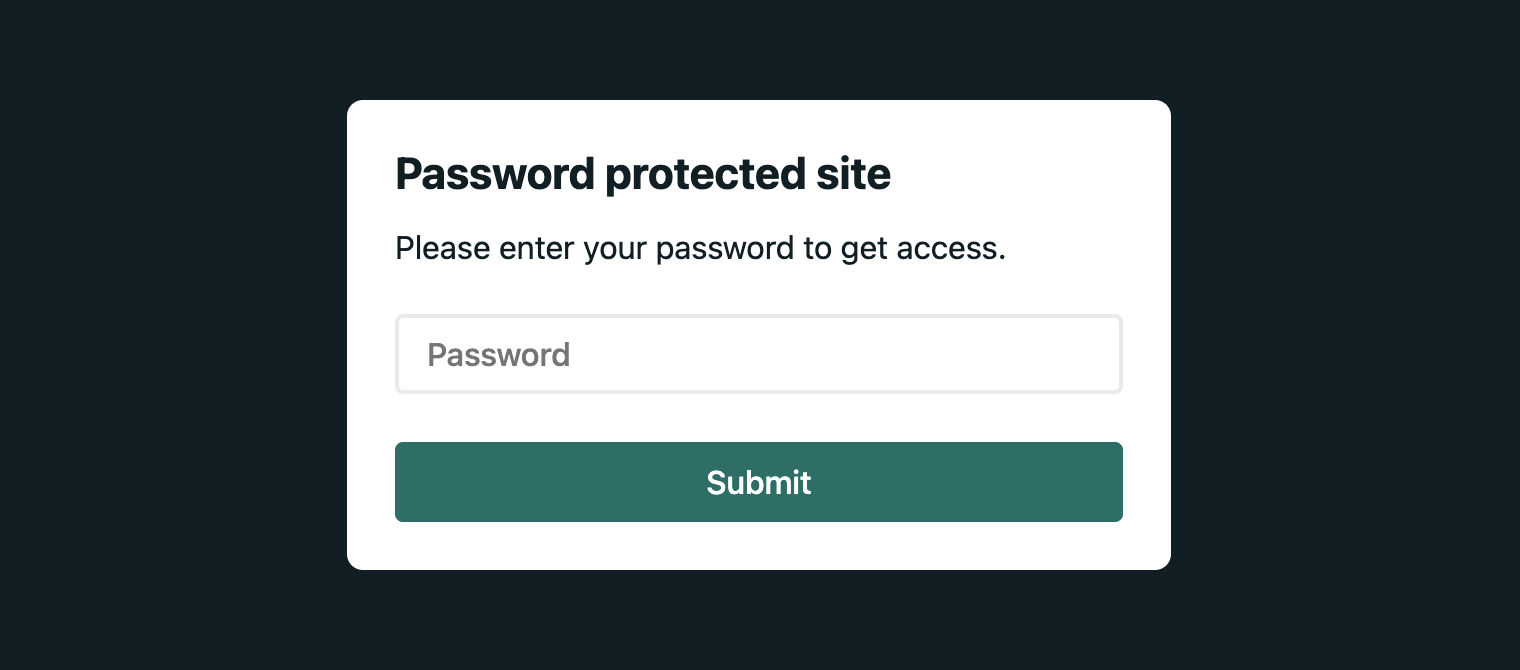
Let’s say you have a website at example.com. This workflow will depend on having a GitHub repo with 2 branches (main and develop) and 2 sites hosted on Netlify, one for production (www.example.com) and one for staging (staging.example.com). The staging site will have site-wide password protection using an option in Netlify.
The workflow using this setup is very common:
Edit web page files locally, e.g. using VisualStudio Code
Commit and push changes to develop branch in private GitHub repo
Any commit to the develop branch in GitHub auto-triggers a build to generate and deploy static files to a staging site in Netlify (staging.example.com)
Preview changes in a password-protected, external staging URL
Merge and push changes from develop branch to main branch. This will auto-trigger a build to generate and deploy static files to a production site in Netlify
View published changes in production (www.example.com)
Note
If you need to make an edit, you can make it directly in GitHub as well.
If you’d like to provide a CMS for your pages (usually for non-technical people), you can use Netlify CMS.
Create GitHub repository and branches
Let’s first create a GitHub repo. We’ll call it example.com and make it private since we don’t want competitors seeing our potentially confidential information. Within this repo, we’ll have 2 branches.
main (for www.example.com / production)
develop (for staging.example.com / development)
GitHub’s default branch is called main so we’ll use that name for the production branch.
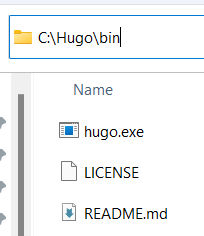
Extract the executable to C:\Hugo\bin. You will end up with 3 files like this.
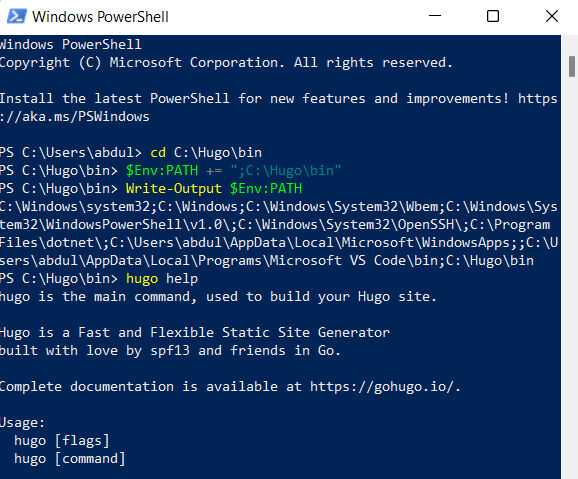
Add the executable to the PATH
open Windows PowerShell
change to the C:\Hugo\bin folder
append C:\Hugo\bin to the existing PATH by entering $Env:PATH += ";C:\Hugo\bin"
Verify the update by outputting the PATH value using the command Write-Output $Env:PATH
Verify the executable by running the command hugo help. You should see output like below.
Create a new site
Now that Hugo is installed, we can use it to create a new site. Run the following commands.
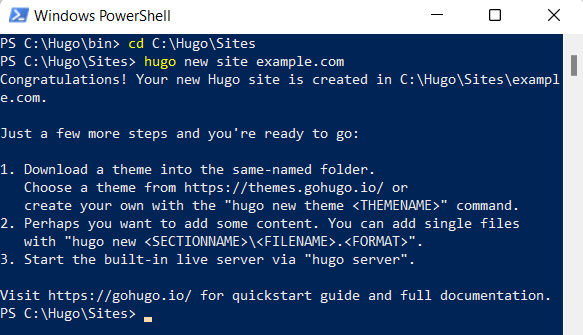
cd C:\Hugo\Sites
hugo new site example.com
You should then see output indicating a new site was created.
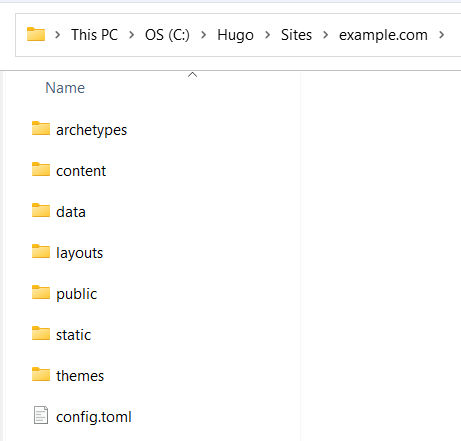
In the Hugo/Sites folder, you should see files and folders as shown below.
Here’s what the folders are for.
├── archetypes (templates for different content types)
├── config.toml (top level configuration file)
├── content (this is where content goes in HTML or markdown format)
├── data (for local and remote dynamic content, e.g. JSON data)
├── layouts (layouts for pages (list pages, home page) and partials, etc)
├── static (images, CSS, JavaScript, etc)
└── themes (for themes)
Install a theme
Now, you can browse themes, install one and make customizations to it. In my case, I will create a theme from scratch.
Create a new theme
Run the command hugo new theme exampleTheme to create a theme called “exampleTheme”.
C:\Hugo\Sites\example.com> hugo new theme exampleTheme
Creating theme at C:\Hugo\Sites\example.com\themes\exampleTheme
C:\Hugo\Sites\example.com>
This will create an exampleTheme subfolder in the themes folder. The folder structure should look like this:
themes/exampleTheme/layouts/index.html this is the home page layout
themes/exampleTheme/layouts/single.html this is the layout for a single page type, e.g. blog post
themes/exampleTheme/layouts/list.html this is the layout for a list of page types, e.g. blog posts
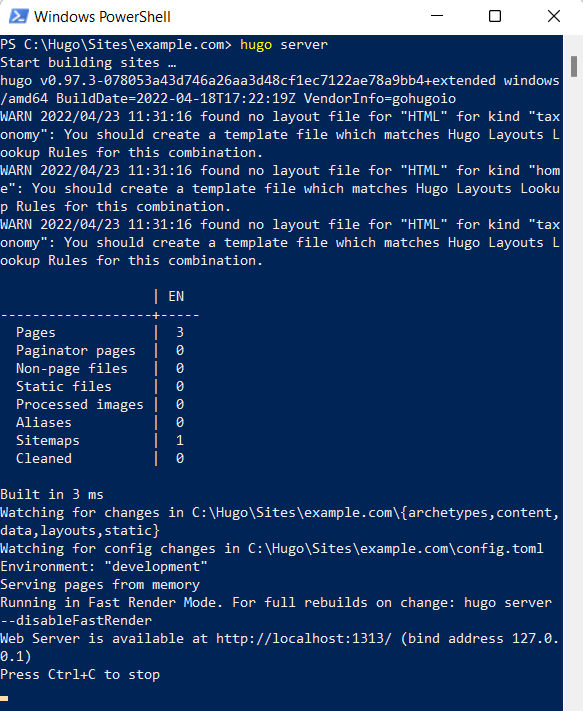
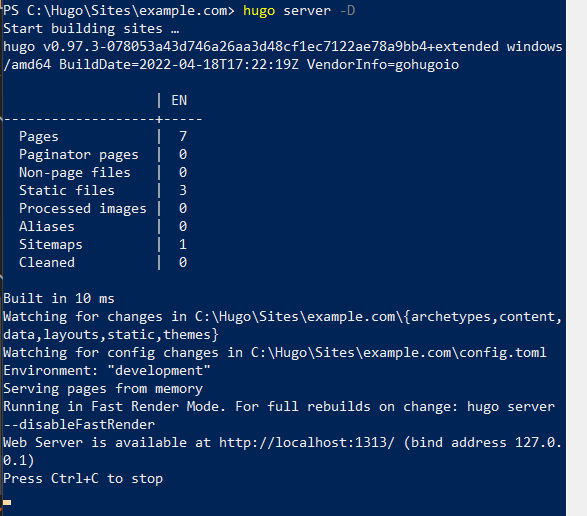
When you start development, you want to run hugo server to have Hugo detect file changes and reload your local browser for you. In the output below, we see that the local server is at http://localhost:1313. If I go to that URL, I will see a blank screen since I haven’t created any web pages yet.
Notice also in the output that there are some warnings because we’re missing some files. They will be fixed.
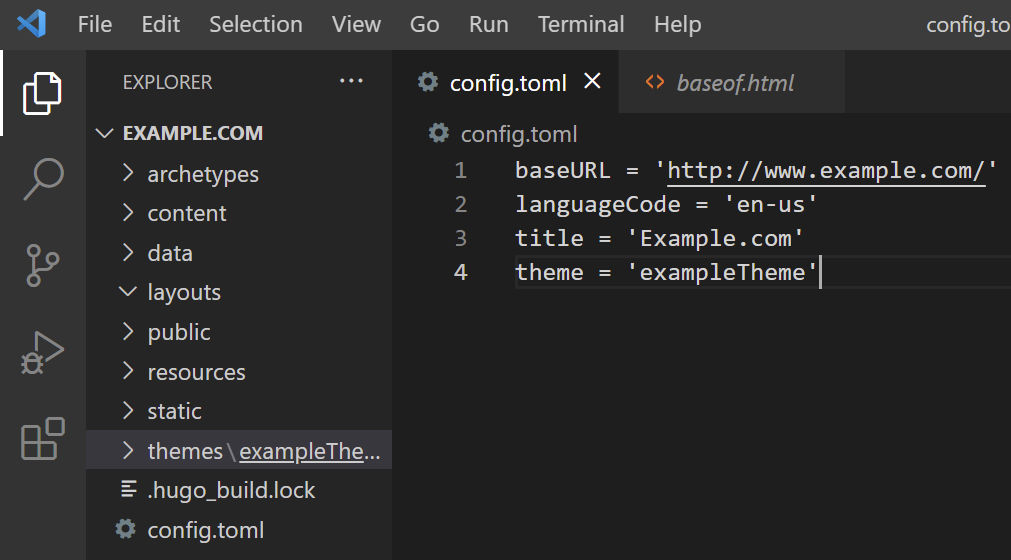
Edit config file
I’m using VisualStudio Code to edit files. First, I’ll update the config.toml file by changing the base URL and title. In order to use the new theme we created, we need to reference it in the config file by adding theme = 'exampleTheme' to it.
Most websites have a main menu for navigating from one page to another. The menu links are common to all pages. Let’s define them in the config file by adding the following to it.
If you open the theme’s layouts folder, you’ll see some default layouts and some partials layouts. The base layout (baseof.html) is the parent-most layout. As you can see in the screenshot below, the base layout has
some partials
a main block
The list (list.html) and single (single.html) layouts will use the base (baseof.html) layout. The contents of the list and single layouts will go in the main block of the base layout.
The base layout includes partials for the
head section (head.html)
header section (header.html)
footer section (footer.html)
of every page. Partials are like include files. They are small, context-aware components that can be used economically to keep your templating DRY. These are standard sections of most websites which is why they’ve been auto-generated. If you don’t want to use a particular section, you can remove it from the base layout or leave it as is as those partial files are empty by default.
Now, let’s fill out the layouts and partials.
head.html partial
Open example.com/themes/exampleTheme/layouts/partials/head.html in a text editor. This will be the place for metadata like the document title, character set, styles, scripts, and other meta information. Paste the following
There are two CSS files. We can create an empty style.css file and put it at example.com/themes/exampleTheme/static/css.
For the page title, we will show the site title (taken from config.toml) if we are on the home page, otherwise, we’ll show the site title followed by the page title of the page we’re on.
header.html partial
Normally in a website’s header you will find navigation links. Open example.com/themes/exampleTheme/layouts/partials/header.html
and paste the following
Note how the navigation link names and URLs are coming from the config.toml file we updated earlier. The keyword range causes the template to loop over the items in .Site.Menus.main array. Alternatively, you could just hardcode the nav links directly in the header.html file.
footer.html partial
For the footer, let’s just add a basic copyright disclaimer.
The current year will be displayed automatically. If you are wondering why “2006”, you can find out more about it here.
script.html partial
Most websites have some JavaScript. The Hugo auto-generated partial files didn’t include a script partial for JavaScript that should be loaded on all pages. Let’s create one at example.com/themes/exampleTheme/layouts/partials/script.html and paste the following code. Later on, we can add other scripts like jQuery to it.
Like style.css, we’ll also need to add a script.js file and put it at example.com/themes/exampleTheme/static/js.
metadata.html partial
Let’s create one more partial to display metadata about each post, e.g. date and tags. Each blog post will have front matter containing key-value pairs specific to each post, e.g.
---
author: "John Doe"
title: "My First Post"
date: "2006-02-01"
tags: ["foo", "bar"]
---
The keys can be referenced as variables in our new partial. Create a new file example.com/themes/exampleTheme/layouts/partials/metadata.html and paste the following code.
As mentioned earlier, the base layout was auto-generated by Hugo. But, since we created a script.html partial for JavaScript files and code that needs to load on all pages, let’s add that partial to the base layout. Open example.com/themes/exampleTheme/layouts/_default/baseof.html and add script.html after footer.html so that JavaScript does not block page rendering.
This layout will be used to display a list of blog posts. As explained earlier, the content in this file will define the main block of the baseof.html layout. We’ll create a simple layout for listing blog posts. Open example.com/themes/exampleTheme/layouts/_default/list.html and paste the following code.
Note how this layout contains a reference to {{ define "main" }} because we are defining the main block of the base layout. We’re referencing .Summary because we only want to show a summary of each blog post.
single.html layout
This layout will be used to display a single page or blog post. As explained earlier, the content in this file will define the main block of the baseof.html layout. We’ll create a simple single-post layout. Open example/themes/exampleTheme/layouts/_default/single.html and copy and paste the code below.
Notice how we are including the metadata.html partial in this layout. Unlike in the list partial, which references the Summary variable, this single partial references the Content variable because we want to show the entire blog post content.
Home page layout
The home page layout is at example.com/themes/exampleTheme/layouts/index.html. Since we’re loading Bootstrap CSS, we can use the Jumbotron component to render a hero section. Paste the following.
Hugo auto-generated an empty 404.html layout in our theme. Since Hugo comes with a default 404, we can delete this one or customize it, if we want.
Write your first blog post
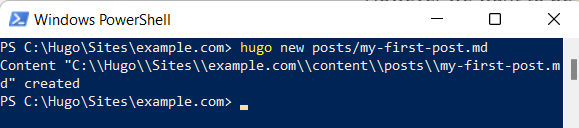
In a terminal, run this command hugo new posts/my-first-post.md.
When you do that, Hugo creates a file with some default front matter.
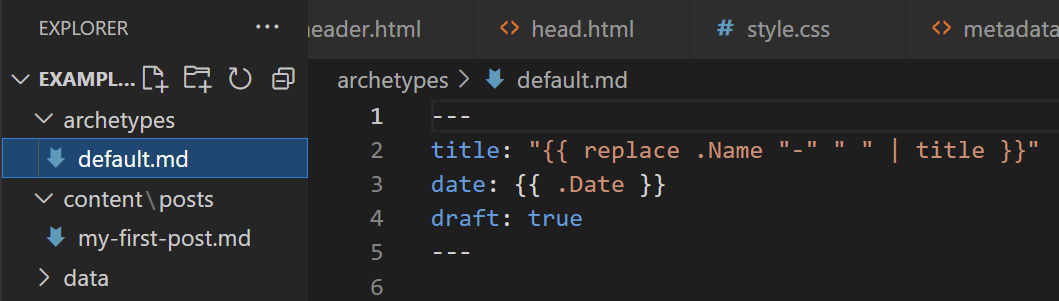
The template for creating new page types is in the archetypes folder. By default, there’s only one called default.md. It’s a markdown file.
Open the newly created content file at example.com/content/posts/my-first-post.md and add some tags to the front matter followed by some content in either Markdown or HTML. Hugo automatically takes the first 70 words of your content as its summary and stores it into the .Summary variable. Instead, you can manually define where the summary ends with a <!--more--> divider. Alternatively, you can add a summary to the front matter if you don’t want your summary to be the beginning of your post.
---
title: "My First Post"
date: 2020-01-26T23:11:13Z
draft: true
tags: ["foo", "bar"]
---
Lorem ipsum dolor sit amet, consectetur adipiscing elit, sed do eiusmod tempor incididunt ut labore et dolore magna aliqua. Pellentesque eu tincidunt tortor aliquam nulla facilisi cras fermentum odio. A erat nam at lectus urna duis.

Sed velit dignissim sodales ut eu sem. Lectus urna duis convallis convallis
tellus. Diam sit amet nisl suscipit adipiscing bibendum est. Sed felis eget
velit aliquet sagittis id consectetur. Vulputate dignissim suspendisse in est ante in nibh mauris cursus. Morbi quis commodo odio aenean. Mollis nunc sed id semper risus in hendrerit gravida rutrum.

<!--more-->

Ac ut consequat semper viverra nam. Hac habitasse platea dictumst vestibulum
rhoncus. Amet porttitor eget dolor morbi non. Justo eget magna fermentum
iaculis eu non. Id eu nisl nunc mi ipsum faucibus vitae aliquet nec. Aliquam
id diam maecenas ultricies. Non sodales neque sodales ut etiam. Amet massa
vitae tortor condimentum lacinia quis. Erat imperdiet sed euismod nisi porta.

Nisl suscipit adipiscing bibendum est ultricies integer quis auctor. Viverra
suspendisse potenti nullam ac. Tincidunt id aliquet risus feugiat in. Varius
quam quisque id diam vel. Egestas erat imperdiet sed euismod nisi. celerisque felis imperdiet proin fermentum leo vel orci porta non. Ut faucibus pulvinar elementum integer. Fermentum odio eu feugiat pretium nibh ipsum consequat nisl.
Viewing the site
Open a terminal and run the following from the root folder of your site
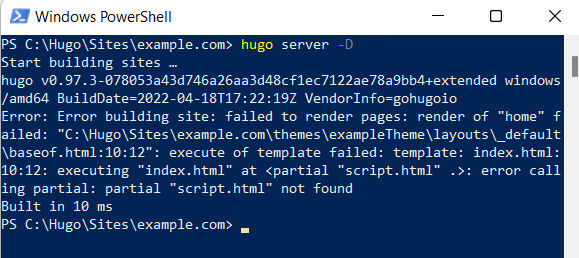
hugo server -D
The -D flag means to include content marked as draft. Alternative, you can change draft: true to draft: false in the front matter. When I ran that command, I got an error in the terminal.
Since I knew Hugo would serve the site at http://localhost:1313, I went there to see what Hugo would show in this case. Fortunately, Hugo also shows a descriptive error in the browser as well.
Apparently, I added a reference to the script.html partial but I forgot to create the partial. After creating the partial, I reran hugo server -D and I get the following output showing no errors.
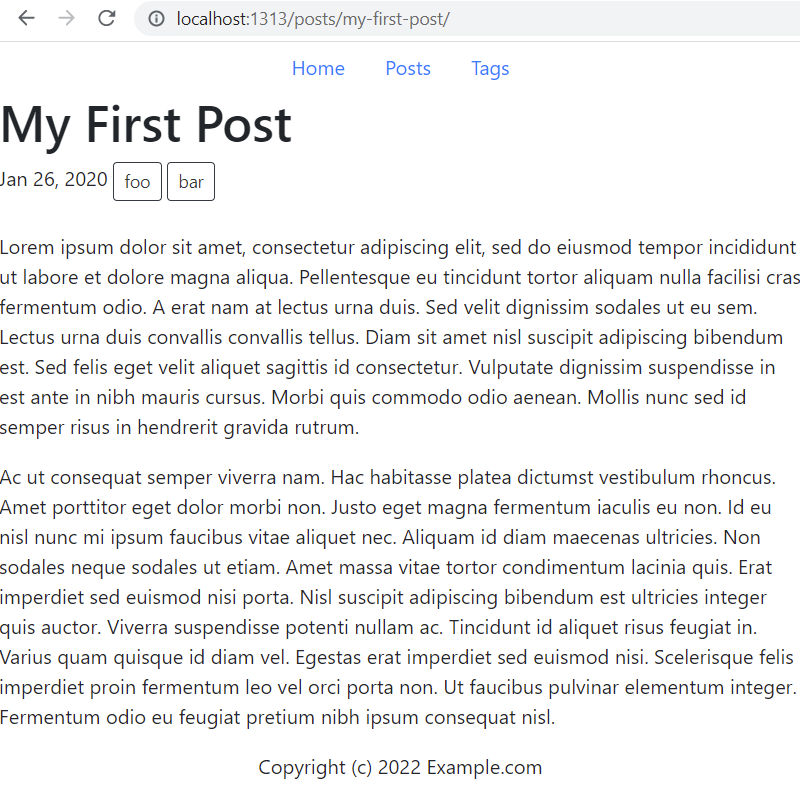
The output says that the web server is at http://localhost:1313. Navigating there shows the site as shown below.
This is the home pageThis is the list view (there’s only one post right now)This is the single blog post detail view
Do a Google search and you’ll find that many people have problems with the ice maker in their Samsung refrigerator. Of all the things Samsung can make, it’s ridiculous that they can’t even make an ice maker that just works without freezing up every 3 months. I have the 28 cu. ft. Food Showcase 4-Door Flex™ Refrigerator with FlexZone™ in Stainless Steel. I went with the counter-depth version. It’s smaller than the full-depth version but more expensive for some reason.
I have no problem with this fridge but as cool as it may look, the ice maker is a joke! I used up my extended warranty to have a “certified” technician come out 3 or 4 times to fix the ice maker (some of them are just clueless!). Anyway, in every situation, the ice maker stopped working because of ice buildup preventing the ice maker from working. One technician (a Samsung technician) said it was because I wasn’t using the original Samsung (overpriced) water filter. So, I put in an overpriced Samsung original water filter and, unsurprisingly, the ice maker still stopped working after a while – again, because of ice buildup. And, of course, I’m past the extended warranty so I have to fix it myself. If your stupid Samsung ice maker stops working because of ice buildup, here’s how you fix it (until it stops working again in 3-6 months).
Buy a steam cleaner
I bought this Bissel steam cleaner on Amazon. It’s supposed to be used for cleaning but it works well for melting ice that jams your stupid Samsung ice maker.
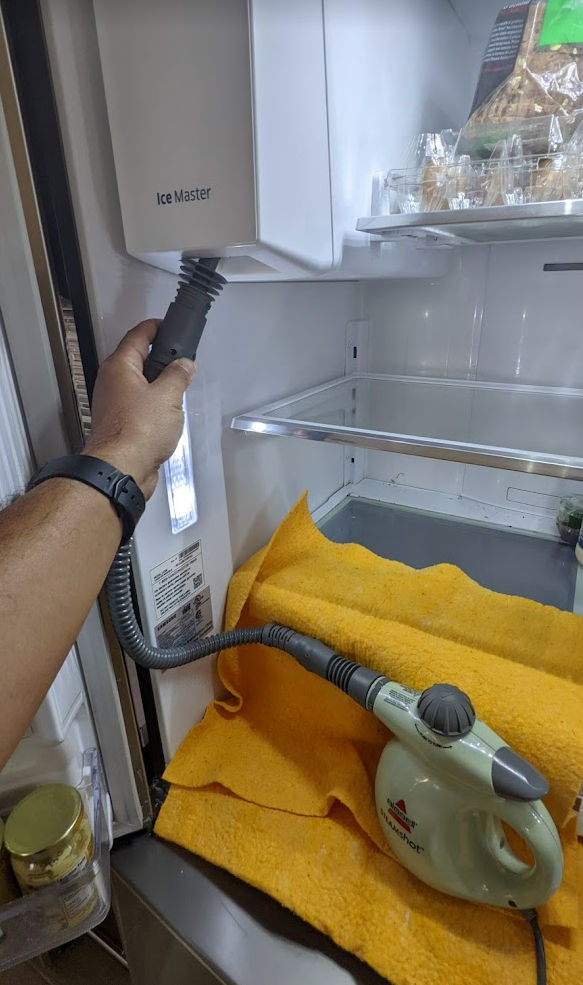
Melt the ice
Put some water in the steamer, wait till it’s hot, then stick the nozzle up the ice maker opening and pull the trigger. Super hot steam will fill up the ice maker box and begin to melt any ice in there.
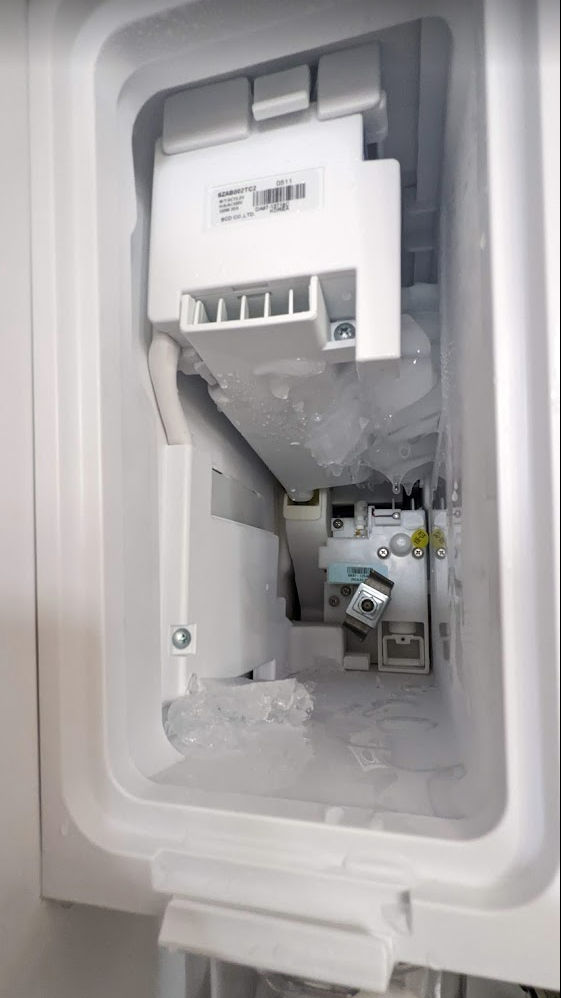
After a while, try to pull out the ice box. If it still doesn’t come out, repeat until it does. Once it comes out, you’ll see some ice buildup like in the picture below.
Use the steamer to target the ice buildup until you can remove all the ice.
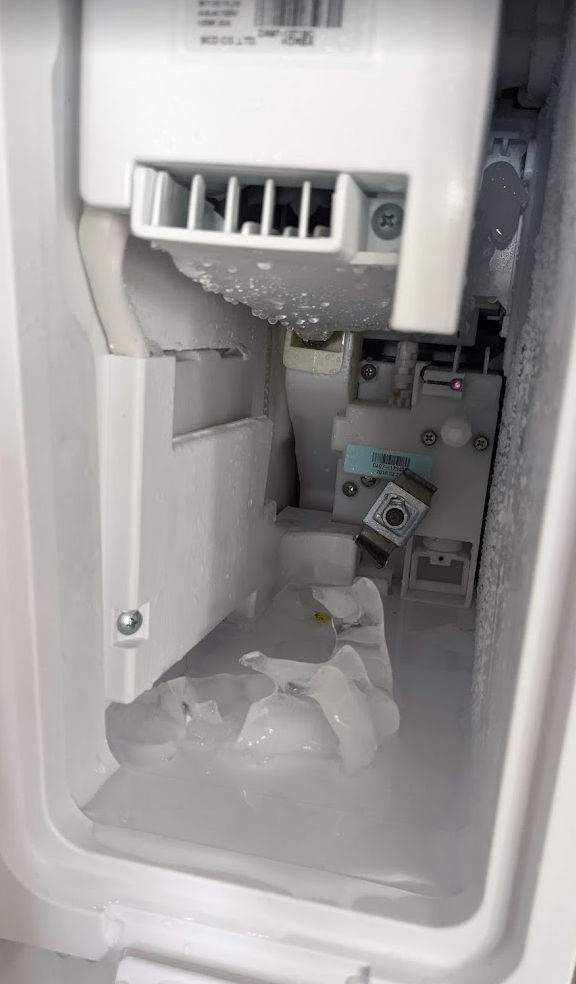
In the picture below, you can see that most of the ice is no longer stuck. Once you’ve removed all the ice, put the ice box back in and wait a day for new ice to be made.
And that’s how you temporarily fix your stupid Samsung ice maker.
Let’s say you want to build a simple, static website with the following requirements.
You want to keep track of changes to each file using version control.
You don’t want to spend a lot of money.
You want a simple setup, intuitive interface, and automatic publishing of changes.
You want SSL encryption with a certificate that automatically renews.
You want your own custom domain.
You don’t want to manage servers and you want to focus on your content.
You can accomplish this in many ways. But, I think the easiest way is to use GitHub and Netlify.
GitHub
GitHub, Inc. is a provider of Internet hosting for software development and version control using Git. It offers the distributed version control and source code management functionality of Git, plus its own features.
Netlify
Netlify is a San Francisco-based cloud computing company that offers hosting and serverless backend services for web applications and static websites.
This post will show you how easy it is to set up a simple website using GitHub and Netlify.
UPDATE: An alternative to Netlify is Render. Unlike Netlify, which is limited to static sites, Render supports web apps (Node.js, PHP, etc) like Heroku. Render is like Netlify + Heroku.
1. Create a free GitHub and Netlify account
This step is self-explanatory. If you create a GitHub account first, you can then log in to Netlify using your GitHub account, which saves time.
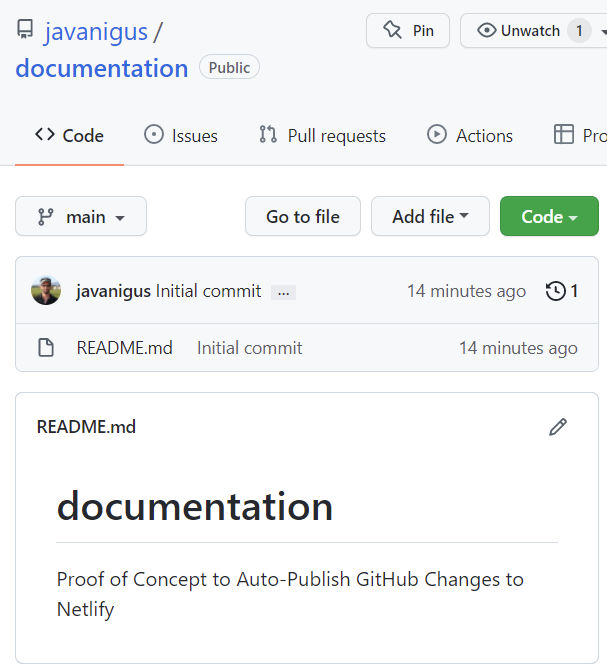
2. Create a repository in GitHub
I created a private repository (repo) called “documentation” to create a hypothetical website containing product documentation. When I created the repo, I opted to automatically create a README.md file to explain what the repo is about. At this point, there’s only one file in the repo.
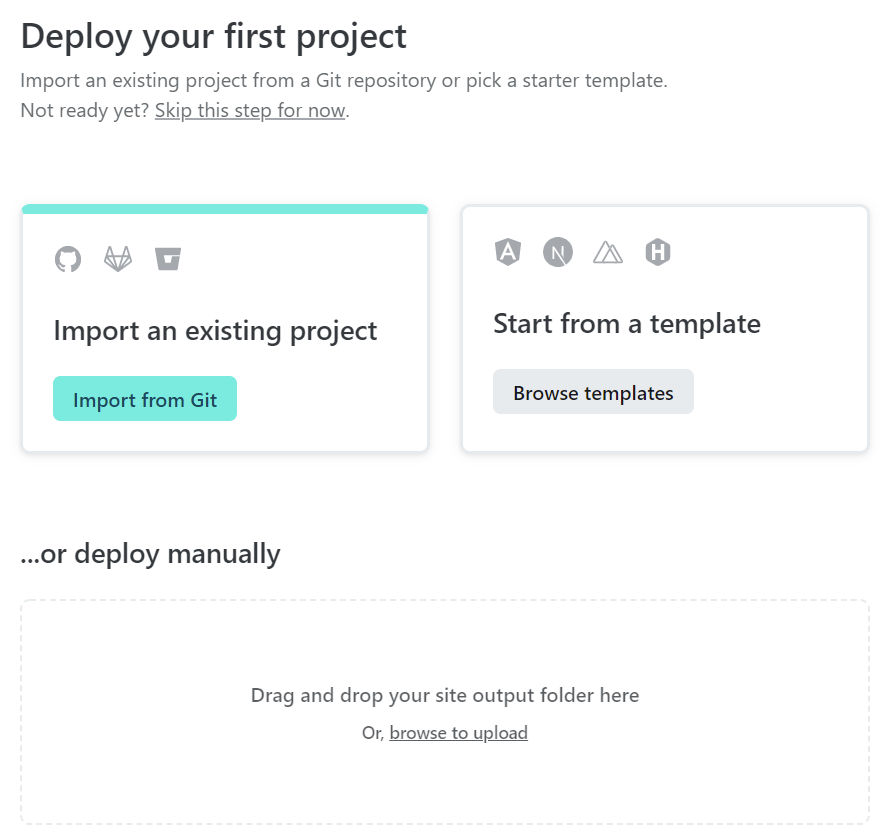
3. Create a new project in Netlify
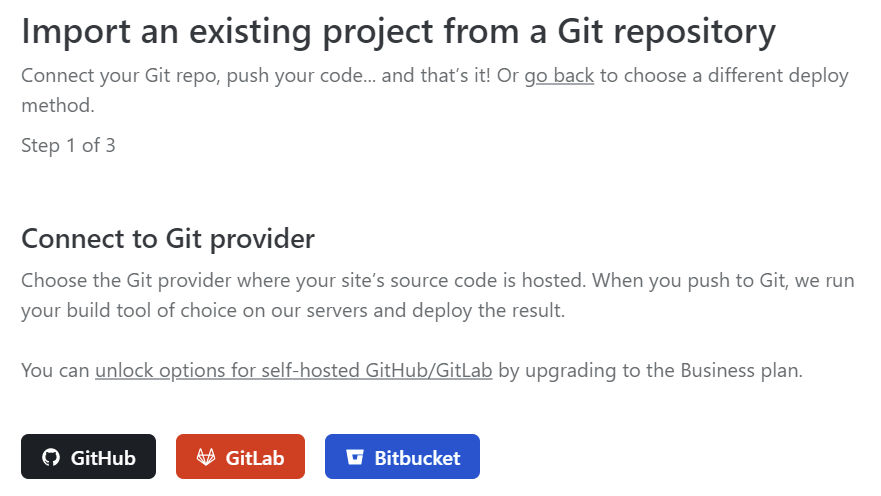
When you create a new project, you have a few options. In this case, we’ll choose “Import from Git”,
4. Choose Git provider
Since we’re using GitHub, choose GitHub.
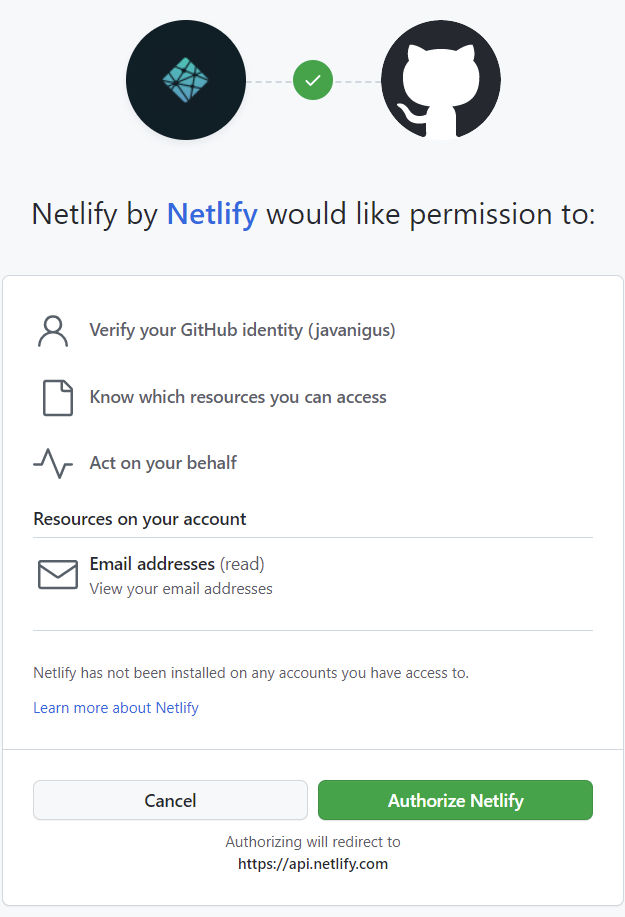
5. Connect Netlify to GitHub
In order to auto-publish from GitHub to Netlify, you need to connect the two.
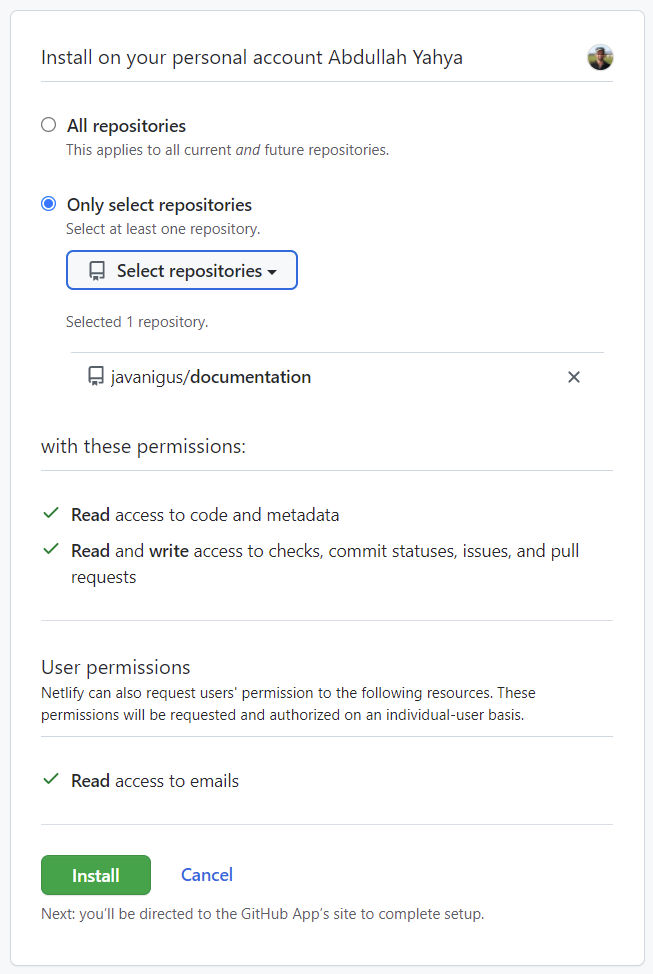
6. Choose repositories
You may choose to connect Netlify to all of your GitHub repositories or just some. In this example, I just want Netlify connected to the one “documentation” repo I just created.
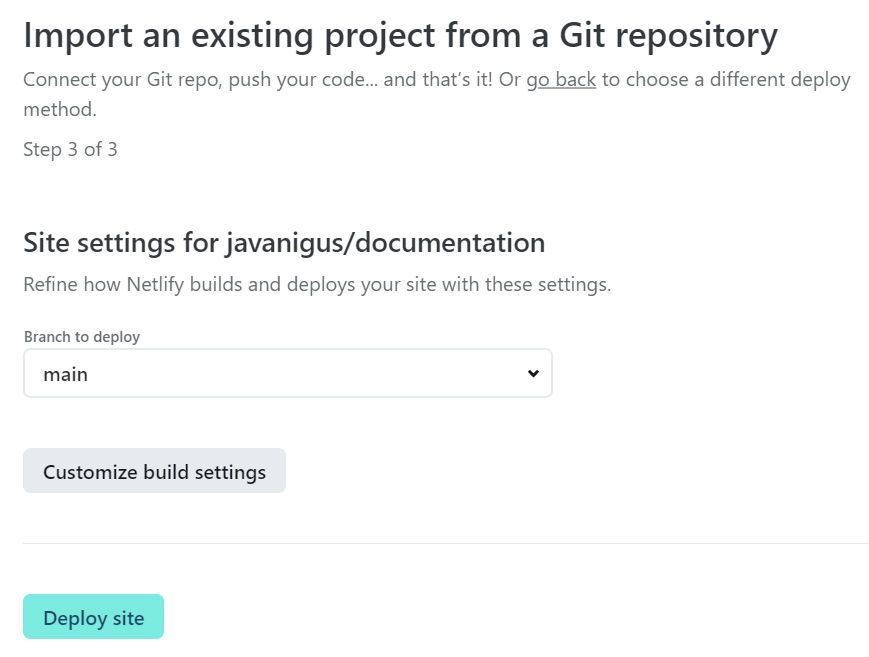
7. Choose a branch to deploy
In this example, I only have one default branch called “main” in the “documentation” repo. Since I just need to transfer static files in GitHub to Netlify, there is nothing to build.
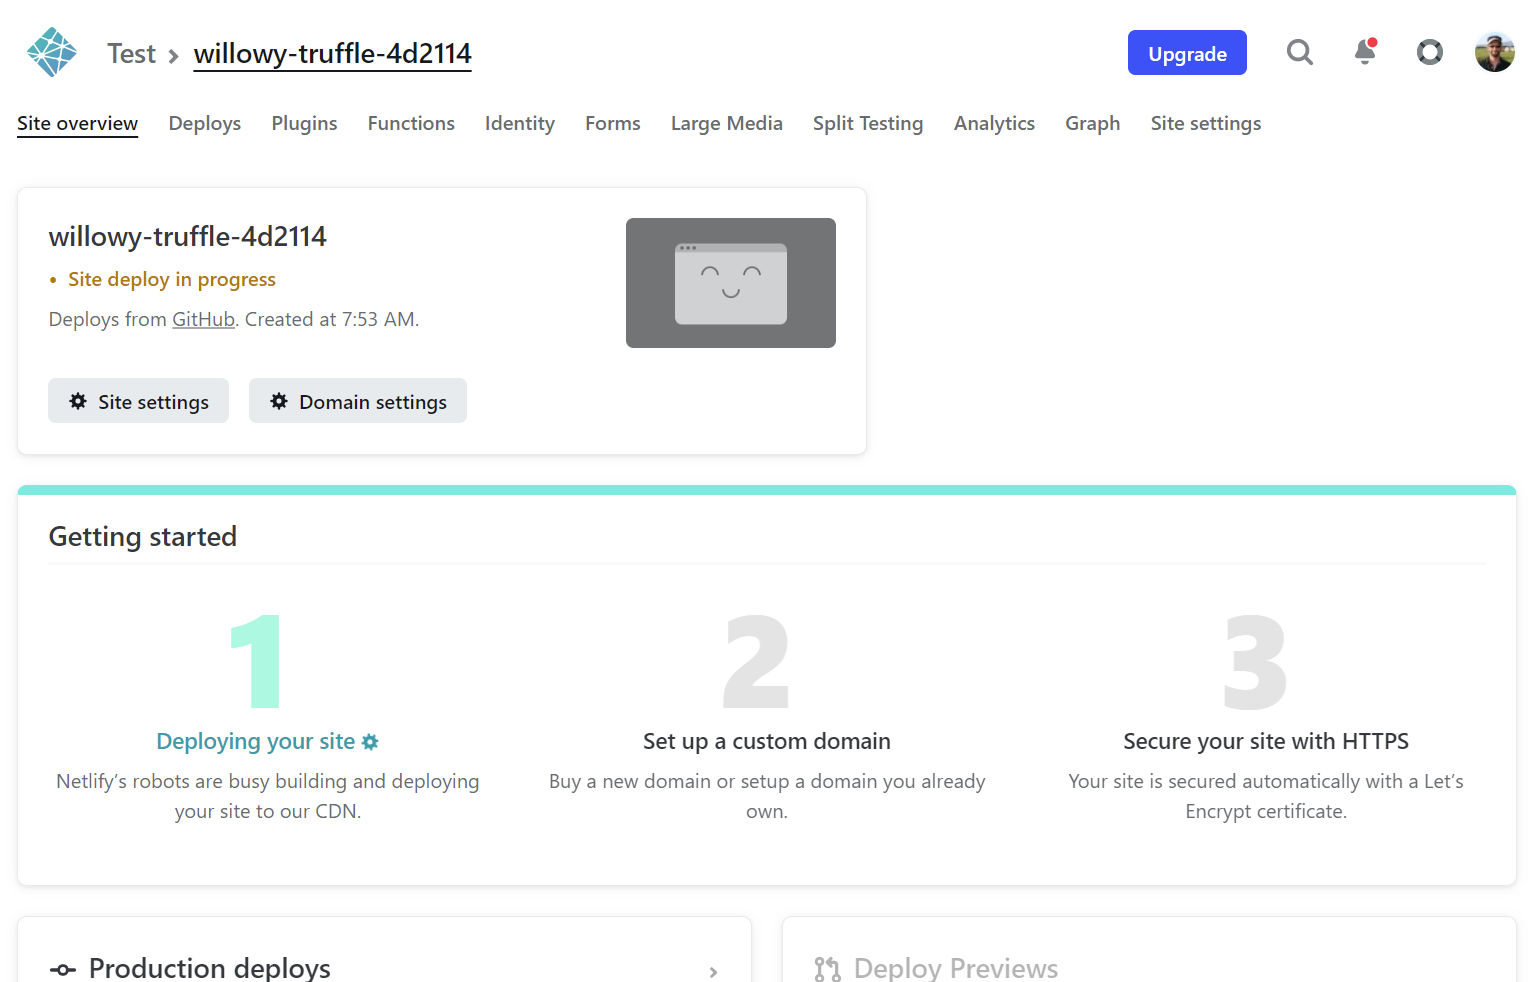
8. Deploy site
Once you click the “Deploy Site” button, Netlify will take all existing files in your GitHub repo and host them. You can see the status of the deployment in the “Site overview” tab along with the default URL. Notice that in steps 2 and 3 of the screenshot below, you can set up a custom domain and secure your site automatically with a Let’s Encrypt certificate.
9. See the deployed site
If you go to the auto-generated URL, you’ll see a Page Not Found error. That’s because we only have a README.md file in the repo.
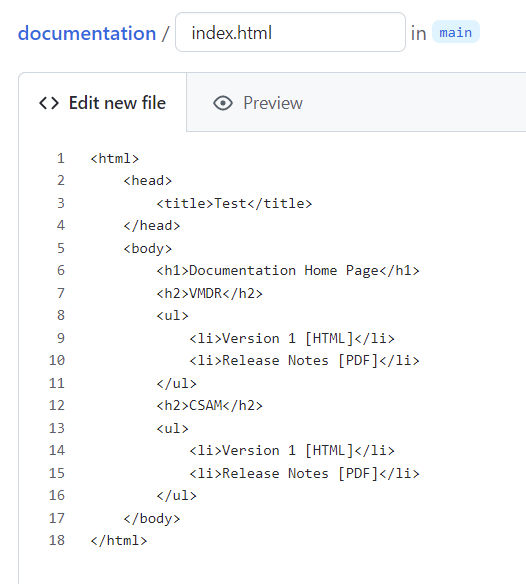
10. Create an index.html file
Let’s create a home page for our new website. In GitHub, create a new file with filename “index.html” and add some HTML to it.
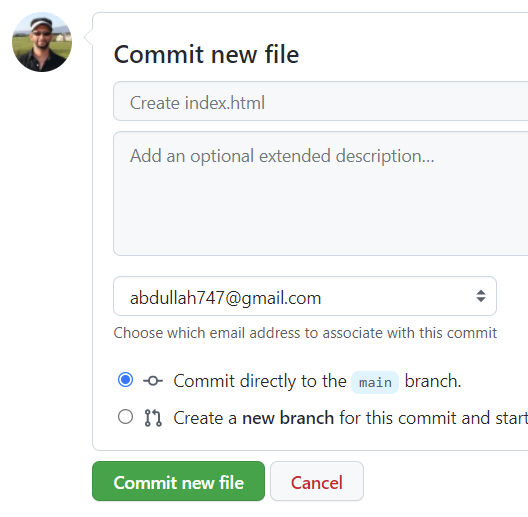
Commit the new file. For simplicity, I will leave the default values and click “Commit new file”.
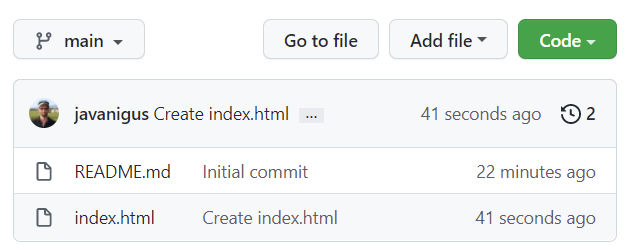
You will then see that you have two files in the repo.
11. View deployment status
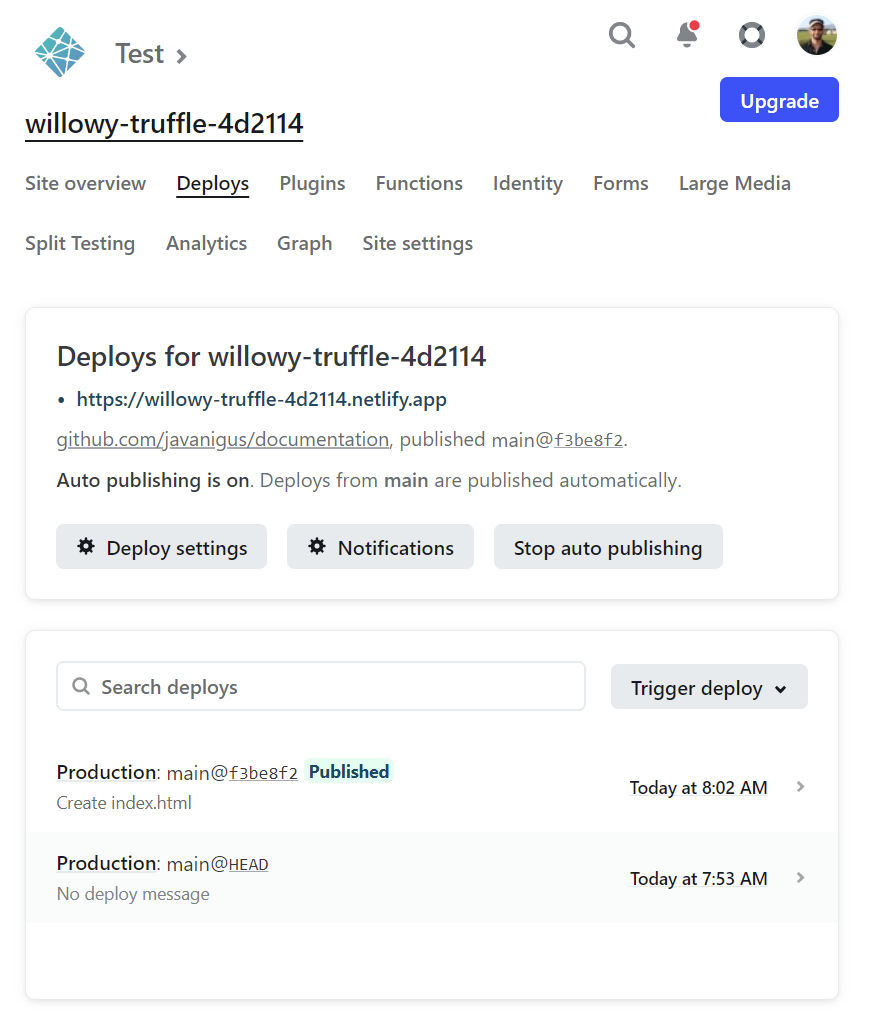
When you committed the file in GitHub, that automatically triggered a deployment to Netlify. In Netlify, click the “Deploys” tab to check the status of the deployment. In the screenshot below, we see that the status is “Published”.
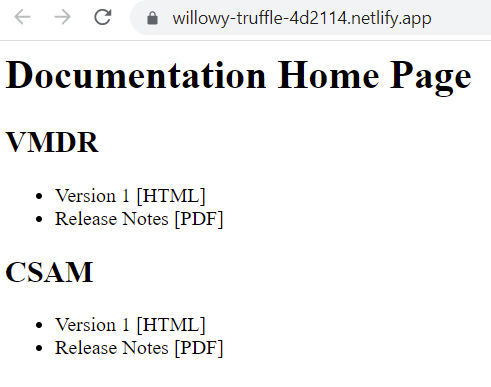
12. View the deployed change
Going to the auto-generated URL in Netlify, we see that our new home page has been published.
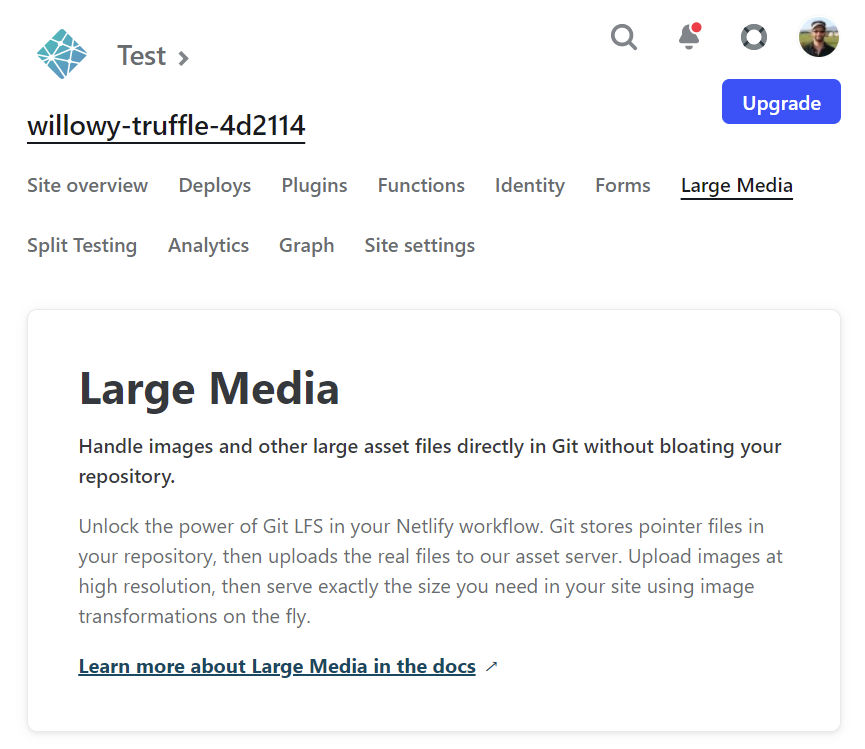
13. Handling Large Media (Images, PDFs, etc)
If you have large, non-text media such as images and PDFs, to avoid bloating your repo, you can use Git LFS. Clicking on the “Large Media” tab gives you more information about that. Personally, for images, I prefer to use ImageKit.io. Alternatives are Cloudinary and Uploadcare.
14. Analytics
You can install Google Analytics on your website and/or you can get analytics from Netlify for $9 per month. Clicking on the “Analytics” tab provides more information.
Redirects
If you need to create redirects, you can use a simple redirect file.
Or, you can create advanced redirects in the Netlify configuration file.
If you want a staging environment where certain people can preview changes before you push them to production, one way to do this is by
creating a “develop” branch in your GitHub repo
connecting Netflify to that branch
enabling site-wide password protection in Netlify (password protection is a paid feature) on the site sourced from that branch.
Though Netlify supports basic authentication, it is not the most secure method of protecting a site. Instead, you can use Netlify’s site-wide protection which uses JWT secret.


