According to RocketMortgage, the average mortgage term is 30 years and the average length is under 10 years. This is because homeowners will either refinance their home, like I did to get a much lower interest rate, or because they want to move. Refinancing your mortgage to get a lower interest rate makes sense if the new rate will be much lower such that you’ll end up saving money. You’ll just have to keep in mind that if you’ve had your mortgage for 10 years, for example, and you refinance, the clock resets and you’ll have 30 years to pay off your mortgage instead of 20. For this reason, I personally continue to pay the same monthly payments at the higher interest rate so that I pay less interest and the mortgage is paid off sooner.
But what if you sell your home to buy a new one within 10 years? What many people may not realize is that by doing this, they will lose a lot of money because their home loan is an amortized loan rather than a simple interest loan. Amortized loans favor lenders, like banks, instead of borrowers. Unlike a simple interest loan, where you’re paying the same amount towards principal and interest each month, when you get a mortgage, most of your monthly payments go towards interest in the beginning and less near the end of the 30-year term.
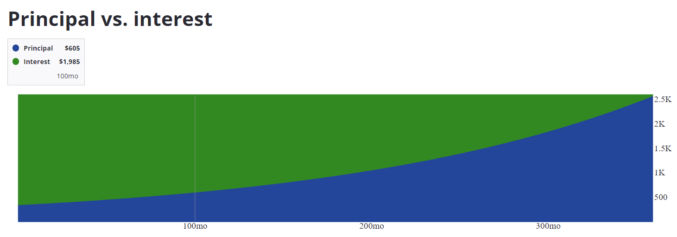
Note that your total interest payments over 30 years is more than the loan amount.
Let’s take a few points in time and compare how much of your monthly payment goes towards principal and interest.
Principal
Interest
Percent Towards Interest
First mortgage payment
$346
$2244
86.64%
Mortgage payment at month 100 (8.3 years)
$605
$1985
76.64%
Mortgage payment at month 200 (16.7 years)
$1058
$1531
59.13%
Mortgage payment at month 236 (19.7 years)
$1294
$1295
50%
Mortgage payment at month 300 (25 years)
$1851
$738
28.51%
Mortgage payment at month 360 (30 years)
$2578
$14
0.54%
As you can see, in the first 10 years of your mortgage, the bulk of your monthly payments goes towards paying interest. Your equity from paying down the principal is very little. Therefore, if you sell your house within the first 10 years and buy a new one, you’ll have little equity from your mortgage payments and, when you get a new mortgage for your new home, you’ll start over from month 1, when most of your new monthly payments will go towards interest again.
Of course, your house could appreciate significantly in 10 years, in which case the equity you gain from appreciation could outweigh the equity from paying off the principal. However, that is not always the case.
If you’re planning on selling your home within 10 years and buying a new one, it may not be worth it since you may lose a lot of money from having mostly just paid interest.
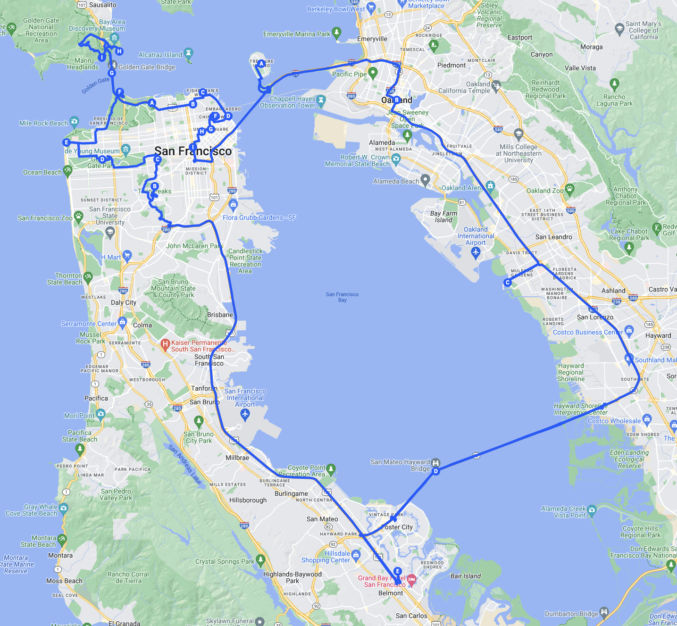
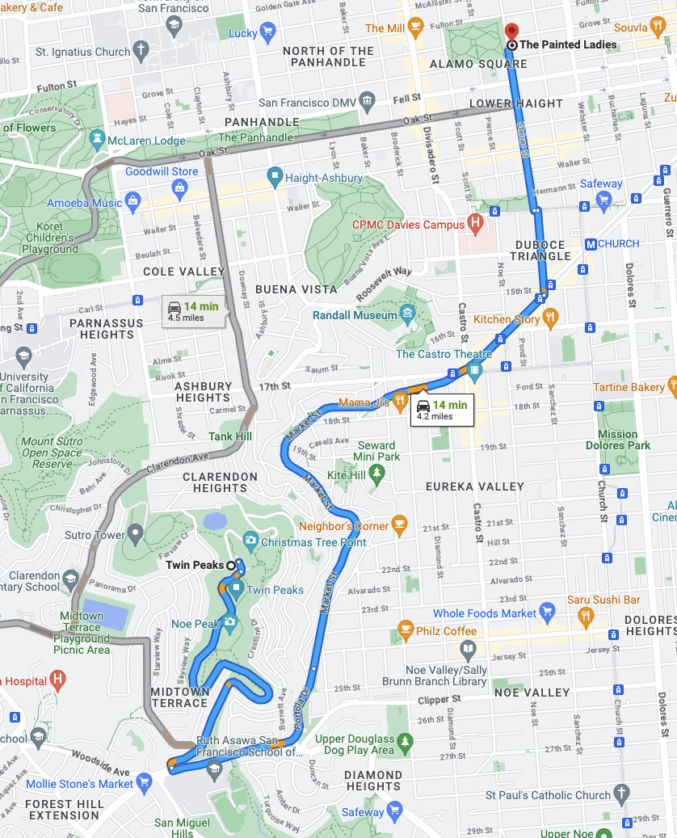
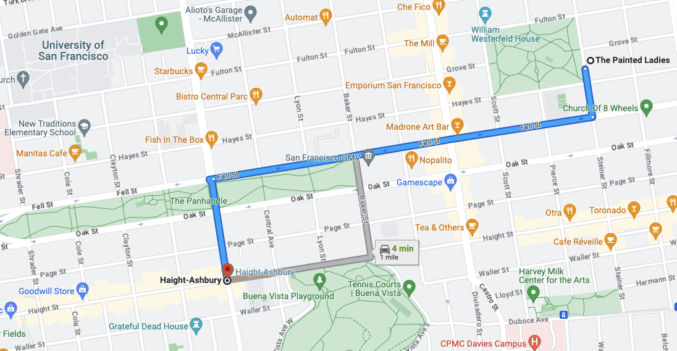
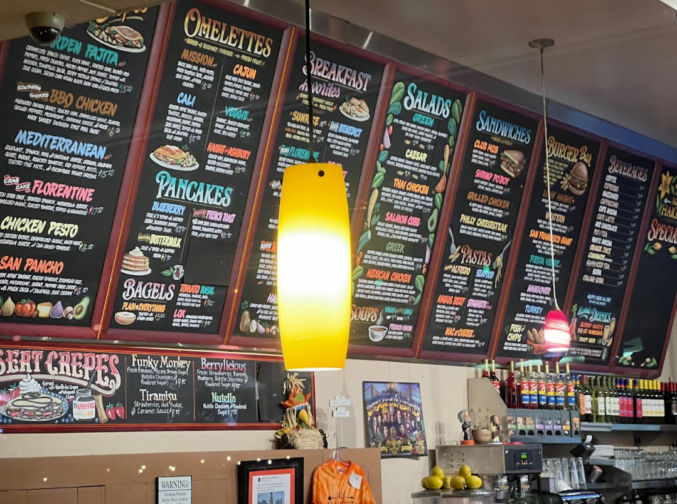
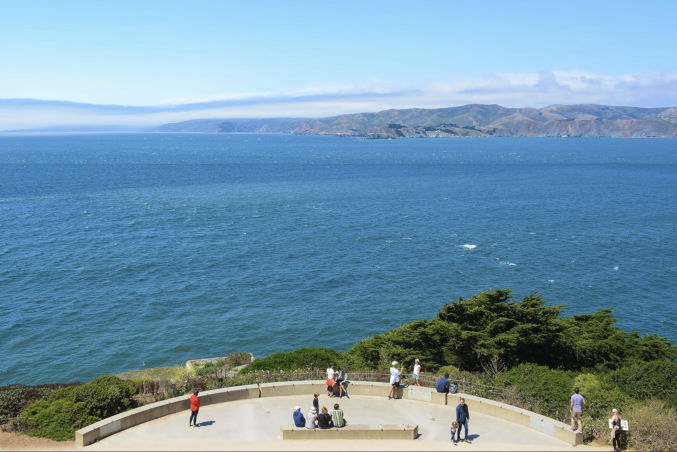
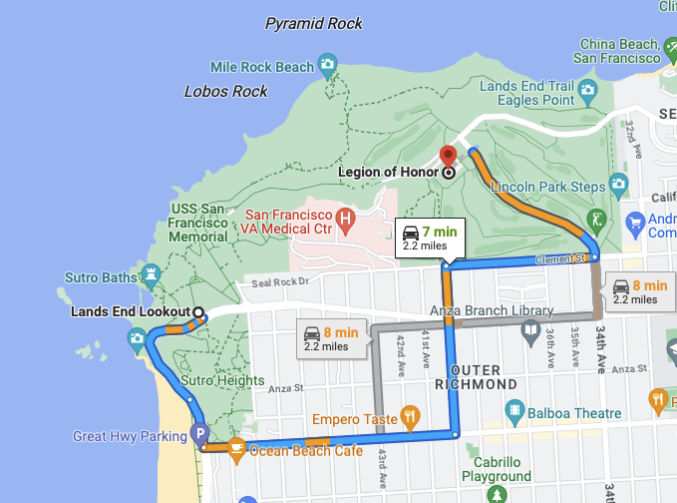
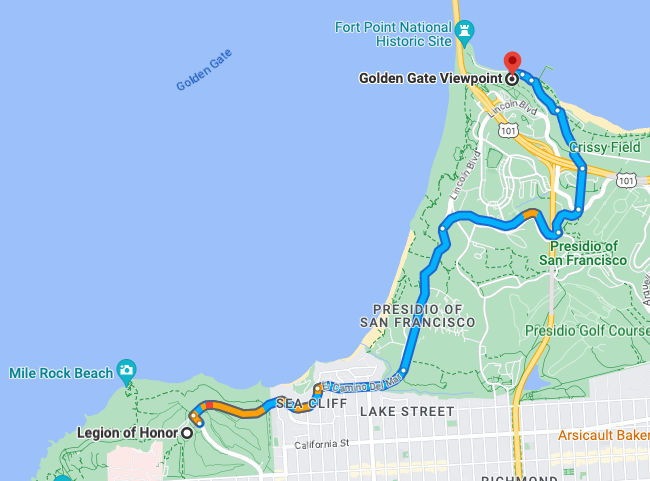
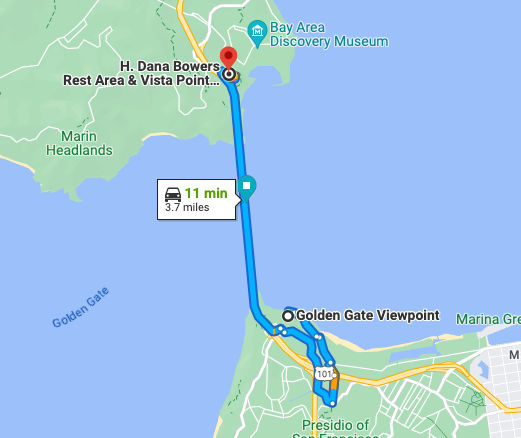
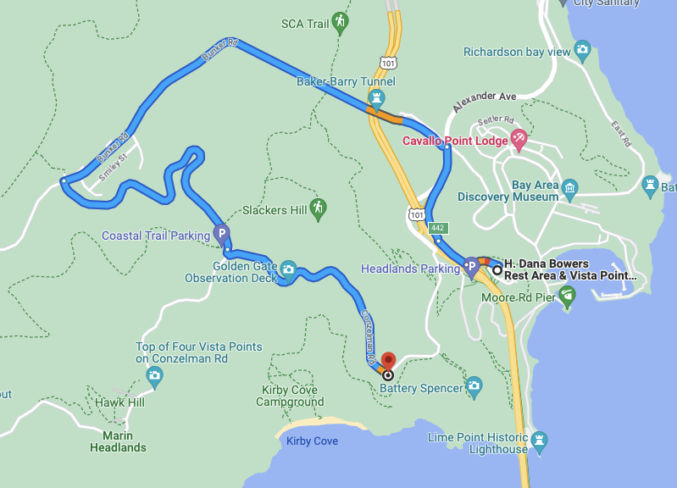
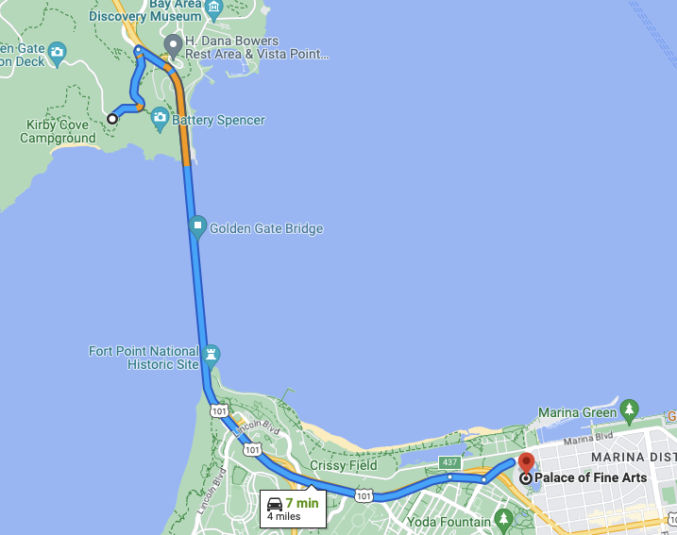
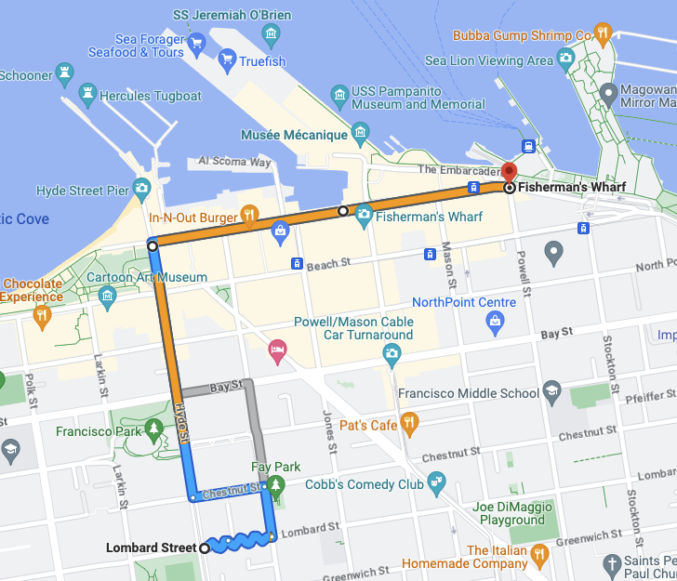
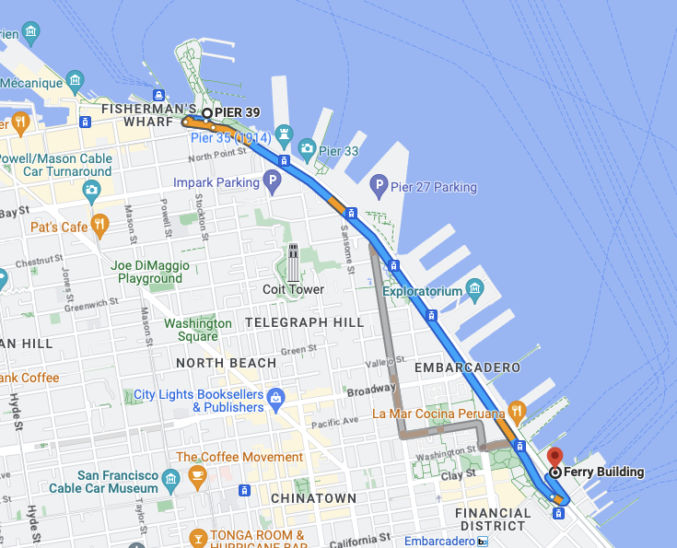
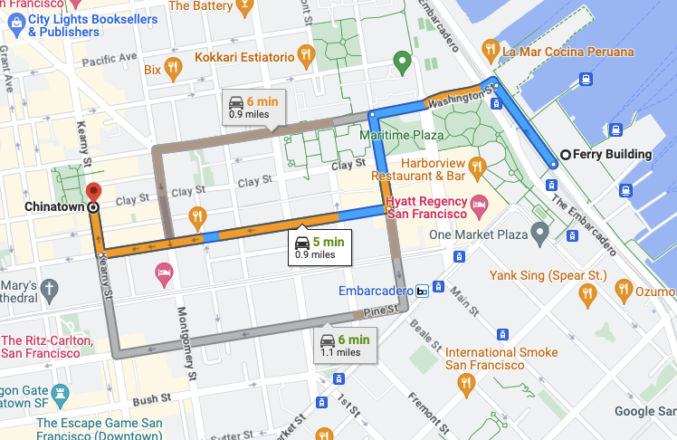
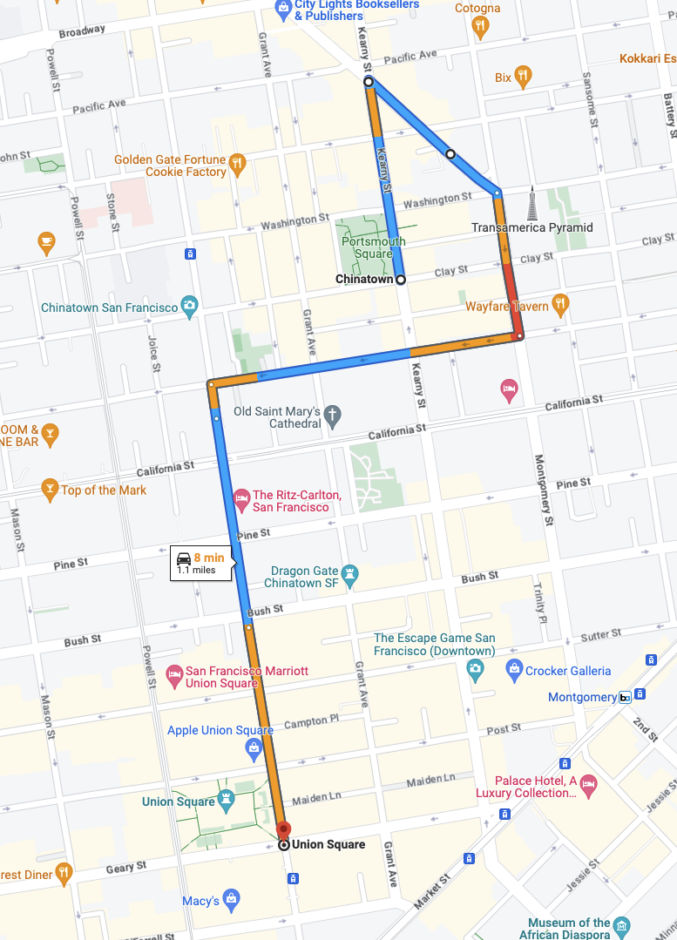
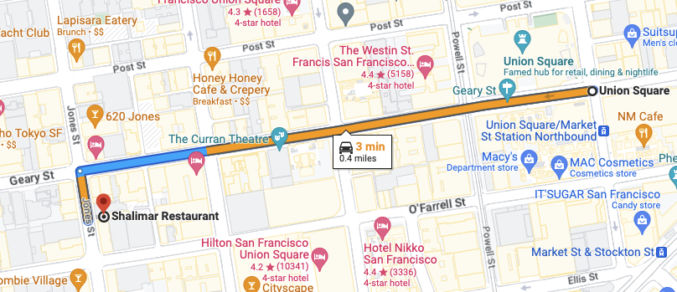
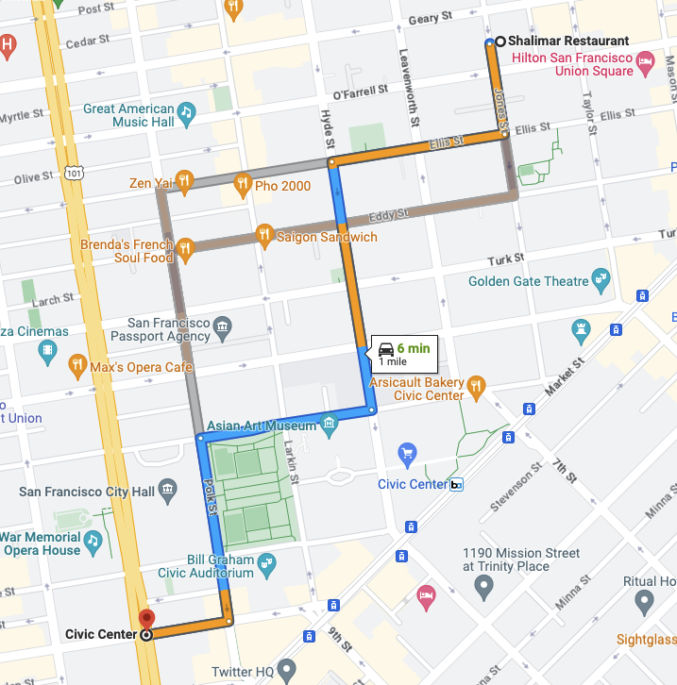
This itinerary assumes a starting point in Foster City, California near Qualys headquarters. It does not include every single tourist destination, but it does include many popular ones. This particular itinerary includes brunch and dinner at restaurants based on personal preference. The itinerary was designed to make a loop to avoid backtracking as much as possible.
Eggs Benedict: Grilled Canadian Bacon, Two Poached Eggs, Crispy English muffins & House-made Tomatillo Hollandaise Sauce. Served with Rosemary Garlic Potatoes or Fresh FruitEggs Florentine: Sautéed Spinach, Roasted Tomatoes, Crispy English muffins, Two Poached Eggs, Topped With House-made Tomatillo Hollandaise Sauce. Served with Rosemary Garlic Potatoes or Fresh FruitHash on Haight: Corned Beef brisket, sauteed peppers, onions, Rosemary Garlic Potatoes & 2 eggs any style topped with house-made tomatillo hollandaise sauce. Served with a side of Fresh FruitPhilly Cheese SteakFunky Monkey Crepe: Bananas, brown sugar, Nutella, ice creamBerrylicious Crepe Tiramisu Crepe Basic Dessert Crepe
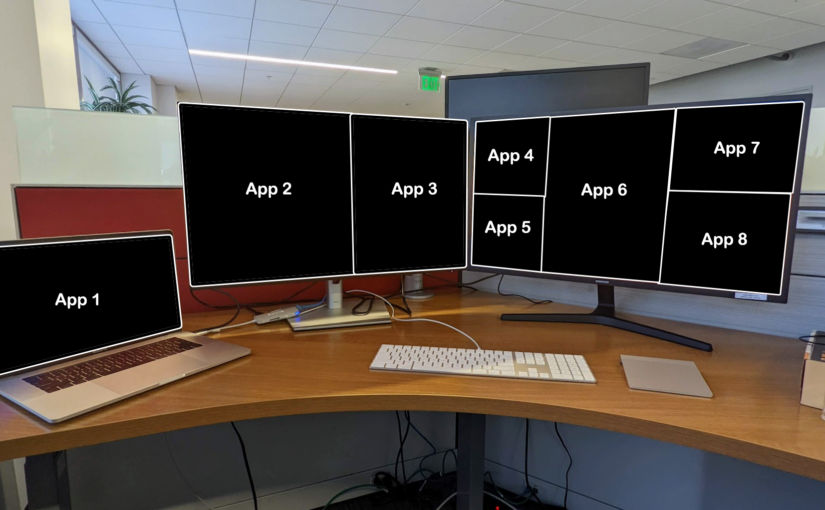
With so many people working both from home and at the office, it can become annoying to have to rearrange your application windows when you move between the two locations. This is especially true for people like me who need multiple monitors, two of which are 32″ 4K ones as shown below, which I need to display multiple windows on each screen.
Though I have a similar setup at home, my application windows always get jumbled up when I move between locations, possibly because the standalone monitors are not all the same brand with the same exact resolution.
Most window management apps allow you to move and resize windows in a grid, e.g.
left 50% of screen,
bottom 50% of screen,
right 33% of screen,
top 50%, left 50% of screen,
etc
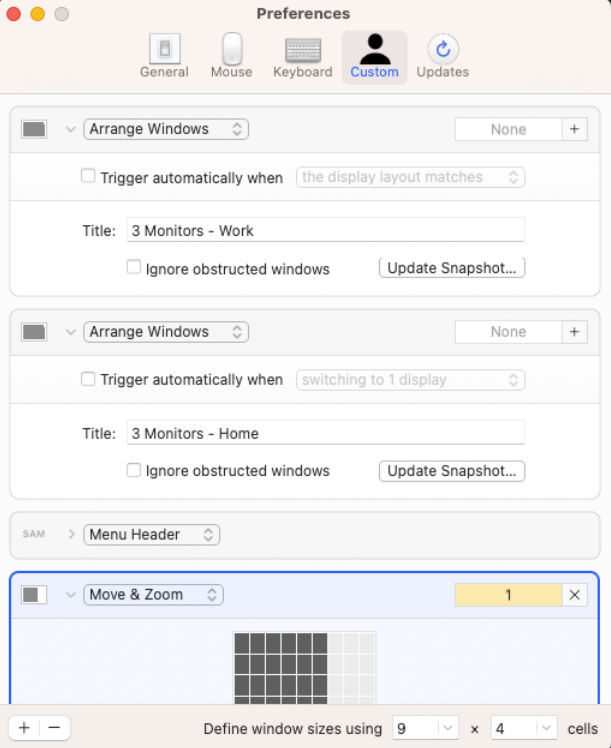
These are fine if you aren’t going to move locations often and don’t have too many windows. If you want the same layout spanning multiple monitors and the ability to instantly move and resize all windows to that layout, then I recommend Moom. Here’s how to use Moom to save layouts for multiple monitor configurations.
At location 1, e.g. work, open your applications and arrange them how you like
Open Moom and create a custom preset with the following settings
Type: Arrange Windows
Name: I put “3 Monitors – Work”
Uncheck all checkboxes
Click “Update Snapshot”
This saves the layout as a preset. To test it, resize and move all your windows around. Then, hover over the green dot in any one window and click on the preset. All windows will instantly move to how you had them.
When you’re at home, you can create another preset and call it something like “3 Monitors – Home”. Now, you no longer have to mess around with moving windows around. Just click on a preset from any open window and get back to business.
Moom has a one-time cost of $10, but it’s obviously worth it.
In this tutorial, I will explain how we can fetch remote paginated JSON data synchronously (in serial) and asynchronously (in parallel).
Data
You can get test data to fetch from RapidAPI, but I’m going to fetch video data from Vimeo using the Vimeo API.
Fetch Method
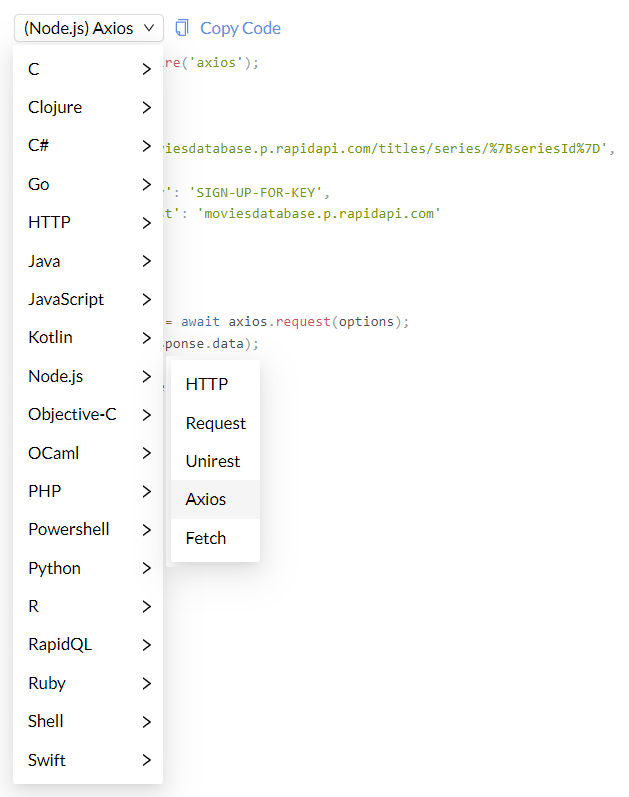
There are many ways you can fetch remote data. The RapidAPI website provides code snippets for various languages and fetch methods. For example, for Node.js, there’s HTTP, Request, Unirest, Axios, and Fetch.
Some services like Vimeo provide libraries and SDKs in a few languages like PHP, Python and Node.js. You can use those as well if you’d like.
I’m actually going to use the Got library [GitHub], which is a very popular library.
CommonJS vs ESM
Many of the latest Node packages are now native ESM instead of CommonJS. Therefore, you can’t require modules like this
const got = require('got');
Instead, you must import modules like this
import got from 'got';
According to this page, you can convert your project to ESM or use an older version of the got package that uses CommonJS.
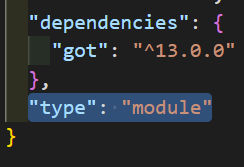
If using ESM, you need to put "type": "module" in your package.json.
Authentication
Many services like Vimeo require authentication in order to use their API. This often involves creating an access token and passing it in the header of the API call like this
GET /tutorial HTTP/1.1
  Host: api.vimeo.com
  Authorization: bearer {access_token}
Setup
Let’s set up our project. Do the following:
Create a new folder, e.g. test
Open the folder in a code editor (I’m using VisualStudio Code)
Open a terminal (I’m doing it in VS Code)
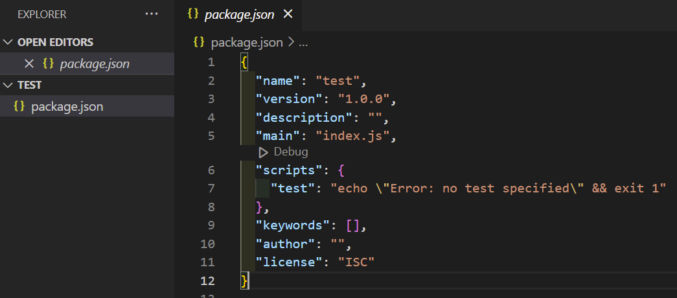
Initialize a Node project by running npm init -y
This will generate a package.json file in the folder.
Since we’re using ESM and will import modules rather than require them, add the following to the package.json file.
"type": "module"
Call the Vimeo API
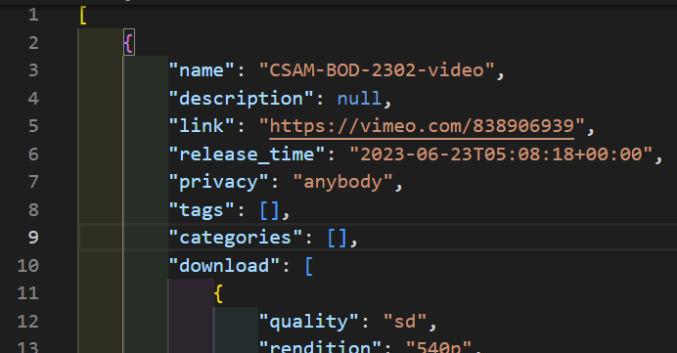
Let’s start by calling the Vimeo API just once. Create a new file called get-data-one.js and copy the following contents into it. Replace {user_id} with your Vimeo user ID and {access_token} with your Vimeo access token.
import got from 'got';

let page = 1;
let per_page = 3;
let fields = "privacy,link,release_time,tags,name,description,download";

const url = `https://api.vimeo.com/users/{user_id}/videos?page=${page}&per_page=${per_page}&fields=${fields}`;
const options = {
  method: 'GET',
  headers: {
    'Authorization': 'bearer {access_token}'
  }
};

let data = await got(url, options).json();
console.log(data);
We’re importing the got library. For this to work, we need to install the got package. Run the following command.
npm install got
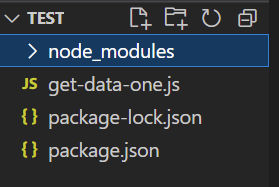
This will download the got package and its dependencies into the node_modules folder.
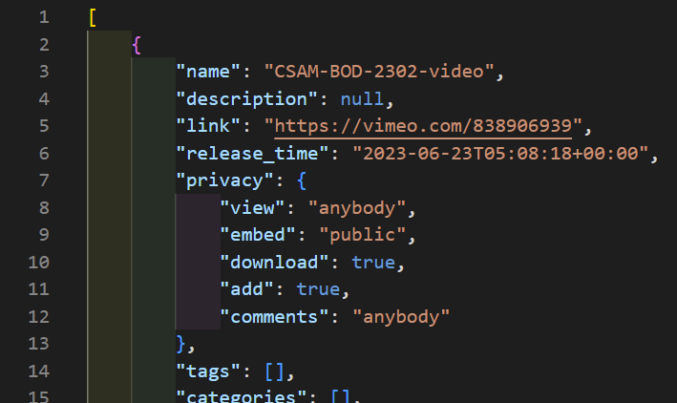
In the code, the Vimeo endpoint we’re calling is /users/{user_id}/videos, which returns all videos that a user has uploaded. According to the API docs, we can
Specify the page number of the results to show using page
Specify the number of items to show on each page of results, up to a maximum of 100, using per_page
Specify which fields to return using fields
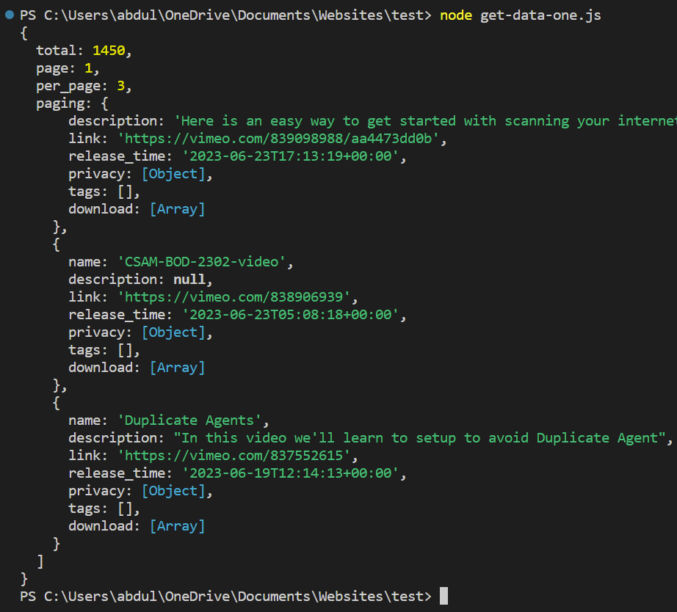
These parameters can be added to the endpoint URL in the query string, which is what we’ve done. However, for this test, we’ll just call one page and return the records (videos). We then call the API using the got library and then dump the results to the console. Let’s run the script and check the output. Run the following command.
node get-data-one.js
As expected, here’s the output.
The output starts with pagination info and the total number of available records (videos) followed by the actual data in the form of an array of video objects. In this case, we see 3 objects because we set per_page to 3.
Let’s update our code to write the output to a file. That will make it easier to read when there’s a lot of data. Add the following code snippets
import fs from "fs";
var stream = fs.createWriteStream("video-data.json",{flags:'w'});
    stream.once('open', function(fd) {
    stream.write(JSON.stringify(data)+"\n");
    stream.end();
});
so the code looks like this:
import fs from "fs";
import got from 'got';

let page = 1;
let per_page = 2;
let fields = "privacy,link,release_time,tags,name,description,download";

const url = `https://api.vimeo.com/users/{user_id}/videos?page=${page}&per_page=${per_page}&fields=${fields}`;
const options = {
  method: 'GET',
  headers: {
    'Authorization': 'bearer {access_token}'
  }
};

let data = await got(url, options).json();
console.log(data);
var stream = fs.createWriteStream("video-data.json",{flags:'w'});
    stream.once('open', function(fd) {
    stream.write(JSON.stringify(data)+"\n");
    stream.end();
});
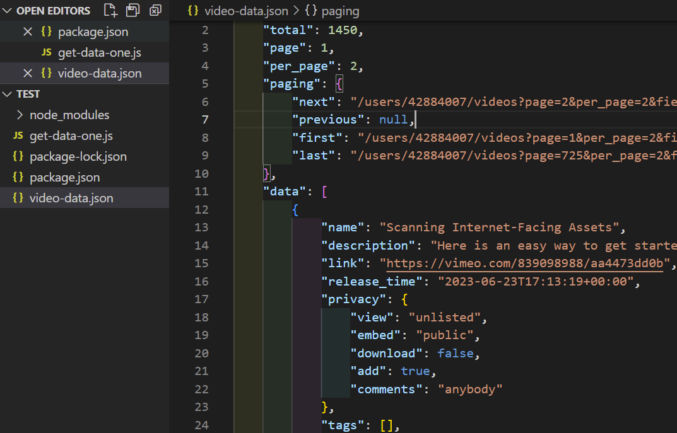
We don’t need to install the fs package because that’s included in Node by default. The stream will write data to a file we’ll call video-data.json and we pass it the “w” flag to overwrite any existing contents of the file.
When we rerun the script, we see the file is created. We can format (prettify) it so it’s easy to read.
Call the Vimeo API Multiple Times in Serial with Pagination
Now, let’s say we want to fetch more data, but the API limits how many records are returned in a single call. In this case, we need to call the API in a loop passing a different page number. Let’s create a new file called get-data-serial.js with the following code.
import fs from "fs";
import got from 'got';

let data = [];
let per_page = 2;
let fields = "privacy,link,release_time,tags,name,description,download";
const options = {
    method: 'GET',
    headers: {
      'Authorization': 'bearer {access_token}'
    }
}

for(let page = 1; page <= 3; page++) {
    const url = `https://api.vimeo.com/users/{user_id}/videos?page=${page}&per_page=${per_page}&fields=${fields}`;

    let somedata = await got(url, options).json();
    data.push(somedata);
    console.log(page);
};

console.log(data);
var stream = fs.createWriteStream("video-data.json",{flags:'w'});
    stream.once('open', function(fd) {
    stream.write(JSON.stringify(data)+"\n");
    stream.end();
});
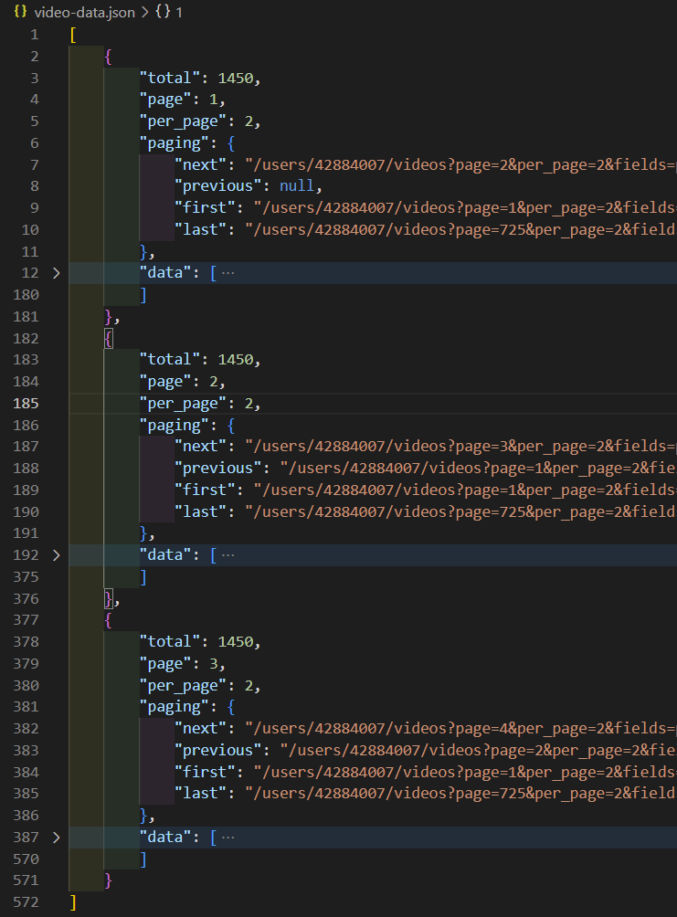
Here, I’m using a simple for loop to loop through 3 pages. I also created a data variable as an empty array. With each loop iteration, I push the page’s returned data to the data array. When all is done, I write the data array to a file, which looks like this.
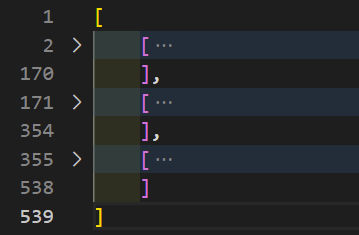
I collapsed the “data” array so we can see that 3 pages of data were returned. We ran this in serial so the order of the output is page 1, page 2, and page 3.
Call the Vimeo API Multiple Times in Parallel with Pagination
Now, let’s do the same thing, but asynchronously (in parallel). Create a new file called get-data-parallel.js with the following code.
import fs from "fs";
import got from 'got';

const options = {
    method: 'GET',
    headers: {
    'Authorization': 'bearer {access_token}'
    }
};

let data = [];
let per_page = 2;
let fields = "privacy,link,release_time,tags,name,description,download";
let pages = [1,2,3];

await Promise.all(pages.map(async (page) => {
    const url = `https://api.vimeo.com/users/{user_id}/videos?page=${page}&per_page=2&fields=privacy,link,release_time,tags,name,description,download`;

    let somedata = await got(url, options).json();
    data.push(somedata);
    console.log(page);
}));

console.log(data);
var stream = fs.createWriteStream("video-data-parallel.json",{flags:'w'});
    stream.once('open', function(fd) {
    stream.write(JSON.stringify(data)+"\n");
    stream.end();
});
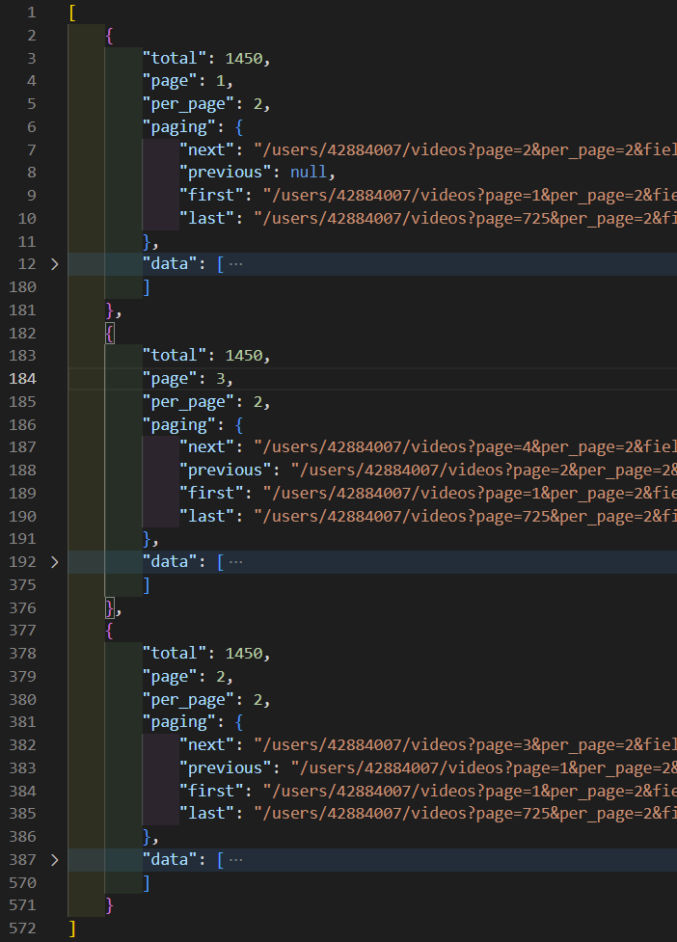
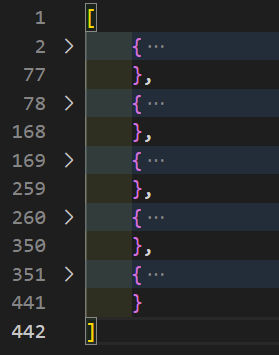
In this case, instead of a for loop, we’re using Promise.all and passing to it an array of page numbers that we loop over using the map function. When we run the script, we get output like the following:
You’ll notice 2 things:
the script runs faster because the API calls are done simultaneously in parallel (asynchronously) rather than one after the other in serial (synchronously).
the order of the output is no longer consecutive by page number. In this example, it was page 1, page 3, page 2.
Modifying the JSON Output Structure
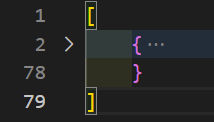
As shown in the previous screenshot, the API call returns an object containing pagination info followed by a data array – an array of objects containing video info.
What if we just want the data objects and not the pagination info. We can do that by modifying the structure of the JSON output. We can replace
data.push(somedata);
with
data.push(somedata.data);
but then the output becomes an array of arrays.
To fix this, let’s flatten the array by adding the following code:
data = data.flat(1);
right before we console it out and write to file.
Now, the output file looks like this (each record is collapsed for visibility).
Filtering Out Certain Records
What if we want to filter out certain records, e.g. we want to filter out all videos that are not public, i.e. we only want videos where privacy.view = “anybody”. We can use the filter function to do that, like this:
Each video record can contain a lot of information, including information we don’t need. For example, the privacy object contains 5 keys.
If we want to return just one privacy key, say “view”, then we can do so using the map function as follows:
// simplify privacy object to just privacy.view
somedata = somedata.map(function (video) {
video.privacy = video.privacy.view;
return video;
});
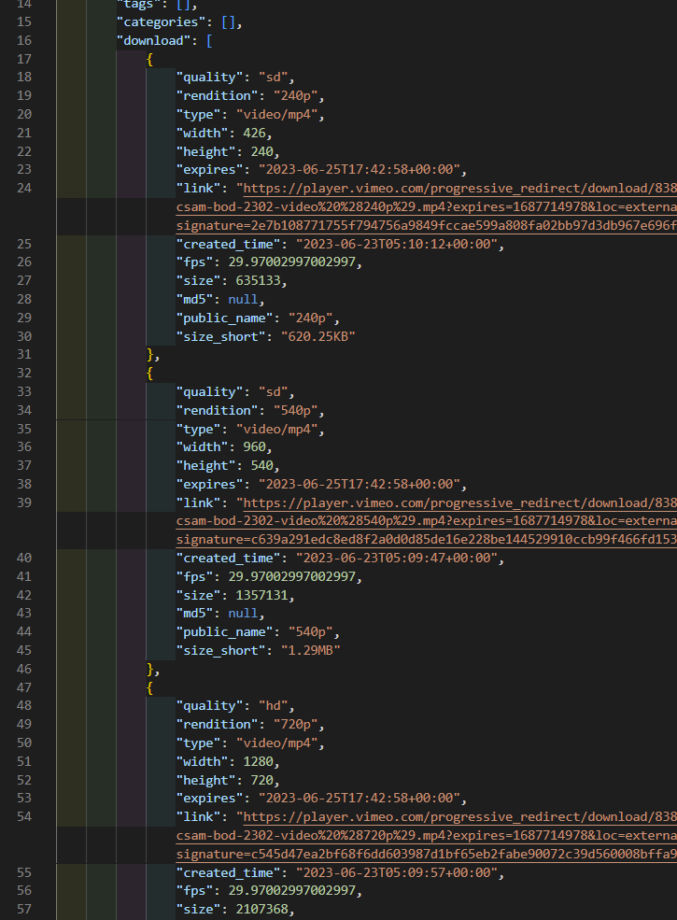
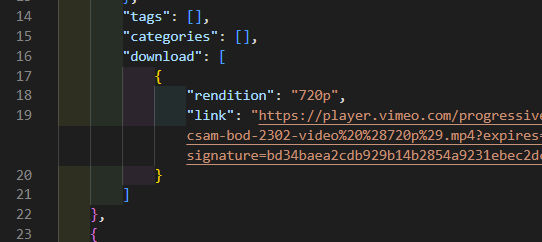
For each video record, the “download” field is an array of objects, one for each available rendition (resolution), e.g.
If we only want to, say, return “hd” videos and only the download links, we can use two map functions like this:
// only include videos that are HD and only return HD video download links
somedata = somedata.map(function (video) {
let download = [];
video.download.map(function (size) {
if (size.quality === "hd") {
download.push({
rendition: size.rendition,
link: size.link
})
}
});
if (download.length !== 0) {
video.download = download;
return video;
}
});
Now, the downloads array is simplified, like this:
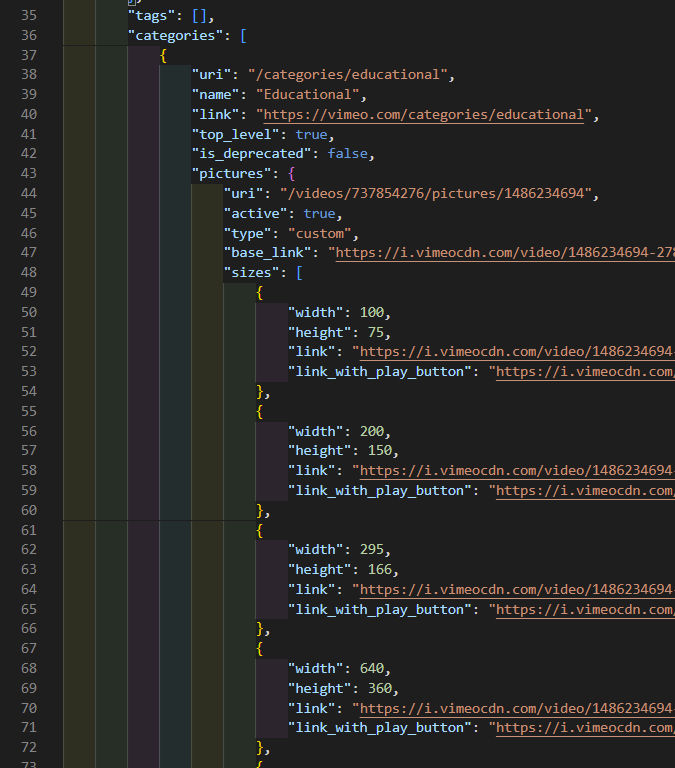
The “categories” field is an array of objects with a lot of data, including objects and arrays of objects.
What if we want to simplify that to just a comma-delimited list of category names. We can do that like this:
For reference, here’s the complete code for get-data-serial.js. The page limit and per_page values can be updated depending on how many results you want.
import fs from "fs";
import got from 'got';
let data = [];
let per_page = 2;
let fields = "privacy,link,release_time,tags,name,description,download,categories";
const options = {
method: 'GET',
headers: {
'Authorization': 'bearer {access_token}'
}
}
for(let page = 1; page <= 3; page++) {
const url = `https://api.vimeo.com/users/{user_id}/videos?page=${page}&per_page=${per_page}&fields=${fields}`;
let somedata = await got(url, options).json();
somedata = somedata.data;
// only include videos that are public
somedata = somedata.filter(video => video.privacy.view === "anybody" );
// only include videos that aren't in the "Educational" category
somedata = somedata.filter(function (video, index, arr) {
    let isEducational = false;
    video.categories.filter(function (category, index, arr) {
        if (category.name === "Educational") {
            isEducational = true;
        }
    });

    if (isEducational === false) {
        return video;
    }
});
// simplify privacy object to just privacy.view
somedata = somedata.map(function (video) {
    video.privacy = video.privacy.view;
    return video;
});
// only include videos that are HD and only return HD video download links
somedata = somedata.map(function (video) {
    let download = [];

    video.download.map(function (size) {
        if (size.quality === "hd") {
            download.push({
                rendition: size.rendition,
                link: size.link
            })
        }
    });

    if (download.length !== 0) {
        video.download = download;
        return video;
    }
});
// simplify categories array of objects to just an array of category names
somedata = somedata.map(function (video) {
    let categories = [];

    if (video !== undefined) {
        video.categories.map(function (category) {
            categories.push(category.name);
        });

        video.categories = categories;
        return video;
    }
});
data.push(somedata);
console.log(page);
};
data = data.flat(1);
console.log(data);
var stream = fs.createWriteStream("video-data.json",{flags:'w'});
stream.once('open', function(fd) {
stream.write(JSON.stringify(data)+"\n");
stream.end();
});
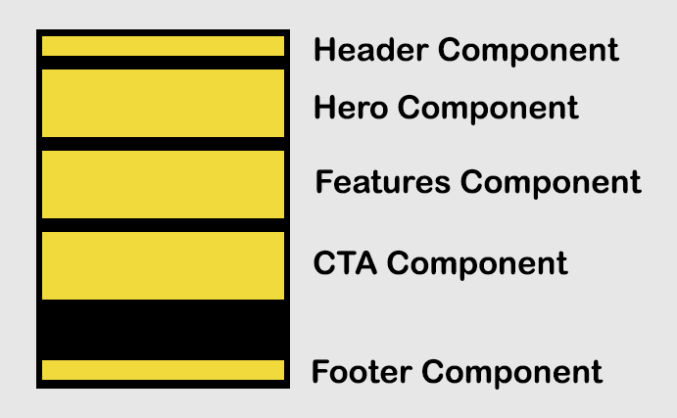
Most websites contain the same or very similar layouts on multiple pages, e.g. header and footer. There also might be a few different hero section designs and a few different CTA section designs. Imagine having 10 product pages each containing three 2-column sections with a text description in the left column and a screenshot in the right column. Each of these product pages may also have a CTA section design but with slightly different text and links. It’s common to put shared CSS in a shared CSS file, e.g. shared.css, common.css, or global.css. This especially makes sense for the header and footer, which are usually shown on all pages. But over time, that shared CSS file can become very long because you may have a lot of CSS for many different common sections. This can make it difficult and dangerous to edit code for just one particular section. It can also make it very difficult if you want to copy a section on one page to add to another page. If the HTML, CSS, and JS for the section aren’t isolated, you may not copy all the necessary code, not to mention you could end up with inconsistencies between two or more sections that should have the same design.
Consolidating all CSS into the fewest files possible is good for website performance (the fewer files, the fewer network requests), but nowadays, it’s common for websites, including simple static websites, to go through an automated build process to optimize the files before publishing them. The build process can do many things like minify and combine multiple CSS and JS files into single CSS and JS files, add prefixes to CSS using tools like PostCSS auto-prefixer, etc.
Following is one simple approach to grouping HTML, CSS and JS by website section. This approach can also be used for any part of a website like blocks within a section, but to keep things simple, we’ll just look at sections which I define as horizontal rows of related content, e.g.
In the src (source) folder, I’m using Nunjucks (njk) files instead of HTML files so they can include logic and pull in the components (partials). When the source files are processed, the built HTML files show up in the “build” folder. For the home page source file (index.njk), the structure of the code could be like this
<html>
<head>

    {% include "/src/components/header/header.css" %}
    {% include "/src/components/footer/footer.css" %}
    {% include "/src/index.css" %}
</head>
<body>
    {% include "/src/components/header/header.njk" %}

    ... some HTML ...

    {% include "/src/components/footer/footer.njk" %}

    {% include "/src/components/header/header.js" %}
    {% include "/src/components/footer/footer.js" %}
    {% include "/src/index.js" %}
</body>
</html>
Note that the home page has its own CSS and JS files for elements that are not part of a component. When this file is built, the CSS and JS files will be combined (Netlify can do this automatically) and the included header and footer njk references will be replaced with their contents, e.g.
Here’s another example. For product page 1 (product1/index.njk), the file contents may look like this
<html>
<head>

    {% include "/src/components/header/header.css" %}
    {% include "/src/components/section1/section1.css" %}
    {% include "/src/components/section4/section4.css" %}
    {% include "/src/components/footer/footer.css" %}
    {% include "/src/product1/index.css" %}
</head>
<body>
    {% include "/src/components/header/header.njk" %}

    {% set title = "Product 1" %}
    {% set heroImage = "product1.jpg" %}
    {% include "/src/components/section1/section1.njk" %}

    ... some HTML ...

    {% set text = "Try Product 1 Now" %}
    {% set link = "/product1/free-trial/" %}
    {% include "/src/components/section4/section4.njk" %}

    {% include "/src/components/footer/footer.njk" %}

    {% include "/src/components/header/header.js" %}
    {% include "/src/components/section1/section1.js" %}
    {% include "/src/components/section4/section4.js" %}
    {% include "/src/components/footer/footer.js" %}
    {% include "/src/product1/index.js" %}
</body>
</html>
In the code example above, we’re passing some variables into components section1 and section 4. That allows us to reuse a component’s layout and design while changing its content. Since product pages usually look very similar, the code for product2/index.njk might look like this
<html>
<head>

    {% include "/src/components/header/header.css" %}
    {% include "/src/components/section1/section1.css" %}
    {% include "/src/components/section4/section4.css" %}
    {% include "/src/components/header/footer.css" %}
    {% include "/src/product2/index.css" %}
</head>
<body>
    {% include "/src/components/header/header.njk" %}

    {% set title = "Product 2" %}
    {% set heroImage = "product2.jpg" %}
    {% include "/src/components/section1/section1.njk" %}

    ... some HTML ...

    {% set text = "Try Product 2 Now" %}
    {% set link = "/product2/free-trial/" %}
    {% include "/src/components/section4/section4.njk" %}

    {% include "/src/components/footer/footer.njk" %}

    {% include "/src/components/header/header.js" %}
    {% include "/src/components/section1/section1.js" %}
    {% include "/src/components/section4/section4.js" %}
    {% include "/src/components/footer/footer.js" %}
    {% include "/src/product2/index.js" %}
</body>
</html>
I reused the components but changed the value of the variables that are referenced in the components.
To prevent code conflicts, you can specify an ID in the first element of each component. For example,
section1.njk
<div id="section1">
    ... some HTML ...
    {{text}}
    {{link}}
</div>
section2.njk
<div id="section2">
    ... some HTML ...
    {{text}}
    {{link}}
</div>
Then, in the component’s CSS, to prevent CSS conflicts, you can prefix all rules like this
section1.css
#section1 .intro {
    ... some CSS ...
}

#section1 .features {
    ... some CSS ...
}
section2.css
#section2 .intro {
    ... some CSS ...
}

#section2 .features {
    ... some CSS ...
}
Similarly, with the JavaScript component file, you can do something similar, e.g.
section1.js
$("#section1 .intro")...
section2.js
$("#section2 .intro")...
Another benefit of this approach is you can create a page showing a preview of all components you have. When you want to create a new page, you can browse the list of component previews to see if you can reuse an existing component or decide if you need to create a new component.
Separate content from design
In the examples above, we’re specifying content in variables above each “include”. This can result in a very long template. A better approach is to move the content to a separate data file in JSON format. Let’s update our file structure as follows:
one for the “hero” section / component (section1.njk),
one for the “features” section / component (section3.njk),
one for the “testimonials” section / component (section4.njk)
To get the component files (section1.njk, section2.njk) to read the data from the data files (product1/index.data.json, product2/index.data.json), we’ll need to update the syntax a bit.
For product page 1 (product1/index.njk), the file contents may look like this
<html>
<head>

    {% include "/src/components/header/header.css" %}
    {% include "/src/components/section1/section1.css" %}
    {% include "/src/components/section4/section4.css" %}
    {% include "/src/components/footer/footer.css" %}
    {% include "/src/product1/index.css" %}
</head>
<body>
    {% include "/src/components/header/header.njk" %}

    {{> /src/components/hero page.hero }}

    ... some HTML ...

    {{> /src/components/section3 page.features }}

    ... some HTML ...

    {{> /src/components/section4 page.testimonails }}

    {% include "/src/components/footer/footer.njk" %}

    {% include "/src/components/header/header.js" %}
    {% include "/src/components/section1/section1.js" %}
    {% include "/src/components/section4/section4.js" %}
    {% include "/src/components/footer/footer.js" %}
    {% include "/src/product1/index.js" %}
</body>
</html>
Note that were passing page.hero, page.features, and page.testimonials, which only contains the JSON data for those sections, to their respective components (hero.njk, section3.njk, section4.njk).
The corresponding component files may look like this
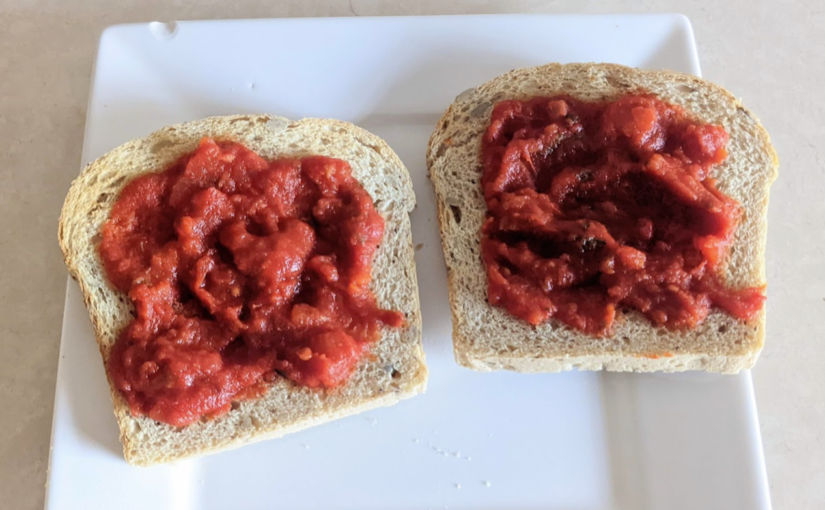
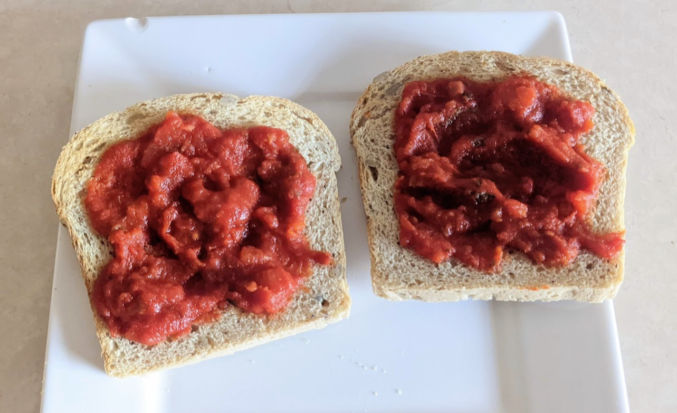
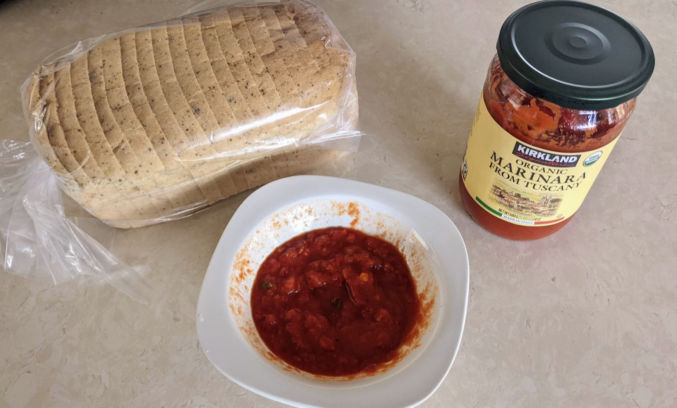
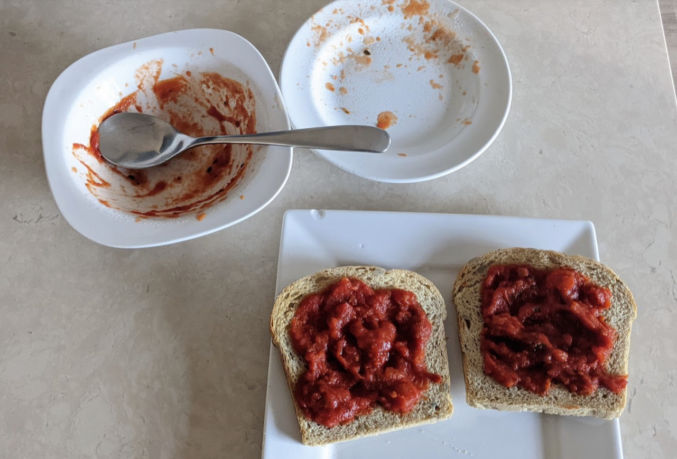
I came across this sample food at Costco. It was Kirkland Organic Marinara from Tuscany dipped in ciabatta bread. It was surprisingly good, but the ciabatta bread was high in calories and not keto. So, here’s a keto version that is super quick to make and can fill you up in a jiffy.
Ingredients
Artisan Bakery Sonoma County Keto Bread (available at Costco)
Kirkland Organic Marinara from Tuscany
Instructions
Heat up some of the marinara in a microwave
Toast the bread slices to your desired toastiness
Spoon the marinara onto the bread slices
Eat
It’s like eating a healthy pizza without the high-calorie cheese. Four slices followed by a glass or two of water will make you feel satiated while only consuming less than 200 calories!
A traditional burger bun like Artesano bakery bun contains 34 grams of net carbs and 190 calories. Replace that with an Orowheat Keto bun, which contains only 6 net carbs and 80 calories.
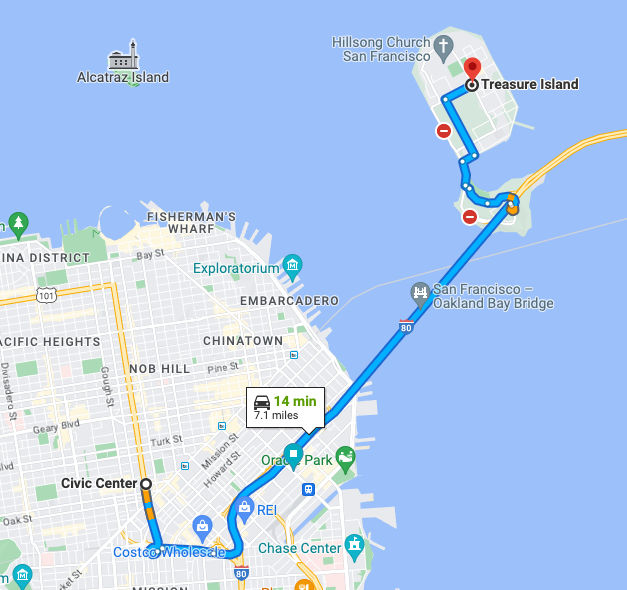
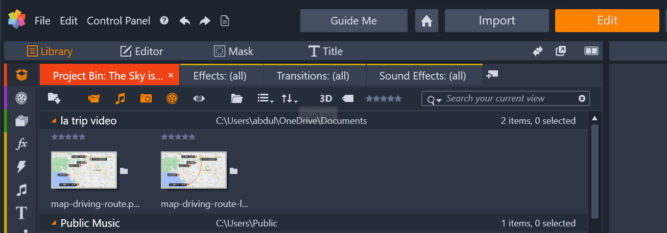
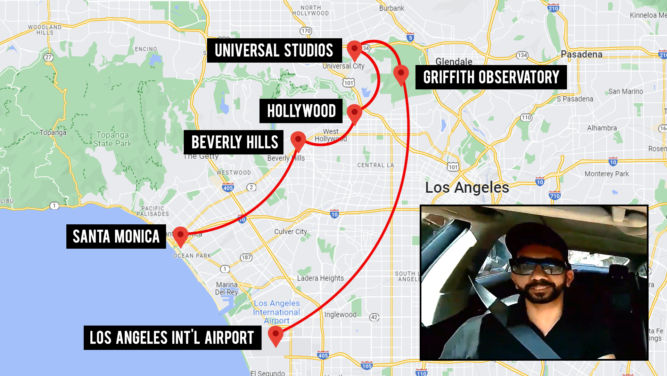
In this tutorial, I will explain how to create an animated travel map route from point A to point B using Pinnacle Studio.
1. Create two map images
We’re going to need to create 2 images.
an image without a route
an image with a route
This tutorial assumes you know how to create such images. I took a screenshot of Google Maps for the map background and used Photoshop to add balloon markers and location labels and to create the smooth route curves.
By default, the clips will be 3 seconds long. I prefer to drag them so they are 10 seconds long.
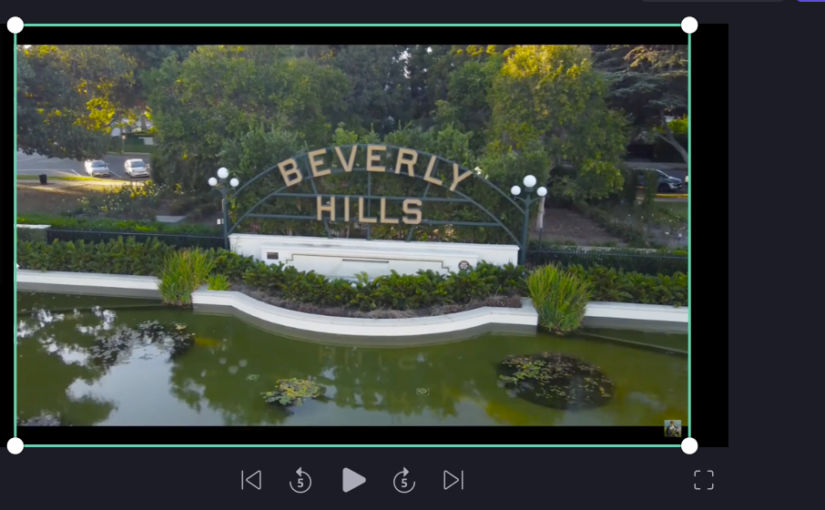
3. Create the animation
Drag the playhead to the beginning of the image clips
Double-click on the image on AV track 1
Click the “Effect” tab
Click the “2D-3D” tab
Double-click “2D Editor Advanced”
For “Select Preset”, choose “No Preset”
Scroll down. Under “Cropping, we’re going to edit the cropping properties as follows:
if the line will mostly animate toward the bottom, drag the Top % slider until the line first completely disappears.
if the line will mostly animate toward the top, drag the Bottom % slider until the line first completely disappears.
if the line will mostly animate toward the right, drag the Left % slider until the line first completely disappears.
if the line will mostly animate toward the left, drag the Right % slider until the line first completely disappears.
The clip in AV track 1 shows a black mask partially covering the image as you drag the slider.
Drag the slider, you’ll notice the line starts to disappear in the preview window.
Scroll back up in the 2D Editor Advanced pane and click on the diamond icon to turn on keyframing.
Drag the playhead to the point on the clip where you want the line to be finished. This will also change the speed of the “animation” as the cropping will go quicker if you end it earlier. I just dragged it to near the end of the clip.
Scroll back down and drag the slider to the left until the line first appears in full
Preview the animation in the preview window.
If the animation looks good, you can export it.
One idea is to partially overlay a video clip of you driving while describing your trip.
Another idea is to overlay the map route animation at 50% opacity over a video of the trip.
In the example above, I used the following two images.
sf-la-without-line.pngsf-la-with-line.png
To create the composite video, I used Corel VideoStudio and put the route animation video on an overlay track.
Double-clicking the overlay clip opens the clip’s settings. I clicked the “Blending” tab and then set the opacity to 50%.
I then had to slow down the speed of the route animation so its duration would be close to or match that of the airplane clips.
Right-click on the route animation clip
Speed > Speed/Time-lapse…
Change duration (in my case, I chose 20 seconds)
UPDATE
It’s actually easier to create the route animation on a Mac using Keynote. See these video tutorials.
Sometimes, you can download a YouTube video using a tool like YouTube-DLG or an online YouTube to MP4 converter. However, this doesn’t always work. One workaround is to use a screen recorder to record the video as it’s playing on YouTube in a browser. However, if you do this, then depending on various factors including the original video and your screen’s resolution, YouTube may show black bars around the video, like this
This tutorial for Windows will explain how to
screen record a YouTube video
resize the recorded video to remove the black bars
Screen Record a YouTube Video
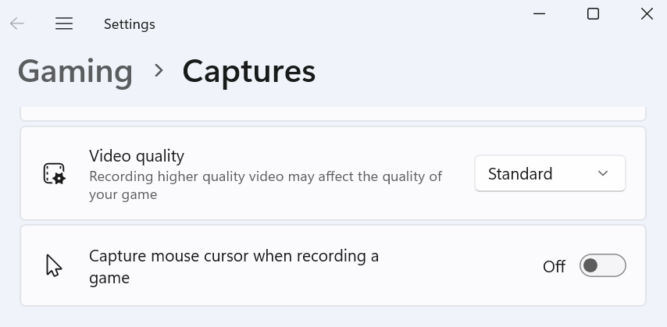
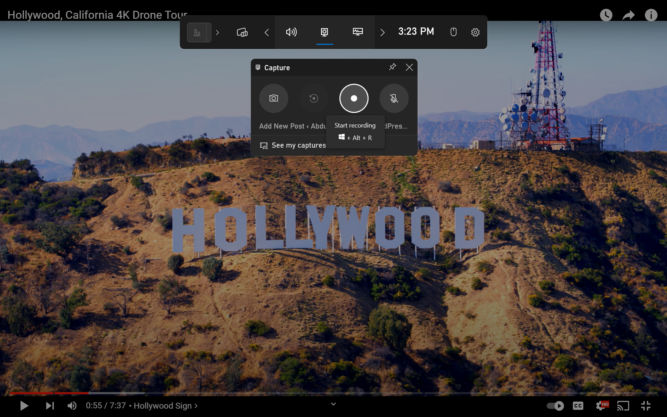
There are many tools you can use to record your screen. I’m going to use the Xbox Game Bar that comes included with Windows. We’ll need to update our video settings to not record the mouse cursor.
Open the Gaming > Captures settings and turn off “Capture mouse cursor when recording a game”
Open a browser, go to YouTube, and go to the video you want to record
Open Xbox Game Bar and click the record button
Play the video
Click to stop recording when you want to stop recording.
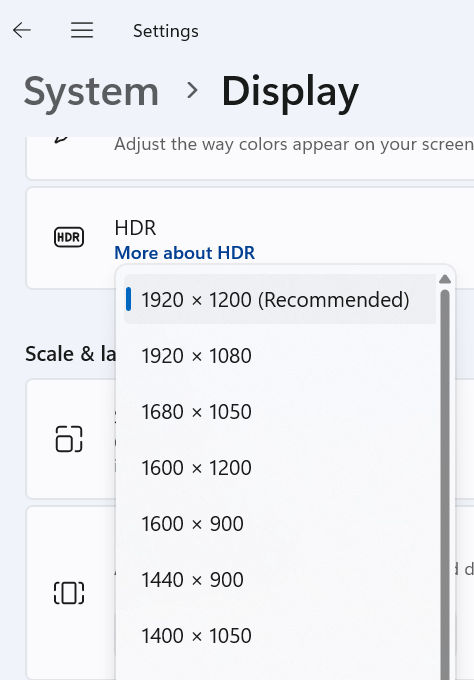
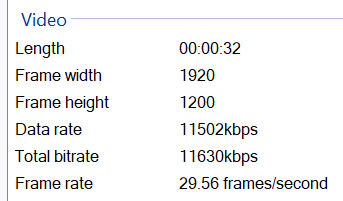
My screen resolution is set to 1920 x 1200.
Therefore, if you open the video recording’s properties, you’ll notice that the resolution is 1920 x 1200 instead of the standard 1920 x 1080 size for 1080p resolution. We’ll need to resize this and remove the black bars.
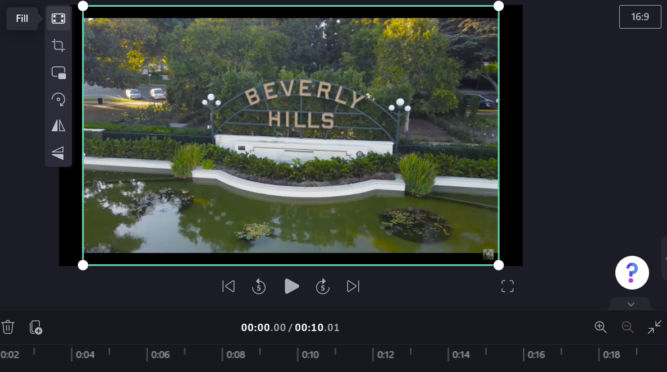
Resize a video and remove the black bars
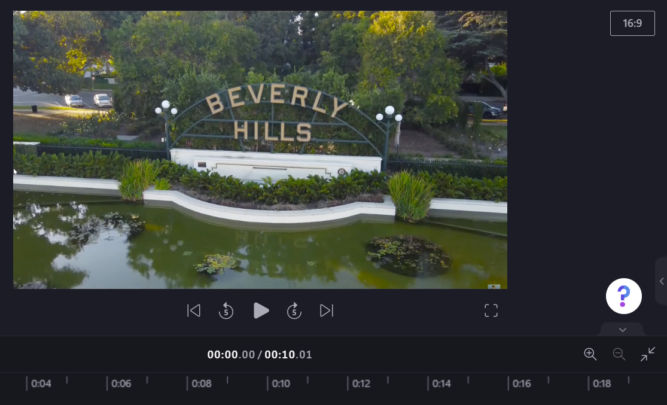
On Windows, open ClipChamp video editor
Import your video file
Drag it to the preview window
Make sure the aspect ratio is set to 16:9
Double-click the “Fill” icon
Notice how the video content fills the preview window and gets rid of the black bars.
Export the video (usually as 1080p).
NOTE: A simpler way is to temporarily change your screen’s resolution to match that of the video, e.g. 1920 x 1080, before recording the video.