In this post, I’ll explain step by step how my HVAC guy replaced an old rooftop HVAC stand with a modern HVAC curb.
I had this done due to water leaking into the building from multiple places below the HVAC unit. The entire process took 6 hours nonstop. These steps can also be used to replace an old HVAC unit.
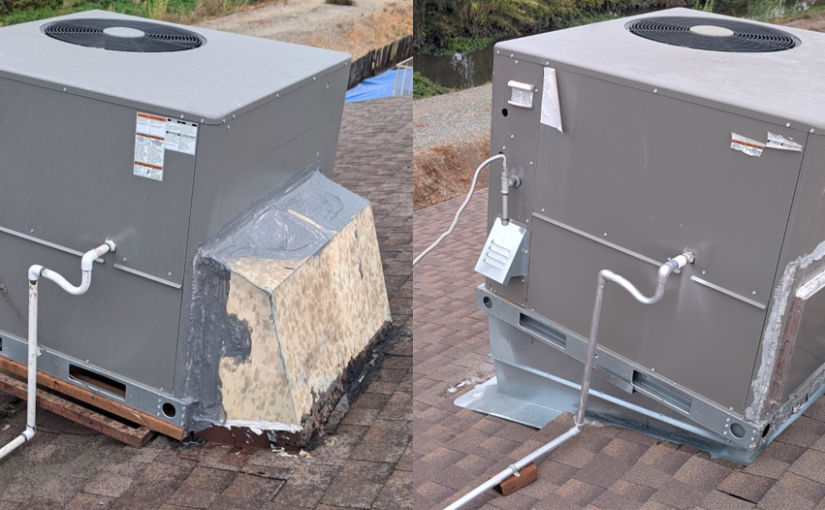
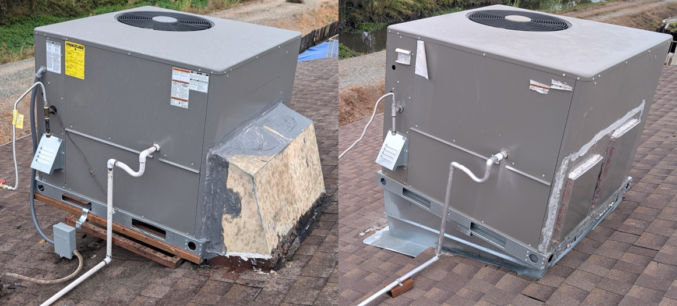
Below are before and after pictures showing the difference.
BEFORE
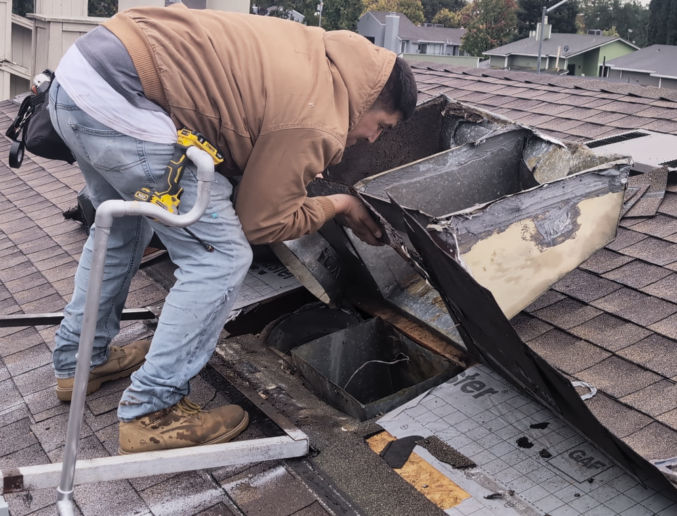
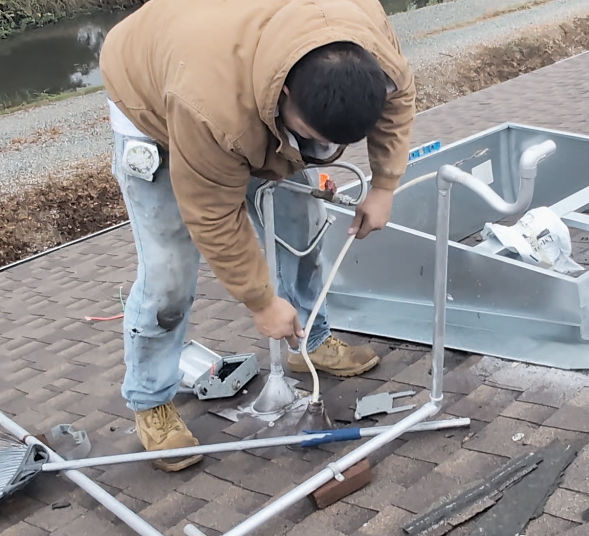
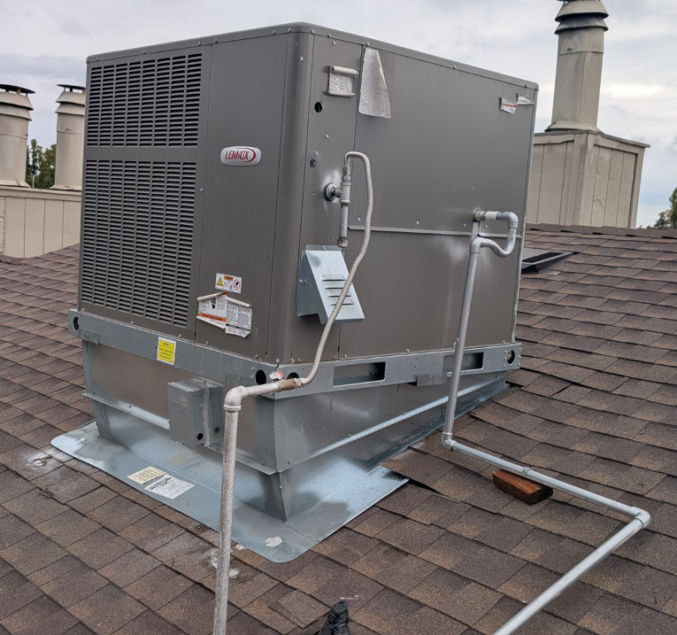
In the following photo, you’ll see the rusted metal stand below the HVAC unit. That stand was from 1978. The HVAC unit was replaced in 2025, but the HVAC contractor was cheap and didn’t replace the stand with a modern curb. Instead, since the new HVAC unit was too large for the stand, he strapped two pressure-treated 2x4s to the stand using a strip of thin metal.
In the photo below, you’ll also see the old “elbow” at the back of the HVAC unit where the air flows into the ducting in the attic and into the building. The elbow is from 1978. Had the HVAC contractor replaced the stand with a modern curb (shown in the “after” photo below), the elbow would be removed and air from the HVAC unit would flow straight down from below the unit.

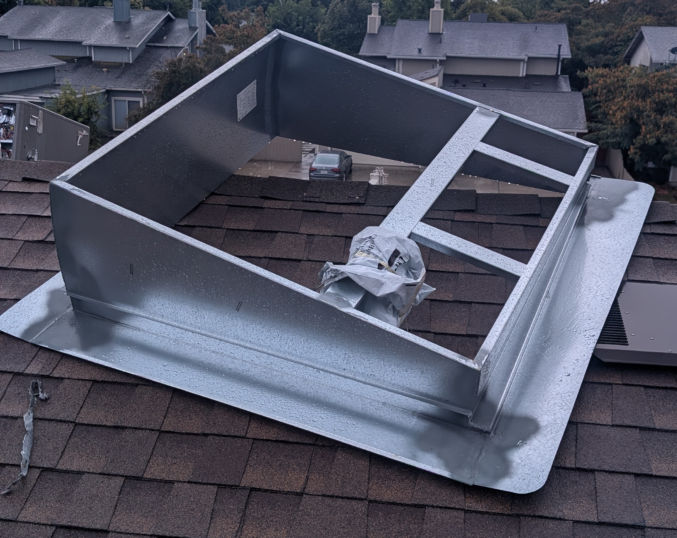
AFTER
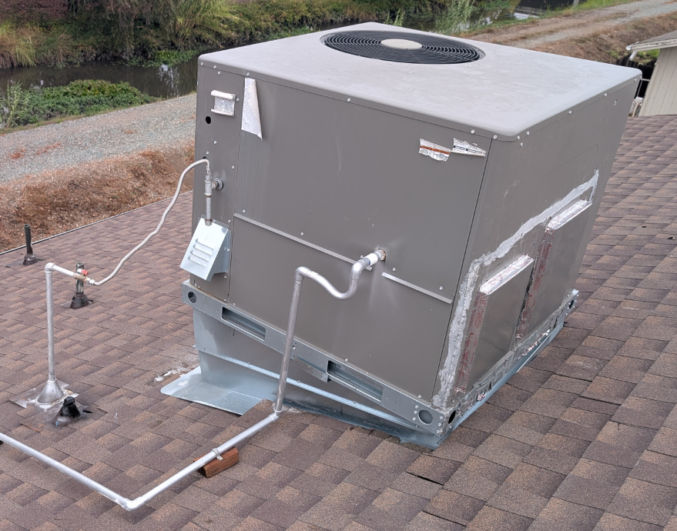
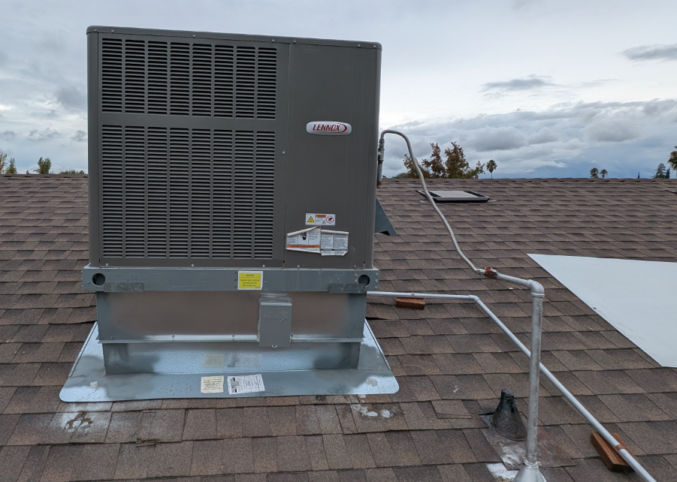
In the following photo, you’ll see the old stand was replaced with a “curb”, which is an enclosed stand. Also, the elbow was removed and the air inlet/outlet on the back of the HVAC unit was closed off with sheet metal because the air now flowed into the building from below the HVAC unit. You’ll also notice the electrical wires (power and thermostat) come out of the roof below the HVAC unit rather than next to it.
If you’re replacing a rooftop HVAC unit, you won’t need to follow all of the steps here.
Note: Most of the screenshots below were taken from this corresponding video.
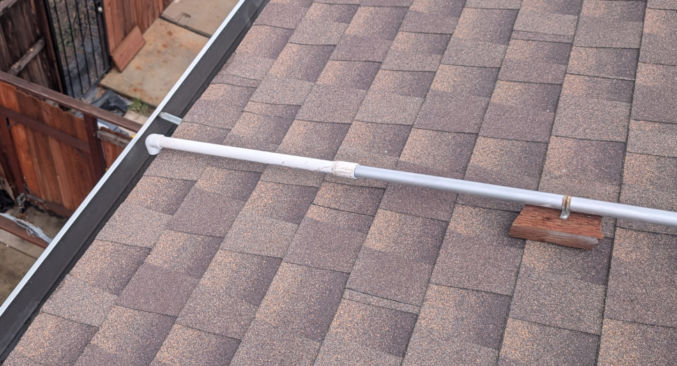
Order a curb that is designed for the HVAC unit you have. A curb looks similar to the picture below.
Disconnect everything from the HVAC unit so it can be lifted using a crane and replaced with the same or a newer one.
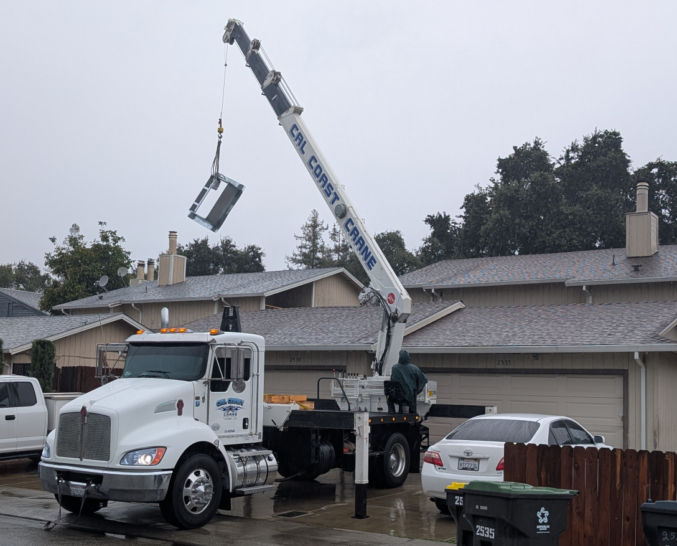
Have a crane operator come to lift the curb onto the roof.
Connect the 4 rope hooks to the 4 holes in the metal base of the HVAC unit. Instruct the crane operator to life the HVAC unit and place it somewhere else.
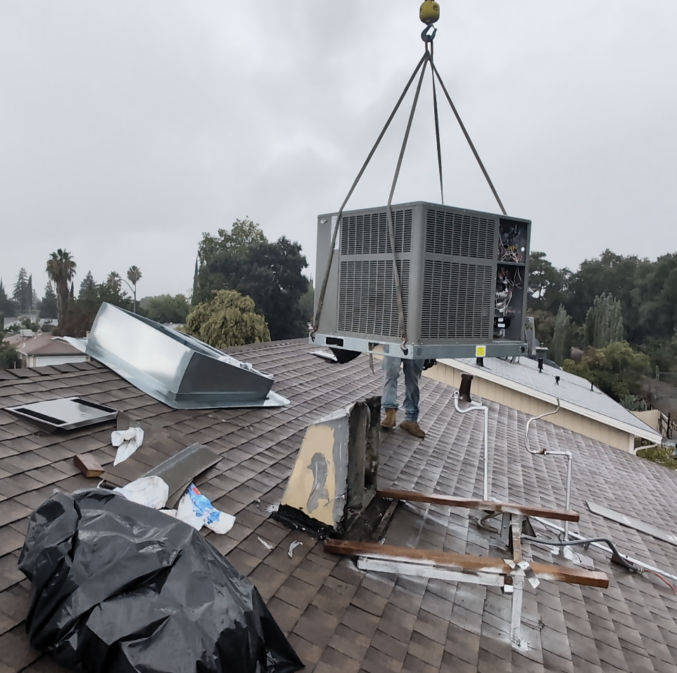
In my case, since we weren’t replacing the HVAC unit itself, we just placed the HVAC unit on another area of the roof.


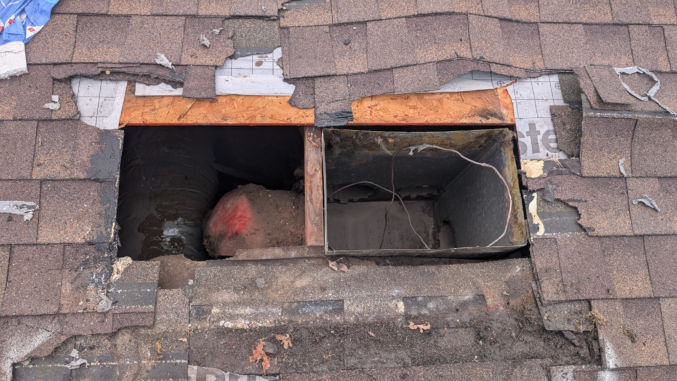
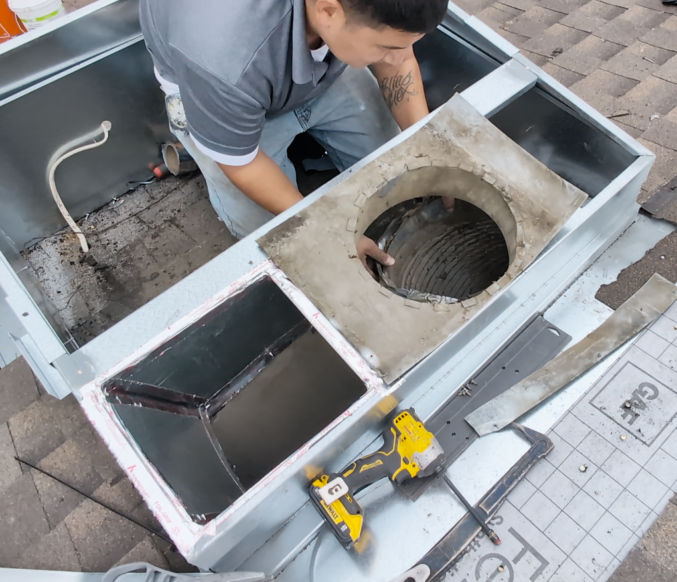
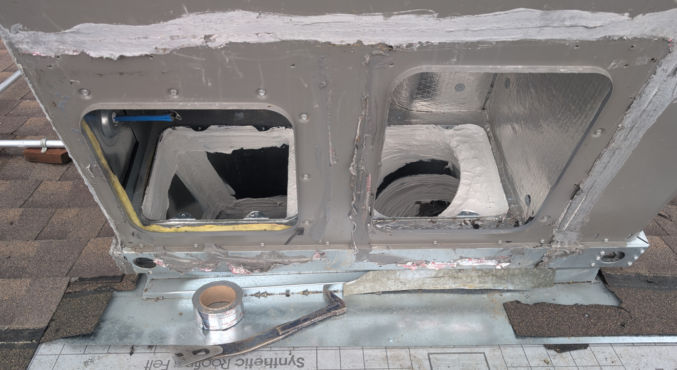
With the HVAC unit out of the way, we can see the old elbow and ducting that goes into the attic. The left duct is for air to return to the HVAC unit and the right duct is for conditioned air to flow into the building.

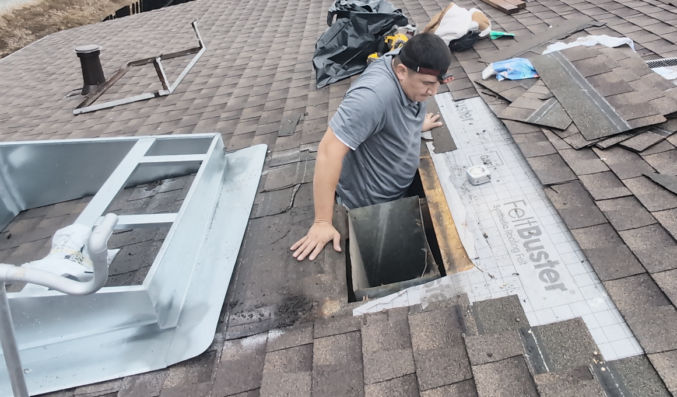
Remove the elbow. You may need a pry bar to lift some shingles and a utility knife to cut some sealant connecting the elbow to the shingles.

Here’s how the opening in the roof looks with the elbow removed.
After dry-fitting the curb on the roof where you want it to go, mark along the inside perimeter and then cut the shingles along the left and right edges of the perimeter. If using a circular saw, adjust the blade cutting depth to avoid cutting deeper than the shingles.
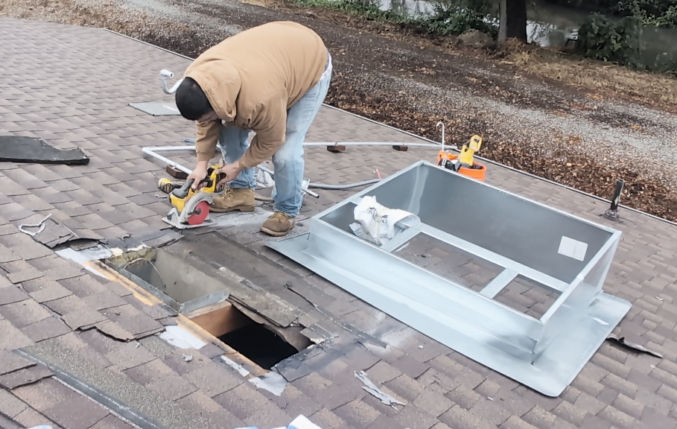
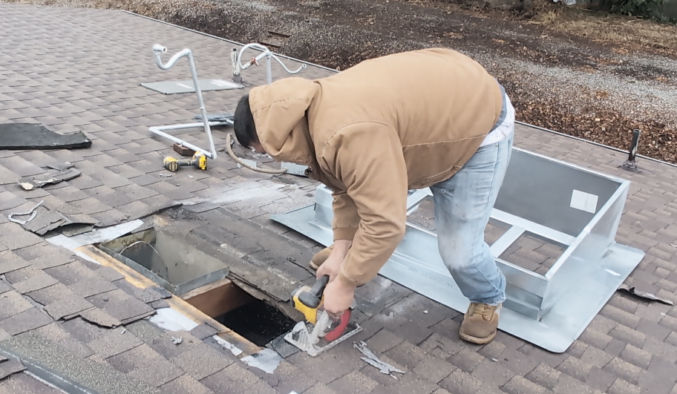

Using a pry bar, a row or two of shingles at the top edge and a bit of shingles on the left and right edges.


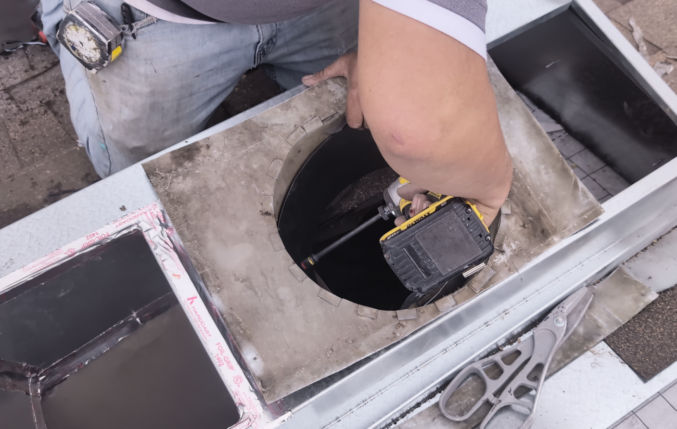
Drill a hole in the roof inside the curb so that the electrical cables can come up through the roof from below the HVAC unit rather than next to the unit.

Turn off the circuit breaker to the HVAC unit and check for any voltage. My Lennox 2.5 ton package HVAC unit had two hot wires, red and black, each at 120V, for a total of 240V. The green wire was for ground.

Remove the line cable, which supplies electrical power from the circuit breaker box, from the HVAC electrical box.

Since the Romex line cable will be moved to come up through the roof from under the HVAC unit, we removed the conduit.

We then pushed the Romex back into the attic so we could push it through the hole in the roof we made earlier.
Then go into the attic so you can push the Romex cable through the new hole in the roof.
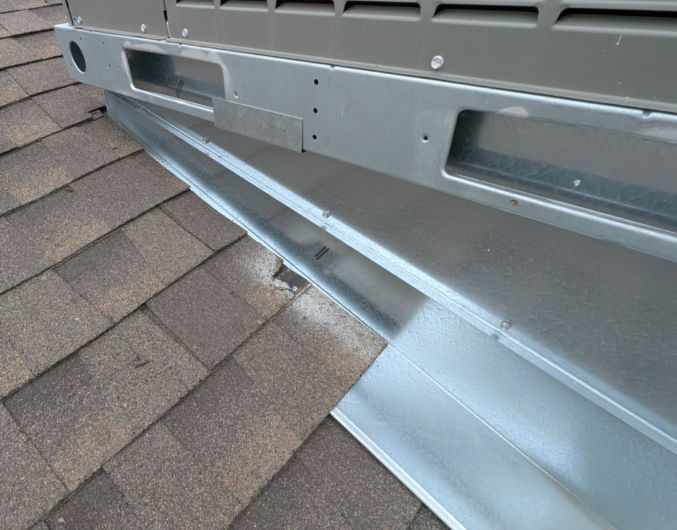
Slide the top half of each side of the curb under the shingles and move the curb into its final position.

You may need to remove some nails holding some shingles down.
Place a magnetic torpedo level on one side of the curb, then lift the front of the curb up until the level shows it is level. This is so the HVAC unit will sit level on the curb rather than angled following the slope of the roof.

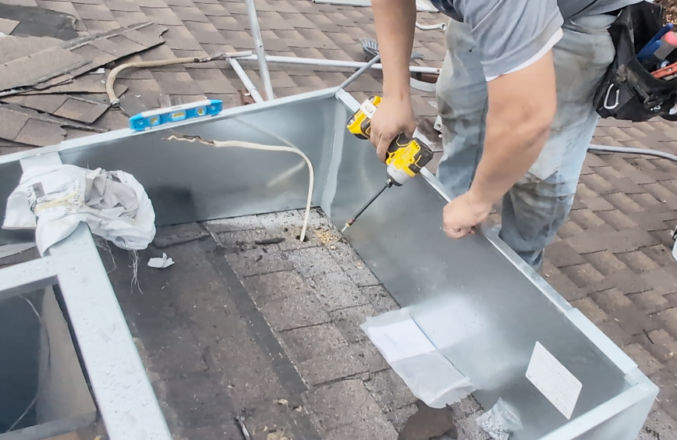
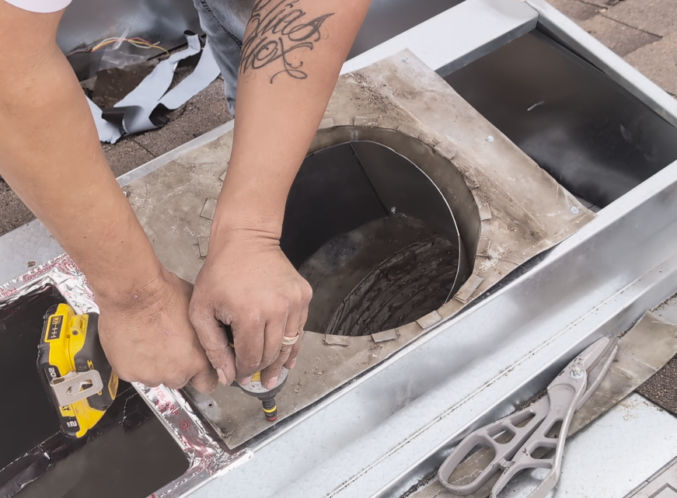
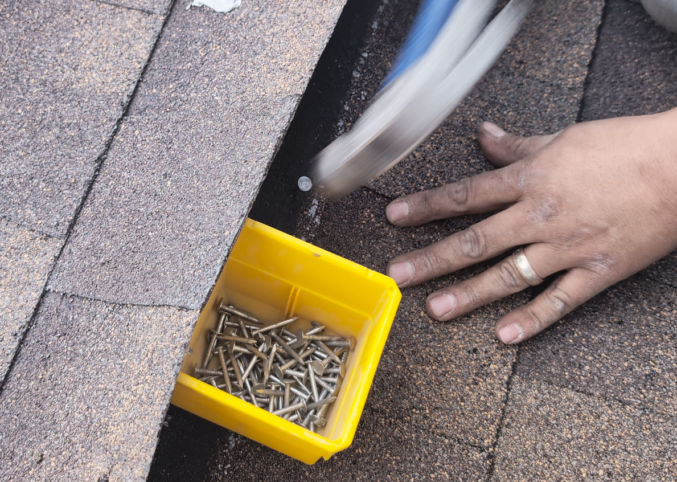
When it’s level, drill a self-tapping screw for metal from the outer side of the curb through the inner side of the curb to hold the outer side in place.


Drill screws in multiple places to ensure the top of the curb remains level and can support the weight of the HVAC unit.
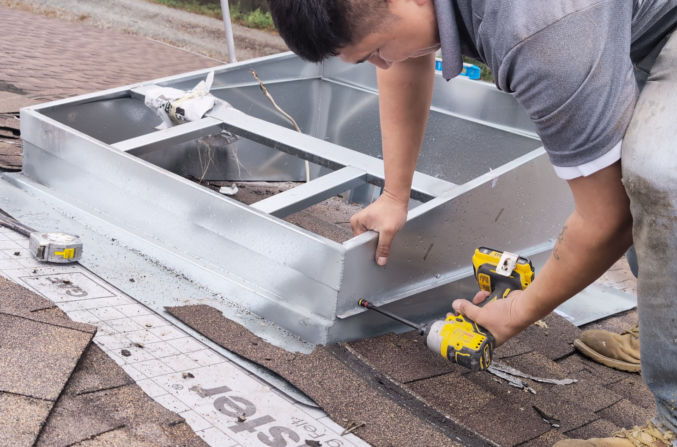
Install the 4 brackets that came with the curb – 2 on the front and one on each side.

Drill a 3/4″ diameter hole in the front of the curb for the electrical Romex cable and the t-stat (thermostat) cable to go through.
We needed some sheet metal to connect some ducts and cover some openings. It’s much cheaper to buy a roll at a dedicated HVAC store than the big-box stores like Home Depot, which only sell small sheets. However, some HVAC stores only allow licensed contractors to buy from them.
The sheet metal roll is held in place using a long zip tie.

When going up and down the ladder, make sure to strap the ladder to the building, like an eye hook in the eaves, to keep the ladder from moving. Some city inspectors require this when they come for an inspection.

Cut pieces of sheet metal to connect the duct in the attic to the curb.
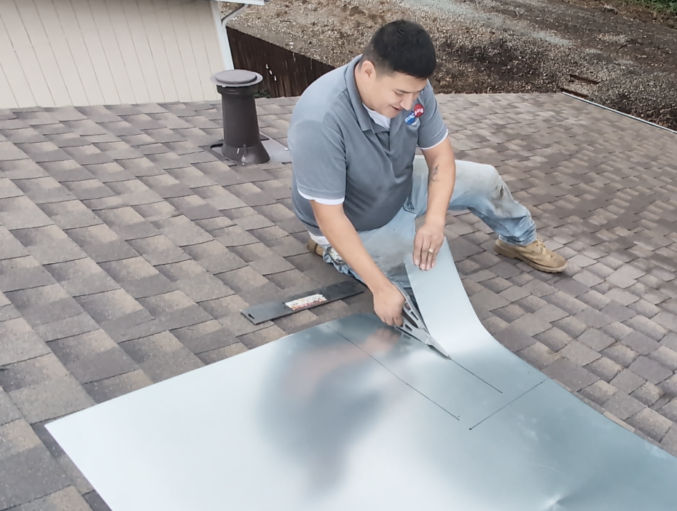

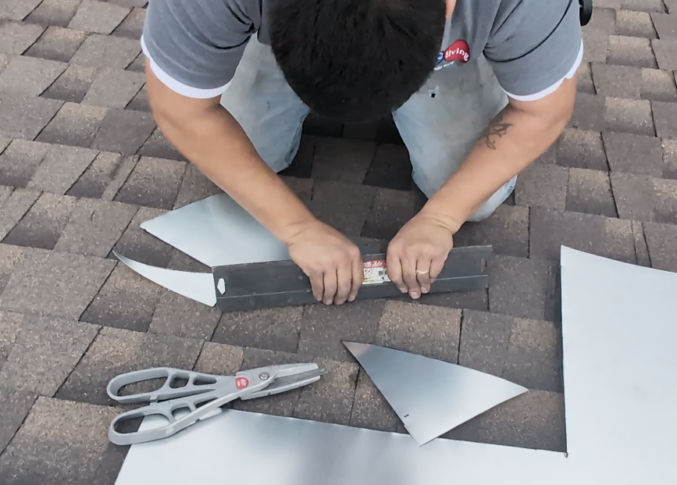
Use a flashing folding tool to fold some edges of the sheet metal.

Position the cut sheet metal to connect the duct to the curb.

Then screw the cut sheet metal to the curb.
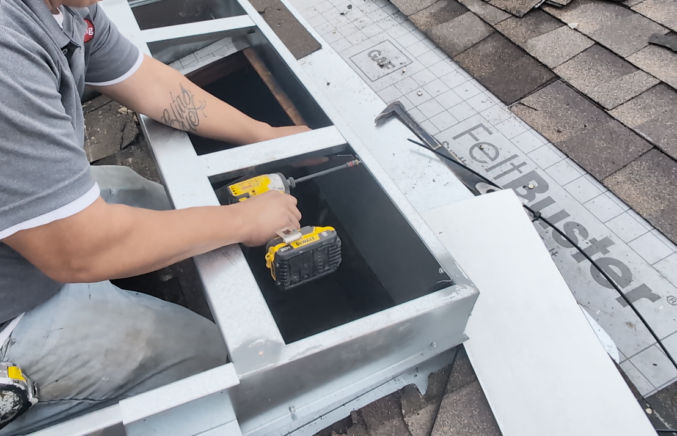
Repeat until you’ve connected the duct in the attic to the curb.
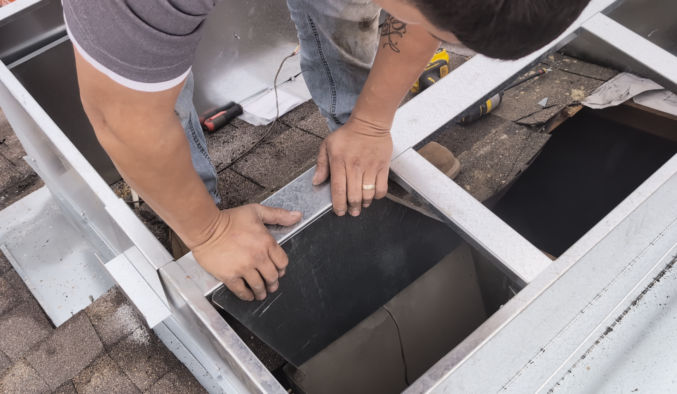


Apply HVAC foil sealer duct tape at the edges of the sheet metal connections.

If it helps, you can reuse old duct parts to connect the duct in the attic to the curb. In the following photo, the left opening is where air flows into the building. The right opening is where air flows from the building back into the HVAC unit.

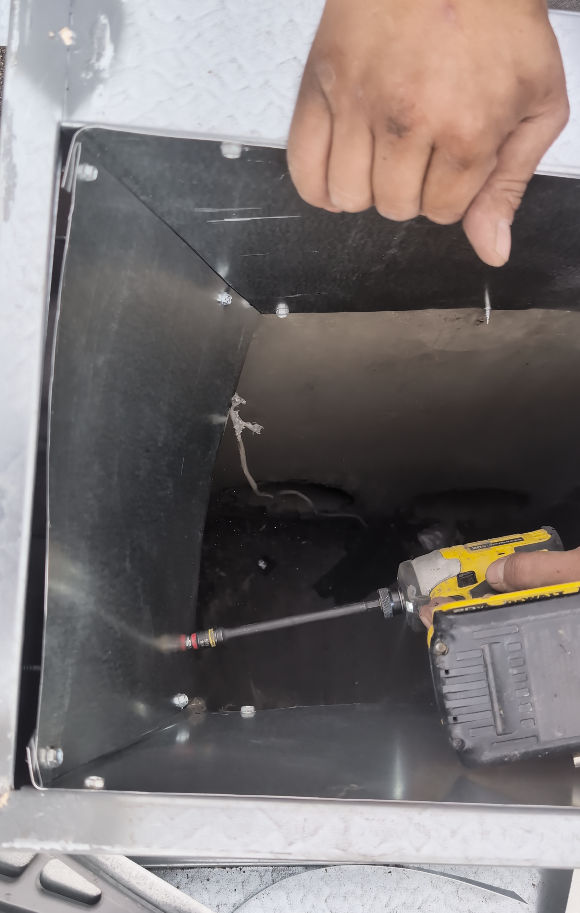
Connecting the duct to the curb can be tricky because there may not be enough slack in flexible ducts and you are sometimes working in tight spaces.
In this case, the contractor had to create a short circular duct to extend the flexible duct that was in the attic.
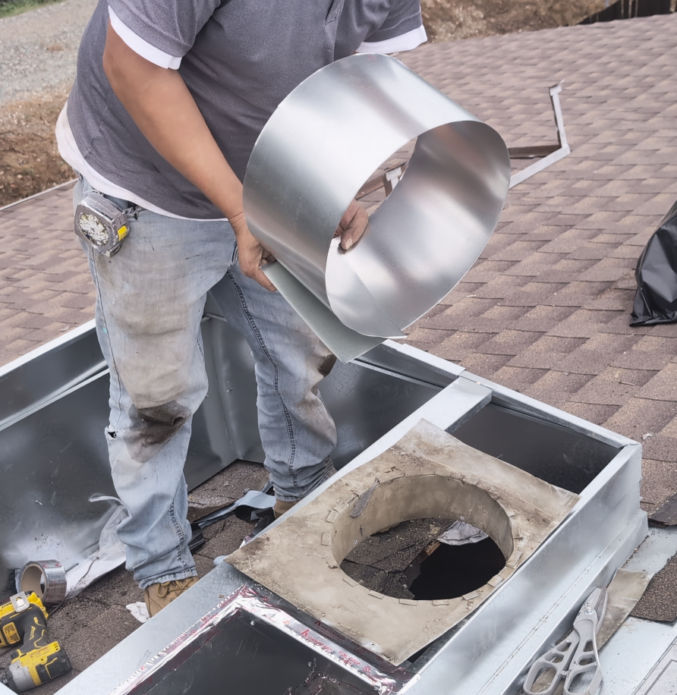
He inserted the duct at an angle since the flexible duct in the attic came in at an angle.

Then, he screwed in the extension piece using self-tapping sheet metal screws.

Then he screwed the flexible duct to the duct extension he just created.

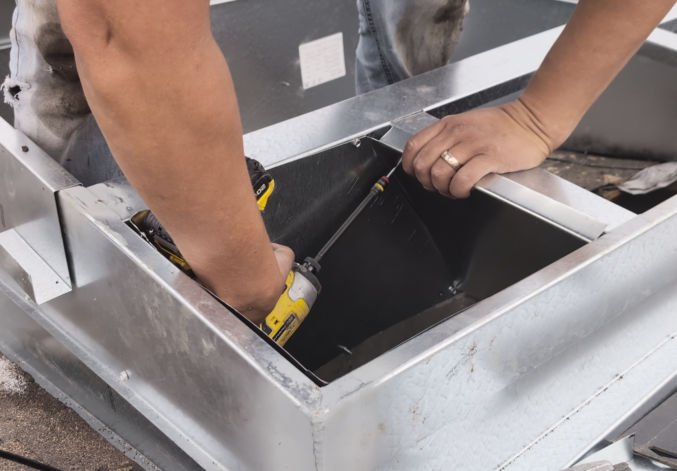
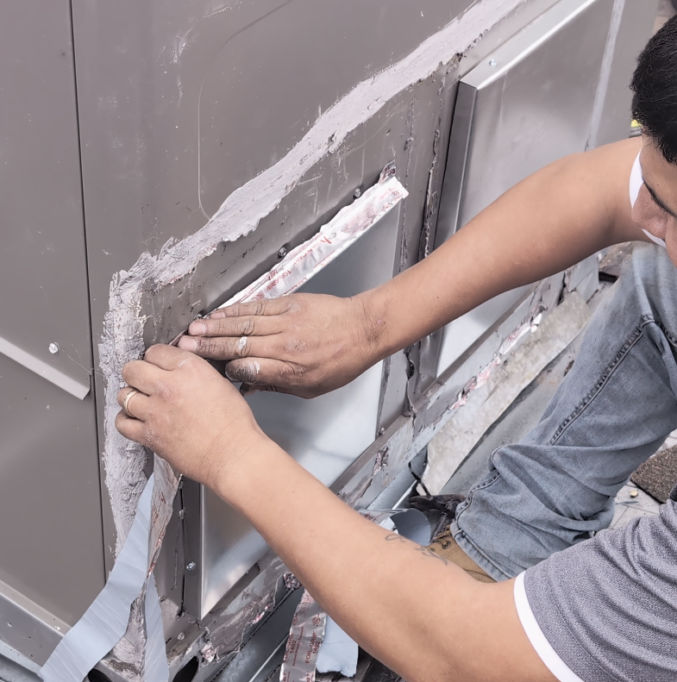
And he applied HVAC tape to all duct and curb connections.
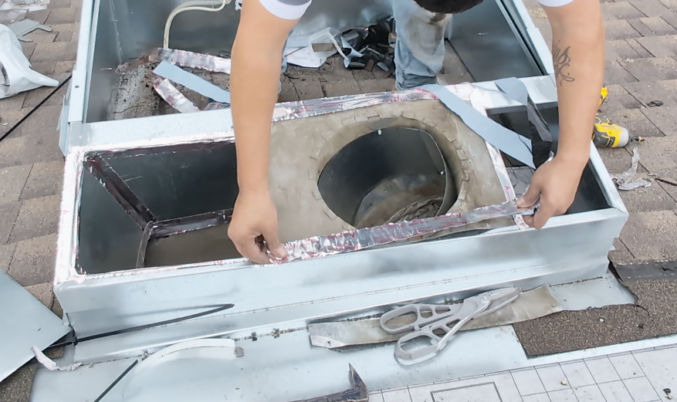
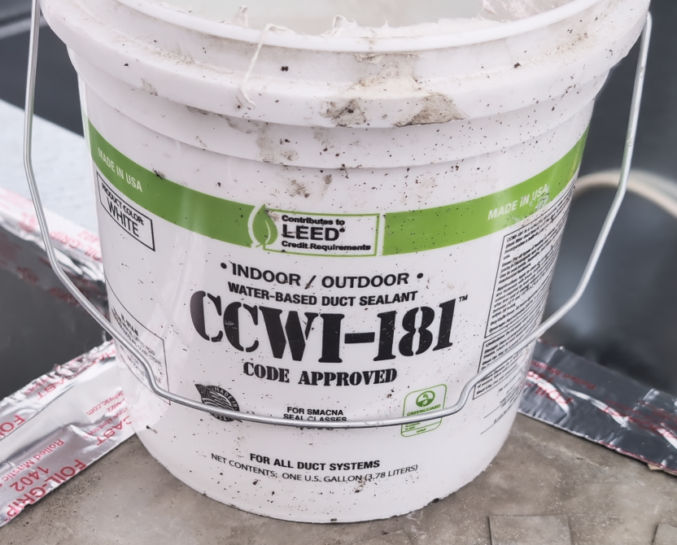
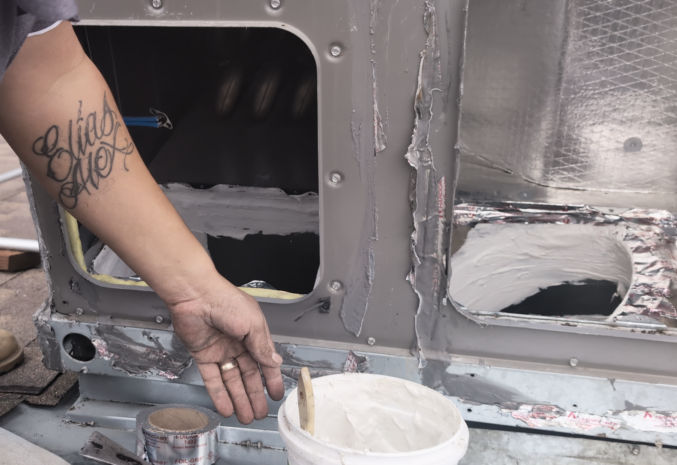
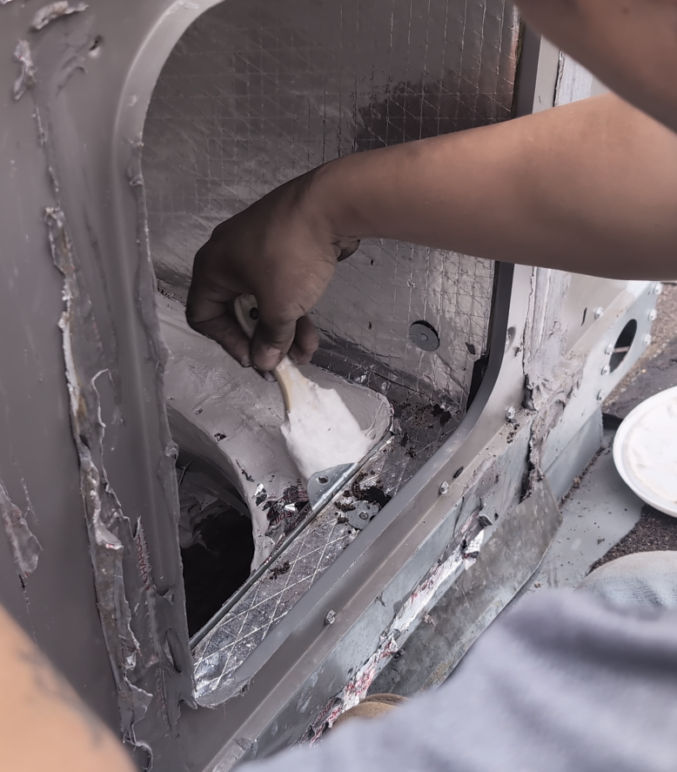
He also covered all gaps with HVAC tape. For big gaps, as shown below, the tape will serve as backing for the HVAC sealant (Pookie).

Apply HVAC sealant (Pookie) to all seams and connections. When dry, this sealant becomes very hard.


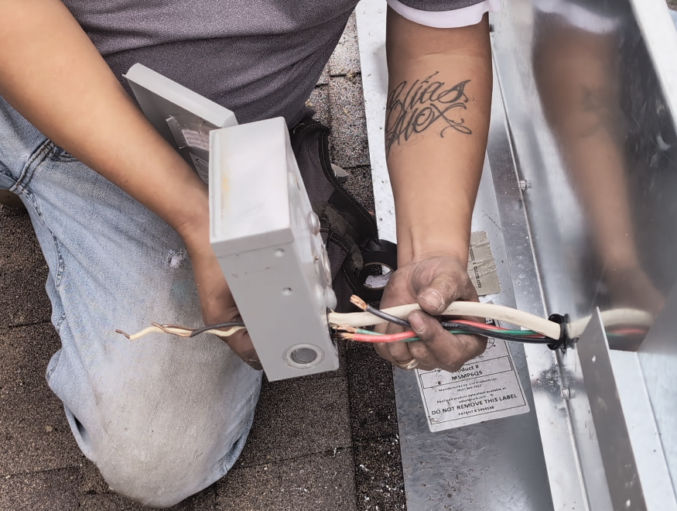
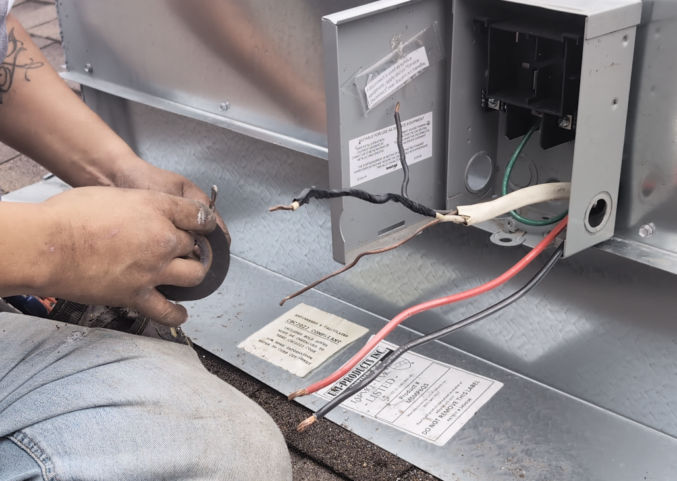
Stick the electrical line cable and load wires (red, black, and green) through the hole previously made in the curb. The load wires connect from the wires in the line cable to the terminals in the HVAC unit.

Insert a 3/4″ plastic bushing in the hole in the metal curb to prevent the wires from getting cut if they slide against the sharp metal hole in the curb.

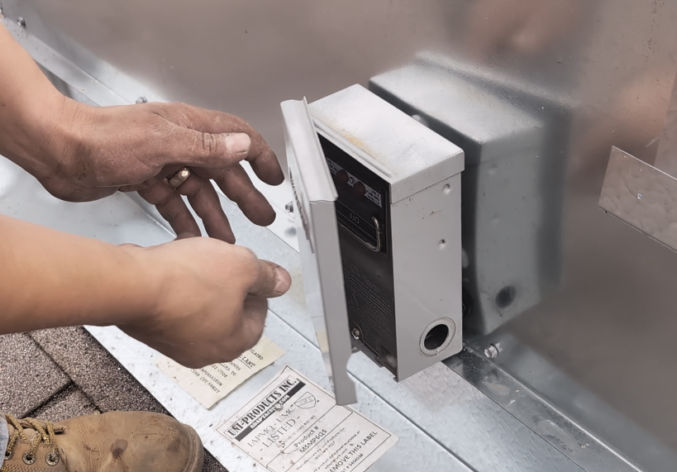
Stick the wires through the hole in the electrical box.
Screw the box to the curb.
Since both the black and white wires in the line cable are hot (120V), the white wire must be colored black to indicate it is hot. You can cover a portion of the white cable sleeve with black electrical tape.
Connect the wires to the appropriate terminals in the electrical junction box.
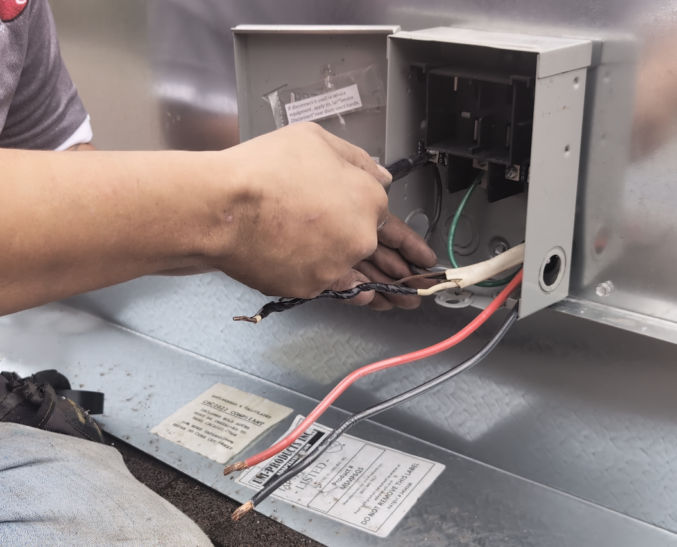
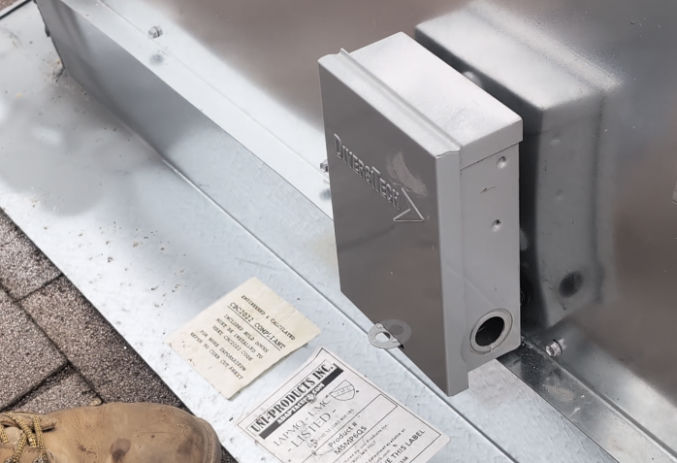
Screw the plastic cover over the terminals.
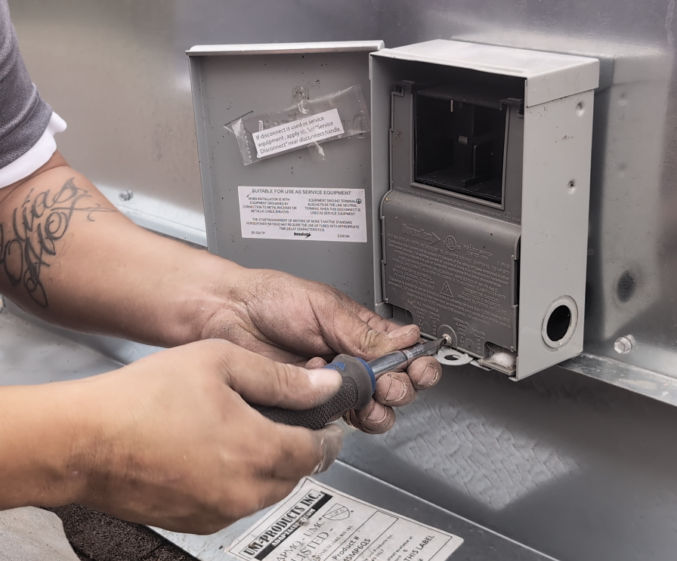
Insert the circuit breaker.
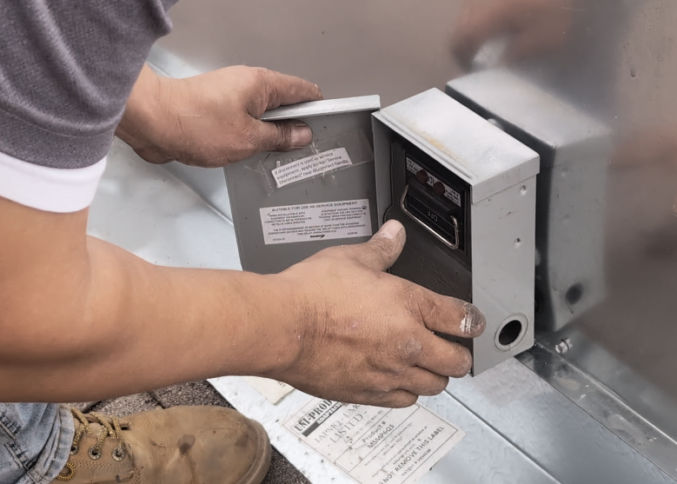
Close the box door.
Optionally lock the door by inserting a lock through the hole.
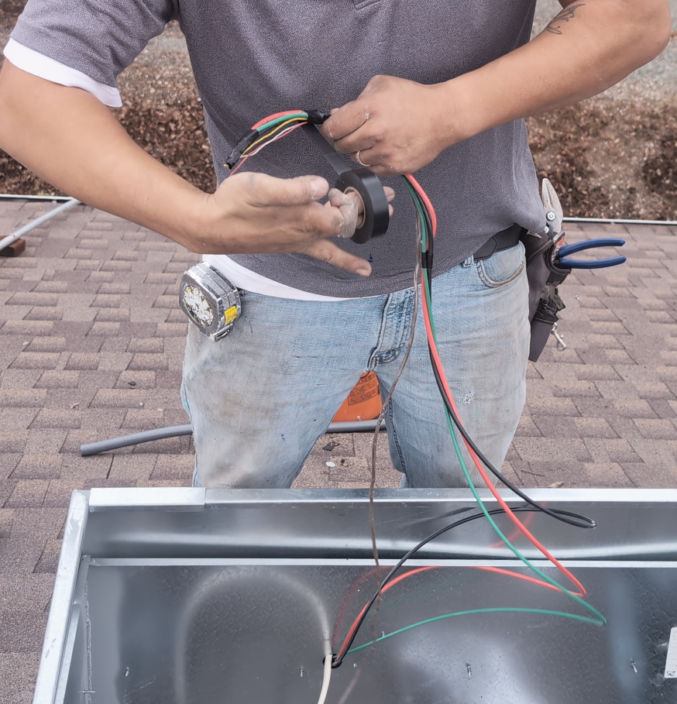
Tape the ends of the load wires and the thermostat wires together to make it easier to access them when the HVAC unit is lowered onto the curb.
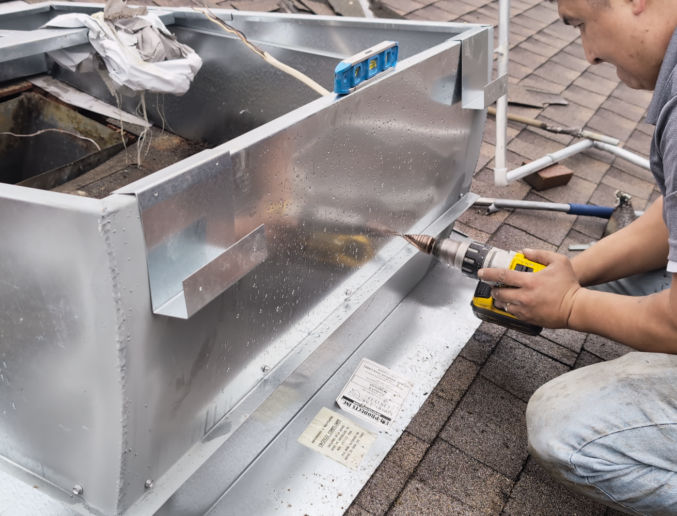
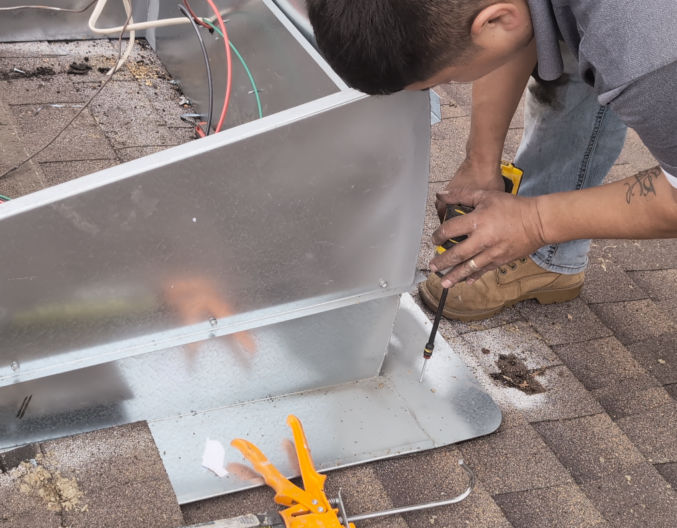
Screw the base of the curb into the roof at various places.
Drill a 3/4″ hole at the bottom of the HVAC unit near where the power and thermostat wires will connect to the unit.

Since the previous HVAC contractor connected the unit to the elbow at the back of the unit, we had to remove the tape and sealant that remained after disconnecting the elbow from the unit.

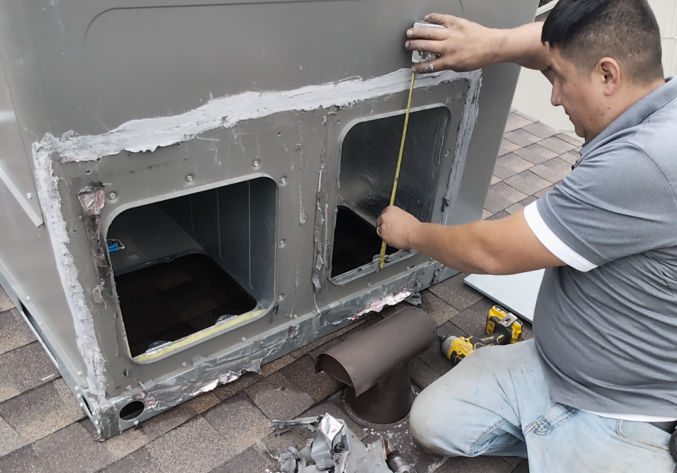
The contractor unscrewed and removed the two panels at the bottom of the HVAC unit since airflow will flow through the bottom rather than the back.
He then measured the openings so he could create some custom panels using sheet metal.
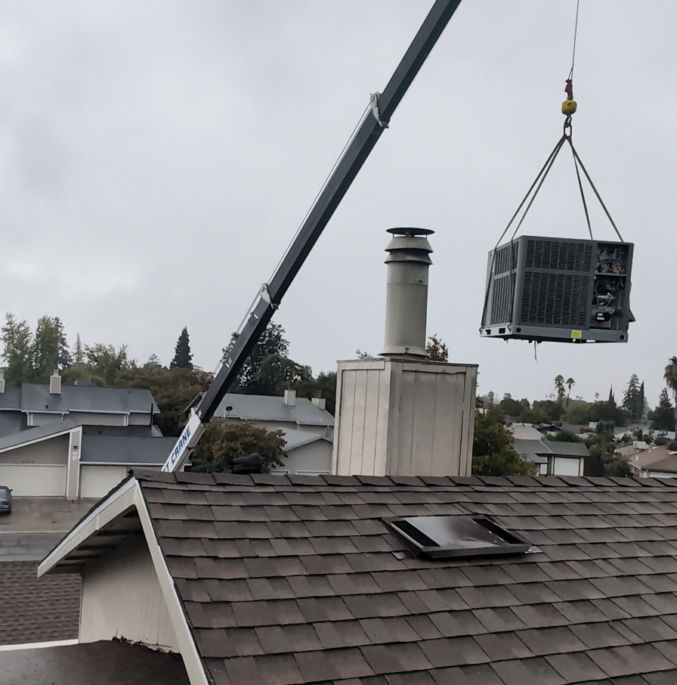
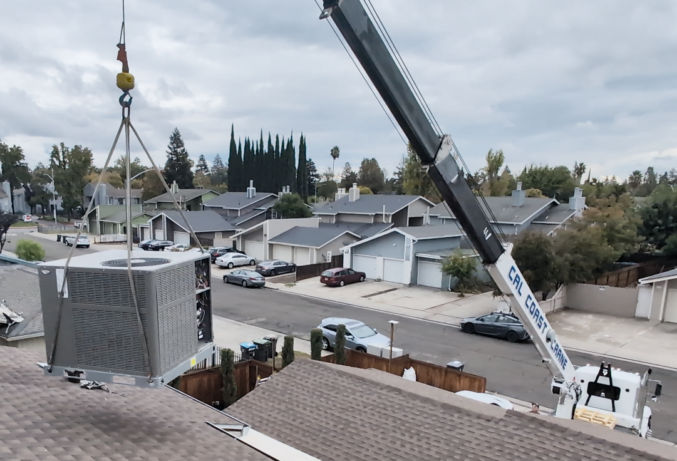
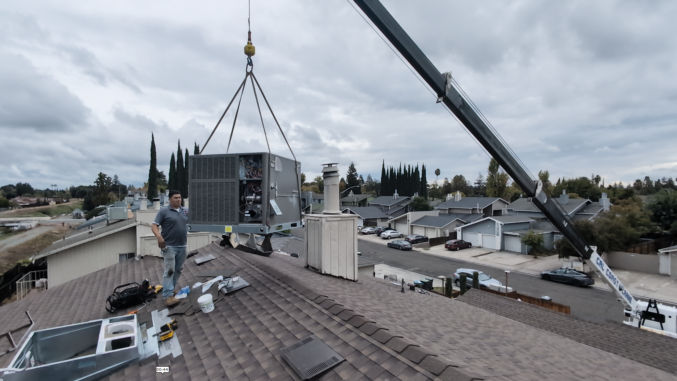
The crane returned to lift the HVAC unit and lower it onto the new curb. The contractor inserted the 4 hooks into the 4 holes at the base of the unit.


The contractor pulled the load and thermostat wire through the hole he made in the base of the HVAC unit.
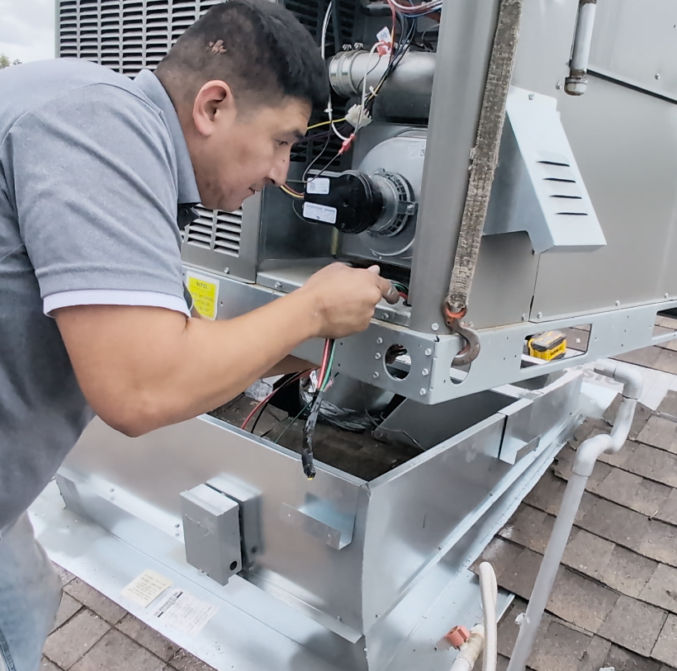
The unit was then lowered onto the curb such that the base would sit on the 4 brackets around the top of the curb.

The contractor routed the wires to where they need to be connected.

He connected the load wires (black, red, and green) to the appropriate terminals.

He connected the thermostat wires to the corresponding color-coded wires in the HVAC unit.

He then connected the gas line to the unit.

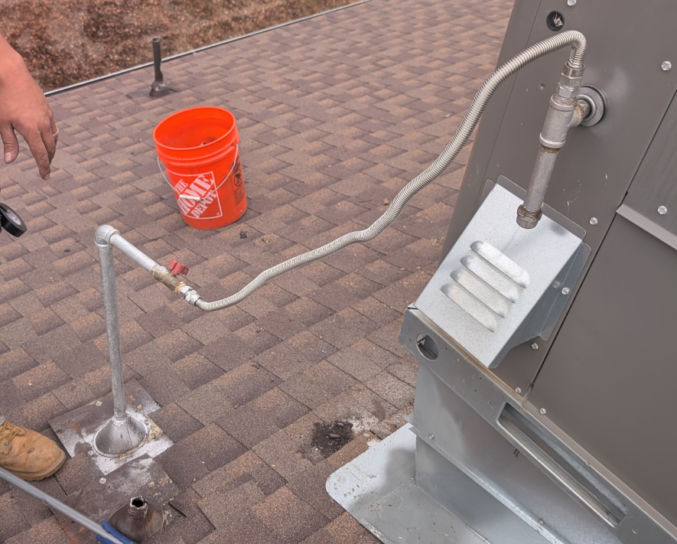
He applied PVC glue to connect the drip line to the unit.


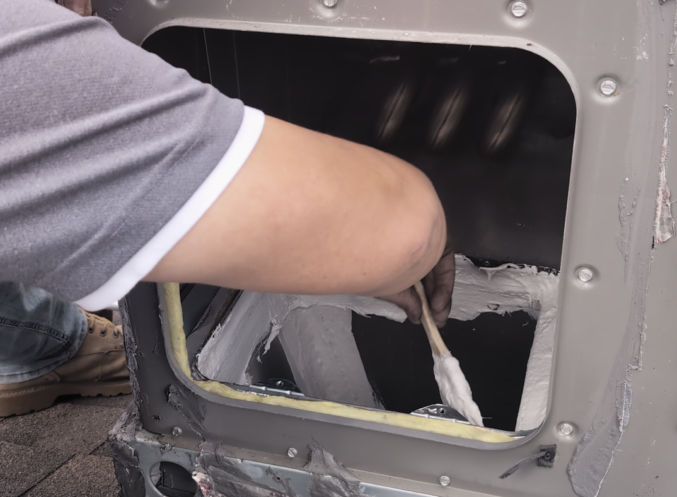
He put HVAC tape to close the gap between the openings at the bottom of the unit and the duct openings in the roof.

He brushed on some HVAC sealant (Pookie) over the tape.
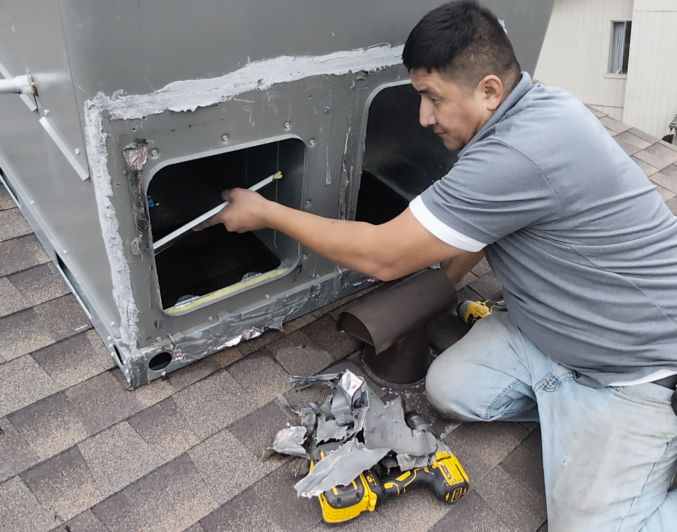
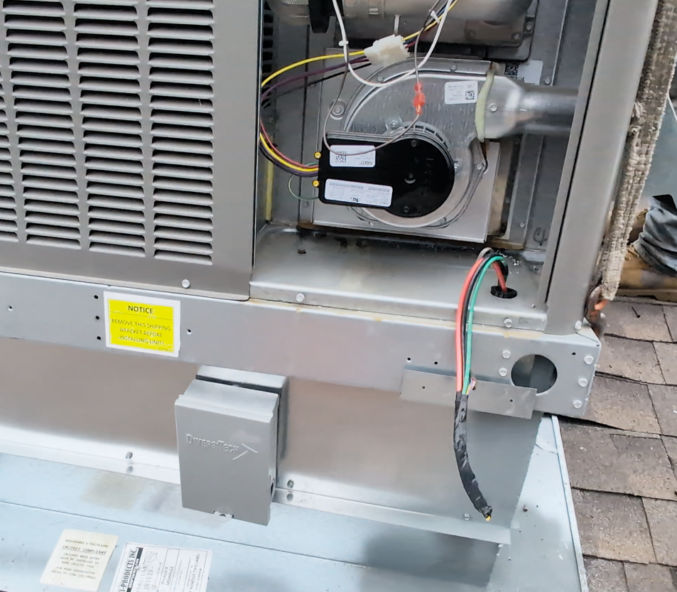
He cut some sheet metal to cover the two openings at the back of the unit.

He folded the 4 corners of the sheet to fit over the lip of the openings at the back of the unit.

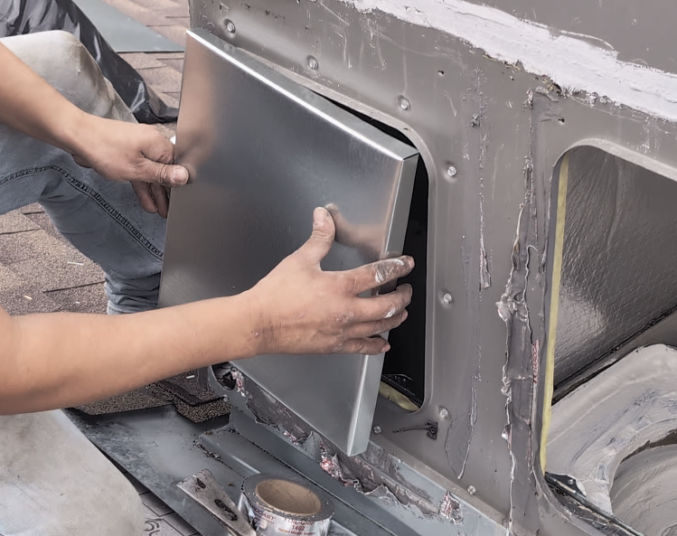
And he screwed the panels in place
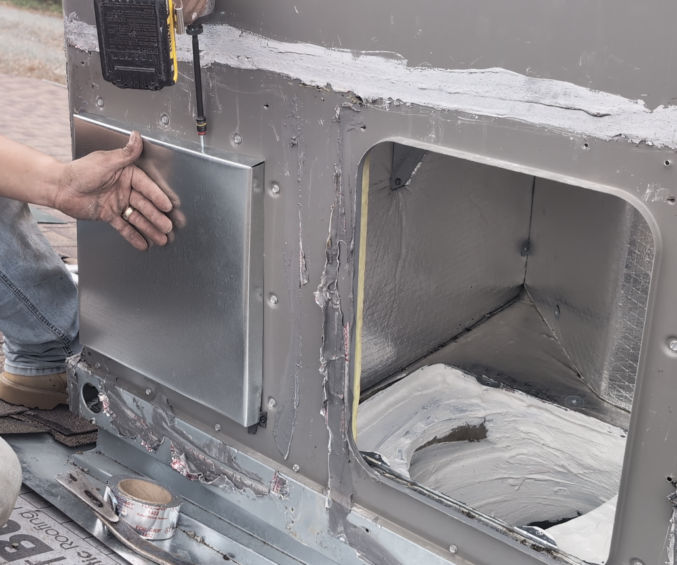
He put HVAC tape around the panels, but he didn’t apply HVAC sealant (Pookie) over the tape so that maintenance and inspection can easily be done in the future, if needed. (Pookie dries really hard and is hard to remove)

He screwed the electrical panel back on the unit.

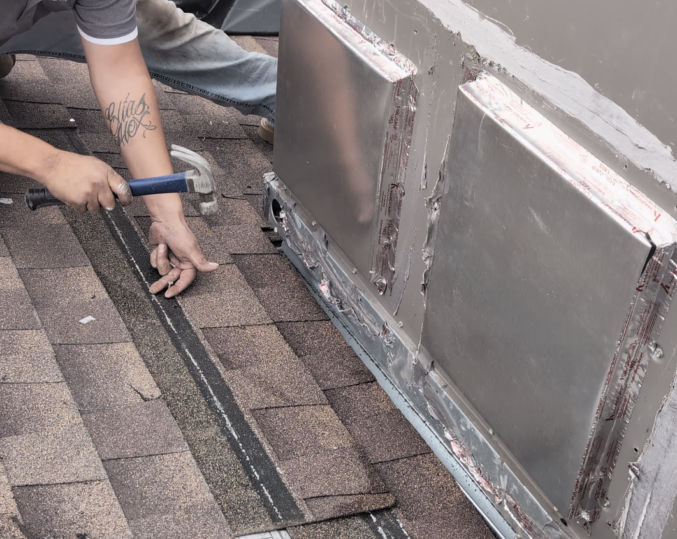
He put new shingles over the area where he had to remove some old shingles.
Since replacing the stand with a curb, the HVAC unit was moved up, so he had to add an extension to the old PVC drip line.
Since the old electrical line cable was moved from outside the HVAV unit to under the unit, he covered the old hole in the roof with HVAC tape, which is very sticky tape.

He applied silicone sealant over screws that could result in roof leaks.
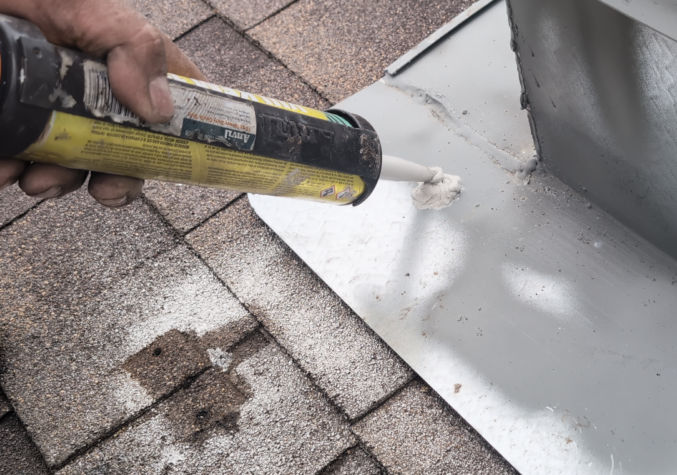
He also applied silicone sealant around the electrical box.

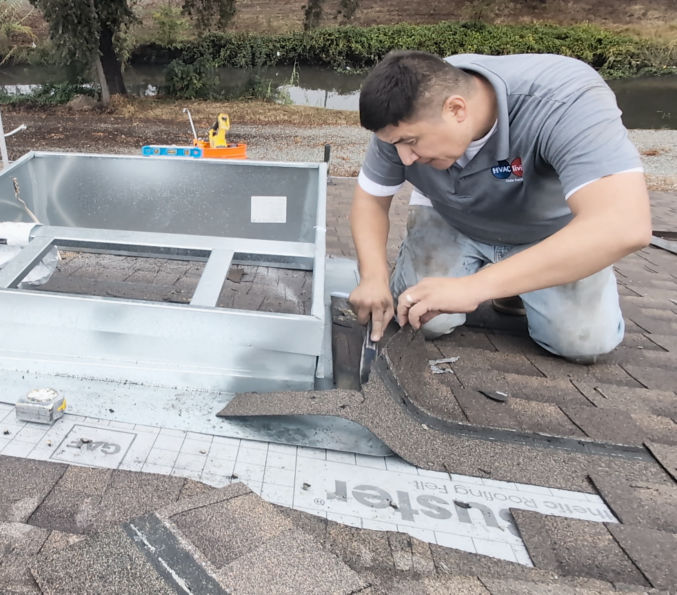
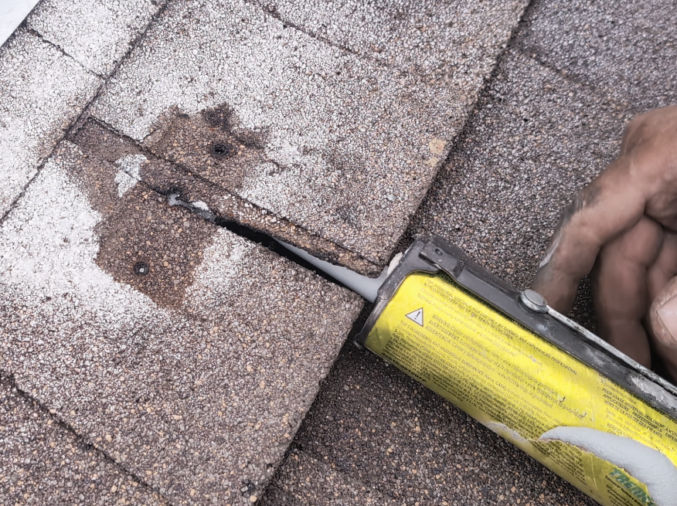
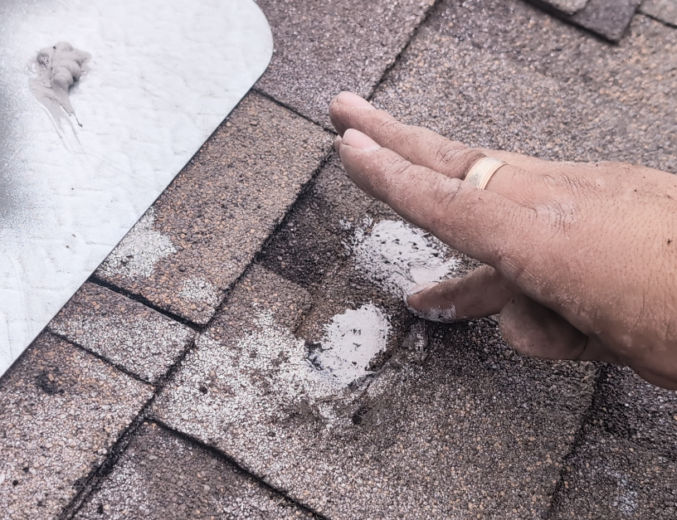
The feet of the old stand were screwed into the roof. He lifted the shingles where the feet were using a pry bar.

And applied sealant in the holes beneath the top layer of shingles.

He then pressed down on the top layer of shingles so the sealant would squeeze out of the holes.
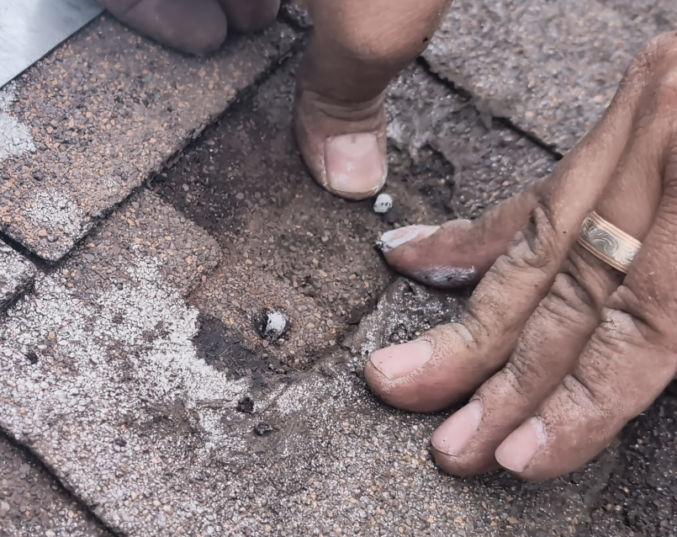
He smeared the sealant to completely cover the holes.
He also applied sealant over the tape that covered the hole where the electrical Romex line cable came out.


And here’s how everything looked when he was done.


He only needed the shingles to cover the top half of both sides of the curb because the lip at the perimeter of the curb would force water to run down the roof rather than sideways.