


I recently picked up an e-scooter and have been having fun scooting around on it. Now, I want to explore more places and make animated route maps. To do this easily, and to film my rides, I’ve come up with the following setup and process.
The Scooter (and accessories)
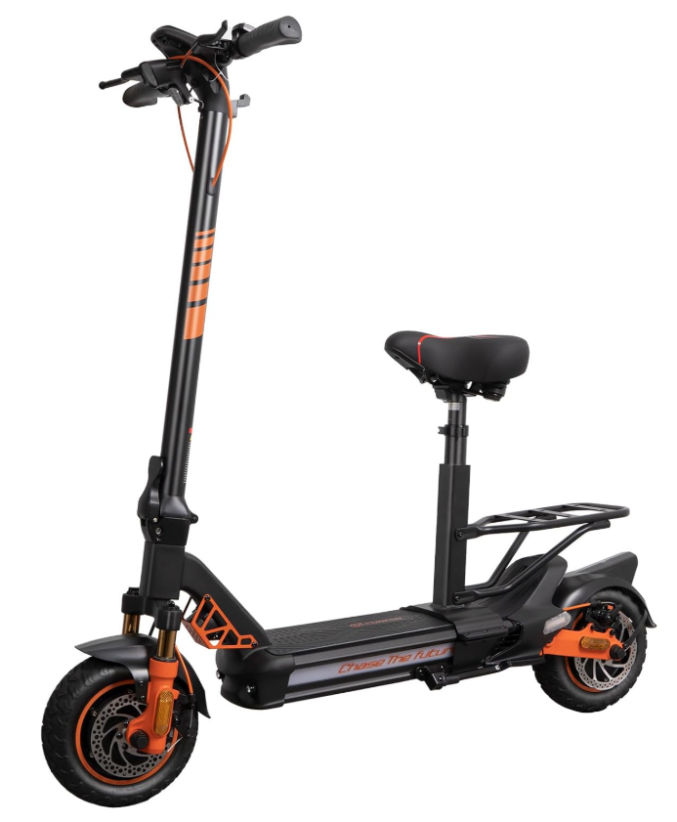
I have the HiBoy S2 electric scooter with seat.
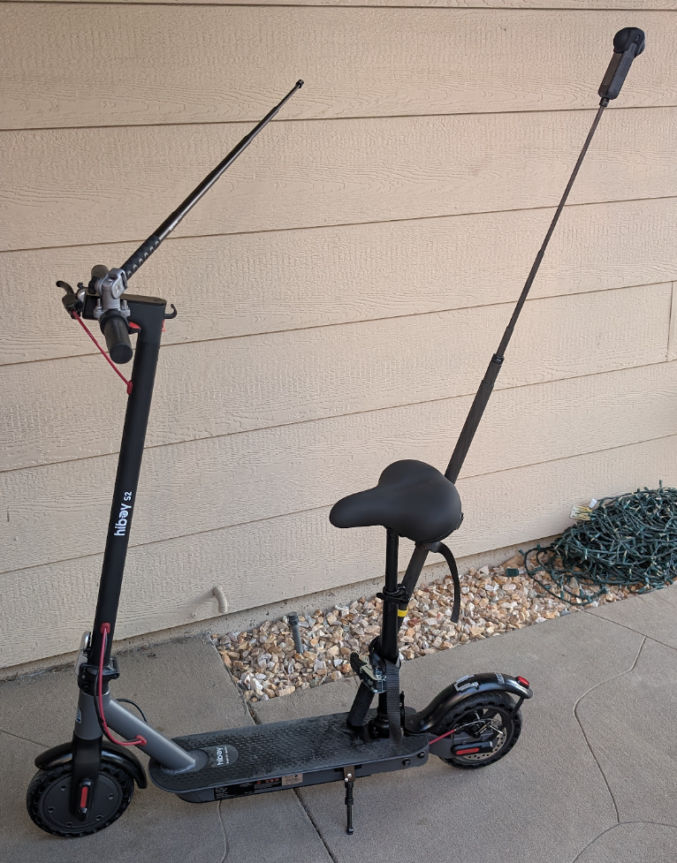
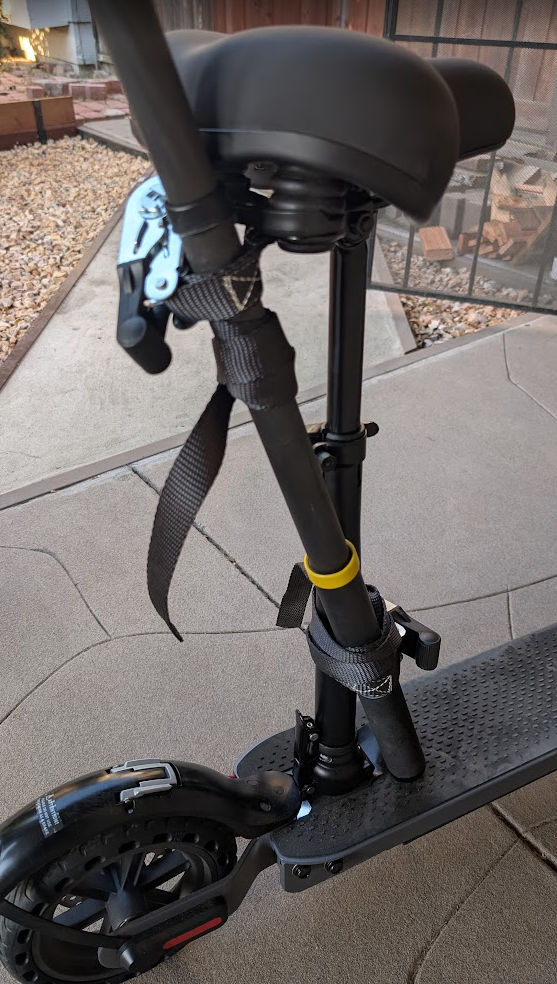
I strapped a 10′-selfie stick to the back so I can take footage like this.

I used two short ratchet straps.
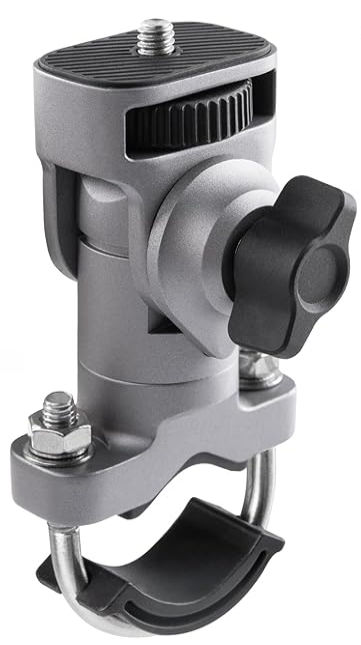
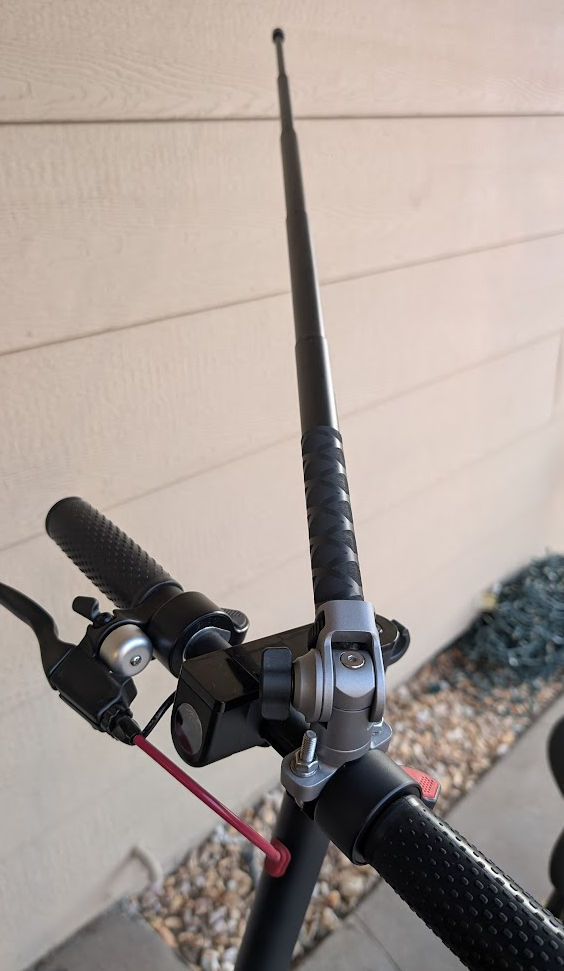
I installed this U-bolt mount on the handlebar to mount another selfie stick to get footage from the side like this.

and like this

depending on the angle and length of the stick.
Here’s what the U-bolt mount looks like.
For the camera, I use the Insta360 X5. Since it’s a 360-degree camera, it can capture everything around you.
Make sure to get a handlebar phone mount, like the one below, so you can easily see turn-by-turn directions on your phone.

Next time, I might get this more powerful scooter instead.
Create a Bike Route
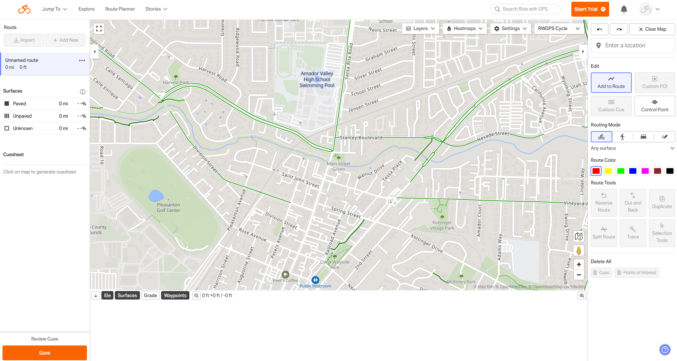
To create a bike route, I like to use the Ride With GPS website. Create a free account and then click “Plan a Route”. By default, you will see something like this.
I like to change the map from “RWGPS” to “Google Map”.

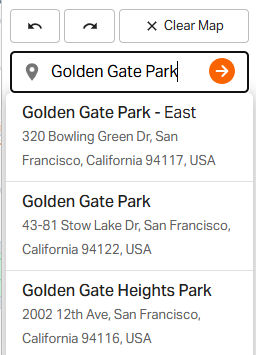
Let’s say we want to create a bike route in Golden Gate Park. Type “Golden Gate Park” in the “Location” field and choose one of the matches.
The map will show a location in Golden Gate Park.

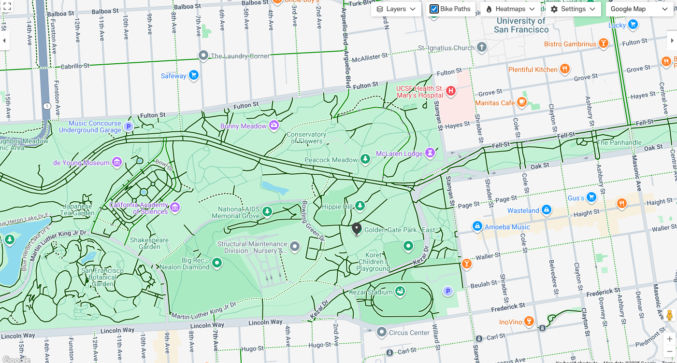
Check “Bike Paths”.

You should now see a bunch of dark green lines representing bike paths.
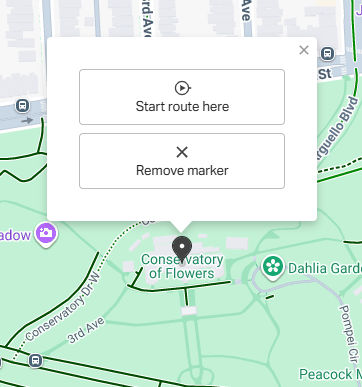
Let’s start the bike route at the Conservatory of Flowers. Search for it in the location field. A popup will appear on its location on the map. Click “Start route here”.
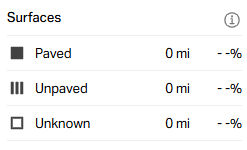
There’s a legend showing you the various surfaces. Paved trails are solid. Unpaved trails are dotted. Plain trails are unknown.
Let’s ride from the Conservatory of Flowers to Rideout Fountain. Click on a path by the Rideout Fountain. RideWithGPS will automatically create a travel segment following paved bike trails between those two locations.
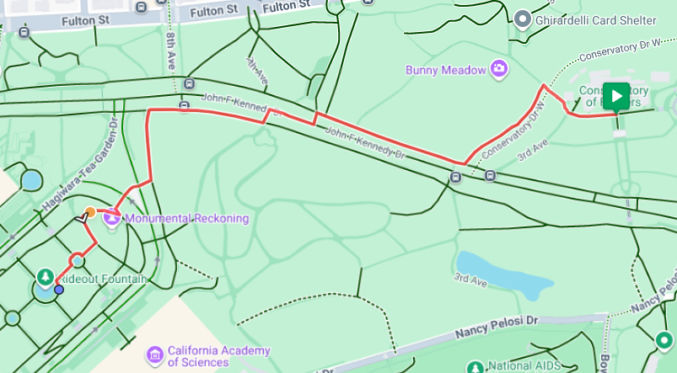
If you make a mistake, you can click the left arrow to undo your changes.

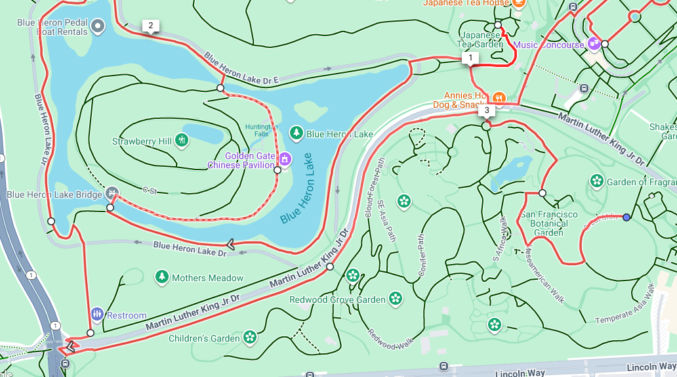
Now, let’s go to the Music Concourse and the Japanese Tea Garden. Click on the paths near those locations to continue the route.
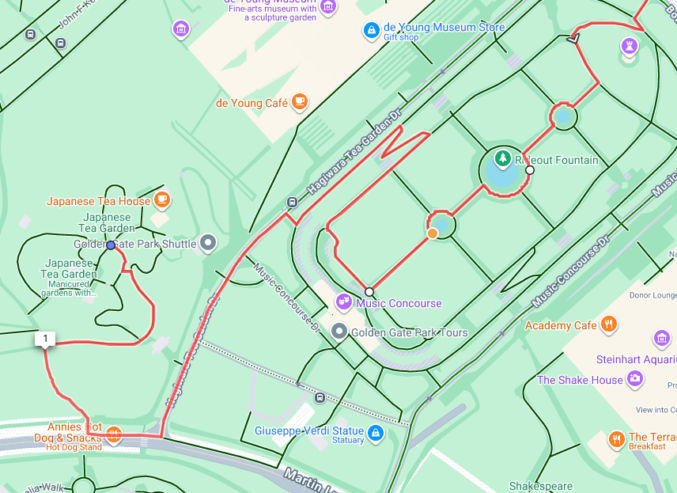
Since there is no direct path from the Music Concourse to the Japanese Tea Garden, Ride With GPS shows the route going backward a bit before making a U-turn to head to the Japanese Tea Garden.
Now, let’s ride around Blue Heron Lake and across Strawberry Hill. Click on points along paths where you want to go. This is what I came up with.
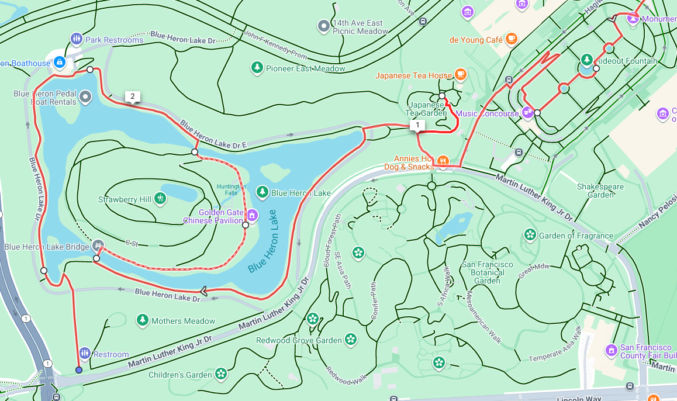
Now, let’s see if we can ride through the San Francisco Botanical Garden. Click on points on various paths where you want to ride your bike/scooter. Since the bike paths aren’t all connected, the following is what Ride With GPS gave me.
Now, let’s ride to the California Academy of Sciences and then head back to the starting point (the Conservatory of Flowers). This is what I got.

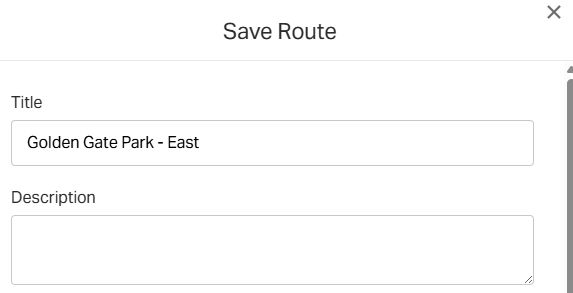
Click Save and name the route.
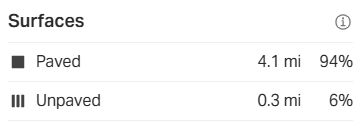
Click “View Route”. You will see the entire route, the elevation, and the total distance (4.1 miles).
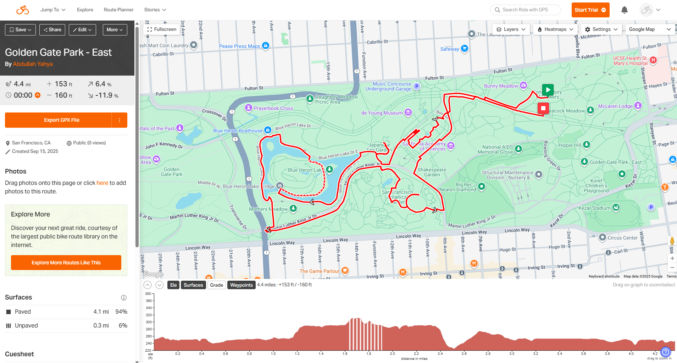
You’ll also see the distance and percentage on paved and unpaved trails.
You’ll also see the cuesheet, showing turn-by-turn directions.

Create an animated route video in AvoMap
In Ride With GPS, click “Export GPX File” and download the .gpx file.

Go to AvoMap.com, create a free account and log in. You can create a video by specifying waypoints, or you can upload a GPS file. Since we already created a route and we have a GPX file, click “Upload GPS File” and select the .gpx file you just downloaded from Ride With GPS.
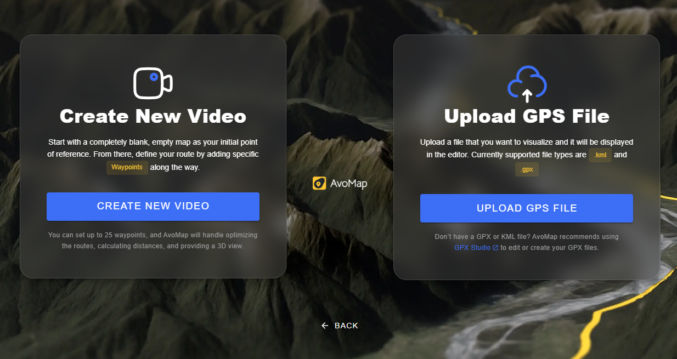
You should see something like this.
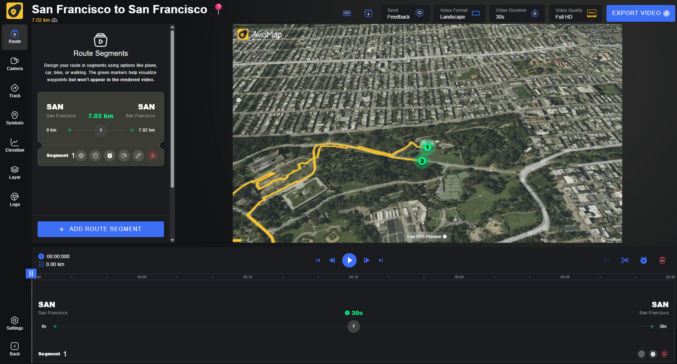
Now, on the left, you can adjust various settings, e.g.
- change units from metric to imperial
- enable “Dynamic camera”
- add “Fly-in” animation with a duration of 8 seconds, a zoom level of 100 km
- add “Fly-out” animation with a duration of 8 seconds, a zoom level of 100 km
- “Traveled Distance” activated
- Elevation enabled with “Chart background” disabled
If you buy credits, you can export the video, which would look something like this.
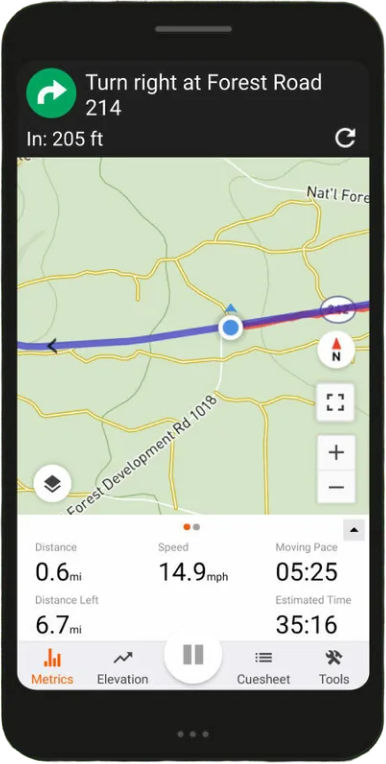
Get Turn-By-Turn Directions
When you’re about to go on your ride, you can get turn-by-turn directions using the Ride With GPS mobile app. However, this is a paid feature. If you don’t ride often, you can buy the monthly subscription for $10 a month and just cancel before the end of the first month.
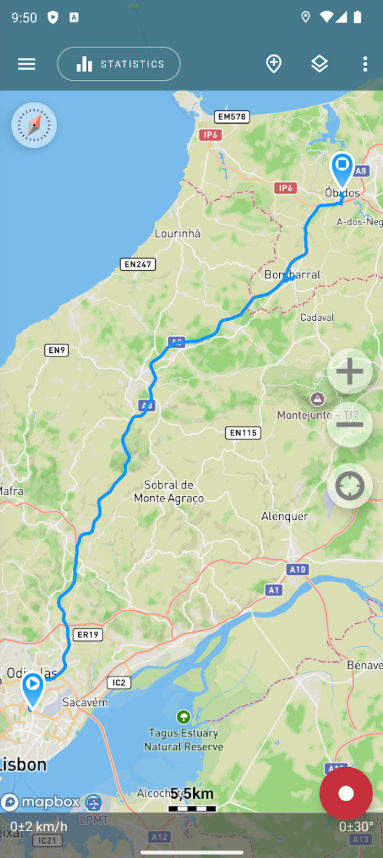
Recording Your Ride’s GPS Data
When you ride, you may not necessarily follow your planned route. If you’d like to track your actual route taken, you can record your GPS data live while you’re riding. You can do this with the paid version of the Ride With GPS mobile app or with the free Geo Tracker Android app. Just tap the red record button to start logging your GPS data, including while the app is running in the background. When you’re done, tap again to stop recording. You can then export the GPS data in GPX format, which you can then import into AvoMap to create a video.
Convert a Google Map to GPX
If you want to create a travel route using Google Maps and then make a video in AvoMap using the Google Maps route, just create directions in Google Maps, optionally with multiple stops, and then copy and paste the URL into https://mapstogpx.com/. Download the GPX file and upload it to AvoMap.
E-scooter Riding Laws in California
- Must have a driver’s license
- May not ride on any sidewalks
- Must ride on designated bike lanes
- May ride on car roads where the speed limit is < 25 mph
- E-scooters are not allowed on the Golden Gate Bridge, but e-bikes are allowed on both sidewalks.
- E-scooters are allowed only on designated bike paths in Yosemite National Park, whereas e-bikes can be used on both bike paths and park roads. Learn more
Yosemite Resources

San Francisco Resources
San Francisco is a foggy city. If you want to go riding in San Francisco, it’s best to check the hour-by-hour weather and live views before you go.