Here’s a step-by-step guide for setting up HTML 5 video with Flash fallback support in websites.
- Use Quicktime Pro and convert video to m4v format
- File > Open File > Browse to your video file (load the source video)
- File > Export for Web
- Check all checkboxes and click OK
When conversion is complete, you will see the following files created.
Use Miro to convert the m4v desktop version to webm format
- In S3, set up the meta data for the following files as follows:
- .m4v, .3gp
- Content-Type: video/mp4
- Cache-Control: max-age=31449600
- .jpg
- Content-Type: image/jpeg
- Cache-Control: max-age=31449600
- .mov
- Content-Type: video/quicktime
- Cache-Control: max-age=31449600
- .webm
- Content-Type: video/webm
- Cache-Control: max-age=31449600
- .m4v, .3gp
The .mov file will determine which version of the m4v to play to optimize streaming based on bandwidth / device.
- Copy and paste this code into your website
https://abdullahyahya.com/video-code.txt
- Use Quicktime X instead instead of Quicktime Pro since it offers better encoding settings.
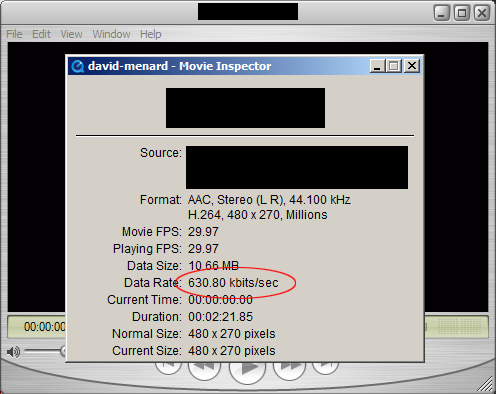
- Check the bitrate of your source video file. In Quicktime, click on Window > Show Movie Inspector and you will see
In this example, the bitrate is 630 kbits/sec. In Quicktime, if you click on Export for Web, you’ll see the various output bitrates:
In this version of Quicktime, the iPhone bitrate is 900 kbps and the Desktop bitrate is 1.5 Mbps which are both higher than our source video. So, we won’t be able to encode the videos at those bitrates and so there’s no point in encoding them unless we get a higher bitrate source video.


